
Microsoft Windows has been rolling out one OS after the other since the dawn of time. From the sharp edges of Windows 98 to the modern boxy design of Windows 10, we’ve seen the OS evolve into the powerhouse it is today. Like its predecessors, 10, too, offers a respectable playing field for music lovers. You have various equalizer settings, enhancements, and more; all of them catering to your specific needs.
If you’re one of the very few people who don’t like their speakers to produce overpowering bass, you could end up feeling frustrated, as the options to tweak the settings are buried quite deep. So, today, we’ll try to lend you a helping hand and tell you how you could decrease the bass in Windows 10.
Related: How to Turn Off Screen Saver on Windows 10
4 Ways to decrease bass in Windows 10
Below are the four major ways you could troubleshoot your bass in Windows 10.
1. Turn off the ‘Bass Boost’ enhancement
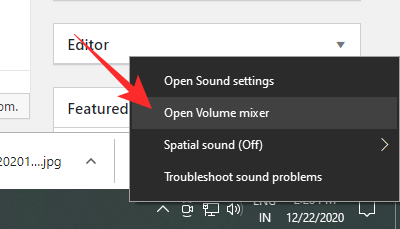
As mentioned before, Windows 10 offers some powerful enhancements to improve your listening experience. Bass Boost is one such popular enhancement on Windows 10, which may very well be hindering your treble notes. To turn it off, first, right-click on the speaker icon on your taskbar and click on ‘Open Volume mixer.’
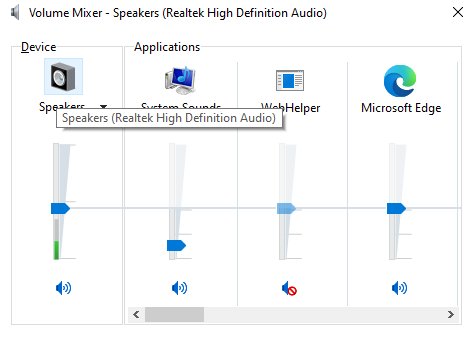
Now, click on the icon of the speaker you’re trying to tweak.
Now, go to the ‘Enhancement’ tab and either uncheck the ‘Bass Boost’ enhancement or check the option to ‘Disable all sound effects.’ Click on ‘Apply’ and ‘Ok,’ then, exit.
Please note that the ‘Bass Boost’ option may not appear if you’ve updated your Windows 10 PC recently or your speaker isn’t supported.
Related: How To Set A Dynamic Wallpaper For Windows 10
2. Decrease subwoofer volume
If you have added a dedicated subwoofer to your Windows 10 PC, you’d be able to tweak it settings from the ‘Volume mixer’ rather easily. After you’ve opened ‘Volume mixer’ and clicked on the speaker of your choice, you would need to go to the ‘Levels’ tab.
Scroll down until you see the subwoofer option and decrease its volume.
Hit ‘Apply’ and ‘Ok’ before exiting the space.
3. Reset your Windows 10 equalizer
Windows 10 also allows you to take control of your music by offering custom equalizers. There are a bunch of presets already in-store, and you can always experiment with the detailed 10-band equalizer. To access the equalizers, you’ll once again need to go to ‘Volume Mixer’ and open the device you’re looking to tweak.
Go to the ‘Enhancement’ tab and click on ‘Equalizer.’ Under ‘Setting,’ make sure ‘Bass’ isn’t selected. Set it to ‘None’ or ‘Treble,’ hit ‘Apply,’ ‘Ok,’ and exit.
Related: How to turn off Windows Defender on Windows 10
4. Check application settings
If your speaker’s sound signature still hasn’t improved, check out the application you’re using on your Windows 10 PC. You could try any other application or check out YouTube videos of the music you are listening to on your music player to see if that makes a difference.

A mediocre engineer hoping to do something extraordinary with his pen (well, keyboard). Loves Pink Floyd, lives football, and is always up for a cup of Americano.
Read Next
Subscribe to Newsletter
Join me on this exciting journey as we explore the boundless world of web design together.
Whether you are using your built-in computer speakers or headphones, it is essential to get the right audio decibels across all the apps and programs. The Windows operating system lets you control your volume and bass levels natively. Controlling these properly, you can get the best output sounds for your games, online meetings, and video streams.
That said, Microsoft previously included a built-in sound equalizer in both Windows 10 and Windows 11. Using it, you could control the different frequency bands and their decibel levels according to your hearing preferences. However, Microsoft then removed this essential tool, and is no longer available.
In this post, we are going to show you multiple ways to increase or decrease the volume as well as the bass so that your sounds are “just right.”
Table of Contents
How to Increase or Decrease Volume in Windows
Adjusting the volume levels on a Windows PC is pretty straightforward. Most of us already know how to do it, but there are many options available to do so. Below, we have listed down all the possible methods to increase or decrease the volume levels on a Windows PC.
Using the Keyboard Multimedia Buttons
The most efficient way of adjusting the output volume on a Windows PC is by using your keyboard. This way, you do not have to minimize any windows and you can increase or decrease the volume while staying inside your current window, even if it is in full-screen mode.
Nowadays, keyboards come with multimedia tools built directly into the keyboard. You can find them somewhere on your keyboard, or as a subscript of a key which can be used by pressing down the Function key simultaneously.

The location of the keys can be different for every manufacturer.
Some keyboards even come with scrollbars to adjust the volume and other dedicated multimedia keys.
From the Quick Access Menu
Another quick way to adjust your output volume is from the Quick Access menu.
Click on the Volume icon in the right corner of the taskbar to expand the volume settings. Here, move the slider in front of the speaker icon to the left to lower the volume, or to the right to increase it.
From Settings App
The Settings app is now the central hub for most configurations within the Windows operating system. There are multiple places from within the settings app where you can control the output volume level of your speaker and your headphone.
-
One way to adjust the output volume is from the Settings app >> System >> Sound. Here, adjust the slider in front of “Volume” to increase or decrease it.

Adjust the volume from the main Sound menu -
Another way to do it is from the device’s properties. Go to Settings app >> System >> Sound >> Output device and adjust the volume from there.
Adjust the volume from the device’s properties -
Another way to adjust the output volume is by using the volume mixer. Using this method, you can control the volumes of the individual apps and the output device that they use.
You can open the volume mixer by going to Settings app >> System >> Sound >> Volume Mixer, or opening it by right-clicking the speaker icon in the taskbar.
Open Volume Mixer from the taskbar


From Volume Mixer Applet
Before the Volume Mixer became a part o the Settings app, it used to be a standalone Control Panel applet. The applet is still available today which you can open simply by running a cmdlet in the Run Command box.
-
Press the Windows Key + R shortcut keys to open the Run Command box.
-
Run the following cmdlet:
sndvolOpen Volume Mixer applet
This will open the Volume Mixer, from where you can control the output volume level of your PC as well as individual applications.

From the Sound Applet
If you really want to get into it, you can also adjust the volume level from the legacy Sound Control Panel applet. Of course, this applet is only to be used in case the other methods aren’t working for you, since the Sound applet is used for advanced configurations.
Follow these steps to use the Sound applet to adjust your device’s volume:
-
Open the Sound applet by typing in “mmsys.cpl” in the Run Command box.
Open the Sound applet -
Select your current output sound device and then click Properties.

Open device properties The device properties window will now open.
-
Switch to the “Levels” tab.
Open the Levels tab -
Adjust the slider to increase or decrease the sound level.
Adjust the volume from the Sound Control Panel applet -
When done, click OK to close the applet.


These are all the methods to adjust the volume levels on a Windows 11/10 computer.
How to Increase or Decrease Bass in Windows
The bass is kind of the essence of the sound. Too much of it might damage your speakers or cause distortion, and too less of it might ruin the experience of the music. Hence, having just the right bass levels is essential, especially if you are an audiophile.
Previously, you could adjust the bass levels using the built-in equalizer in Windows by adjusting the decibels for the lower frequency range. However, as mentioned earlier, this is no longer an option.
Therefore, you are no longer left with many options to adjust the bass. Natively, in Windows, you can adjust the base levels from the legacy Sound Control Panel applet using the method given below.
Adjust Bass Level from the Sound Applet in Windows
Before we begin, we must inform you that the bass can be adjusted from the “Enhancements” tab inside the Sound applet. However, it is no longer available by default. Therefore, the steps given below include the steps to first make the “Enhancements” tab visible and then use it to adjust the bass level.
-
Open the Device Manager by typing in “devmgmt.msc” in the Run Command box.
Open Device Manager -
Expand “Sound, video and game controllers.”

Expand sound devices -
Right-click “Realtek(R) Audio” and then click “Disable device” from the context menu.
Disable Realtek audio -
When asked for confirmation, click Yes.
-
Right-click “Realtek(R) Audio” again and then click “Update Driver” from the context menu.
Update driver -
In the Update Drivers wizard, click “Browse my computer for drivers.”
Browse computer -
Click “Let me pick from a list of available drivers on my computer.”
Pick driver -
Now select “High Definition Audio Device” and then click Next.
Select driver The new driver available on your PC will now be installed.
-
Once the driver has been installed, close the wizard as well as the Device Manager.
This concludes making the “Enhancements” tab available inside the Sound applet. Let us now continue to use this feature to adjust the bass levels.
-
Open the Sound applet by typing in “mmsys.cpl” in the Run Command box.
Open the Sound applet -
Select the output sound device and click Properties.
Open device properties -
Switch to the Enhancements tab.
Open the Enhancements tab -
Uncheck the box next to “Disable all enhancements.”
Uncheck “Disable all enhancements” -
Now check the box next to “Bass Boost.”
Select “Bass Boost” -
Click “Settings” under the Enhancement Properties section.
Open enhancement settings -
Select the frequencies and their boost levels from the drop-down menus, then click Ok.
Adjust frequency and required boost levels 50-75Hz is usually within the sub-bass range. 75-250HZ is the bass range. 250-500Hz is within the lower midrange. 500-600Hz is within the mid-range settings.
-
Click Apply and Ok on the device’s Properties window to save the settings.


Once the steps above have been performed, check to see if you have achieved the required bass levels. If not, keep making adjustments to the boost levels from the drop-down menu, or turn off Bass Boost completely if needed.
Using Third-Party Apps
Unfortunately, there is no other native method to adjust the system’s bass levels. However, you can use third-party apps and equalizers that will do the job for you.
Here are our top 8 picks for equalizers that you can use on a Windows PC to manage how your sounds come out of your speakers or headphones.
How to Open Equalizer in Windows
We have found that Windows users are still looking to open the equalizer within the Windows OS. Let us inform you that the native equalizer has been discontinued in Windows 10 and Windows 11. Even upgrading to the latest Realtek Audio driver does not work anymore.
Therefore, the short answer to the question “How to open the equalizer” is that you can’t anymore.
How to Adjust Treble in Windows
With the discontinuation of the equalizer, there is no longer a native method to adjust the treble in Windows either. If you want to adjust the output treble, you need to use a third-party app/equalizer.
Here are our top 8 picks for equalizers that you can use on a Windows PC.
Closing Thoughts
Still not having the best sound experience? Try these methods to improve the sound quality of your output device and then check if you get what you needed.
If you find that there is still a lot of distortion, then there might be something wrong with the hardware. Try updating your audio driver, and if the problem persists, have your device looked at by a professional for any hardware damage.
We hope that his guide helped you in adjusting your sound settings to get the best audio output/
Sign in to your MUO account
For those of you who don’t like weak audio or are fond of feeling the resonance in your body rather than just hearing the music through your ears, it is definitely important to be able to adjust the bass on your Windows device.
In this guide, we will walk you through the steps of doing so in detail. The methods in this guide work for both Windows 10 and Windows 11 users.
1. How to Adjust the Bass on Windows via the Enhanced Audio Feature
One of the easiest ways to adjust bass and almost all other advanced sound features like room correction and loudness equalization is via Windows Settings. Like the previous Windows versions, Microsoft has included a dedicated Sound section in Windows 11 Settings as well.
For demonstration, we will be using Windows 11 to enable the Enhanced Audio feature for boosting the bass, but the steps are safe to be followed by Windows 10 users too.
Follow these steps to proceed:
- Press Win + I together to open Windows Settings.
-
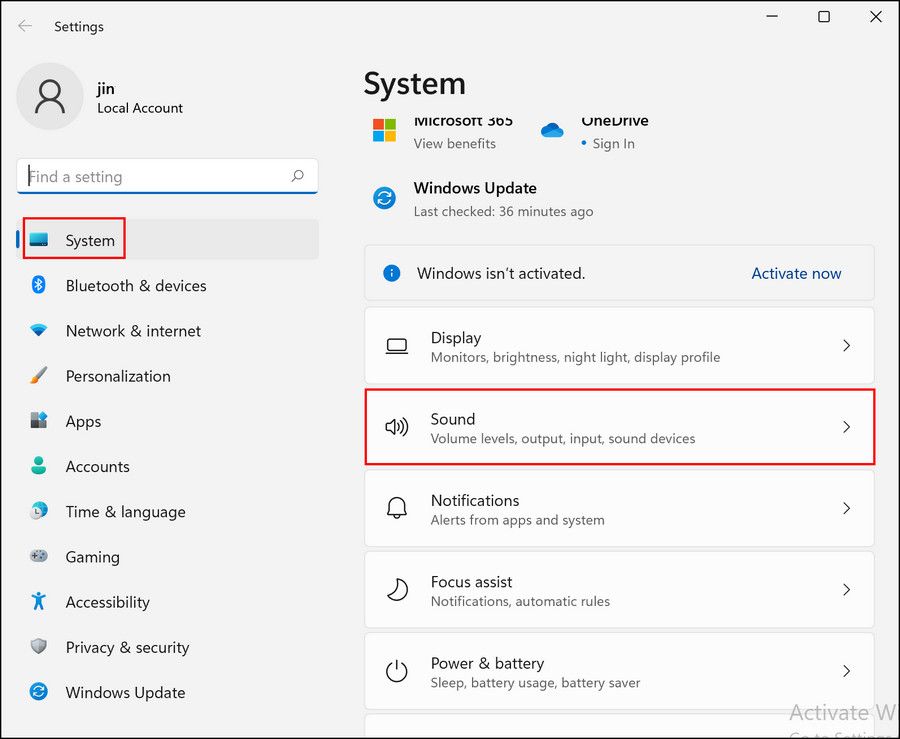
In the Settings window, head over to System > Sound.

-
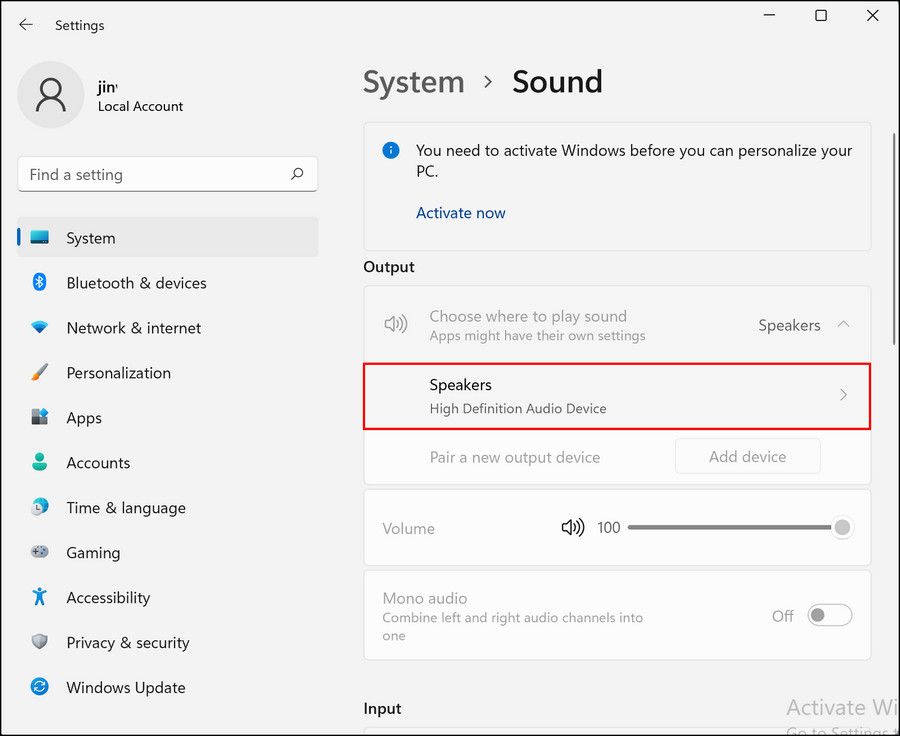
Head over to the Output section and click on Speakers.

-
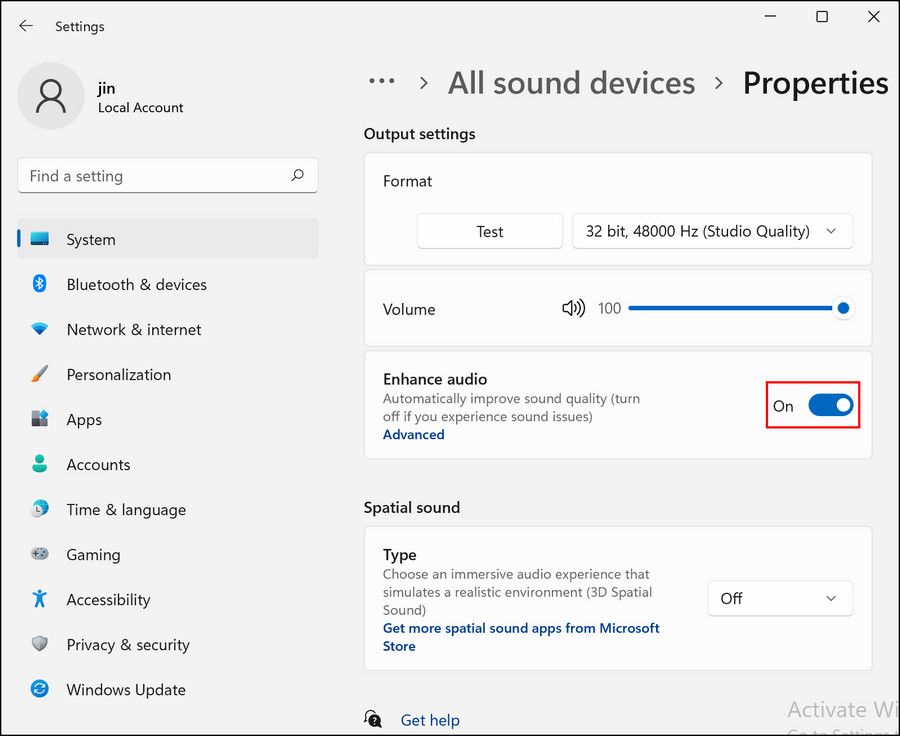
Turn the toggle on for Enhance audio under Output settings.
- Then, click on the Advanced option right under Enhance audio. This should launch a Speaker Properties dialog.
-
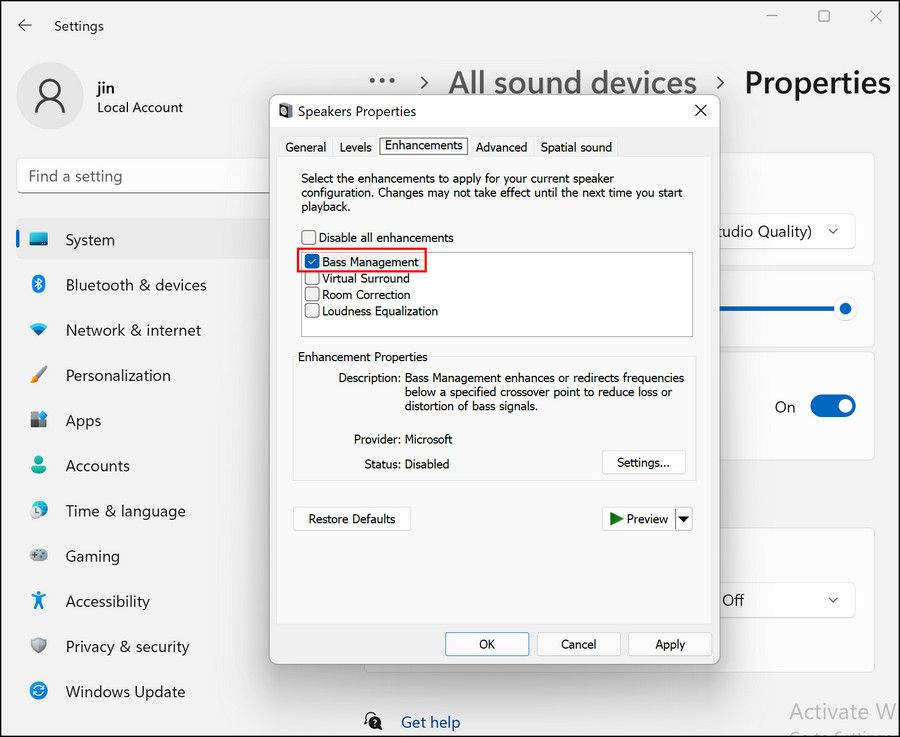
Checkmark the Bass Management option.

- Click on Apply > OK to save the changes.
This should increase the bass on your device. If you want to disable the Bass Management option in the future, you can either disable the Enhanced audio feature directly or uncheck the Bass Boost option by following the steps we have mentioned above.
Keep in mind, however, that disabling the Enhanced audio feature will automatically disable all the other audio features it offers, like Room correction.
2. How to Adjust the Bass on Windows via the Control Panel
Another way to adjust the bass on Windows is via Control Panel. The outcome of this method is almost the same as the method we just discussed above, but the steps vary.
Here is how you can use the Control Panel to adjust bass:
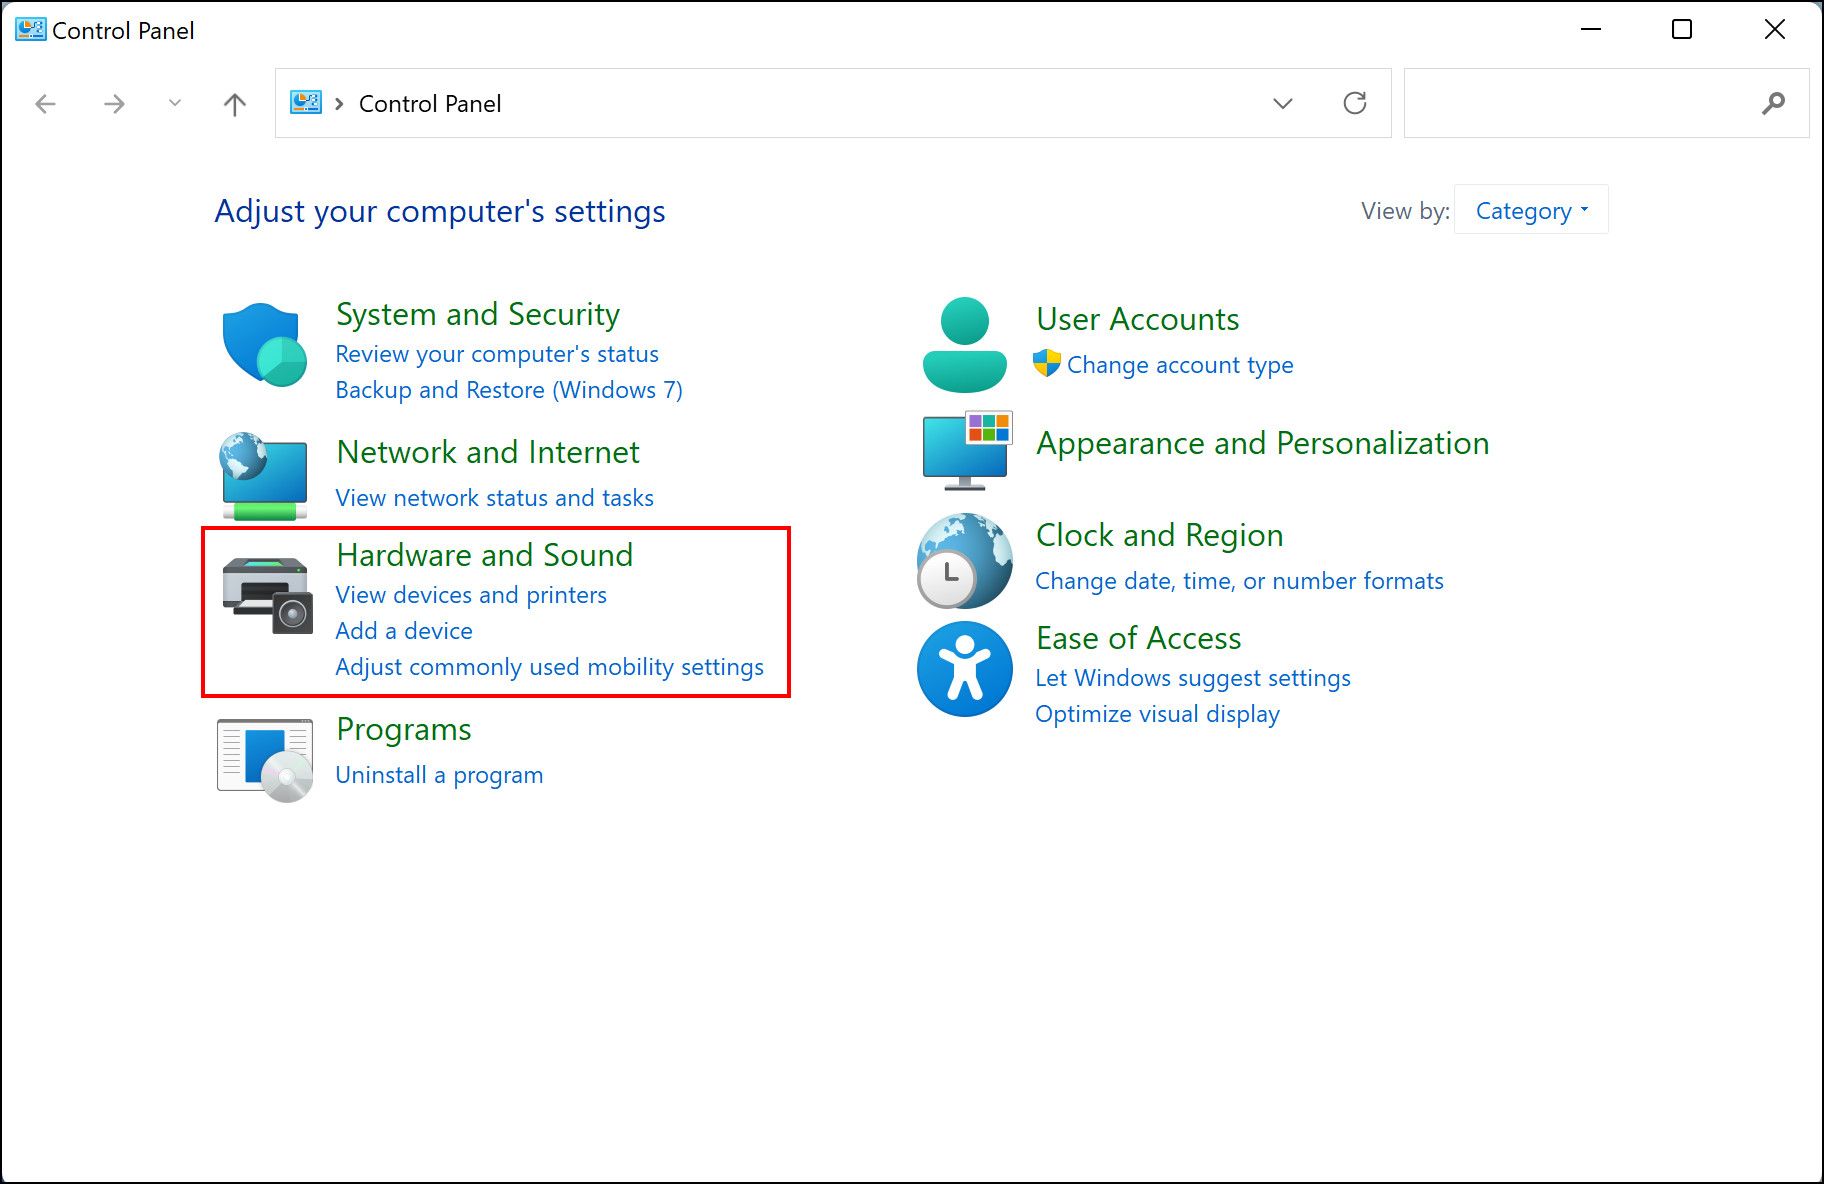
- Type Control Panel in Windows search and click Open.
-
In the following window, click on Hardware and Sound.

-
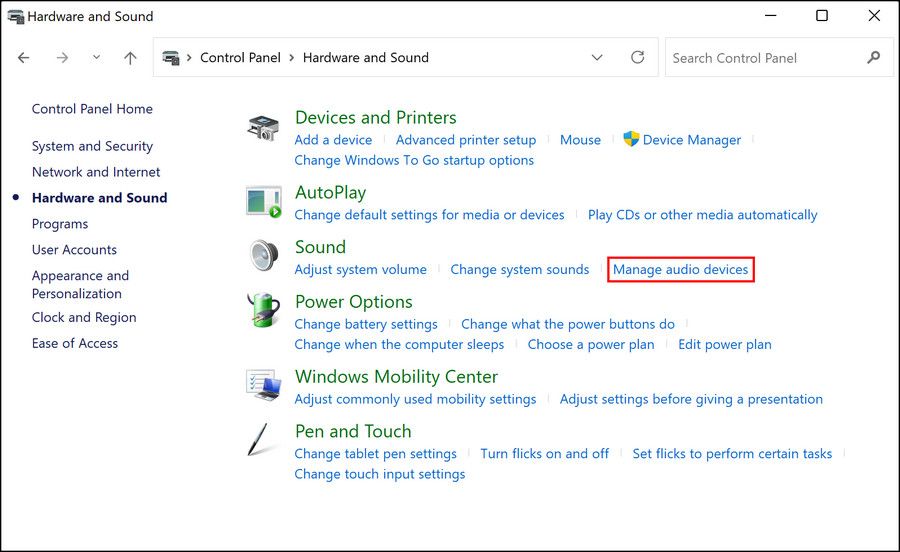
Head over to the Sound section and click on Manage audio devices. This will launch a Sound dialog.

-
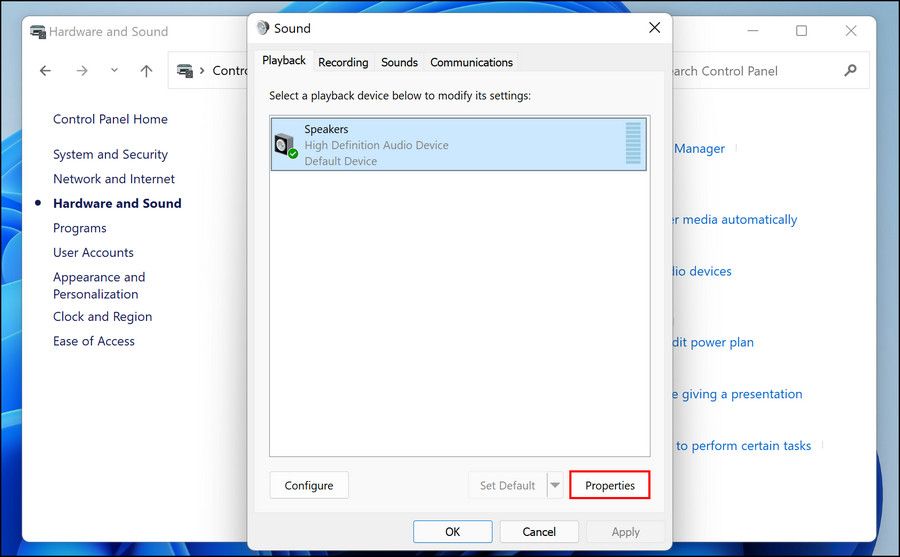
In the Playback tab, select your preferred audio source and click on the Properties button.

-
Navigate to the Enhancements tab and check/uncheck the Bass Management option as per your preferences.

- Click Apply > OK to save the changes.

If you use Windows Media Player to play your audio or video files, then you can adjust the bass settings on that app specifically. This method is ideal for those of you who use the Windows Media Player as your default audio/video player.
Follow these steps to proceed:
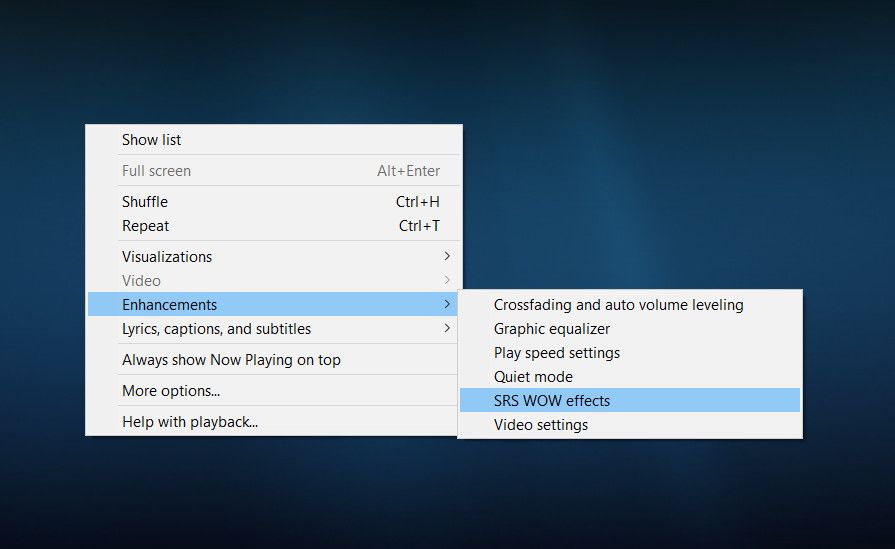
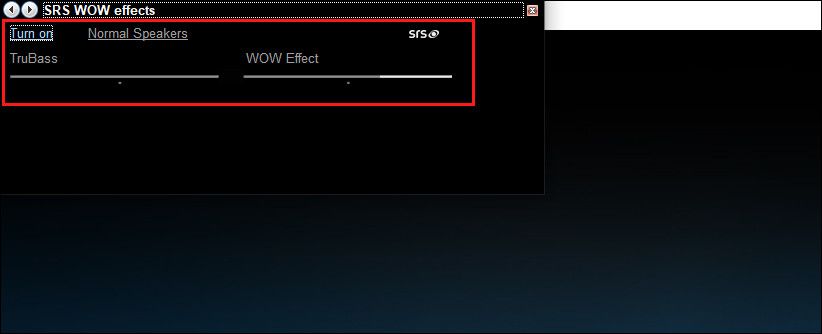
- Open Windows Media Player and in the Now Playing mode, right-click anywhere on the screen.
-
Choose Enhancements > SRS WOW effects.

-
Turn on/off Trubass and check if the bass has been adjusted according to your requirements.

4. Ensure You Have the Right Drivers for Playing Bass
The drivers installed on your operating system serve as a connecting bridge between the system and the hardware.
To make sure that the drivers work as they are supposed to, we highly recommend you download the drivers from the official website of your manufacturer.
You can do this by visiting the manufacturer’s website, looking for the latest version of the driver (sound card driver, in this case), and downloading it according to your Windows version (32-bit or 64-bit).

After downloading the driver, install it on your system by following the on-screen prompts. Once it is downloaded, you can restart your PC and test the driver.
You must also make sure that the drivers installed on your computer are always up-to-date. Outdated drivers are often prone to corruption issues and can easily become incompatible with the system.
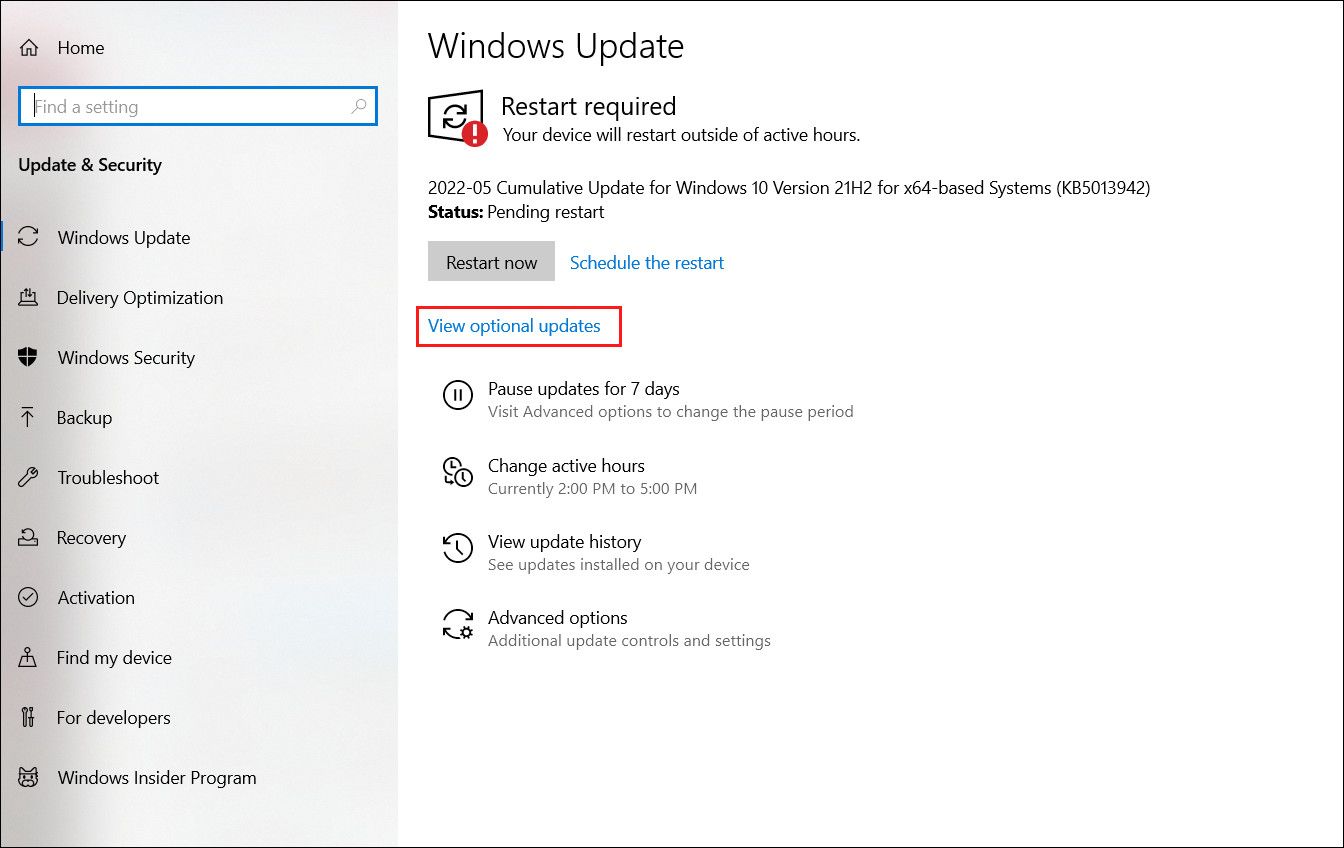
You can find the latest available updates for your drivers in the Optional updates section of Windows Updates. Simply head over to Windows Settings > Updates & Security > Windows Updates. Click on Optional updates and install any pending updates that might be available.
You can also use the Device Manager to reinstall and update the drivers.
5. Use Third-Party Software
While Windows offers reasonable ways to adjust the bass on your device, you can try using third-party software if you want to make some advanced-level changes. Here are some of the most famous bass-adjusting third-party programs:
- Equalizer APO
- Bass Treble Booster
- FX Sound
If you are looking for a program with a simple interface and some basic functionality, FX Sound is a good choice. However, for additional features like filters and editable frequencies, you can consider using Equalizer APO and Bass Treble Booster.
All three tools are free to download and use on Windows. Simply head over to the official website and download the right file according to your Windows version.
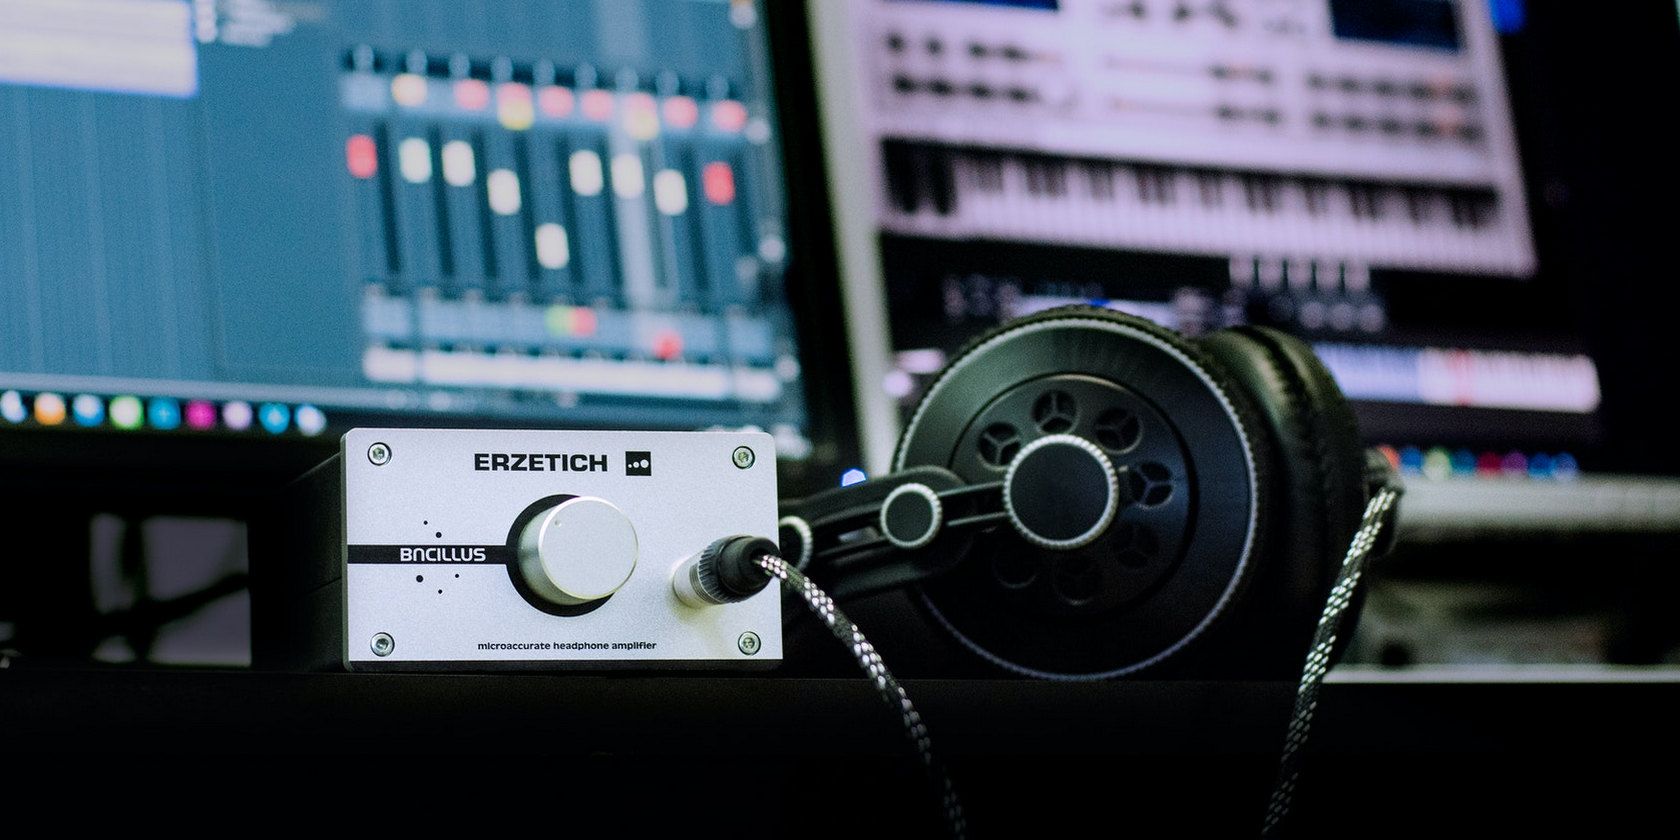
You may also want to consider getting a good subwoofer if your regular speakers aren’t able to cope with the bass-heavy tracks. In case you are not a speaker kind of person and prefer wireless earphones with strong bass, check out our detailed review of The Tranya T10.
Listen to Music With Both Body and the Ear
The methods mentioned above should help you adjust the bass on your Windows device within a few minutes. Here, it is also important to note that contrary to the popular belief, the bass does not damage your ear. The small-diaphragm in your ear properly responds to higher frequencies but since it is not large enough, the bass does not affect it.
An expensive speaker or an exclusive headset can also fail to provide proper bass if you don’t adjust it properly. In most cases, you blame the hardware accessory for incompatibility and the real issue stays out of your knowledge that it may not always be a speaker.
Changing some default audio driver configuration such as Realtek HD audio drivers can provide the maximum bass output from a speaker. Certain third-party applications like equalizer APO for Windows will also help you effortlessly to get maximum output whether the speaker is built-in or external.
Lower Bass on Windows 11 and 10
Here is How to Reduce or Lower Bass on Windows 11 pr 10 –
Reduce Bass on Windows 10 using equalizer APO application
Third-party applications may serve you more than customizing the default settings of Windows sometimes. You may find some software programs on the internet but, in case of lowering the Bass of a speaker, equalizer APO comes out at the top. Here is how you can reduce the bass using this third party application –
- Open any web browser you prefer and navigate the page equalizer APO.
- When the page arrives, click the Download option from here.
- After the browser asks to download the exe file, choose the desired location and follow by clicking the Save button.
- Once the downloading finishes, make a double click on the file.
- If a UAC prompts from permission, give access clicking Yes button.
- From the installation wizard upon appearing, select gradually options in the following order –
Yes=> Next=> I agree=>Next=> Install
- In the Configuration window, check the against Speaker and select Close at the bottom.
- Another pop-up window may come up asking to reopen the previous window anytime, choose Yes to proceed.
- In the final page of the setup wizard, you will be asked to restart Windows. Select the radio button against Reboot Now and also click Finish button.
- Windows will reboot and all the changes will be saved in the system.
- Once a new session of Windows begins, press Win+S hotkeys at once and type configuration in the empty text area of taskbar Search.
- Select Configuration Editor from the result.
- Proceeding to the application window, you can now adjust the Bass of your speaker as per need just by moving the slider.
- For instance, you can drag any of the sliders from 25 to 160 columns above neutral 0 lines for increasing the bass.
- To lower Bass on Windows 11 or 10, move the slider from 25 to 1601 column below the 0 lines.
- To customize the settings more, you can test them one after another and choose the perfect one.
- After reaching to preferred settings, click File option from the top left corner of this window and select Save as option.
- Choose the desired location where you opt to keep these files and also rename the content.
- Lastly, click on the Save button to complete the task.
1] How to Filter Microphone Background Noise in Windows 10
2] How to Configure Sound Settings on Windows 10 April 2018 Update 1803
3] Customize DTS Sound in Windows 10 [Guide]
4] How to Change Default Sound Device in Windows 10
5] How to Turn on Spatial Sound for Headphones in Windows 10
That’s all!!!
Загрузить PDF
Загрузить PDF
В этой статье описывается, как настроить басы на компьютере. На некоторых компьютерах под управлением Windows есть предустановленный звуковой менеджер, с помощью которого можно включить и отрегулировать эквалайзер. Однако на большинстве компьютеров с Windows и Mac OS X нужно установить стороннюю программу, чтобы настроить басы.
-

Нажмите на логотип Windows в левом нижнем углу экрана.
-
Введите звук в меню «Пуск», а затем нажмите «Звук» в верхней части меню «Пуск».
-
Эта опция помечена значком, который выглядит как динамик с бело-зеленой галочкой.
- Если вы не видите эту опцию, щелкните по вкладке «Воспроизведение» в левой верхней части окна «Звук».
-
Вы найдете ее вверху окна «Свойства: Динамики».
- Если такой вкладки нет, вы не сможете настроить басы в окне «Звук». В этом случае настройте их с помощью эквалайзера.
-
Эта опция находится в списке, который расположен в центре окна «Свойства: Динамики». Возможно, вам придется прокрутить список, чтобы найти эту опцию.
- Опции упорядочены по алфавиту.
- Если вы не можете найти опцию «Эквалайзер», аудиокарта не поддерживает регулировку басов. Тогда установите стороннюю программу для настройки басов.
- Если вы не видите опцию «Эквалайзер», поищите опцию «Усиление басов». Если вы нашли такую опцию, установите около нее флажок, чтобы усилить басы.
-
Эта опция расположена справа от «Настройка» внизу окна.
-
Вы найдете эту опцию вверху окна «EQ». Раскроется меню.
-
Басы будут автоматически усилены.
- Переместите ползунки ближе к средним значениям, чтобы приглушить басы.
-
Так вы сохраните новые настройки.
-
Вы найдете эту кнопку внизу окна. Новые звуковые настройки вступят в силу.
Реклама


-
-
Вы найдете эту темно-зеленую кнопку в центре страницы. На компьютер скачается установочный файл Equalizer APO.
- Возможно, сначала вам придется выбрать папку для загрузки и нажать «Сохранить».
- В установочном файле, который хранится на указанном сайте, нет вредоносных кодов, но браузер может запросить подтверждение на скачивание исполняемого файла.
-
Дважды нажмите на скачанный установщик Equalizer APO, а затем:
- нажмите «Yes» (Да), когда появится запрос;
- щелкните по «Next» (Далее);
- нажмите «I agree» (Принимаю);
- щелкните по «Next» (Далее);
- нажмите «Install» (Установить).
-
В окне «Configurator» (Конфигуратор) отобразятся все доступные устройства для воспроизведения звуков. Установите флажок у акустической системы своего компьютера, чтобы назначить ее основной в программе Equalizer APO.
-
Для этого дважды щелкните по OK.
-
Эта опция расположена посередине окна.
-
Эта опция находится внизу окна. Компьютер будет перезагружен, а программа Equalizer APO начнет контролировать устройство для воспроизведения звуков вашего компьютера.
-
Когда компьютер перезагрузится, нажмите «Пуск»

, введите configuration editor, а затем щелкните по Configuration Editor (Редактор конфигурации) вверху меню «Пуск».
-
Сделайте это в разделе, который находится в центре Редактора конфигурации: поставьте ползунки столбцов «25» – «160» над значением «0»; поставьте ползунки столбцов, которые расположены справа от столбца «250», под значением «0».
- Ползунок столбца «250» поставьте на «0».
- Чтобы приглушить басы, поставьте ползунки столбцов «25» – «160» ближе к «0».
- Когда настраиваете звук, тестируйте его, чтобы понять, в каком направлении (вверх или вниз) передвигать ползунки.
-
Нажмите File (Файл) вверху окна, а затем в меню выберите Save (Сохранить). Настройки басов вступят в силу.
- Возможно, вам придется перенастроить звук в Редакторе конфигурации, когда будете слушать разные музыкальные жанры.
Реклама


-
В адресной строке веб-браузера введите https://www.bitgapp.com/eqmac/.
-
Эта серая кнопка находится справа на странице.
-
Для этого:
- дважды щелкните по скачанному DMG-файлу;
- перетащите значок eqMac в папку «Программы»;
- разрешите устанавливать программы от неизвестных разработчиков, когда появится запрос;
- следуйте инструкциям на экране.
-
Нажмите на значок, который выглядит как ракета и находится в доке.
-
Он имеет вид ряда вертикальных ползунков. Значок eqMac появится в строке меню компьютера.
- Прокрутите вправо или влево, чтобы найти значок eqMac.
- Возможно, придется щелкнуть по «Открыть», когда вы нажмете на значок.
-
Он имеет вид ряда вертикальных ползунков и расположен справа в строке меню. Раскроется меню.
-
В меню отобразится ряд пронумерованных ползунков:
- басы — ползунки «32», «64» и «125» настраивают басы;
- дисканты — ползунки «500», «1K», «2K», «4K», «8K» и «16K» настраивают высокие частоты;
- нейтральный — ползунок «250» нужно оставить на горизонтальной черте со значением «0».
-
- Чтобы усилить басы, передвиньте ползунки басов выше горизонтальной черты со значением «0», а ползунки дискантов — значительно ниже этой черты.
- Чтобы приглушить басы, опустите ползунки басов ближе к горизонтальной черте (или под нее), а ползунки дискантов поднимите к этой черте (под или над ней).
- Когда настраиваете звук, тестируйте его, чтобы понять, в каком направлении (вверх или вниз) передвигать ползунки.
-
9
Сохраните настройки басов. Нажмите на значок в виде дискеты в правом верхнем углу меню, введите имя настроек, а затем еще раз нажмите на указанный значок. Теперь эти настройки можно загрузить в любое время.
Реклама


Советы
- Качественные программы для настройки звука довольно дорогие, но с их помощью можно добиться тонкой настройки звука. Такими программам являются Graphic Equalizer Studio (в системе Windows) и Boom 2 для (в системе Mac OS X).
Реклама
Предупреждения
- Регулировать басы нужно методом проб и ошибок. Поэтому в процессе настройки постоянно тестируйте звук.
Реклама
Об этой статье
Эту страницу просматривали 221 685 раз.