

Случается так, что Windows 10 отказывает пользователям в предоставлении доступа к файлам и папкам, хранящимся на компьютере. В основном, данная проблема связана с тем, что юзеры не обладают соответствующими правами, даже несмотря на наличие учетной записи с правами администратора. Обычно такое происходит в случае с системными файлами / папками, либо с теми, что ранее принадлежали пользователю, чья учетная запись более не существует. Что делать, если отказано в доступе к файлу или папке в Windows 10? Если данная проблема мучает и вас, вам должна помочь эта инструкция, в которой описано, как получить полный доступ к файлам или папкам в Windows 10.
Получить полный доступ к файлу или папке в Windows 10 через Проводник
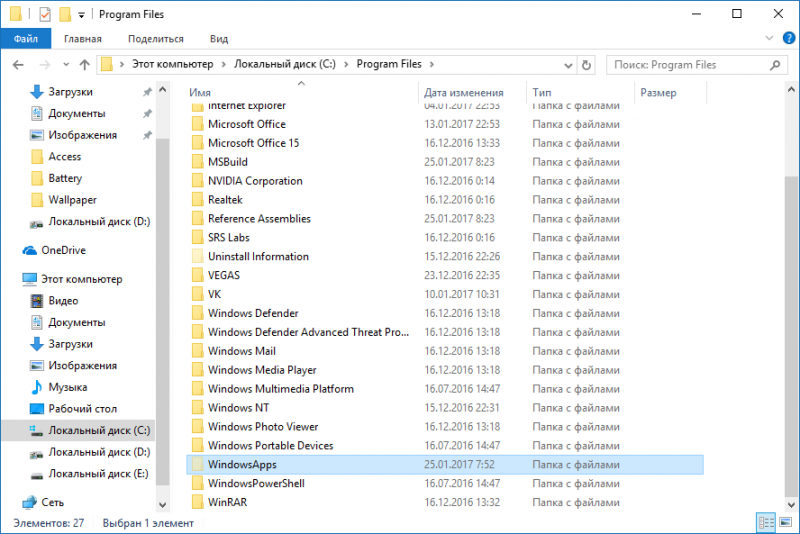
- Откройте Проводник и отыщите нужный файл или папку. Если файл или папку в проводнике не видно, не забудьте включить отображение скрытых файлов и папок.

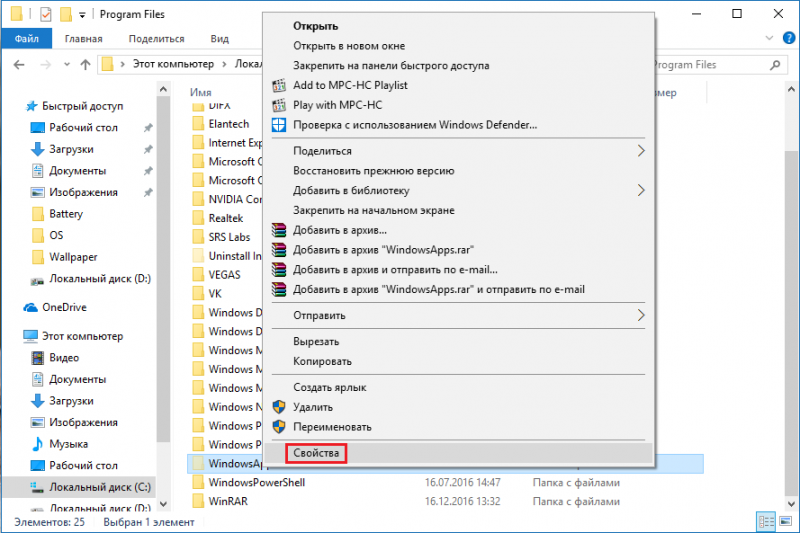
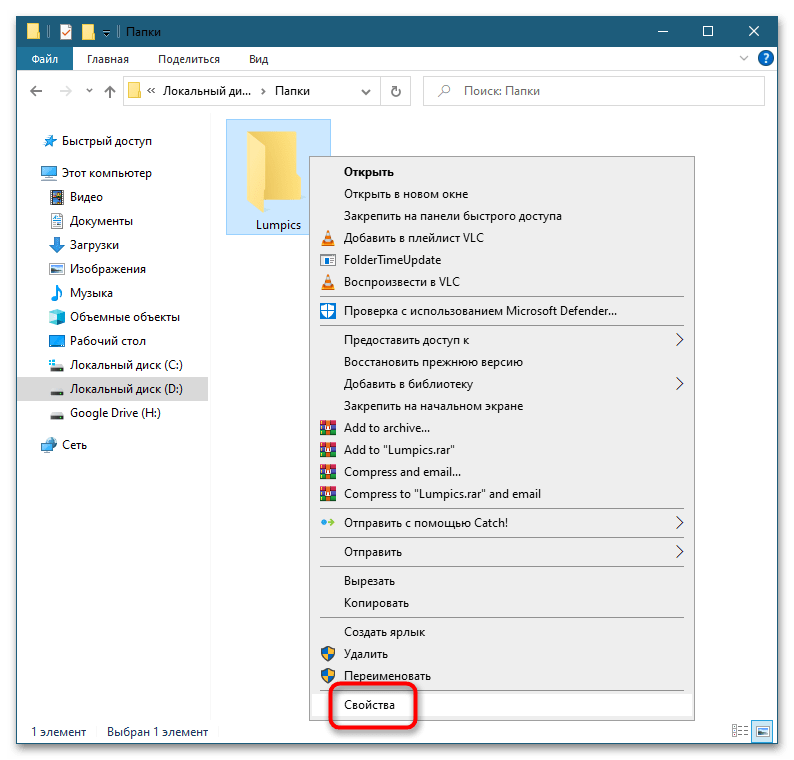
- Правой кнопкой мышки щелкните по файлу или папке и нажмите на пункт Свойства.

- Перейдите в Безопасность и нажмите на кнопку Дополнительно.
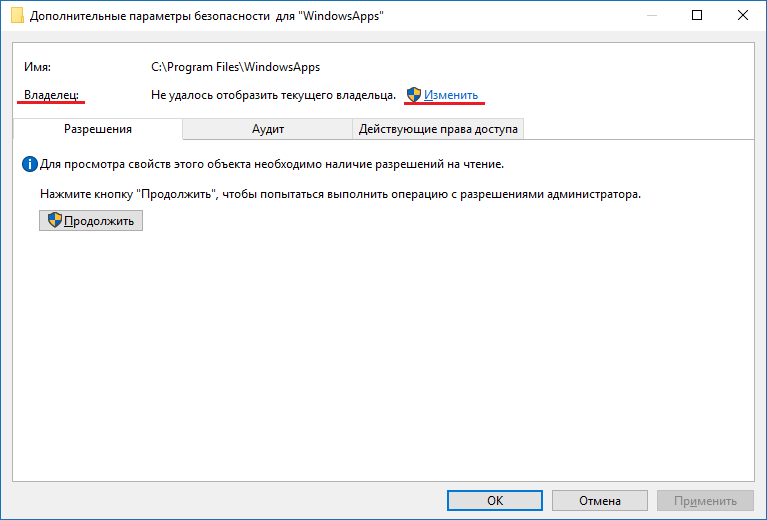
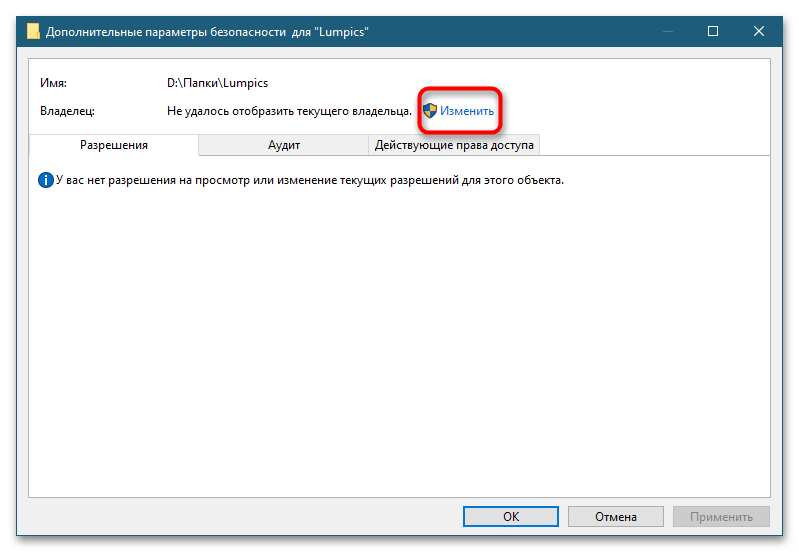
- В окне Дополнительные параметры безопасности нажмите на ссылку Изменить.

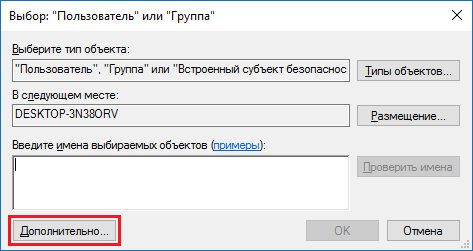
- Нажмите на Дополнительно — Поиск.

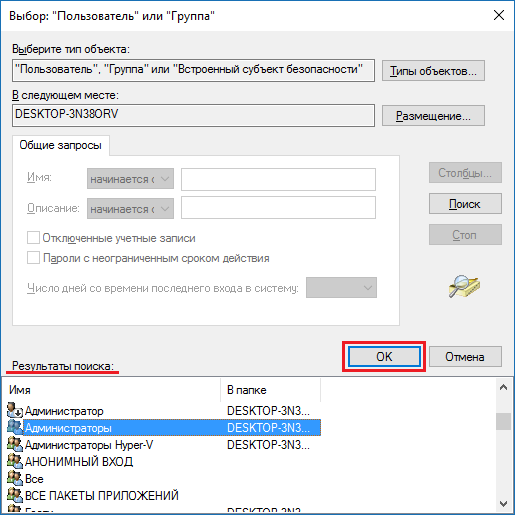
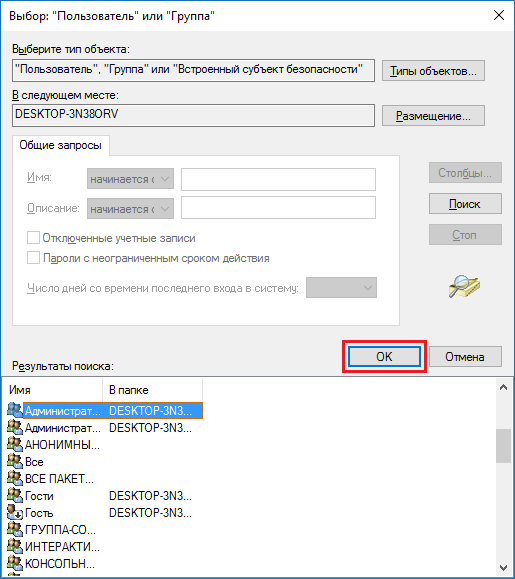
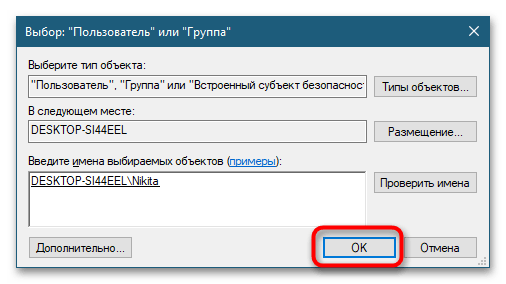
- Из перечня пользователей и групп выберите предпочитаемого владельца и нажмите ОК.

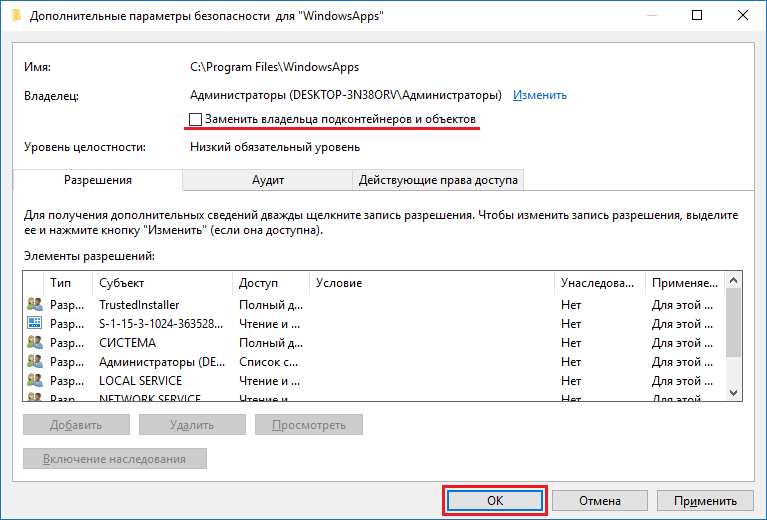
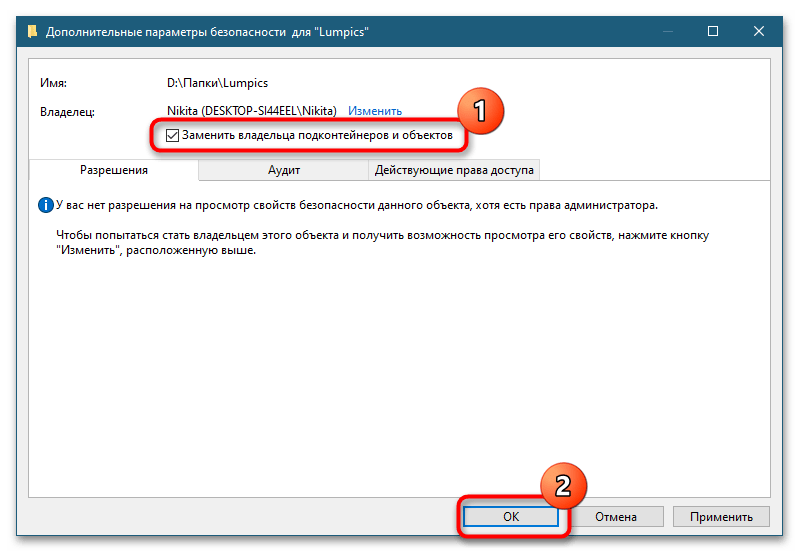
- Установите галочку напротив Заменить владельца подконтейнеров и объектов, и нажмите на ОК.
- Вновь щелкните правой кнопкой мышки по файлу или папке и откройте Свойства – Безопасность.
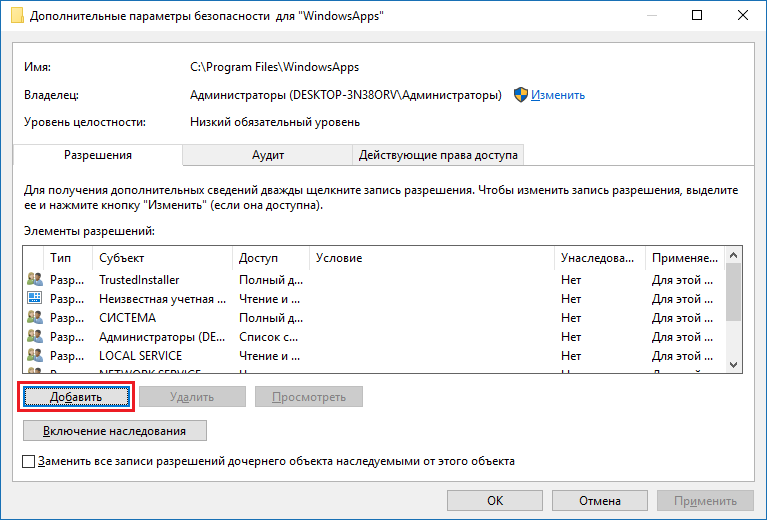
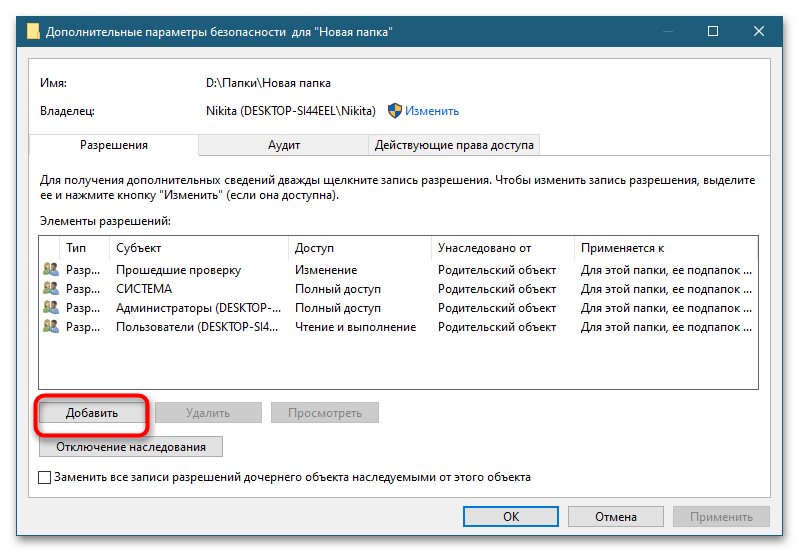
- Нажмите на Дополнительно – Добавить.
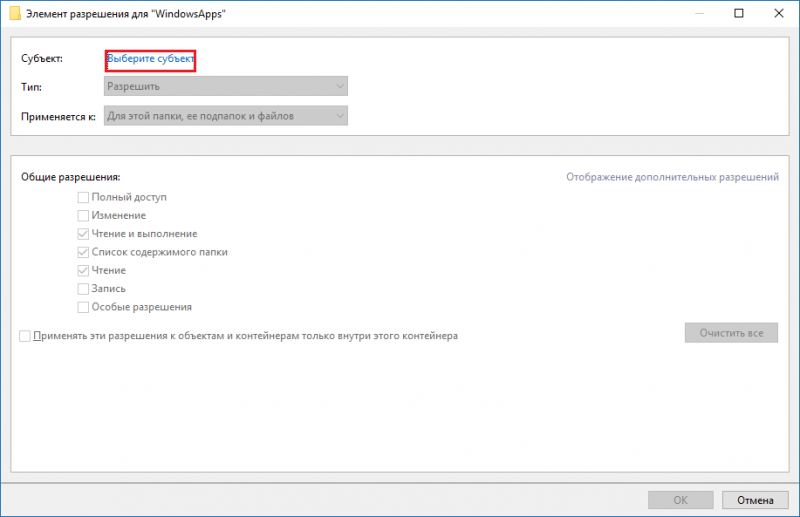
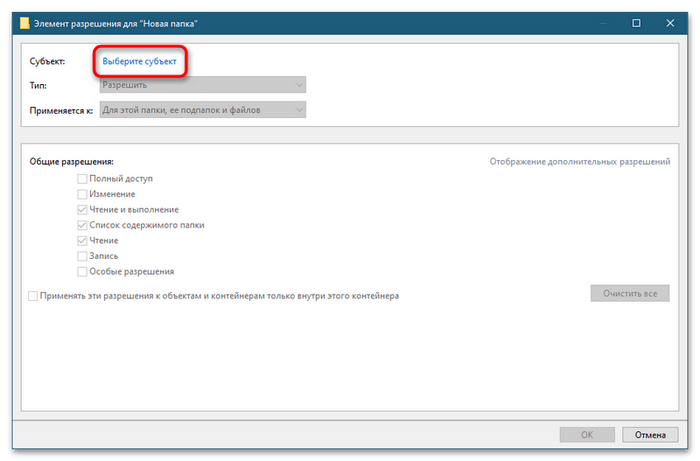
- Щелкните по ссылке Выберите субъект.

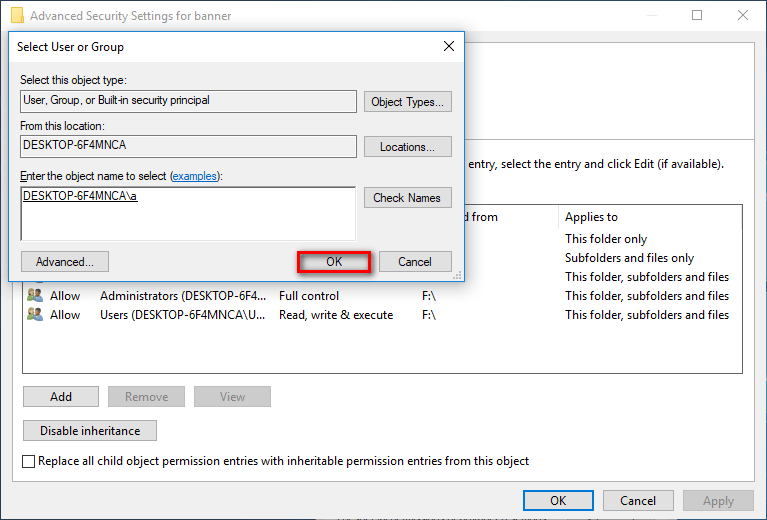
- Нажмите на Дополнительно – Поиск, выберите субъект из списка и нажмите ОК.

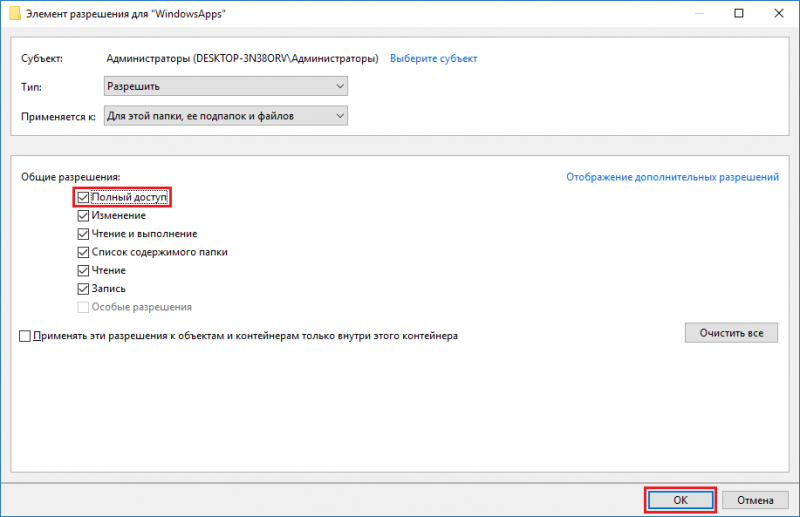
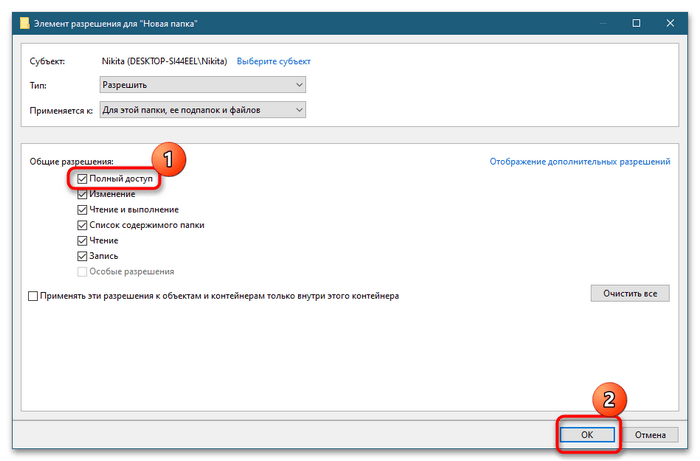
- Под надписью Общие разрешения поставьте галочку напротив пункта Полный доступ и нажмите на ОК.
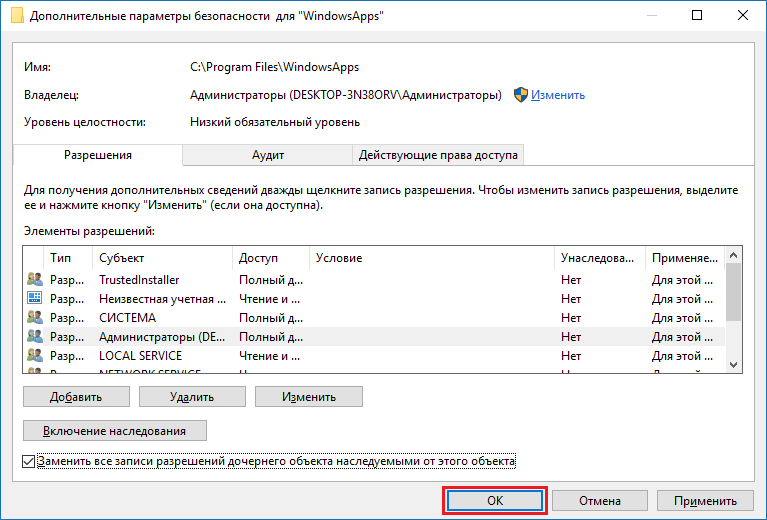
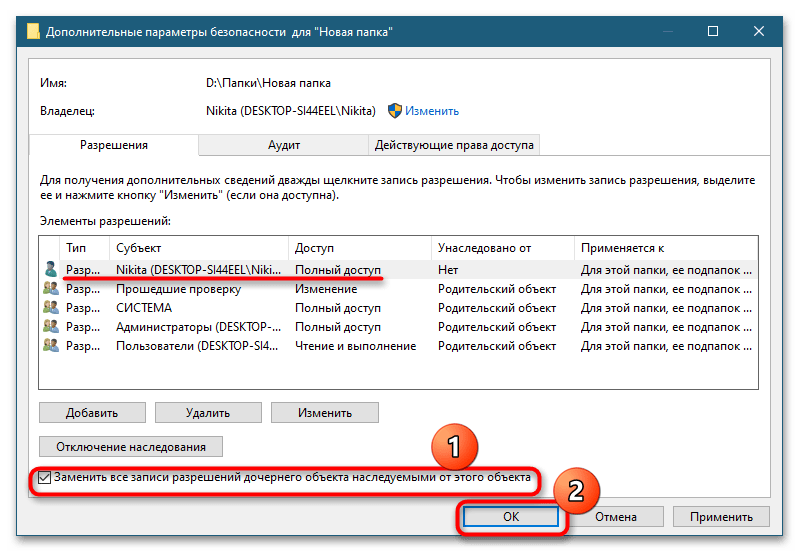
- Поставьте галочку напротив пункта Заменить все записи разрешений дочернего объекта наследуемыми от этого объекта.
- Нажмите на ОК для применения всех изменений.

Стать владельцем файла или папки в Windows 10 с помощью утилиты TakeOwnershipEx
В качестве альтернативного варианта вы можете использовать утилиту TakeOwnershipEx. Она позволяет заменить владельца файла или папки и получить полный доступ к ним в несколько простых нажатий. Пользователям достаточно сделать следующее:
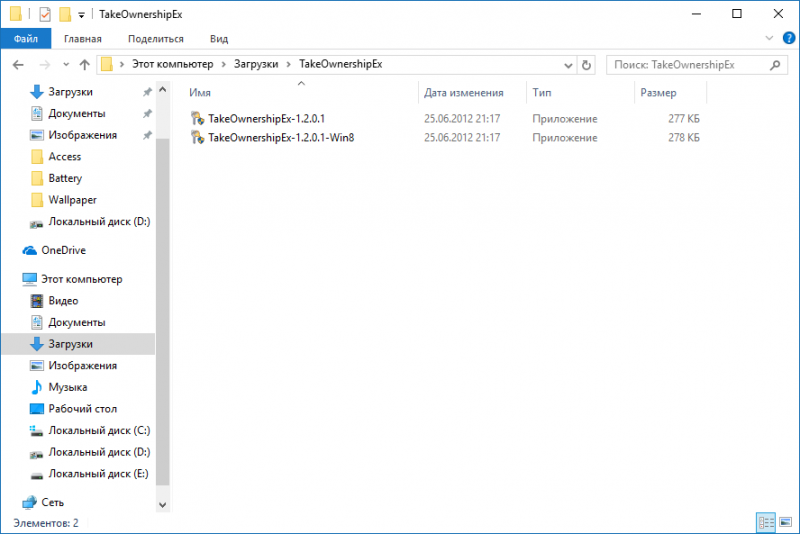
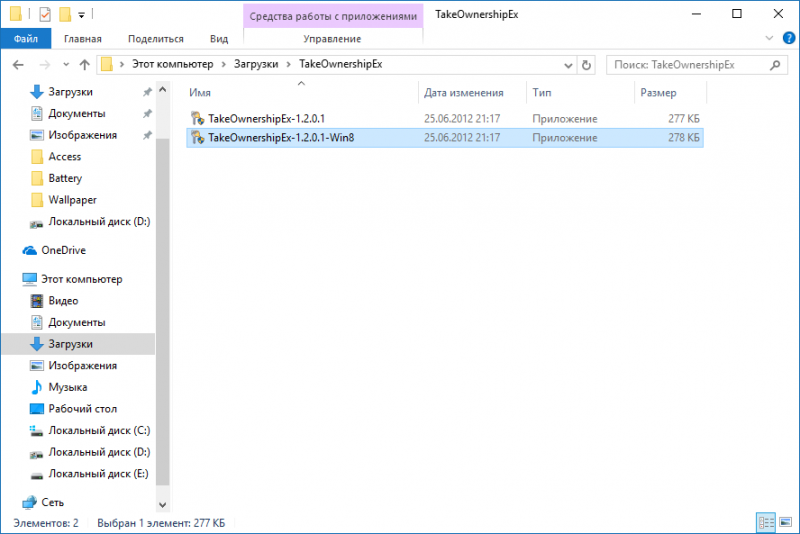
- Скачать архив с установщиками и распаковать их в удобную вам директорию.
- Открыть файл TakeOwnershipEx-1.2.0.1-Win8 и следовать подсказкам мастера установки.
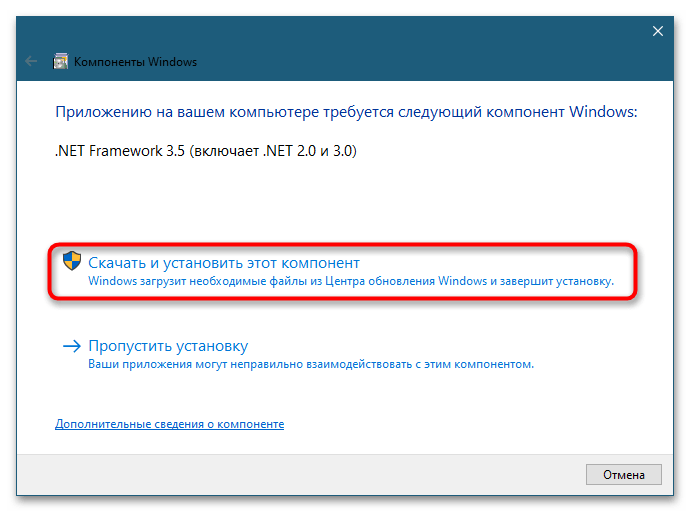
- Запустить установленную утилиту TakeOwnershipEx. В окне Компоненты Windows нажать на Скачать и установить этот компонент.

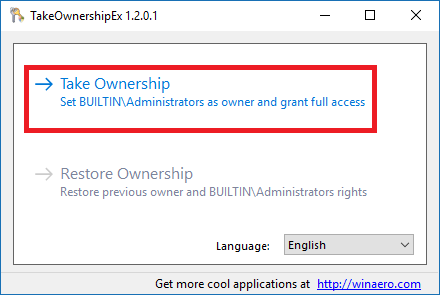
- Повторно запустить утилиту. Нажать на кнопку TakeOwnership или Получить права доступа, если вы выбрали русский язык в окне программы.

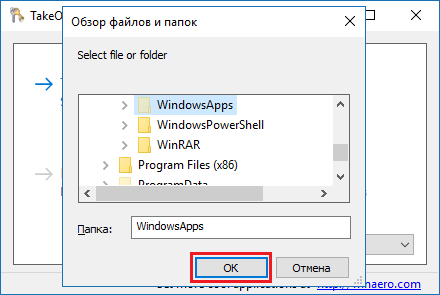
- Выбрать нужный файл или папку и нажать ОК.
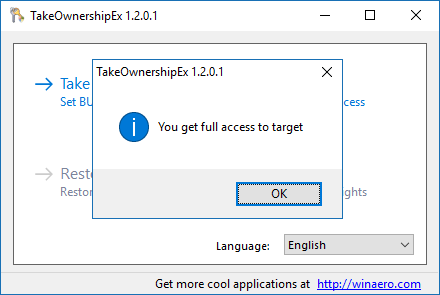
- В случае успешного выполнения команды должно появиться окно с сообщением: You get full access to target или Получен полный доступ к файлу/папке.

Оказалась ли полезной данная инструкция? Помогла ли она вам в решении проблемы с получением доступа к файлам и папкам в Windows 10? Напишите свой ответ в комментариях.
Last Updated :
07 Apr, 2025
If you’re trying to take ownership of a folder in Windows 10, you might encounter access issues or permission problems. Changing the Windows 10 folder permissions allows you to gain full control over a specific folder or file. This guide will show you step-by-step how to change folder ownership in Windows 10 and ensure you can easily manage your files. Whether you’re looking to fix access issues or update the folder ownership settings, these instructions will help you take control of a folder in Windows 10.
What is User Account Control?
User Account Control is a mandatory access control enforcement feature for Windows. Microsoft introduced it to strengthen the security of its essential system files and folders. Often, you need to take ownership of a file or folder to perform operations on system files and folders. The Trusted Installer group owns these system files and folders.
Hence, any other group including the Administrators group cannot change the permissions of any of those files or folders unless they also have ownership.
If you navigate to Control Panel > User Accounts > Change Account Type, you will see the following options listed on the page:
- Standard: Standard Account can use most software and change system settings that don’t affect other users or the security of the PC.
- Administrator: Administrators have a complete control panel over the PC. They can change any settings and access all of the files and programs stored on the PC.
As we can see, the Administrator account is more privileged than the standard account. Hence, it’s best to set your account type to Administrator. Check the box that says Administrator and hit Change Account Type to save your changes.

Why Ownership of Files and Folders is Important in Windows 10/11?
In Windows 10/11, every system file or folder you see on your PC has a predefined owner. The owner is the person or group that created the system file or folder. The owner is the one who decides how the permissions are set on a system object and to whom permissions will be granted.
In Windows 10/11, the users or the Administrators are not allowed to access a system object, but they are permitted to change ownership of files and folders on their device. They can include NTFS files and folders, registry keys, services, processes, etc.
Taking Ownership of Files and Folders is Important in Windows 10/11. Here are some privileges given to the owner of the folder.
- Taking ownership grants control over folder access.
- Facilitates managing permissions for files within.
- Enables making changes, deleting, or moving items.
- Essential for resolving permission-related issues.
- Safeguards against unauthorized access or modifications.
- Allows customer settings to individual needs.
- Promotes accountability for folder content and management.
Microsoft has changed the method of changing ownership of folders in Windows 10/11. Earlier, you had to navigate to the Owner tab, click on Edit, select your username, and hit OK to save your changes.

Note: In Windows 10/11, you have a section named Owner, where you will be able to see the current owner of the chosen folder. You can click on Change to select a different owner for the folder.

How to Take Ownership of Files and Folders in Windows 10/11?
If you are in a similar situation where you want to operate on a system folder in Windows 10/11 but are not permitted to do it, follow these steps below to get ownership of the folder:
Step 1: Right-click on the folder and hit Properties.

Step 2: Go to the Security tab and click on Advanced, located at the bottom-right corner of your screen.

Step 3.1: Click on Change.
Step 3.2: Click on Advanced.

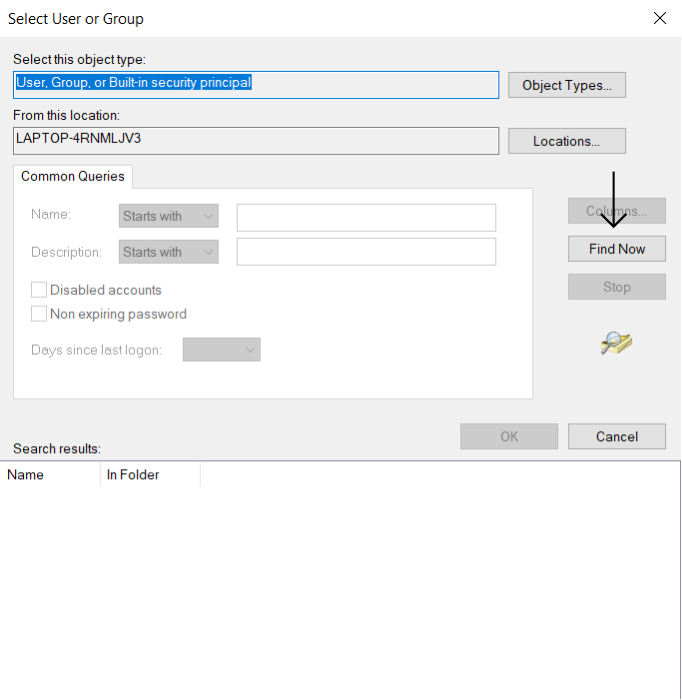
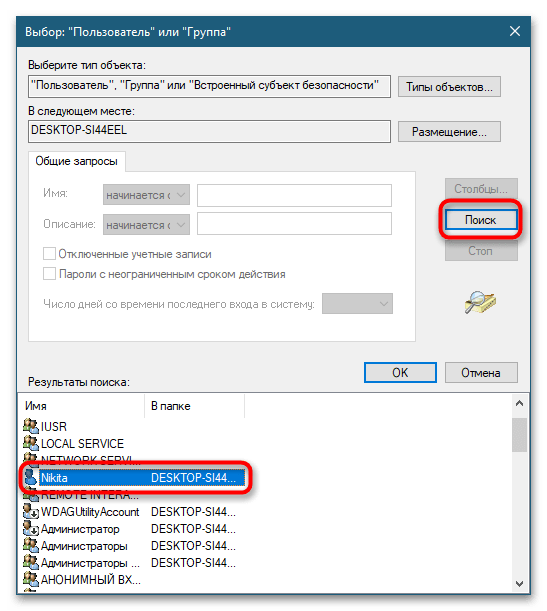
Step 4: Click on Find Now.
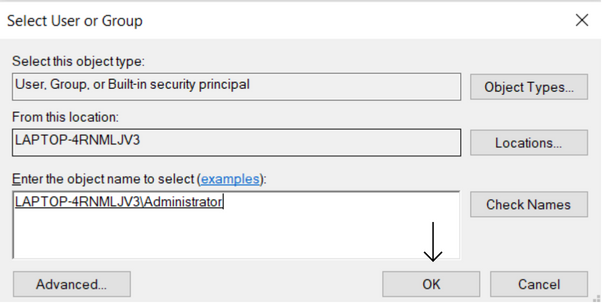
Step 5: Select your username and hit OK.

Step 6: Click OK.
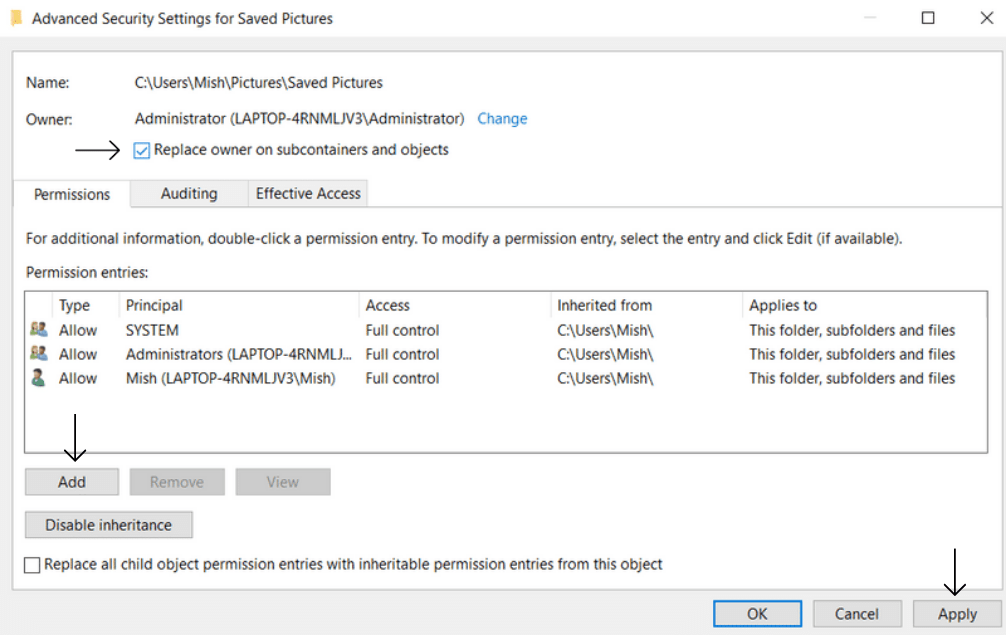
Step 7: Check the box that says Replace owner on sub containers and objects and click on Apply.
Now, you need to repeat steps 1-3 and reach this page again.
Step 8: This time around, click on the Add button on your screen.
Step 9: Click on Select a principal.
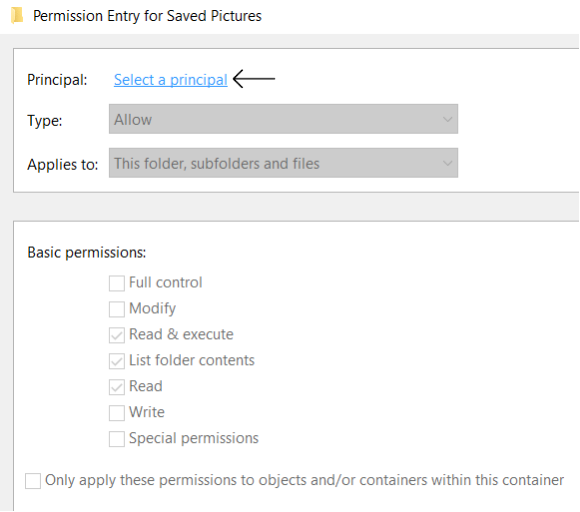
Step 10: Check the box that says Full control. Then, hit OK.

Step 11: Click on Apply.

In the above-explained case, We tried changing the name of the Software Distribution folder to Distribution but were not permitted to. Hence, we get ownership of the folder. Now, we have successfully changed the name of the folder. Here’s the proof:

Conclusion
Knowing how to take ownership of a folder in Windows 10 is essential for managing your files and overcoming access restrictions. By following the steps to change folder permissions and updating the Windows 10 folder ownership, you can resolve any issues related to file access. Whether you’re dealing with administrative rights or locked files, changing the ownership of files in Windows 10 ensures you have the necessary control.
Also Read
- How to Hide a Folder in Windows?
- How to Show Hidden Files and Folders in Windows 10
- How to Encrypt folder without any Software on Windows?
- How to create a Folder without any name and icon in Windows OS
Sign in to your MUO account
Windows 11 and 10 include some restricted access folders by default. When you try to open such folders, a message pops up that denies you permission to access them. Those restricted access folders are even closed off from admin-level users.
Such folders are usually restricted for good reason, but at any rate, you can still access them. To do so, you’ll need to take ownership of them. Taking ownership of a folder enables you to change the object permissions for it. You can take ownership of folders in Windows 11 and 10 with the alternative methods below.
How to Manually Take Ownership of Folders on Windows
The WindowsApps folder is a good example of a restricted access folder. That folder includes installed Universal Windows Platform apps on your PC. You’ll see the usual access (or permission) denied message when you try to open it.
You can manually take ownership of that folder, and others, to open it by changing its permissions via the Security tab. That tab includes the advanced security settings you’ll need to tweak to take ownership of folders. This is how you can take ownership of the WindowsApps folder within Windows 11.
- Open File Explorer (the Win + E keyboard shortcut launches it).
- Click View and Show to open more Explorer options.
- Select Hidden Items on the menu.
- Bring up the C:\Program Files folder path.
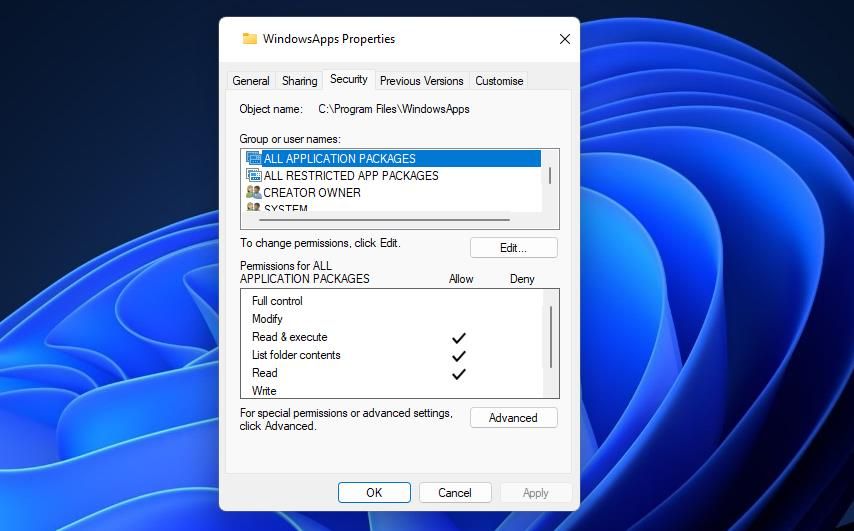
- Right-click WindowsApps to select Properties.
-
Select the Security tab shown in the snapshot directly below.

-
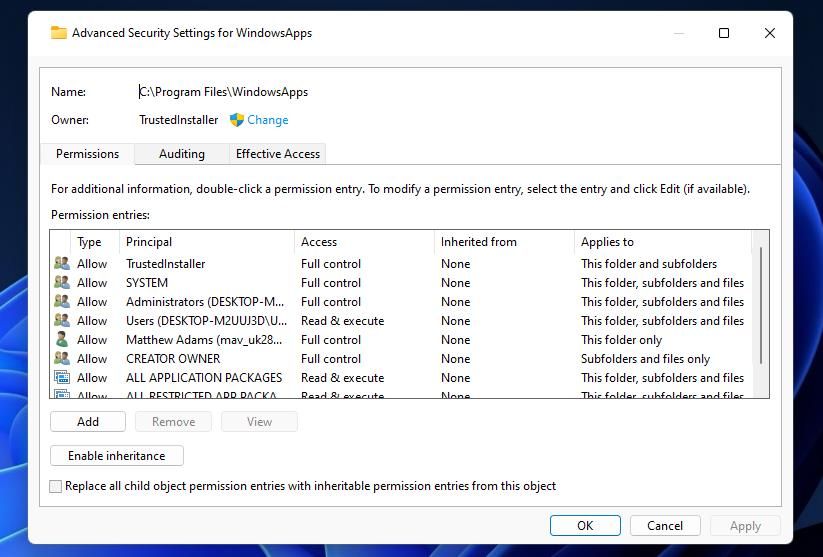
Click Advanced to view the Security Settings for WindowsApps window.

- Then click Change to open a Select User or Group window.
-
Enter Administrator in the object name box. Alternatively, you can enter your target user account there.

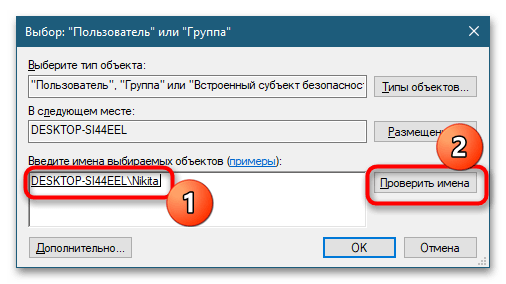
- Press the Check Names button, and click the OK option.
- Click the Replace owner on subcontainers and objects checkbox to select it.
- Then select Apply > OK to change the folder permission as configured.
- Click OK on the prompt that confirms you’ve taken ownership of the folder.

Now go ahead and try opening WindowsApps again. That folder will now open for you after taking ownership of it. You can take ownership of other folders much the same.
How to Take Ownership of a Folder With the Command Prompt
The Command Prompt gives us another way to take ownership of folders. It’s a bit simpler and faster to take ownership of a folder by entering a quick command. You can take ownership of WindowsApps in the Command Prompt as follows:
- Click inside the Type here to search box on the Start menu, or you can press the Windows + S keys at the same time.
- Input cmd in your search box and open Command Prompt with elevated rights by selecting Run as administrator.
-
Type in this takeown command:
takeown /F "C:\Program Files\WindowsApps” - Press the Enter keyboard key to take ownership of the folder.

The above command will assign ownership to the currently logged-in user. You can further modify that command by adding extra switches to it. For example, adding an /A and /R switch to it will assign ownership to the admin group and apply ownership to all subfolders included in the primary directory. That command for the WindowsApp folder would look like this:
takeown /F C:\Program Files\WindowsApps /A /R
If you would prefer an even simpler way to take ownership of folders, set up a Take Ownership context menu option. You can add a Take Ownership shortcut to Windows 11’s desktop context menu with the freeware Winaero Tweaker. Then you can simply select that context menu option to take ownership of whatever folder you fancy. These are the steps for adding a Take Ownership option to the Context Menu with Winaero Tweaker:
- First, go to the Winaero Tweaker download page in a web browser.
- Click Download Winaero Tweaker on that webpage to save a ZIP archive for the software.
- Launch File Explorer to open the folder that includes Winaero Tweaker’s ZIP file.
-
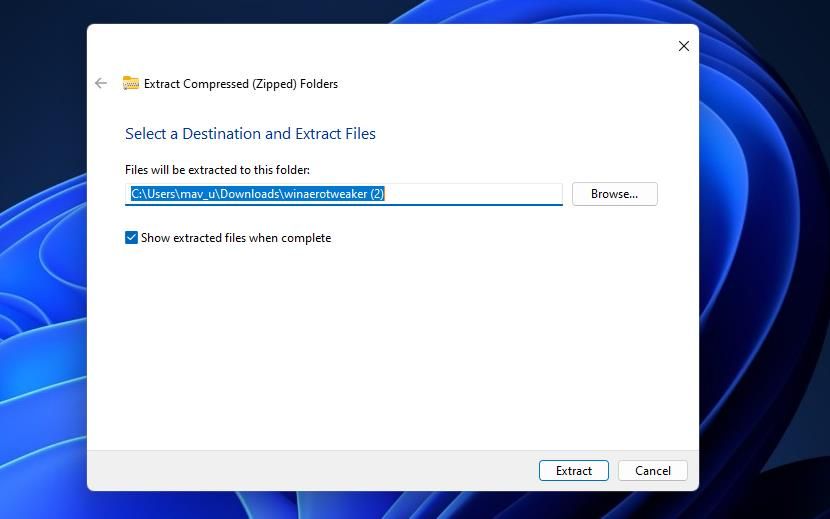
Click the winaerotweaker ZIP archive with your right mouse button and select Extract All.

-
Select Show extracted files and Extract.

- Double-click the setup file for Winaero Tweaker.
- Click Next to reach the agreement options.
- Select the I accept agreement radio button and click Next again.
- If you don’t want to install the software in a default directory, select Browse to choose another one.
- Keep clicking Next until you reach the final Install option.
- Click Install to do that.
- Select Run Winaero Tweaker to start the software after exiting the setup wizard.
- Press Finish to exit the installer and bring up Winaero Tweaker.
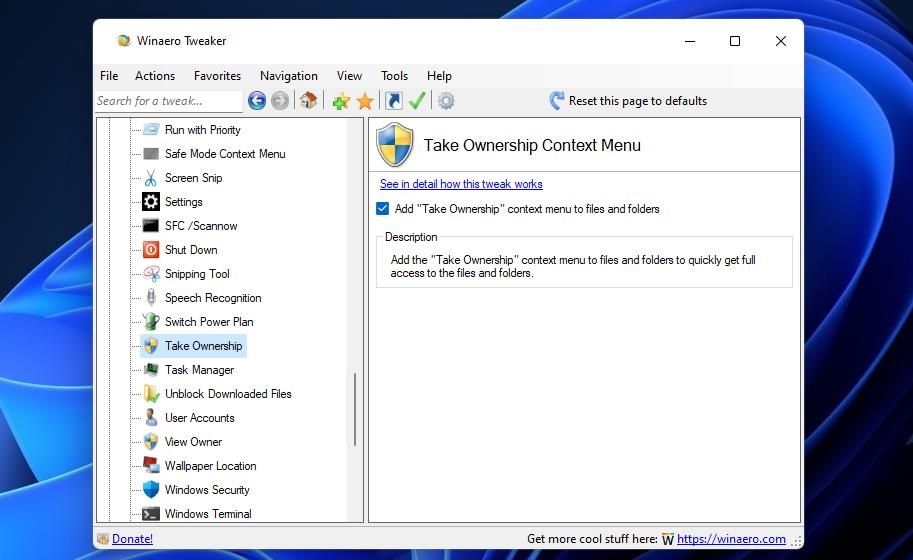
- Double-click Context Menu in Winaero Tweaker to view that category’s options.
-
Select the Take Ownership option.

- Click the Add “Take Ownership” context menu to files and folders checkbox to select it.
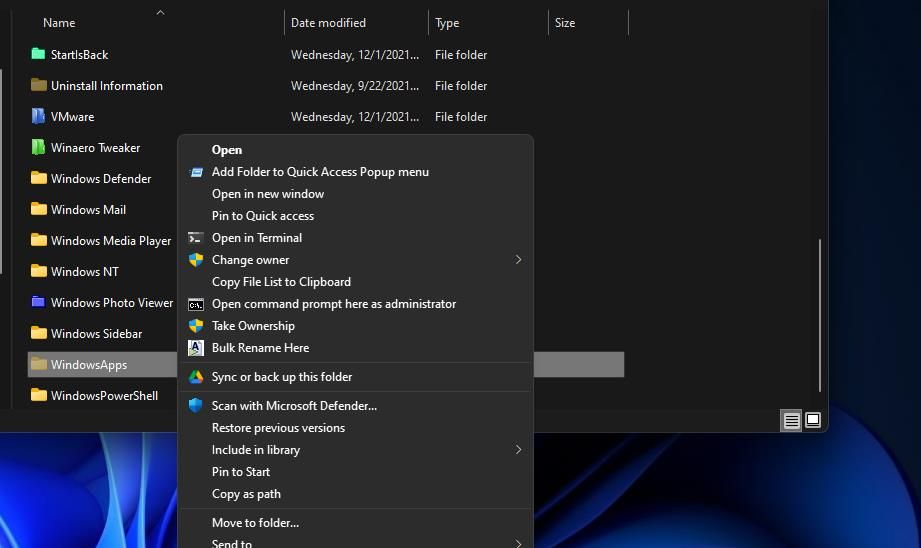
Now you can try out your new Take Ownership context menu shortcut. Open the C:\Program Files folder in File Explorer and make sure Hidden Items is selected as outlined in steps one to four of the first method. Right-click the WindowsApps folder and select Show more options at the bottom of the context menu. Click the new Take Ownership option in the classic menu, and select Yes in UAC prompts.
A cmd.exe window will then pop up. Wait for the Command Prompt to apply your ownership of the selected folder (it will tell you to press any key when done). Thereafter, you can go ahead and open WindowsApps to see what’s inside.
You can also remove the Take Ownership option from the context menu with Winaero Tweaker. To do so, uncheck the Add Take Ownership context menu to files and folders to deselect that option in Winaero Tweaker. Or you can click Reset this page to defaults instead.
Expand Your System Access by Taking Ownership of Folders
When you’ve taken ownership of some folders, you’ll be able to view exactly what’s inside them. In the case of WindowsApps, you’ll be able to open installation subfolders for Windows apps from there. Thus, taking ownership of folders effectively gives you greater access to everything on your PC. However, it’s recommended that you don’t try to delete the contents of such folders unless you’re clear about exactly what you’re erasing.
-
Home
-
News
- How To Take Ownership Of Folder In Windows 10 By Yourself
By Sarah |
Last Updated
You may fail to change files or folders sometimes on your computer. Why? That indicates you don’t have full access to them. At this time, you need to take ownership of files and folders so as to move, modify, or copy a file/folder on your computer. This article tells you exactly how to take ownership of folders and files in Windows 10.
As a computer user, you must be familiar with this scene: after you clicked on a file/folder on a Windows 10 computer, the system gives you a prompt saying that you don’t have permission to access it. How disappointed you will be especially when you need to access the file/folder immediately.
You Need to Take Ownership of Folder in Windows 10 to Get Full Access
In this case, you are advised to take ownership of folder in Windows 10 to settle down the problem. Actually, it’s quite a normal thing to change the file ownership of Microsoft Windows 10 (a deep dive through property settings is involved).
This often happens to a system file/folder or the file/folder that was created by a user account and now the account doesn’t exist anymore. The file system of Windows 10 actually offers you permissions to certain groups and users for accessing files and folders on a computer.
What if you fail to access a file since it becomes 0 bytes? Please go to find solutions here:
What Is Ownership
As long as you signed into Windows 10 with the account that was used to create files and folders, you’ll get full control over them. Indeed, the ownership grants you permissions power to decide who can access and modify the file/folder and who can’t.
Yet, there are some cases in which file or folder ownership must be changed to someone else. That’s why you need to change ownership of files and folders in order to access them as usual. This can be completed by both the current owner and the individual with proper system administration credentials.
Tip: Here is a piece of wonderful folder recovery software for you to recover lost folders.
How to Get Full Permission on Windows 10
There are exactly quick and efficient ways to grant admin full control in Windows 10: take ownership of folder in Windows 10 through File Explorer and change permissions in Windows 10 with command line. Here, I’ll mainly focus on the former method.
Take Ownership of a File or Folder via Windows File Explorer
- Open Windows Explorer and find the certain file/folder that you want to take ownership of.
- Right click on the file/folder and choose Properties.
- Shift to Security tab from General (selected by default).
- Click on the Advanced button for special permissions or advanced settings.
- Click on the Change option on the right side of the owner name.
- Click on the Advanced button in the lower left corner of the Select User or Group window.
- Click on the Find Now button.
- Choose your username from the list and then click on the OK button.
- Click on the OK button gain in the following Select User or Group window.
- Click on the Apply button in the Advanced Security Settings window.
- Select OK in the pop-up Windows Security window.
- Click on the Add button to make sure you have all kinds of permissions.
- Click on Select a principal option and click on the Advanced button in the Select User or Group window.
- Repeat step 7 to step 9.
- Check Full control under basic permission.
- Click on the OK button to confirm.
- Click on the OK button in the Advanced Security Settings window.
- Now, you can click on your user name to verify the new permissions.
Certainly, you may ask how to take ownership in Windows 10 via cmd. Please click here to learn more about Windows 10 take ownership of folder command line.
If you still cannot take ownership of file on Windows 10 or can’t take ownership of folder on Windows 10, please turn to Windows Registry file edit to have a try.
Learn Practical Ways To Recover Missing Files On Windows 10.
About The Author
Position: Columnist
Sarah has been working as an editor at MiniTool since she graduated from university. Sarah aims at helping users with their computer problems such as disk errors and data loss. She feels a sense of accomplishment to see that users get their issues fixed relying on her articles. Besides, she likes to make friends and listen to music after work.
Чтобы иметь возможность получения полных прав на не принадлежащую пользователю папку, необходимо обладать в системе правами администратора.
Способ 1: Средствами Windows 10
В Windows 10 имеются встроенные средства управления правами и разрешениями пользователей. Они не слишком удобны, но для поставленной задачи вполне подходят.
- Откройте «Свойства» папки из ее контекстного меню.
- Переключитесь в окне свойств на вкладку «Безопасность» и нажмите кнопку «Дополнительно».
- Напротив параметра «Владелец» нажмите кнопку «Изменить», если владелец отсутствует или им является другой пользователь.
- В открывшемся диалоговом окошке выбора впишите ваше имя пользователя и нажмите «Проверить имена», чтобы убедиться в правильности ввода данных.
- Вместо непосредственного ввода имени пользователя можно нажатием кнопки «Дополнительно» открыть окно выбора пользователя или группы, в нем нажать кнопку «Поиск» и выбрать пользователя, которого хотите назначить владельцем.
- После того как имя пользователя появится напротив параметр «Владелец», отметьте флажком опцию «Заменить владельца подконтейнеров и объектов» и сохраните настройки нажатием «OK».
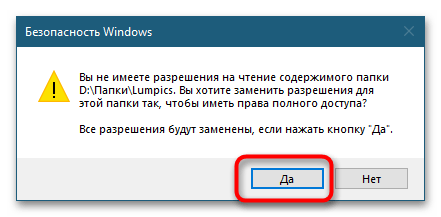
- Подтвердите действие в открывшемся диалоговом окошке.
- Снова откройте свойства папки на вкладке «Безопасность» и убедитесь, что выбранный пользователь имеет все разрешения.
- В противном случае нажмите «Изменить» и установите флажок в пункте «Полный доступ».
Может статься, что назначенного пользователя в группе не окажется либо опция снятия/установки разрешений будет неактивной. В этом случае выполните следующие действия:
- Откройте «Дополнительные параметры безопасности» как было показано выше в шаге 2 и нажмите кнопку «Добавить».
- В открывшемся окне нажмите «Выберите субъект».
- Добавьте нужного вам пользователя как было показано выше в шаге 4 и нажмите «OK».
- В окне «Элемент разрешения для…» выставьте «Полный доступ» и сохраните настройки нажатием «OK».
- Выделите в окне дополнительных разрешений только что добавленного участника мышкой и отметьте флажком чекбокс «Заменить все записи разрешений дочернего объекта наследуемыми от этого объекта». Сохраните настройки и подтвердите выполнение операции.
Способ 2: Сторонние программы
Для получения прав на пользовательские и некоторые системные каталоги также можно использовать специализированные утилиты, например TakeOwnershipEx. Эта небольшая бесплатная программа хороша тем, что интегрируется непосредственно в окружение «Проводника».
Скачать TakeOwnershipEx с официального сайта
- Скачайте, установите и запустите утилиту. В Windows 10 инструмент может потребовать .NET Framework — согласитесь на его инсталляцию, нажав в диалоговом окне «Скачать и установить этот компонент».
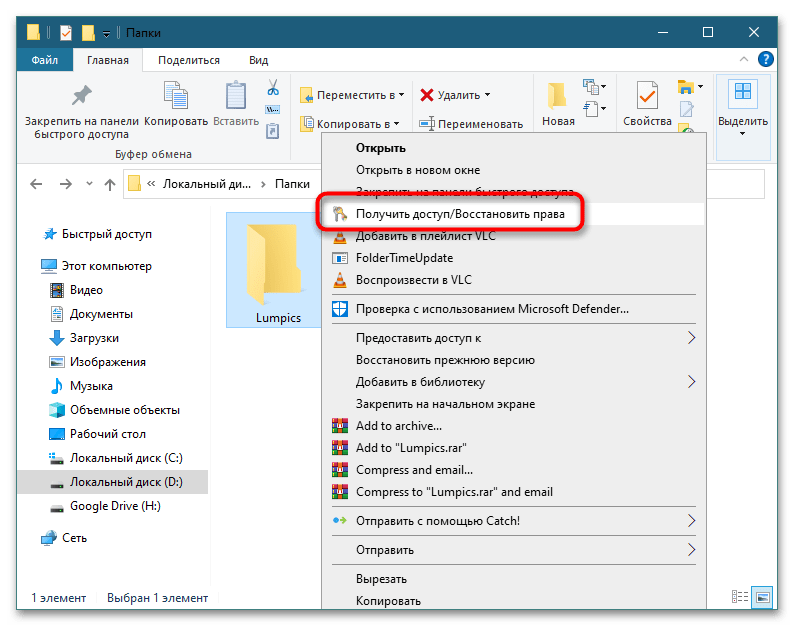
- Кликните по папке, на которую хотите получить права и доступ правой кнопкой мыши, и выберите из контекстного меню опцию «Получить доступ/Восстановить права».
В случае удачного получения всех разрешений утилита вернет сообщение «Получен полный доступ к файлу/папке».
Наша группа в TelegramПолезные советы и помощь