Как сравнить две папки с файлами в windows 10

Quick Links

  • Compare Folders From Properties

  • Compare Folders Using Command Prompt

  • Compare Folders With WinMerge

Summary

  • One way to compare folders is to right-click your folders one at a time and choose «Properties» for each. Then compare the Properties window of each folder.
  • The robocopy command is a command-line tool that can be used to view the differences between folder.
  • Use WinMerge to compare the contents and details of folders if you want a graphical tool.

Do you want to compare the number of files or folders or simply visualize the difference between two folders? If so, you have two graphical and one command line method to do that. We’ll show you how to perform the folder comparison task on your Windows 11 or Windows 10 PC.

Compare Folders From Properties

To compare the number of files, subfolders, the size, and the creation date of two folders, use the Properties option in Windows File Explorer. This lets you quickly glance at the main attributes of a folder.

To start, launch File Explorer using Windows+E. Find the first folder, right-click it, and select «Properties.»

'Properties' highlighted for a folder in File Explorer.

Keep the first folder’s «Properties» window open. Then, find the second folder, right-click it, and select «Properties.»

You now have the «Properties» window open for both your folders. Bring these windows side-by-side by dragging them, and you can see the differences in the contents of these folders. For example, you can see how many files both folders have, what size these folders are, and so on.

'Properties' windows for two folders in File Explorer.

That gives you a general overview of the differences between your folders.

Compare Folders Using Command Prompt

If you prefer command line methods over graphical ones, use the robocopy command in Command Prompt to see the differences between the two folders. This command is actually for copying files from one folder to another, but you can make it show the differences between two specified folders and not copy any files.

To use robocopy, first open the Start Menu, search Command Prompt, and launch it.

Command Prompt highlighted in Start Menu.

In Command Prompt, type the following command. Replace «Folder1» with the path to your first folder and «Folder2» with the path to your second folder. Ensure both folder paths are enclosed in double quotes.

To copy a folder’s full path along with double quotes around the path, hold down the Shift key on your keyboard, right-click your folder, and choose «Copy as Path.»

robocopy "Folder1" "Folder2" /L /NJH /NJS /NP /NS
The 'robocopy' command typed in Command Prompt.

You’ll see the differences between your folders.

If you’re curious as to what the robocopy command does, here’s an explanation of each flag we used with the command:

  • L: This tells the command not to copy files but show the log of the files in the specified folder.
  • NJH: This flag excludes junctions, hard links, and reparse points from consideration. This way, the command focuses on the regular files in the specified folders.
  • NJS: This flag excludes symbolic links from the process.
  • NP: This flag excludes folder timestamps.
  • NS: This flag excludes file security information.

Compare Folders With WinMerge

If you want more details about the differences in your folders, Windows doesn’t have a built-in tool to help you with that. However, you can use a free third-party app called WinMerge to compare multiple folders.

To use it, launch a web browser on your PC, head to the WinMerge site, and download and install the app. Make sure to download the app’s executable and not the ZIP version.

Open the WinMerge app, then select File > Open in the Menu Bar or press Ctrl+O.

File > Open highlighted in WinMerge.» src=»https://static1.howtogeekimages.com/wordpress/wp-content/uploads/2024/01/5-open-folder-winmerge.jpg»></p>
<div class= Картинка с сайта: www.howtogeek.com

For the «1st File or Folder» field, select «Browse» and choose the first folder to compare.

'Browse' highlighted for the '1st File or Folder' field in WinMerge.

For the «2nd File or Folder» field, click the «Browse» button and choose the second folder to compare.

'Browse' highlighted for the '2nd File or Folder' field in WinMerge.

In both fields, enable the «Read-Only» option. Click the «Folder: Filter» field and type *.* if it isn’t already there. This ensures the app compares all the files in both the specified folders. Then, at the bottom, click «Compare.»

Various comparison options highlighted in WinMerge.

On the following screen, you’ll see the comparison of the specified folders. You’ll see information like identical files in both folders, files missing from one folder, and so on.

The comparison of two folders in WinMerge.

And that’s how you know what one folder has that another doesn’t. This can be really useful if you’re trying to quickly compare different versions of the same folder, like you’d have when you create a backup.

When we move the files from one folder to another, it is highly recommended that you ensure that all the files have been moved accurately. Some files, if not copied perfectly, may lead to data loss. A visual comparison of files copied from the original directory to a new one may look easy but isn’t feasible for many files. Hence, there arises a requirement for a tool that compares files in two folders. One such tool is WinMerge. You can identify the missing files by comparing them with the original directory.

In this guide, we have explained the basic steps to compare files in two folders with the help of WinMerge. You will learn how to install WinMerge in your system and how to use it to compare files.

How to Compare Files in Two Folders

Table of Contents

How to Install WinMerge on Windows 10?

WinMerge is a free application, and you can download it from the website mentioned here.

1. Click on Download Now button.

2. Wait for the download to be complete. After that, click twice on the downloaded file to open the installation wizard.

3. Here, click on Next on the license agreement page. This means you agree to continue with the selection. It takes you to the next page, which will give you an option to select the features during installation.

Click on Next on the license agreement page.

4. Click on the Features you want to include during installation and select Next.

5. You will now be redirected to a page where you can select Additional tasks, like a desktop shortcut, File Explorer, context menu integration, etc. There are many other features available in the menu, which you can either enable or disable. After making the required selections, choose Next to continue.

6. When you click on Next, you will be directed to the final page. It will display all the options you have selected thus far. Check the list and click on Install.

7. Now, the installation process begins. When the installation process gets completed, click on Next to skip the short message, and finally, click on Finish to exit from the installer.

Also Read: How to Rename Multiple Files in Bulk on Windows 10

How to Compare Files in Two Folders Using WinMerge?

1. To begin the process, open WinMerge.

2. Once the WinMerge window pops up, click Control+O keys together. This will open a new comparison window.

3. Select the first file or folder by clicking on Browse, as shown below.

c

You can select the 1st file or folder by clicking on the Browse option.

4. Next, select the 2nd file or folder by the same method.

Note: Make sure that the two files are checked with the Read-only box.

5. Set Folder Filter to “*.*”. This will allow you to compare all the files.

6. After selecting the files and ensuring the checks, click on Compare.

7. When you click on Compare, WinMerge starts to compare the two files. If the file size is small, then the process will be completed quickly. On the other hand, if the file size is large, it takes a while for the process to be completed. When the comparison is made, all the files will be displayed in folders, and the comparison result will be displayed along with the last date of modification.

Important info: These color combinations will help you to make analysis easier.

  • If the Comparison result displays, Right only indicate that the corresponding file/folder is not present in the first comparison file. It is indicated by the color grey.
  • If the Comparison result displays, Left only, it indicates that the corresponding file/folder is not present in the second comparison file. It is indicated by the color grey.
  • Unique files are indicated in white.
  • The files that have no similarities are colored in Yellow.

8. You can view the distinct differences between files by double-clicking on them. This will open a wide pop-up screen where the comparisons are made in a more detailed manner.

9. The comparison results can be customized with the help of the View option.

10. You can view the files in tree mode. You can select the files, namely, Identical Items, Different Items, Left Unique Items, Right Unique Items, Skipped Items, and Binary Files. You can do so by checking the desired option and unchecking the rest. Such customization will save analysis time, and you can identify the target file at the earliest.

Thus, you can compare files in two folders by following the above steps.

Note: If you want to update any changes to the existing comparison, you can click on the refresh icon displayed in the following picture or click on the F5 key.

To start a new comparison, tap the Select Files or Folders option. In the next step, replace your target files or folders using the Browse option and click Compare.

Some Other Tools to Compare Files in Two Folders

1. Meld

  • Meld is an open-source app that supports both Windows and Linux.
  • It supports two and three-way comparing and merging features for files and directories.
  • The editing feature is available directly in the comparison mode.

2. Beyond Compare

  • Beyond Compare supports Windows, macOS, and Linux.
  • It compares PDF files, excels files, tables, and even image files.
  • You can generate the report by merging the changes you have added to it.

3. Araxis Merge

  • Araxis Merge supports not only image and text files but also office files like Microsoft PowerPoint, Microsoft Word, Microsoft Excel, etc.,
  • It supports both Windows and macOS.
  • A single license is valid for both operating systems.

4. KDiff3

  • It is an open-source platform that supports Windows and macOS.
  • An automatic merging facility is supported.
  • Differences are clarified line-by-line and character-by-character.

5. DeltaWalker

  • DeltaWalker is similar to that of Araxis Merge.
  • Apart from comparing office files, DeltaWalker lets you compare file archives like ZIP, JAR, etc.
  • DeltaWalker supports Windows, macOS, and Linux.

6. P4Merge

  • P4Merge supports Windows, macOS, and Linux.
  • It is cost-free and suits basic comparison needs.

7. Guiffy

  • Guiffy supports Windows, macOS, and Linux.
  • It supports syntax highlighting and multiple comparison algorithms.

Recommended:

  • Show or Hide Folder Merge Conflicts in Windows 10
  • How to Fix Broken Registry Items in Windows 10
  • Fix Steam Corrupt Disk Error on Windows 10
  • How to Copy and Paste in PuTTY

We hope this article was helpful and you were able to compare files in two folders on Windows 10 PC. If you have any queries, reach out to us through the comments section below.

  1. Step 1 Нажмите ⊞ Win+E, чтобы открыть Проводник.

  2. Step 2 Дважды щелкните по первой папке, чтобы отобразить ее содержимое.

  3. Step 3 Перетащите окно вправо.

    Для этого удерживайте панель меню в верхней части окна и перетащите его в правую часть экрана. Окно теперь будет занимать правую половину экрана.

  4. Step 4 Нажмите ⊞ Win+E, чтобы открыть другое окно Проводника.

  5. Step 5 Дважды щелкните по второй папке.

  6. Step 6 Перетащите окно влево.

    Удерживайте панель меню в верхней части окна и перетащите его в левую часть экрана. Таким образом, содержимое одной папки будет показано слева, а другой — справа.

    • Отрегулируйте положение окон в зависимости от размера монитора и разрешения экрана, чтобы отобразить всю информацию.
  7. Step 7 Перейдите на вкладку Вид в верхней части обоих окон.

  8. Step 8 Переключите способ отображения...

    Переключите способ отображения в обеих папках на Содержимое из панели «Структура». Так вы увидите больше информации о каждом файле и вложенной папке, включая тип файла (папка с файлом, видео, изображение).

    • Если папка содержит подпапки, то рядом с каждой из них будет стоять дата последнего изменения.
  9. Step 9 Щелкните правой кнопкой...

    Щелкните правой кнопкой мыши по пустому пространству в одной из сравниваемых папок. На экране появится всплывающее меню.

  10. Step 10 Выберите Свойства, чтобы отобразить общий размер текущей папки.

  11. Step 11 Щелкните правой кнопкой...

    Щелкните правой кнопкой мыши по пустому пространству в другой папке. Теперь отобразите размер второй папки, чтобы можно было их сравнить.

  12. Step 12 Выберите Свойства, чтобы отобразить размеры обеих папок бок о бок.

    Реклама

Об этой статье

Эту страницу просматривали 21 555 раз.

Была ли эта статья полезной?

If you need to compare files or folders, you’ll find there is no shortage of apps that can help you do the job. If you need to compare folder content from the Command Prompt, Windows 10 comes with a built-in tool called RoboCopy. It’s a Microsoft tool that comes bundled in Window 10 as of its recent versions. It’s a pretty useful tool that can compare folder content among other things. All you need to know is the correct command to run.

Compare folder contents

In order to compare folder contents, you need the complete path to the two folders that you want to compare. It’s easy enough to get. Open both folders in File Explorer and click inside the location bar. Copy the folder locations and paste it in the following command. Replace Path 1 and Path2 with the path to the two folders that you want to compare.

Syntax

robocopy Path1 Path2 /L /NJH /NJS /NP /NS

Example

robocopy "C:\Users\fatiw\Desktop\Test Folder 1" "C:\Users\fatiw\Desktop\Test Folder 2" /L /NJH /NJS /NP /NS

Understanding results

For the above command, the Command Prompt returned the following results. When you run this command on your system, the file names will be different however The *EXTRA File and the New File title will precede the files that RoboCopy finds. You need to understand the result in order find the difference between the two folders that you just compared.

*EXTRA File alex-1315367-unsplash.jpg
*EXTRA File beautiful-bloom-blooming-132474.jpg
*EXTRA File irina-iriser-1323394-unsplash.jpg
New File abstract.jpg
New File Clouds_minimalistic_binary_storage_2560x1600.jpg
New File Triangle_1920x1080.jpg

RoboCopy is showing you unique files found in the two folders that you compared. This means that all the files listed in the results are present on only one of the two folders that you compared.

The files that are preceded by *EXTRA Files are the files that are present in the second folder that you entered in the command. From the previous example, the files alex-1315367-unsplash.jpg, beautiful-bloom-blooming-132474.jpg, and irina-iriser-1323394-unsplash.jpg are present in Test Folder 2 and are NOT present in Test Folder 1.

It is then obvious that the file names preceded by New File are all files that are present in the first folder that you entered and are not present in the second folder. Again, continuing with the initial example, abstract.jpg, Clouds_minimalistic_binary_storage_2560x1600.jpg, and Triangle_1920x1080.jpg are all present in Test Folder 1 and are NOT present in Test Folder 2.

The command will not list the files that are common between the two folders.

If you’re having trouble figuring out the results, run the command on two dummy folders which only have a small number of files so that you can compare the results with the actual files in the folders and understand them.

Need a quick way to copy a file to multiple folders at once? There’s a little command that can do just that.

default avatar image

Fatima Wahab

Fatima has been writing for AddictiveTips for six years. She began as a junior writer and has been working as the Editor in Chief since 2014.

Fatima gets an adrenaline rush from figuring out how technology works, and how to manipulate it. A well-designed app, something that solves a common everyday problem and looks

Follow this guide to easily compare folders for duplicates in Windows 11, 10, 8, and 7 and remove repeating files. Compare the files in two or more folders to find and delete the duplicates.

Here you will find information on how to compare folders for duplicates. Undoubtedly, you can compare two or more folders for duplicates and set “Source” and “Target” for the comparison.

Compare Two Or More Folders For Duplicates

We provide tools to search for similar or duplicate images, similar or duplicate audio files, and similar and duplicate files of any type. We provide both free and commercial versions that are used by millions of users. Certainly, our duplicate finders are the leading clone removal applications on the market and provide multiple duplicate search options. Download the free Duplicate File Finder and save valuable disk space by removing useless repeating files.

  1. How To Compare “Source” And “Target” Folders for Duplicates
  2. Compare Folders for Duplicates Examples
  3. Manual Methods for Folder Comparison
  4. Command-Line Method to Compare Folders

How To Compare “Source” And “Target” Folders for Duplicates

In the digital age, managing files efficiently is crucial for maintaining an organized and clutter-free system. One common challenge users face is dealing with duplicate files scattered across various folders, which not only consumes storage space but also complicates file retrieval and organization. In this article, we’ll explore different methods and tools available for comparing folders in Windows operating systems (Windows 11, 10, 8, and 7) to identify and manage duplicate files effectively. Whether you prefer manual methods, command-line tools, or third-party software solutions, we’ll cover everything you need to know to streamline your file management process and reclaim valuable disk space.

This information applies to:
Fast Duplicate File Finder
Visual Similarity Duplicate Image Finder
Audio Dedupe

There are situations where merging folders or comparing two or more folders is necessary. In such cases, you wouldn’t want to check a “source” folder for duplicates. You would want to compare it only with one or more “target” folders. Comparing two or more folders for duplicates is very easy using the “Exclude From Self Scan” feature in the folders list.

Disable “Self-scan”

If you disable self-scan for folder ‘VSD’ (as displayed in the image above), it tells the application that it should not compare files inside it against each other. As a result, it will compare the files inside it only with those located in other folders you have added to the folders list.

If you disable self-scan for the folders ‘VSD’ and ‘VSD1’, you tell the tool to compare the files in ‘VSD’ ONLY with the files in ‘VSD1’ and vice-versa. To clarify, that differs from the default setting which compares all the files in ‘VSD’ and ‘VSD1’ against each other.

As this feature is very versatile and works for more than two folders, it may be a little bit hard to understand. As some of our users have difficulties with how this feature works, we have provided more examples below.

Compare Folders for Duplicates Examples

The [ ] brackets below visualize the checkboxes. The [x] inside the brackets denotes that the checkbox is ticked.

Compare Folders – Scenario 1:

Folders in the folder list:
[ ][ ]vsd
[ ][ ]vsd1

This is the default state. In this configuration, the application will compare all files in both folders against each other.

Compare Folders – Scenario 2:

Folders in the folder list:
[ ][x]vsd
[ ][ ]vsd1

The tool will compare the files inside ‘vsd’ with the files in other folders – in this case, ‘vsd1’. To clarify, it will not compare them with each other. Therefore, it will compare the files in ‘vsd1’ with the files in all other folders. In addition, it will compare the files in the other folders with each other which is the difference with the ‘vsd folder’.

Compare Folders – Scenario 3:

Folders in the folder list:
[ ][x]vsd
[ ][x]vsd1

The tool will not compare the files in ‘vsd’ against each other. Likewise, it will not compare those in ‘vsd1’ against each other. As a result, the tool will compare the items in ‘vsd’ with the files in ‘vsd1’ and vice-versa. To summarize, if there were more folders in the list, the tool would compare the files in ‘vsd’ with those too. Also, it would compare the files in ‘vsd1’ with them too.

Ticking ‘Disable self-scan’ tells the application not to compare the items inside the corresponding folder with each other.

You can disable Self-scan for a folder by ticking the checkbox in front of the corresponding folder name. Generally, there are two columns in front of the folder name column. To clarify, the column with the icon that illustrates a red circle with a white dash inside contains the “Disable self-scan” checkboxes. Of course, you can also hover the icon to view a descriptive tooltip.

A related article can be found here: How To Exclude A Folder From Auto-Check Or How To Set A “Source” Folder

Manual Methods for Folder Comparison

In this section, we’ll explore manual methods that users can employ to compare folders for duplicates on Windows systems. These methods involve built-in features and functionalities available within the operating system itself, making them accessible and straightforward for users without the need for additional software. We’ll discuss techniques such as using File Explorer’s built-in search and comparison features, leveraging PowerShell commands for folder comparison, and employing third-party software for advanced folder synchronization and duplicate file detection. Whether you’re a novice user or a seasoned Windows enthusiast, these manual methods provide versatile options for managing duplicate files effectively. Let’s delve into each method in detail.

Step-by-step guide on how to manually compare folders for duplicates in Windows Explorer

  1. Open Windows Explorer and navigate to the parent directory containing the folders you want to compare.
  2. Select the first folder you want to compare. Hold down the Ctrl key and click on the second folder to select it as well. Alternatively, you can hold down the Ctrl key and click on multiple folders to select them simultaneously.
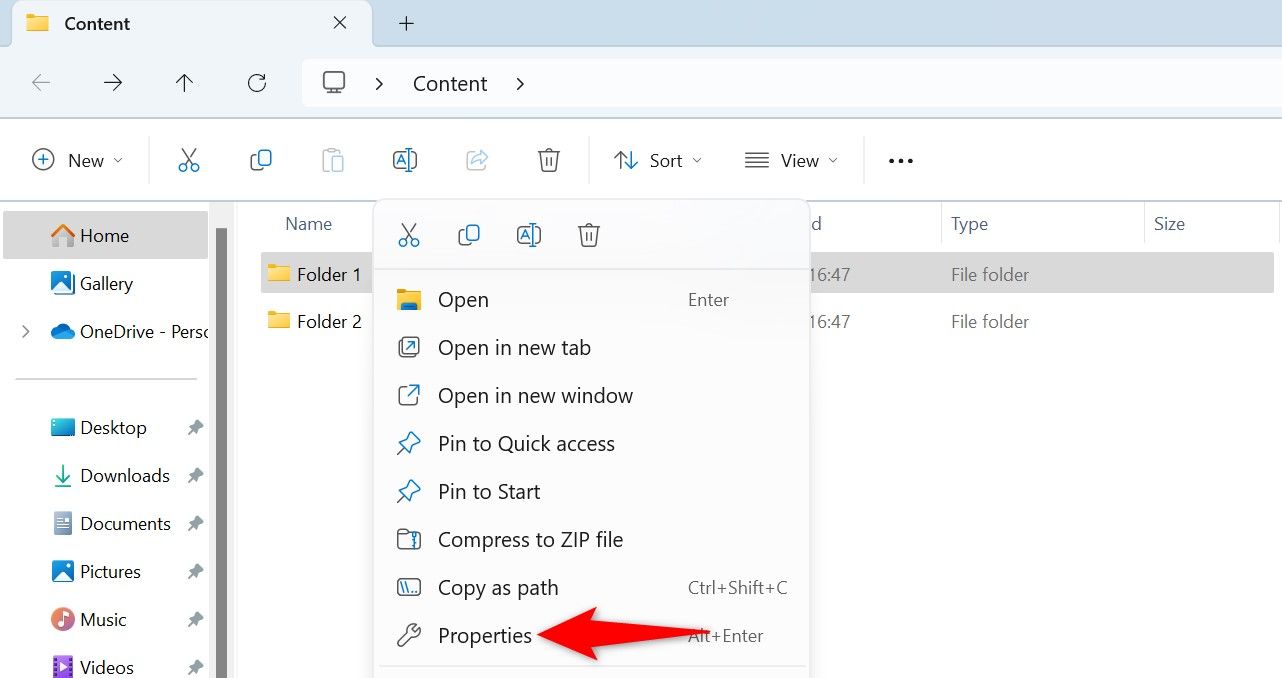
  3. Right-click on one of the selected folders to open the context menu.
  4. From the context menu, hover your mouse over the “Send to” option to expand it, and then click on “Desktop (create shortcut)” to create shortcuts for the selected folders on your desktop.
  5. Once the shortcuts are created, go to your desktop and locate the shortcuts for the folders you want to compare.
  6. Double-click on the first folder shortcut to open it. Then, double-click on the second folder shortcut to open it in a separate window.
  7. Arrange the two folder windows side by side on your screen for easier comparison.
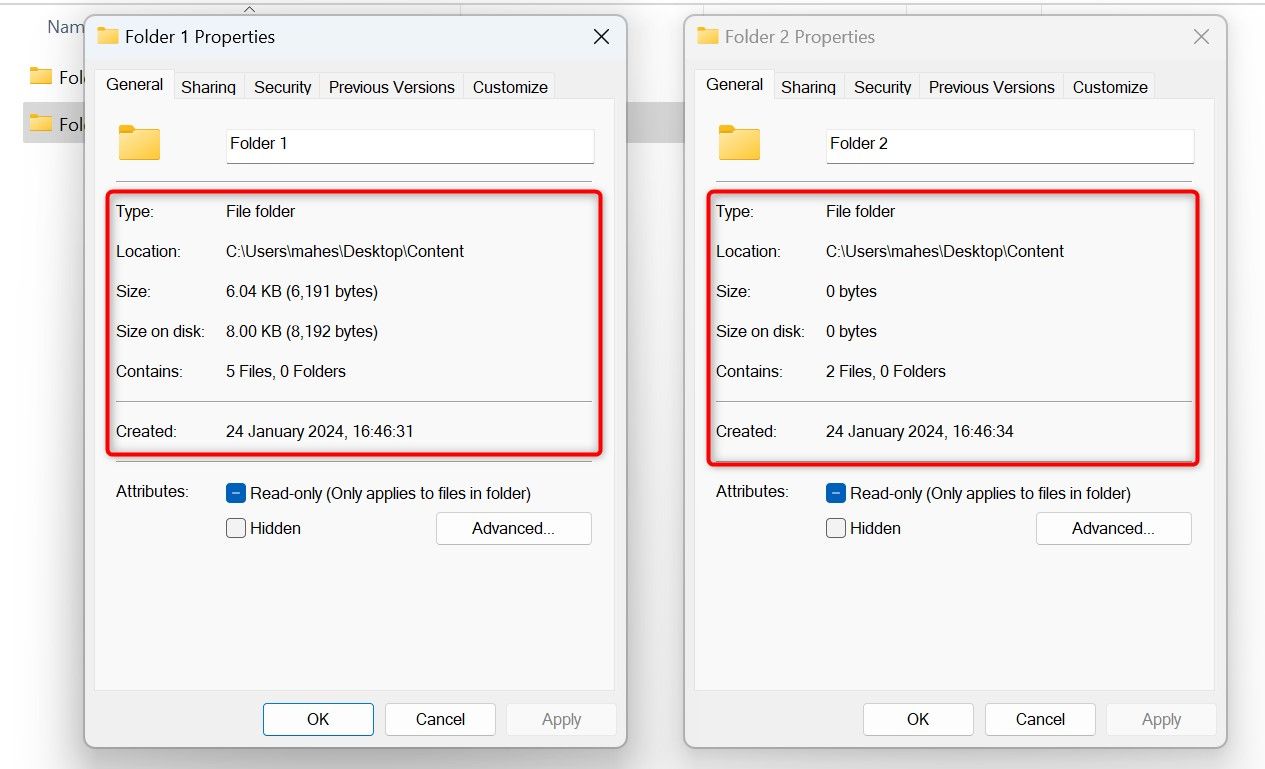
  8. Manually scan through the contents of both folders, visually comparing file names, sizes, and types to identify duplicate files.
  9. When you encounter duplicate files, you can choose to delete them from one or both of the folders to free up disk space and avoid redundancy.
  10. Repeat this process for any additional folders you want to compare.

By following these steps, you can manually compare folders for duplicates using Windows Explorer, allowing you to efficiently manage your files and optimize storage space on your computer.

Advantages and limitations of manual comparison

Advantages:

  1. No additional software required: Manual comparison can be done using built-in file management tools like Windows Explorer, eliminating the need to download or install third-party software.
  2. Full control: You have full control over the comparison process, allowing you to customize the criteria for identifying duplicates and decide which files to keep or delete.
  3. Understanding of file organization: Manual comparison helps users understand the organization of their files and folders, leading to better file management practices.
  4. Cost-effective: Since no specialized software is required, manual comparison is a cost-effective solution for users looking to manage their files without investing in additional tools.

Limitations:

  1. Time-consuming: Manual comparison can be time-consuming, especially when dealing with large numbers of files or complex folder structures.
  2. Human error: There is a risk of human error during manual comparison, leading to the accidental deletion of important files or overlooking duplicates.
  3. Limited efficiency: Manual comparison may not be efficient for identifying duplicates based on file content or metadata, as it relies solely on visual inspection.
  4. No automation: Unlike automated duplicate file finders, manual comparison does not offer automation features such as batch processing or scheduled scans, requiring users to manually repeat the process for each comparison.

Overall, while manual comparison offers control and cost-effectiveness, it may not be the most efficient or accurate method for identifying duplicates, especially in large-scale file management tasks. Users should consider the advantages and limitations of manual comparison before deciding on the most suitable approach for their needs.

Command-Line Method to Compare Folders

Using the command line in Windows provides a powerful way to compare folders for duplicates without the need for graphical interfaces. Here’s how to do it:

  1. Open Command Prompt:
    • Press Windows + R to open the Run dialog.
    • Type cmd and press Enter to open Command Prompt.
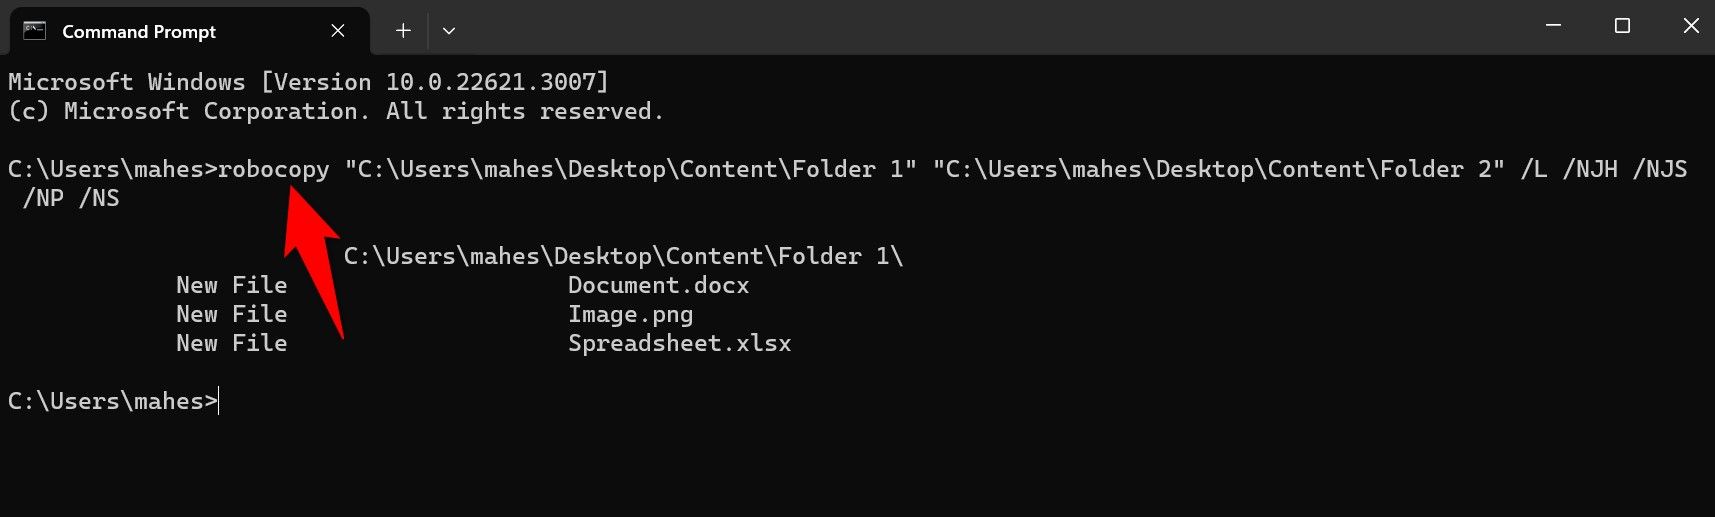
  2. Navigate to the directories:
    • Use the cd command to navigate to the directories containing the folders you want to compare.
    • For example, to navigate to the first directory, type cd path\to\first\directory , and press Enter.
    • Repeat the process for the second directory.
  3. Use the dir command to list files:
    • Type dir /b > filelist.txt and press Enter in both directories to generate text files containing lists of files.
    • This command lists all files in the directories and saves the output to a text file named filelist.txt.
  4. Compare the text files:
    • Use a file comparison tool or text editor to compare the two text files generated in step 3 (filelist.txt from each directory).
    • Look for duplicate file names in the lists to identify duplicates.
  5. Take necessary actions:
    • Once duplicates are identified, take appropriate actions such as deleting or moving the duplicate files to another location.

Using the command-line method offers flexibility and efficiency, especially for users comfortable with the command-line interface. However, it requires familiarity with command-line commands and may not provide as user-friendly an experience as graphical interfaces for some users.

Conclusion

Summary of the methods discussed

In this article, we explored various methods for comparing folders for duplicates in Windows. We began with the manual method using Windows Explorer, followed by third-party software solutions and the command-line approach. Each method has its advantages and limitations, offering users flexibility in choosing the most suitable option for their needs.

Recommendations for the most effective method based on user preferences and requirements

The choice of method depends on user preferences, technical expertise, and specific requirements. For users who prefer a simple and intuitive approach, third-party software solutions like Duplicate File Finder or Visual Similarity Duplicate Image Finder offer user-friendly interfaces and comprehensive features. On the other hand, for advanced users comfortable with command-line interfaces, the command-line method provides a powerful and efficient way to compare folders for duplicates.

Final thoughts on the importance of regularly comparing folders for duplicates in maintaining an organized file system

Regularly comparing folders for duplicates is essential for maintaining an organized file system, optimizing storage space, and improving system performance. By identifying and removing duplicate files, users can free up valuable storage space, reduce clutter, and streamline file management processes. Whether using manual methods or specialized software tools, the process of comparing folders for duplicates should be integrated into regular maintenance routines to ensure the efficient management of digital assets.

Duplicate Finder – Related Information

This article also relates to: Beyond Compare Tool, Compare Directories, Compare Directories Windows 10, Compare Files In Two Folders Windows 10, Compare Folders Mac, Compare Folders Windows 10, Compare Source And Destination Files, Compare Source And Target Folders, Compare Two Directories Linux, Compare Two Folders And Copy Missing Files, Compare Two Folders For Duplicate Files, Compare Two Folders Windows 10, Duplicate Folder Finder, Duplicate Folder Finder Windows 7, Duplicate Video Finder Free, Duplicati 2.0, Duplicati Alternative, Duplicati Command-Line, Duplicati Exclude Folder, Duplicati Github, Duplicati Mac, Duplicati Restore, Duplicati Review, Duplicati Vs Duplicity, Fast Duplicate File Finder, Fast Duplicate File Finder 4.7.0.1 Crack, Fast Duplicate File Finder Pro Crack, Folder Comparison, Pathsync Freeware, Pathsync Windows 7, Robocopy Compare, Robocopy Compare And Copy, Ultracompare Lite, V Folder Dups, Winmerge Compare Folders, Winmerge Review.

Понравилась статья? Поделить с друзьями:
0 0 голоса
Рейтинг статьи
Подписаться
Уведомить о
guest

0 комментариев
Старые
Новые Популярные
Межтекстовые Отзывы
Посмотреть все комментарии
  • Cmd синхронизация время windows
  • Установка windows 10 с флешки на ssd gigabyte
  • Adobe cleaner tool for windows
  • Как изменить id оборудования windows 10
  • Apps and games for windows