WoeUSB is the best way to create a bootable Windows 11 USB on Linux. It takes care of the formatting, flashing, and other configuration settings. All the user has to do is provide a Windows 11 ISO.
The WoeUSB app isn’t installed on any Linux operating systems by default. Thankfully, you’ll be able to set up the app using the commands below.
Ubuntu
Sadly, Ubuntu doesn’t provide WoeUSB in their official software repositories, and past PPAs are no longer available. As a result, Ubuntu users will need to get it working with the Python3 package tool.
You must set up the dependencies required to run the software to start. Using the apt install command down below, set up the packages.
sudo apt install git p7zip-full python3-pip python3-wxgtk4.0
With all of the packages set up and configured, use the pip3 install command to download and install the latest version of WoeUSB on your Ubuntu system.
sudo pip3 install WoeUSB-ng
Debian
Like Ubuntu, there is no way to get the WoeUSB app through official software sources, so it must be installed via Python. Use the apt-get install command and set up the latest dependency packages.
sudo apt-get install git p7zip-full python3-pip python3-wxgtk4.0
Once all of the packages are configured and installed on your system, you can install the latest version of the WoeUSB application on your Debian Linux system.
sudo pip3 install WoeUSB-ng
Arch Linux
The WoeUSB application is available in the Arch Linux Community software repository. However, this version doesn’t ship with a GUI. To get the GUI version, install WoeUSB with the commands below.
wget https://builds.garudalinux.org/repos/chaotic-aur/x86_64/woeusb-ng-0.2.10-1-any.pkg.tar.zst

sudo pacman -U woeusb-ng-0.2.10-1-any.pkg.tar.zst
Fedora
The WoeUSB application is in the official Fedora Linux package repositories. However, the Python version of the app works much better. Install the dependency packages using dnf install and set up the app using pip3 install to get it set up.
sudo dnf install git p7zip p7zip-plugins python3-pip python3-wxpython4

sudo pip3 install WoeUSB-ng
OpenSUSE
To get the latest version of WoeUSB working on your OpenSUSE Linux system, head over to the WoeUSB-ng page on the OpenSUSE build site. Then, select your operating system, and choose the “1 Click Install” button to install the software to your system.
Generic Linux
If you’re using a Linux OS not covered by the instructions in this guide, you’ll still be able to install the software through Python 3. However, you’ll first need to set up the package dependencies.
To create a bootable Windows 11 USB on Linux, follow the step-by-step instructions below.
Step 1: Open up the app menu and launch “Woeusb-ng.” When you launch the app, you’ll be asked to enter your password. Using the keyboard, enter your password to access the app.
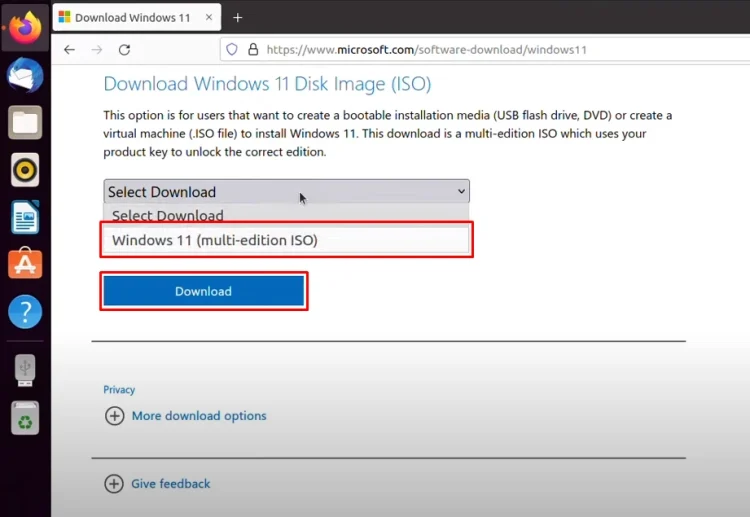
Step 2: Once the Woeusb-ng application is open, you must download Windows 11. Head over to the Windows 11 download page and find “Download Windows 11 Disk Image (ISO).”
Step 3: After locating “Download Windows 11 Disk Image (ISO),” find the “Select Download” menu and choose “Windows 11 (multi-edition ISO),” and click on the blue “Download” option to download the ISO file.
Step 4: Once the Windows 11 ISO is done downloading, go to WoeUSB and find the “From a disk image (iso)” area. Click on the “None” button to bring up a pop-up window.
Step 5: Use the pop-up window to browse for the Windows 11 ISO you downloaded previously. Then, find “Target device” and select your USB flash drive. Finally, click on the “Install” button when you’re ready to begin.
Step 6: After selecting the “Install” button, WoeUSB will present a message. This message states, “Are you sure? This will delete all your files and wipe out the selected partition.” Click the “Yes” button to continue.
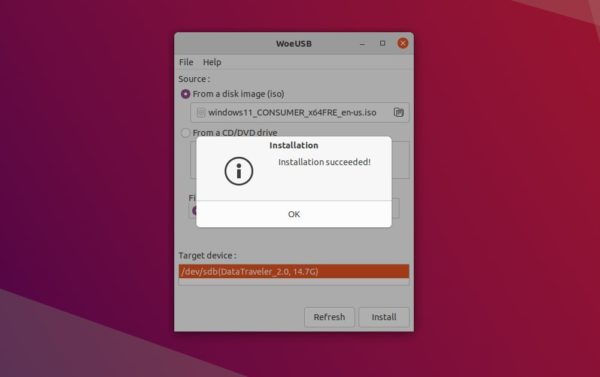
The installation process will take time to complete, as the Windows 11 ISO file is enormous. When the process is complete, you will see “Installation succeeded!”
Other ways to create a Windows 11 USB on Linux
While the WoeUSB app is undoubtedly useful, it isn’t the only way to create a live Linux USB. It is also possible to create one by hand by following the step-by-step instructions below.
Step 1: Head over to the official Windows 11 download page, find “Download Windows 11 Disk Image (ISO),” and download your ISO.
Step 2: After downloading your ISO file, install the gparted app, plug in your USB flash drive, and open the Gparted application.
Step 3: Select your USB flash drive inside of Gparted. Then, click on the “Device” menu. Next, select “Create Partition Table,” select the “Gpt” option, and click “Apply.”
Step 4: Right-click on “unallocated” and select the “New” option in the right-click menu. Create a new Fat32 partition with 1024 MB in size.
Be sure to label it “BOOT” in all caps.
Step 5: After creating the Fat32 partition, right-click on the unallocated space, select the “New” option and create a new NTFS partition with the remaining space left over. Be sure to label this partition “INSTALL.”
Step 6: Open the Linux file manager, select downloads, and right-click on the Windows 11 ISO file. Select “Open with disk image mounter.”
Alternatively, you can mount the ISO with the following commands.
mkdir -p ~/win11iso/
sudo mount -o loop ~/Downloads/Win11_English_x64v1.iso ~/win11iso/
Step 7: Once the image is mounted, copy all files to the flash drive to create your Windows 11 live USB.

Hello everyone. In this article, I am going to show you how to create a Windows 11 bootable USB on Ubuntu using the GParted project.
Updating Your System
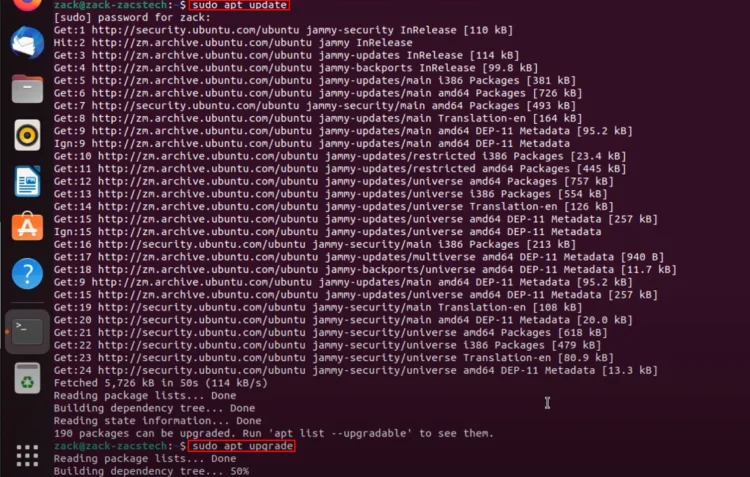
Before we begin, if you’re using Ubuntu, it’s a good practice to update your system. I will show you how to create a Windows 10 or 11 bootable USB in Ubuntu. You can start by updating your system by typing “sudo apt update” in Terminal. If there are any packages that need to be upgraded, you can upgrade them by typing “sudo apt update“.
Downloading the Windows 10/11 ISO
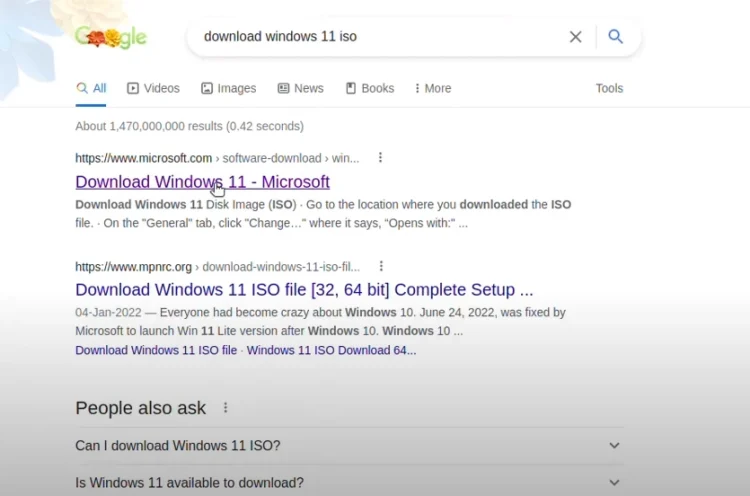
So, the first step is to download the Windows 11 ISO image. Open your favorite browser or simply use the default browser that comes with Ubuntu. Simply search for “download Windows 11 ISO” and you’ll get the Windows 11 ISO image from Microsoft’s official website.
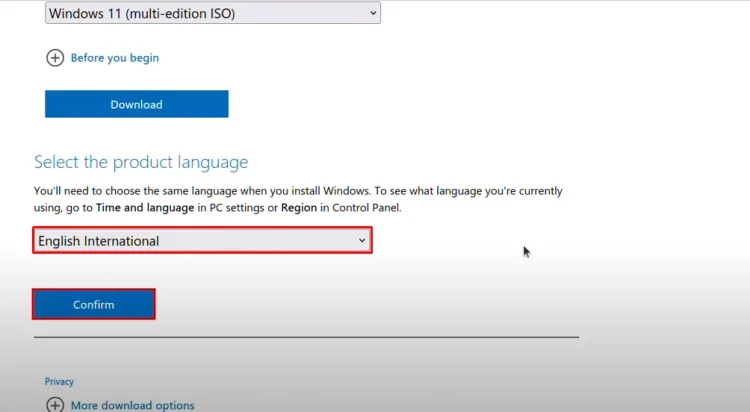
After that, you have to select the Windows 11 ISO image edition and click Download.
Choose a language and click Confirm.
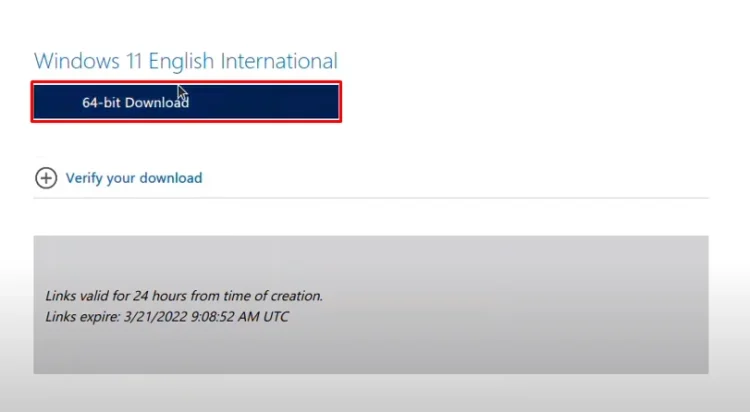
Then click 64-bit Download and save it. It will save the file to your computer.
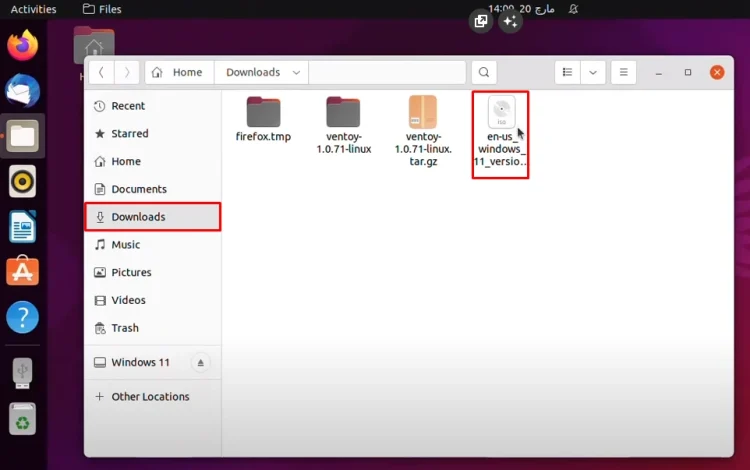
Now, I’m going to insert it because I already have it. If I have to show you, it’s in the Downloads directory, which I have simply imported from my main PC. The size is around 4 GB.
Preparing the USB Flash Drive
The second step is to attach the USB flash drive to your computer. I’ve already done that, so there’s no need for me to attach it.
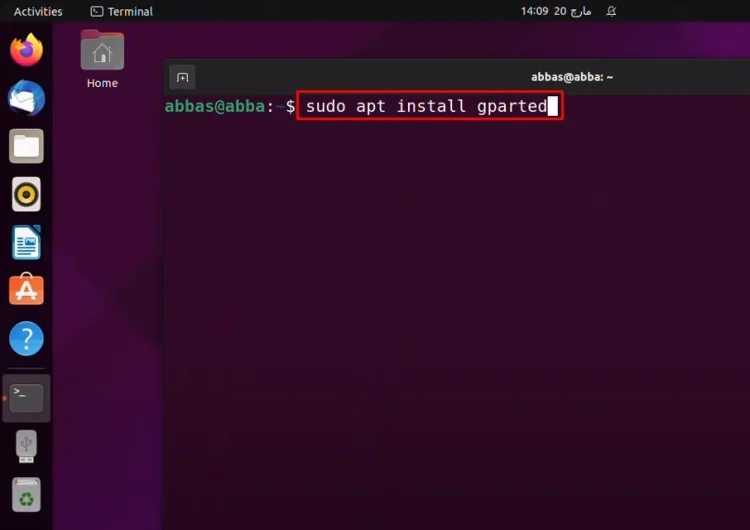
The third step is to install GParted onto your computer.
You can use the Ubuntu Software or the Terminal. I prefer the terminal because it’s faster. Once it’s launched, simply type “sudo apt install gparted“.
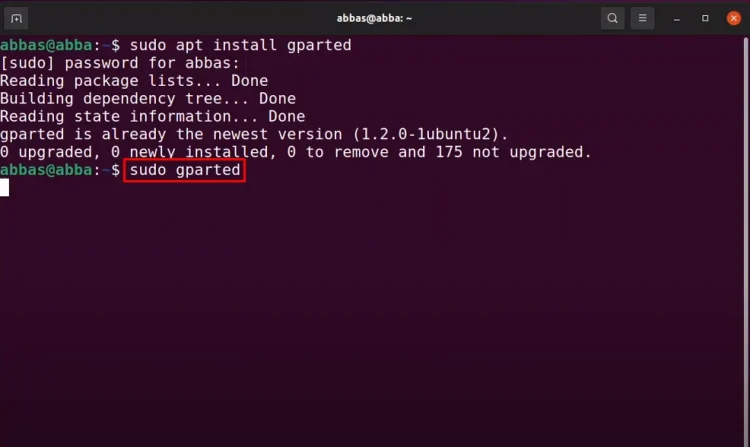
The next step is to launch GParted, typing “sudo gparted” in Terminal.
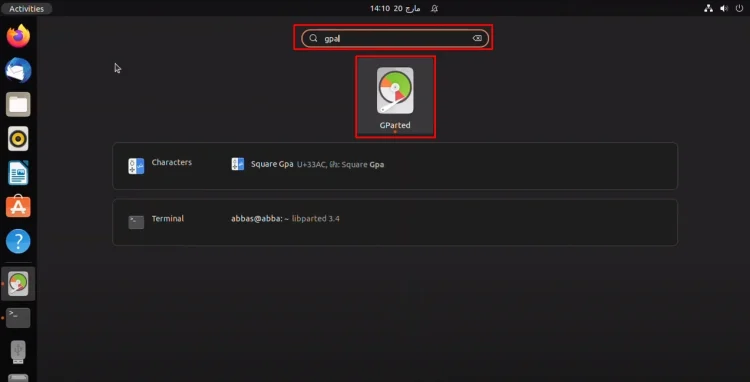
You can also launch GParted from Launchpad. Just simply search for GParted and launch it.
Once it’s launched, select the USB flash drive.

Partitioning the USB Flash Drive
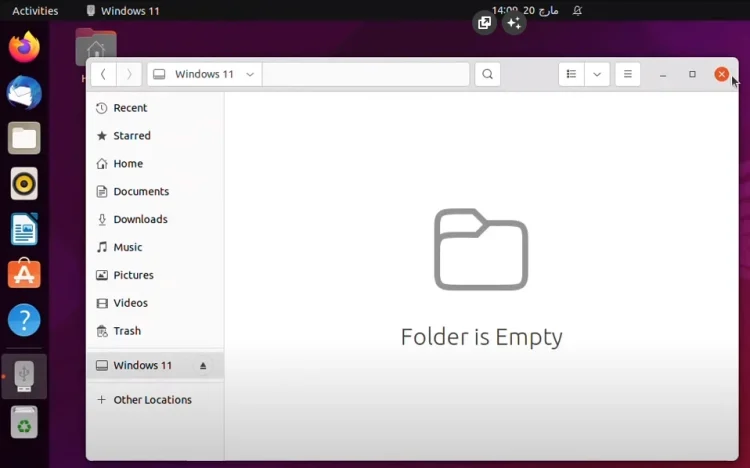
By default, you can see that it’s a bootable USB flash drive of Windows 11.
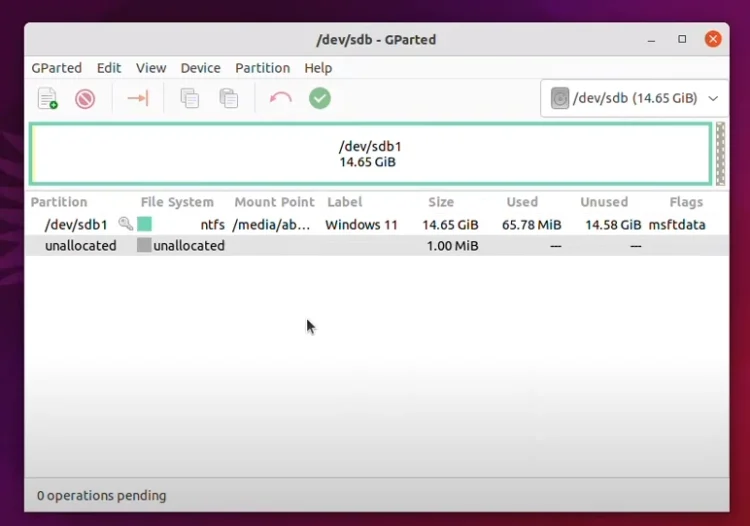
For now, I have to delete all of them and then I’ll show you how to create them again from the beginning.
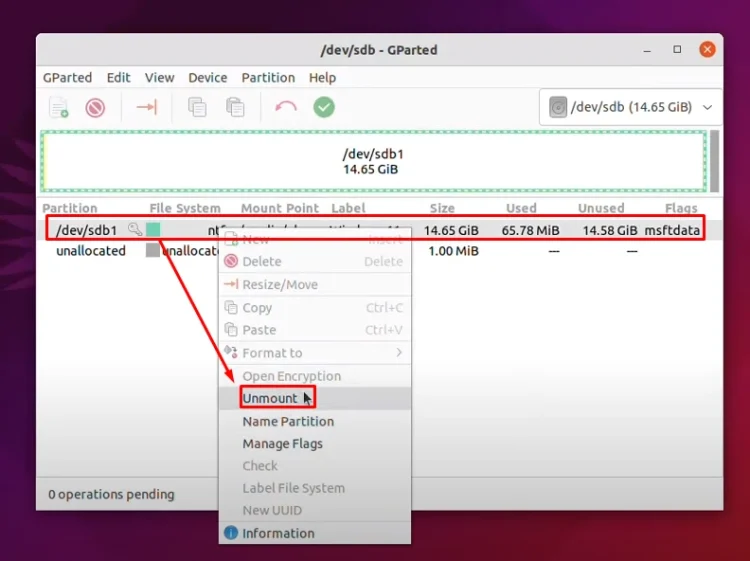
Let me delete it first. You have to unmount it, then delete it. Sorry for that. Now delete.
Okay, it is deleted.
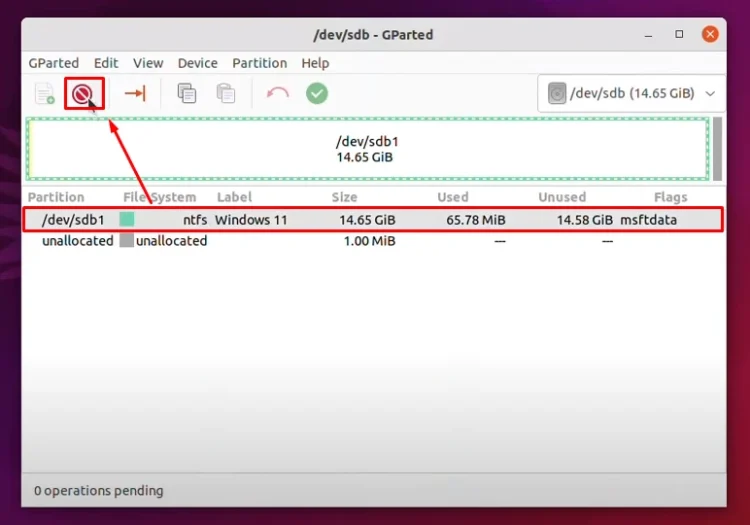
Now click Apply.
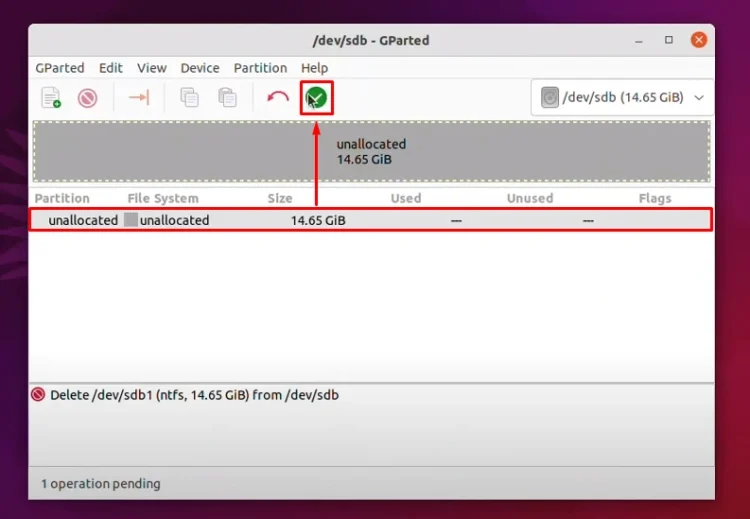
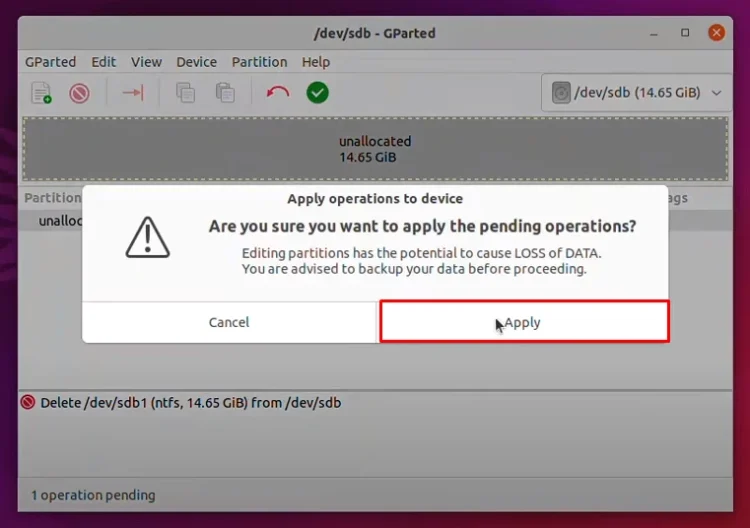
Once it’s removed, we need to create a partition for it. Go to Device and click Create partition table.
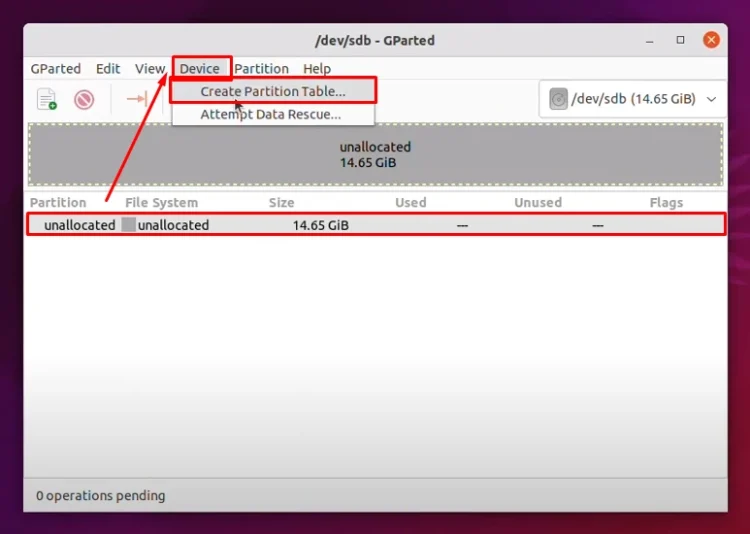
From here, select a partition style for Windows. We are going to choose gpt. Click Apply.
Remember, it’s going to remove everything from your USB flash drive, so back up your files.

Formatting and Copying Files
The next step is to create a file system for it.

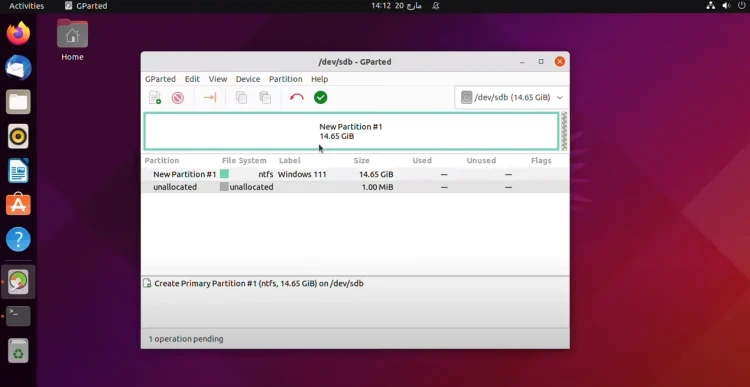
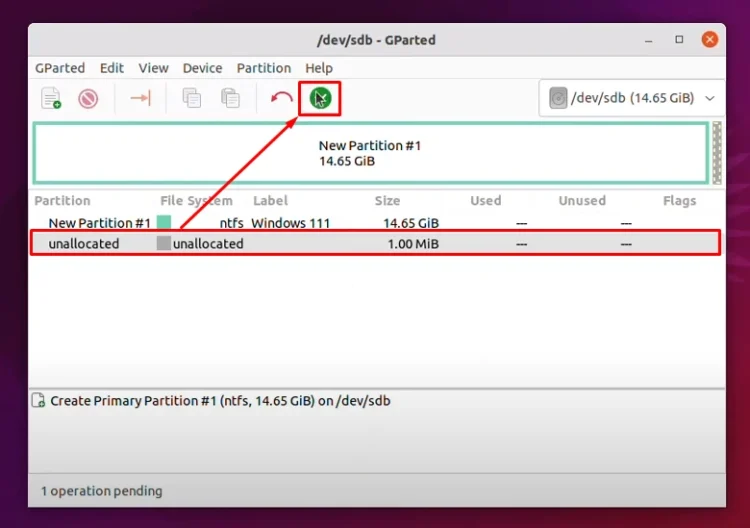
By default, Linux personal file system is ext4. Windows is using NTFS. We’re going to choose NTFS. We can also label the USB flash drive. I’m going to name it “Windows 111“. Click Add.
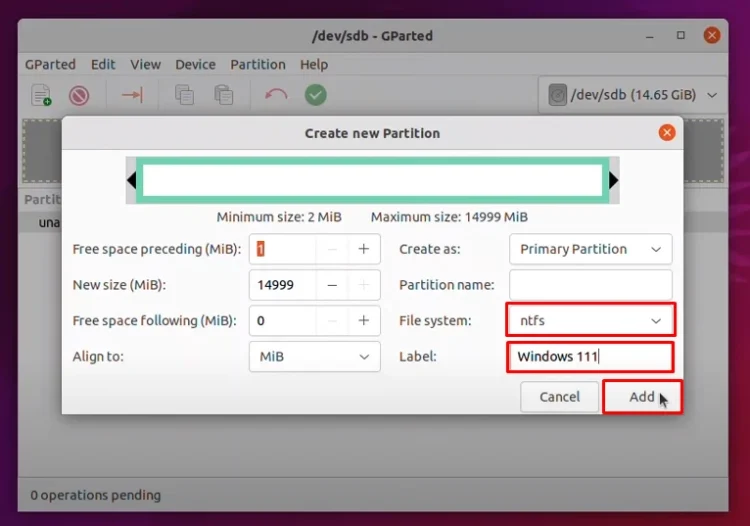
Now you can see that it’s done, but the changes have not applied. Click Apply and wait for it.
Once it’s done, you can close it.
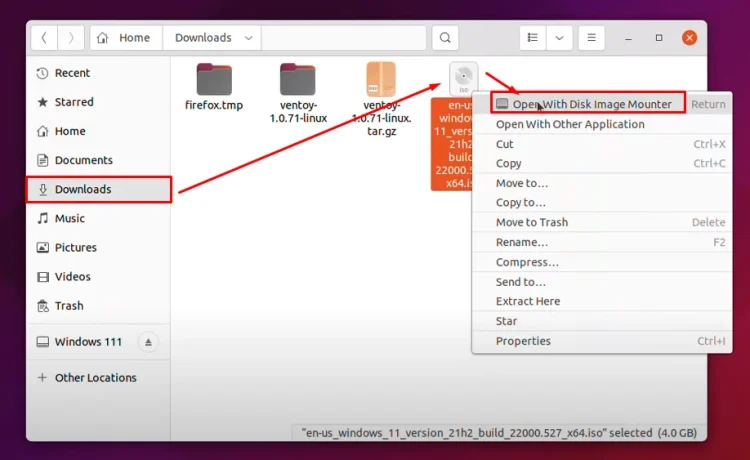
The next step is to open files and go to the Downloads folder where Windows 11 is located. Right-click on it and choose Open With Disk Image Mounter.
Finalizing the Bootable USB
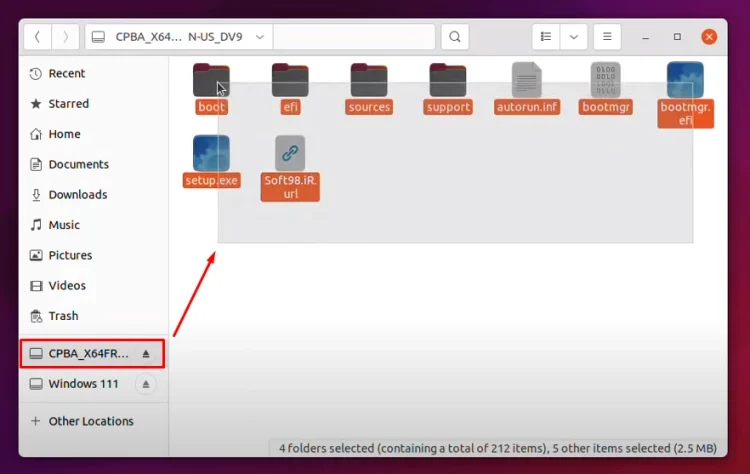
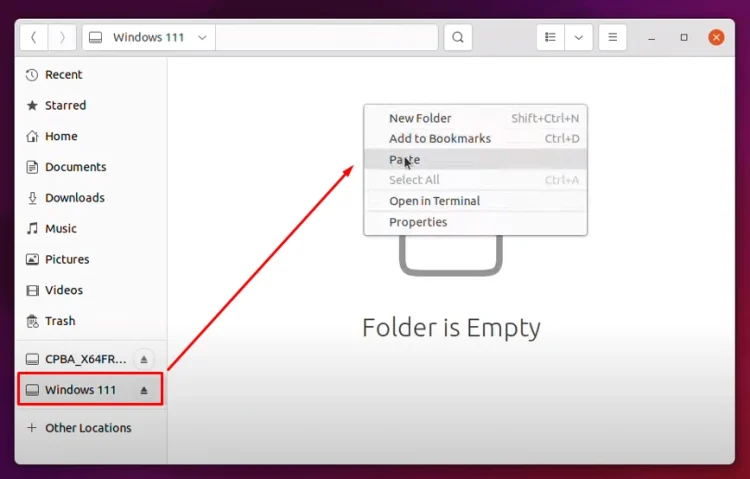
Here you can see that Windows 11 is mounted. Right-click, copy, and now go to the USB flash drive and paste them here.
During the copy of the files, you will not face any type of error. If you face any type of error, it means the Windows 11 ISO that you downloaded from the internet has been corrupted. Maybe the speed of your internet connection was not fast and somehow it got corrupted.
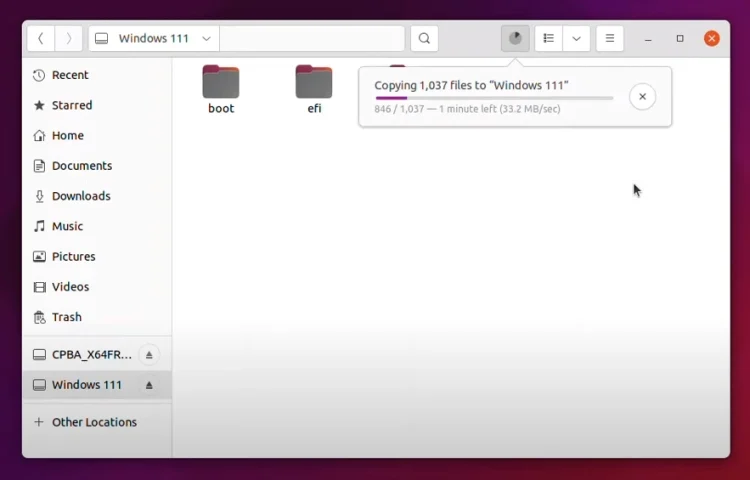
So basically, this is how you can create a Windows 11 bootable USB. For now, I am going to wait until the files are copied from the ISO inside the USB flash drive.
Post Views: 4,632
Creating a bootable USB drive for Windows 10/11 in Linux can be challenging for some users, especially those new to Linux. A bootable USB drive is essential when installing Windows on a computer, as it allows you to bypass traditional installation methods such as a CD/DVD or over the network. It can also be used for system recovery or troubleshooting purposes.
This article is a step-by-step guide on creating a bootable Windows 10/11 USB drive in Linux. It will cover everything you need to know, from the tools you need to the actual installation process. So if you’re a Linux user wanting to install Windows on your computer or create a bootable USB drive for system recovery purposes, this article is for you.
Creating a bootable Windows 10/11 USB in Linux
Prerequisites
Before you can create a bootable Windows 10/11 USB drive in Linux, you will need to make sure you have the following prerequisites:
- A Linux distribution installed on your computer. Ubuntu, Arch Linux, Fedora, and CentOS are popular Linux distributions you can use. (I will use Ubuntu 22.04 for illustration purposes)
- A Windows 10/11 ISO file. You can download the latest Windows 10/11 version from the official Microsoft website.
- A USB drive with at least 8GB of storage capacity.
Using WoeUSB
WoeUSB is a powerful tool that allows you to create bootable Windows USB drives from ISO images on Debian-based distros. There are two methods to install WoeUSB: using the PPA repository or using a bash script. Let’s explore both methods:
Installing WoeUSB on Debian-based Linux derivatives
Follow the section below to find out how to install WoeUSB on Debian-based Linux derivatives:
Step 1: Downloading and Installing WoeUSB
There are several distinct methods that can be used to download and install WoeUSB on Debian-based distros. To get a glimpse at some of them, check out the subsequent sections:
Method 1: Using PPA to Install WoeUSB
Step 1: Add the WoeUSB PPA
Launch the terminal by pressing “CTRL+ALT+T” and add the WoeUSB PPA to your Ubuntu system with the following command:
sudo add-apt-repository ppa:tomtomtom/woeusb -y
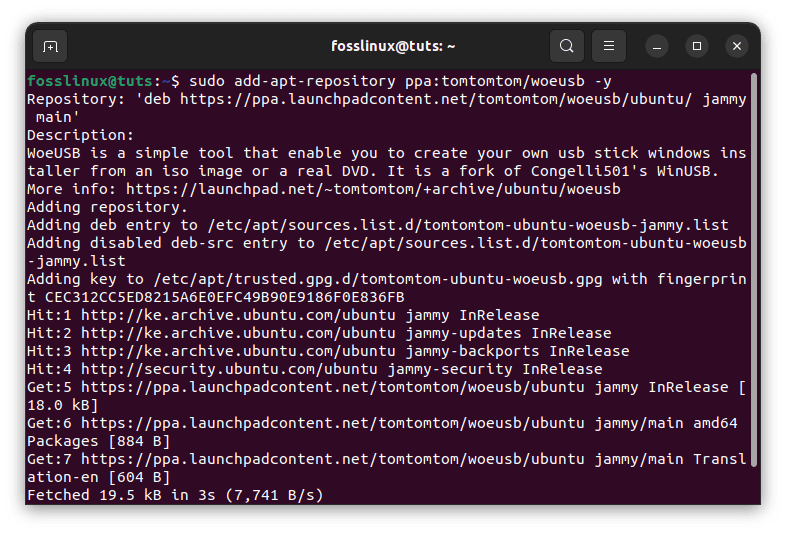
Add woeusb PPA
Step 2: Update Ubuntu Core Libraries
After adding the PPA, it’s essential to update the core libraries of Ubuntu:
sudo apt update
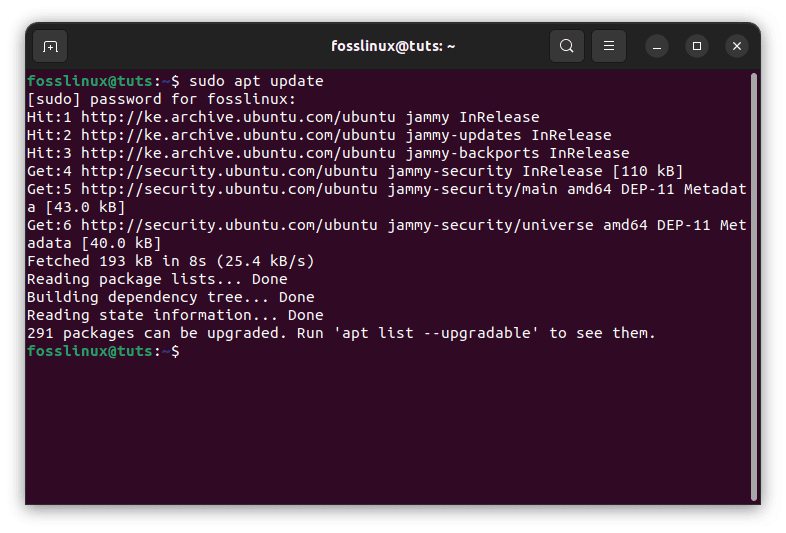
Update system resources
Step 3: Install WoeUSB
Once the repositories are updated, you can install both the CLI and the GUI support for WoeUSB with the following command:
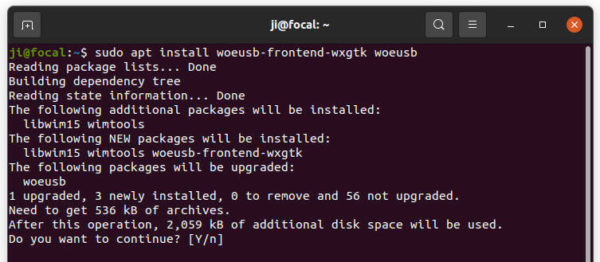
sudo apt install woeusb woeusb-frontend-wxgtk -y
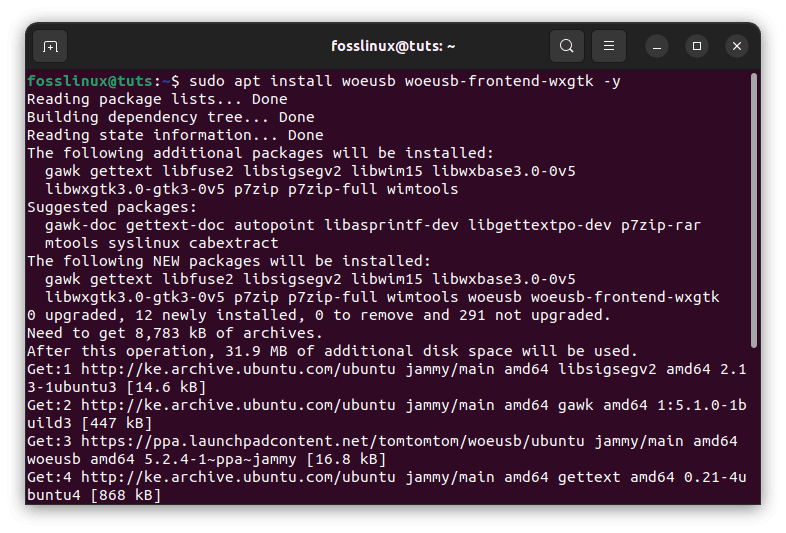
Install woeusb
If you only need the CLI (Command Line Interface) of WoeUSB, you can install it separately:
sudo apt install woeusb -y
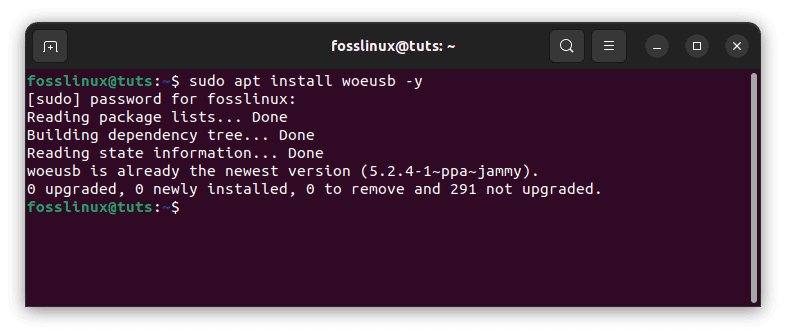
Install woeusb cli
To verify that WoeUSB is successfully installed, run the following command:
woeusb -h
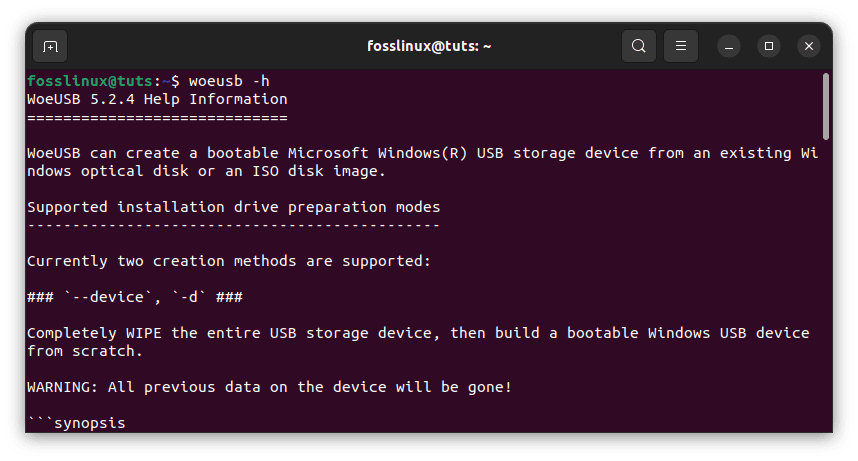
Verify is woeusb was successfully installed
This command will display the version and possible usage of the WoeUSB tool.
Launching the WoeUSB GUI
To launch the WoeUSB GUI, run the following command:
woeusbgui
Launch woeusb
The WoeUSB GUI will be launched and ready to use.
Method 2: Install WoeUSB Using a Bash Script
The second method involves installing WoeUSB using a bash script available on GitHub. Follow these steps:
Step 1: Download the Script
Download the latest bash script of WoeUSB from the GitHub repository. The downloaded file will appear in the “Downloads” directory of Ubuntu.

Download woeusb bash script
Step 2: Make the Script Executable
Open the terminal and make the bash script executable with the following command:
cd Downloads

chmod +x woeusb-5.2.4.bash
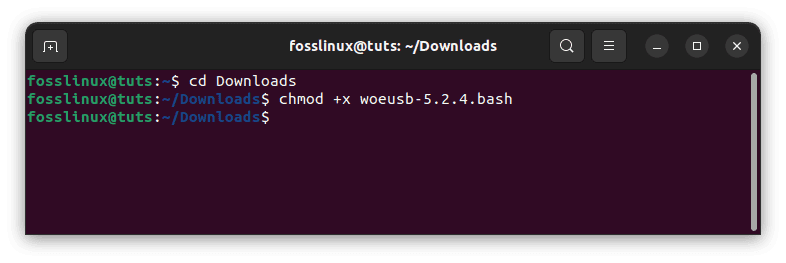
Make script file executable
Step 3: Install the Wimtool Utility
Before executing the script, install the “wimtools” utility, which is required for WoeUSB to function properly:
sudo apt install wimtools
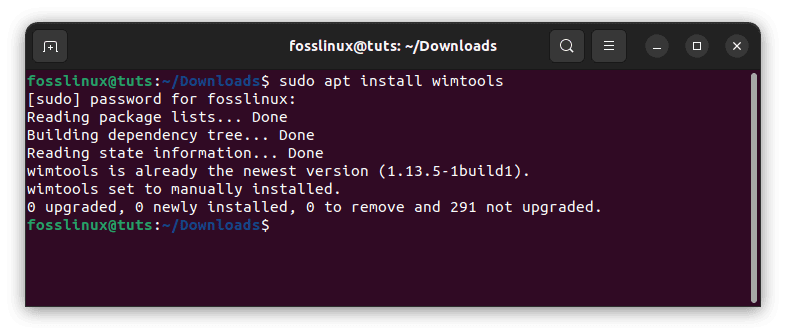
Install the wimtools utility
Step 4: Execute the Bash Script
Run the bash script with the following command:
./woeusb-5.2.4.bash
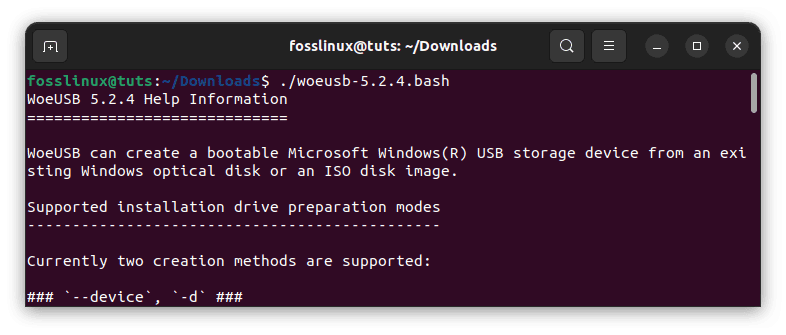
Execute the bash script file
The WoeUSB Command Line Interface will now be ready to use.
Installing WoeUSB on Other Linux Distros
WoeUSB is not limited to Ubuntu or Debian-based Linux distributions; it can be installed on various other Linux distros as well. The installation process could differ slightly depending on the package manager used by the specific Linux distro. Below are the steps to install WoeUSB on Arch Linux, Fedora, and CentOS:
Installing WoeUSB on Arch Linux
To install WoeUSB on Arch Linux, follow the steps provided below:
Step 1: Open a Terminal
First, open a terminal on your Arch Linux system. You can do this by clicking the “CTRL+ALT+T” keyboard combination or by searching for “Terminal” in the application launcher.
Step 2: Install WoeUSB
Use the following command to install WoeUSB from the AUR (Arch User Repository):
yay -S woeusb-git
The above command assumes you have an AUR helper like “yay” installed. If you don’t have an AUR helper, you can install “woeusb-git” manually by cloning the AUR repository and building the package. Here’s how you can do it:
git clone https://aur.archlinux.org/woeusb-git.git cd woeusb-git makepkg -si
Enter your password when prompted to proceed with the installation.
Step 3: Launch WoeUSB
Once the installation is complete, you can start WoeUSB by running the following command in the terminal:
woeusbgui
The WoeUSB graphical user interface (GUI) will be launched, and you can now use it to create bootable Windows USB drives from ISO images.
WoeUSB is now successfully installed on your Arch Linux system. You can employ this powerful tool to create bootable USB drives for Windows 11/10 and other Windows operating systems. Enjoy the convenience of WoeUSB’s user-friendly interface and create bootable media effortlessly.
Installing WoeUSB on Fedora
To install WoeUSB on Fedora, use the following steps:
Step 1: Open a Terminal
Open a terminal on your Fedora system. You can do this by clicking the “CTRL+ALT+T” keyboard combination or by searching for “Terminal” in the application launcher.
Step 2: Install WoeUSB
Use the following command to install WoeUSB from the official Fedora repositories:
sudo dnf install woeusb
Enter your password when prompted to proceed with the installation.
Step 3: Launch WoeUSB
Once the installation is complete, you can start WoeUSB by running the following command in the terminal:
woeusbgui
The WoeUSB graphical user interface (GUI) will be launched, and you can now use it to create bootable Windows USB drives from ISO images.
WoeUSB is now successfully installed on your Fedora system. You can employ this powerful tool to create bootable USB drives for Windows 11/10 and other Windows operating systems.
Installing WoeUSB on CentOS
Please note that CentOS may not have an official package for WoeUSB. However, you can still use the WoeUSB bash script method, as shown in the “Install WoeUSB Using a Bash Script” section in the previous instructions. The bash script method allows you to install WoeUSB on CentOS without relying on specific repositories or package managers.
To use the bash script method, follow the steps provided in the previous section (“Install WoeUSB Using a Bash Script”). This method works on various Linux distros, including CentOS.
Once you have installed WoeUSB on your preferred Linux distro, you can use it to create bootable Windows USB drives from ISO images, just like on Ubuntu. WoeUSB provides a user-friendly interface for this purpose and is a reliable tool for creating bootable media. With WoeUSB, you can effortlessly create bootable Windows 11/10 USB drives on different Linux distributions.
Step 2: Insert the USB Drive
Insert the USB thumb drive into any available USB port on your Linux computer.
Step 3: Launch WoeUSB
Navigate to the ‘Activities’ section, look for ‘WoeUSB’ and launch it. If that method fails, launch your terminal and move to section 4 below and follow the subsequent steps to create a bootable Windows 10/11 USB drive using WoeUSB:
Step 4: Select the Windows ISO
Open the WoeUSB graphical user interface (GUI) by running the following command in the terminal:
woeusbgui
Launch woeusb
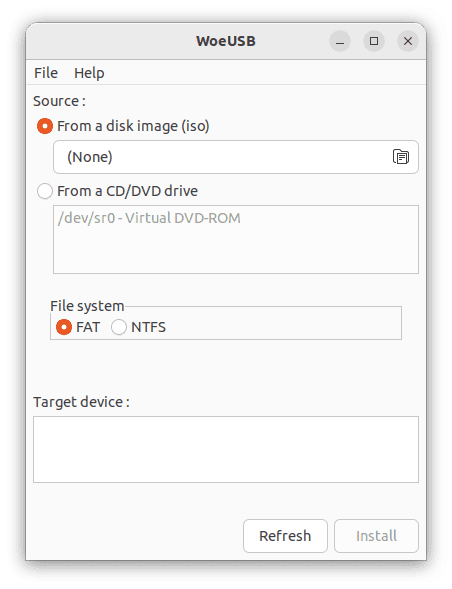
Click on the “From a Disk image (iso)” option in the GUI.
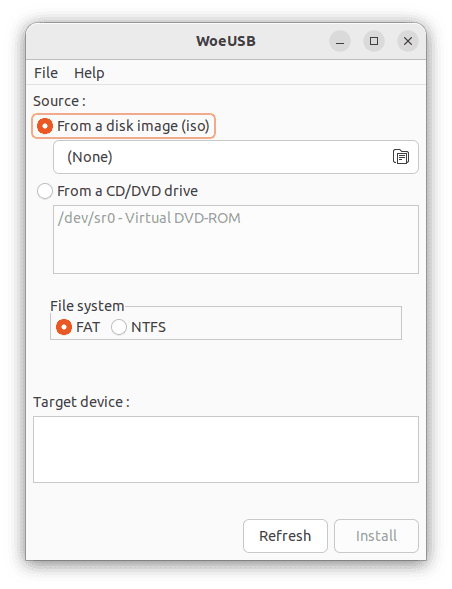
Select iso option
Navigate to the location where the downloaded Windows 11/10 ISO file is located.
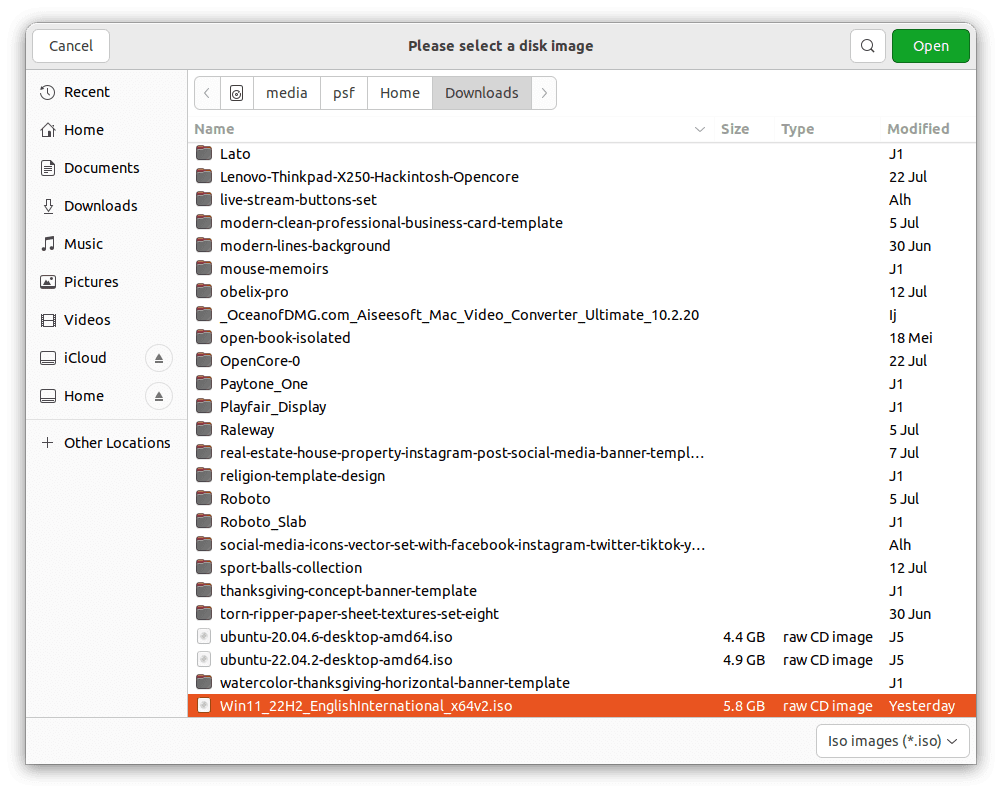
Choose downloaded iso image
Select the downloaded Windows ISO file and click “Open” to load it into WoeUSB.
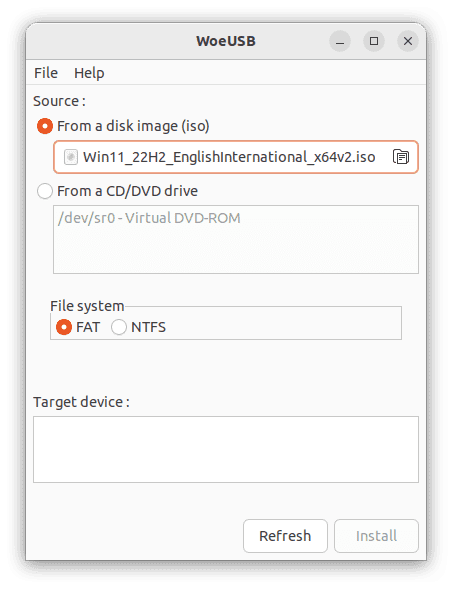
Click open to load it into woeusb
Step 5: Select the USB Drive
Choose the target USB drive you inserted earlier from the list of available drives in the WoeUSB GUI. Double-check the USB drive name to avoid accidentally overwriting any critical data.
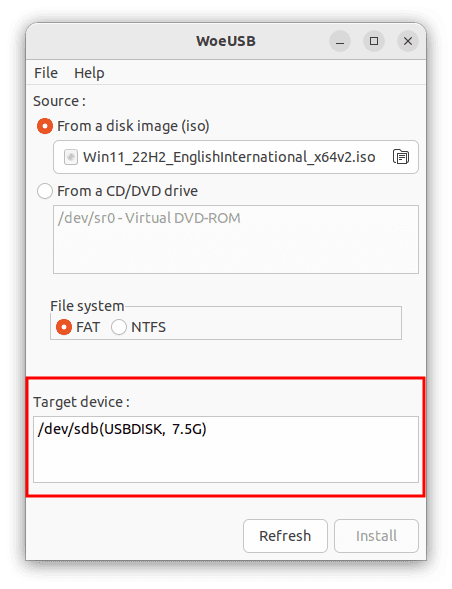
Choose target device
Step 6: Start the Creation Process
Once you have ascertained the Windows ISO and the USB drive in the WoeUSB GUI, click the “Install” button to start creating the bootable Windows USB drive. WoeUSB will format the USB thumb drive and copy the contents of the downloaded ISO file onto it. This process might take some time to complete depending on several factors, such as computer specs.
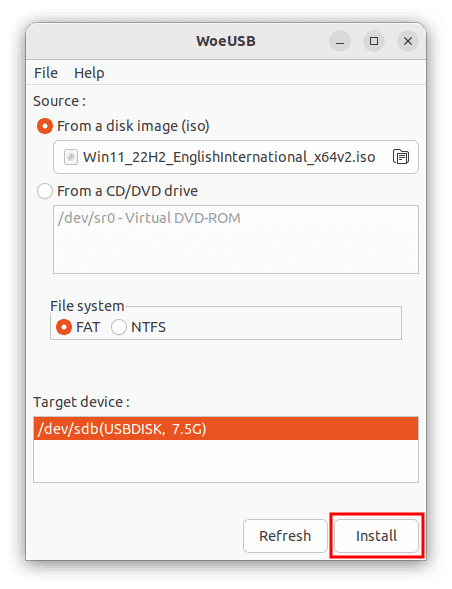
Click install button to start the creation process
Step 7: Eject the USB Drive
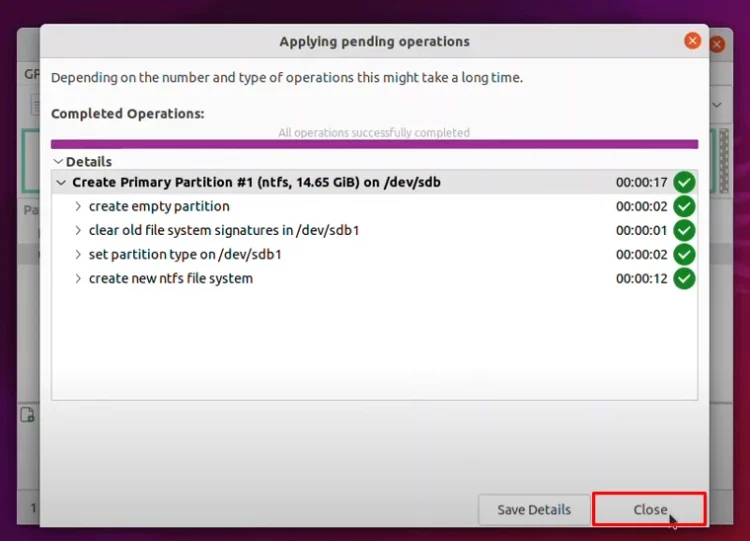
After the creation process is finished, you will receive a notification from WoeUSB. First, safely eject the USB drive from your computer.
Installation process complete
Congratulations, you have successfully created a bootable Windows 10/11 USB drive in Linux using WoeUSB! However, it is essential to note that this is not the only method available for creating a bootable USB thumb drive for Windows 10/11 on Linux. Continue reading to explore other alternative methods for achieving the same result.
Step 8: Boot from the USB Drive
To install Windows 10/11 on a computer, restart the PC and access the boot menu while powering on the PC by pressing the appropriate key (usually F12 or Esc). Select the bootable USB flash drive as the primary boot device. Note that the key to access the computer’s boot menu may vary depending on your system’s manufacturer. Refer to your system’s user manual or search online for specific instructions.
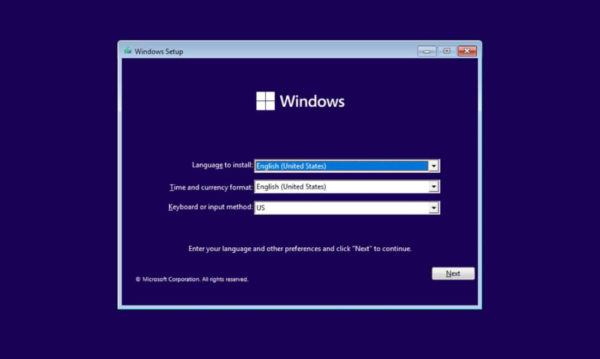
Step 9: Install Windows
Your PC will boot from the selected USB drive, and you can install Windows 11/10 by following the on-screen instructions.
Following the steps above, you can create a bootable Windows 11/10 USB drive on Linux using WoeUSB. WoeUSB simplifies the process and ensures a successful installation. Enjoy installing Windows 11/10 on your desired computer.
Note: These steps should help you install and use WoeUSB on Arch Linux, Fedora, and CentOS. Remember to adjust the version numbers and filenames based on the latest releases.
Command-line way of creating a Windows installer USB drive
In addition to the method we discussed earlier using WoeUSB, there are other methods you can use to create a bootable Windows 10/11 USB in Linux. In this section, we will discuss some of these methods.
Using dd Command
One of the straightforward methods to create a bootable Windows 10/11 USB in Linux is using the dd command. This method works well for creating bootable USB drives for any operating system, including Windows.
Here are the steps to follow:
Step 1: Download the Windows ISO
Download the Windows ISO from the official Microsoft website. Make sure to download the correct ISO file for your system architecture.
Step 2: Insert the USB Drive
Insert the USB drive into your computer’s USB port.
Step 3: Identify the USB Drive
Identify the device name of the USB drive using the following command:
sudo fdisk -l
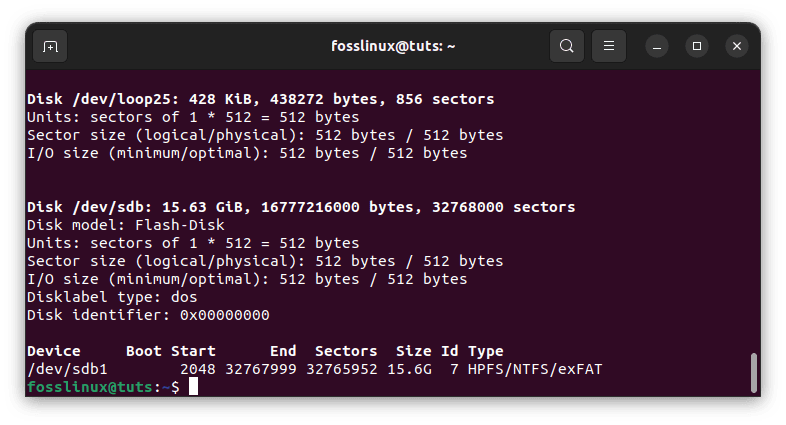
Check the USB drive name
This will list all the storage devices connected to your computer. Look for the device name of your USB drive. It will be in the format /dev/sdx, where x is a letter representing the device identifier.
Note: Be careful when selecting the device name for your USB drive, as choosing the wrong device can result in data loss.
Step 4: Unmount the USB Drive
Unmount the USB drive using the following command:
sudo umount /dev/sdx
Replace /dev/sdx with the device name of your USB drive. For my case, I will execute the following code:
sudo umount /dev/sdb1
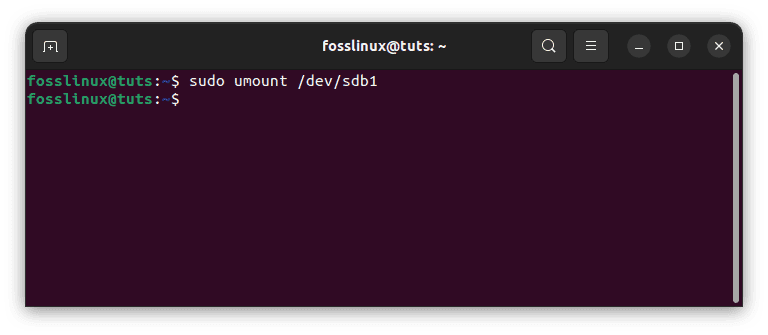
Unmount disk
Step 5: Write the Windows ISO to the USB Drive
Write the Windows ISO to the USB drive using the following command:
sudo dd bs=4M if=/path/to/windows.iso of=/dev/sdx status=progress && sync
Replace /path/to/windows.iso with the path to the Windows ISO file and /dev/sdx with the device name of your USB drive.
Example:
sudo dd bs=4M if=/home/fosslinux/Documents/Win11_22H2_EnglishInternational_x64.iso of=/dev/sdb1 status=progress && sync
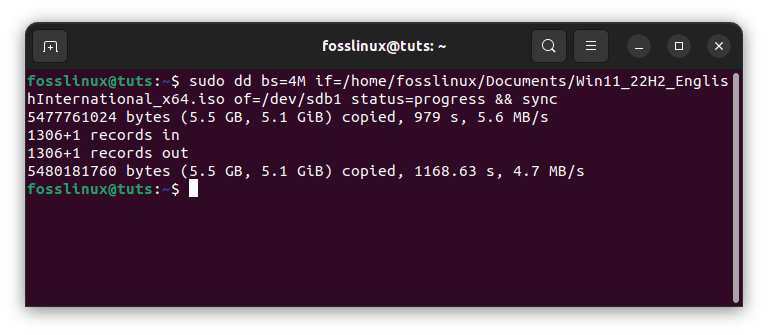
Write the Windows ISO to USB
The bs=4M option sets the block size to 4 megabytes, which can improve performance. The status=progress option displays the progress of the write operation. The sync command ensures that all data has been written to the USB drive before the command exits.
Step 6: Eject the USB Drive
Once the write operation is complete, eject the USB drive from your computer.
Using the bootable drive to install Windows 10/11
Now that you have created a bootable Windows 10/11 USB drive in Linux, you can install Windows on your computer. The installation process will vary depending on whether your computer uses BIOS or UEFI.
Installation Process for BIOS
To install Windows using the bootable USB drive on a computer that uses BIOS, follow these steps:
Step 1: Insert the USB Drive
Insert the bootable USB drive into your computer’s USB port.
Step 2: Boot from the USB Drive
Restart your computer and press the key to access the boot menu. The key to accessing the boot menu may vary depending on your computer’s manufacturer. Standard keys include F2, F12, and Del.
Select the USB drive from the boot menu and press Enter to boot from it.
Step 3: Install Windows
Follow the on-screen prompts to install Windows on your computer. You may need to enter the product key during the installation process.
Installation Process for UEFI
To install Windows using the bootable USB drive on a computer that uses UEFI, follow these steps:
Step 1: Insert the USB Drive
Insert the bootable USB drive into your computer’s USB port.
Step 2: Boot from the USB Drive
Restart your computer and access the UEFI firmware settings. The key to access the UEFI firmware settings may vary depending on your computer’s manufacturer. Standard keys include F2, F12, and Del.
Enable Legacy Boot or Compatibility Support Module (CSM) and disable Secure Boot in the UEFI firmware settings.
Save the changes and exit the UEFI firmware settings.
Step 3: Install Windows
Restart your computer and press the key to access the boot menu. The key to accessing the boot menu may vary depending on your computer’s manufacturer. Standard keys include F2, F12, and Del.
Select the USB drive from the boot menu and press Enter to boot from it.
Follow the on-screen prompts to install Windows on your computer. You may need to enter the product key during the installation process.
That’s it. Wait for the installation process to complete. Once it does, enjoy your newly installed Windows OS!
Important aspects to consider while creating a bootable drive
One thing to remember when creating a bootable Windows USB drive in Linux is that it may take longer than making one in Windows, depending on your chosen method. Some ways, such as the dd command, may take longer to complete, but they are generally more reliable.
Additionally, you must ensure you have enough storage space on your USB drive for the Windows ISO file and any other files you may need. A standard 8GB USB drive should be sufficient for most purposes, but you may need more space if you have a large ISO file or need to store additional files on the drive.
Finally, double-checking your work before using the bootable USB drive to install or repair Windows on a computer is always a good idea. Ensure the USB drive is formatted correctly and that you have selected the correct ISO file before proceeding. This will help ensure that the installation or repair process goes smoothly without any issues.
Overall, creating a bootable Windows 10/11 USB drive in Linux is a valuable skill, primarily if you frequently work with Windows computers or need to repair a computer with a corrupted or non-functional operating system. With the right tools and patience, you can create a bootable USB drive that will allow you to install or repair Windows easily.
Conclusion
Creating a bootable Windows 10/11 USB drive in Linux is a valuable skill for anyone who needs to install Windows on a computer or create a bootable USB drive for system recovery purposes. With the help of the free and open-source tool WoeUSB, the process can be done easily and quickly.
In this article, we covered the prerequisites; we discussed two methods for creating a bootable USB drive: WoeUSB and the dd command. Each method has its own advantages and disadvantages, and you should choose the one that works best for you. Besides, we discussed how to use the bootable drive to install Windows 10/11 and the step-by-step process for creating a bootable Windows 10/11 USB drive in Linux. We have also provided examples of the installation process for both BIOS and UEFI systems.
No matter which method you choose, download the correct Windows ISO file and follow the instructions carefully. With attention to detail and patience, you can create a bootable Windows 10/11 USB drive in Linux that will allow you to install or repair Windows on any computer.
We hope this article has been helpful to you in creating a bootable Windows 10/11 USB drive in Linux. If you have any questions or feedback, please comment below. Thank you for reading!
Creating a Windows 11 Install USB in 2022
I have been installing Windows for a long time. Does it get easier? I want to say it gets easier, but it seems like there’s always some new wrinkle! These instructions are as much a note to my future self as they may be useful to anyone else.
For me, I was not able to get any exfat-based installs, or even any of the GUI helpers to make this process any more straightforward. Maybe on your target Windows / host OS those helpers will work, but the below process (as of current year) is consistent, and not overly complicated.
Overview:
- Downloading an official ISO image from MS:
- https://www.microsoft.com/software-download/windows11
- Formatting the drive (at least 8GB) as GPT, and one FAT-format partition (aka MS-DOS)
- Can use Disks or Disk Utilty for this
- Mounting the ISO either in a file browser (eg. Files or Finder)
- Copying over all the files except
sources/install.wim - Using wimsplit from wimtools to split the
install.wimfile onto the destination drive- FAT-format filesystems have a limitation of 4GB per file, wimsplit creates two files in a format the Windows installer understands
Commands
Prereqs
Format the the target drive, as mentioned above. It should be at least 8GB, FAT/MS-DOS-formatted, and GPT partitioning scheme.
Install wimsplit on Ubuntu:
sudo apt install wimtools
On macOS (needs brew first
brew install wimlib
Usage
- Let’s say
Downloads/Win11_22H2_English_x64.isois the Windows ISO.- Double click or right-click Open this file with «Disk Image Mounter» to mount it
- The USB drive is (FAT/MS-DOS formatted) mounted at
/Volumes/TheUSB- (on Ubuntu, it’s likely in
/media/<name>/<usb>)
- (on Ubuntu, it’s likely in
- The mounted Windows ISO is at
/Volumes/CCCOMA_X64FRE_EN-US_DV9(say that 10 times fast)- (Ubuntu:
/media/<name>/CCCOMA_X64FRE_EN-US_DV9)
- (Ubuntu:
The following command copies over all files except install.wim:
rsync -avP --exclude sources/install.wim /Volumes/CCCOMA_X64FRE_EN-US_DV9/* /Volumes/TheUSB
Then, this command splits and copies install.wim at 3000MB (Just under the FAT limit):
wimsplit /Volumes/CCCOMA_X64FRE_EN-US_DV9/sources/install.wim /Volumes/TheUSB/sources/install.swm 3000
Make sure to replace /Volumes with the path to where the files/drives are mounted in the above commands.
Result
If successful, you should see /Volumes/TheUSB (your target USB) looks very similar to /Volumes/CCCOMA_X64FRE_EN-US_DV9 (the mounted ISO), except that in the sources folder, the USB has install.swm and install2.swm. Again, these will be presented to the Windows installation environment as one file.
After this, put the USB in your target device, and boot off it from the boot menu.
Since we’re using UEFI boot, it should just appear in the boot menu of the computer.
If your computer hardwaare does not support UEFI boot, you can try reformatting the drive using MBR instead of GPT (But still using FAT). I can’t vouch for this, but according to sources online it should Also Work.
Bonus (Unsupported OS Workaround)
If you get the error «Unsupported OS» in Windows, this has to do with a deliberate attempt to make Windows 11 harder to install on platforms that Microsoft has not deemed worthy. Or something like that. And, to make this very clear, if you see this error, your platform is NOT worthy. (Again, according to the publicly traded company MSFT).
This worthiness is not an issue at this time, but if MS and Amazon merge or partner down the road, you could imagine you need the right hardware or you can’t buy groceries (Or… something)
To fix it, you can follow these steps, to summarize:
- At the install screen (Before you click Install) press Shift+F10 to bring up a cmd prompt
- (I hope you have F1 through F12 keys, otherwise you will need to get creative)
- In cmd, type
regedit, and press enter- This is the Windows Registry Editor. It’s an old program that allows you to modify different system and user config files. This is kind of similar to editing
plistfiles in~/Libraryon macOS.
- This is the Windows Registry Editor. It’s an old program that allows you to modify different system and user config files. This is kind of similar to editing
- On the left, navigate to
HKEY_LOCAL_MACHINEthenSYSTEMthenSetup- Inside that
Setupfolder should be these three «Keys»:AllowStart,Pid,SETUPCL
- Inside that
- Right click the
Setupfolder, and create a new Key, named:LabConfig - Enter the
LabConfigkey, and on the right-hand-side, right click to create a newDWORD (32-bit)value. Do this three times, with the following names:BypassTPMCheckBypassSecureBootCheckBypassRAMCheck
- After creating each of those, double click or right-click -> Modify them, so that each of their values is
1. - Now continue with the installation
Note: If you are using Virtualbox (AKA, you probbaly aren’t on this page?) You should use these settings for Windows 11.
Bonus 2 (UNMOUNTABLE_BOOT_VOLUME)
If, after installing, you get a bluescreen that occurs quickly with the code UNMOUNTABLE_BOOT_VOLUME, there are tutorials online that will have you run variations of the following commands:
bootrec /fixmbr
bootrec /fixboot
bootsect /nt60 sys
bootrec /fixboot (yes, again, after the bootsec)
bcdedit /rebuildbcd
If you mess around with those commands, but still nothing seems to fix it, I would suggest just completely deleting the EFI partition. Leave that space as unallocated, and allow the Windows installer to recreate it all on its own. I used to have a 1GB EFI partition manually created (FAT format) that housed both ubuntu and Windows boot folders. As of Windows 11, however, no matter what I did, the Windows bootloader refused to boot with this partition.
After deleting the partition, however (And backing up EFI/ubuntu), the Windows installer recreated the EFI partition as a 100MB partition, alongside 2 other recovery/unused partitions. I believe there’s some issue with the boot logic where it expects these partitions to be present during UEFI boot, and if Linux created the EFI partition, it ends up in an unexpected state.
Once Windows 11 recreated them during the install, and boot normally, I just copied back the EFI/ubuntu folder, and was able to boot back into Linux. If you aren’t able to back up this folder, you should be able to re-create the entries needed for Linux like this:
(With the EFI partition mounted at /boot/efi):
grub-install --efi-directory=/boot/efi
UEFI booting is supposed to be simpler: just manage an entry on the EFI partition. The UNMOUNTABLE_BOOT_ERROR makes it seem more complicated, but I would mentally file this under «Microsoft just requiring some special sauce» category of issues. Copying and moving around the /boot/efi/ubuntu folder back and forth to the EFI partition, whether Windows create it or not, on my machine allowed me to consistently boot back into Linux.
As an aside, this is why some tutorials will suggest for dual boots to install Windows first, let it set up the partitions how it wants them, and then after that, install Ubuntu/Linux.
In case you are in a similar situation to me, here are some rough CMD analogues to some common unix commands:
cp [targ] [dest]->xcopy [targ] [dest] /E /H /C /Imv [targ] [dest]->ren [targ] [dest]ormove [targ] [dest]rm [targ]->del [targ]rm -rf [targ]->rmdir /s [targ]
And next time someone tells you DOS commands being arcane isn’t an issue because Powershell or WSL exists, kindly remind them that these won’t help you when it’s 2am and you can’t get your OS to boot.
Microsoft has announced Windows 11. Besides online upgrading, here’s how to burn Windows 11 as an USB installer in Ubuntu Linux.
The official Windows 11 iso image will be available to download soon in next week. Though it has leaked! And you can easily install it using an USB stick.
Requirements:
Before getting started, you need a 6 GB+ USB drive, as well as a computer or laptop with:
- 1 gigahertz (GHz) or faster processor.
- 4GB+ RAM.
- 60GB+ hard disk.
- Graphics with DirectX 12 or later compatible.
- UEFI, Secure Boot capable.
- TPM 2.0 (Some succeed on old machines via WinPE).
Option 1: Boot Windows 11 iso via Ventoy:
It has been tested that Ventoy works for Windows 11. Simply install Ventoy on your USB stick and then copy the iso and boot it! See the link for more:
Option 2: Create Windows 11 USB via WoeUSB:
WoeUSB is a free and open-source Microsoft Windows® USB installation media preparer for GNU+Linux.
1. Install WoeUSB in Ubuntu:
For all current Ubuntu releases, including Ubuntu 18.04, Ubuntu 20.04, Ubuntu 21.04, you can install the tool from the PPA repository.
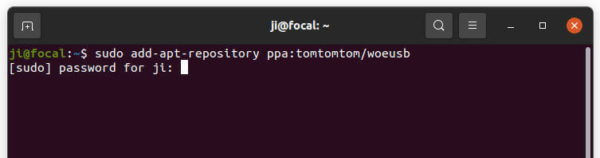
First, search for and open terminal from system app launcher.

Next, run command to add the PPA. Type user password, no asterisk feedback, when it asks and hit Enter.
sudo add-apt-repository ppa:tomtomtom/woeusb
Finally, install WoeUSB via command:
sudo apt install woeusb woeusb-frontend-wxgtk
For Ubuntu 18.04, Linux Mint, you need to run sudo apt update command to refresh package cache first.
2. Burn Windows 11 iso image:
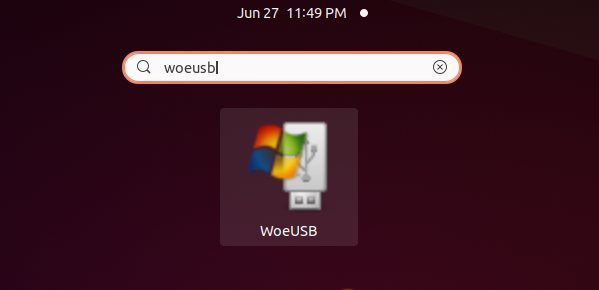
Now plug-in your USB drive! Search for and open WoeUSB from system app launcher.
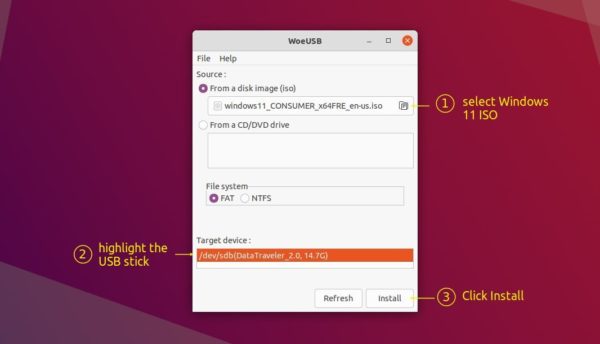
When it opens, select ‘From a disk image (iso)’ and choose your ISO image. Then highlight the USB device from ‘Target device’. Finally click on ‘Install’ button.
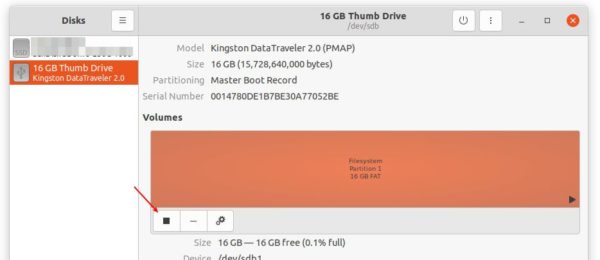
NOTE you have to unmount the USB or it will pop-up an error dialog. To do so, search for and open Disks utility.
Select your device in left pane, and click on the square icon to unmount it.
Next go back to WoeUSB, click refresh and select the USB device. After clicking on the Install button, it starts to wipe USB and burn Windows 11 into it.

When everything’s done successfully, it will prompt that installation succeeded. Close it and boot the USB to get start installing Windows 11!