
Creating a Windows 10 virtual machine on VirtualBox can be simple and efficient. First, download and install VirtualBox, then get a Windows 10 ISO file. Create a new virtual machine, allocate resources, and install Windows 10 using the ISO file. Follow these steps to run a virtualized instance of Windows 10 on your computer.
This guide will walk you through the steps to set up your very own Windows 10 virtual machine using VirtualBox. Virtual machines are excellent for testing software, running different operating systems, or just exploring without risking your main system.
Step 1: Download and Install VirtualBox
Head over to the VirtualBox website and download the installer suitable for your operating system.
VirtualBox supports various OS like Windows, macOS, and Linux. The installation process is straightforward; just follow the prompts and accept the default settings unless you have specific needs.
Step 2: Download a Windows 10 ISO File
Go to the Microsoft website and download the Windows 10 ISO file.
You’ll need this file to install Windows 10 on your virtual machine. Ensure you download the correct version and save it somewhere easily accessible.
Step 3: Open VirtualBox and Create a New Virtual Machine
Launch VirtualBox and click on the “New” button to start creating a new VM.
A wizard will appear to guide you through the process. Name your virtual machine and select “Windows 10” as the version.
Step 4: Allocate Resources
Assign the amount of RAM and CPU cores to your new virtual machine.
For a smooth experience, it’s recommended to allocate at least 4GB of RAM and 2 CPU cores. However, adjust these settings based on your system’s capabilities.
Step 5: Create a Virtual Hard Disk
Choose to create a new virtual hard disk and select a file type for it.
The default VDI format works well. Allocate at least 30GB of storage space to ensure you have enough room to install and run Windows 10.
Step 6: Configure Storage Settings
Go to the “Settings” of your new virtual machine and navigate to the “Storage” section.
Here, you’ll need to link the Windows 10 ISO file to the virtual machine. Click on the empty disk icon and select “Choose a disk file” to locate your ISO.
Step 7: Start the Virtual Machine
Click on the “Start” button to power up your VM.
VirtualBox will boot from the ISO file, launching the Windows 10 installation process. Follow the on-screen instructions to complete the setup.
Step 8: Install Guest Additions
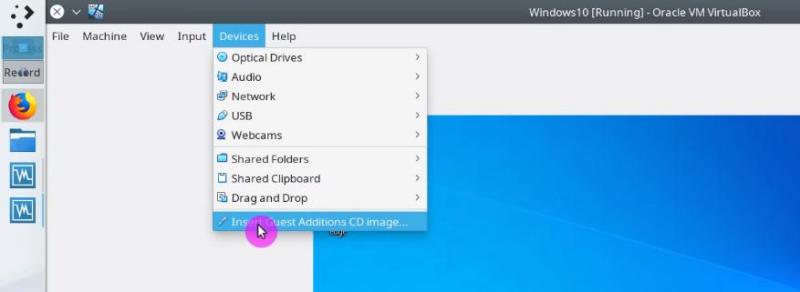
Once Windows 10 is installed, go to the “Devices” menu and select “Insert Guest Additions CD image.”
This step enhances the performance and usability of your virtual machine by installing additional drivers and tools.
After these steps, your virtual machine will run Windows 10 just like a physical computer. You can install programs, browse the internet, and customize settings within the virtual environment.
Tips for Creating a Windows 10 Virtual Machine on VirtualBox
- Allocate sufficient resources: Make sure you give your VM enough RAM and CPU power for smooth performance.
- Use dynamic storage: Selecting dynamic allocation for the virtual hard disk saves space on your physical drive.
- Update VirtualBox: Always use the latest version of VirtualBox for better compatibility and features.
- Backup regularly: Take snapshots of your VM to easily revert changes or recover from issues.
- Optimize settings: Tweak VirtualBox settings for optimal performance based on your specific use case.
Frequently Asked Questions
Why should I use a virtual machine?
Virtual machines allow you to run different operating systems on your existing hardware without affecting your main OS. They are great for testing software, experimenting, and improving security.
What is an ISO file?
An ISO file is a digital copy of a CD/DVD. For installing an operating system, it’s like having a virtual install disk.
How much RAM should I allocate?
For Windows 10, at least 4GB of RAM is recommended. However, if your system has more to offer, allocating more can improve performance.
Can I use VirtualBox on a Mac?
Yes, VirtualBox is compatible with macOS. The installation process is similar to Windows.
Are virtual machines safe?
Yes, VMs are isolated from your host system, meaning any issues within the VM won’t affect your main OS. However, always practice good security habits.
Summary
- Download and install VirtualBox.
- Download a Windows 10 ISO file.
- Open VirtualBox and create a new virtual machine.
- Allocate resources.
- Create a virtual hard disk.
- Configure storage settings.
- Start the virtual machine.
- Install guest additions.
Conclusion
Creating a Windows 10 virtual machine on VirtualBox can be a game-changer. It opens up a world of possibilities for testing, learning, and development in a secure environment. Whether you’re a student trying to learn more about different operating systems or a developer needing a safe space to test apps, a virtual machine is a versatile tool.
Remember to allocate enough resources to your VM and regularly update VirtualBox to ensure smooth operation. Don’t forget to take snapshots so you can easily return to a previous state if things go awry. With these tips and steps, you’ll be well on your way to mastering virtual machines. Happy virtualizing!
Matt Jacobs has been working as an IT consultant for small businesses since receiving his Master’s degree in 2003. While he still does some consulting work, his primary focus now is on creating technology support content for SupportYourTech.com.
His work can be found on many websites and focuses on topics such as Microsoft Office, Apple devices, Android devices, Photoshop, and more.
Some Linux users face a problem of the need to run Windows-specific utilities in Linux. The simplest and reliable way to do that is to use Windows in a virtual machine inside Linux. In this post, you will learn how to install Windows 10 in VirtualBox and make this Windows system completely functional including full-screen mode, shared clipboard, shared folder and other handy features that help integrate Virtual environment and your main system.
Content
- Install VirtualBox
- Create a Virtual Machine for Windows 10
- Configuring VirtualBox for Windows 10 installation
- Download Windows 10 ISO
- Install Windows 10 in VirtualBox
- VirtualBox mouse pointer Capture
- Windows 10 installation
- Fix the screen resolution for Windows 10 in VirtualBox
- Install VirtualBox Guest Additions
- Test full-screen mode
- Enable Shared Folder
- Enable Shared Clipboard
- Enable files drag and drop
VirtualBox is an application developed and maintained by Oracle that allows you to install operating systems in a virtual environment inside other operating systems. Thanks to VirtualBox we can install several operating systems, including Windows 10, in our main Linux system. VirtualBox is very intuitive to use but some tips are required to make an installed system fully functional.
Install VirtualBox on your system
VirtualBox is a very popular application in Linux. So, it is available in most of the official repositories of the most used Linux distributions. You should be able to find it in your Software Center.
However, it is possible that the version in the repositories is a bit out of date. If you want to download the latest version or if you are using Windows or macOS, then you can download it from the VirtualBox website.
Create a new Virtual Machine for Windows 10
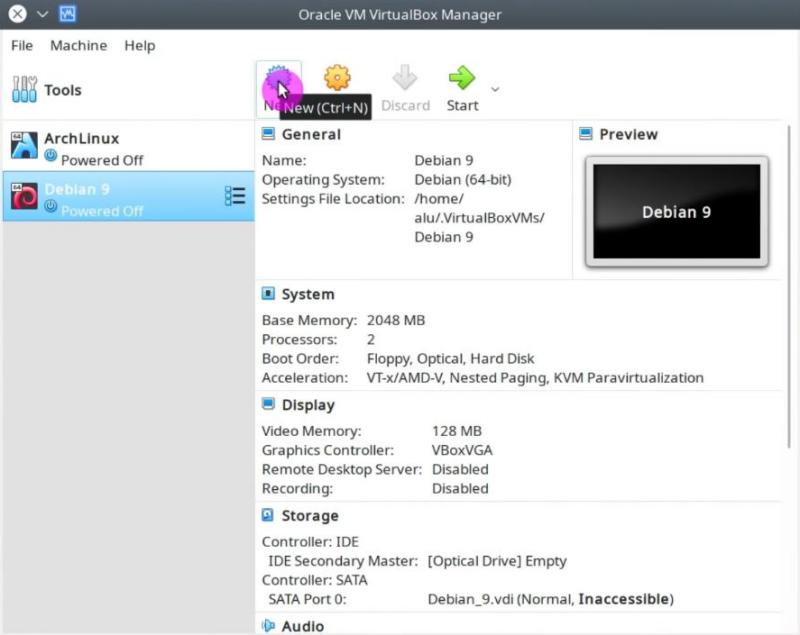
To install Windows 10 in VirtualBox it is necessary to create a virtual machine. Click on the New button. You can also do it with the keyboard shortcut CTRL + N.
In the opened window, you have to type the name of a new virtual machine. If you type the name Windows 10, VirtualBox will complete the rest of the fields. However, if it does not detect everything correctly, you can modify some of the fields. Then click on the Next button:

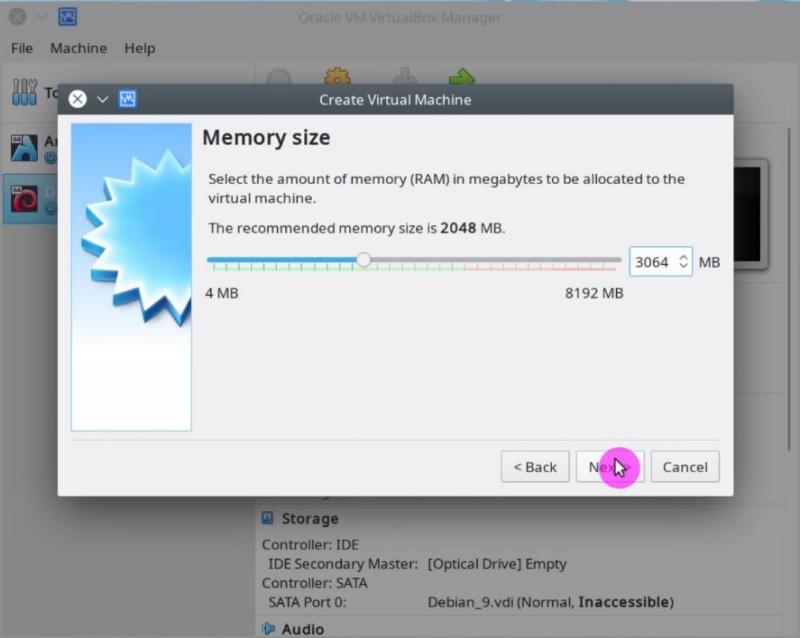
Next, you have to define the size of the RAM that the new virtual machine will use. For Windows 10 the recommended size is at least 3Gb. Then, click on the Next button:
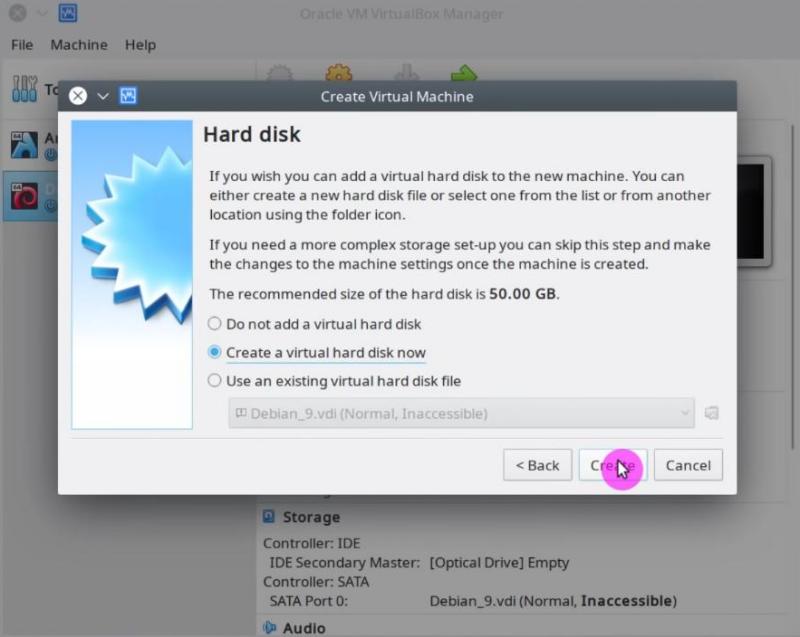
After that, you need to choose the virtual hard disk that the virtual machine will use. Normally you have to create a new one. So, choose the second option and click on the Create button:
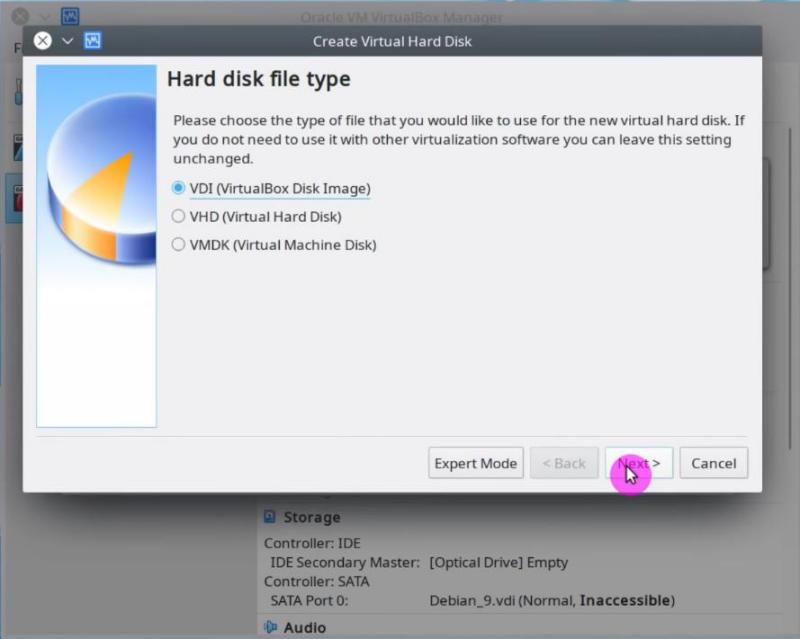
Then you have to choose the type of hard disk. There are three options, choose the first one (VDI):
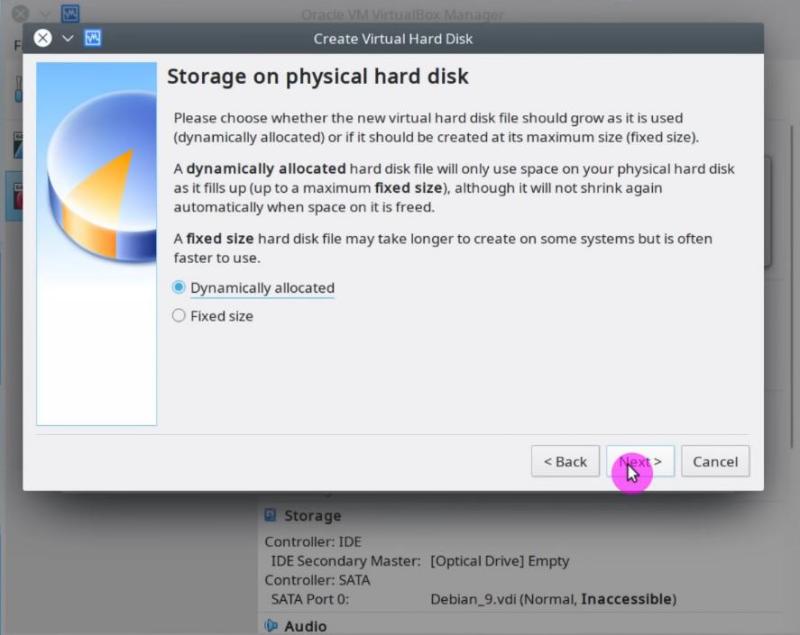
In the next window, choose Dynamically Allocated. This way the virtual disk will use only the amount of space that is taken by the virtual system instead of the maximum allocated space. This option helps to use the disk space more effectively:
Finally, you have the option to set the path where the virtual hard disk file will be located and its size:
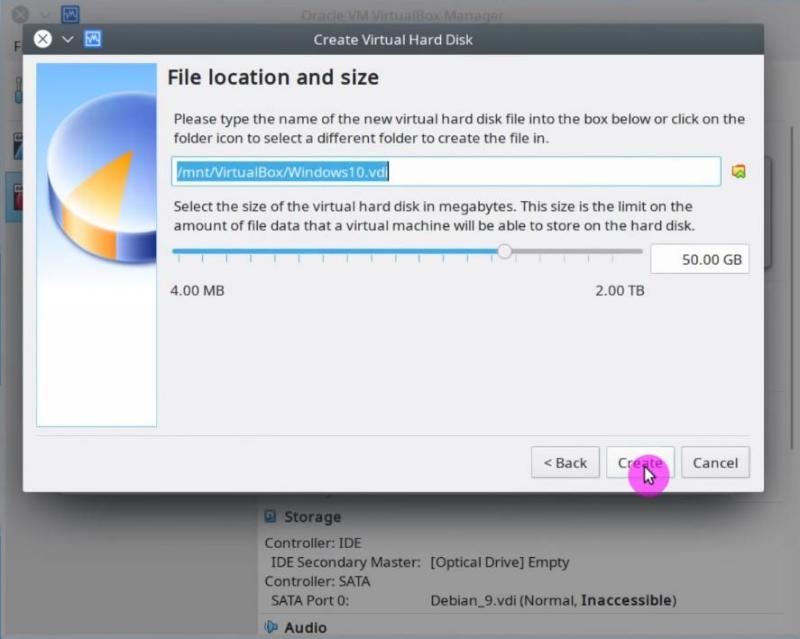
After this, the virtual machine will be created.
Configuring VirtualBox for Windows 10 installation
There are a few more things to be adjusted before you can use it to install Windows 10.
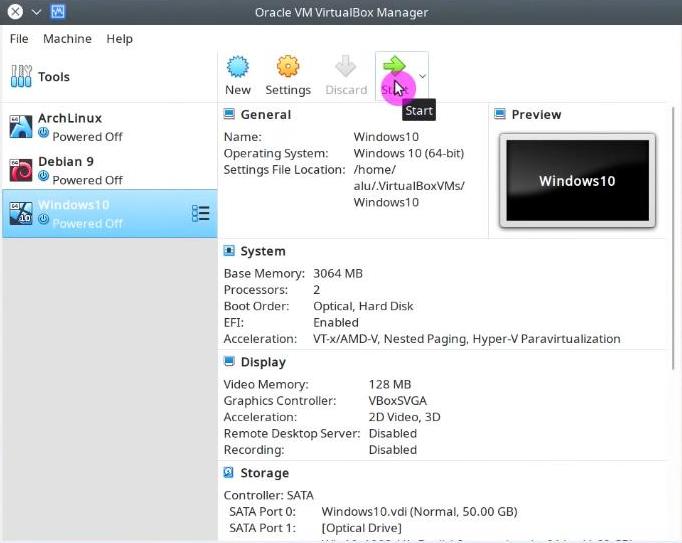
First, from the main VirtualBox window select the Windows 10 virtual machine and click on the Settings button:

Now you will see the options of this virtual machine. On the left side click on the System section and then the Motherboard tab, and enable EFI because Window 10 requires the EFI mode:
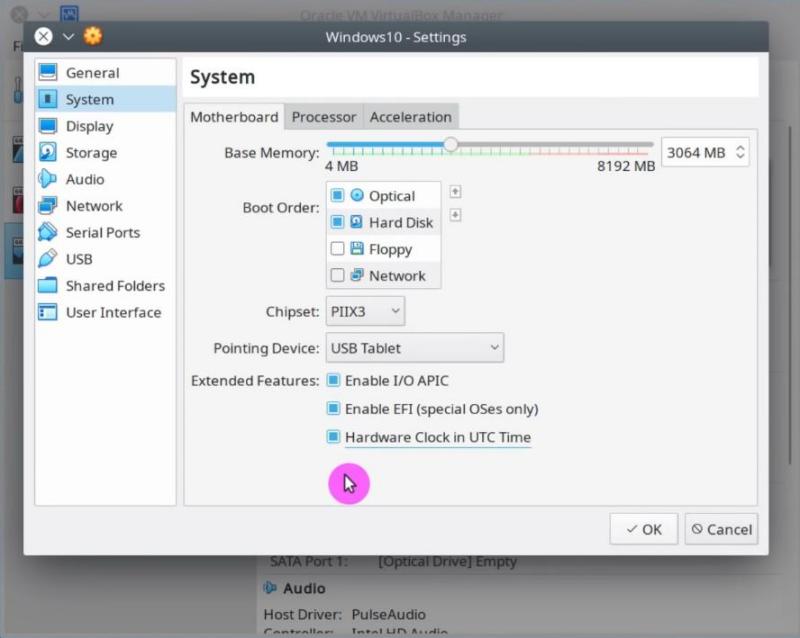
Then, in the Processor tab increase the number of processor cores to be used by the virtual machine. Check how many cores VirtualBox will allow you to use without warning. In my case, I have 4 cores and VirtualBox allows me to allocate 2 cores for the virtual machine without any harm for my main system:

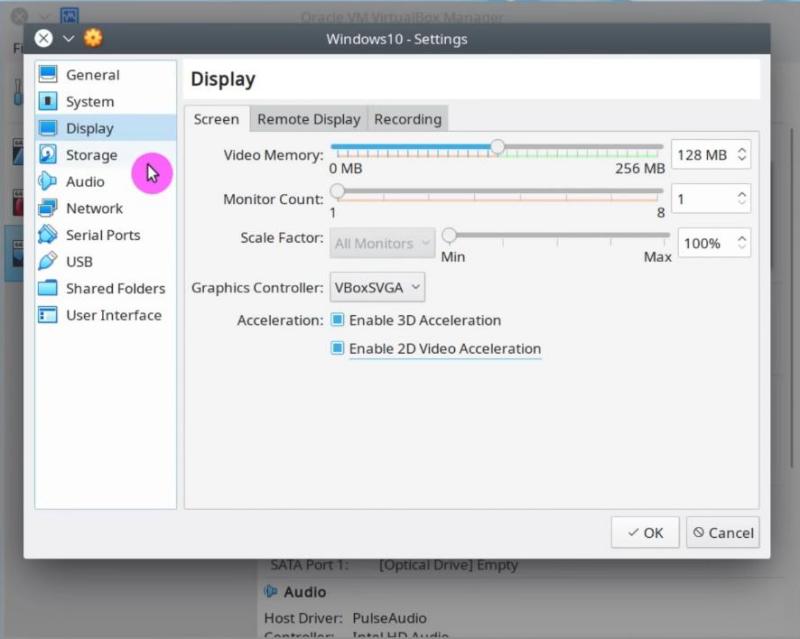
After this, click on the Display section and increase the amount of Video Memory for the virtual machine. I recommend 128Mb minimum. Also for Windows 10, you need to enable 3D and 2D Video Acceleration:
Now, it is necessary to define the location of the ISO file of the Windows 10 ISO image. Click on the Storage section, and select the small disk icon that says Empty. Then, click on the disk image on the right side and select your Windows 10 ISO image:
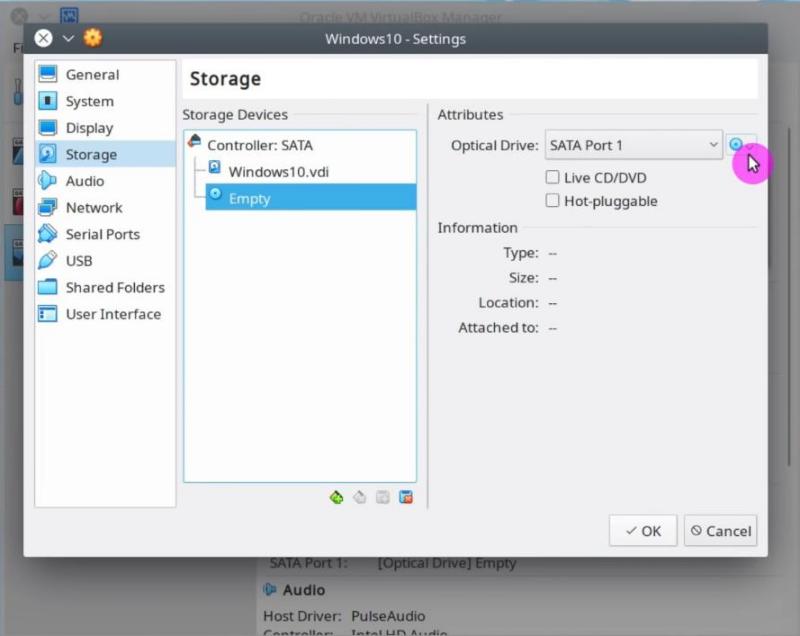
Next, click on the Ok button.
Download Windows 10 ISO
In case you do not have the Window 10 ISO image, you can download it from the Microsoft website:
Download Windows 10
Then, add this ISO image to VirtualBox as shown above.
Install Windows 10 in VirtualBox
Now you can start the virtual machine. Select it and click on the Start button:
VirtualBox mouse pointer Capture
When you start the virtual machine you will be asked if you want the guest system (Windows 10) to capture the events of the mouse and keyboard. Read the instructions on how to use mouse integration with VirtualBox and agree to Capture:
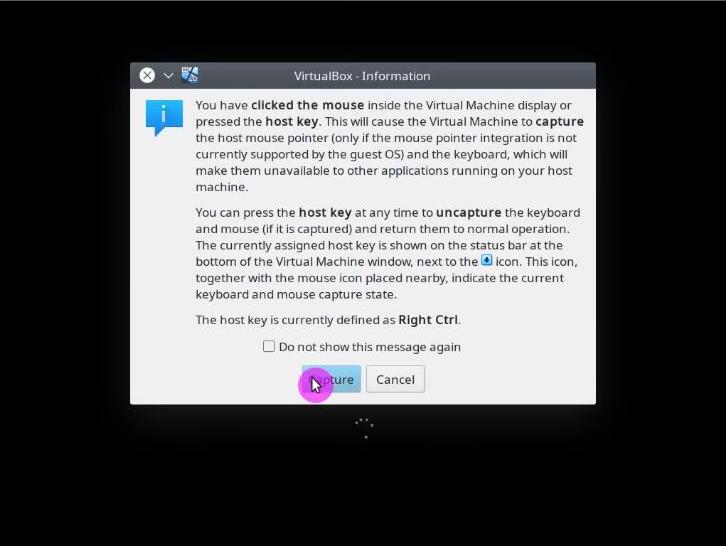
The rest of the process is the standard Windows 10 installation.
Windows 10 installation
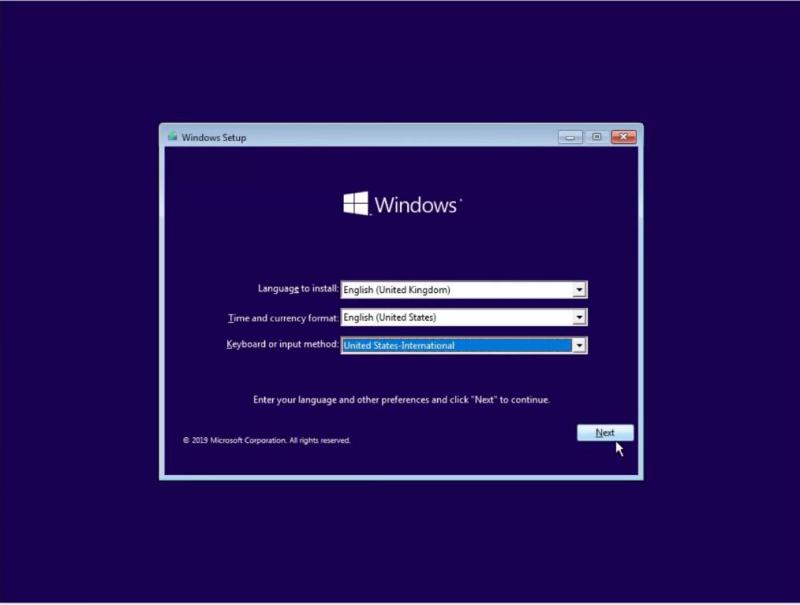
First, choose the language, keyboard layout, and time format:
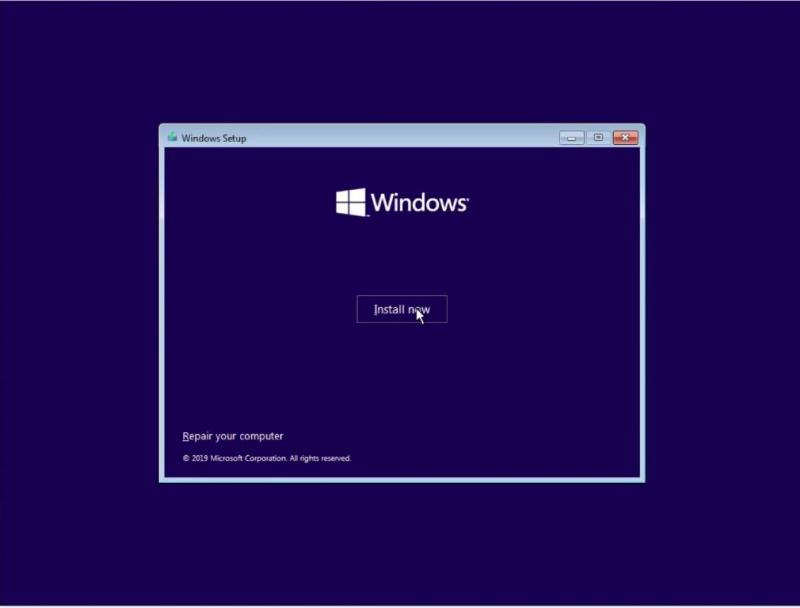
After that, click on the Install Now option:
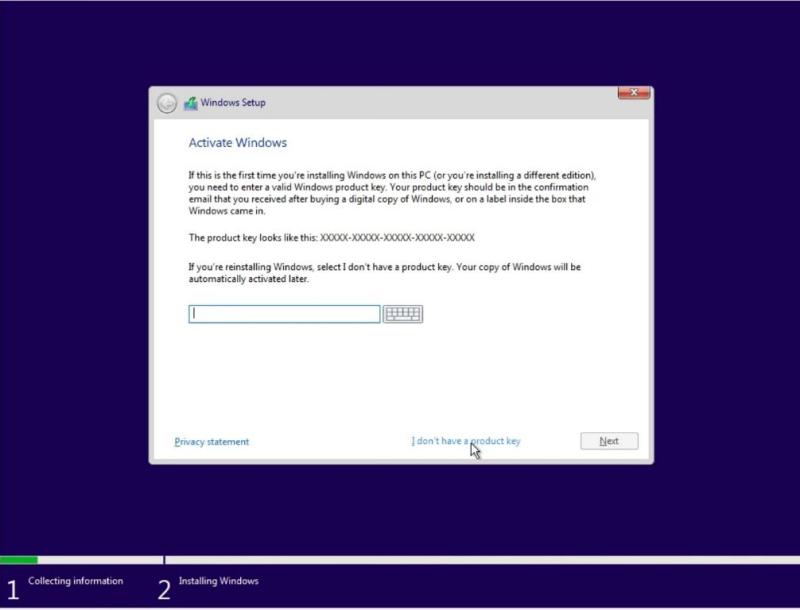
If you have a valid Windows 10 license, you can add it on the following screen. If not, you can click on the option I don’t have a product key and continue in a trial mode:
If you downloaded the ISO from the Microsoft website, it will contain several types of systems. You can select whatever version you prefer. I select Windows 10 PRO:

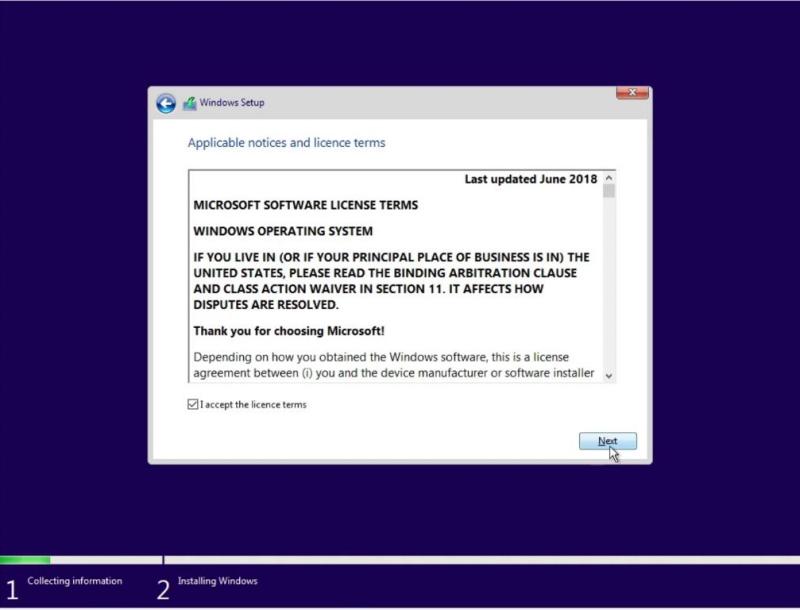
Accept the terms of the license and continue:
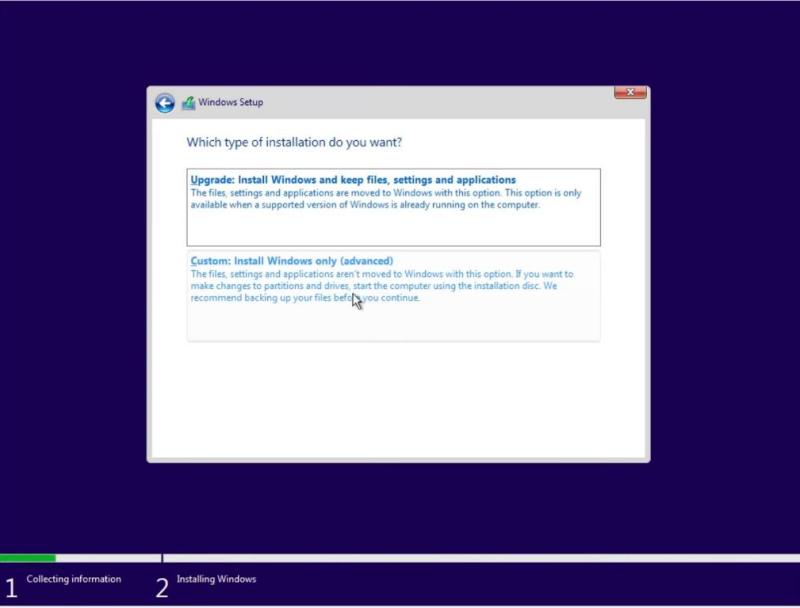
As the hard disk is newly created and has no partition created you will have to choose the Custom: Install Windows only option:
In this screen, you will only have to select the only visible disk and click on the Next button. The installer will create and format the partition automatically:
Then, it will start the installation:
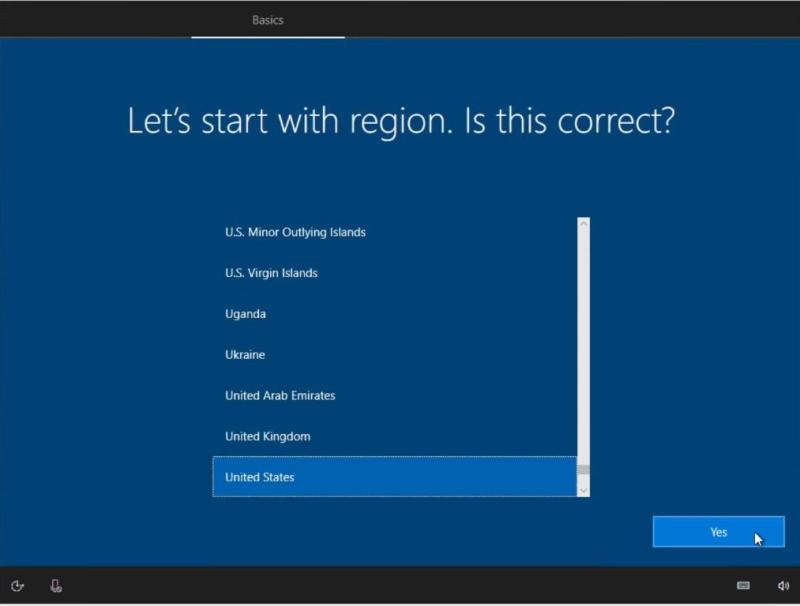
The Windows 10 installer will restart virtual machine several times. This is normal. After the restart, you will need to provide the information on your region:
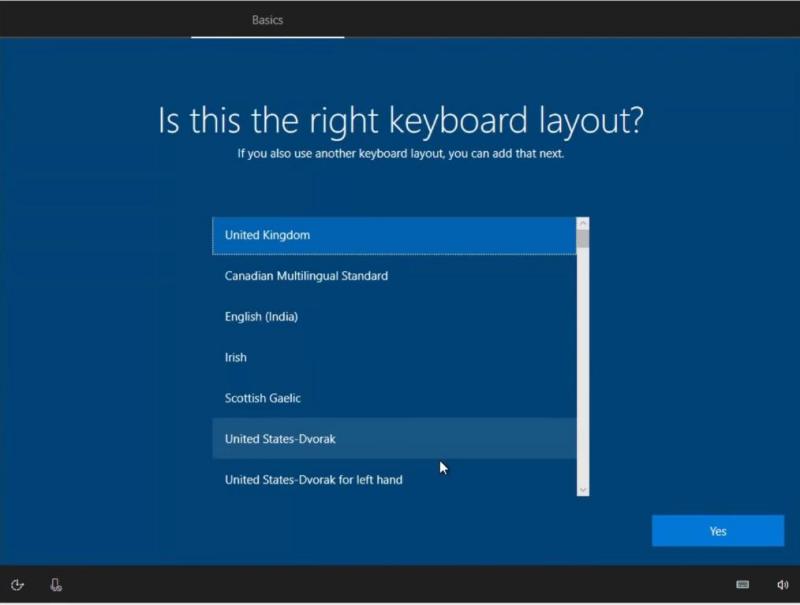
Keyboard layout:
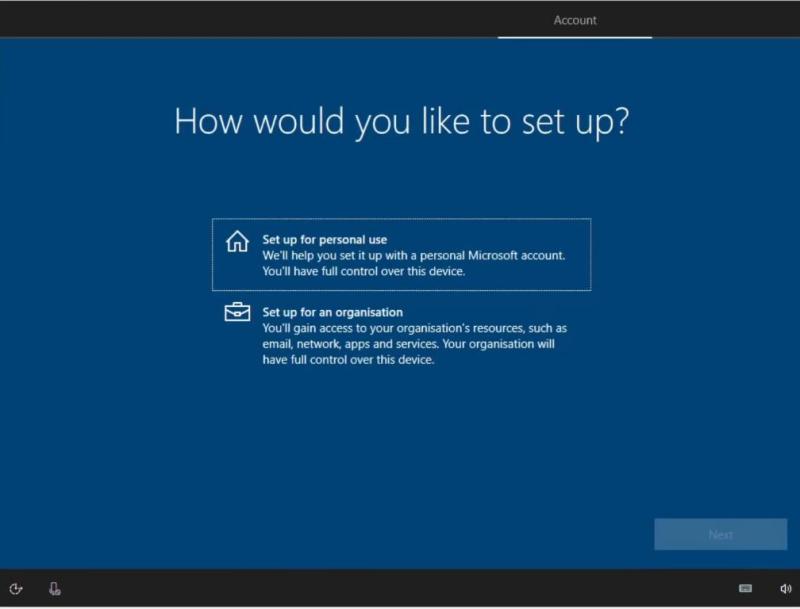
Then, you can choose to configure it for personal or business use. Likely, you will need to choose for personal use:
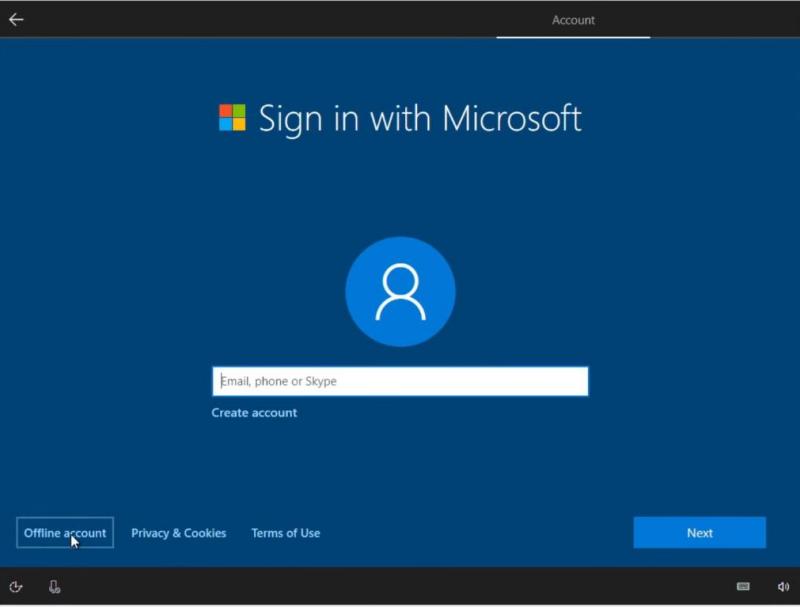
Next, you can log in to your Microsoft account or skip it by choosing Offline account:
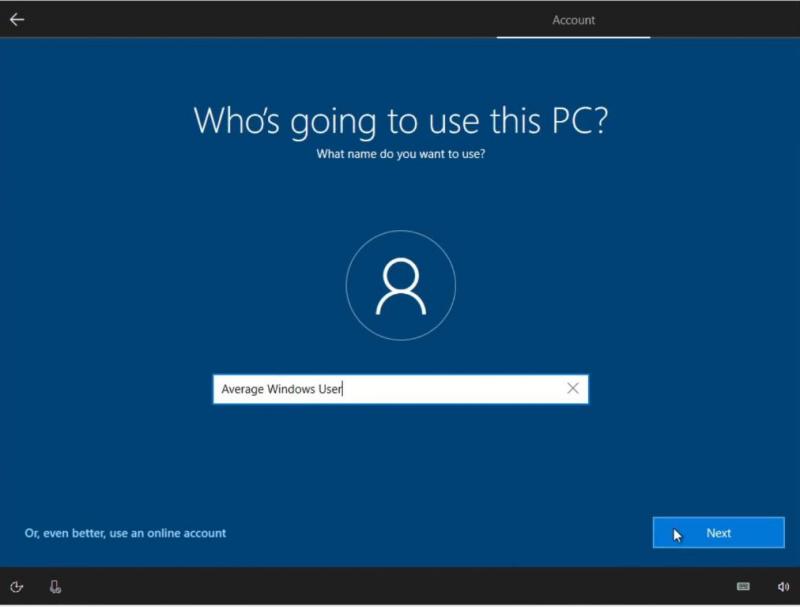
Type the name of the user who will use the system:
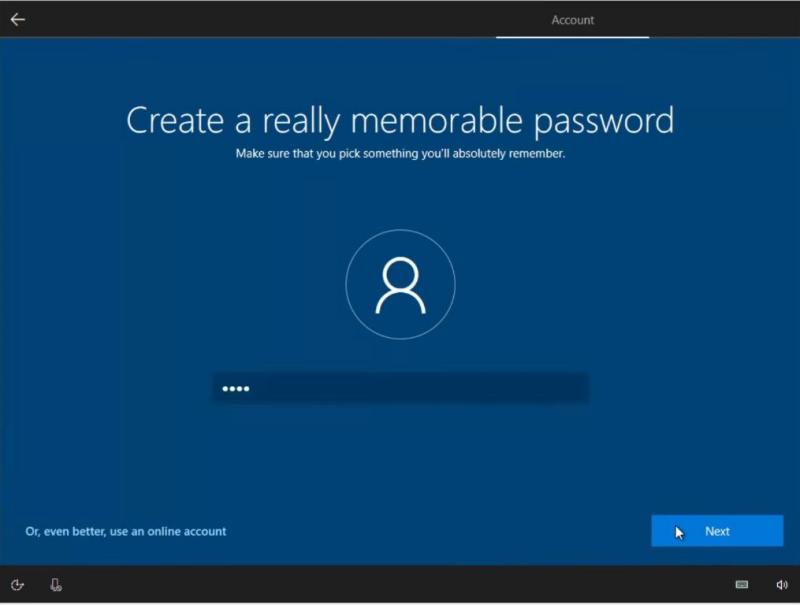
Set a password for the system:
If you do not use multiple Windows 10 devices, you can skip this section:
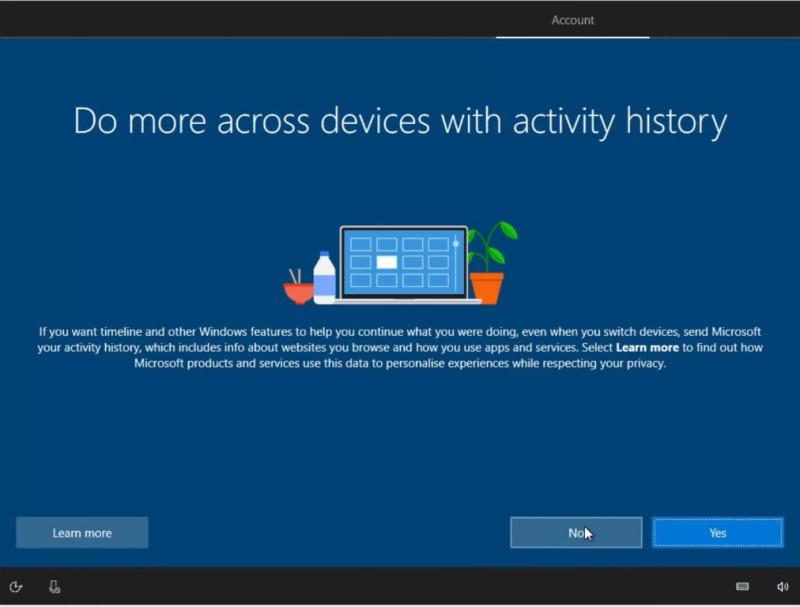
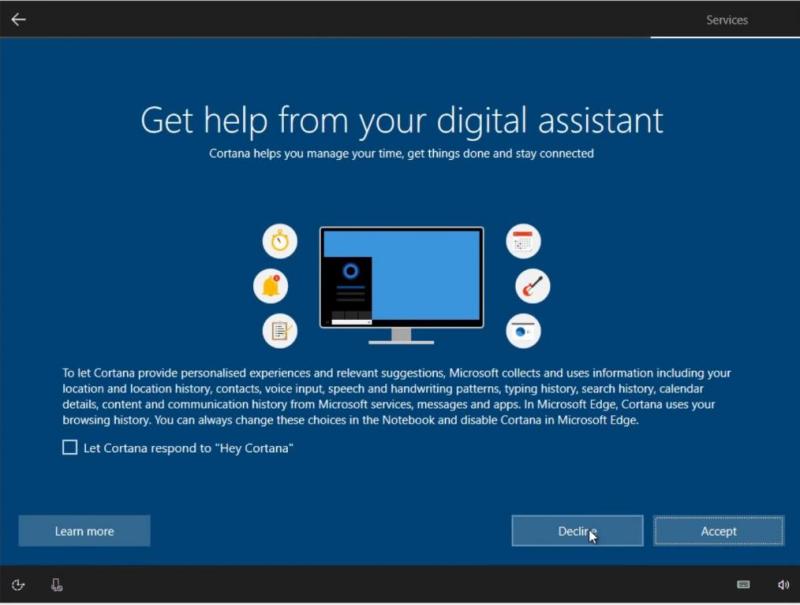
The following screen corresponds to the Cortana configuration. Probably, you won’t need it in a virtual machine, so you can also skip this section:
Configure your privacy settings. I usually disable all options in this screen:
Finally, you have to wait about half an hour to complete the install and then you will be able to log in to your Windows 10 in VirtualBox:
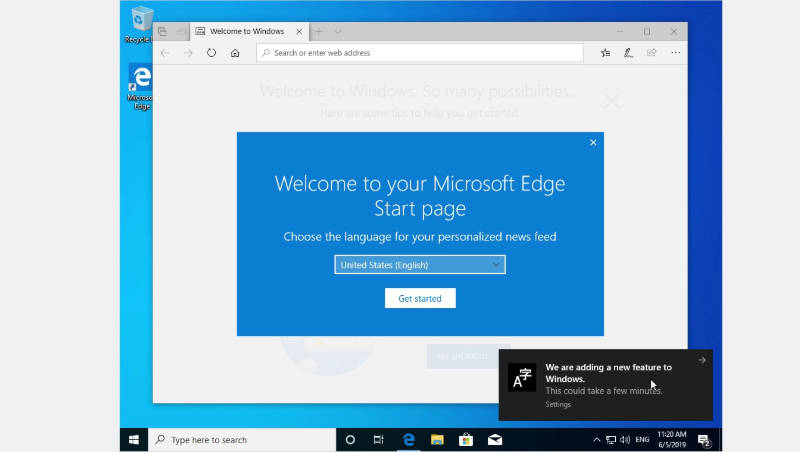
At this stage, Windows 10 is correctly installed but it is not fully functional. So, you need to do a few additional steps to get maximum from your Windows 10 in VirtualBox.
Fix the screen resolution for Windows 10 in VirtualBox
One of the first things you will notice is that this Windows screen is too small and not adapted to the size of your screen (see the image above). To fix that and also enable some additional features, you need to install VirtualBox Guest Additions.
Install VirtualBox Guest Additions
Go to Devices in the VirtualBox menu of the running Windows 10 and click on the Insert Guest Additions CD image option:
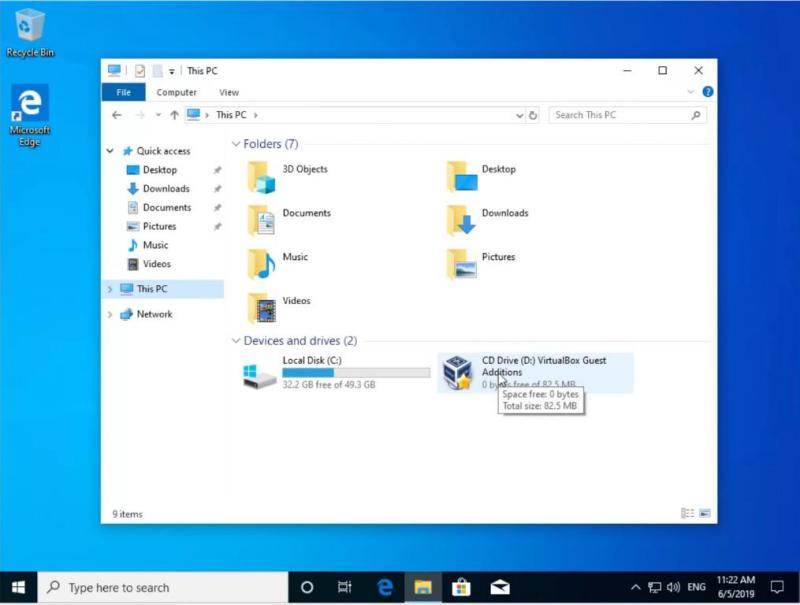
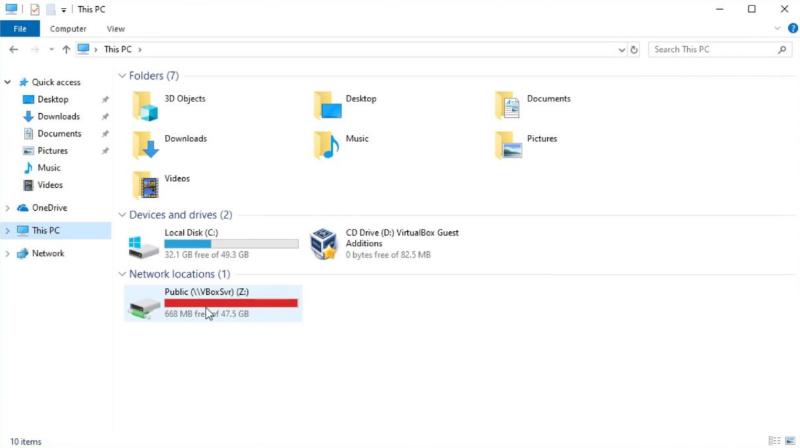
Then, in your Windows 10 system, open the file manager and go to This PC on the left side. In the Devices and Drives section, you will find the VirtualBox Guest Additions CD:
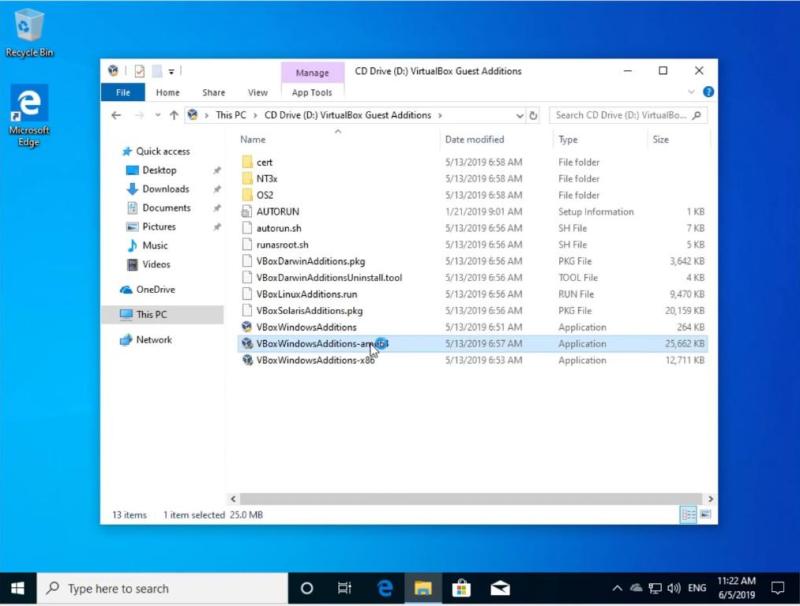
Once you have entered the image, you will see many different files. If the installed Windows 10 is 64-bit, you have to install the VBoxWindowsAdditions-amd64 file but if the system is 32-bit then you have to install VBoxWindowsAdditions-x86. Most Likely, you have the 64-bit system. So, install it by double-clicking on the file:
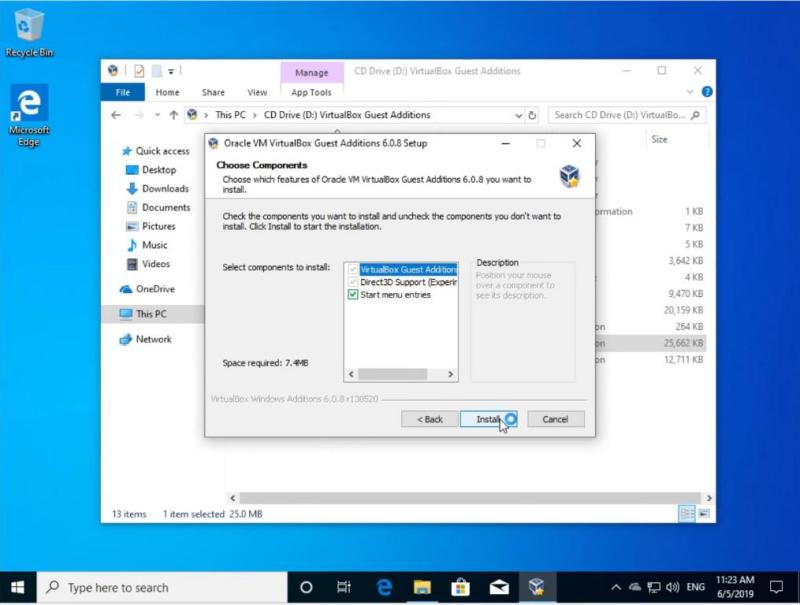
During the installation, keep all options by default:
Note: The screen will blink several times during the installation process. This is normal and there is nothing to worry about, just wait for the installation to finish.
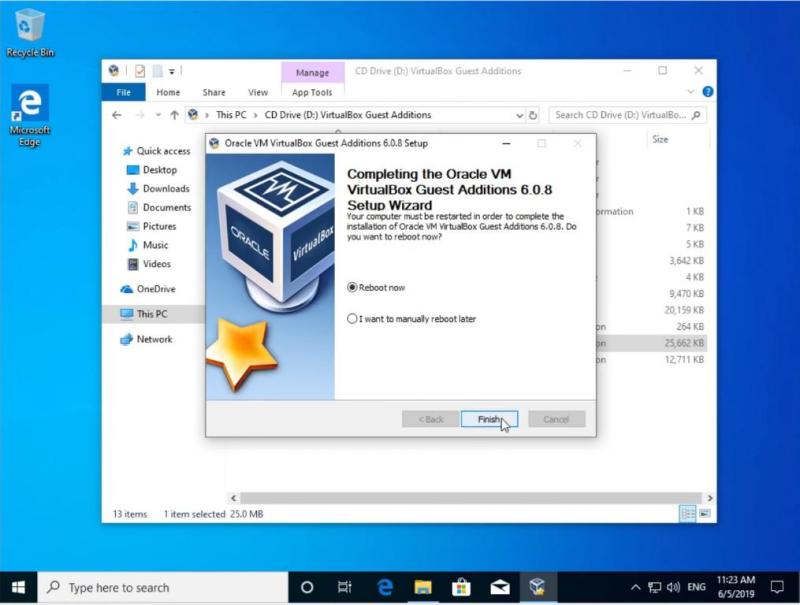
Once the installation is complete, it is necessary to restart the system to apply the changes:
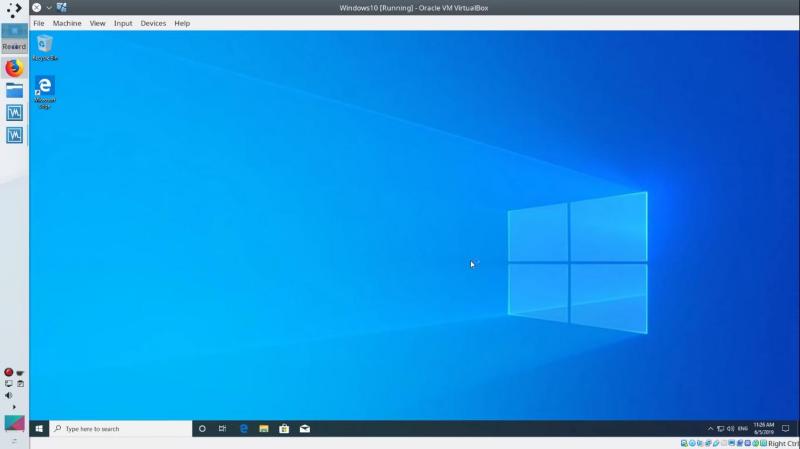
When you start your system, your Windows 10 screen will adapt to the size of your real screen:
Test full-screen mode
You can even view this Windows 10 in the full-screen mode. To that end, go to the View menu and click on the full-screen mode option or simply press the keys right CTRL + F:
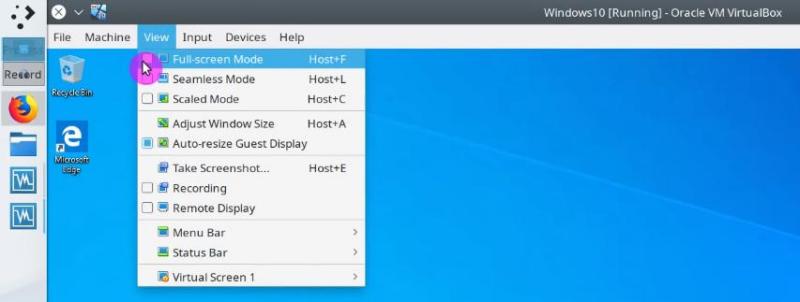
So, you can enjoy full-screen mode. To exit from the full-screen use the same shortcut right CTRL + F.
When working with virtual machines it is also convenient to share files between the host and the guest systems. This can be achieved with a Shared Folder.
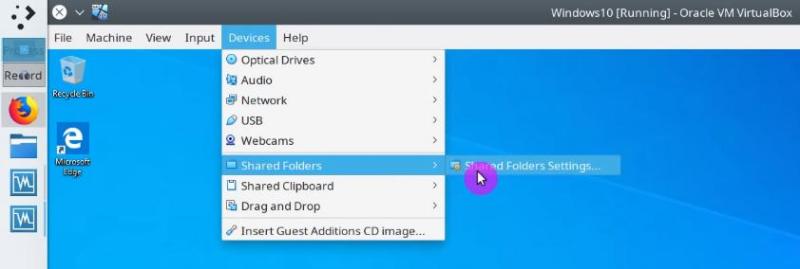
To enable it, go to the Devices menu and in the Shared Folders category click on the Shared Folders Settings option:
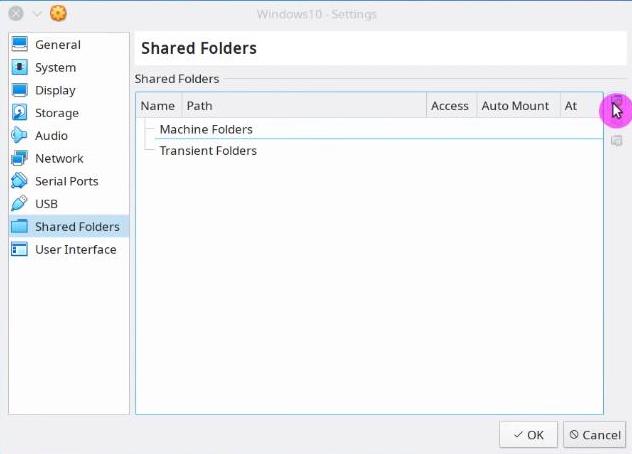
In the opened window, select the Machine Folders option and click on the small folder icon on the right side:
In Folder Path field, choose the path of the folder you want to share. In my case, I usually share my Public folder. If you want to increase the security of the folder you can check the Read-Only option to prevent Windows 10 from modifying the contents of this folder. This way only Linux system can modify this folder. It is also better to make the folder mount automatically and make it permanent:

In the end, reboot the Windows 10 system to apply the new configuration.
After the reboot, you will find the shared folder in This PC section of the Windows 10 file manager. You can now use it to share files between to your Linux and Windows systems:
In the case of a Linux system as a guest, the process of enabling the shared folder is little different. Check out my post about How to enable a VirtualBox shared folder for Linux guest systems.
Another productive feature is the sharing of the clipboard between the two systems. That is, when you copy the text in one system, it will also be available in the other.
To enable this feature, you have to install VirtualBox Guest Additions as you have seen above, then go to the Devices menu and in the Shared Clipboard section click on the Bidirectional option.

Now if you can share the clipboard content on both systems.
Enable files drag and drop
Finally, you can also enable bidirectional drag and drop of files to share them between systems. I recommend using a shared folder for this purpose because a shared folder is more reliable. But you may try the drag and drop too.
To enable it, go to the Devices menu and in the Drag and Drop section click on the Bidirectional option:
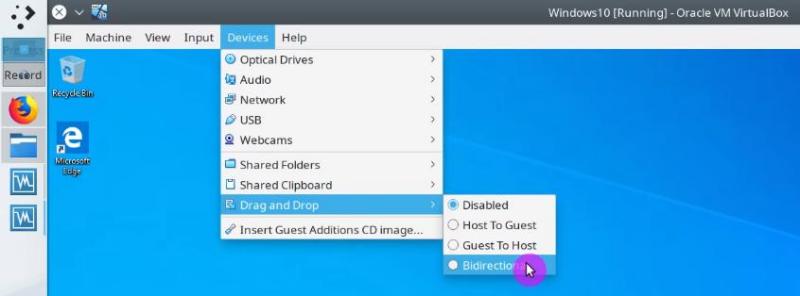
Now, you can drag a file from your host system and drop it to the Windows 10. It should also work the other way, but it did not work for me. Again, that’s why I recommend using a shared folder.
Conclusion
These were the essential steps to get Windows 10 working in VirtualBox. If you are required to use some Windows application but you run Linux as your main OS, this can be a lifesaver. Install Windows 10 in VirtualBox and running Windows programs inside it is not an ideal solution, but it is very reliable. All Windows programs will work correctly.
You can also try using emulators like Wine, but in my experience, very few Windows applications run well in Wine. Many users also prefer to dual boot Linux and Windows, but I am against such option. So, I think installing Windows in VirtualBox is the best solution to get Windows programs working in Linux.
Add Windows 10 to your stable of virtual machines.
Windows 10
Many developers use virtual machines to test apps running under various hardware and software configurations. Because Windows 10 has already proved itself to be a very popular OS, developers and programmers already have a need to create Windows 10 VMs for app testing.
Besides the upgrade, Windows 10 can also be downloaded from Microsoft using the Windows Media creation tool. Mark Hachman wrote about the Windows 10 upgrade process, along with information on how to use the creation tool to make bootable Windows 10 USB sticks and ISO files. I chose to make an ISO, intending to use it to create a VirtualBox virtual machine (VM).
VirtualBox
Provided you have a license, the Windows 10 ISO file can be installed onto a virtual machine using the latest version of VirtualBox. If you are upgrading VirtualBox, the app can also automatically “pick up” VMs you’ve created previously using an older version.
To illustrate, VirtualBox listed my Slackware Linux and Andy the Android emulator VMs in its VM pane, both were created using a previous version.
Creating the VM
To start, click the New toolbar button, ensuring that Microsoft Windows and Windows 10 are selected as Type and Version.
For Memory size, try to allocate as much as possible. But in most instances, 1024 MB is sufficient to install Windows 10 in a VM.
One VirtualBox setting that is often overlooked is found under the System, Acceleration tab: Make sure both Hardware Virtualization boxes are ticked.
Select VirtualBox Disk Image as hard disk type, dynamically allocated, with a minimum size of 32GB.
After the drive has been created, add the Windows 10 ISO file to the Storage Tree, this is done so the ISO file will be treated as an optical drive by the VM.
Finally, click the green start arrow to start the VM, and begin the installation…
VirtualBox provides a free and easy way to create a virtual machine to run Windows 10 (or another OS) alongside the main installation without the need for extra hardware, and here’s how to set it up.
A virtual machine is a virtualization technology that allows you to run multiple operating systems in containers isolated from the main installation as a separate device but without the extra hardware.
Usually, the ability to create a virtual machine can come in handy in many scenarios. For example, to test untrusted applications, run legacy programs in older versions of Windows, install different operating systems like Linux or keep specific work separate. You can also use it to install and run Windows Insider Preview builds without the need for another computer.
In this guide, you will learn the steps to create a VirtualBox virtual machine with Windows 10.
If you plan to set up one or multiple Windows 10 virtual machines, you will need to install VirtualBox, download the latest ISO file of Windows 10, and then continue with the instructions below.
To create a virtual machine to host a Windows 10 installation, use these steps:
-
Open VirtualBox.
-
Click the Machine menu and select the New option.

Create vm option -
In the Name field option, confirm a descriptive name for the virtual machine. For example, vm-win10-lab.
-
(Optional) In the Machine Folder option, select the folder location to create the Windows 10 VM.
-
In the “Type” option, select the Microsoft Windows platform option.
-
In the Version option, select the Windows 10 (64-bit) option.

Virtual machine OS settings -
Click the Next button.
-
Specify the amount of system memory to allocate for the machine.
VirtualBox vm RAM configuration Quick tip: Ideally, you want to give it at least 4GB of RAM, but this setting will depend on the amount of physical memory available on the device and the applications you will be using.
-
Select the Create a virtual hard disk now option.
VirtualBox vm hard disk configuration -
Click the Create button.
-
Select the VDI (VirtualBox Disk Image) option.

VDI hard disk type Quick note: The application supports multiple hard drive file types, including VDI, VHD (Virtual Hard Disk), and VMDK (Virtual Machine Disk). While every option has its advantages and disadvantages, the VDI option is optimal for most use cases for general purposes.
-
Click the Next button.
-
Select the Dynamically allocated option to grow the size of the drive as needed.
Storage dynamically allocated option -
Click the Next button.
-
Specify the size of the virtual hard drive.
VirtualBox create a virtual drive Quick note: The default 50GB is suitable for installation and light applications, but the size will depend on the applications and files you want to store in the drive.
-
Click the Create button.
-
Right-click the newly created virtual machine from the left side and select the Settings option.
Virtual machine settings option -
Click on System.
-
Click the Motherboard tab.
-
(Optional) In the Boot order option, configure the boot order by selecting the item and using up and down arrows on the left. Or clear the item check box to disconnect peripherals.

VirtualBox change boot order -
Click the Processor tab.
-
In the Processors option, use the slider to select how many processors to allocate for the Windows 10 virtual machine.
Virtual machine CPU allocation Quick note: The selection will depend on your hardware capability, but usually, you want to give at least two to four cores per machine.
-
Click on Storage.
-
Under the “Storage Devices” section, select the Optical Drive (disc icon) option.
-
Under the “Attributes” section, click the disc icon menu, and select the Choose a disk file option.
VirtualBox mount Windows 10 ISO -
Select the Windows 10 ISO file.
-
Click the Open button to mount the installation media.
-
(Optional) Click on Display.
-
Click the Screen tab.
-
(Optional) In the Acceleration option, check the Enable 3D Acceleration option to improve video performance.
Important: If Windows 10 graphics do not behave as expected (for example, transparent taskbar), you may want to consider disabling this option.
-
In the Video Memory option, use the slider and specify the virtual machine’s amount of video memory. (The more, the better.)
Virtual machine video memory allocation -
Click the OK button.
-
Right-click the virtual machine, select the Start submenu and choose the Normal Start option.
Start virtual machine option -
On the “Windows Setup” page, click the Next button.

Install Windows 10 on VirtualBox -
Click the Install now button.
-
Confirm a valid product key to activate Windows 10.
Quick note: You can skip this step, but since you will be setting up a new device, you will need a new product key to activate Windows 10. After the installation, you can enter the key on the “Activation” settings page.
-
Click the Next button.
-
Accept the licensing agreement.
-
Click the Next button.
-
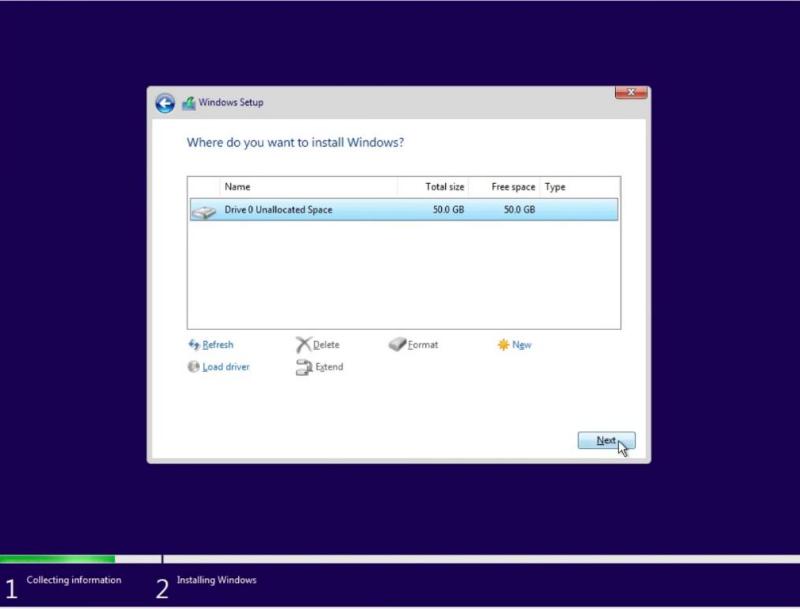
Click the Custom: Install Windows only (Advanced) option to perform a clean install of Windows 10.
-
Select the Drive 0 Unallocated Space drive.
-
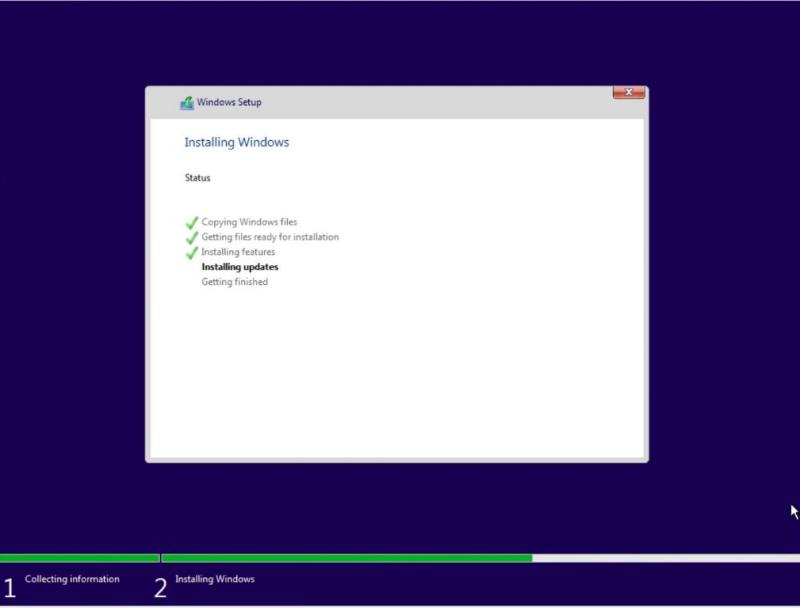
Click the Next button to continue with the installation.
-
Continue with the on-screen directions to finish the out-of-box experience (OOBE) to complete the installation.
-
After the installation, while on the Windows 10 desktop, click the Devices menu and select the Insert Guest Additions CD image option.

Insert Guest Additions CD image Quick note: The Guest Additions is the package that contains all the VirtualBox drivers to allow the operating system to work correctly in the virtual environment.
-
Open File Explorer in the virtual machine (Windows key + E keyboard shortcut).
-
Click on This PC from the left side.
-
Under the “Devices and drives” section, double-click to open the VirtualBox Guest Additions disc.
-
Double-click the VBoxWindowsAdditions.exe file to launch the installer.

VBox Windows Additions -
Click the Next button.
-
Click the Next button again.
Virtual drivers install location -
Click the Install button.
VirtualBox install Windows 10 drivers -
Select the Reboot now option.
-
Click the Finish button.


Once you complete the steps, the virtual machine will restart, and you can start using Windows 10 in a virtual environment.
While you can use VirtualBox to create virtual machines, Windows 10 also includes several features to avoid third-party virtualization technologies. For example, Windows Sandbox to test applications, Microsoft Defender Application Guard to load untrusted websites, and the Windows Subsystem for Linux 2 run distros of Linux like Ubuntu or Kali.
Why You Can Trust Pureinfotech
The author combines expert insights with user-centric guidance, rigorously researching and testing to ensure you receive trustworthy, easy-to-follow tech guides. Review the publishing process.
07 Dec 2018
- virtualbox
Задача: Перенести существующую Windows 10 со всеми настройками, файлами и дисками на виртуальную машину. Как оказалось, решений несколько, и все они весьма простые.
Задача номер один — конвертировать существующие диски в виртуальные
Существует несколько способов перенести копию операционной системы на виртуальный диск, с помощью disk2vhd и с помощью средства резервного копирования Windows
Способ первый — с помощью disk2vhd
Скачиваем disk2vhd v2.01 и запускаем.
- Снимаем галочку с пункта «Use Vhdx».
- В левой части окна отмечаем галочкой нужные диски, можно выбрать только диск с установленной Windows, мне же нужно было отметить все диски.
- Указываем место хранения и имя файла виртуального диска.
- Нажимаем Create

И программа начнет создание виртуального диска, в зависимости размера это может занять значительное время. Когда программа закончит работу файл виртуального диска с расширением .vhd будет находится в той папке, которую вы указали.
Способ второй — с помощью резервного копирования Windows
Так как формат vhd принадлежит Microsoft, встроенное в Windows средство создания резервного образа системы, создает образы в формате vhd. Чтобы создать виртуальный диск нужно перейти:
Панель управления->Система и безопасность->История файлов->Резервная копия образа системы
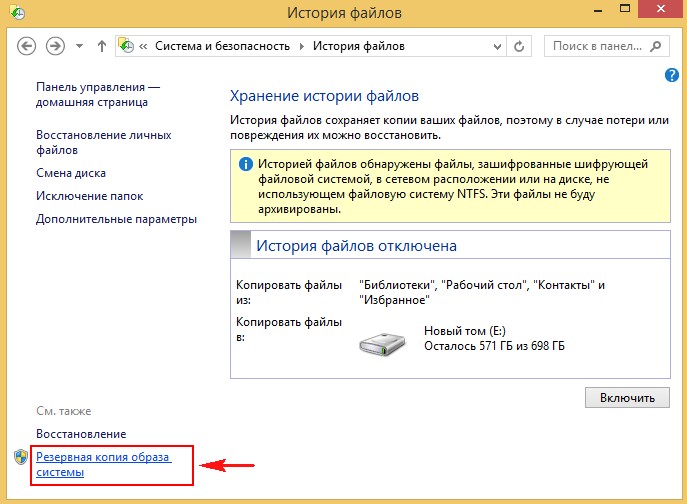
Затем выбираем место сохранения резервного образа.
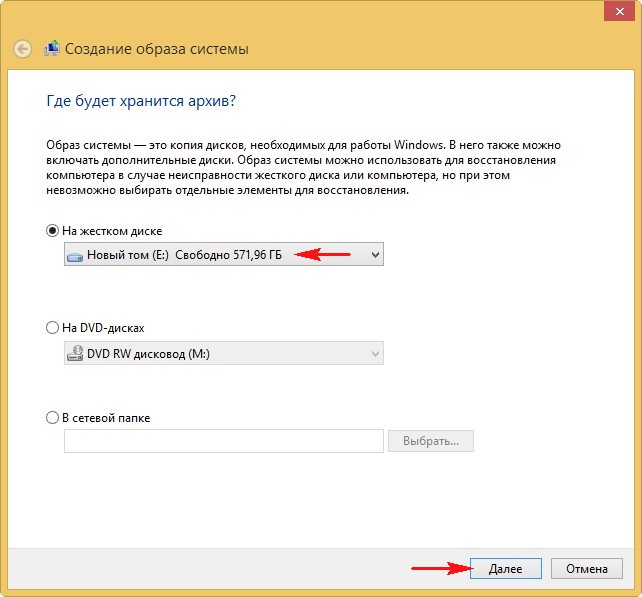
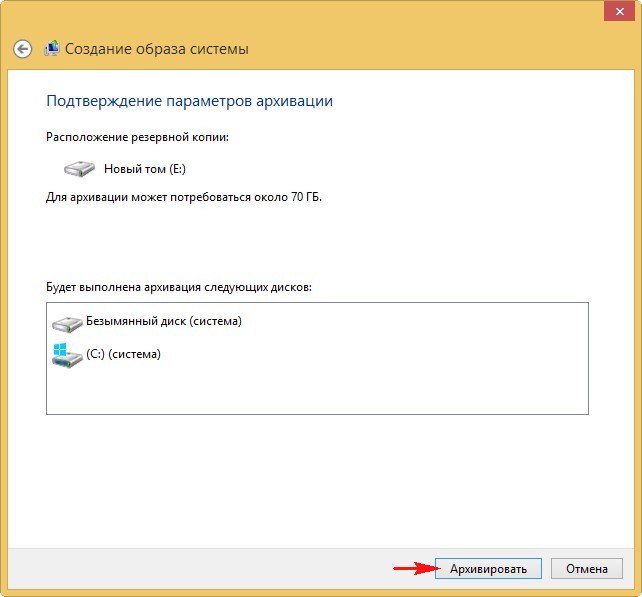
По умолчанию выбран диск С и скрытый раздел с файлами загрузки Windows.
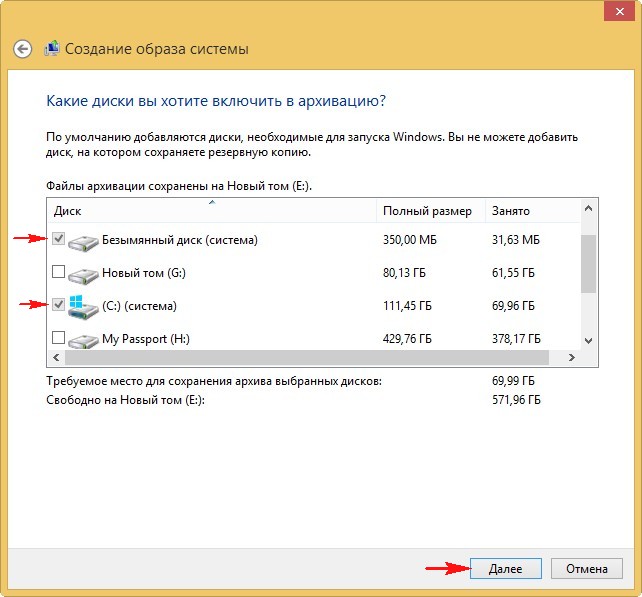
Нажимаем Архивировать
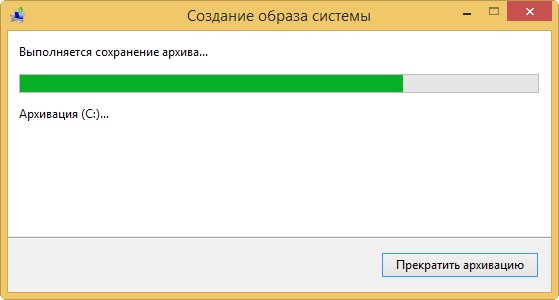
Начнется процесс создания архива
Архивированный файл будет в папке WindowsImageBackup->Имя пользователя->Backup
Задача номер два — запустить сохраненную систему на виртуальной машине
Теперь нам нужно создать виртуальную машину и запустить ее. Иногда, при переносе Windows в виртуальную среду страдает загрузчик системы, который нам придется восстановить, чтобы это сделать мы загрузимся с iso-образа Windows и с помощью среды восстановления исправим загрузчик.
Установка VirtualBox и создание виртуальной машины
Windows
Установка VirtualBox на Windows не должна вызывать вопросов, поэтому просто скачиваем VirtualBox, устанавливаем и запускаем ее.
Linux
Есть два способа установки VirtualBox: из репозиториев ubuntu или из репозиториев Oracle.Чтобы установить из репозиториев ubuntu используйте:
sudo apt-get install virtualbox
После этого терминал запросит у вас пароль, введите его и ждите завершения загрузки и установки.
Установка из репозиториев Oracle более предпочтительна — версии там новее.
Сначала добавляем репозиторий:
echo "deb http://download.virtualbox.org/virtualbox/debian $(lsb_release -sc) contrib" | sudo tee -a /etc/apt/sources.list
Затем добавим ключи репозитория:
wget -q https://www.virtualbox.org/download/oracle_vbox_2016.asc -O- | sudo apt-key add -
wget -q https://www.virtualbox.org/download/oracle_vbox.asc -O- | sudo apt-key add -
Обновляем список пакетов:
Устанавливаем пакет для модулей ядра таких как vboxdrv и vboxnetflt:
sudo apt-get install dkms
Устанавливаем VirtualBox:
sudo apt-get install virtualbox-5.2
После того как VirtualBox установится, нам нужно добавить нашего пользователя в группу vboxusers:
sudo usermod -a -G vboxusers `whoami`
Создание вируальной машины
В главном окне нажимаем “Создать”.
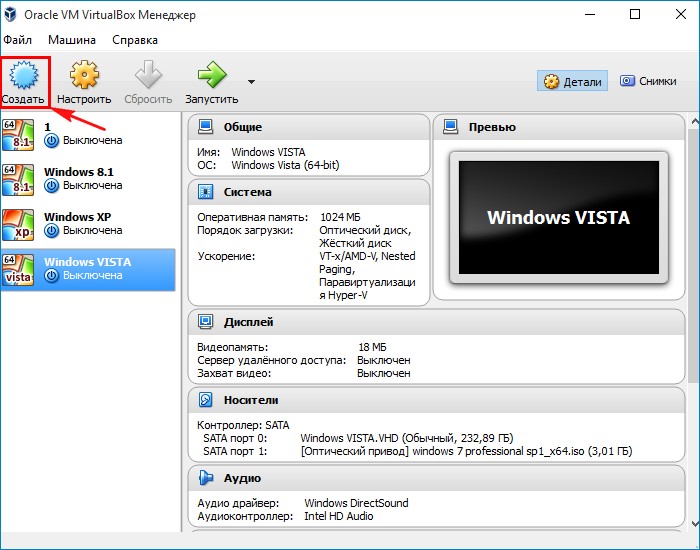
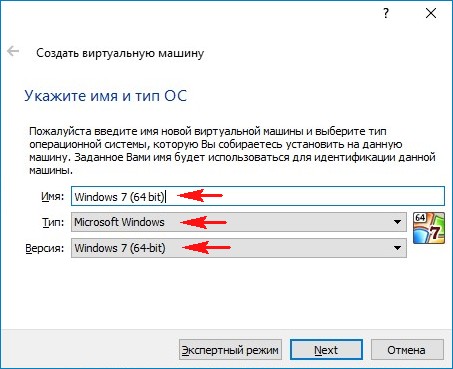
Даем имя и выбираем тип и версию системы в соответствии с тем, какую систему мы будем загружать
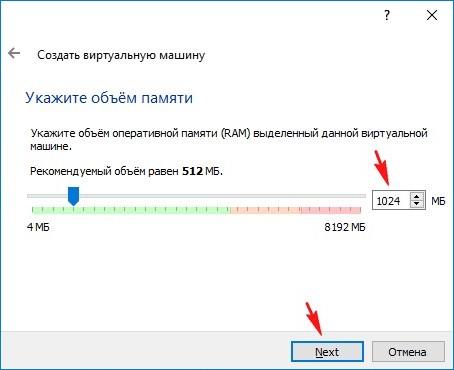
Выделяем необходимое количество оперативной памяти. Для Windows 10 я ставлю не меньше 2048 Мб.
Выбираем “Использовать существующий виртуальный диск” и нажимаем на кнопку проводника
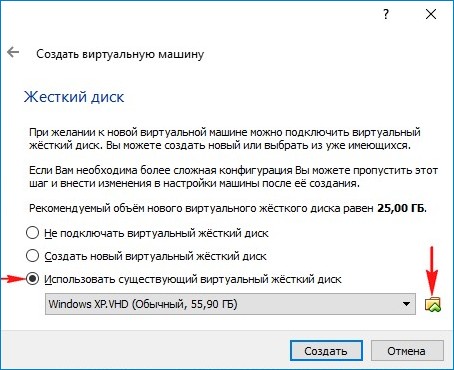
В проводнике находим нужный нам образ системы. Выделяем, нажимаем “Открыть”.

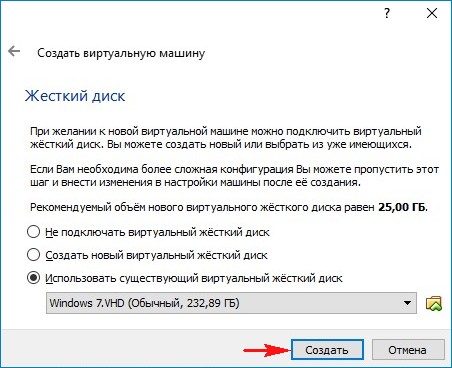
Нажимаем “Создать”.
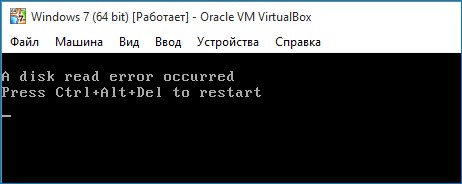
Виртуальная машина создана, но при запуске скорее всего выдаст ошибку при загрузке.
Исправление загрузчика
Это решение с исправлением загрузчика относиться только к MBR дискам и системам. С исправлением загрузчика в GPT еще не сталкивался, если будут проблемы придется дополнить заметку.
Чтобы исправить загрузчик нам нужно загрузиться в iso-образа и войти в среду восстановления.
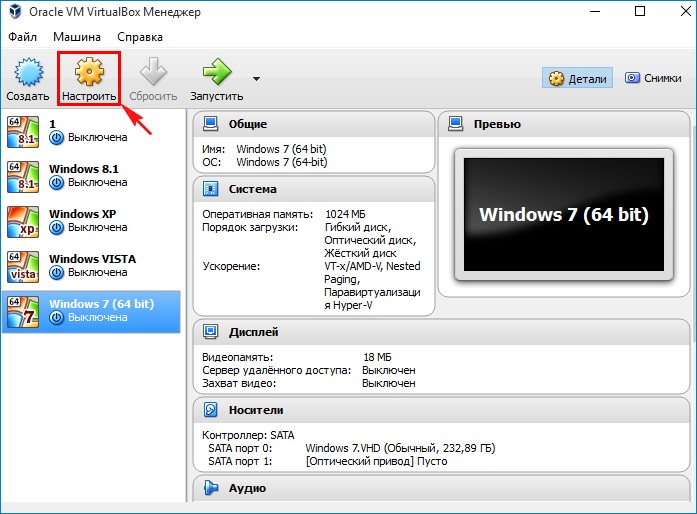
Для этого нажимаем “Настроить”
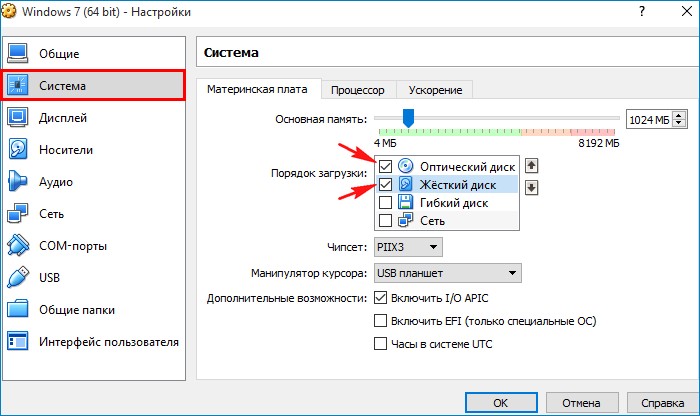
На вкладке «Система» стрелочками меняем порядок загрузки, первым устройством выставляем — Оптический диск, а вторым — Жёсткий диск. Нажимаем “Ок”.
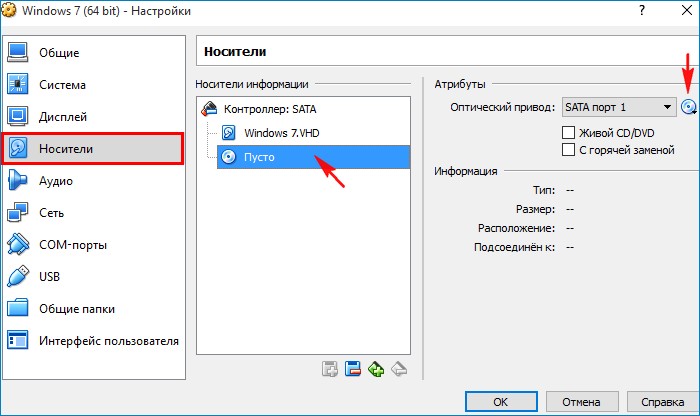
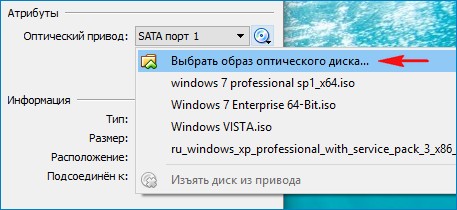
На вкладке “Носители” подключаем iso-образ. Выбираем пустое поле и нажимаем на значок диска.
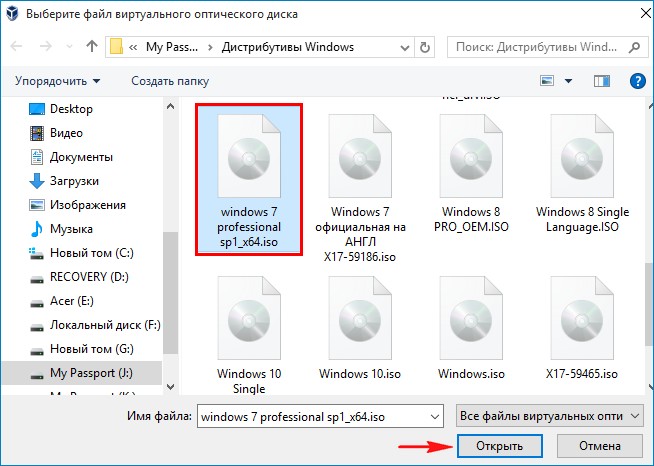
Нажимаем “Выбрать образ оптического диска” и выбираем iso-образ Windows. Во избежание конфликтов, той же версии Widows, как и система, которую мы пытаемся реанимировать.
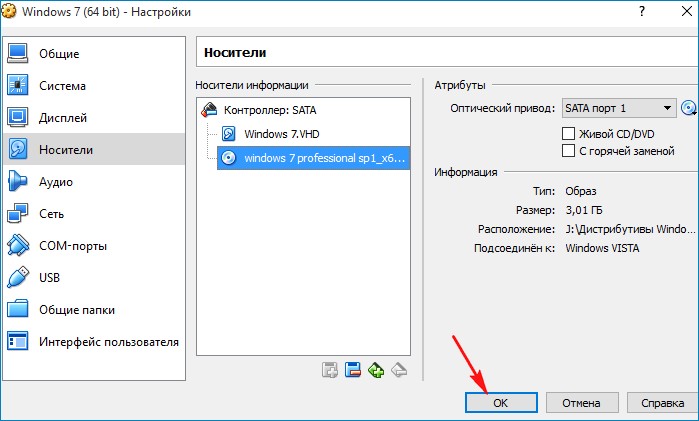
Настройка VirtualBox завершена. Нажимаем “Ок”, тем самым сохраняем настройки.
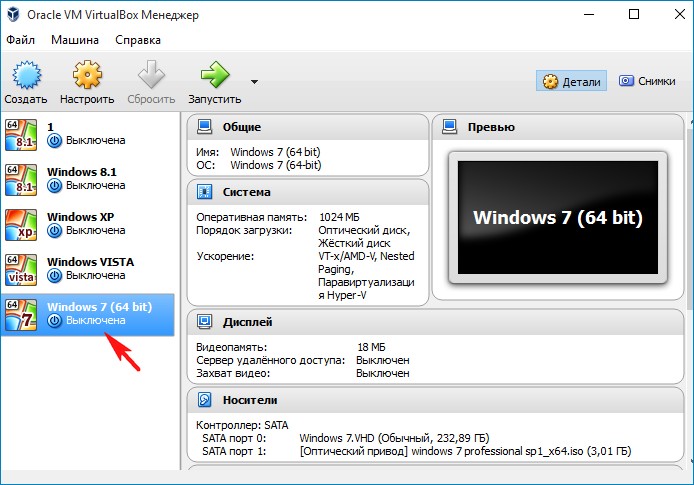
Запускаем виртуальную машину.
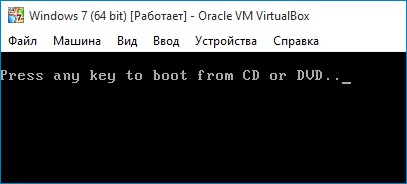
На предложение загрузится с CD соглашаемся и нажимаем любую клавишу. После этого система загрузиться с нашего iso-образа.
После загрузки нажимаем Shift+F10, чтобы открыть окно командной строки.

Вводим команды:
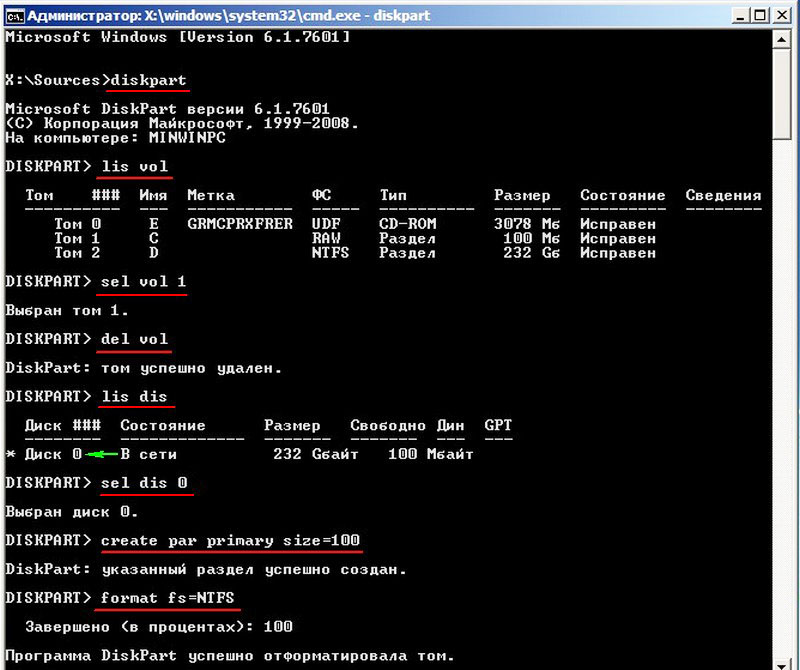
- diskpart
- lis vol — выводим все разделы жёсткого диска или дисков (если их несколько) в список.
- sel vol 1 — в моем случае Том 1, это скрытый раздел System Reserved (Зарезервировано системой) размер 100 Мб — отвечающий за загрузку Windows 7, он некорректен (файловая система RAW) и его нужно удалить, а затем создать заново.
- del vol — удаляем некорректный раздел образуя нераспределённое пространство на жёстком диске.
- lis dis — выводим список дисков подключенных к компьютеру.
- sel dis 0 — выбираем единственный Диск 0.
- create par primary size=100 — создаём заново скрытый раздел System Reserved (Зарезервировано системой) размер 100 Мб.
- format fs=NTFS — форматируем его в файловую систему NTFS.
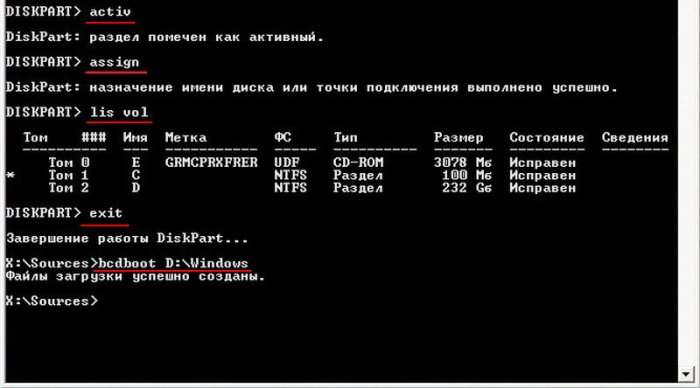
- activ — делаем активным.
- assign — присваиваем букву.
- lis vol — выводим все разделы накопителей подключенных к компьютеру в список.
- exit
- bcdboot D:\Windows — создаём заново файлы загрузки на скрытом разделе System Reserved для Windows, так как буква диска операционной системы в среде восстановления (D:)).
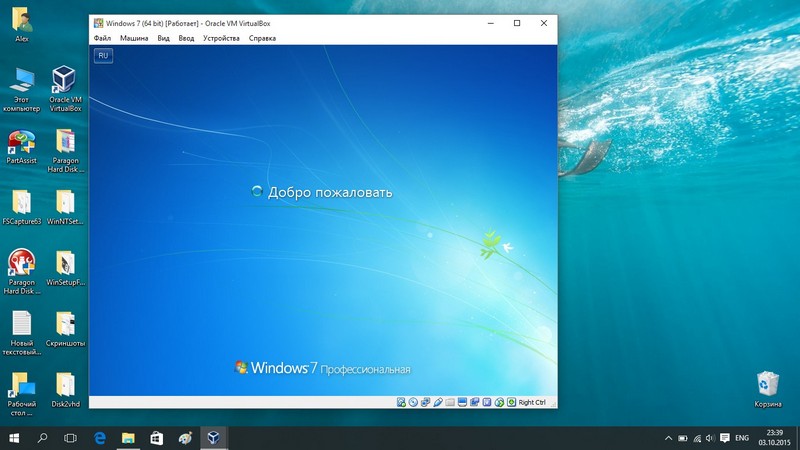
Выходим из командной строки, выключаем виртуальную машину, в настройках меняем порядок загрузки, как мы это делали раньше, только теперь первым делом ставим Жесткий диск, также можно удалить iso-образ из Оптического диска. Загружаемся уже не с iso-образа. Наша Windows должна успешно загрузиться.
Возможные ошибки
Ошибка при удалении защищенного раздела
Иногда при попытке удаления тома raw возникает ошибка “память не может быть read”. Это происходит, если мы пытаемся удалить защищенный раздел в помощью команды del vol. Disk2vhd копирует только выбранный нами раздел, но сохраняет также и структуру всего диска.
Такая ошибка возникает, если мы решим удалить защищённый раздел с помощью команды del vol. Disk2vhd копирует только выбранный нами раздел,но сохраняет структуру всего диска. RAW, это отсутствие файловой системы раздела, но так как ID разделов Disk2vhd сохраняет, нужно действовать немного по-другому. В командной строке вводим команды:
- diskpart
- lis dis — выводит список физических дисков
- sel dis 0 — выбираем основной жёсткий диск
- lis par — показ всех разделов выбранного диска
- sel par 3 — выбираем третий(в нашем случае третий, может быть другой раздел
- del par override — удаляем раздел, для удаления раздела ESP и MSR или раздела OEM-изготовителя ноутбука, необходимо указать параметр override
Далее действуем также, как описано выше — восстанавливаем загрузчик:
- lis dis — выводим список дисков подключенных к компьютеру.
- sel dis 0 — выбираем единственный Диск 0.
- create par primary size=100 — создаём заново скрытый раздел System Reserved (Зарезервировано системой) размер 100 Мб.
- format fs=NTFS — форматируем его в файловую систему NTFS.
- activ — делаем активным.
- assign — присваиваем букву.
- lis vol — выводим все разделы накопителей подключенных к компьютеру в список.
- exit
- bcdboot D:\Windows — создаём заново файлы загрузки на скрытом разделе System Reserved для Windows, так как буква диска операционной системы в среде восстановления (D:)).
После этого из командной строки, выключаем виртуальную машину, в настройках меняем порядок загрузки,как мы это делали раньше, только теперь первым делом ставим Жесткий диск, также можно удалить iso-образ из Оптического диска. Загружаемся уже не с iso-образа. Наша Windows должна успешно загрузиться.
Синий экран при запуске виртуальной машины
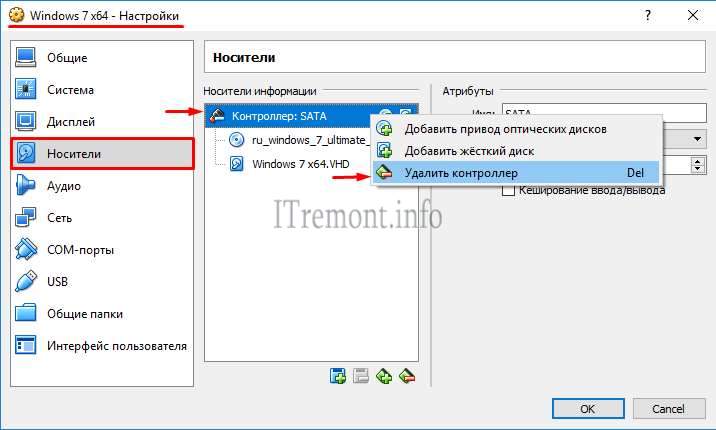
Иногда после восстановления загрузчика Windows не загружается и мы видим синий экран с ошибкой 0x0000007B. Это случается из-за того, что ваша система, которую теперь мы пытаемся запустить на виртуальной машине работала к контроллером IDE, а не SATA. Выключайте виртуальную машину, заходите в Настройки -> Носители. Выбирайте контроллер SATA и удаляйте его.
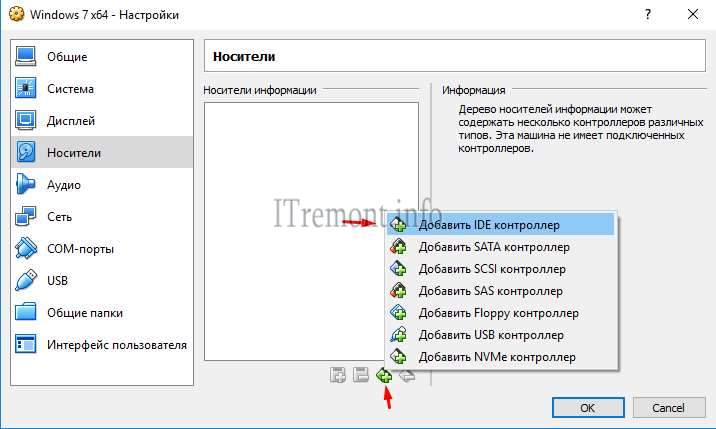
Затем добавляйте контроллер IDE.
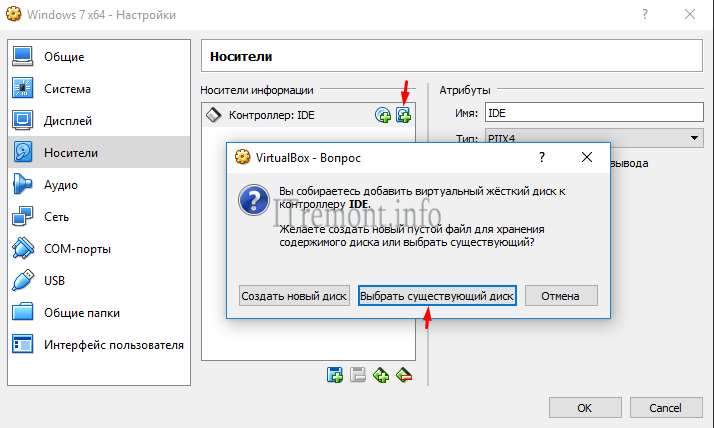
И прикрепляйте к нему наш виртуальный образ.

Запускаем виртуальную машину и радуемся.
Ошибка аппаратное ускорение (VT-x AMD-V) недоступно в вашей системе
Чтобы исправить эту ошибку нужно убедиться, что ваш процессор поддерживает апаратную виртуализацию. Для этого перезагружаемся и заходим в биос. Там ищем пункт, связанный с Virtual, Virtual mode или Virtualization. В некоторых версиях биос он находится на вкладке Advanced в пункте CPU Configuration и называется Secure Virtual Machine Mode, в других на вкладке Advanced BIOS Features, но он может называться по-другому. Напротив этого пункта нужно перевести переключатель из режима Disabled в режим Enabled. Сохраняем изменения и выходим из BIOS.
Если вы не нашли нужного пункта в BIOS, и не знаете поддерживает ли ваш процессор аппаратную виртуализаци, попробуйте программу SecurAble. Она не требует установки, скачиваете, запускаете и в третьем столбце видите либо YES, значит виртуализация поддерживается и она уже включена, либо LOCKED, значит виртуализация поддерживается, но заблокировна в BIOS и нужно ее включить, либо NO, в этом случае аппаратная виртуализация не поддерживается.
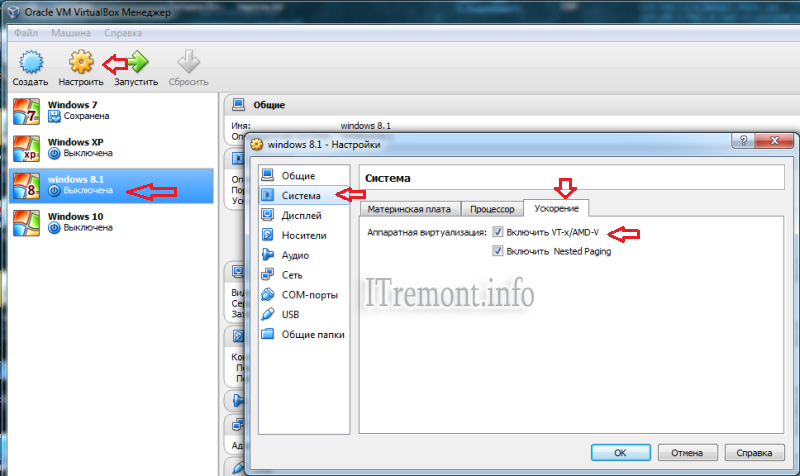
Загружаемся, открываем VirtualBox и в настройках виртуальной машины находим
Настройки -> Система -> Ускорение И, если пункт VT-x AMD-V не отмечен галочкой, отмечаем и нажимаем ОК.
Запускаем виртуальную машину.
Настройка виртуальной машины
Дополнения гостевой OC: общие папки и общий буфер обмена
Теперь осталось установить “Дополнения гостевой ОС”, после их установки VirtualBox настроит все драйвера и появится возможность переходить в “Режим полного экрана” и создавать общие папки и настроить общий буфер обмена с машиной хостом.
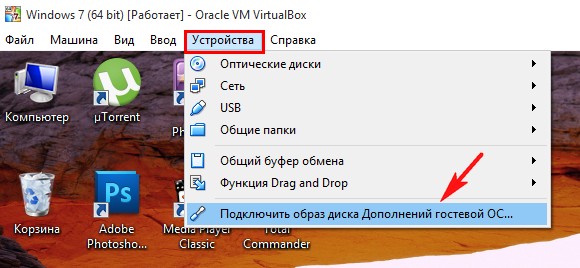
После того, как мы нажмем “Подключить образ диска Дополнения гостевой ОС” в CD приводе виртуальной машины появится диск с дополнениями. Нужно его открыть и установить программное обеспечение, которое на нем находится. Во время установки могут появится предупреждения о несовместимости драйверов. Везде соглашайтесь с установкой. После этого диск можно “изъять”. Чтобы дополнения заработали виртуальную машину придется перезапустить.
Установку Guest Additions (Дополнения гостевой ОС) на виртуальных машинах Linux удобнее выполнять через пакетный менеджер, а не через образ диска. Запустите терминал и установите:
sudo apt-get install virtualbox-guest-x11
sudo apt-get install virtualbox-guest-utils
Затем перезагрузите гостевую операционную систему.
Общий буфер обмена
Чтобы включить общий буфер обмена на запущенной виртуальной машине, в пункте меню Устройства, где мы выбирали “Подключить образ диска Дополнения гостевой ОС0”, выбираем пункт Общий буфер обмена и выбираем Двунаправленный.
Полный экран и настройка экрана
Чтобы настроить режим полного экрана или чтобы экран гостевой машины соотвествовал экрану хост машины, на запущенной виртуальной машине выбираем Вид и выбираем Подгонять размер экрана гостевой ОС для того, чтобы подогнать разрешение экрана виртуальной машины под разрешение экрана вашей хост машины для комфортной работы. Там же можно выбрать Режим интеграции дисплея или Полноэкранный режим в зависимости от ваших нужд.
Общие папки
Чтобы удобно обмениваться файлами между хост и гостевой машинами настроим общую папку. Переходим в меню Устройства -> Общие папки -> Настроить общие папки. Значком + добавляем общую папку и в открывшемся окне проводника выбираем путь к папке, отмечаем галочками Автоподключение и Создать постоянную папку. Нажимаем сохранить, чтобы закрыть оба окна и, если и хостовая и гостевая машина у вас Windows перезагружаем компьютер, чтобы общая папка была готова к использованию. Файлы в общей папке видны одновременно и на хост и на гостевой машине.
Если хост или гостевая машина у вас Linux, то перед тем как перезагружать компьютер нужно добавить своего пользователя в группу vboxsf, если вы не сделали этого раньше, на этапе установки VirtualBox. На Linux машине используйте команду, где вместо user укажите имя пользователя, от которого вы будете запускать файловый менеджер:
sudo usermod -aG vboxsf user
После этого перезагрузите компьютер.
Если после перезагрузки в гостевой машине Windows не появилась общая папка подключите сетевой диск, который находится по адресу \vboxsvr\имя_папки.
имя_папки — то самое имя, которые Вы дали расшаренной директории.
Оптимизация: VMware OS Optimization Tool
Для виртуальных машин на Windows я использую VMware OS Optimization Tool. Скачиваем архив, распаковываем и запускаем программу на нашей виртуальной машине. Не на хосте.
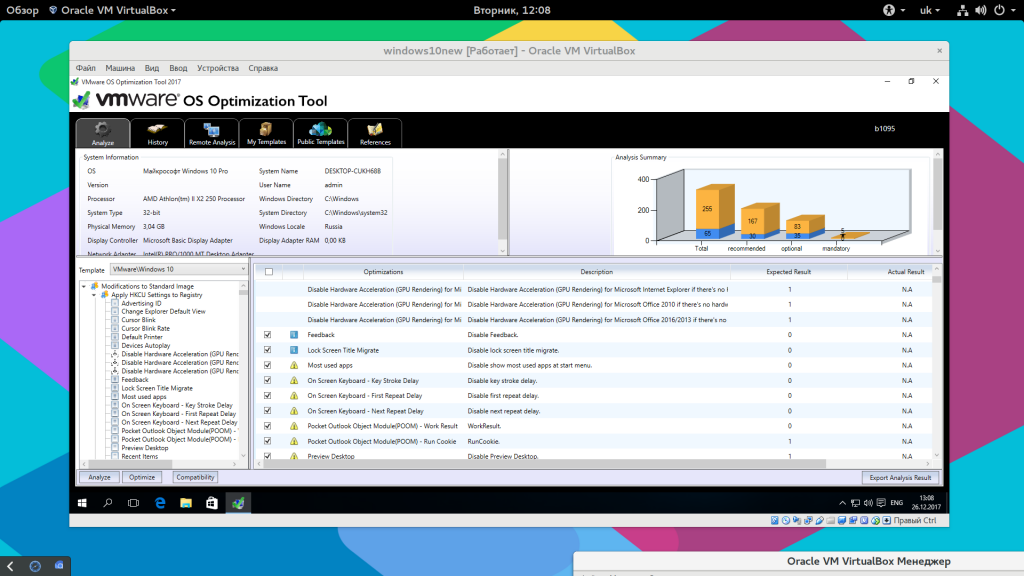
В окне программы мы видим доступные опции для оптимизации. Многие из них включены по-умолчанию. В левом нижнем углу кнопка, чтобы запустить оптимизацию — “Optimize”.
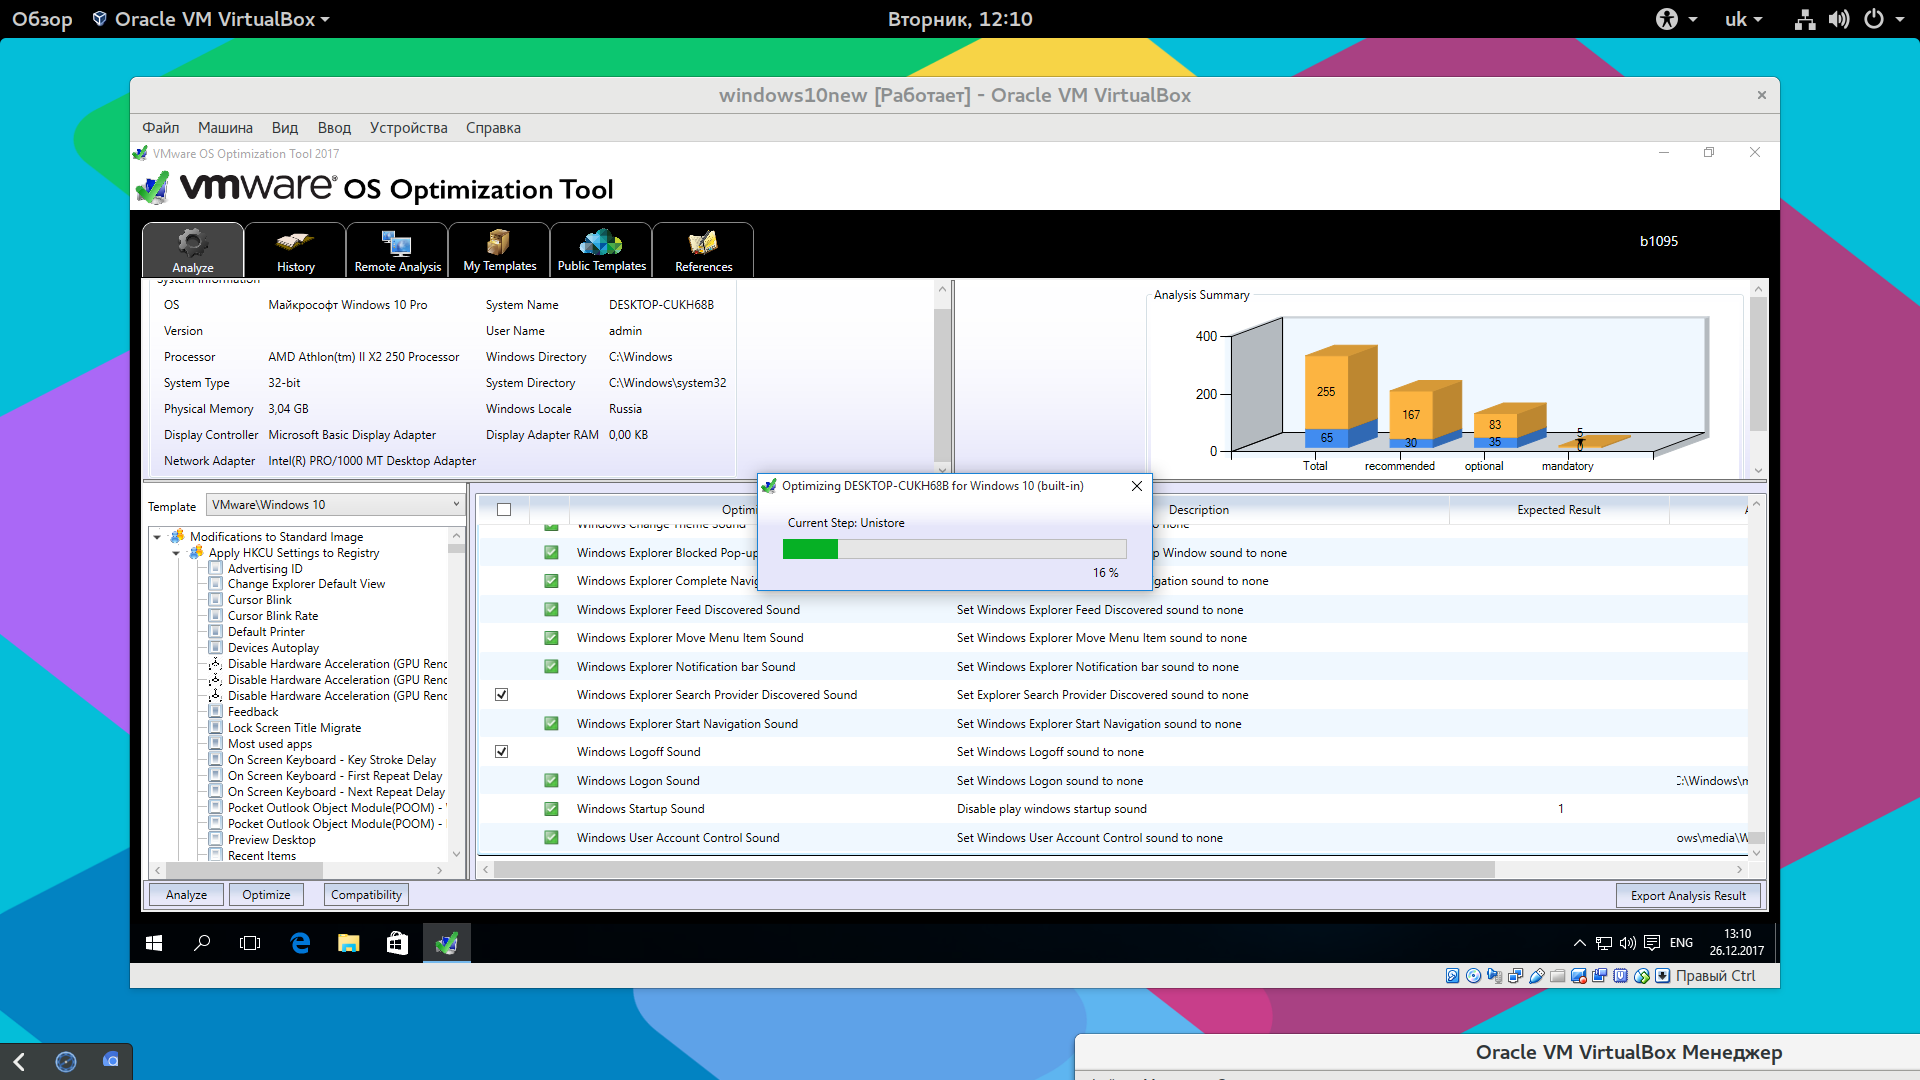
Начнется процесс оптимизации, после завершения которого ваша Windows будет работать значительно быстрее и потреблять меньше оперативной памяти.
Важно Отдельно хочу посоветовать, пробежаться глазами по включенным пунктам оптимизации и снять галочки с тех пунктов, которые вам оптимизировать не нужно, например, один из пунктов отключает OneDrive и если вы собираетесь его использовать на виртуальной машине снимите галочку с соответствующего пункта.
Несмотря на то, что VMware OS Optimization Tool делает бекап реестра и все измененные пункты можно откатить назад, если что-то пойдет не так, рекомендую сделать снапшот (снимок состояния виртуальной машины) прежде чем запускать утилиту — снапшоты использовать куда удобнее и безопаснее, чем восстанавливать бекап реестра.
P.S. Спасибо админу remontcompa.ru за эту статью и вот эту статью, а также remontka.pro за этот материал про создание виртуального диска и вот этот про восстановление загрузчика в Windows 10. За часть скриншотов спасибо losst.ru