
Раз в год Windows 11 получает большие обновления компонентов, которые меняют её версию, а сам процесс обновления больше похож на установку новой ОС, чем простое обновление. Если вы остались недовольны очередным обновлением компонентов, вы можете удалить его и вернуть предыдущую версию ОС.
В этой инструкции подробно о способах выполнить откат Windows 11 до предыдущей версии после установки очередного обновления компонентов, на момент написания — 24H2, но информация актуальна и для других версий.
Возврат к предыдущей версии в «Параметрах»
При выполнении обновления Windows 11 до следующей версии, на системном разделе диска создаётся папка Windows.old, содержащая файлы предыдущей версии системы, и именно она служит для отката. При этом следует учитывать:
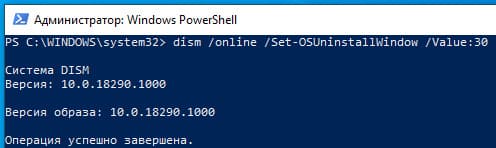
- По умолчанию откат возможен в течение 10 дней после выполнения обновления, после чего файлы удаляются. Вы можете изменить этот период с помощью команды, в командной строке от имени администратора. В примере устанавливается время равное 30 дням:
dism /online /Set-OSUninstallWindow /Value:30

- Если вы вручную удалили папку Windows.old или она была удалена автоматически (например, по истечение срока хранения или сторонними программами очистки), вернуть старую версию можно будет только путём её чистой установки на компьютере.

Если условия выполняются, необходимые файлы для отката есть, то для удаления обновления версии Windows 11 можно использовать следующие шаги:
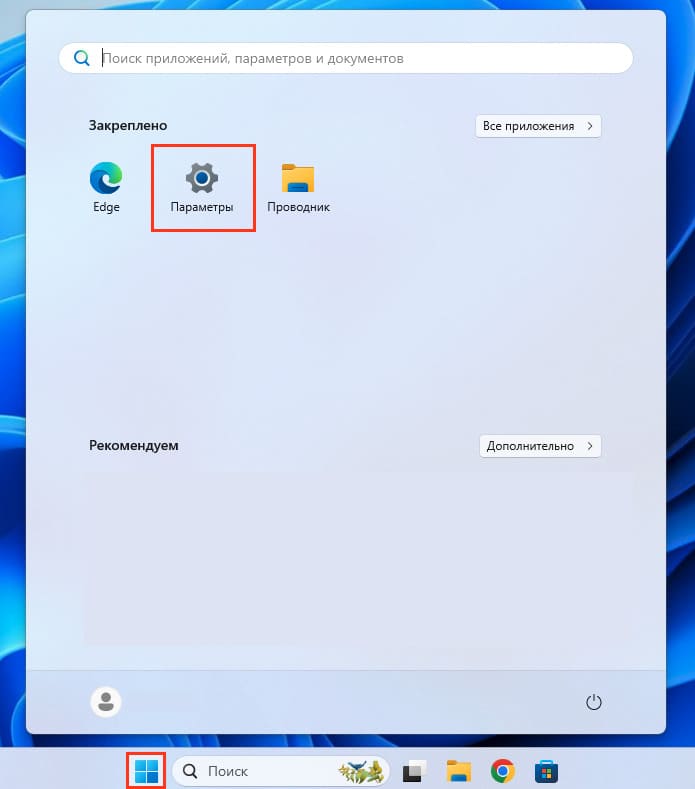
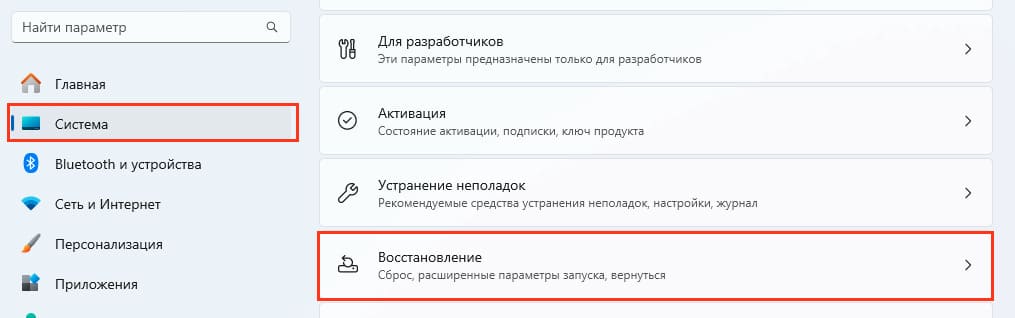
- Откройте «Параметры» (через меню «Пуск» или с помощью сочетания клавиш Win+I), перейдите в раздел «Система» — «Восстановление», либо «Центр обновления Windows» — «Журнал обновлений» — «Восстановление».
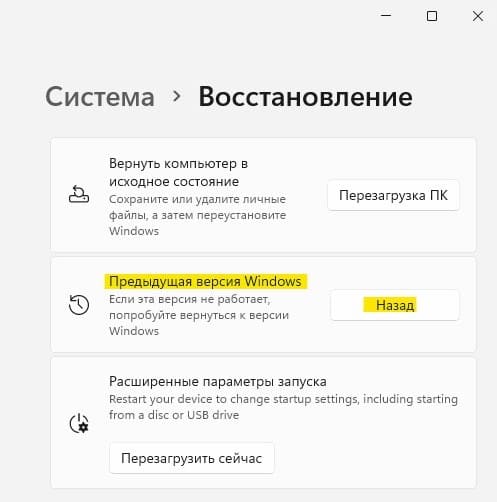
- Нажмите кнопку «Назад» в разделе «Параметры восстановления».

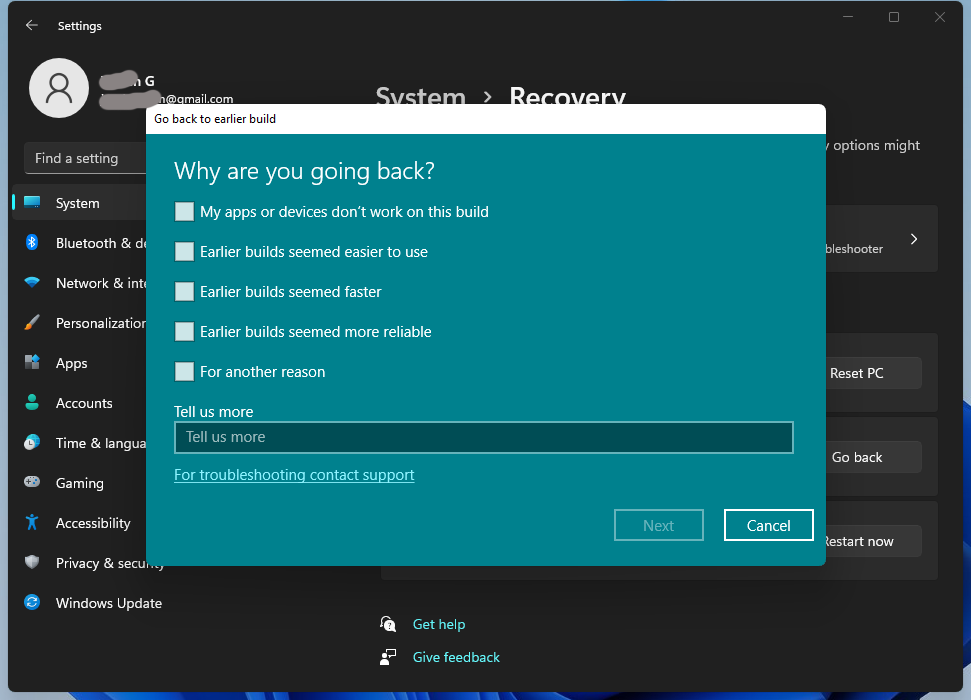
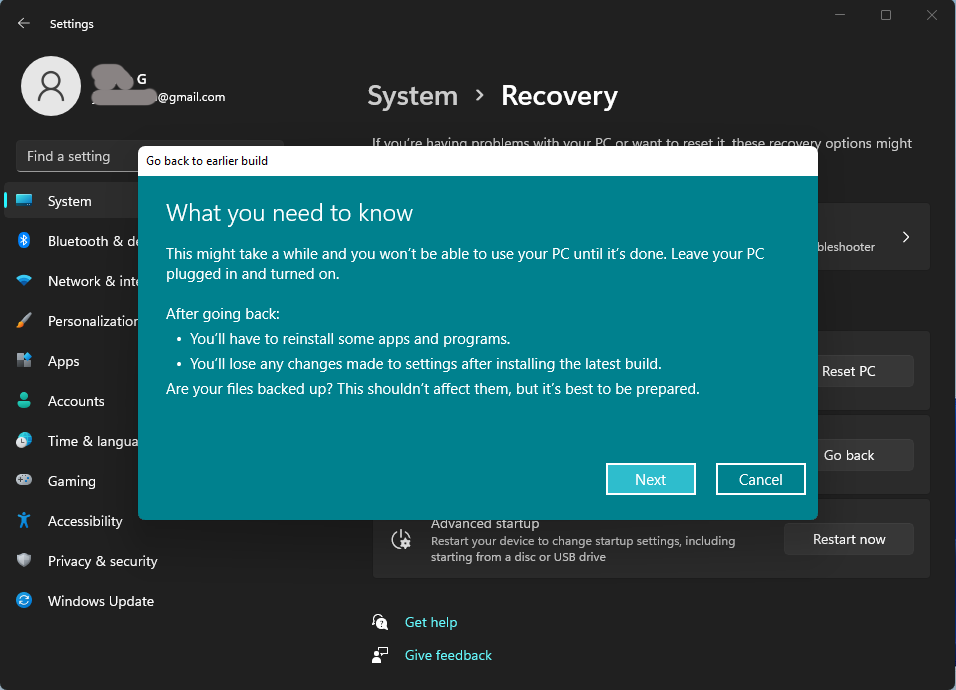
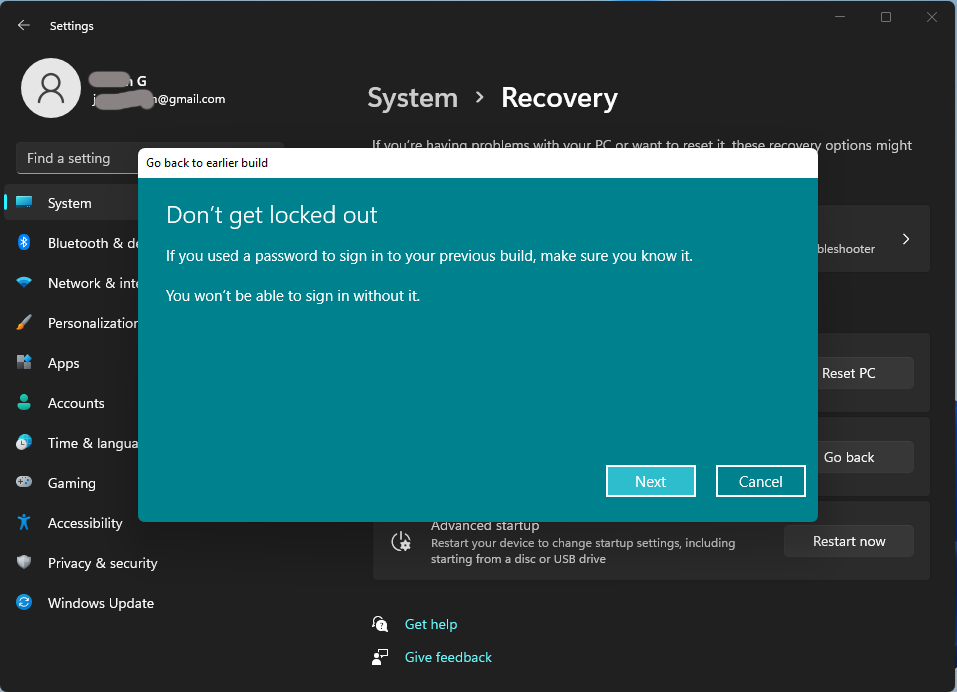
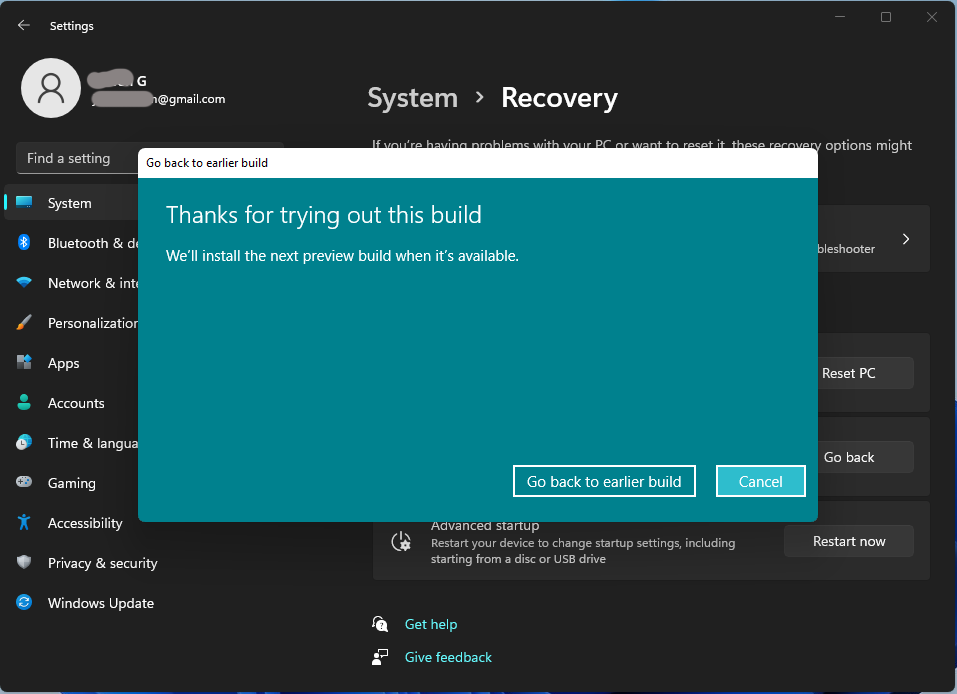
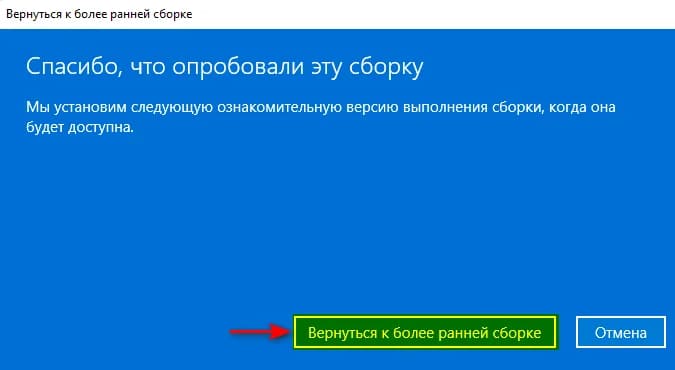
- Вы увидите несколько экранов и предупреждений (прочтите их внимательно), на каждом из которых потребуется нажать «Далее», а в конце, на экране «Спасибо, что опробовали эту сборку» нажать кнопку «Вернуться к более ранней сборке» для подтверждения возврата.


В результате будет инициирован процесс удаления обновления компонентов и возврата к предыдущей версии Windows.
Среда восстановления
Если после обновления Windows 11 до новой версии она перестала запускаться или вход в систему стал невозможен, вы можете попробовать зайти в среду восстановления Windows и уже там выполнить откат.
- Зайдите в среду восстановления Windows. Для этого на экране входа в систему или в уже запущенной системе можно открыть меню завершения работы, после чего, удерживая клавишу Shift, нажать «Перезагрузка». Есть и другие способы входа в среду восстановления.
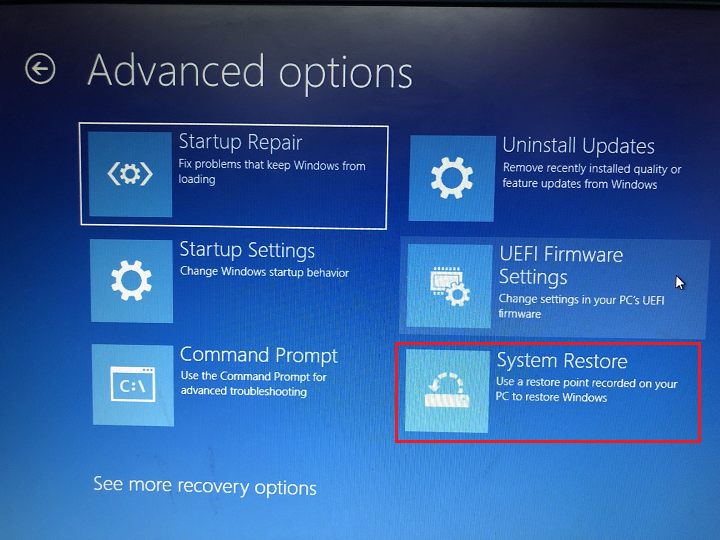
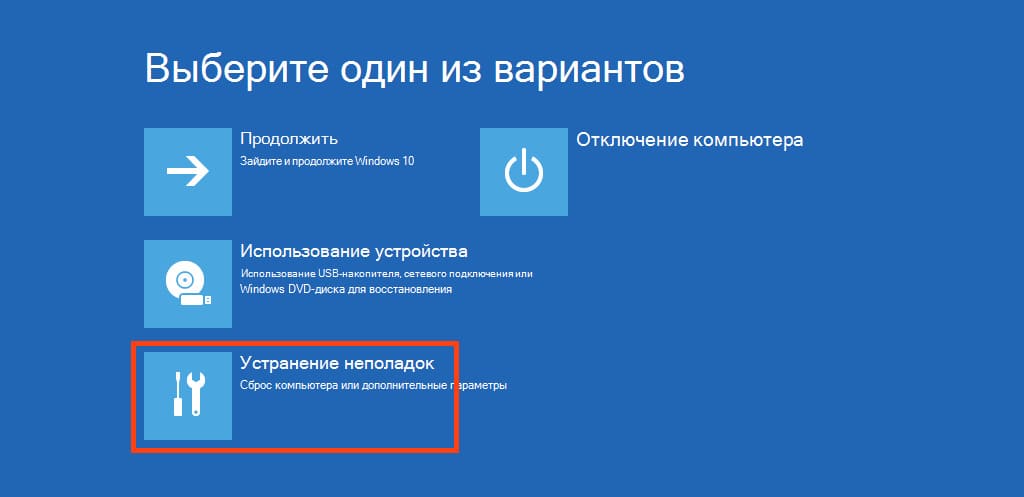
- Перейдите в раздел «Поиск и устранение неисправностей» — «Дополнительные параметры» — «Удалить обновления».

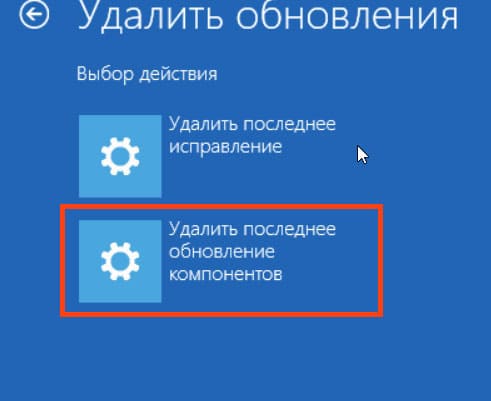
- Выберите опцию «Удалить последнее обновление компонентов».

- Подтвердите удаление обновления компонентов и возврат Windows 11 к предыдущей версии.


Если всё пройдёт успешно, после достаточно продолжительного процесса, в ходе которых компьютер может перезагружаться, вы вернётесь к предыдущей версии ОС.
Командная строка
И ещё один способ, который может помочь, если вход в Windows возможен, но открыть «Параметры» не получается:
- Запустите командную строку от имени Администратора.
- Введите команду
DISM /Online /Initiate-OSUninstall
и нажмите Enter
- Подтвердите перезагрузку вводом «Y».

- Дождитесь завершения восстановления предыдущей версии Windows.


Если файлы, необходимые для возврата к предыдущей версии Windows 11 не сохранились, либо процесс завершается с ошибками, вы можете:
- Скачать ISO файл с нужной версией Windows 11, смонтировать его в системе (правый клик — «Подключить») и запустить setup.exe с него, после чего выполнить процесс установки.
- Выполнить чистую установку с флешки с требуемой версией Windows
К сожалению, в обоих вариантах потребуется переустановка всех ваших программ, они не сохранятся, в отличие от случая использования штатного отката системы.
Инструкция на близкую тему: Способы удалить обновления Windows 11 (как обновления компонентов, так и обычные накопительные обновления).
So, you’ve taken the plunge into Windows 11 24H2 expecting a shiny futuristic OS, and instead, you’re greeted by sluggish load times or irritating app crashes. Perhaps a critical app isn’t playing nice, or the new features just aren’t meaningful to your workflow. Whatever the reason, you want to reverse course and return to the warm, familiar embrace of Windows 11 23H2. You’re not alone—complaints and rollback queries have made this a recurring theme in the Windows community.
Don’t sweat it! Downgrading is entirely possible, and with some careful steps, you can do so without losing your precious data. Let’s unpack three foolproof methods tailored to suit different scenarios.

Method 1: The Magic of the “Go Back” Button
If you’ve recently upgraded to Windows 11 24H2, this method will be your saving grace. Windows stores your old operating system files in a Windows.old folder, and for a short time after updating (usually 10 days by default), you can revert to your previous version with a few clicks. Here’s how:
- Launch Settings: Open the Start Menu and click on the Settings app (gear icon).
- Navigate to Recovery: Once in Settings, select System from the left sidebar and scroll down to Recovery.
- Roll Back: Under the Recovery Options, find the “Go back” section and hit the Go Back button.
- Reason for Downgrade: A pop-up will ask why you’re rolling back—select a reason (e.g., “Performance Issues” or “Apps Not Working”) and click Next.
- Follow Prompts: Click through warnings and advice prompts until you reach the final Go Back button. Click it.
- Sit Tight: Your PC will restart and revert to Windows 11 23H2. Depending on your device, this could take several minutes—patience is key!
Why This Method Rocks:
The process retains most of your files, settings, and customizations; it essentially rewinds the clock. However, it works only if the rollback period hasn’t expired and the Windows.old folder hasn’t been deleted.
Method 2: Windows Recovery Environment (WinRE): The Emergency Hatch
Let’s say you’ve entered the twilight zone where your computer refuses to boot properly after upgrading. In such cases, the Windows Recovery Environment (WinRE) could be your knight in shining armor. By utilizing the advanced recovery tools baked into Windows, you can remove problematic updates—even when the OS itself is stubbornly unresponsive.
Steps to Revert Using WinRE:
- Enter Recovery Mode: Power on your computer. As soon as you see the Windows logo, press and hold the power button until the system shuts down. Repeat this “start-shutdown” cycle two or three times until you’re greeted by the Preparing Automatic Repair screen.
- Access WinRE: Allow Automatic Repair to launch and then select Advanced Options when prompted.
- Uninstall Updates:
- Choose Troubleshoot > Advanced Options > Uninstall Updates.
- Next, click Uninstall Latest Feature Update and confirm your choice.
- Restart and Rollback: After the system processes the uninstallation, restart your computer. Presto! You should now be running Windows 11 version 23H2.
When to Use This:
If the “Go Back” feature isn’t available, or system instability post-upgrade prevents accessing regular settings, WinRE is indispensable. Additionally, it’s especially valuable for troubleshooting systems stuck in boot loops.
Method 3: Clean Installation for a Fresh Start
For those unlucky individuals who are past the rollback grace period or facing severely corrupted files, a clean installation of Windows 11 23H2 becomes your last resort. Yes, it’s the nuclear option, but sometimes starting fresh clears more issues than it creates.
Key Steps for a Clean Install:
- Backup Everything That Matters:
Before anything else, back up documents, photos, or anything you’ll need later. Use external drives or cloud storage solutions like OneDrive or Google Drive. A clean install is akin to hitting the factory-reset button—everything on your drive will be wiped! - Prepare Installation Media:
- Download the official Windows 11 23H2 ISO from Microsoft (or trusted sources).
- Use a tool like Rufus to create a bootable USB drive. Plug in a USB (minimum 8GB), open Rufus, and load the ISO. Ensure you select the appropriate file system and partition scheme—MBR for legacy BIOS or GPT for UEFI-based systems.
- Install Windows 11 23H2:
- Plug in the bootable USB and restart your PC.
- Enter your BIOS/UEFI settings (usually by pressing F2, F12, or DEL during startup).
- Set USB as the primary boot device, save changes, and exit.
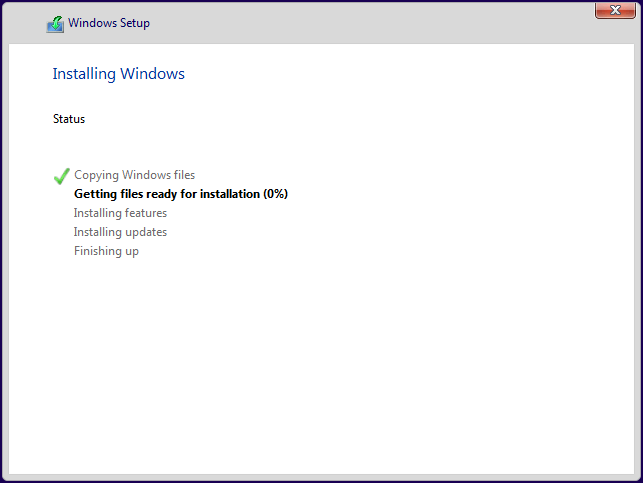
- Windows setup will guide you through the installation process. Choose Custom Installation, and select or format the drive/partition for the OS installation.
- Post-Setup:
- Once the setup is complete, install drivers and restore your backed-up files.
- Install your favorite applications and patch Windows for updates.
Why Clean Install Works:
There’s no cleaner slate than freshly wiping and reinstalling the OS. You avoid remnants of malfunctioning files or settings that could clutter rollback processes. However, this method is best suited to users comfortable handling detailed OS installations and backups.
Wrapping Up the Downgrade Journey
While it might seem scary, downgrading from Windows 11 24H2 to 23H2 can be streamlined if you understand your options. Here’s a quick recap:
- Quick Revert? Use the “Go Back” button within 10 days of upgrading for a seamless rollback.
- Crisis Management? The Windows Recovery Environment (WinRE) is your greatest ally during boot failures or stubborn upgrades.
- Starting Over? A clean installation is your best choice for those who prefer a fresh OS installation or are past the rollback windows.
Remember, upgrading and downgrading operating systems are always accompanied by the risk of data loss or misconfigurations. Taking preventative steps like comprehensive backups and ensuring recovery media is ready can save you a world of headache. For any specific challenges, the WindowsForum.com community is always here to provide help and moral support!
What’s Your Downgrade Experience?
Have you successfully rolled back to Windows 11 23H2? Share your tips, tricks, or frustrations in the comments section below—there’s always strength in numbers. Tech journeys are better traveled together!
Source: Appuals How to Downgrade from Windows 11 24H2 to 23H2 Without Losing Data?
This article released by MiniTool introduces you with three useful methods that enable you to uninstall Windows 11 and go back to the previous Windows 10 operating system (OS). For different situations, you may find a different solution that works for you.
Update: The official Windows 11 is already available since October 5, 2021.
No matter in which way you get current Windows 11, by upgrading from Windows 10 or fresh installation, you can roll back with one of the following solutions.
Tips:
Experience a faster system with MiniTool System Booster – your solution to effortless program uninstallation.
MiniTool System Booster TrialClick to Download100%Clean & Safe
#1 Uninstall Windows 11 from the Recovery Option
If you are with a certain number of days (say 10 days) after upgrading to Windows 11, you are able to uninstall the upgrade and go back to the previous Windows operating system (Windows 10 for example).
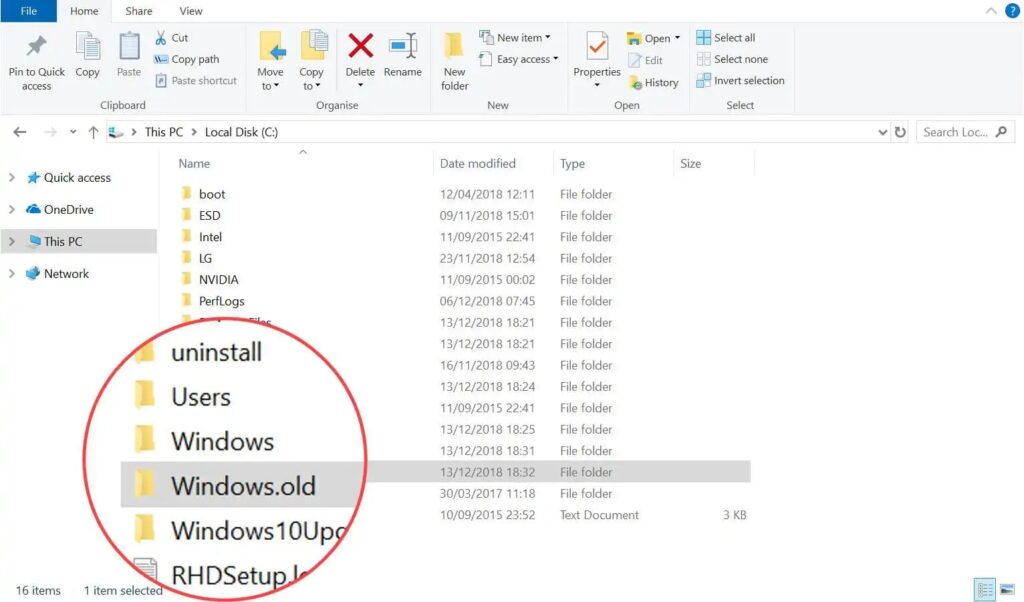
Before you can uninstall the newly installed Windows 11, you need to check for Windows.old and $WINDOWS.~WS two folders, which include everything to revert to the old version of the system. Just go to the root location of the system C drive (the usual location of those 2 folders), if the folders are there, you are ready to uninstall.
Tip: You will need to show hidden items to see the $WINDOWS.~WS folder.
1. Navigate to Start > Settings > System > Recovery.
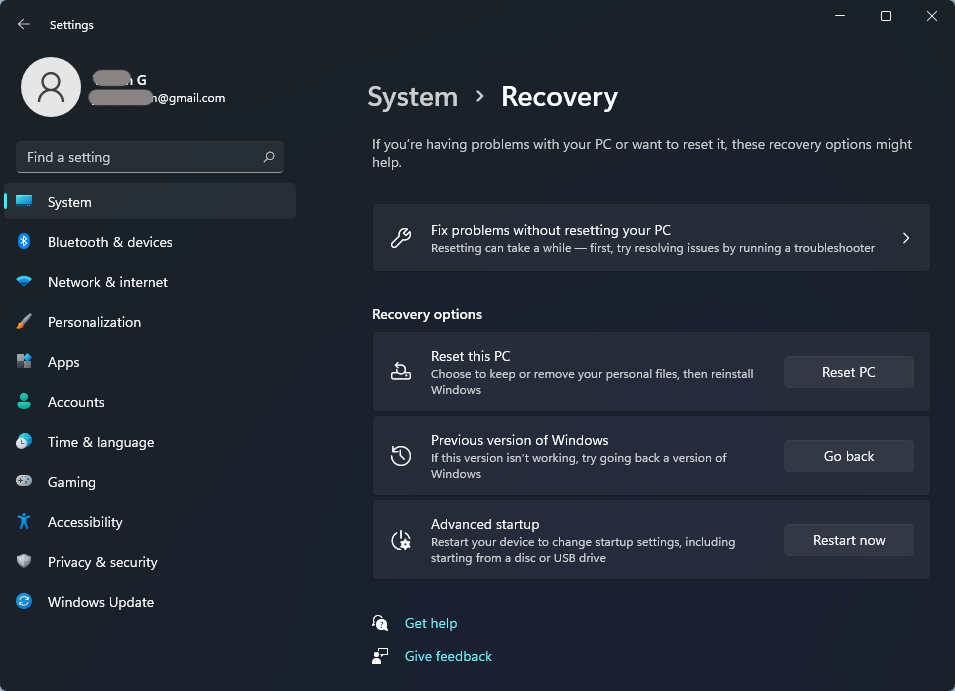
2. If you are still within the reverting period, the Go back button within the Previous version of Windows is available. Just click on it to go on.
3. Select the reason for going back.
4. Before you go back, you will be offered a choice to install updates (if available) to try to fix the possible problem. If you decided to downgrade windows 11 to 10, just click No, thanks to continue.
5. You will be informed about what will happen with your apps and settings after going back to Windows 10. Click Next to proceed.
Tip: It also recommends you back up your files in case of unexpected things happen. To do that, a reliable and fast data backup program like MiniTool ShadowMaker is needed.
MiniTool ShadowMaker TrialClick to Download100%Clean & Safe
6. If you use a different password to sign in to your Microsoft account on the previous version of the system installation, you’ll need that password to sign in after you go back.
7. Finally, click the Go back to Windows 10 button to start the uninstalling process.
If the Get Back button within the Previous version of Windows section isn’t available, it is either you are out of the uninstalling Windows 11 period or there is something else wrong with your computer. for that case, just try the following solutions.
#2 Uninstall Windows 11 from Windows 10 Backup
If you have ever backed up your previous Win10 and still have the system image, you can go back to Windows 10 relying on the OS image. Yet, you need a repair disc to boot your computer into the Windows Recovery Environment to restore the previous version. If you don’t have one yet, you can create one using the Create a system repair disc feature in Backup and Restore.
Besides, you should back up your files in Windows 11 with a backup tool like the previously mentioned MiniTool ShadowMaKer, which is also a system backup and recovery program.
Once your repair disc is ready and your files are backed up, let’s start.
1. Connect the storage device that contains the previous system backup to your computer. If the backup image is on the local hard drive, just skip to the next step.
2. Reboot your PC with the repair disc.
3. On the Setup screen, click Next to go on.
4. Select Repair your computer.
5. Go to Troubleshoot > Advanced options > System Restore.
6. Sign in with your user account.
7. Choose the backup you’d like to restore and click Next.
8. Then, follow the on-screen instructions to finish the recovery process.
After you have successfully restored to your previous Windows 10, you may have to reinstall some apps that you installed after upgrading to Windows 11. Also, you need to restore the files to your machine.
#3 Uninstall Windows 11 by Clean Installing Windows 10
If none of the above solutions available for you. You still have the last option to fresh install Windows 10. Yet, you’ll have to provide the product key and everything on your computer will be erased including settings, apps, as well as files.
There, before starting, you must back up at least your crucial data with a professional data backup tool such as MiniTool ShadowMaker mentioned above.
MiniTool ShadowMaker TrialClick to Download100%Clean & Safe
Step 1. Get Windows 10 Installation Files
First of all, you need to acquire the installation files of the previous Win10, which you can download from the official webpage. You will be asked to provide your product key to download the Windows 10 ISO for free.
Step 2. Fresh Install Windows 10
When the above preparations are done, you can clean install the previous Windows.
- Double-click on the Win10 ISO and double-click the Setup file within.
- On the Setup screen, specify the language, time, and keyboard you prefer. Then click Next.
- Select Install now.
- Input the product key and click Next to go on.
- Choose a hard drive to install Windows 10.
- Accept Microsoft Software License Terms.
- Choose Custom: Install Windows only (Advanced).
- Finally, it will start installing the system.
After installation, you will go through the initial settings of the OS.
В этой статье расскажем, как откатить Windows 11 версии 24H2 к предыдущей версии, если после обновления возникли проблемы с производительностью или совместимостью.
Каждый год Windows 11 получает важные обновления. Одним из таких обновлений является версия 24H2, которая предлагает новые функции, улучшения производительности и исправления ошибок. Однако иногда обновления могут вызывать проблемы, и в таких случаях может потребоваться откат системы к предыдущей версии.
Windows 11 24H2 — это важное обновление операционной системы, выпущенное Microsoft. Оно содержит множество улучшений, включая новые функции интерфейса, оптимизацию работы системы и исправления уязвимостей, что делает его более безопасным и надёжным для пользователей. Однако, как и любое другое обновление, 24H2 может не подойти всем пользователям. Некоторые из них могут столкнуться с проблемами совместимости или производительности.
Скачать оригинальные дистрибутивы Windows 11 с самыми новыми версиями, можно у нас на сайте.
Приобрести оригинальные ключи активации Windows 11 можно у нас в каталоге от 1690 ₽
Когда нужен откат к старой версии ОС?
Откат к предыдущей версии ОС необходим в следующих случаях:
1. Проблемы с производительностью: если после обновления система стала работать медленнее или зависает.
2. Ошибки и сбои: если вы сталкиваетесь с частыми сбоями или ошибками, которые не были ранее.
3. Несовместимость приложений: если важные для вас приложения перестали работать или выдают ошибки.
4. Проблемы с драйверами: если обновление привело к конфликтам с драйверами оборудования.
Как откатить Windows 11 24H2 через Параметры
После обновления Windows 11 на системном разделе создаётся папка Windows.old, в которой хранятся файлы предыдущей версии системы. Эта папка и служит основой для отката. Однако стоит учесть несколько важных моментов:
— Срок отката: по умолчанию вы можете откатиться в течение 10 дней после обновления. После этого файлы будут удалены.
— Изменение срока хранения: вы можете увеличить этот срок до 30 дней, выполнив команду в командной строке от имени администратора:
dism /online /Set-OSUninstallWindow /Value:30
— Удаление папки Windows.old: если вы вручную удалили папку или она была удалена автоматически, вернуть старую версию можно будет только с помощью чистой установки системы.
Если все условия выполнены и необходимые файлы для отката доступны, следуйте этим шагам:
1. Откройте Параметры: используйте меню «Пуск» или нажмите сочетание клавиш Win + I.
2. Перейдите в раздел «Система»: найдите пункт «Восстановление» или откройте «Центр обновления Windows» и выберите «Журнал обновлений» — «Восстановление».
3. Нажмите кнопку «Назад»: в разделе «Параметры восстановления» выберите опцию для возврата к предыдущей версии.
4. Следуйте инструкциям на экране: прочитайте предупреждения и нажимайте «Далее». На последнем экране подтвердите возврат к более ранней сборке.
Что делать, если работа ОС завершается синим экраном (BSOD)?
Если ваша система не загружается и вы сталкиваетесь с синим экраном смерти (BSOD), откат через Параметры будет невозможен. В этом случае вы можете попробовать следующие шаги:
1. Используйте среду восстановления: перезагрузите компьютер и во время загрузки нажмите клавишу F8 или Shift + F8 (в зависимости от модели вашего устройства) для входа в меню восстановления.
2. Выберите «Устранение неполадок»: в меню восстановления выберите «Устранение неполадок», затем «Дополнительные параметры».
3. Выберите «Удалить обновления»: если доступно, выберите опцию для возврата к предыдущей версии Windows.

4. Выберите опцию отката «Удалить последнее обновление компонентов» и подтвердите удаление обновления компонентов. Компьютер выполнит действия и вернет Windows 11 к предыдущей версии.
Если после обновления Windows 11 возникли проблемы, то откат к предыдущей версии может стать эффективным решением. Следуя простым инструкциям, вы сможете вернуть свою систему к более стабильной и надёжной версии.
Не забывайте о важности соблюдения сроков хранения файлов и регулярной резервной копии важных данных. Это поможет вам избежать потери информации и сохранить ценные файлы.
Лицензионный ключ активации Windows 11 от