
Если вы хотите отключить отображение иконки Защитника Microsoft в системном трее панели задач Windows 11 или Windows 10, это достаточно просто.
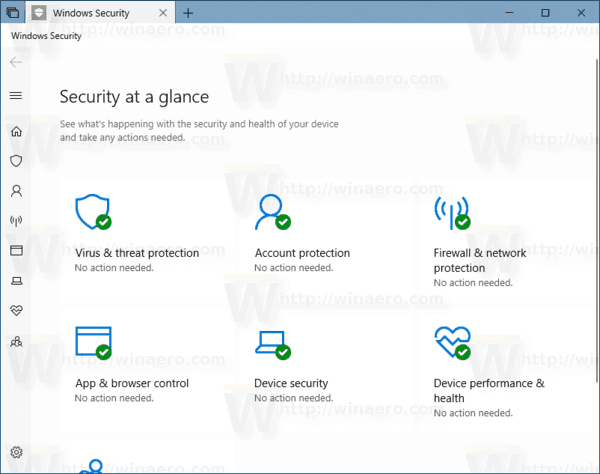
Начиная с Windows 10, значок «Защитника Windows» по умолчанию отображался на панели задач в области в системном трее или в углу переполнения панели задач. Значок Защитника Windows показывает состояние защиты ПК, с его помощью, вы можете открыть интерфейс приложения «Безопасность Windows», с помощью которого, вы можете выполнить сканирование, проверить наличие и удалить обнаруженные угрозы.
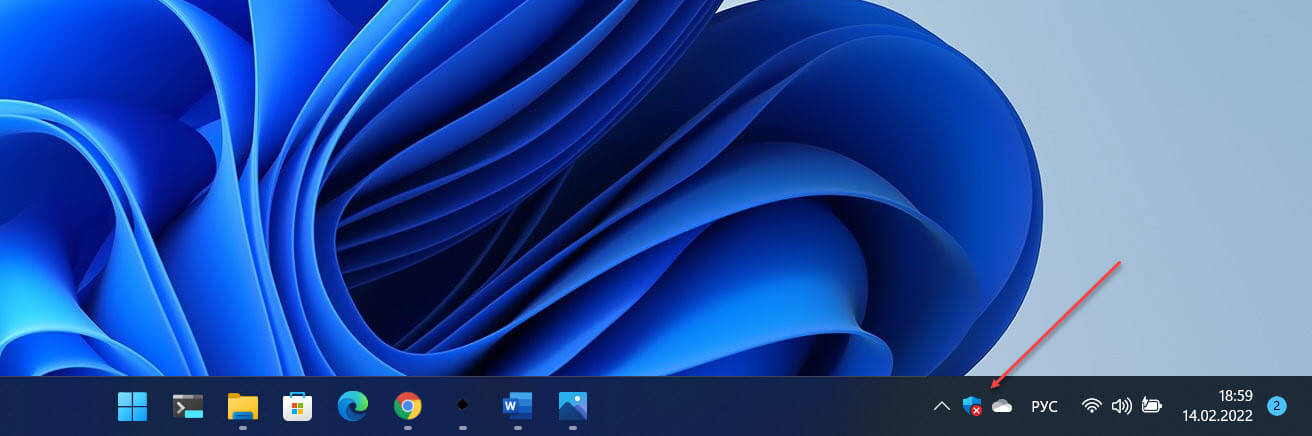
Иконка отображаемая на панели задач Windows 11 находится по следующему пути:
C:\Windows\System32\SecurityHealthSystray.exe
Защитник хорошее дополнение для безопасности вашего устройства, но если вы отключили антивирусную программу «Защитник Windows», вы можете захотеть избавится от иконки приложения защитника в системном трее на панели задач. Вот как это сделать:
Отключить отображение иконки Защитника Windows на панели задач в Windows 11 \ 10
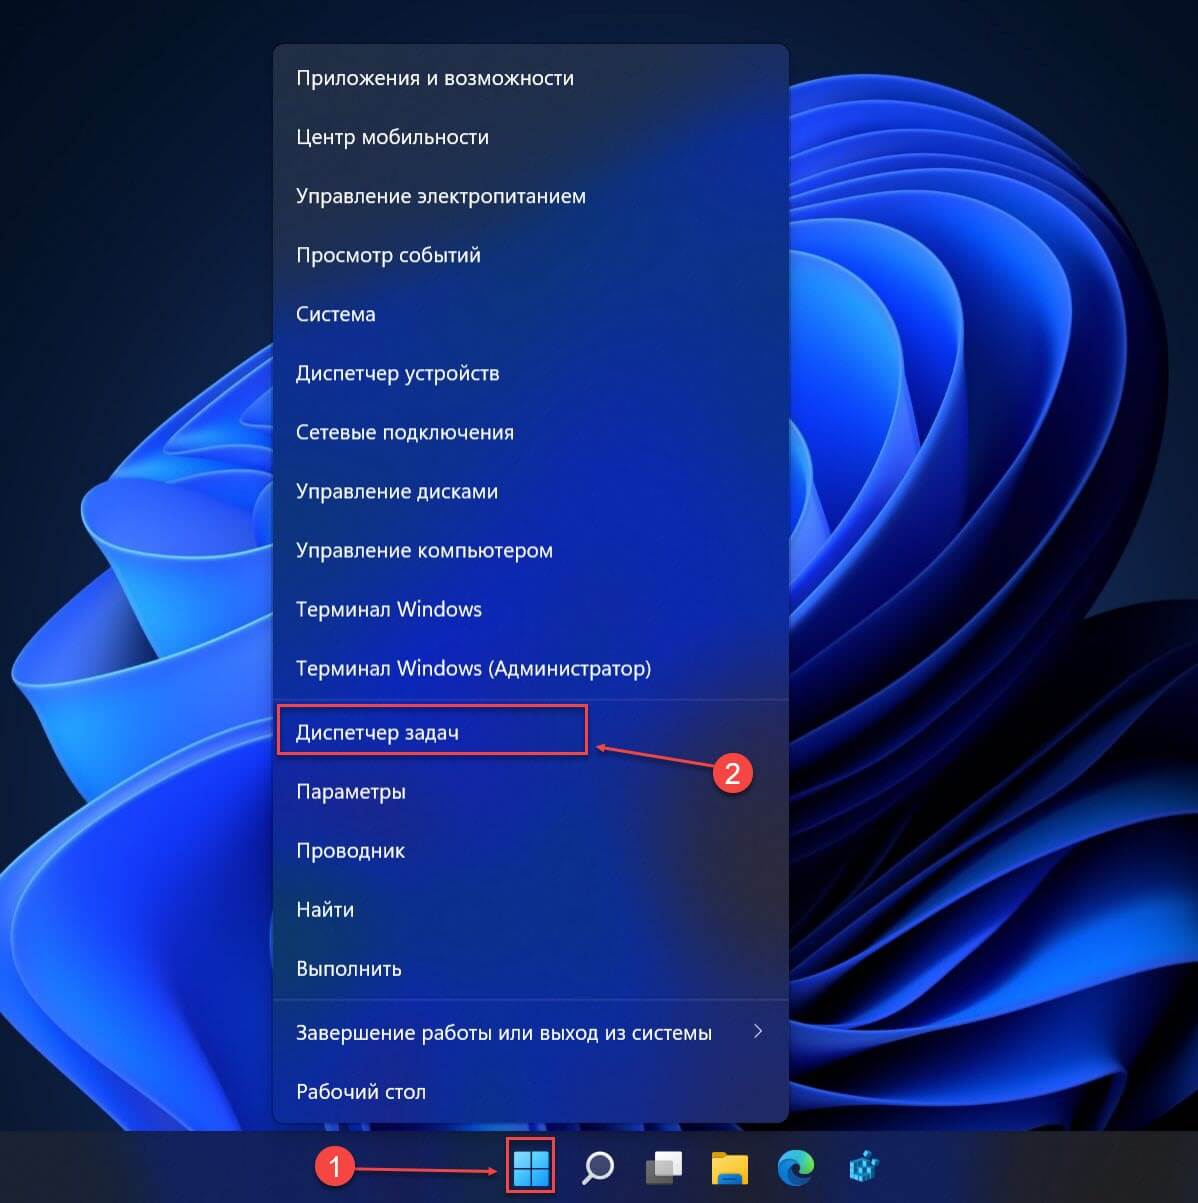
Шаг 1: С помощью меню Win X или любым удобным вам способом откройте «Диспетчер задач».
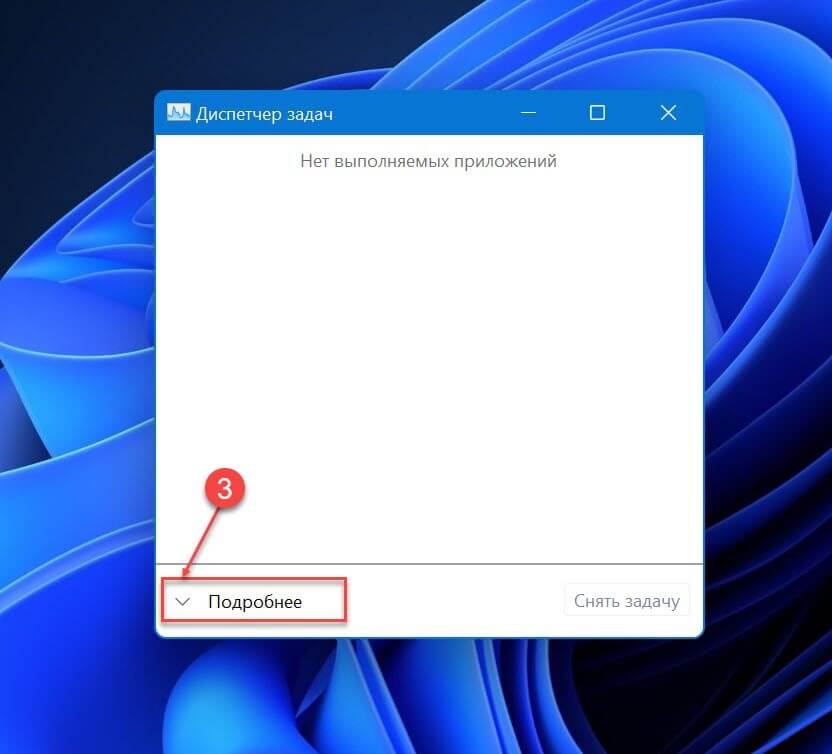
Шаг 2: В открывшемся окне, при необходимости нажмите кнопку «Подробнее».
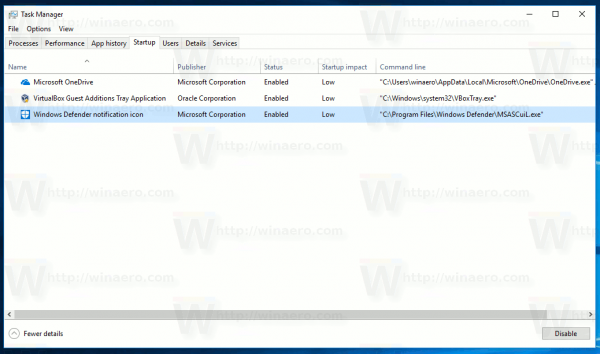
Шаг 3: В «Диспетчер задач» перейдите на вкладку «Автозагрузка».
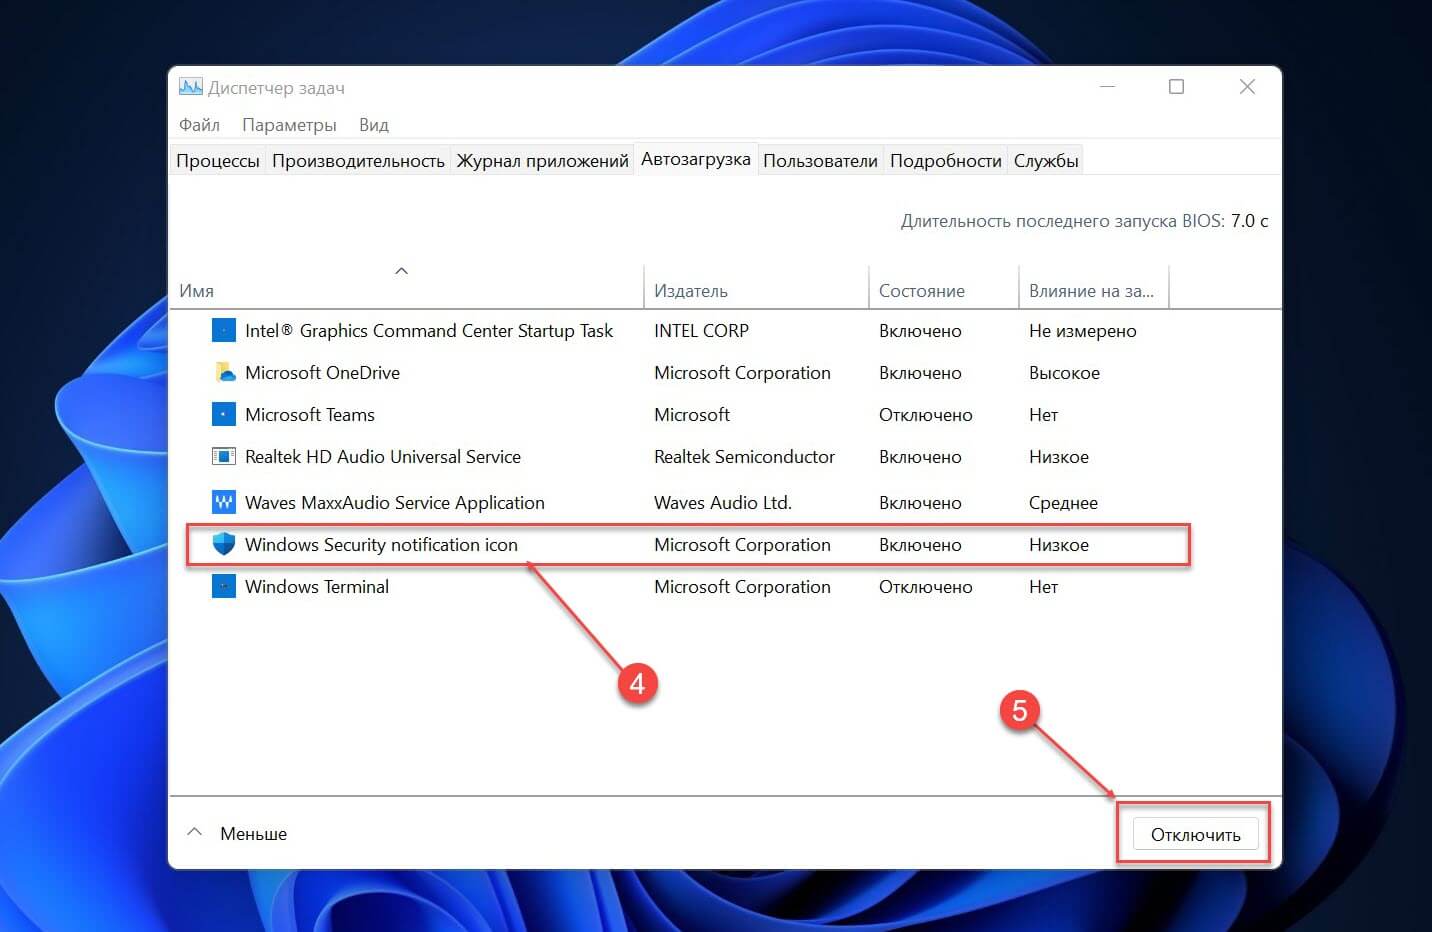
Шаг 4: Выберите приложений найдите запись «Windows Security notification icon» или «SecurityHealthSystray» (в зависимости от версии Windows), кликнув по ней и нажмите кнопку «Отключить». Также вы можете кликнуть на записи правой кнопкой мыши и выбрать в контекстном меню опцию «Отключить».
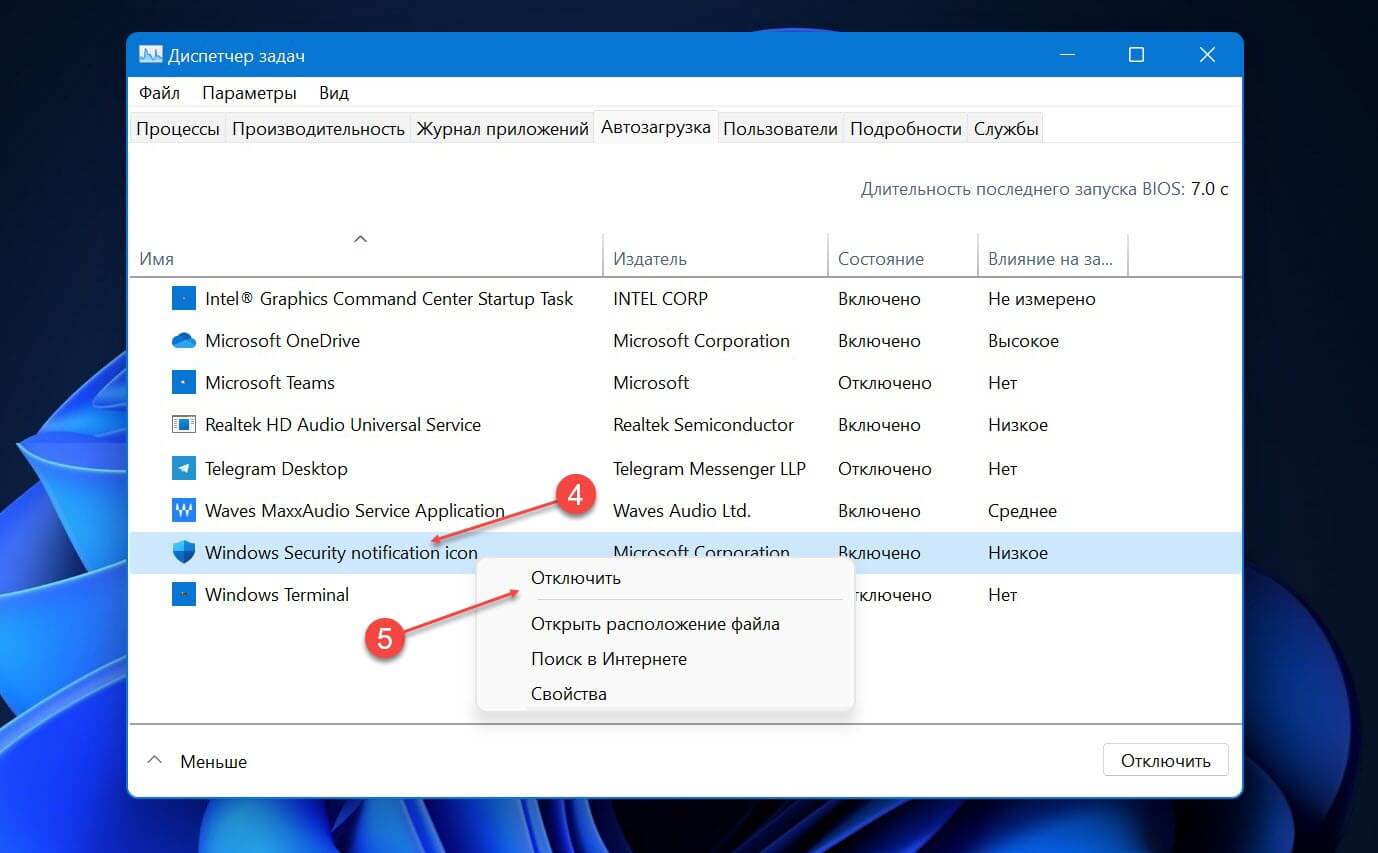
Шаг 5: Перезагрузите компьютер, чтобы изменения вступили в силу. После перезагрузки, или выхода из системы и входа вы избавитесь от значка Центра безопасности Защитника Windows на панели задач.

Если вы когда-нибудь снова увидите иконку Защитника Windows на панели задач в области переполнения, пожалуйста, следуйте данной инструкции снова.
Как скрыть значок Защитника Microsoft с помощью групповой политики
Начиная с Windows 10 версии 1809 существует специальный параметр групповой политики, который позволяет скрывать значок «Защитника Windows» на панели задач. Если вы используете версию Windows 11\10 Pro, Enterprise или Education, вы можете использовать приложение «Редактор групповых политик», чтобы настроить параметр с помощью графического интерфейса редактора следующим образом.
Шаг 1: Откройте Редактор групповых политик (см. как)
Шаг 2: В Редакторе перейдите по следующему пути:
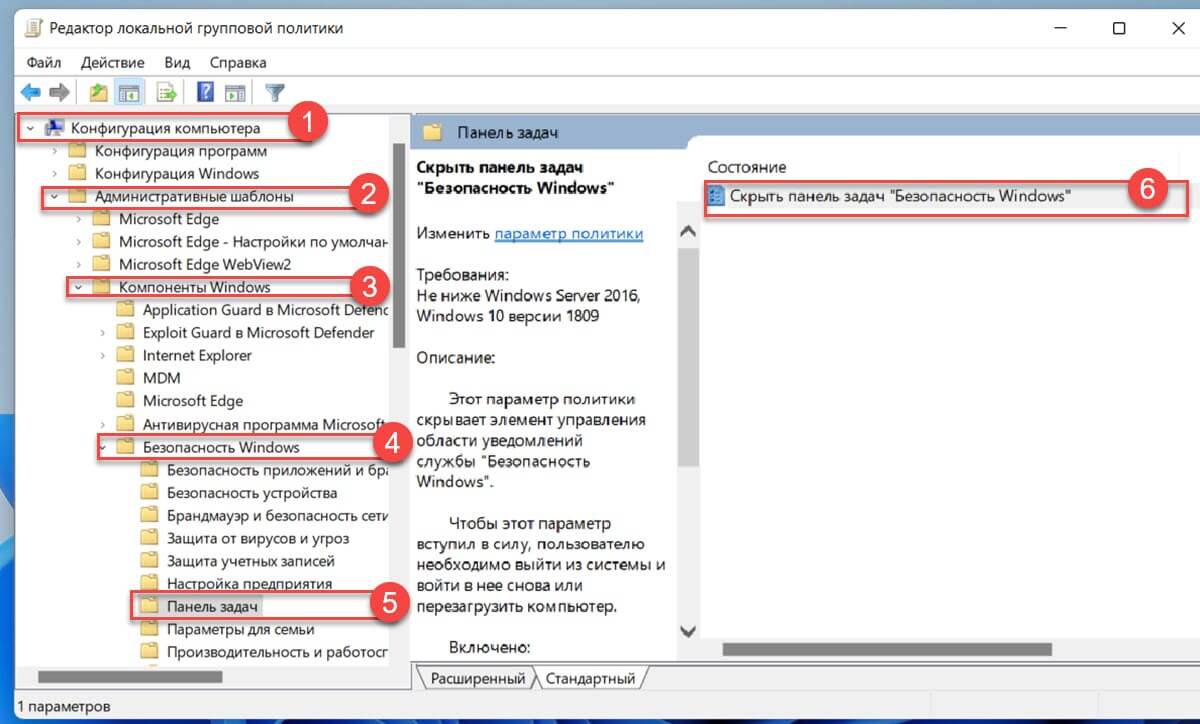
Конфигурация компьютера → Административные шаблоны → Компоненты Windows → Безопасность Windows → Панель задач.
Шаг 5: Здесь найдите параметр политики «Скрыть панель задач «Безопасность Windows», как показано ниже и откройте его для редактирования.
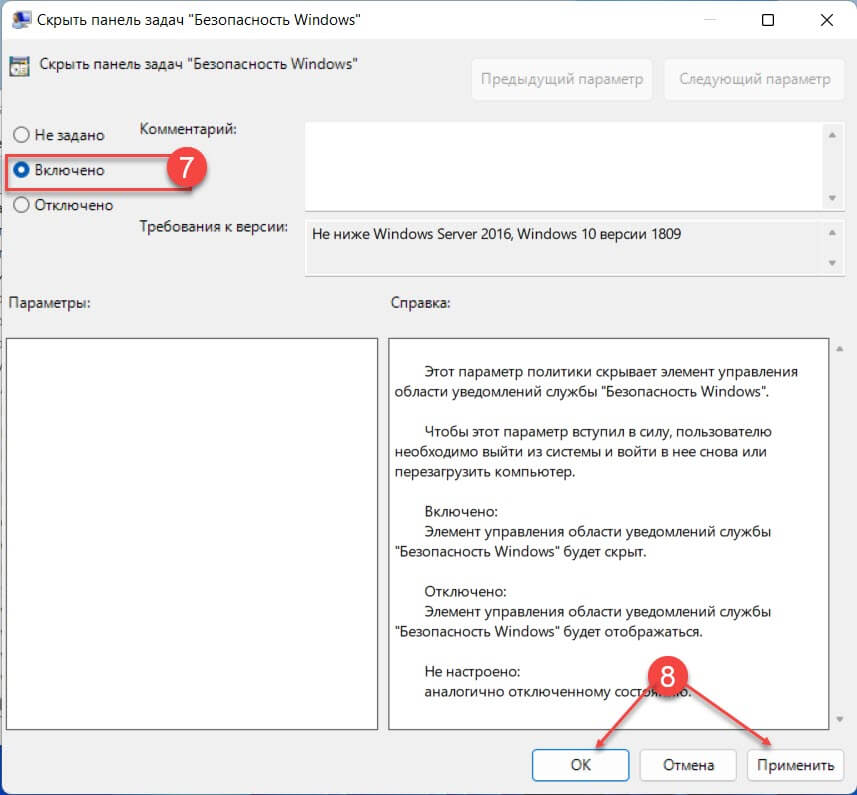
Шаг 5: Измените параметр выбрав вариант «Включено» и нажмите кнопку «Применить» и «ОК».
Шаг 6: Перезагрузите компьютер.
После перезагрузки, значок «Безопасность Windows» не будет отображаться на панели задач.
Если вы используете Windows 11\10 Home или другую версию, которая не включает редактор локальных групповых политик, вы можете применить твик реестра.
Скрыть значок защитника с помощью редактор реестра
Шаг 1: Откройте редактор реестра.
Шаг 2: Перейдите к следующему разделу:
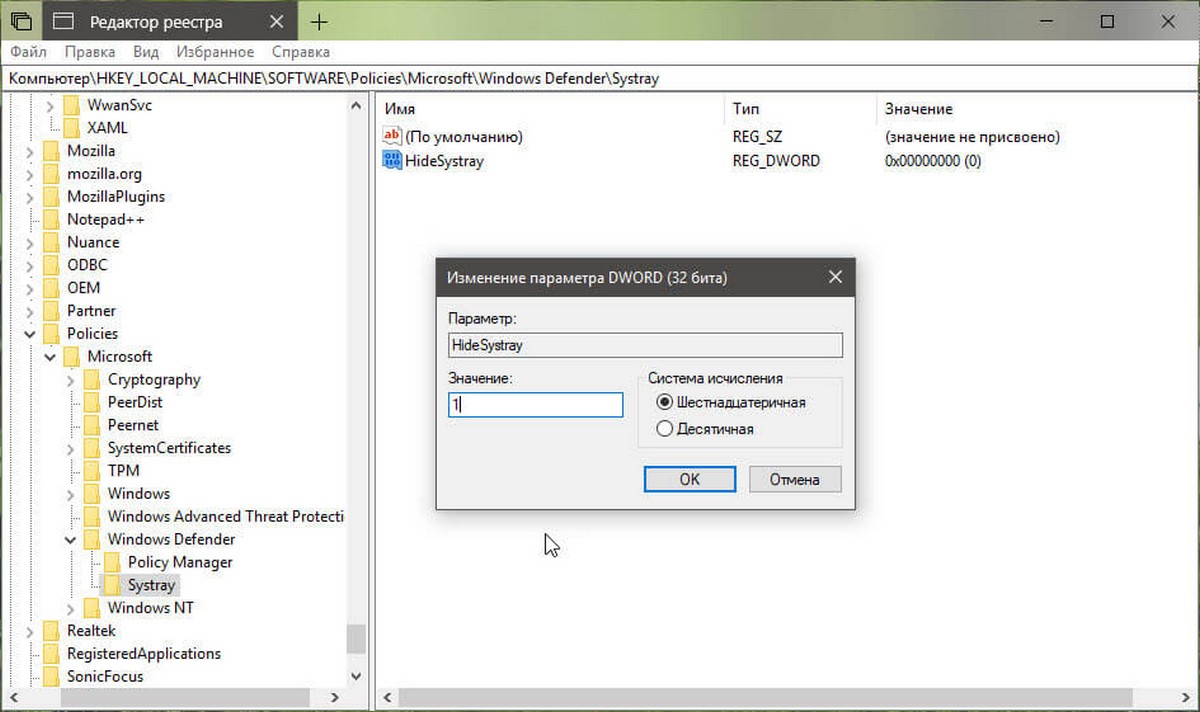
HKEY_LOCAL_MACHINE\SOFTWARE\Policies\Microsoft\Windows Defender\Systray
Если такого раздела нет, просто создайте его.
Шаг 3: Здесь создайте новый параметр DWORD (32 бита) с именем «HideSystray».
Примечание: Даже если вы используете 64-битную Windows , вам все равно нужно использовать параметр DWORD (32 бита).
Шаг 4: Установите значение для параметра с именем «HideSystray»: «1», это позволит отключить отображение значка «Безопасности Windows» на панели задач.
Шаг 5: Чтобы изменения, вступили в силу, необходимо перезагрузить Windows 11\10.
Позже вы можете удалить параметр «HideSystray», чтобы вернуть значок в системный трей.
Все! Если вам известны другие способы, Как отключить иконку Защитника Windows, пожалуйста поделитесь в комментариях ниже.
Вас может заинтересовать: Как в Windows 11 отключить антивирусную программу «Защитник Windows»
Как Отключить Защитник Windows в Windows 10
Want to remove Windows Security System tray icon? This article has everything to help you out. Windows security, the built-in security tool, is a new name of Windows Defender Security Center that comes with Windows 10 October 2018 update (1809). The application serves as a simple straight means to offer advanced control over privacy, the performance of the device and system protection. There is usually a tray icon (that looks like a shield) which allows users to quick-launch the app for use.
Now, in case, to have neat and clean taskbar or for any reason, you decide you want to remove Windows Security System tray icon, here are some methods. After eliminating, you won’t be able to quick-launch Windows Defender, but you can open the same from the Start menu.
Ways to remove Windows Security System tray icon in Windows 11 and 10
Here is how to remove Windows Security System tray icon in Windows 11 or 10 –
Method-1: Using Task manager
This is a simple and generally used method for disabling or removing Windows Security System tray icon.
Step-1: Open Task Manager. You can either right-click on the taskbar and select the Task Manager option or press shortcut keyboard keys Ctrl + Shift + Esc for this.
Step-2: If what opens is the mini-version of task manager, clicking on ‘More details’
Step-3: By default Processes tab will be selected; Click on the Startup.
Step-4: Find the Windows Defender notification icon entry. Right click on the same and choose Disable.
Method-2: Using Regedit.exe
As with many settings, you can disable Windows Security System tray icon by tweaking registry keys as well.
- Access Registry Editor.
- Copy and paste the following path into the address bar to make your way to this key location –
HKEY_LOCAL_MACHINE\SOFTWARE\Policies\Microsoft\Windows Defender Security Center\Systray
- Right click in the right side and select DWORD (32-bit) Value.
- Name the value Hidesystray.
- Set the data to 1.
- Lastly, Restart Windows Explorer.
If you want to restore Windows Security System tray icon sometime later, you can simply delete the value.
Method-3: V Group Policy
You can also remove Windows security taskbar icon through Group Policy. However, note that this feature is available only for Windows 10 version 1809 and later. Here’s how you get rid of the tray icon by this method.
- Open Group policy editor.
- Go to Computer Configuration option on the left pane.
- Select Windows Components.
- Navigate to Windows Security.
- From the options available there, select Systray
- In the Edit policy settings section, you will find Hide Windows Security Systray. Double Click on it.
- Hide Windows Security Systray window will pop open.
- Select ‘Enabled’.
- Finally, Reboot the system.
So you can Remove Windows Security System Tray Icon in Windows 11 or 10 using 3 super easy ways.
That’s all!!!
1) How to Shift Third Party App Icons From Taskbar to System Tray Windows 10
2) How to Restore Old Battery Flyout on windows 10
3) Add Seconds to Taskbar Clock Hours and Minutes in Windows 10
4) Remove Windows Security System Tray Icon in Windows 10
5) Registry Hacks for Start Menu and Taskbar in Windows 10
Последние версии Windows 10 поставляются с приложением под названием Безопасность Windows. Приложение, ранее известное как «Центр безопасности Защитника Windows», было переименовано в Безопасность Windows. Он предназначен для того, чтобы помочь пользователю в ясной и удобной форме управлять своими настройками безопасности и конфиденциальности. У приложения есть значок в трее, который виден из коробки. Если вам не нравится это видеть, вот несколько способов скрыть это.
Вы можете запустить Windows Security из меню «Пуск» или с помощью специальный ярлык. Кроме того, вы можете получить к нему доступ, используя его значок в трее. На момент написания это выглядит следующим образом:
Есть вспомогательный инструмент, который рисует иконку. Он находится здесь:
"C: \ Program Files \ Защитник Windows \ MSASCuiL.exe"
Обновление: Начиная с Windows 10 версии 1809, вспомогательный инструмент был переименован. Теперь есть
C: \ Windows \ System32 \ SecurityHealthSystray.exe
Этот файл запускается при запуске, когда вы входите в свою учетную запись Windows 10, и поэтому значок появляется на панели задач. Чтобы избавиться от значка, можно убрать вспомогательный инструмент из автозагрузки. Эта операция не имеет побочных эффектов и полностью отключит значок в области уведомлений.
Для удаления MSASCuiL.exe / SecurityHealthSystray.exe из автозагрузки воспользуемся методами, описанными в статье Как добавить или удалить автозагрузочные приложения в Windows 10.
Чтобы отключить значок безопасности Windows на панели задач, сделайте следующее.
- Открыть диспетчер задач.
- Переключитесь на вкладку с названием Запускать.
Совет: Вы можете открыть вкладку Автозагрузка диспетчера задач непосредственно в Windows 10, выполнив следующую команду:taskmgr / 0 / запуск
Посмотреть, как создать ярлык для управления запускаемыми приложениями в Windows 10.
- Найдите строку с названием «Значок уведомления Защитника Windows», как показано ниже:
- Щелкните его правой кнопкой мыши и в контекстном меню выберите «Отключить»: Совет: на скриншоте выше вы можете увидеть дополнительный столбец «Командная строка», который по умолчанию не отображается. Чтобы включить его, см. Статью Дополнительные сведения о запуске в диспетчере задач Windows.
Вариант групповой политики
Начиная с Windows 10 версии 1809 (Redstone 5), есть специальная опция групповой политики, которая позволяет скрыть значок Windows Security в трее. Если вы используете Windows 10 Pro, Enterprise или Education версия, вы можете использовать приложение Local Group Policy Editor для настройки параметра с помощью графического интерфейса, как показано ниже.
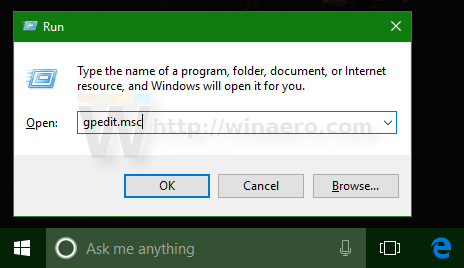
- Нажмите Победить + р вместе на клавиатуре и введите:
gpedit.msc
Нажмите Ввод.
- Откроется редактор групповой политики. Перейти к Конфигурация компьютера -> Административные шаблоны _> Компоненты Windows -> Безопасность Windows -> Системный лоток. Включите опцию политики Скрыть системную панель безопасности Windows как показано ниже.
- Перезагрузите компьютер.
Если вы используете Windows 10 Домашняя или другую версию ОС, которая не включает редактор локальной групповой политики, вы можете применить настройку реестра.
Настройка реестра
- Открытым Редактор реестра.
- Перейдите к следующему ключу реестра:
HKEY_LOCAL_MACHINE \ SOFTWARE \ Policies \ Microsoft \ Центр безопасности Защитника Windows \ Systray
Совет: см. как перейти к желаемому ключу реестра одним щелчком мыши.
Если у вас нет такого ключа, то просто создайте его.
- Здесь создайте новое 32-битное значение DWORD HideSystray. Примечание: даже если вы под управлением 64-битной Windows, вам все равно нужно использовать 32-битное DWORD в качестве типа значения.
Установите его в 1, чтобы отключить значок в трее. - Чтобы изменения, внесенные настройкой реестра, вступили в силу, вам необходимо: перезапустить Windows 10.
Позже вы можете удалить значение HideSystray, чтобы значок стал видимым.
Вот и все!
Статьи по Теме:
- Добавить Защитника Windows в панель управления в Windows 10
- Как включить Application Guard в Защитнике Windows в Windows 10
- Отключить Защитник Windows в Windows 10
- Как добавить исключения для Защитника Windows в Windows 10
- Как отключить Центр безопасности Защитника Windows
Благодаря deskmodder.de для варианта настройки.
Recent versions of Windows 10 come with an app called Windows Security. The application, formerly known as «Windows Defender Security Center», has been renamed to Windows Security. It is intended to help the user control his security and privacy settings in a clear and useful way. The app has a tray icon, which is visible out of the box. If you are not happy to see it, here is number of ways to hide it.
You can launch Windows Security from the Start menu or with a special shortcut. Alternatively, you can access it using its tray icon. As of this writing, it looks as follows:
There is a helper tool which draws the icon. It is located here:
"C:\Program Files\Windows Defender\MSASCuiL.exe"
Update: Starting in Windows 10 version 1809, the helper tool has got renamed. Now it is
C:\Windows\System32\SecurityHealthSystray.exe
This file runs at startup when you sign in to your Windows 10 account and so the icon appears in the tray. To get rid of the icon, you can remove the helper tool from startup. This operation has no side effect and will disable the tray icon completely.
To remove MSASCuiL.exe/SecurityHealthSystray.exe from startup, we will use the methods described in the article How to add or remove startup apps in Windows 10.
To disable Windows Security tray icon, do the following.
- Open Task Manager.
- Switch to the tab named Startup.
Tip: You can open the Startup tab of Task Manager directly in Windows 10 by running the following command:taskmgr /0 /startup
See how to create a shortcut to manage Startup apps in Windows 10.
- Find the line named «Windows Defender notification icon» as shown below:

- Right click it and select «Disable» in the context menu:

Tip: in the screenshot above, you can see an additional «Command line» column which is not visible by default. To enable it, see the article Get more details about Startup in Windows Task Manager.
Group Policy Option
Starting in Windows 10 version 1809 (Redstone 5), there is a special Group Policy option which allows hiding the tray icon of Windows Security. If you are running Windows 10 Pro, Enterprise, or Education edition, you can use the Local Group Policy Editor app to configure the option with a GUI, as follows.
- Press Win + R keys together on your keyboard and type:
gpedit.msc
Press Enter.

- Group Policy Editor will open. Go to Computer Configuration -> Administrative Templates _> Windows Components -> Windows Security -> Systray. Enable the policy option Hide Windows Security Systray as shown below.

- Reboot your computer.
If you are running Windows 10 Home or other edition of the OS which doesn’t include Local Group Policy Editor, you can apply a Registry tweak.
Registry Tweak
- Open Registry Editor.
- Go to the following Registry key:
HKEY_LOCAL_MACHINE\SOFTWARE\Policies\Microsoft\Windows Defender Security Center\Systray
Tip: See how to jump to the desired Registry key with one click.
If you do not have such a key, then just create it.
- Here, create a new 32-bit DWORD value HideSystray. Note: Even if you are running 64-bit Windows, you still need to use a 32-bit DWORD as the value type.
Set it to 1 to disable the tray icon. - To make the changes done by the Registry tweak take effect, you need to restart Windows 10.
Later, you can delete the HideSystray value to make the icon visible.
That’s it!
Related articles:
- Add Windows Defender to the Control Panel in Windows 10
- How to Enable Windows Defender Application Guard in Windows 10
- Disable Windows Defender in Windows 10
- How To Add Exclusions for Windows Defender in Windows 10
- How To Disable Windows Defender Security Center
Thanks to deskmodder.de for the tweak option.
Support us
Winaero greatly relies on your support. You can help the site keep bringing you interesting and useful content and software by using these options:
If you like this article, please share it using the buttons below. It won’t take a lot from you, but it will help us grow. Thanks for your support!
The Windows Defender icon is automatically displayed on the Taskbar or on the system tray since Windows 10 Anniversary Update. But do you know how to hide Windows Defender icon? This post shows you 5 different ways. Besides Windows Defender, you can also use MiniTool software to protect your PC.
Windows Defender is a built-in anti-malware program of Windows. It was first released in the Windows XP and later shipped with Windows Vista and Windows 7. The Windows Defender icon is automatically displayed on the Taskbar or on the system tray since Windows 10 Anniversary Update.
So, the Windows Defender notification icon will make it easier for users to access the built-in security suite. However, to some users, they say that the Windows Defender notification icon is totally useless for them. So they ask whether they can remove or hide Windows Defender icon.
Fortunately, you can dismiss the Windows Defender notification icon. You can remove Windows Defender icon from Taskbar without disabling its functionality.
And in the following section, we will show you how to hide Windows Defender icon.
Way 1. Hide Windows Defender Icon via Task Manager
The first way to hide Windows Defender icon is to hide it via Task Manager. Now, here is the tutorial.
Step 1: Right-click on the Taskbar and choose Task Manager from the context menu to continue.
Step 2: In the pop-up window, go to the Startup tab. Then right-click Windows Defender notification icon and choose Disable to continue.
When you have finished all steps, the Windows Defender notification icon will be removed from the system tray at the next startup. So, you can reboot your computer to check whether you have successfully hidden Windows Defender icon.
Way 2. Hide Windows Defender Icon via Settings
Here, we will show you the second way for Windows 10 hide Windows Defender icon. You can remove Windows Defender icon from Settings.
Here is the tutorial.
Step 1: Press Windows key and I key together to open Settings.
Step 2: In the pop-up window, choose Personalization.
Step 3: Then choose Taskbar in the left panel and scroll down to find Notification area to continue. And click Select which icons appear on the taskbar.
Step 3: In the next window, select the Windows Defender notification icon and switch the toggle to Off.
When all steps are finished, you can check whether the Windows Defender icon has been removed from the Taskbar or the system tray.
Way 3. Hide Windows Defender Icon via Startup
Here, we will show you the third way to disable Windows Defender icon. You can hide Windows Defender icon in the Startup.
Here is the tutorial.
Step 1: Press Windows key and R key together to open Run dialog. They type the ms-settings:startupapps in the box and click OK to continue.
Step 2: In the pop-up window, find out Windows Defender notification icon and switch it toggle to Off.
After that, you can check whether you have successfully removed Windows Defender icon from Taskbar.
Way 4. Hide Windows Defender Icon in Registry Editor
The fourth way to hide Windows Defender icon is to remove it from the Registry Editor. Then we will show you how to hide Windows Defender icon registry with the step by step guide.
Note: Making some changes on Registry Editor is a risky thing, so please back up computer before proceeding.
Step 1: Press Windows key and R key together to open Run dialog. Then type regedit in the box and click OK to continue.
Step 2: In the Registry Editor window, please navigate to the specific folder according to the following path.
HKEY_LOCAL_MACHINE\SOFTWARE\Policies\Microsoft\Windows Defender Security Center\Systray
Step 3: The right-click the HideSystray on the right panel and change its value data from 0 to 1.
Tip: If the HidenSystray is not here, you can create a new one.
After you have finished all steps, reboot your computer and check whether you have successfully removed Windows Defender icon from Taskbar.
Way 5. Hide Windows Defender Icon via Group Policy
Apart from the ways listed above, there is another available way to hide Windows Defender icon. You can remove Windows Defender icon from Taskbar via Group Policy. But this method can only be used for Windows 10 1803 or advanced editions.
Now, we will show you how to remove Windows Defender icon Group Policy.
Step 1: Press Windows key and R key together to open Run dialog. Then type gpedit.msc in the box and click OK to continue.
Step 2: In the Local Group Policy Editor window, please navigate to the following location.
Computer Configuration \ Administrative Templates \ Windows Components \ Windows Security \ Systray
Step 3: On the right panel of Systray, double-click Hide Windows Security Systray and choose Enable. Then click OK to continue.
After all steps are finished, reboot your computer and check whether you have hidden Windows Defender icon.
Final Words
To sum up, this post has introduced 5 ways to hide Windows Defender icon. If you also want to remove Windows Defender icon from Taskbar or the system tray, try these ways.