
Все способы:
- Способ 1: «Управление компьютером»
- Способ 2: «Редактор локальной групповой политики»
- Способ 3: «Командная строка»
- Вопросы и ответы: 0
Способ 1: «Управление компьютером»
Скрыть учетную запись администратора в Windows 10 можно посредством изменение соответствующего параметра в специальном меню «Управления компьютером». Для этого выполните следующие действия:
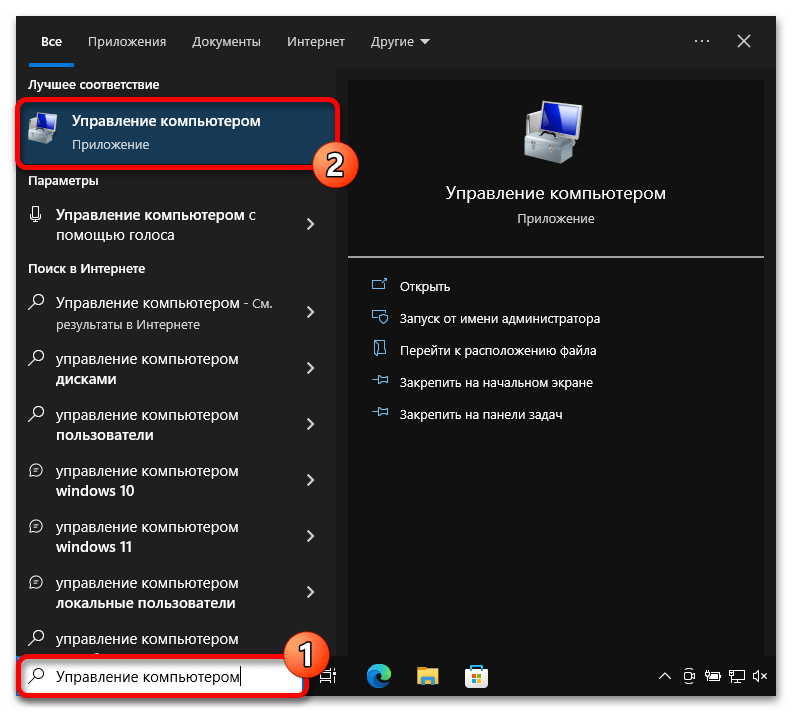
- Откройте утилиту «Управление компьютером» любым доступным способом. Например, воспользовавшись поиском по системе. Для этого установите курсор в соответствующее поле на панели задач и введите запрос «Управление компьютером». После щелкните левой кнопкой мыши по одноименному приложению в результатах.
- В появившемся окне, воспользовавшись навигацией на панели слева, перейдите в раздел «Локальные пользователи и группы», а затем в основном меню откройте папку «Пользователи».
- В списке всех пользователей найдите имя «Администратор» и откройте его свойства, дважды кликнув левой кнопкой мыши по названию.
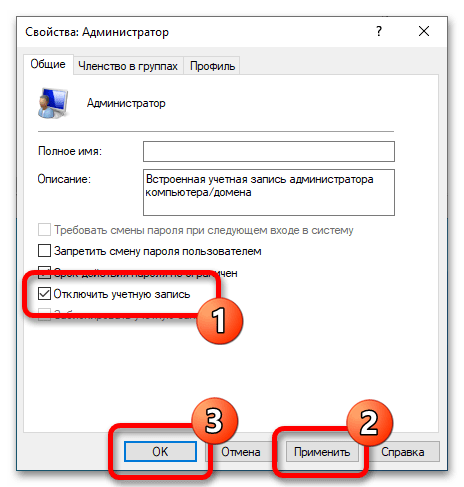
- В новом мню, находясь во вкладке «Общие», установите отметку напротив пункта «Отключить учетную запись». После этого сохраните внесенные изменения, поочередно нажав кнопки «Применить» и «ОК».


Теперь окно «Управления компьютером» можно закрыть. При перезагрузке компьютера в списке доступных пользователей «Администратор» будет отсутствовать.
Способ 2: «Редактор локальной групповой политики»
Подобным образом скрыть учетную запись администратора можно и через «Редактор локальной групповой политики». Достаточно будет найти соответствующий параметр и поменять его значение на нужное.
Важно! Воспользоваться этим способом могут только те пользователи, у которых на компьютере установлена операционная система редакции «Профессиональная» или «Корпоративная», в противном случае нужная утилита будет отсутствовать.
Читайте также: Как проверить версию операционной системы в Windows 10
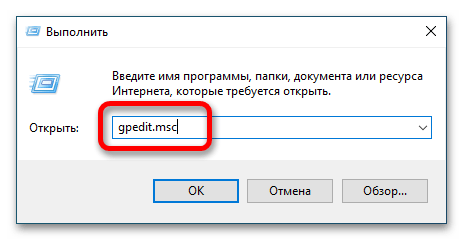
- Откройте «Редактор локальной групповой политики» любым доступным способом. Сделать это можно, например, через окно «Выполнить». Вызовите его сочетанием клавиш Win + R, а затем в поле «Открыть» впишите команду
gpedit.mscи нажмите Enter. - В появившемся окне «Редактора локальной групповой политики», воспользовавшись древовидной структурой каталогов в левой части интерфейса, перейдите по следующему пути:
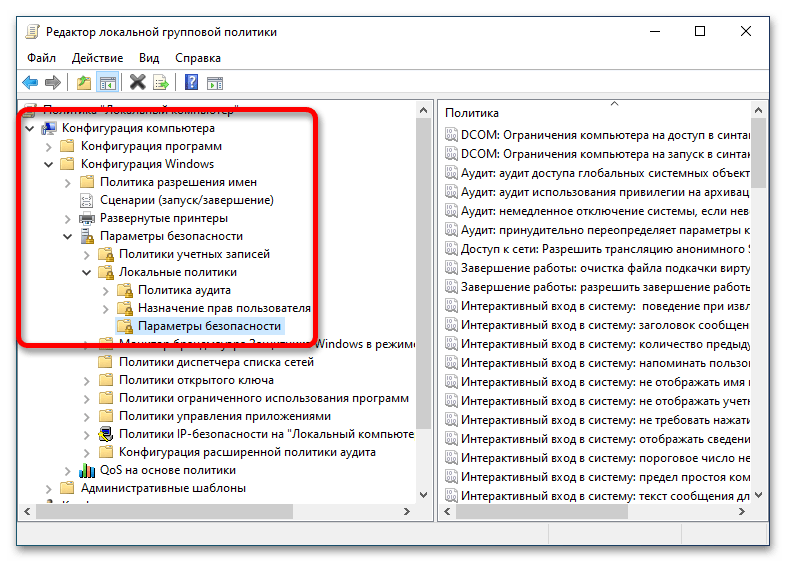
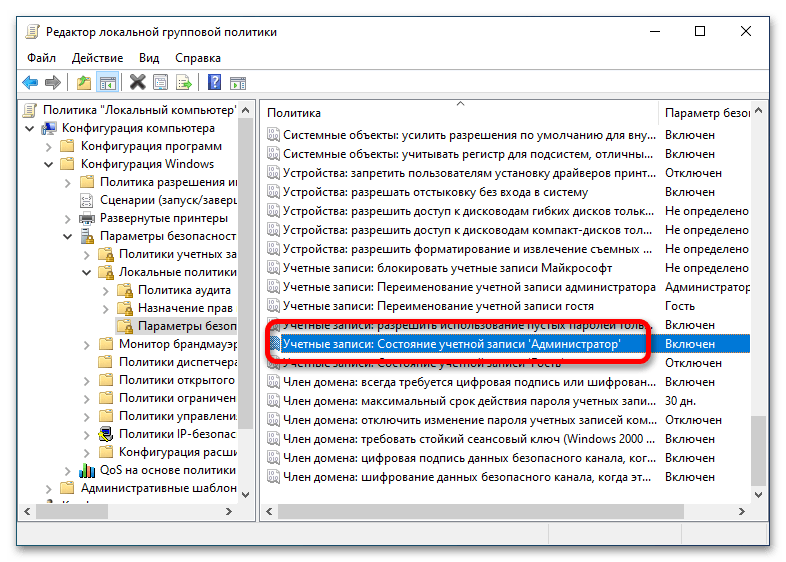
«Конфигурация компьютера» → «Конфигурация Windows» → «Параметры безопасности» → «Локальные политики» → «Параметры безопасности»
- В основной области окна найдите параметр под названием «Учетные записи: Состояние учетной записи ‘Администратор’» и откройте его свойства. Для этого дважды кликните по названию левой кнопкой мыши.
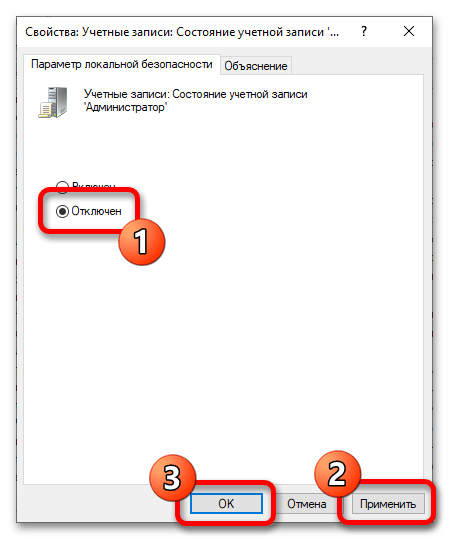
- В появившемся окне, находясь во вкладке «Параметр локальной безопасности», переведите переключатель в положение «Отключен», а затем щелкните по кнопкам «Применить» и «ОК», чтобы сохранить внесенные изменения.
После этого учетная запись администратора будет скрыта, так что никто не сможет получить к ней доступ.
Способ 3: «Командная строка»
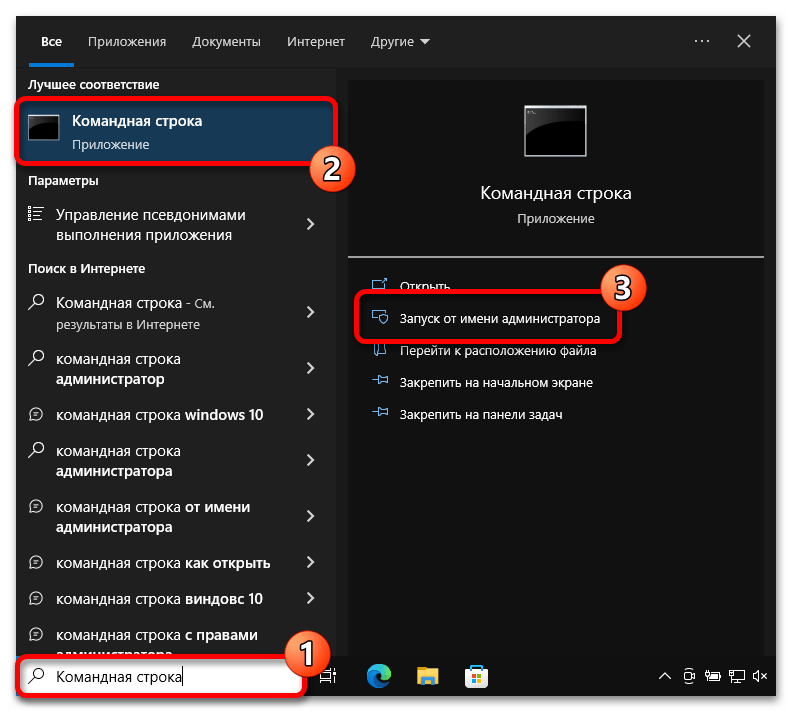
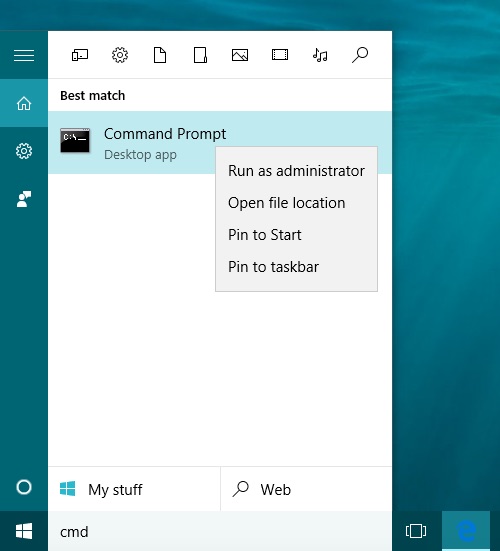
Скрыть учетную запись администратора можно через «Командную строку», для этого потребуется ввести всего одну команду и нажать Enter, но открыть консоль следует с повышенными привилегиями. Для этого в поисковой строке на панели задач введите запрос «Командная строка», а в результатах щелкните по пункту «Запуск от имени администратора».
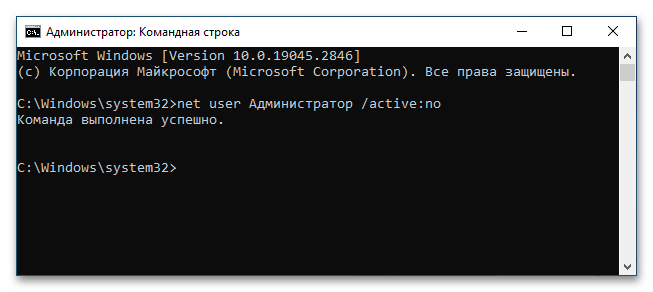
При необходимости подтвердите запуск, щелкнув во всплывающем диалоговом окне по кнопке «Да», а затем в появившемся интерфейсе консоли введите указанную ниже команду:
net user Administrator /active:no (для англоязычной версии операционной системв)
или
net user Администратор /active:no (для русскоязычной версии операционной системв)
Если вы все сделали верно, на экране высветится надпись «Команда выполнена успешно». Окно консоли после этого можно закрыть.
Читайте также: Как скрыть пользовательские учетные записи в Windows 10
Наша группа в TelegramПолезные советы и помощь
Download Windows Speedup Tool to fix errors and make PC run faster
If you have multiple users on Windows 11/10 computer, the names are listed on the login screen. Respective users can select the account available at the bottom left, and enter the password to get access to the account. That said, if you want to hide a user account from the login screen in Windows 11/10, here is how you can get it done. Follow the steps in reverse to show all user accounts.

If you want to hide all the accounts from the Sign-in or Log-in screen, follow the linked post. It will replace the current login screen with a prompt where the user needs to enter the username manually. No user account is displayed in this case.
Since we are hiding that user account, it means we do not want the person to use it at all. Follow the steps to hide a specific User Account from the sign-in screen or login screen in Windows 11/10:
- Open File Explorer and navigate to C:\Users
- The username you want to hide and one the folder name available here should match.
- So the User AK has the folder name AK. Note down this name
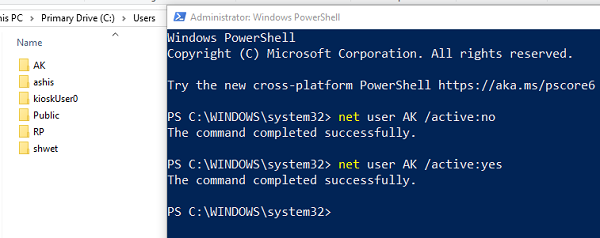
- Open PowerShell as Administrator
- Type net user [USERNAME] /active:no where [USERNAME] = AK.
- It will hide the Windows user account and also hide the user from the login screen.
To bring back the username in the Login Screen, type the following and hit Enter:
net user [USERNAME] /active:yes
Here [USERNAME] = AK. It will activate the user account, and it will show the user account on the login screen.
If you cannot use the Net User command, then you can also use the Registry method. It works on Windows 10 Home as well.
Show or Hide user account On Sign in screen using Registry
Here when you will select Key it will create a folder. Do remember that.
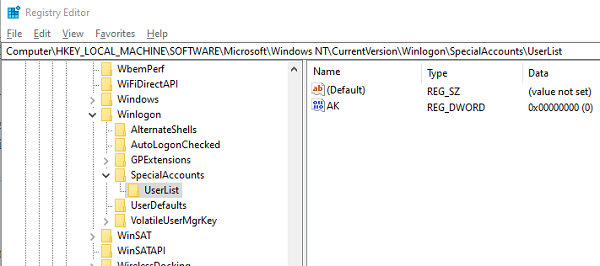
Open Registry Editor and navigate to the following path:
HKEY_LOCAL_MACHINE\SOFTWARE\Microsoft\Windows NT\CurrentVersion\Winlogon
Right-click on Winlogon, select New >Key from the menu.
Name the new key as SpecialAccounts. Right-click the SpecialAccounts key, select New >Key from the menu.
Name the new key as UserList. Inside of UserList, again right-click, and this time choose New> DWORD (32-bit) Value.
Make sure to name this DWORD the same as the user account name you plan to hide.
Then set the value as 0. You can double-click to edit the value.
To unhide, either remove the DWORD or set it to 1.
If this key exists, then you will need not to create the values manually-
Computer\HKEY_LOCAL_MACHINE\SOFTWARE\Microsoft\Windows NT\CurrentVersion\Winlogon\SpecialAccounts\UserList
We hope the tutorial was easy to follow, and you were able to show or hide the specific User Accounts from the Sign-in screen on Windows 11/10.
Ashish holds a Bachelor’s in Computer Engineering and is a veteran Windows. He has been a Microsoft MVP (2008-2010) and excels in writing tutorials to improve the day-to-day experience with your devices.
windows 10 hidden user activate 8
Short Bytes: Using a hidden user administrator account on Windows 10, you can ensure the privacy of your personal data very easily. This anonymous account will also have administrator privileges and keep your personal life safe from others.
A new net user administrator is created on Windows 10 using Command prompt. We can also create an anonymous and hidden administrator on Windows using the same command by editing some attribute values of the same.
Follow these steps to create hidden net user administrator on Windows 10 (This method also works on Windows 7 and 8.1):
- Open Notepad. To Open Notepad, press Windows + R and type Notepad inside the box
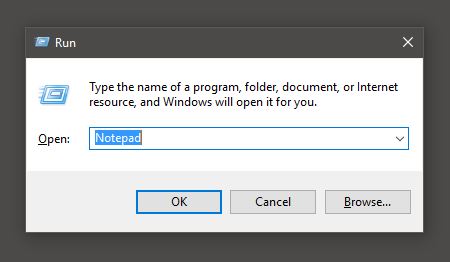
- Copy and paste the code below in Notepad:
@echo off
net user hidden mypassword /add
net local group Administrators hiddenuser /add
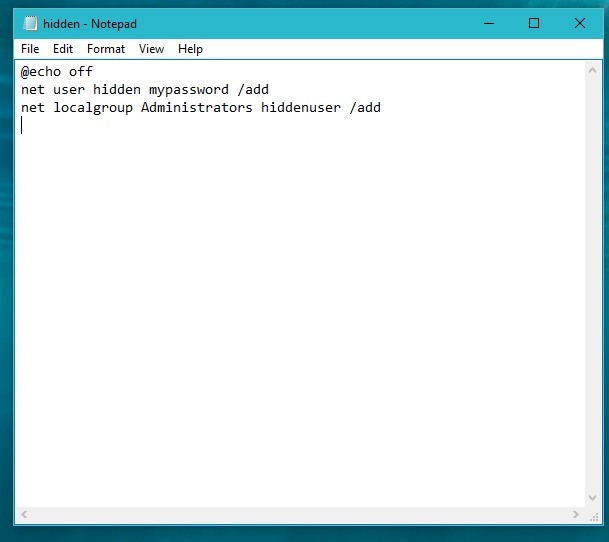
- In the above code, Replace mypassword with your own password and hiddenuser with your administrator name.
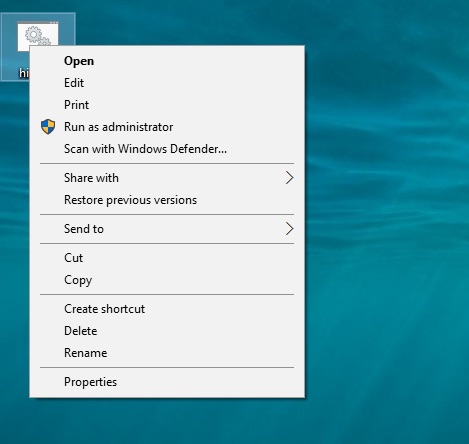
- Now save the file as Hidden.bat. Here, .bat stand for the batch file extension.
- Once you save, you will see a bat file icon created in the folder where you saved the .bat file.
- Right click on the icon and select ‘Run as Administrator’. Once you ‘Run as Administrator’, a command prompt will appear showing that your account is being created.
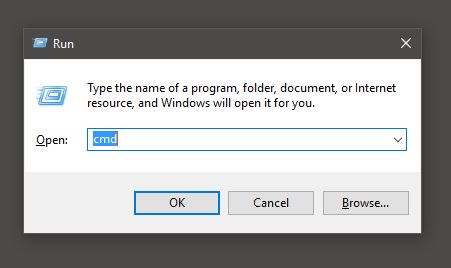
- Once it’s done, you might want to recheck it. So, to recheck and confirm your created account, open a Command Prompt window. Press Windows+R and type cmd in the box and a Command Prompt window will appear. There are also other Windows 10 Keyboard shortcuts to make your life easier.
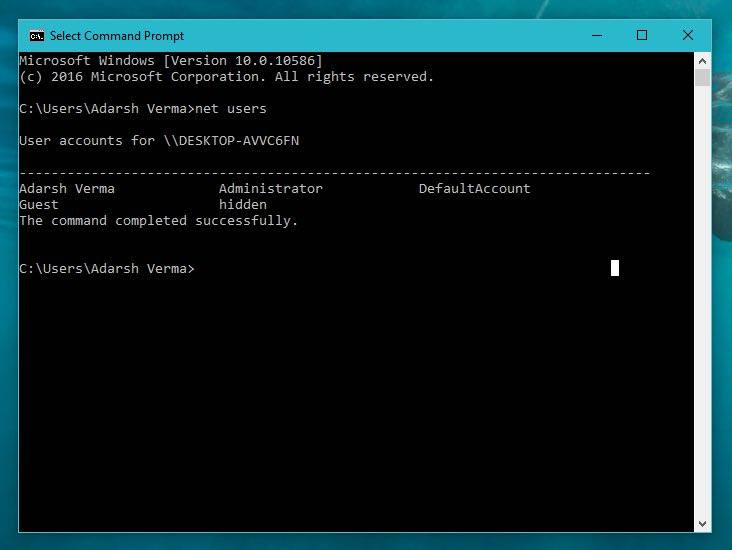
- Type the command net user in the command prompt. There should space in between net and user in the command and press enter. Now you can see your hidden Net User Administrator account On Windows 10.
Hiding The Hidden Net User Administrator:
- Now, the next step is to hide this account. Open a new Command Prompt window with administrative permissions by right clicking on the cmd icon.
- Now type the following command and press enter: net user hidden /active:no
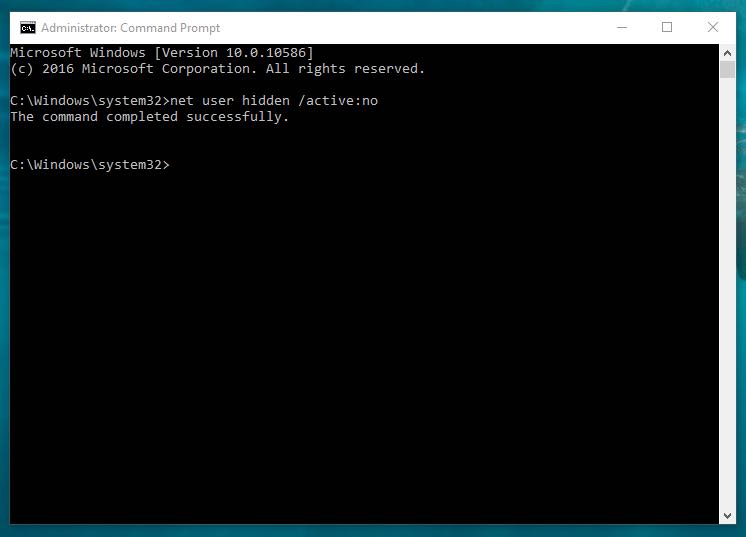
- Like this, you’ll be able to hide an account on your Windows 10 PC.
Accessing The Hidden Net User Administrator:
- To access this account, you need to open a new Command Prompt window with administrative permissions.
- Now, enter the following command and press enter: net user hidden /active:yes
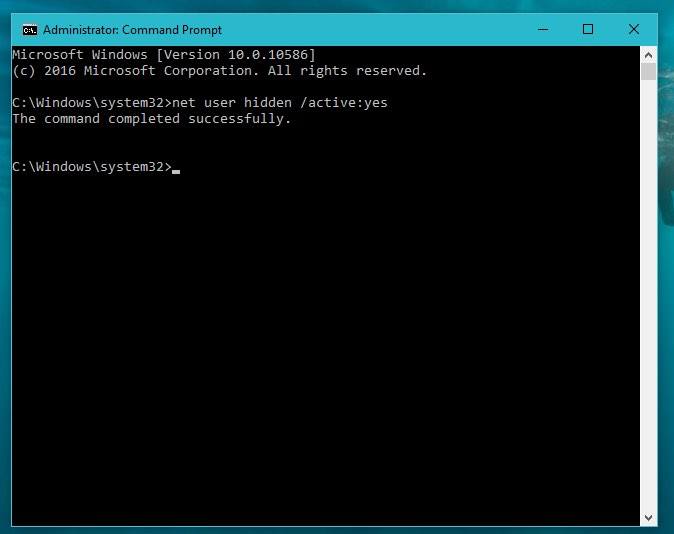
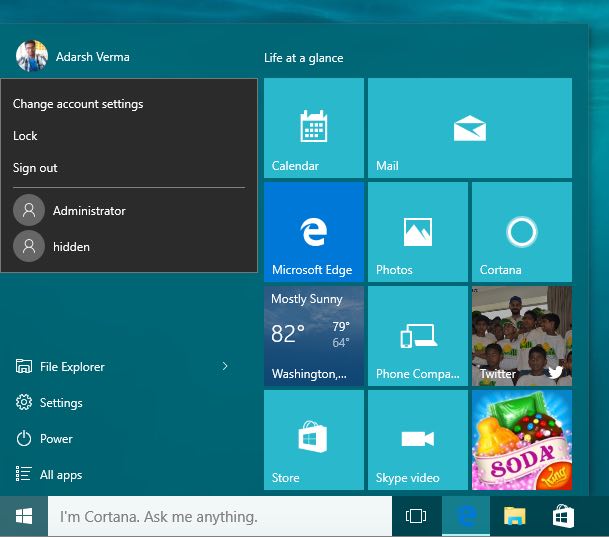
- This will bring your account to the front with the name you specified. To check this, you need to log off your computer or click on top-right corner of the Start Menu.
- After using this hidden account, follow the step to hide this hidden user account and restrict people from accessing it.
Now with this account, you can ensure privacy by managing all your private information under this hidden account. Moreover, this account will have complete administrator access to your computer.
If you want to share some other tips and trick on Windows 10, do share with us in the comments below.
Also Read: Windows 10 Backup: How To Take A Complete Backup Of Your System
Fossbytes co-founder and an aspiring entrepreneur who keeps a close eye on open source, tech giants, and security.
Get in touch with him by sending an email — [email protected]
Содержание
- Как отключить/скрыть учётную запись
- Первый вариант – использование функционала «Локальные пользователи и группы»:
- Второй вариант – использование функционала консоли командной строки:
- Заключение
В прошлой статье, мы коснулись вопроса удаления учётной записи пользователя с сохранением и без сохранения файлов.
Но, в рамках функционала операционной системы Windows 10 существует и возможность отключения учётной записи, без её непосредственного удаления.
Данный способ, другими словами, подразумевает лишь скрытие данных входа и отображения учётной записи в системе, что позволяет реализовать множество поставленных задач в решении большинства организационных проблем.
А как именно это сделать и будет показано в рамках настоящей статьи.
Как отключить/скрыть учётную запись
Для начала, необходимо отметить, что заблаговременно стоит убедиться, что после скрытия целевой учётной записи, останется актуальной УЧ наделённая правами администратора.
Это потребуется для дальнейшего входа в систему.
Остановимся на двух основных способах решения поставленной задачи:
Первый вариант – использование функционала «Локальные пользователи и группы»:
- Кликните правой кнопкой мышки по ярлыку «Этот компьютер» и выберите «Управление»;
- Откроется окно «Управление компьютером»;
- Откройте папку «Служебные программы» — «Локальные пользователи и группы» — «Пользователи»;

- Выберите нужную учётную запись и кликните по ней правой кнопкой мышки, выбрав «Свойства»;
- На вкладке «Общие» установите флажок в строке «Отключить учётную запись» и нажмите «ОК».
На этом всё — учетная запись Windows успешно отключена.
Второй вариант – использование функционала консоли командной строки:
- Нажмите «WIN+S» и введите в строку поиска «cmd.exe»;
- Нажмите на кнопку «Запуск от имени администратора»;
- Откроется консоль, в которую необходимо ввести и выполнить команду «net user»;
- Обратите внимание на открывшейся список учётных записей и выберите нужную вам;
- Введите команду «net user ИМЯ /active:no», где вместо «ИМЯ» введите наименование учётной записи, которая идёт на отключение.
Перезагрузите компьютер и убедитесь, что выбранная ранее учётная запись перестала отображаться при входе на рабочий стол.
Заключение
Последнее, что стоит отметить – это активация отключенной учётной записи производится абсолютно с тем же порядком действий. В первом варианте – это снятие галочки с указанного пункта, во втором – это вместо «no», указать в команде «yes».
-
Home
-
Partition Manager
- Hide Specific User Accounts from Login Screen on Windows 10
By Vicky |
Last Updated
You may be willing to share your computer with your family members and friends. But Windows 10 by default will list every user account on the sign-in screen and you may want to keep some of them secret for other reasons. In this post, MiniTool shows you how to hide specific user accounts from login screen.
Hide Specific User Accounts from Login Screen
You may have set up no less one user accounts on your Windows 10 computer. But you do not want the person who borrows your computer to use one of the accounts. Let’s see how to hide user accounts from login screen on Windows 10.
Note: It is not recommended that you hide all the accounts, including your own, because it is maybe tough to get back in.
Stage 1: Get the Full Name of Your User Account
To complete this work, you need to get the full name of the user account you want to hide from login screen first.
Here is the tutorial on checking the exact name of the user accounts.
Step 1: Press the Windows key and the R key on the keyboard simultaneously to call out the Run window.
Step 2: On the Run window, please type netplwiz and click the OK button to launch User Accounts.
Step 3: Select the user account you want to hide and then click the Properties button.
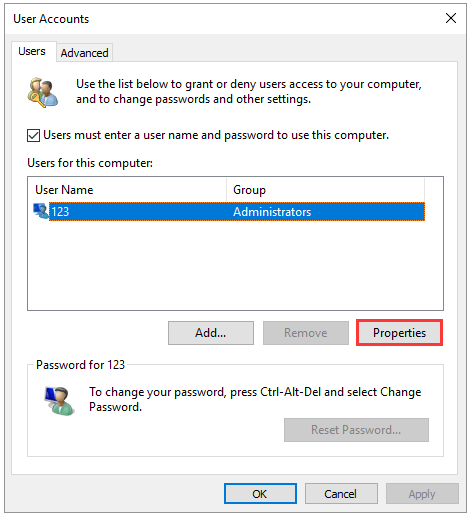
Step 4: Copy the user name on the newly popping-up window to Word or a place you prefer.
Now you have gotten the exact name of the user account you want to hide, and you can move to Stage 2 to complete hiding this account from login screen.
Stage 2: Hide the User Account from Login Screen via Registry Editor
To complete this work, you need to make some changes in Registry Editor. This may be risky if the changes are not done properly. Therefore, it is wise to back up your computer in case something goes wrong and then you can start hiding one user account.
Here is the tutorial on how to hide specific user accounts from login screen.
Step 1: Call out the Run window and then type regedit and click the OK button to launch Registry Editor.
Step 2: Look at the left pane of the current window and navigate to the path below.
HKEY_LOCAL_MACHINE > SOFTWARE > Microsoft > Windows NT > CurrentVersion > Winlogon
Step 3: Right-click the Winlogon and select New > Key. Name the key as SpecialAccounts.
Step 4: Right-click the SpecailAccounts key and select New > Key to create a key named UserList.
Step 5: Expand the UserList key, right-click the empty space in the right pane, and select Next > DWORD (32-bit) Value.
Step 6: Name the DWORD as the name of the user account that you want to hide (the name you have copied in Step 4 in Stage) and set its Value data to 0.
After completing the above steps, your user account should be invisiable on the login screen. Apart from the screen, the account is also hidden from the switch user menu in the Start menu, from Control Panel, from the Settings app, etc.
If you want to show the hidden user account on login screen again, you just need to change the Value data of the account from 0 to 1 in Registry Editor.
Are you interested in keeping your digital data secret? If yes, you can read 5 Operations to Keep Your Digital Data Secure Effectively. This post shows you a detailed tutorial.
Bottom Line
Have you mastered how to hide specific user accounts from login screen? If you have any questions about this work, please leave them in the comment zone and we will reply to you as soon as possible.
About The Author
Position: Columnist
Vicky is a website editor who has been writing tech articles since she was graduated from university. Most of her articles talk about Windows PC and hard disk issues. Some of her articles also touch on YouTube usage and issues.
During her spare time, she likes to spend time reading, watching videos, and sitting on her Yoga mat to relax.