
It is always a best practice to backup important data regularly, or preferably in real-time, to prevent data loss due to unforeseen circumstances such as hard disk failure. One of the best methods to backup your files locally is by syncing the files between two folders in two different drives.
In that way, if one of the drives fails, you would have a complete backup on the other. This short tutorial will show you how to sync files between two folders in Windows 11 or Windows 10 easily using a free tool called DSyncronize.
Tip: If you want to quickly sync your files as a backup measure without much hassle, we recommend to just use a cloud storage syncing solution such as Dropbox, Google Drive or OneDrive.
However, most of these cloud storage services are free for only the first few gigabytes of cloud storage. Once you reached the free limit, you will have to pay a fee in the form of subscription for more storage size. Well, if you have a rather huge folder you want to sync and don’t feel like paying, use the method below to sync files between two folders locally instead.
Sync files between two folders or computers using DSynchronize
Synchronizing files between folders on different drives or multiple computers in the same network isn’t an easy task to accomplish. There is currently no built-in tool in Windows 11/10 that is able to achieve this. We will have to rely on a third party software to help us in this matter.
Among all the free file syncing software, we recommend DSynchronize because of its extremely easy to use and user friendly interface (unlike many others which have rather complicated and difficult GUI).
First, download DSynchronize from its official website.
http://dimio.altervista.org/eng/#DSynchronize
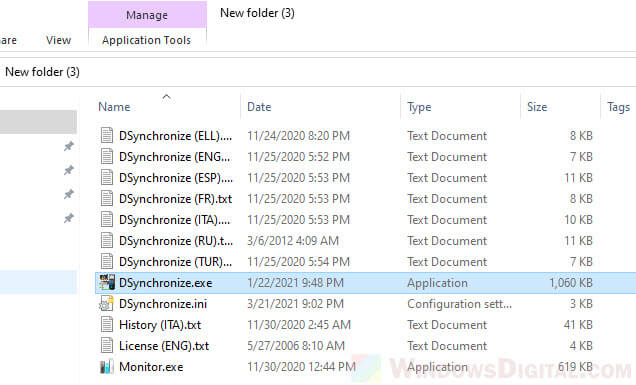
Since it’s a portable software, you don’t need to install anything. Just unzip the downloaded zip file onto a folder and launch the DSynchronize.exe (recommended to run as administrator to prevent insufficient privileges issue) from the extracted folder to start using the software.
How to sync files between two folders from different drives
Assuming you want to sync files between two folders on two different drives, here’s how to quickly do it in DSynchronize.
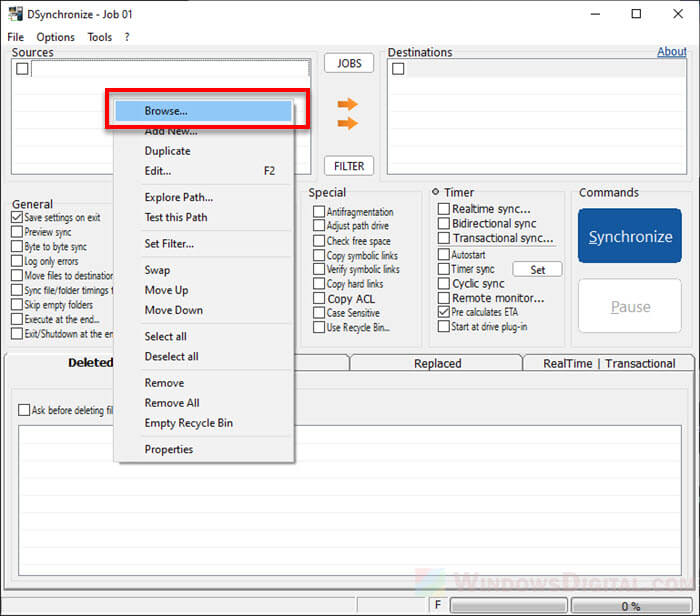
In the DSynchronize window, add a source by right-clicking anywhere in the Sources area, then select Browse. Browse to the folder which you want to sync (the folder that contains the important files you want to backup), and then click OK to add the folder as the source.
Next, right-click anywhere in the Destinations box, then select Browse. Browse to the folder where you want to sync your source files to (the location where you want to copy your files over to). Click OK to add the folder as the destination.
Note: Make sure the destination folder is empty, otherwise anything in it will be deleted if the source folder doesn’t have those files.
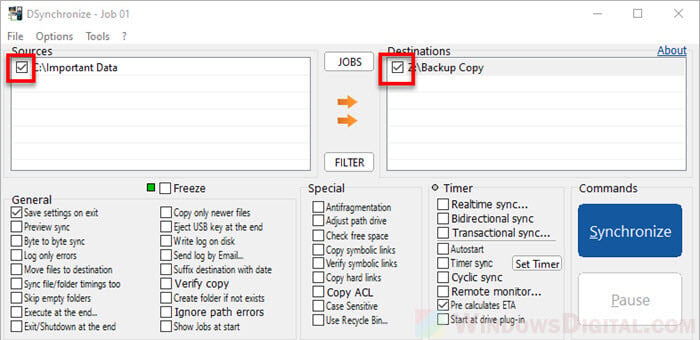
Click to check the checkboxes of the source(s) and destination(s) folders you’ve added.
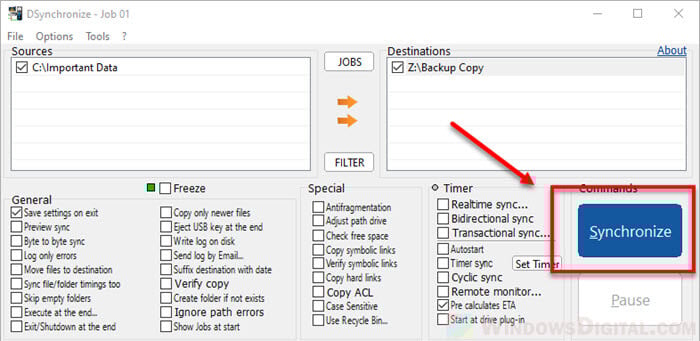
To begin syncing the files between the two folders now, click on the Synchronize button.
Sync files between two computers in Windows 11/10
To sync files between two computers using DSynchronize:
- Make sure both computers are connected to the same local network.
- Turn on Network Discovery and File sharing in Windows 11 or Windows 10 on both computers.
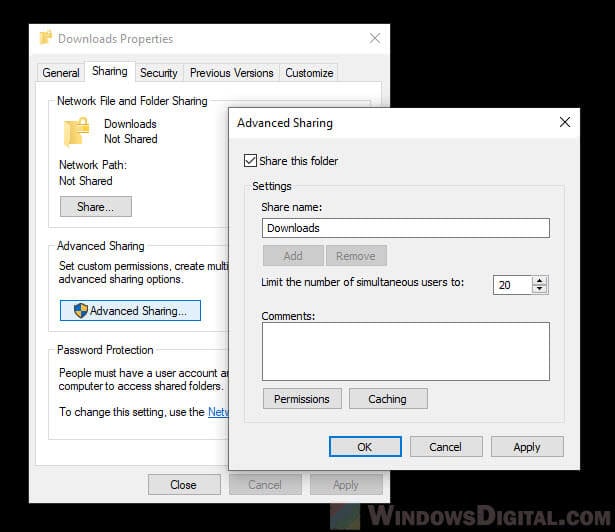
- Create a folder on the destination computer and and share the folder by right-clicking the folder > Properties > Sharing > Advanced Sharing > Share this folder, so that the source computer can see the folder from the Network directory.
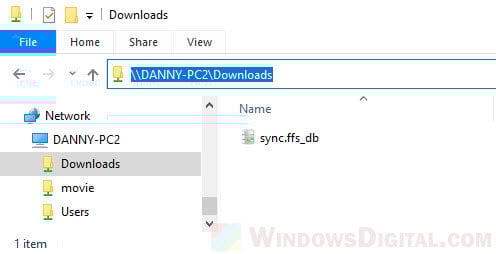
Once you’ve done all of the above, in the File Explorer, browse to the destination network folder. Copy the full path of the network folder by clicking on the path address bar while in the network folder and press CTRL + S keys to copy the entire path.
Now, in DSynchronize, manually add the destination folder by double-clicking on the empty area in the Destinations box, then paste (or manually enter) the full path of the network folder you’ve copied earlier.
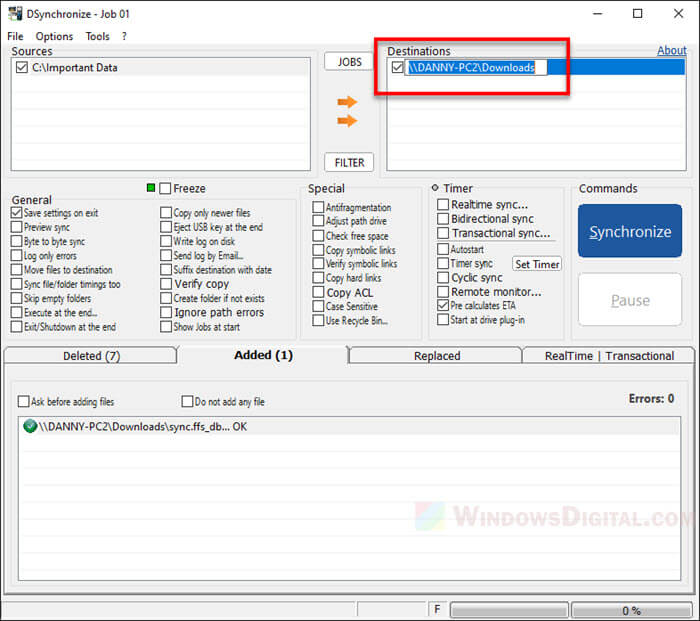
Click on the Synchronize button to begin syncing the files between the two folders from two different computers.
You can repeat the steps to add multiple destinations to sync folders across multiple computers in Windows 11/10.
How to allow automatic real time syncing in DSynchronize
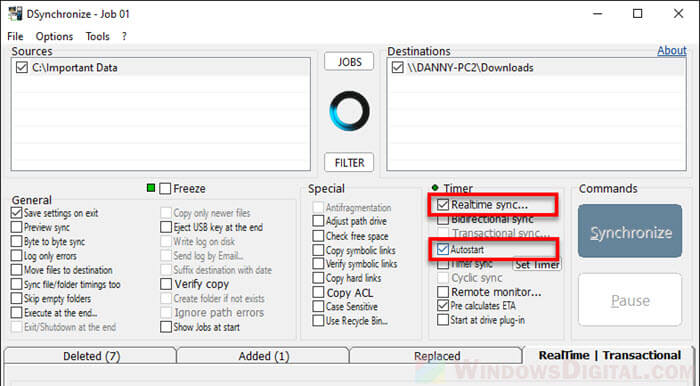
To set up automatic real time sync, enable the “Realtime sync” checkbox in DSynchronize. From now onward, whenever you make changes from either folder, it will be synced immediately in real time.
To allow DSynchronize to sync the files as soon as you startup your computer, enable the “Autostart” option in DSynchronize. When both “Realtime sync” and “Autostart” options are enabled, DSynchronize will be automatically launched upon startup of your PC and will begin real time sync immediately.
How to sync files between multiple sources or destinations
DSynchronize takes each line of source to destination as one syncing job. You can set multiple sources or destinations by adding more folders to them.
For example, to sync a single source to multiple destinations, add a new line with the same source but to a different destination. The screenshot below is an example of syncing files from a single source folder to two different destinations, so that I can have two backup copies on two different locations.
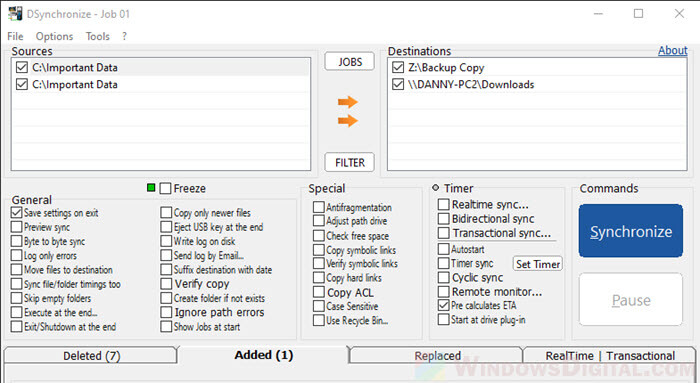
Be sure to also check out other optional configurations under “General” and “Special” which you may find useful at some point of time later as you use the software.
Whether you want to sync files from one folder to another locally or sync files to a network drive, Windows provides free ways to do it. In this article, I will show you 3 ways to sync files in Windows 10.
Method 1: Sync files with built-in tools
As you may know, Robocopy is a command-line utility that is included in Windows 10 for copying files. You can write a script to copy files and then set up a task in the Task Scheduler to run the script at a particular time.
For the script shared below, you just need to add the frequency in days, the path to the folder from where you want to move the files, and the path for the folder you want to move the files to.
Step 1. Create a new text file. Copy and paste the following command in the TXT file. Be sure to replace the number of days, destination folder, and source folder as per your needs.
@echo off
set X=<days>
set “source=C:\<Source Folder Path>”
set “destination=D:\<Destination Folder Path>”
robocopy “%source%” “%destination%” /mov /minage:%X%
exit /b

Step 2. Change the file extension to .bat and save the file.
Step 3. Open Task Scheduler. You can find it by using the search box or type “taskschd.msc” from a Run box.
Step 4. Click Create Task in the right panel and taye a task name.

Step 5. Under the Triggers tab, click New to create a Trigger. In the settings, select Daily and check the option Repeat Task Every 1 hour. You can change the frequency if needed.

Step 6. After saving the settings for Trigger, let’s go to the Action tab. Click New to create a new action. Click Browse to find the .bat file that you previously created.

Step 7. Click OK to save all the settings for this new task and close the Task Scheduler.
As you can see, it is not perfect for file sync, but if works and you don’t need to download third-party apps. Actually, Microsoft has provided its own file sync software for Windows. Keep reading to check it out.
Method 2: SyncToy
Windows also provides a dedicated tool SyncToy for file sync that you can download from Microsoft Store. The latest version is SyncToy 2.1 that allows you to synchronize files and folders between locations. You can also use it to share files with other computers and create backup copies of files and folders.
To use SyncToy, you need to download it from Microsoft website by choosing the appropriate Windows version and then install in on Windows 10. After installation, you can follow the steps below to sync two folders in Windows 10 on the same computer.
Step 1: Within the SyncToy main interface, click Create New Folder Pair to start a new task.

Step 2: specify the Two Folders You Want to Sync by clicking the Browse button. It is pretty straightforward as you can see from the screenshot.

Step 3: Select the right Method to Sync Two Folders in Windows 10. If you like two-way sync, then you should check Synchronize. Echo and Contribute are for one-way sync. The difference is deleting files in the Left Folder won’t cause the change in the Right Folder with Contribute method.

Step 4: assign a name for the synchronization task and click click the Run button to start Windows sync files between folders.
After that, this sync program will start the process of folder sync between drives and you will see whether the task is successful or not.
Sync Network Files
Windows 10 also has a built-in feature Sync Center that allows you to sync the files between your PC and network servers, so you can get them when your server or your PC is not connected to the network.
Step 1. Launch Sync Center. Press Windows+R key to bring out Run window and type mobsync in the box and tap OK.
Step 2. click on the Manage offline files link on the left side column. In the General tab, click Enable Offline Files and click Ok. You may need to restart the computer.

Steop 3. After restarting the computer, then you will have other tabs available on the Offline Files to configure the Offline Files including Disk Usage, Encryption, and Network tabs.
Step 4. Configure Disk Usage for the the available space for keeping the offline files on your PC. Under the network tab, you can choose to automatically keep your files offline if the network connection is too slow. You can also set how often you’d like to check for a slow connection.
Conclusion
That’s the 3 ways to sync files or folders in Windows 10 for free. If you like to sync files to another drive, the SyncToy is the best choice because it supports two-way sync and one-way sync. The other two options also have its own purpose. Now it is your turn. Let us know which method you prefer in the comments.
Знаете ли вы о том, что можете получить доступ к любым вашим файлам и фотографиям, где бы вы ни находились? При этом вся информация останется актуальной благодаря автоматической синхронизации. Все это возможно с бесплатным облачным хранилищем Microsoft OneDrive, которое доступно в вашей Windows 10 по умолчанию.
Начать пользоваться OneDrive просто:
Чтобы отправить документ или медиафайл в ваш OneDrive, откройте Проводник, справа выберите OneDrive и перетащите все, что хотите, в открывшуюся папку. Этот контент вы можете просмотреть откуда угодно, воспользовавшись своим мобильным устройством или зайдя на сайт OneDrive.com. Благодаря синхронизации между устройствами в OneDrive вы всегда найдете актуальные версии файлов.
OneDrive сохраняет копию загруженного файла в облаке и на ПК. Однако если на вашем устройстве мало памяти или вы вообще пользуетесь клаудбуком, можно вручную выбрать, какие именно документы будут оставаться на компьютере, а какие нет. Просто откройте папку OneDrive в Проводнике, кликните на любой папке правой кнопкой мыши и в контекстном меню кликните «Выбрать папки OneDrive для синхронизации». Уберите галочки напротив всех папок, которые вам не нужны на ПК, и вуаля – содержимое будет удалено с вашего девайса, но по-прежнему будет доступно через сайт OneDrive.com или с мобильного устройства. Вы также можете задать в настройках автоматическую отправку фотографий со смартфона в OneDrive, тогда ваши снимки будут доступны на всех ваших компьютерах.
Проведите время в облаке с удовольствием!
Синхронизация файлов с помощью OneDrive в Windows
Applies ToOneDrive для бизнеса SharePoint Server по подписке SharePoint Server 2019 SharePoint в Microsoft 365 Microsoft365.com Администратор Microsoft 365 Служба Office 365, предоставляемая 21Vianet Служба Office 365, предоставляемая 21Vianet, — для администраторов OneDrive (для работы или учебы) OneDrive (для дома или персональный) OneDrive (для работы или учебы), предоставляемый 21Vianet OneDrive для Windows Центр администрирования SharePoint SharePoint в Microsoft 365 для малого бизнеса SharePoint, предоставляемый 21Vianet

Важно: С 1 января 2022 года мы прекращаем поддержку определенных классических приложений OneDrive в операционных системах Windows 7, 8 и 8.1. Дополнительные сведения.
Используя OneDrive, вы можете синхронизировать файлы между компьютером и облаком, чтобы получать доступ к файлам любым способом: с помощью компьютера, мобильного устройства или веб-сайта OneDrive по адресу OneDrive.com. Если вы добавите, измените или удалите файл или папку в своей папке OneDrive, эти же изменения произойдут на веб-сайте OneDrive, и наоборот. Вы можете работать с синхронизированными файлами прямо в проводнике, в том числе в автономном режиме. Любые внесенные изменения будут синхронизированы, как только вы снова установите подключение.
В этой статье описано, как скачать Приложение синхронизации OneDrive и войти с помощью личной, рабочей или учебной учетной записи, чтобы начать синхронизацию. Если вы используете Приложения Microsoft 365 для бизнеса, вы также можете синхронизировать файлы со своих сайтов SharePoint. Если вы не используете Приложения Microsoft 365 для бизнеса, см. статью Синхронизация файлов SharePoint с помощью приложения синхронизации OneDrive для бизнеса (Groove.exe).
Примечание: Дополнительные сведения об использовании OneDrive см. на странице Обучение работе с OneDrive.
-
Установка и настройка
-
Основные моменты при настройке OneDrive
-
Просмотр файлов OneDrive и управление ими
Установка и настройка
-
Если вы используете Windows 10 или 11, на вашем компьютере уже установлено приложение OneDrive. Перейдите к шагу 2.
Если у вас нет Windows 10, 11 или Office 2016, установите версию нового приложения приложение синхронизации OneDrive для Windows.
-
Запустите настройку OneDrive.
-
Если у вас нет учетных записей, подключенных к OneDrive
-
Если у вас уже есть учетная запись, подключенная к OneDrive
-
Если у вас нет учетных записей, подключенных к OneDrive
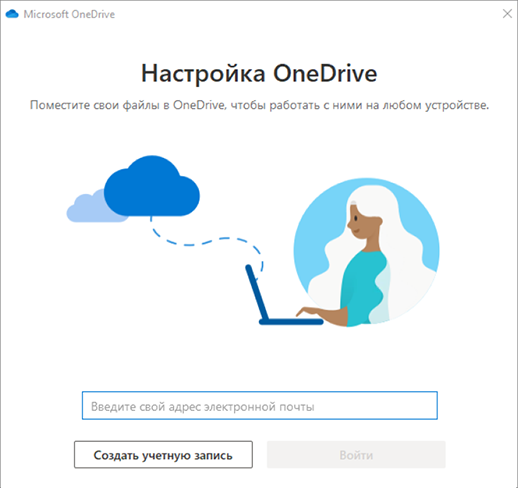
Если у вас нет учетной записи, вошедшего в OneDrive, используйте эти инструкции, чтобы запустить OneDrive.
-
Нажмите кнопку Пуск, выполните поиск по запросу OneDrive и откройте программу:
-
В Windows 10 или 11 выберите OneDrive.

-
-
Когда запустится программа настройки OneDrive, укажите свою личную, рабочую или учебную учетную запись и нажмите кнопку Войти.

Основные моменты при настройке OneDrive
В программе настройки OneDrive есть два экрана, на которые нужно обратить внимание.
-
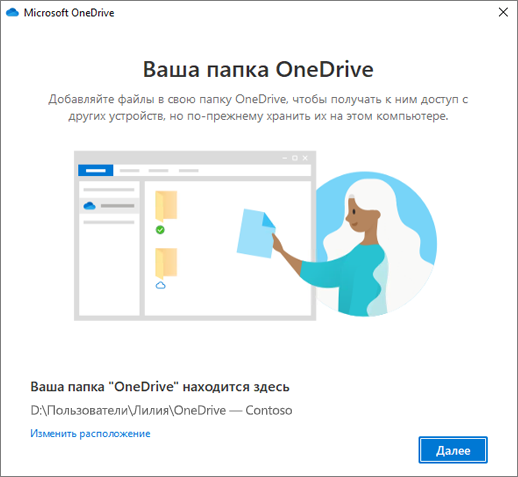
На экране Ваша папка OneDrive нажмите кнопку Далее, чтобы принять расположение папки по умолчанию для файлов OneDrive. Если вы хотите изменить папку, лучше сделать это сейчас, выбрав пункт Изменить расположение.
-
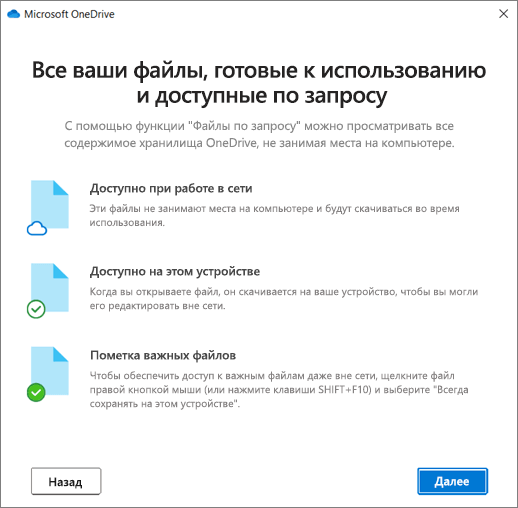
На экране Все ваши файлы доступны в любой момент показано, как помечены файлы: доступны только при работе в сети, доступны локально или всегда доступны.
Функция Файлы по запросу позволяет получать доступ к файлам в OneDrive, не скачивая все их на свое устройство с Windows. Нажмите кнопку Далее.
Примечание: Если вы уже синхронизировали OneDrive для работы и учебы на компьютере (с помощью предыдущего приложения синхронизации) и только что установили приложение синхронизации, вы не увидите надписи Это ваша папка OneDrive или экрана Синхронизировать файлы из OneDrive во время настройки OneDrive. Приложение приложение синхронизации автоматически синхронизируется с тем же расположением папки, которым вы пользовались до этого. Чтобы выбрать папки для синхронизации, щелкните правой кнопкой мыши значок синего облака в области уведомлений на панели задач и выберите Параметры > Учетная запись > Выбрать папки.
Просмотр файлов OneDrive и управление ими
На этом настройка завершена. Ваши файлы OneDrive отобразятся в проводнике в папке OneDrive. Если у вас несколько учетных записей, личные файлы отображаются в списке OneDrive: персональный, а рабочие или учебные файлы в списке OneDrive: название_организации.
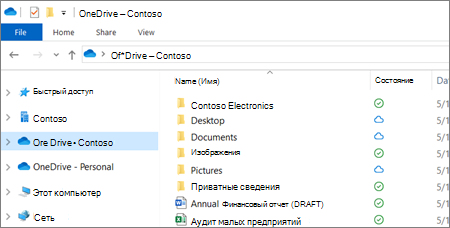
В области уведомлений появится новый белый или синий значок облака (или оба), и ваши файлы будут синхронизироваться с компьютером. Значок синего облака будет отображаться какOneDrive — CompanyName при наведении указателя мыши на значок.
Примечание: Contoso — это пример имени, у вас будет отображаться имя вашей организации.
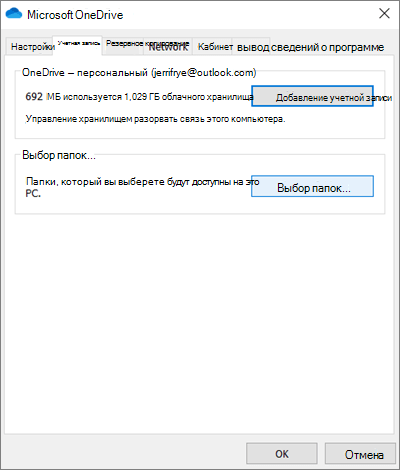
Если вам потребуется изменить папку, которую вы синхронизируете на своем компьютере, щелкните правой кнопкой мыши значок облака в области уведомлений на панели задач и выберите Параметры > Учетная запись > Выбрать папки. Здесь приведены дополнительные сведения о вашей учетной записи, а также можно изменить другие параметры OneDrive.
Подробнее
-
Как исправить ошибку «Установлена более новая версия OneDrive»
-
Сведения о функции «Файлы по запросу» в OneDrive
-
Резервное копирование папок «Документы», «Изображения» и «Рабочий стол» с помощью OneDrive
-
Выбор папок OneDrive для синхронизации с компьютером
-
Решение проблем с синхронизацией OneDrive
Дополнительные сведения
Важно:
Поддержка старого приложения синхронизации OneDrive для бизнеса в SharePoint Online завершена. Если вы видите этот значок на панели задач, см. эту статью.
Нужна дополнительная помощь?
Нужны дополнительные параметры?
Изучите преимущества подписки, просмотрите учебные курсы, узнайте, как защитить свое устройство и т. д.
-
Pilot
Администратор
Команда форумаВ сегодняшней статье мы рассмотрим как синхронизировать любую папку с OneDrive в Windows 10 .
OneDrive – это бесплатное онлайн-хранилище, которое поставляется вместе с Windows 10 и используется с вашей учетной записью Microsoft. После сохранения файлов в OneDrive вы сможете получить к ним доступ с любого ПК, планшета или телефона. Вы можете выбрать, какие папки синхронизировать в OneDrive с вашим ПК . Windows 10 по умолчанию сохраняет папку OneDrive в папке %UserProfile% вашей учетной записи (например “C:\Users\Aleks”).
1.Откройте командную строку : один из способов – в строке поиска введите cmd => нажмите на “Командная строка” левой кнопкой мыши или нажмите кнопку Enter на клавиатуре.
2. В этом примере мы покажем как сделать, чтобы все что попадает в папку Downloads на диске D синхронизировалось с OneDrive (вы же можете выбрать любую другую папку и на любом другом диске). В командную строку нужно ввести mklink /j “%UserProfile%\OneDrive\Downloads” “F:\Downloads“ и нажать кнопку Enter (выделенное красным меняйте на свое).
После выполнения команды копия папки Downloads (та папка которую вы указали) появится в папке OneDrive и все содержимое будет синхронизировано с облачным хранилищем. Если я удаляю, что-то из папки Downloads на диске D, оно также удаляется с папки OneDrive, по сути – мы просто в папке OneDrive создали ярлык на папку, которую хотим синхронизировать.
На сегодня все, если вы знаете другие способы – пишите в комментариях! Удачи Вам