
В Windows 11 по умолчанию расширения зарегистрированных типов файлов не показываются — для кого-то это может быть удобно, но иногда полезно видеть конкретное расширение: например, так меньше вероятность запустить вредоносный exe файл с иконкой как у файла фото или документа.
В этой пошаговой инструкции для начинающих подробно описаны три способа включить показ расширений файлов в проводнике Windows 11. На близкую тему: Как показать или скрыть скрытые и системные файлы Windows 11.
Меню Проводника
Самый быстрый способ включить отображение расширений — использовать соответствующую опцию в меню нового Проводника.
Шаги будут следующими:
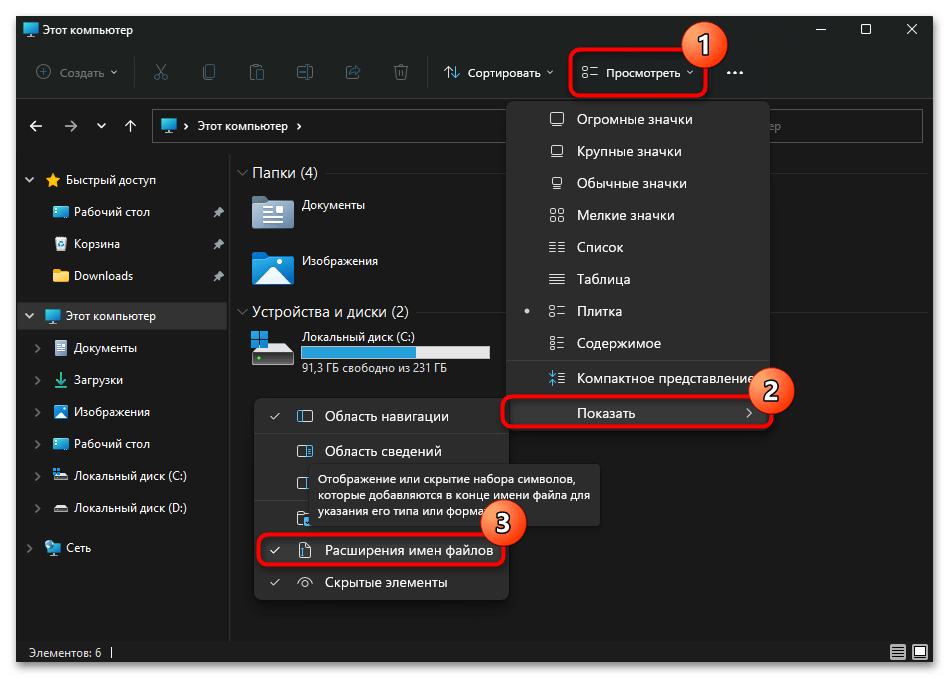
- Откройте проводник. В верхней строчке нажмите кнопку «Просмотреть». Если такой кнопки нет, нажмите по трём точкам, а затем — «Просмотреть».

- Перейдите в раздел «Показать»
- Отметьте пункт «Расширения имен файлов».


С этого момента расширения файлов начнут показываться в Проводнике и на рабочем столе.
В параметрах проводника
Второй способ — использовать элемент панели управления «Параметры проводника» для включения отображения расширений. Открыть его можно одним из следующих способов:
- Открыть меню Проводника и выбрать пункт «Параметры».
- Открыть панель управления и открыть пункт «Параметры проводника»
- Нажать клавиши Win+R на клавиатуре, ввести control folders и нажать Enter.

В открывшихся параметрах проводника:
- Перейдите на вкладку «Вид».
- Снимите отметку с пункта «Скрывать расширения для зарегистрированных типов файлов».
- Примените настройки.
После выполненных действий расширения начнут показываться, во всяком случае для тех файлов, которые его имеют (вам могут встретиться и файлы без расширения).
Параметры разработчика
И ещё одна возможность: включить показ расширений файлов можно в Параметрах, для этого используйте следующие шаги:
- Откройте Параметры — Система — Для разработчиков.
- Раскройте раздел «Проводник» и включите пункт «Отображение расширений файлов».


При этом сам режим разработчика включать не обязательно, чтобы указанная опция работала.
Способ 1: Раздел меню «Проводника»
В Windows 11 появилось быстрое включение и отключение отображения расширений, что очень удобно для тех, кто постоянно работает с большими объемами файлов.
Для этого откройте любую папку в «Проводнике» и кликните по кнопке с названием «Посмотреть». Из выпадающего меню наведите курсор на строчку «Показать» для отображения дополнительного меню. В нем уже выберите пункт «Расширения имен файлов».
В будущем можете легко переключаться между значениями этого параметра. Галочка стоит — расширения отображаются, и наоборот.
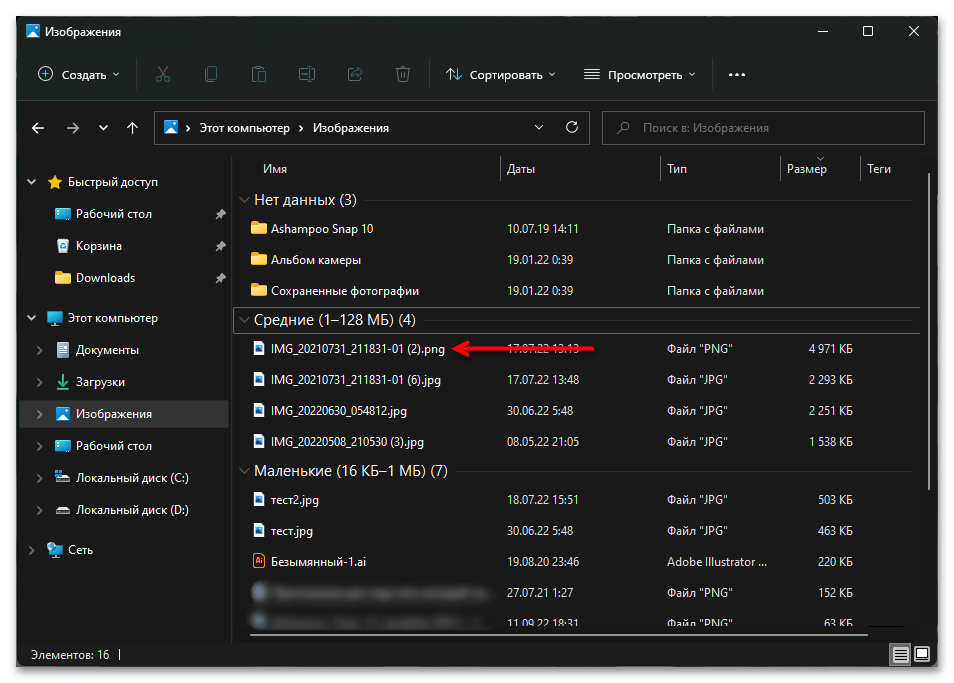
Можете перейти в любую папку, где есть файлы, и посмотреть, появились ли расширения в конце их названий.
Способ 2: «Параметры папок»
Классический для всех Windows метод включения расширений заключается в вызове окна «Параметры папок».
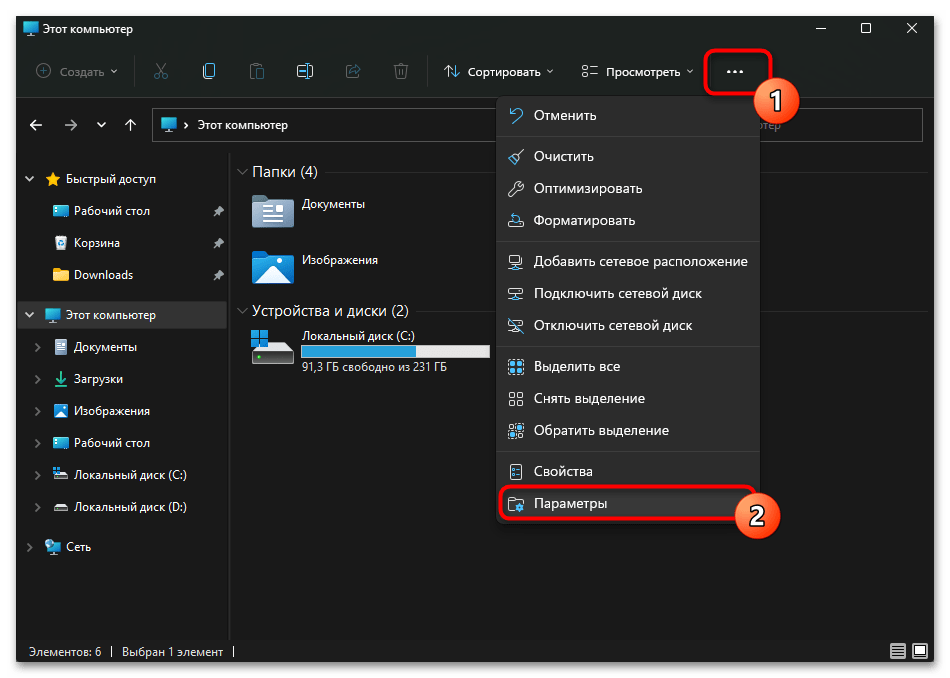
- Откройте любую папку «Проводника» и кликните по кнопке с тремя точками. Из выпадающего меню щелкните по строке «Параметры».
- Появится новое окно, в котором переключитесь на вкладку «Вид», прокрутите список дополнительных параметров в самый низ и уберите галочку с пункта «Скрывать расширения для зарегистрированных типов файлов». Примените изменения кнопкой «ОК».

Результат будет тем же, что и в предыдущем способе.
Наша группа в TelegramПолезные советы и помощь
- To show file extensions on Windows 11, open File Explorer, then click on “View,” select “Show,” and choose the “File name extensions” option to show extensions.
- Another way is to open “Folder Options” and clear the “Hide extensions for known file types” option.
- Furthermore, you can enable this feature from the Settings app or by using Command Prompt or PowerShell.
On Windows 11, you can show file extensions on File Explorer in multiple ways, and in this guide, I will show you how to complete this configuration. A file extension is the three or four letters after the period at the end of a filename. It indicates the file format type, such as .txt, .docx, or .pdf. While not strictly necessary for file functionality, extensions offer several benefits.
For example, they provide a quick visual way to identify a file’s format, making it easier to select the right application to open it, and they allow for easy modification of a file’s type, for instance, changing a .txt file to a .bat file for scripting purposes.
File Explorer hides the extensions for known file types by default because it can create a cleaner, less cluttered appearance, particularly for users who aren’t tech-savvy. However, it also helps safeguard against unintentional changes to file extensions, which could render the file unusable. In addition, historically, it was used to mask malicious files disguised as harmless ones, though this is less of a concern today.
Despite the default behavior, it’s often beneficial to display file extensions, and you can change this configuration from the File Explorer and Settings app. If you’re comfortable editing the Registry and using commands, you can also make extensions visible through Command Prompt or PowerShell.
In this guide, I will teach you the easy steps to show extensions for files on File Explorer.
- Show file extensions on Windows 11 from File Explorer
- Show file extensions on Windows 11 from Settings
- Show file extensions on Windows 11 from Command Prompt
To show file extensions on Windows 11, use these steps:
-
Open File Explorer (Windows key + E) on Windows 11.
-
Click the View menu button in the command bar.
-
Select the Show submenu and choose the “File name extensions” option.


Enable extensions from Folder Options
You can also enable file extensions from the “Folder Options” settings using these steps:
-
Open File Explorer.
-
Click the See more button and click on Options.

-
Click the View tab.
-
Clear the “Hide extensions for known file types” option under the “Advanced settings” section.
-
Click the Apply button.
-
Click the OK button.

Once you complete the steps, File Explorer will show extensions for known file types on Windows 11, such as .txt, .exe, and .docx.
Show file extensions on Windows 11 from Settings
To make file extensions visible from the Settings app, use these steps:
-
Open Settings.
-
Click on System.
-
Click the For developers page.
-
Click the File Explorer setting.
-
Turn on the “Show file extensions” toggle switch.


After you complete the steps, the file extensions will now be available on File Explorer.
Show file extensions on Windows 11 from Command Prompt
You can also use Command Prompt or PowerShell to enable extensions for files by running a command that will edit the Registry to enable the feature. This option will also come in handy when turning on extensions through a script file.
Warning: It’s crucial to note that modifying the Registry can cause serious problems if not used properly. It’s assumed you know what you’re doing and created a full backup of your system before proceeding.
To show file extensions through the Command Prompt on Windows 11, use these steps:
-
Open Start.
-
Search for Command Prompt or PowerShell, right-click the top result, and choose the Run as administrator option.
-
Type the following command to show extensions for files and press Enter:
reg add HKCU\Software\Microsoft\Windows\CurrentVersion\Explorer\Advanced /v HideFileExt /t REG_DWORD /d 0 /f


After you complete the steps, File Explorer will start displaying file extensions on Windows 11.
If you want to undo the changes, you can use the same instructions, but in step 3, run this reg add HKCU\Software\Microsoft\Windows\CurrentVersion\Explorer\Advanced /v HideFileExt /t REG_DWORD /d 1 /f command.
Update October 30, 2024: This guide has been updated to ensure accuracy and reflect changes to the process.
Readers help support Windows Report. We may get a commission if you buy through our links.
Read our disclosure page to find out how can you help Windows Report sustain the editorial team. Read more
All files on your computer have an extension, but in most cases it is hidden, and you’ll just see the name of the file.
This applies to most common file types since users are often concerned only with the actual file name rather than its extension.
However, sometimes you need to reveal the file extensions of your documents to find a specific one in no time or to perform a certain task.
This is pretty simple to do, and in today’s guide, we’re going to show you how to see file extensions for a file on Windows 11 but not before understanding what extensions really are and if some of them are revealed by default.
What is a file extension?
The file extension is located at the end of the file name, and it’s used as a file type identifier. This extension consists of a period followed by 2-4 characters.
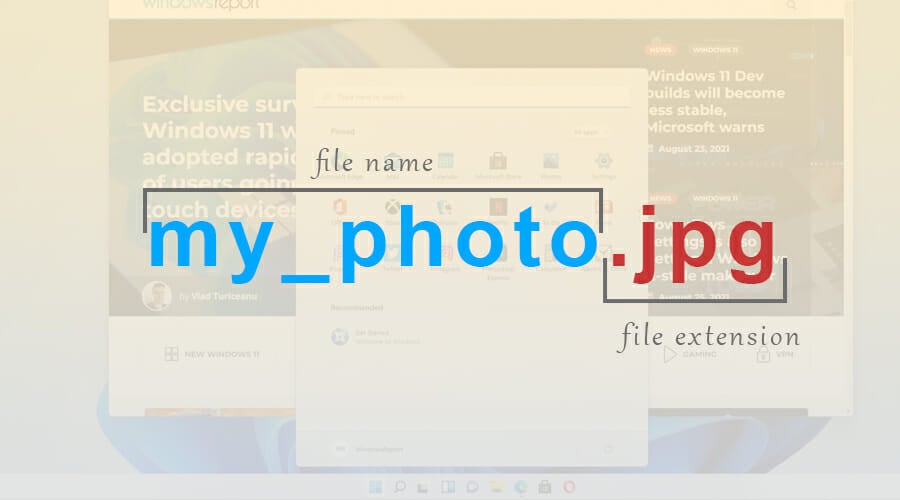
When you try to open a certain file, Windows analyzes those characters and starts the application that is assigned to that file type.
There are more than a thousand file extensions available, and many applications have unique extensions that they use.
Are certain file extensions shown by default?
File extensions on Windows 11 aren’t revealed by default for most file types. This includes executable files, pictures, etc. However, certain extensions, such as ones for DLL files are revealed.
This is a clever design choice because many users don’t know the difference between a file name and a file extension, and less experienced ones might change the file extension by accident.
How can I view file extensions in Windows 11?
- Open the desired directory in File Explorer.
- Now click on View, expand the Show section and click on File name extensions.


Keep in mind that the same option can be used to hide file extensions in Windows 11 with just two clicks.
2. Change File Explorer options
- Click on the Search icon in the Taskbar to open the Search menu.

- Now type file explorer options. Select File Explorer Options from the results.
- Head to the View tab and uncheck Hide extensions for known file types. Click Apply and OK to save the changes.


Once you save the changes, you’ll be able to view file extensions for all file types.
Many reported that the Search bar is not working in Windows 11 and if you happen to have the same issue, we have a guide with some quick ways to fix it.
- Recent Windows 11 update lets you disable profanity filter in voice typing
- Microsoft wants Windows 10 users to upgrade to Windows 11 or Copilot + PCs
- Windows 11 KB5055627 update makes File Explorer more fluid
- A few keyboard settings are moving from Control Panel to Settings app in Windows 11
3. Modify your registry
-
1. Press the Windows + R keys at the same time on your keyboard.
-
2. The Run dialog box will open.
-
3. Type regedit in it and then click OK.
-
4. The Registry Editor window will open.
-
5. Navigate to the following key:
Computer\HKEY_CURRENT_USER\Software\Microsoft\Windows\CurrentVersion\Explorer\Advanced
-
6. Now double-click the HideFileExt DWORD.
-
7. Set the Value data to 0 and click OK.

-
8. For file extensions to appear, you might have to restart your Windows 11 PC after the procedure.


If you are looking to view file extensions on your Windows 11 device, you can also tweak the Registry. By modifying the HideFileExt DWORD, you can enable or disable the hiding of file extensions.
What happens if I change the file extension of a file?
Windows already has a system that prevents this from happening, and if you try to change the extension, you’ll get a warning message telling you that the file extension will become unusable.
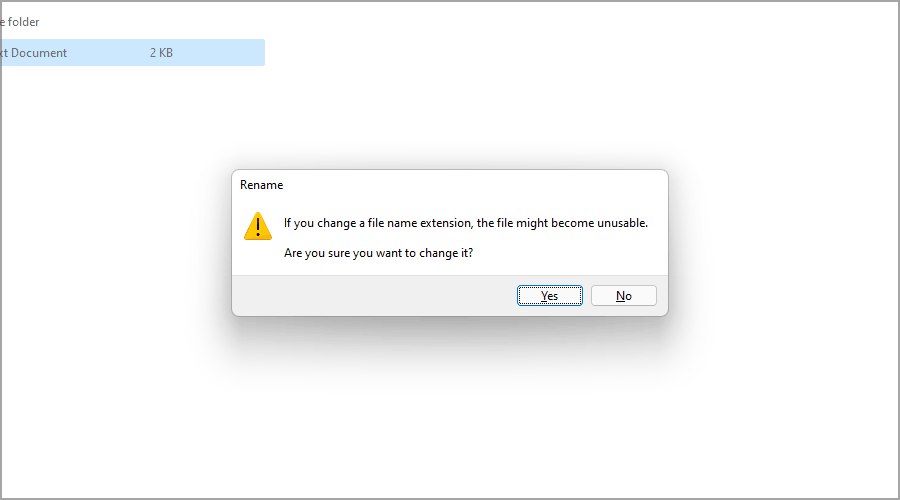
But if you manage to change the extension, there are several results depending on the file extension and the file type.
Assuming that you rename the file and accidentally remove its file extension, then you won’t be able to open that file anymore.
However, you can easily fix that by renaming the file and adding the file extension at the end. What happens when you change one file extension to another?
If you, for example, change the extension of a .jpg file to .png, since the file types are similar, the file should still work.
But if you change it to a different format, such as .txt, the file will be opened by another app and it won’t work properly, but changing the extension back to the original one should fix the problem.
When should I show file extensions?
For most everyday users there’s no need to view hidden file extensions. But if you’re an advanced user, and you’re looking for a specific file type or if you want to change a file extension of a file, then you can go ahead and reveal file extensions.
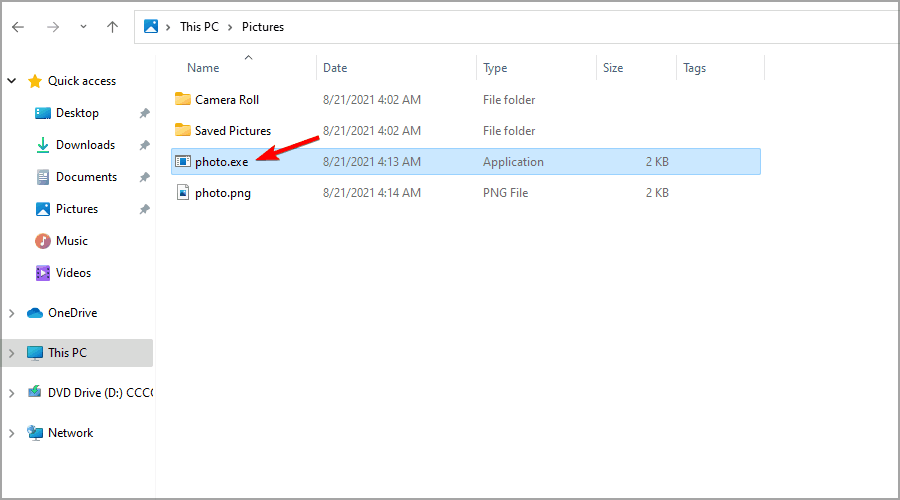
Another example when it might be useful to show file extensions is when dealing with malware. It sometimes tries to copy the name of a regular file and trick the users into running it.
However, by revealing file extensions, it should be easy to detect a malicious file that is imitating the normal file.
These are just a couple of simple methods that you can use to reveal file extensions on Windows 11, so be sure to give them a try.
As you can see, some of them are similar to the ones applied when trying to show file extensions in Windows 10.
In most cases, there’s no need to enable file extensions for all file types, but if you choose to do so, be sure not to change or remove the file extension when renaming files.
What method are you using to reveal file extensions? Let us know in the comments section below.
Milan Stanojevic
Windows Toubleshooting Expert
Milan has been enthusiastic about technology ever since his childhood days, and this led him to take interest in all PC-related technologies. He’s a PC enthusiast and he spends most of his time learning about computers and technology.
Before joining WindowsReport, he worked as a front-end web developer. Now, he’s one of the Troubleshooting experts in our worldwide team, specializing in Windows errors & software issues.