
Shutdown Timer is one useful way to shut down your computer without your direct action. Setting a shutdown timer is often helpful when you need to need to leave your computer while it’s downloading or copying something huge, or performing a very time-consuming task such as defragmenting or scanning your drives, and want it to shut down automatically after a set time period.
With a set shutdown timer, you can leave your computer alone while it does its things and when the timer expires, it will automatically shut down itself. There are several ways to set a shutdown timer in Windows 11 without the need to install any app. However, if you are not very tech-savvy and have trouble understanding and using commands in Windows, you can use a third party shutdown app instead.
Also see: How to Turn Off Auto Shutdown in Windows 11
How to set a timer for shutdown in Windows 11
This guide will show you 4 different methods to set a shutdown timer, as well as apps you can use to schedule automatic shutdown in Windows 11.
Method 1: Command Prompt
The easiest way to quickly set a shutdown timer in Windows 11 is to execute a simple command in Command Prompt. You can use the same command lines in PowerShell or Windows Terminal as well.
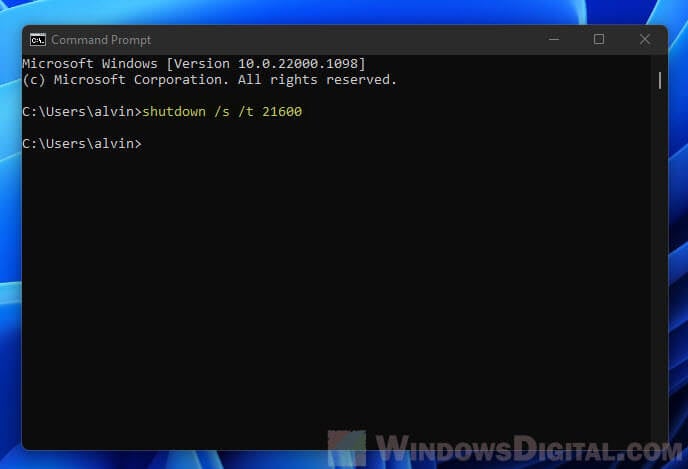
- Search for “Command Prompt” or simply “cmd” via Start and open it. In most cases, you don’t need to run CMD as administrator for the command line to work.

- In the Command Prompt window, execute the following command line.
shutdown /s /t xxx

- Replace xxx with the number of seconds you want to set as the time-out period before your computer shut down on its own. For example,
shutdown /s /t 1800will schedule an auto shutdown after 1800 seconds, which is 30 mins.

If you would like to cancel an already scheduled shutdown timer, execute this command line: shutdown /a.
In addition, if you execute the shutdown timer command when there is already a pending scheduled shutdown, you will receive and error that reads “A system shutdown has already been scheduled (1190)“.
If you would like to set a timer to restart instead of shutdown, use the parameter “/r” instead of “/s“. The command to set a restart timer in Windows 11 would look like shutdown /r /t 1800. To hibernate your computer, use “/h” as the parameter. To log off Windows instead, use “/l” as the parameter.
Learn more: Sleep vs. Hibernate vs. Hybrid Sleep vs. Shutdown
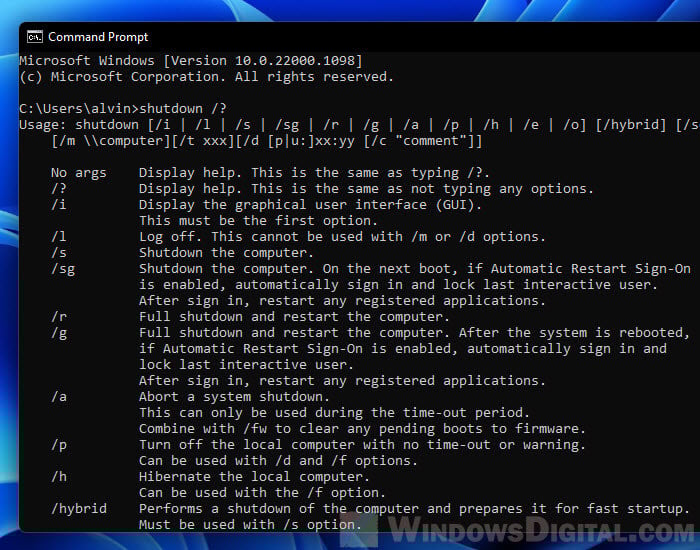
You can view a list of arguments you can use with the shutdown command by executing shutdown /? in the command prompt.
Unfortunately, there is no way to view the countdown timer (to know how much seconds left until next shutdown) after an automatic shutdown is scheduled this way. The best you can do is to determine if there is a pending scheduled shutdown. You can do so by executing the shutdown timer command line again and see if it will show the (1190) error.
Method 2: Run dialog box
Another simple way to set a timer to shut down Windows 11 is to enter a run command in the Run dialog box. The command line you will use in the Run dialog box will be the same as the one you use in Command Prompt.
First, open the Run dialog box by either pressing Win + R keys or by search “Run” via the Start menu.

Next, type the following line into the “Open” text field and then click OK to run it.
shutdown /s /t 10800
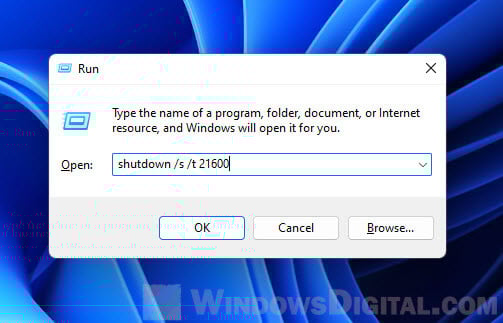
Replace xxx with the countdown duration in number of seconds you want to set as the shutdown timer. When the timer expires, your computer will shutdown automatically. For example, setting a timer of 10800 would tell your computer to shut down after 3 hours.
To cancel a scheduled shutdown, reopen the Run dialog box and enter shutdown /a.
Related issue: Can’t Shut Down Windows 11 (Goes back to login screen)
Method 3: Create a shortcut
If you often need to set a shutdown timer for your computer, it would be a great idea to create a shortcut to do so. This way you can save time from needing to open the command prompt or run dialog box and manually enter the command line.
With this shortcut, you can double-click it to directly execute the shutdown timer command line without the need to open anything else. Without further ado, here’s how to create a shortcut to set a shutdown timer in Windows 11.
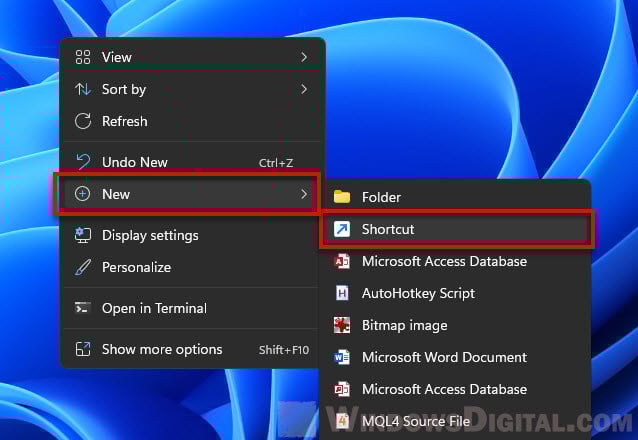
- Right-click anywhere on the desktop and select New > Shortcut.

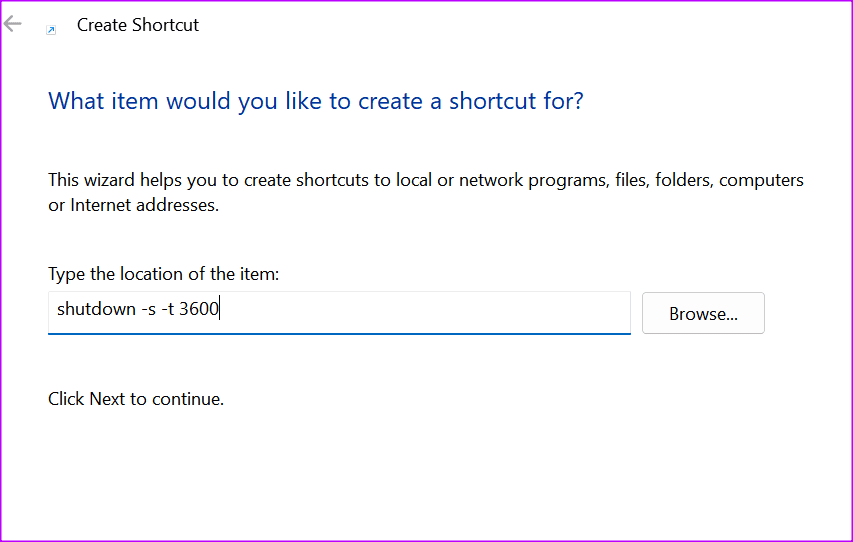
- In the “location of the item” field, type the following.
C:\Windows\System32\shutdown.exe /s /t xxx

- Replace xxx with the number of seconds before Windows execute shutdown itself automatically. Replace C:\ if your Windows was installed on another drive. Click Next to continue.
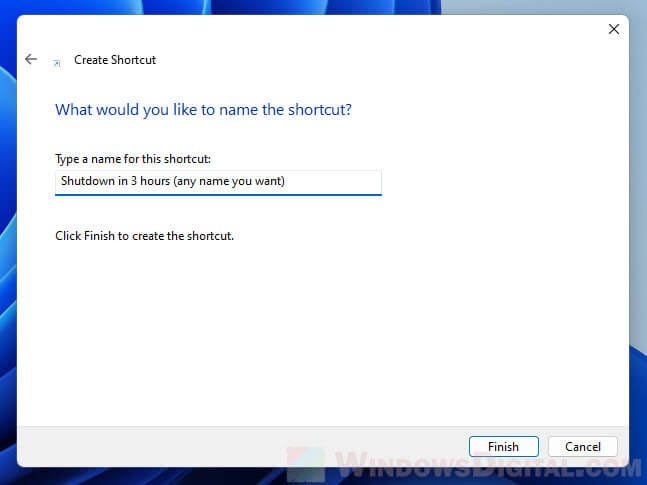
- Next, type a name for the shortcut. You can name it anything you want. Click Finish to complete the wizard.

- Every time you want to set a shutdown timer for your PC, just double-click the shortcut to instantly schedule the automatic shutdown.

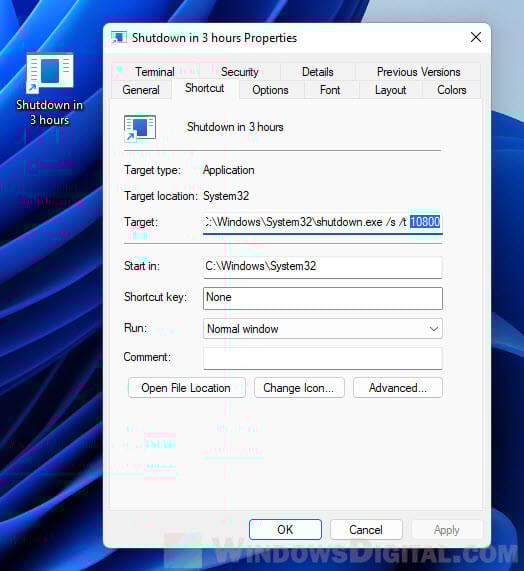
You can change the timer by right-clicking the created shortcut and select Properties. In the Target text field, replace the existing time-out period (number of seconds) with the new timer you want to set.
Method 4: Use a shutdown app
There are plenty of third-party apps that allow you to flexibly schedule an automatic shutdown for Windows 11. These apps also provide graphical-user interface so it’s much more easier to use. You will also be able to see more info about the shutdown timer such as how much time left until next scheduled shutdown, etc.
You can find these apps directly from the Microsoft Store. Go to Microsoft Store and search for “shutdown“. Most of these simple apps are free to use. You can try each one of them until you find one that satisfies your needs.
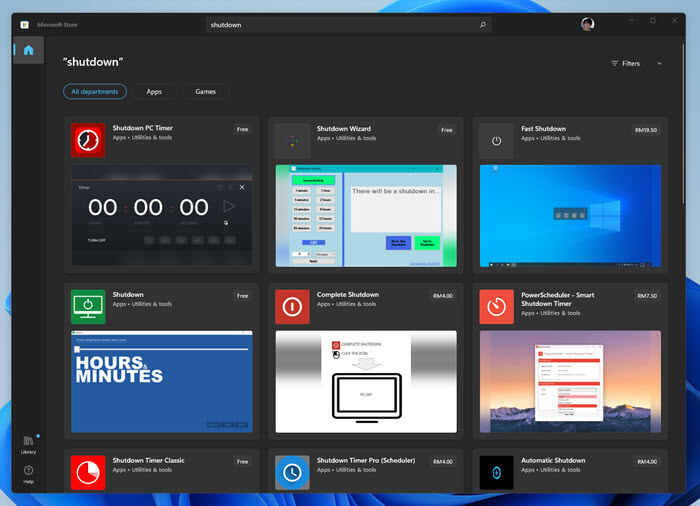
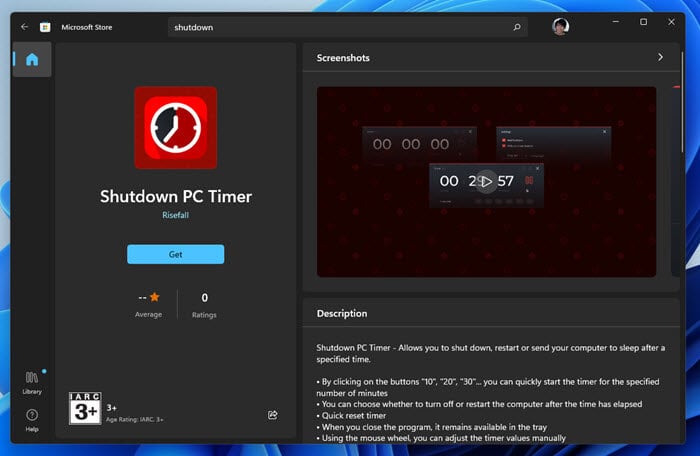
To install an app, select the app and then click the “Get” button to install it.
After you’ve installed the shutdown timer app, you can find the app from the Start menu “All apps” section or manually search for it. You can then pin the app to your taskbar for quick access.
1. Using Command Prompt
• Open the Windows Command Prompt.
• Type in the following command:
Shutdown -s -t 3600
The -s argument specifies that your machine should be shut down, and the -t argument specifies that there should be a 3600-second wait.
(external link removed by moderator)
2. Sleep Timer Desktop Shortcut
• Right-click on your desktop and then select New > Shortcut.
• Paste below command:
Shutdown -s -t 3600
• Type the name of the shortcut and then click on the Finish button.
(external link removed by moderator)
Sleep Timer Cancellation Shortcut
• Right-click on your desktop and then select New > Shortcut.
• Paste below command:
Shutdown -a
• Type the name of the shortcut and then click on the Finish button.
Windows 11 allows users to schedule their PC’s shutdown at a certain time or after a certain period of inactivity. Scheduling shutdowns not only saves energy, but it also ensures that your PC is protected from unauthorised access when you are away from your computer. The function is particularly useful for overnight updates or if you are taking a break from work.
What are different ways to schedule a shutdown in Windows 11?
Scheduling your PC’s shutdown means that your Windows system will switch off at a certain time or after a set period of time. Unless you have specified for it to do otherwise, your system will shut down completely. You should be aware that unsaved files or settings may be lost when your computer shuts down. It is important to save everything before leaving your computer. If you’re wondering how to schedule a shutdown in Windows 10, the instructions for Windows 11 are quite similar:
Use Command Prompt
Step 1: open the Run menu using the windows shortcut [Windows] + [R]. Enter the CMD command ‘cmd’ and confirm with [Ctrl] + [Shift] + [Enter] to open the dialogue with administrator rights.
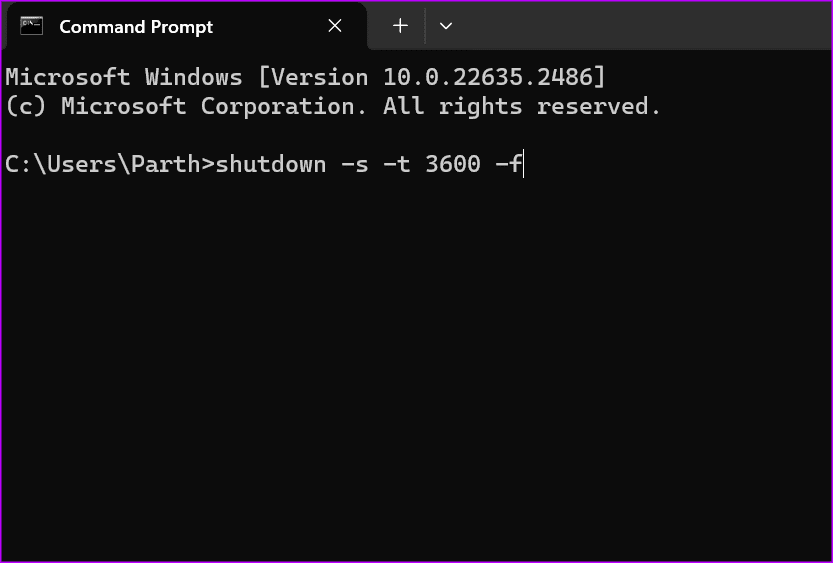
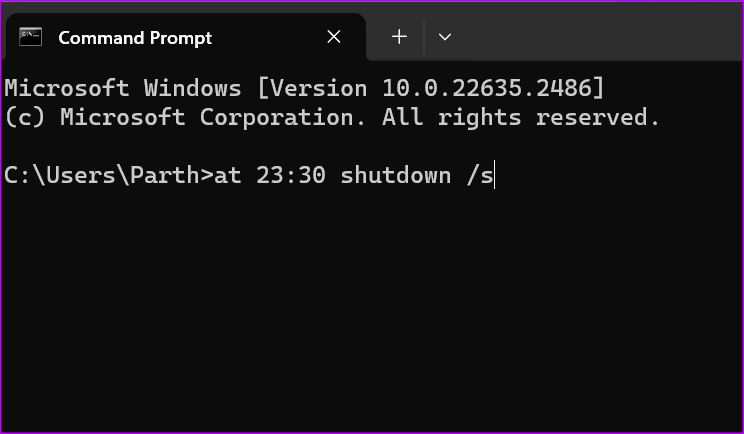
Step 2: enter the command ‘shutdown -s -t XXXX -f’ in the terminal window. ‘XXXX’ is a placeholder for the number of seconds after which your computer should shut down. For example, enter ‘shutdown -s -t 3600 -f’ if you want your PC to shut down after 3,600 seconds, or one hour, of inactivity. If you want your PC to restart after a specified period of time, replace the ‘-s’ with ‘-r’ in the command. If you want to define a time for the shutdown, use the command ‘at time shutdown /s’. Use the time parameter to specify the exact time, for example, ‘at 23:30 shutdown /s’.

The shutdown command has several custom settings. Simply type ‘shutdown’ and press [Enter] to view these. The settings for restarting your PC, force quitting applications, and activating the hibernating mode in Windows 11 are available here.

Use the Windows search bar
Step 1: the Windows search bar is a handy shortcut if you don’t want to use the Run dialogue. Enter ‘shutdown -s -f -t (time)’ in the Windows search bar in the taskbar. The placeholder ‘(time)’ is used to indicate the amount of time before your PC should shut down. For example, ‘shutdown -s -f -t 3600’ specifies that the PC will shut down after one hour of inactivity. Keep in mind, you should save all files and changes before a shutdown is due to take place.

Step 2: the command ‘shutdown -a’ is used to stop the shutdown command. Enter this in the search bar and press [Enter].
Use Windows Power Options
The Power Options menu is the first place to go if you want to make Windows 11 faster, schedule a system shutdown, or edit settings for startup programs in Windows 11.
Step 1: enter ‘Edit Power Plan’ into the Windows search bar and then select it.
Step 2: go to Change advanced power settings in the menu window.
Step 3: click Sleep in the Power Options menu. Then click on Hibernate after in the dropdown menu. You’ll find On battery and Plugged in listed here. You can set the time in minutes and your computer will shut down after being inactive for the specified amount of time.

Step 4: click OK to confirm the changes.
Use Windows Task Scheduler
You may want your computer to shut down at a certain time or after a period of inactivity. The Windows Task Scheduler allows you to specify the exact time your computer should shut down every day.
Step 1: type ‘Task Scheduler’ into the Windows search bar.
Step 2: click on Create Task… in the menu which is found on the right side of the window.
Step 3: go to the General tab and give the task a name. Check the boxes next to Run only when user is logged on and Run with highest privileges. Select Windows 11 in the Configure for dropdown menu.

Step 4: go to the Triggers tab. Click on New….
Step 5: select On a Schedule under Begin the task. You can decide in Settings whether the task should be completed One time, Daily, Weekly or Monthly. You can also choose when the task should start and whether it should be limited to a certain period of time.
Step 6: check the Enabled box and confirm with OK.
Step 7: now, you need to choose the type of task. Go to the Actions tab and click New…. The menu window New Action will appear. Select Start a program. Enter the command ‘shutdown’ in the Program/script field. Under Add arguments, enter ‘/S /F’ and confirm with OK.
Step 8: finally, specify the conditions under which the task should take place. Go to the Conditions tab and activate the Start the task only if the computer is idle for option. Enter the time after which the task should be triggered. You should also activate the option Stop if the computer ceases to be idle and Restart if the idle state resumes. Confirm with OK.
Was this article helpful?
Quick Tips
- To schedule a shutdown from the Windows search bar, type the following command, replacing ‘time’ with the number of seconds before the PC turns off: shutdown -s -f -t time
- Using hibernate is quicker than shutting down and restarting your PC. To do so, open the Power options, choose Sleep, and then select Hibernate.
Method 1: Set Auto Shutdown Using Task Scheduler
Task Scheduler is a built-in Windows OS app that can be used to schedule different chores. Here’s how to use it to schedule an auto shutdown on your PC.
Step 1: Type Task Scheduler in your Windows computer’s search bar and hit Enter.
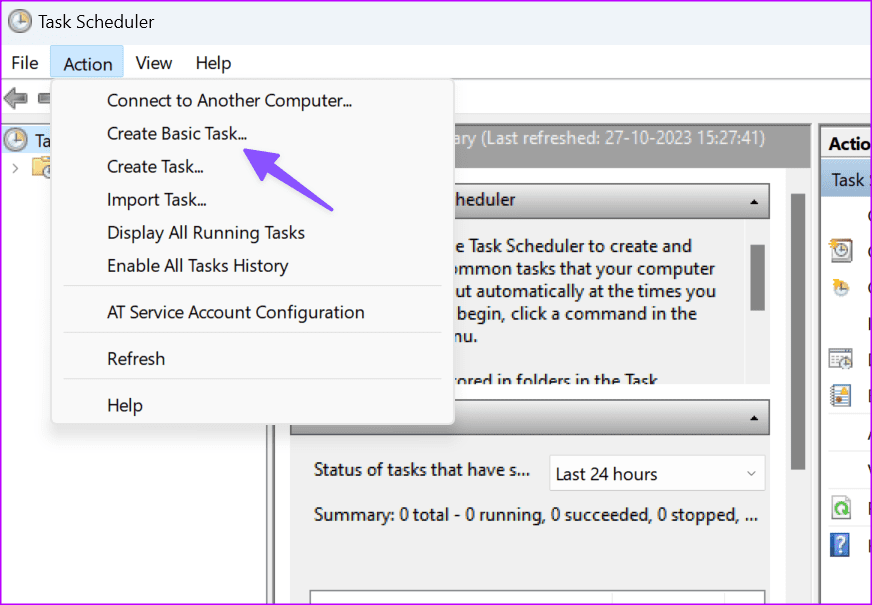
Step 2: Under the Actions section, click Create Basic Task.
Step 3: Give the task a name and a description (optional), and click Next. For this tutorial, we’ll name the task Auto-Shutdown at 12 AM.
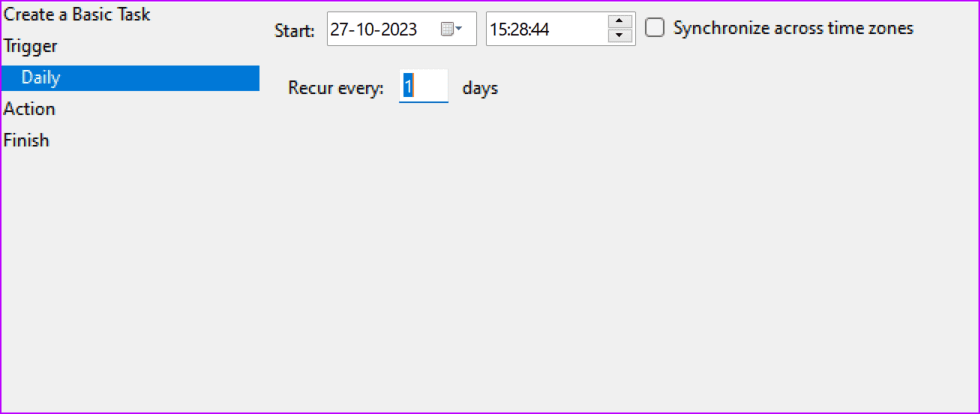
Step 4: Choose how often you want the task done (daily, weekly, monthly, or a one-time task) and click Next.
Step 5: Next, select a start date and the time you want your PC to shut down automatically.
Step 6: On the new window, select Start a program and tap the Next button.
Step 7: Click the Browse button from the subsequent menu.
Step 8: Navigate to the bottom of the page, select the shutdown application, and click Open.
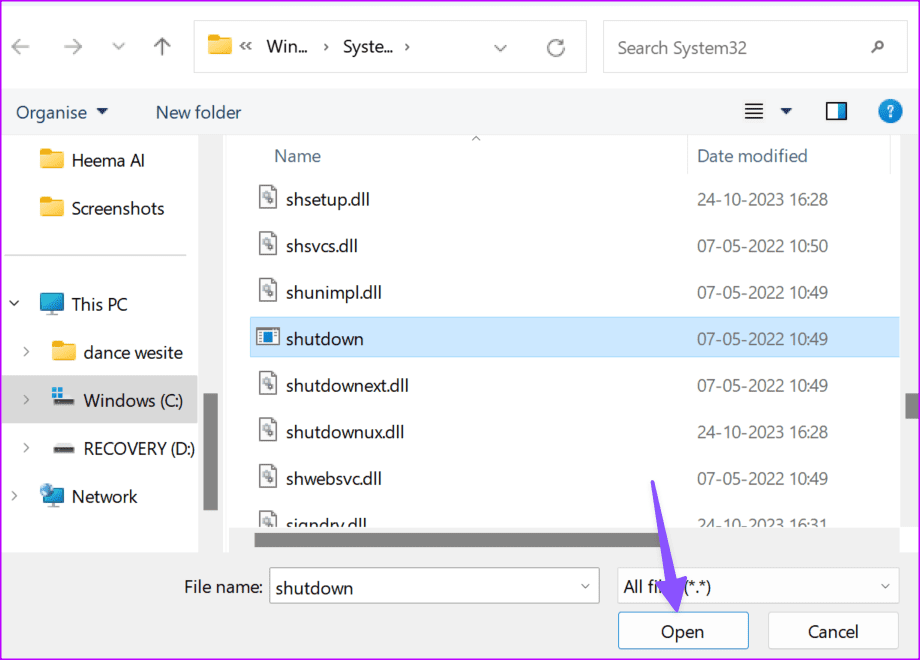
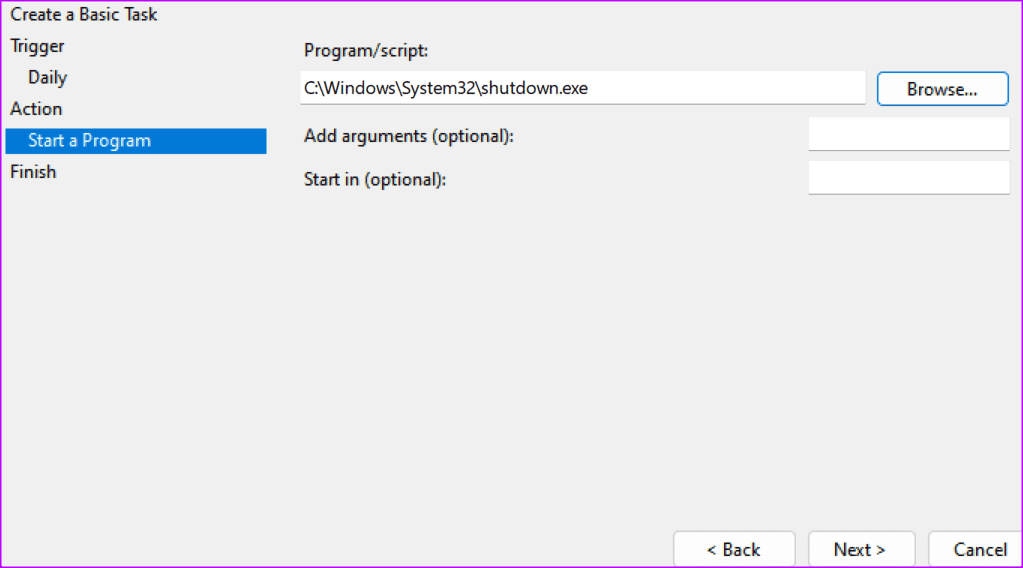
Step 9: Type -s into the Add arguments (optional) box and click Next.
Step 10: Preview the auto shutdown task on the new window and click Finish.
Method 2: Use Command Prompt
You can use the Command Prompt menu to auto-shutdown a Windows PC. Here’s how.
Step 1: Press the Windows key to open the Start menu, type Command Prompt, and hit Enter.
Step 2: Enter the command below in the Command Prompt window. Replace XXXX with the number of seconds after which the computer shuts down.
shutdown -s -t XXXX -f
Step 3: You can also shut down the PC at a specific time. For instance, you can enter’ at 22.:30 shutdown /s’ to do so.
at time shutdown /s
Refer to our guide if the Command Prompt doesn’t open on your Windows PC.
Method 3: Create a Desktop Shortcut for Shutdown Timer
You can create a desktop shortcut if you don’t want to remember a specific auto-shutdown command. Here’s how.
Step 1: Right-click on the desktop and expand New from the context menu.
Step 2: Select Shortcut.
Step 3: Enter the following command and click Next. Replace XXXX with the number of seconds after which you want to shut down the PC:
shutdown -s -t XXXX
Type a name for the shortcut. Once done, tap the Finish button.
Windows will then create a desktop shortcut. You can double-click it to start the auto shutdown timer.
Was this helpful?
Thanks for your feedback!
The article above may contain affiliate links which help support Guiding Tech. The content remains unbiased and authentic and will never affect our editorial integrity.
Readers help support Windows Report. We may get a commission if you buy through our links.
Read our disclosure page to find out how can you help Windows Report sustain the editorial team. Read more
Settings up a shutdown timer in Windows is possible with a relatively simple command, or using the Task Scheduler. We’ll walk you through all the steps necessary below.
So, if you want to be able to shut down once a long download is finished or want to prevent keeping your computer running in case you fall asleep, keep reading.
How can I schedule the shutdown in Windows 11?
1. Auto shutdown Windows 11 with Run
- First, press the Windows key + X hotkey, which will open a Win + X menu.
- Select Run on the menu to open the window for that accessory.

- Type the following shutdown timer command in the Open box:
shutdown -s -t XXXX
- Then click OK to set the timer. Windows 11 will shut down after the number of seconds set by your timer command.


You will need to replace XXXX in that command with an actual numerical time value. Entering a value of 1 would set Windows to shut down in one second.
Entering 3600 (three thousand, six hundred seconds) will set Windows to shut down in an hour. There are some more time values:
- Two hours: shutdown -s -t 7200
- Three hours: shutdown -s -t 10800
- Four hours: shutdown -s -t 14400
- Five hours: shutdown -s -t 18000
- Six hours: shutdown -s -t 21600
2. Schedule shutdown via Windows Terminal
- First, launch the search tool (you can press the Windows key + S hotkey to do so).
- Input the keyword Windows Terminal within the text box to find that command-line app.
- Right-click Windows Terminal and select Run as administrator on the context menu.
- Then click the Open a new tab button to bring up a menu.

- Select Command Prompt on the menu.
- Enter this command in the Prompt’s tab:
shutdown -s -t XXXX - Then hit the Return key to set the shutdown timer.

NOTE
This method is based on the same command as the Run one. So, you’ll need to specify a time in seconds for the timer much the same.
3. Schedule shutdown with Task Scheduler
- First, launch the search utility and type Task Scheduler within the search tool’s text box.
- Select Task Scheduler to open that utility’s window.
- Click Create Basic Task on the right side of Task Scheduler.

- Enter Scheduled Shutdown within the Name box, and click the Next button.
- Select the One time option, and click the Next option to continue.
- Then choose a date and time for the PC to shut down at, and select the Next option.

- Click the Start a program option and Next.
- Press the Browse button to select the shutdown.exe at:
C:\Windows\System32\shutdown.exe - Then select the Open option.
- Enter -s in the Add arguments box.

- Select the Next and Finish options to complete the scheduled task setup.


4. Set up a shutdown timer desktop shortcut
- Right-click a empty space on your desktop to select the New and Folder options.

- Then enter the shutdown timer command in the item location box:
shutdown -s -t XXXX
- Click Next to go to the final step.
- Enter a title for the shortcut in the text box, and select the Finish option.
- Thereafter, click the Scheduled Shutdown shortcut you just added to the desktop.


NOTE
Make sure you replace the XXXX in the command with an actual timer value as specified within the first resolution.
- Laptop won’t shutdown in Windows 10/11 [ULTIMATE GUIDE]
- How to Delete Windows 11 Saved Passwords
Wrapping up
If you want to specify Windows 11 to shut down at a specific time every day, the Task Scheduler method is the best. With that tool, you can set up a recurring daily shutdown task for a specific clock time. Then you won’t need to keep on entering a shutdown timer command every day.
Moreover, keep in mind that you can shut down Windows 11 with a keyboard shortcut. You may even create a custom shutdown shortcut to turn off your computer globally even if other apps are opened.
So, choose whatever method you prefer for scheduling shutdown in Windows 11. Note that those methods will also work in other Windows platforms.
Before you leave, don’t miss our latest article to learn how to stop Windows 11 shutdown after inactivity.
Frequently Asked Questions
Is there a sleep timer on Windows 11?
Yes, you can set a sleep timer in Settings > System > Power & battery > Screen and sleep. Choose the idle time after which your PC will automatically go to sleep.
Can I schedule my PC to shut down automatically?
Yes, use Task Scheduler to create a task that runs shutdown.exe -s at a specific time. This method allows for recurring shutdowns, so your PC will turn off automatically based on your schedule.
Does Windows 11 have a night mode?
Windows 11 includes Night Light, which reduces blue light emission. Enable it via Settings > System > Display, and you can schedule it to turn on at a specific time to reduce eye strain during late hours.
Matthew Adams
Windows Hardware Expert
Matthew is a freelancer who has produced a variety of articles on various topics related to technology. His main focus is the Windows OS and all the things surrounding it.
He is passionate about the tech world, always staying up-to-date with the latest and greatest. With an analytical view, he likes problem-solving, focusing on errors and their causes.
In his free time, he likes to read and write about history and tries to always develop new skills.