In addition to the default theme provided by Windows, you can create your own custom theme based on your liking to make your user experience more fun and personal.
Both Windows 10 and 11 allow users to create their own customized themes, where they can customize everything from sound to colors, background, and even the mouse cursor. In this guide, we will look at how to get creative with themes in Windows to jazz up the overall look of your system!
How to Create a Custom Theme in Windows 10
To create a custom theme, you must first select the theme you wish to personalize. Then, you can proceed with changing its background, color, sound effects, and cursor options.
If you are a Windows 10 user, follow the steps below to create your custom theme.
- Press Win + I to open Settings.
- Choose Personalization from the list of options available.
-
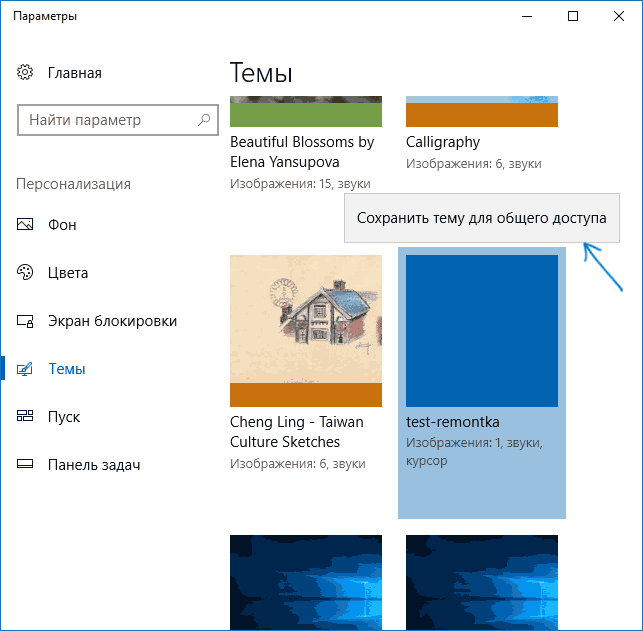
Select Themes from the left pane.

- Now, you can either pick a theme that you want to customize or choose your own background to get started with creating your own theme. In any case, move to the next method below.
Once done, it is time to get creative with the ideas you have in mind!
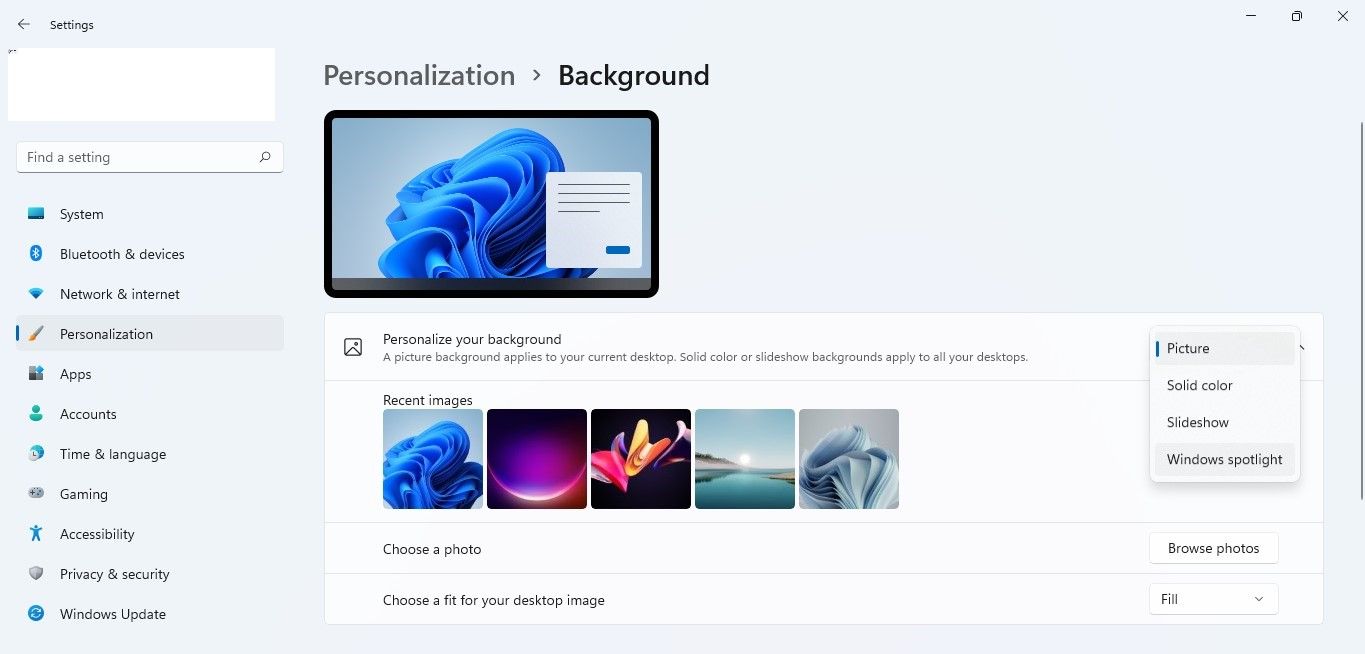
1. Background
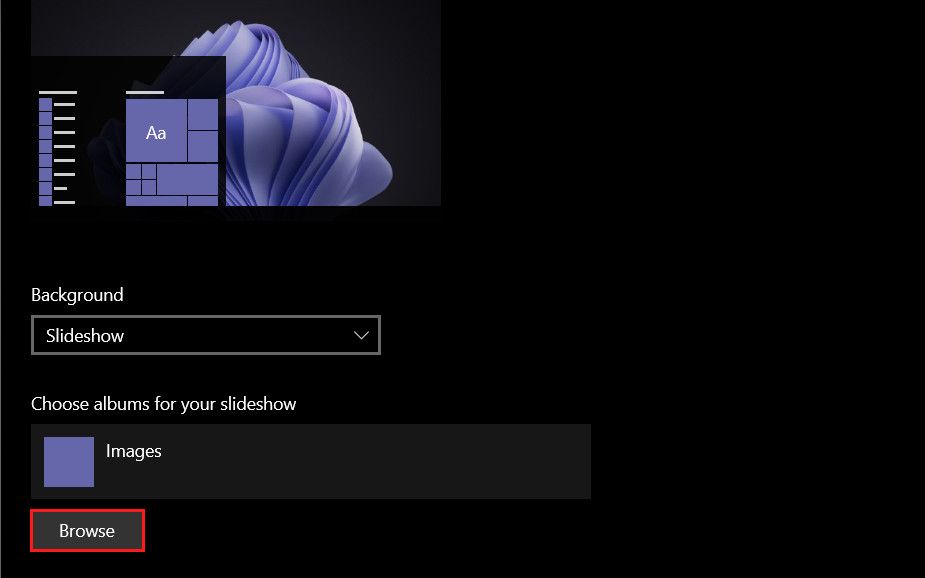
The first step is to set a background of your choice. You have the option to use a picture, solid color, and slideshow to use as the background.
- In the Background section, expand the dropdown for Background and choose your preferred option.
-
If you want to add a picture, you can either choose the ones offered by Microsoft or click on the Browse button to add one from your folders.

-
If you want to go for a solid color, simply pick a background color from the options provided. This will appear on your desktop.

-
In the slideshow, you can pick your preferred album by clicking on the Browse button and then choose how frequently the images will change.

2. Colors
Once you have picked a background, you can pick a color for the system. You will be presented with three options; light, dark, and custom.
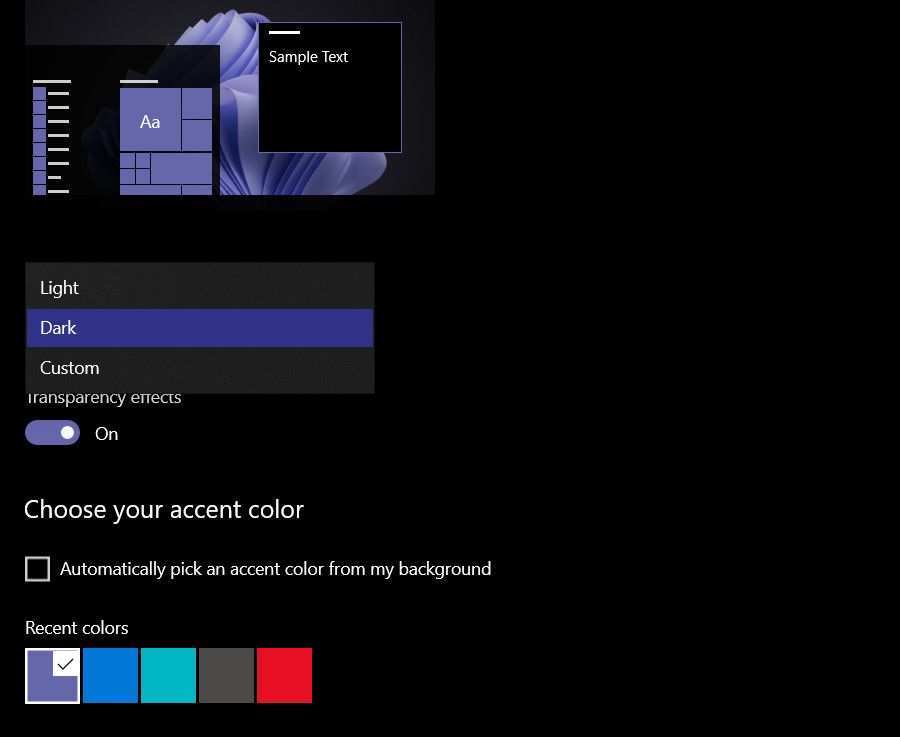
If you choose the Custom option, then you can further pick what you want your default Windows and app mode to be (light or dark). You can also scroll down the same window to pick an accent color of your choice.
3. Sounds
The next setting to customize on our list is the sound.
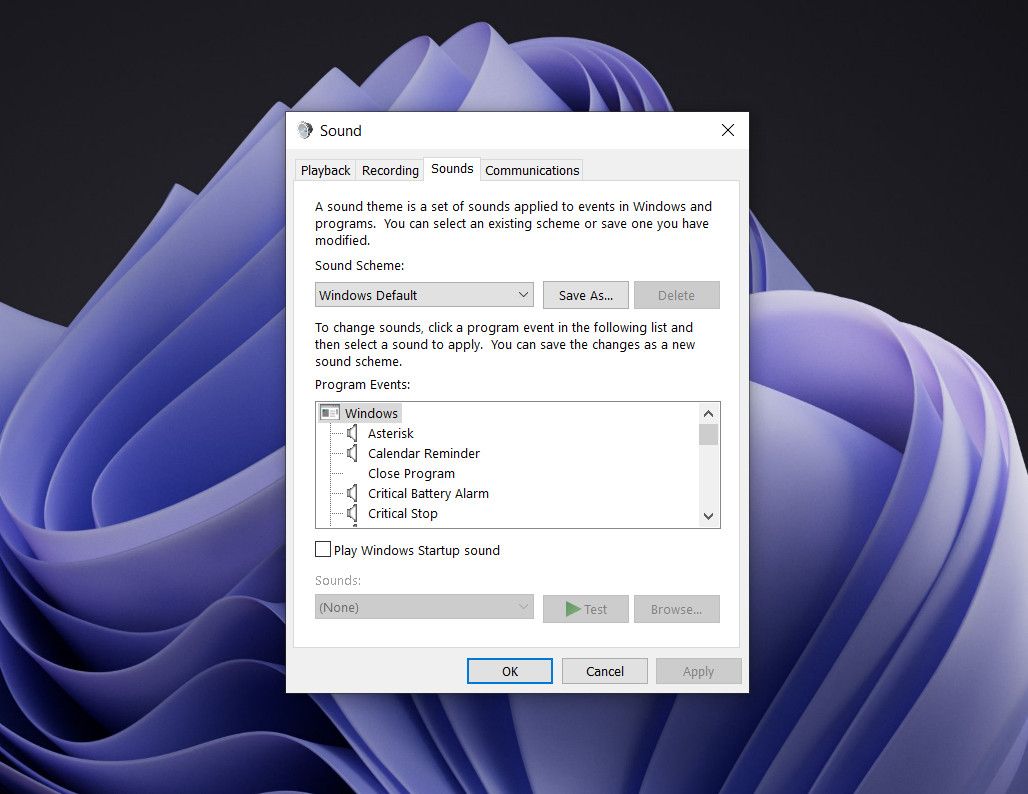
Simply choose Sounds to open the Sound dialog and pick your preferred sound scheme. In the same dialog, you should see a Program Events section. Click on an event to test or change its default sound.
Moreover, if you would like Windows to start with a jingle, you can checkmark the Play Windows startup sound option.
4. Mouse Cursor
Finally, we have the option to customize cursor settings.
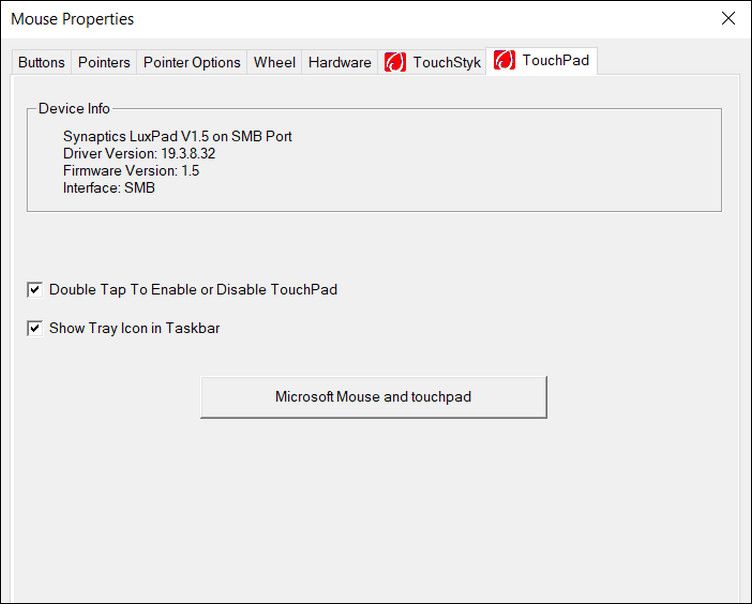
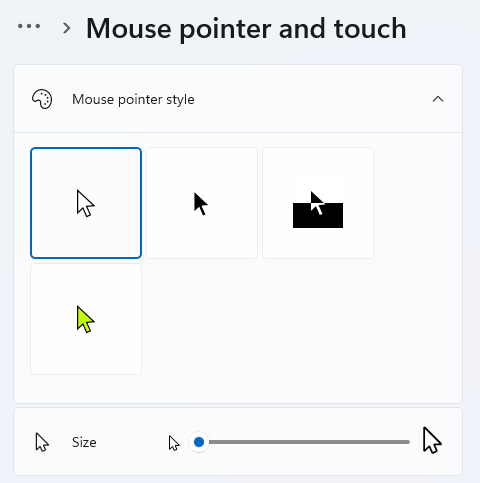
Click on the Mouse cursor option and in the following dialog, you can customize the buttons, pointers, wheel, hardware, and touchpad settings. The default mouse cursor settings are quite satisfactory, so we recommend you only change the ones you are sure about.
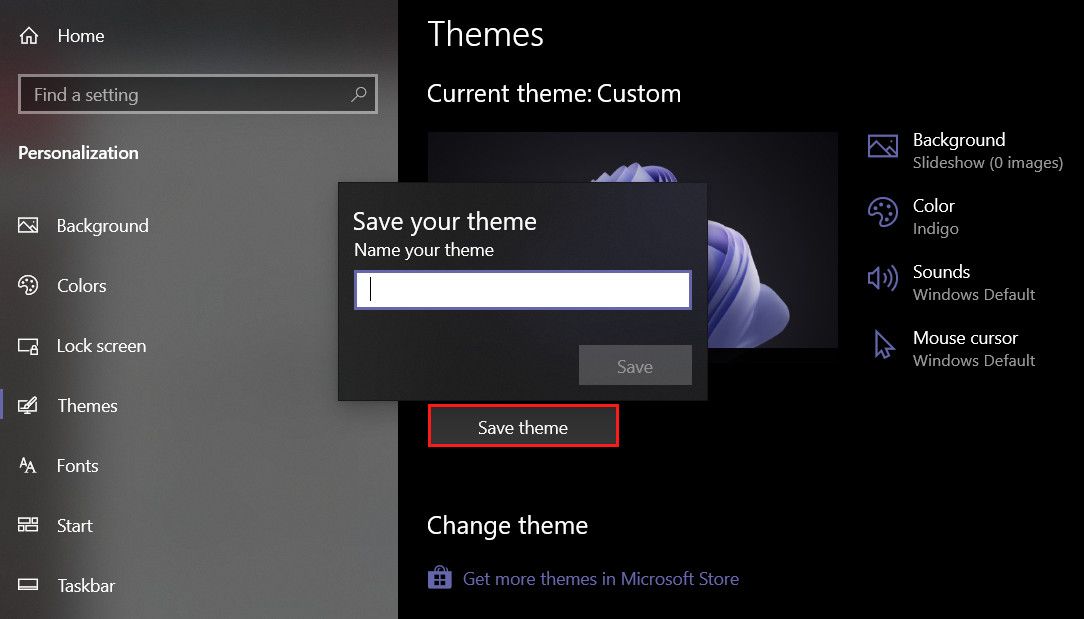
5. Save the Changes
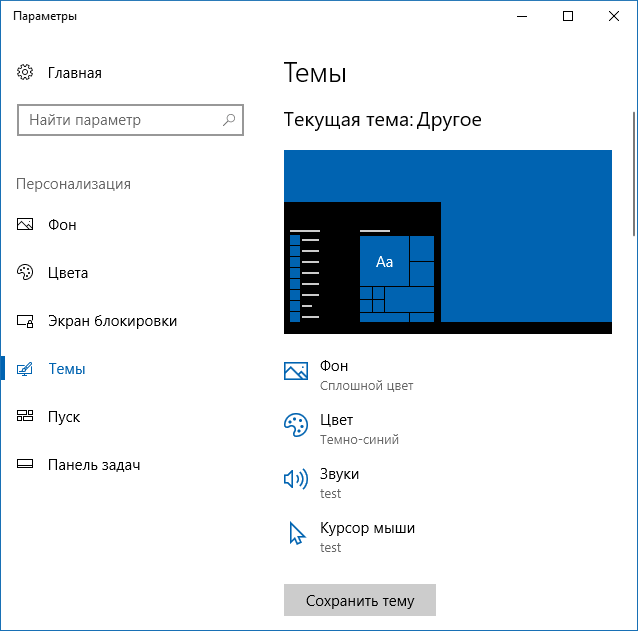
Till this point, you have made all the important changes needed to customize the theme. If you are satisfied with the results, click on the Save theme button in the Themes section of Personalization Settings. Enter a name for your theme, and you are good to go.
If you want to go a step even further, you can also customize the taskbar and fonts as well.
To change fonts, you can either use the ones already available in the Fonts’ section of Personalization Settings or download new fonts. If you are considering customizing the taskbar, you can center the taskbar icons or change the taskbar icons for programs.
How to Create a Custom Theme in Windows 11
The steps of creating a custom theme in Windows 11 are quite similar to the ones in Windows 10.
Head over to Windows Settings > Personalization > Themes to view the installed themes and pick the one you want to customize. If you would like to start from scratch, then you can choose the Background option in the same window. Choose the type of background you want.
Once done, proceed with customizing the other settings using the steps we have outlined above.
How to Download Themes From the Microsoft Store
If you want to change your Windows theme and do not have the time to create and customize a personal one, you can consider downloading a theme from the Microsoft Store.
The Microsoft Store offers a bunch of both free and paid themes that you can install and apply via Windows Settings on Windows 10 and 11. The method of downloading themes from the Microsoft Store on both the operating system versions is almost the same. We will use Windows 10 to demonstrate the steps in this method.
Here is how to proceed:
- Press Win + I to open Settings.
- Choose Personalization in the following window.
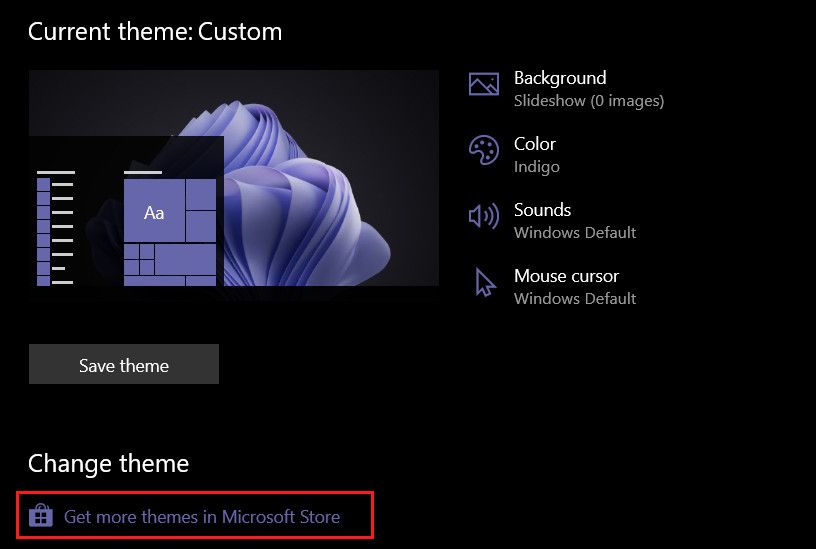
-
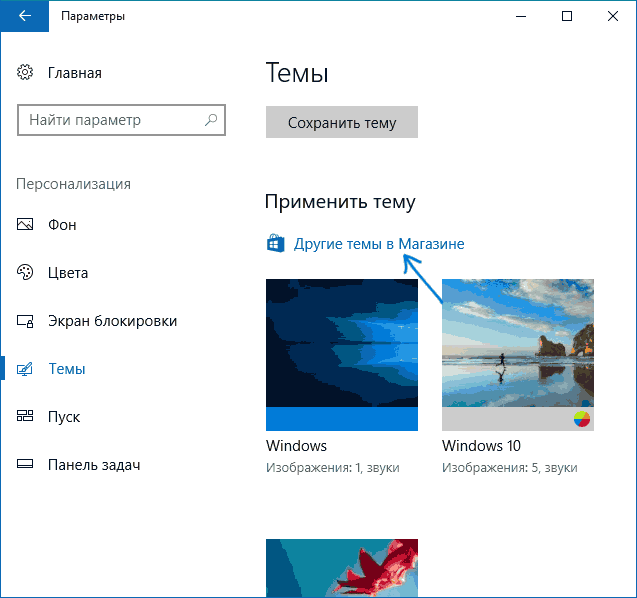
Select Themes from the left pane and click on the Get more themes in Microsoft Store link on the right side of the window.

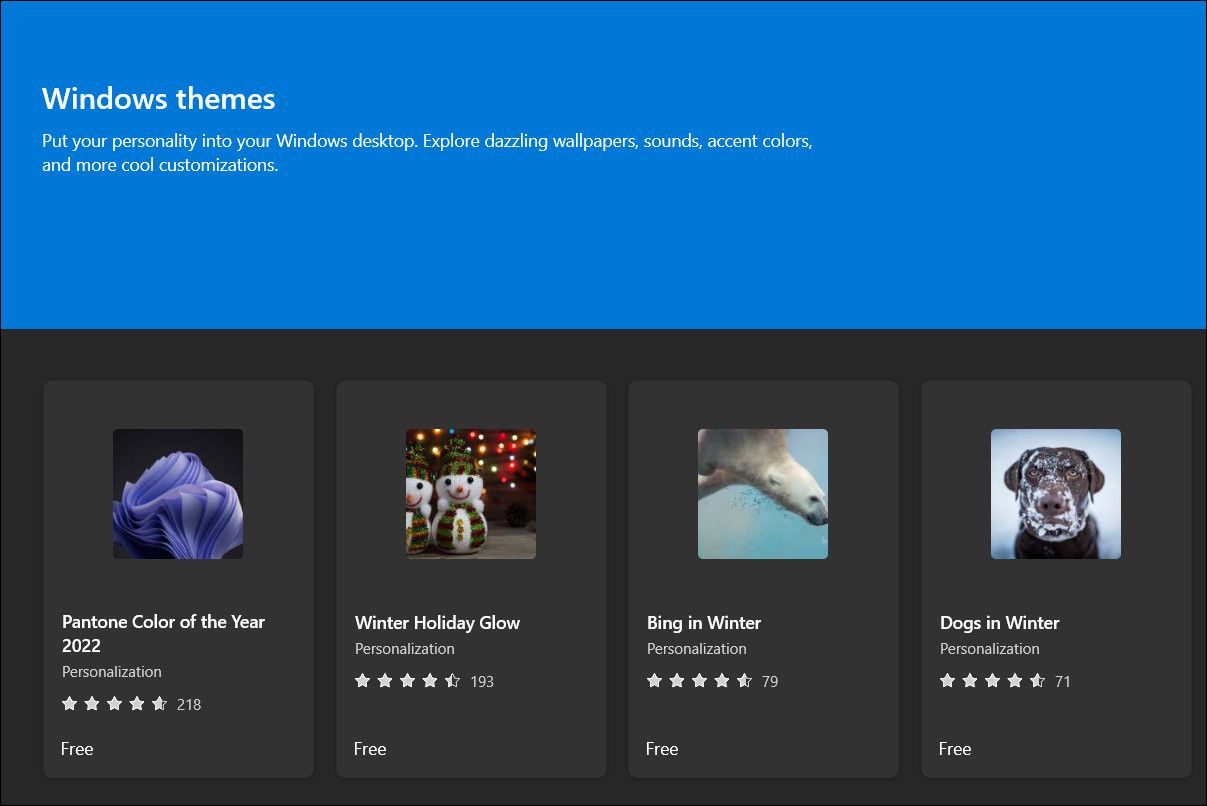
-
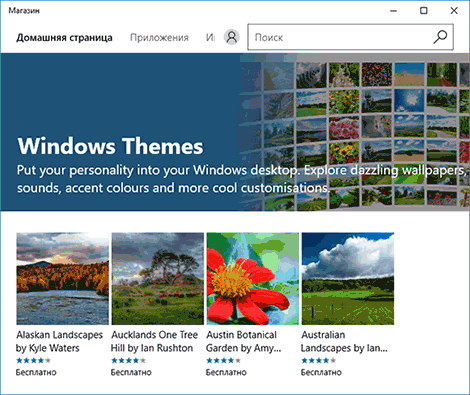
You should now be able to see a list of available themes in the Microsoft Store. Click on the theme you like and hit the Get button to download it.

- Once the theme is downloaded, head back to the Personalization section of the Settings app.
- Click on the theme to apply it and see if you like it!
Personalize Your Windows Operating System
While the default Windows theme is quite satisfactory, you do not have to settle for it if you don’t want to. Fortunately, Windows lets you customize almost all aspects of themes, so if you haven’t done it yet, now might be the best time to give your desktop a personal touch.
You can also look for Windows themes from third-party programs online if you don’t want to spend the time creating your own theme, and you aren’t satisfied with what is available in the Microsoft Store.
|
Как создавать собственные темы? |
|
1 | 0 Пятница, 21.08.2015, 16:27 1 № 1 Хочется самому сделать тему(для своей души)Чтобы знал,что я сделал и для меня было самое то.
|
|
343 | 64 Пятница, 21.08.2015, 17:04 2 № 2 FuziShow, Здесь почитай, но если ты не силен в таком…то лучше и не начинать.))я пару раз начинал..получалось,а потом бросал…нудное и долго это дело на самом деле.+фотошоп еще. Злой модер. Не зли меня, и я не буду злиться!
|
|
312 | 83 Пятница, 21.08.2015, 21:15 3 № 3 axe17, согласен, нижно терпение, или если есть желание, бери другую понравившуюся тему и модифицыруй её Windows 10 + Rainmeter = ❤️
|
|
269 | 67 Воскресенье, 23.08.2015, 17:29 4 № 4 Как минимум через примерно 10 тем, получается очень быстро. могу за два дня делать тему с нуля…ну если только задумал что либо очень трудное, то неделя, и то это то время что отнимают эксперименты с экспериментируемым, а то есть пз, или топ окна или ещё что))) ведь упорство и труд всё перетрут)) бывает готов плюнуть, так как не получается ничего, а плюс или минус в один маржинс может поставить все точки над I, то над чем корпел — скажем два дня)))))
|
|
2 | 0 Воскресенье, 08.11.2015, 11:22 5 № 5 Скажите, а кто нибудь в курсе как увеличить иконки на панели задач как это было в 7ке и даже 8.1? а то на 10ке они мелкие…
|
|
351 | 57 Воскресенье, 30.10.2016, 12:58 6 № 6 Не могу понять как поменять шрифт вот тут: В семерке без проблем могу поменять а вот в десятке никак не могу сообразить что делать. Прикрепления:
|
|
4 | 0 Вторник, 08.11.2016, 16:05 7 № 7 Похоже, что о WindowBlinds никто не слышал? ~ElectroSelf~
|
|
76 | 92 Вторник, 08.11.2016, 16:34 8 № 8
Цитата dezinto () Похоже, что о WindowBlinds никто не слышал? А вы похоже не слыхали что такое спойлер, пока я за вас этого не сделал ? скриншот такого размера всегда убирается под спойлер.
|
|
4 | 0 Суббота, 12.11.2016, 06:17 9 № 9 Причём здесь софт? WindowBlinds просто подмена UI Windows, чтобы создавать свои темы с помощью SkinStudio, чем я, собственно и занимаюсь с 2001 года… И, насколько можно судить по представляемым темам, Windows Style Builder не дает таких широких возможностей для изменения исходной темы; большинство элементов интерфейса недоступны для изменения. Но — нет, так нет… ~ElectroSelf~
|
|
76 | 92 Суббота, 12.11.2016, 07:49 10 № 10 dezinto, если есть желание чем то поделиться, то не надо писать мол вы чего дураки что ли, не знаете программу WindowBlinds. Создайте ветку в которой опишите, что это за программа, как ей пользоваться, какое она имеет преимущество и достоинства, можете поделиться работами, не кто не запрещает вам.. пройдет модерацию и вперед… вдруг ваши работы хороши и разойдутся большим тиражем, кто знает..
|
|
4 | 0 Суббота, 12.11.2016, 18:07 11 № 11 Олрайт. Подскажите тогда поподробнее: в каком разделе создать эту тему, куда сливать ресурс и т.д. ~ElectroSelf~
|
|
1790 | 488 Суббота, 12.11.2016, 20:14 12 № 12 dezinto, Создайте ветку на форуме в разделе соответствующий ОС, с названием аля «темы от dezinto» и выкладывайте свои работы в том виде каком считаете нужным, а там посмотрим.
|
|
1 | 0 Воскресенье, 18.12.2016, 18:57 13 № 13 а как поменять кнопку пуск?
|
|
76 | 92 Воскресенье, 18.12.2016, 19:23 14 № 14
Цитата izobretatel () а как поменять кнопку пуск? Инструкции по установке (FAQ)
|
|
4 | 0 Среда, 13.06.2018, 08:04 15 № 15 нужна помощь… Прикрепления:
|
Table of contents
- Why Create Custom Themes in Windows?
- How to Create Themes in Windows 10
- Customizing Background
- Choosing Colors
- Adjusting Sounds
- Modifying Mouse Cursor
- Saving Your Theme
- How to Create Themes in Windows 11
- Extra Tip: Personalizing Your Windows Operating System Further
- Creating Custom Themes in Windows
- FAQ
These latest iterations of the OS provide users with an extensive array of options for creating custom themes, allowing for an even more tailored computing experience. Whether you’re aiming to enhance the aesthetic appeal of your desktop or seeking a setup that aligns with your workflow preferences, Windows 10 and 11 cater to a diverse range of customization needs.
Why Create Custom Themes in Windows?
Creating custom themes in Windows 10 and 11 is much more than just altering the color scheme and desktop backdrop. It also includes fully customizing the music settings, the appearance of the mouse cursor, and the system mode (light or dark). With this degree of personalization, users can design a computer environment that suits their needs for comfort and productivity in addition to aesthetics.
- A person who spends a lot of time at their computer might, for example, choose a dark theme to lessen eye strain, while someone else would go for a bright and colorful theme to keep their workstation interesting and energetic.
- By making windows and icons simpler to view and use, custom themes can significantly enhance user engagement.
- By improving accessibility to regularly used materials, they can also lessen cognitive burden and increase productivity.
More importantly, having the option to design a custom theme brings a personal touch of originality and fun to the user experience. It enables people to use their computing environment to express their personality and preferences, which enhances and personalizes every encounter with a PC.
Also Read: Windows 10 Display is Too Big for a Monitor
How to Create Themes in Windows 10
Creating a custom theme in Windows 10 allows you to personalize your digital environment to suit your preferences for visuals, sounds, and overall usability. Follow these instructions to craft a theme that reflects your style:
- Press Win + I to open the Settings app.
- Once in Settings, click on Personalization. This section houses all the tools you need to start creating your custom theme.
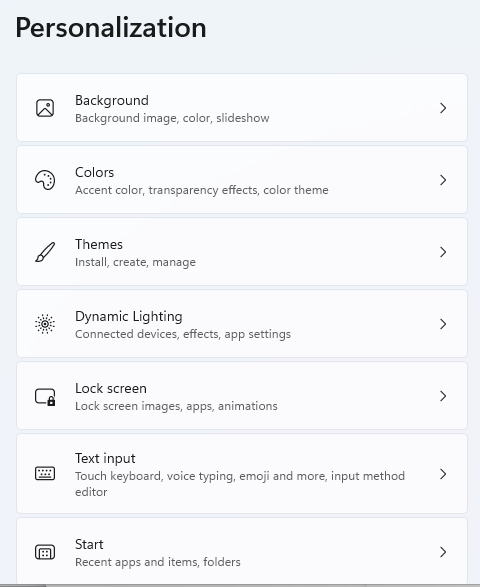
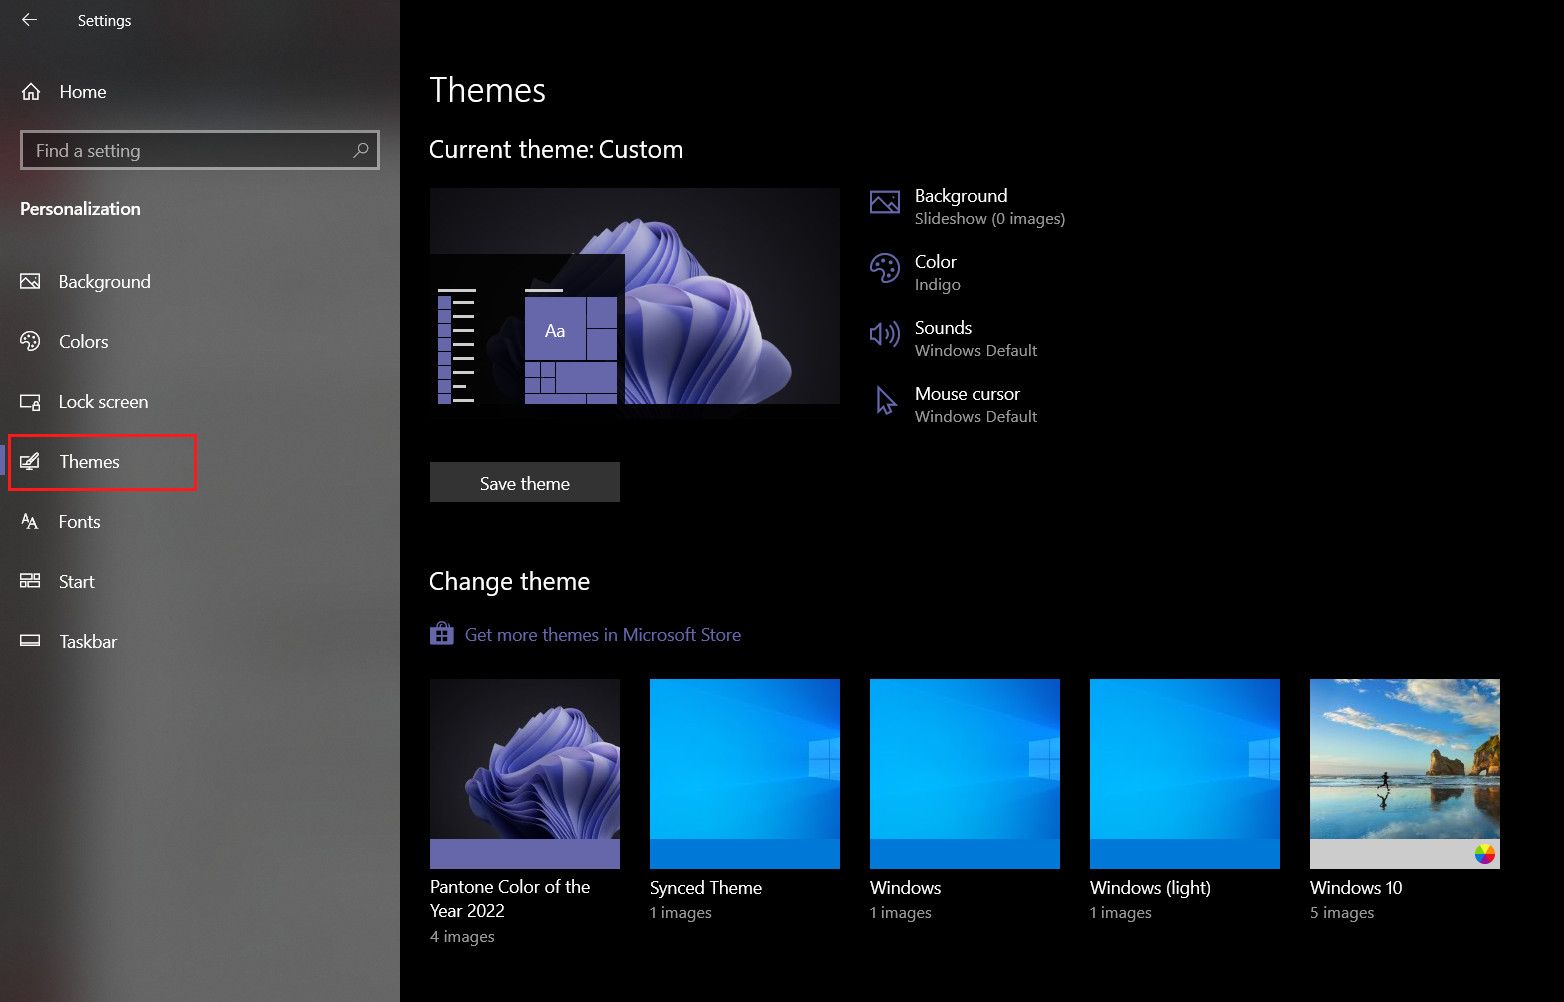
- In the Personalization menu, select Themes from the left pane. Here, you can see your current theme and other available themes.
- To start customizing, you can either select an existing theme to modify or click on Theme settings to start from scratch.
Here’s how to edit a theme in Windows 10:
Customizing Background
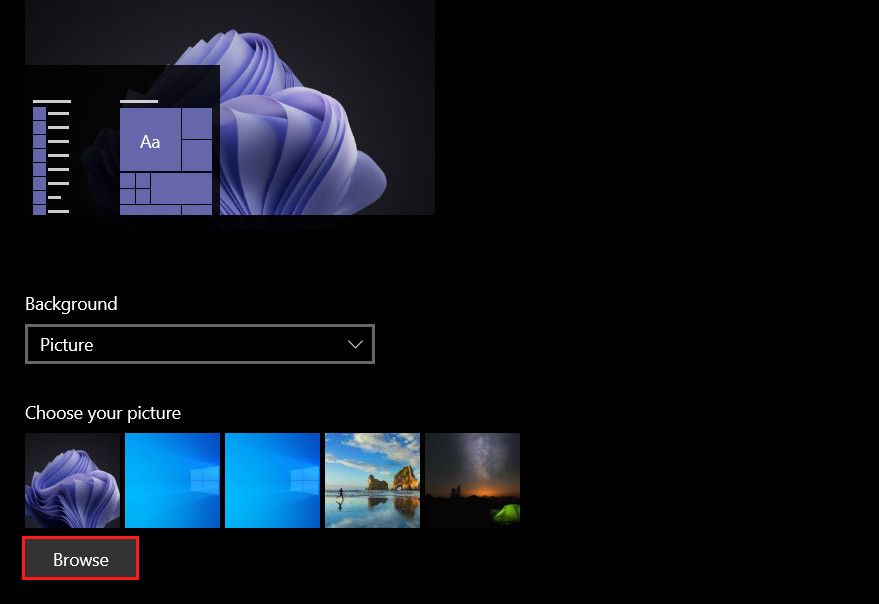
Under Background, you have three options:
- Picture: Select an image from your collection or use one of the Windows defaults. Click Browse to choose an image from your files.
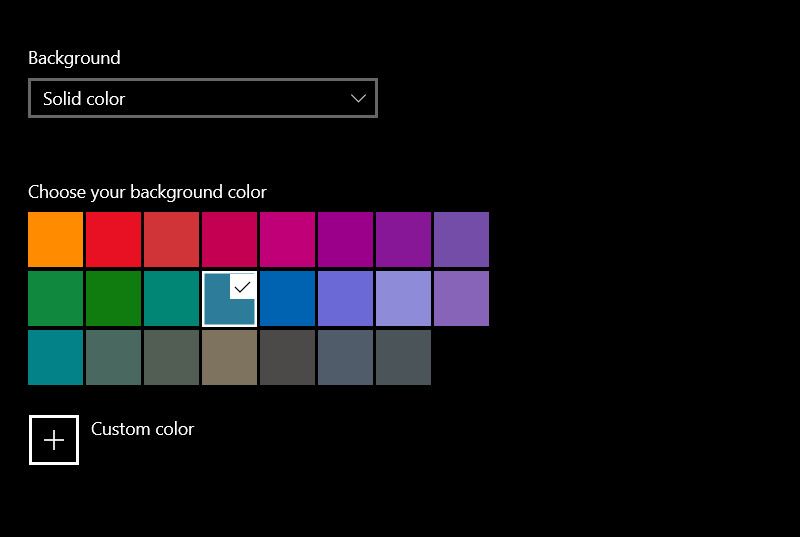
- Solid color: Choose from a palette of colors to set as your desktop background.
- Slideshow: Select a folder with images, and Windows will cycle through them at an interval you specify.
Choosing Colors
Moving to Colors, you can select a Light, Dark, or Custom theme. The Custom option allows you to mix and match colors for a more personalized look. Further down, you can choose an accent color or let Windows pick an accent color from your background.
Adjusting Sounds
For sounds, navigate to Sounds within the Personalization > Themes section. Here, you can select a sound scheme that changes all system sounds at once or customize each event sound individually. Choose Sounds to open a dialog where you can assign different sounds to program events.
Modifying Mouse Cursor
The Mouse cursor option is found under Mouse settings in the main Settings app.
You can change the cursor’s appearance by selecting from a variety of schemes or customize each cursor action (like text selection or hyperlink hover) in the Pointers tab.
Saving Your Theme
Once you are satisfied with your customizations, go back to the Themes section in Personalization.
- Click Save Theme, give your theme a name, and it will be saved for future use or sharing.
Creating a custom theme in Windows 11 shares many similarities with the process in Windows 10, reflecting Microsoft’s commitment to maintaining a consistent user experience across its operating systems. However, Windows 11 introduces a more streamlined interface and additional customization options that cater to the evolving tastes and preferences of users. Here’s how to navigate the theme creation process in Windows 11, along with tips for further personalizing your operating system.
Also Read: How to Customize Your Microsoft Edge Homepage and Settings
How to Create Themes in Windows 11
Similarities with Windows 10The foundational steps for creating a custom theme in Windows 11 are virtually identical to those in Windows 10.
Users begin by accessing the Settings app, navigating to Personalization, and then selecting Themes. From there, the process of choosing or customizing a theme, adjusting background settings, selecting color schemes, customizing sounds, and modifying the mouse cursor remains consistent. These steps ensure that users transitioning from Windows 10 to Windows 11 will find the process familiar and intuitive.
Additional Customization Steps Specific to Windows 11
Windows 11 builds on the customization options available in Windows 10 and adds several new options for tailoring your experience.
- One notable addition is the enhanced range of themes directly accessible from the Personalization menu, designed to complement Windows 11’s modern aesthetic.
- Additionally, Windows 11 introduces more granular controls over system and app light/dark modes.
- Adding virtual desktops with different backgrounds and changing how the taskbar looks and works gives users more ways to make their computer feel personal.
Also Read:Windows Tweaks: How to Customize Your Windows 10/11
Downloading Themes from the Microsoft StoreLooking to refresh your Windows theme without the effort of crafting one from scratch? The Microsoft Store is your go-to, offering an array of both free and premium themes to effortlessly enhance your desktop’s look. This convenient option is available on both Windows 10 and 11, with the download process being straightforward across both versions. Here’s how to how to install Windows themes:
- Hit Win + I to open the Settings menu.
- Once in Settings, select the Personalization option.
- In the Personalization menu, click on Themes from the list on the left. Then, find and select the option to Get more themes in the Microsoft Store, which is typically located on the right.

- You’ll be directed to the Microsoft Store, where a variety of themes are displayed. Browse through the selection and click on a theme that catches your eye.
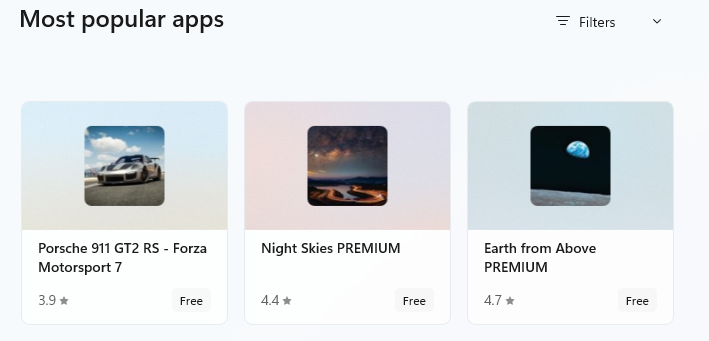
Source: Microsoft Store
- Click the Get button to initiate the download of your chosen theme.
- Return to the Personalization settings, where your newly downloaded theme will be listed. Click on it to apply and transform your desktop instantly.
Windows 10 and 11 let you change your computer’s look a bit, but you can do much more with extra programs. For example, you can use programs like Rainmeter for custom desktop widgets. Websites for Windows customization offer lots of cool stuff like new icons, mouse cursors, and themes that can make your computer look unique. Playing with these tools can really change how your desktop looks and works, making it fit your style and how you like to do things.
Also Read:How to Set a Dual Monitor Wallpaper on Windows 10 And 11?
Creating Custom Themes in Windows
Whether you’re updating an existing Windows 10 theme or diving into the new features of Windows 11, the journey to a more personalized computing experience is both accessible and rewarding. With a mix of built-in options and third-party enhancements, your Windows operating system can become a reflection of your personality and a workspace that inspires productivity and creativity.
FAQ
Can I create custom themes in both Windows 10 and 11?
Yes, both Windows 10 and 11 allow you to create custom themes. The process involves personalizing aspects such as the desktop background, color scheme, sounds, and mouse cursor to suit your preferences.
What customization options are available for themes?
You can customize the background (with pictures, solid colors, or slideshows), choose system colors (including light, dark, or custom themes), adjust system sounds, and modify the mouse cursor appearance.
Are there any differences between creating themes in Windows 10 and 11?
The foundational steps are similar, but Windows 11 introduces additional customization options and a more streamlined interface. For example, Windows 11 offers enhanced theme options directly accessible from the Personalization menu and more granular controls over light/dark modes.
Can I download themes from the Microsoft Store?
Yes, the Microsoft Store offers a wide selection of both free and paid themes for Windows 10 and 11. You can access these by navigating to Personalization > Themes and clicking on “Browse themes” to open the Microsoft Store.
How do I apply a theme I downloaded from the Microsoft Store?
Once a theme is downloaded, it will appear in your Themes menu in the Personalization settings. Click on the theme to apply it.