
Applies ToWindows 10
-
В зависимости от оборудования вы можете использовать клавишу с логотипом Windows + PrtScn для быстрого создания снимка экрана. Если на устройстве нет клавиши PrtScn, вы можете использовать сочетание Fn + клавиша с логотипом Windows + ПРОБЕЛ чтобы сделать снимок экрана, который можно распечатать.
-
Чтобы найти снимки экрана, откройте проводник на панели задач. В боковой области навигации откройте папку Изображения и выберите Снимки экрана.
-
Просмотреть полный список сочетаний клавиш.
Вы также можете использовать приложения «Ножницы» для захвата снимков экрана.
Нужна дополнительная помощь?
Нужны дополнительные параметры?
Изучите преимущества подписки, просмотрите учебные курсы, узнайте, как защитить свое устройство и т. д.
If the printscreen key (PrtScn or PrtSc) on your keyboard is broken or if there is simply no printscreen button on your keyboard, you can use other keyboard shortcuts or screenshot apps to take screenshot on Windows 11 or Windows 10 without the need of the printscreen button.
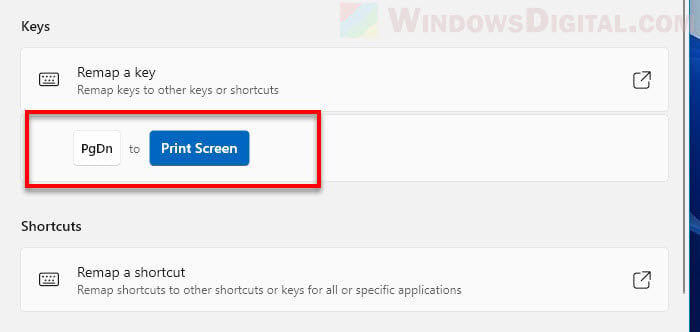
Alternatively, you can also remap a key you don’t use to the printscreen key. For example, you can change the PgDn key (or any key you prefer) to become the PrtScn key, so that when you press the PgDn key, it will act as the PrtScn key.
This guide outlines all the possible ways to print screen on a laptop or desktop computer without the printscreen button.
Also see: How to Screenshot Games on Windows 11
How to screenshot without printscreen button
Keyboard shortcut for print screen without printscreen button
Fn + Windows + Space Bar
If you are using a laptop (e.g. HP, Dell, Lenovo, Asus or Toshiba) with a Function (Fn) key, try to use the Fn + Windows + Space Bar keyboard shortcut to take a screenshot in Windows 11 or Windows 10.
This keyboard shortcut works similar to the Windows + PrtScn key. Once pressed, a screenshot of your entire screen will be taken and automatically saved into the Pictures > Screenshots folder.
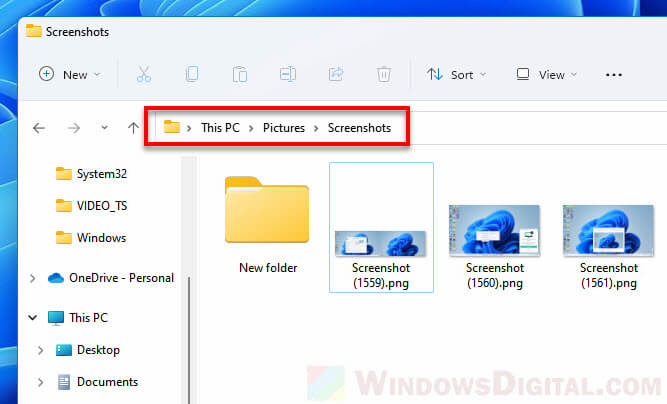
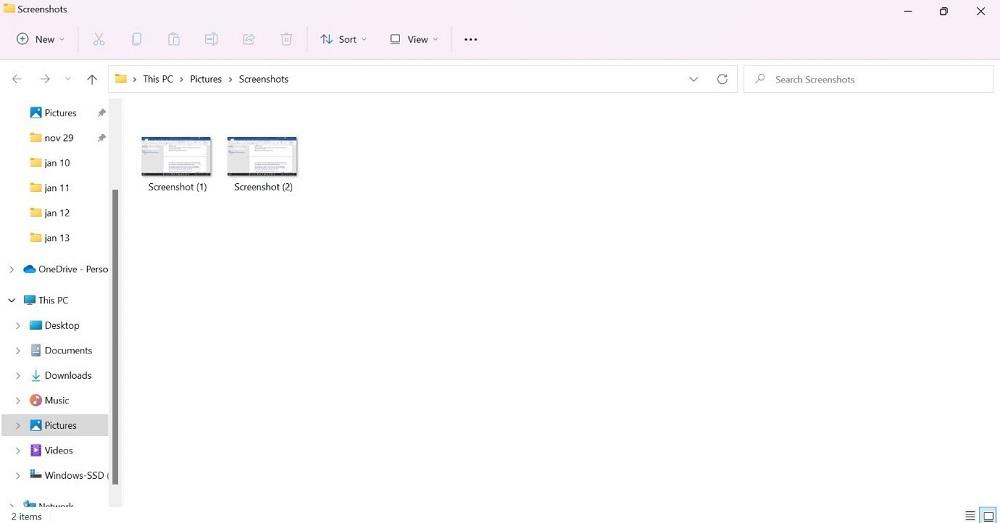
You can access this folder by first opening File Explorer from the taskbar (or from Start menu). On the left pane, select Pictures, and then open a folder called “Screenshots“. All screenshots taken using the keyboard shortcuts mentioned above will be automatically saved into this folder.
Suggested Guide: How to Crop Screenshot on Windows 11
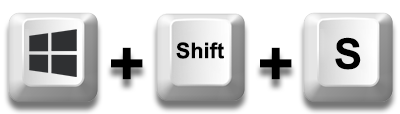
Windows + Shift + S
Another useful keyboard shortcut to take a screenshot in Windows is the Win + Shift + S hotkey. It works universally with all keyboards on both laptop or desktop computers since it doesn’t require the Fn key.
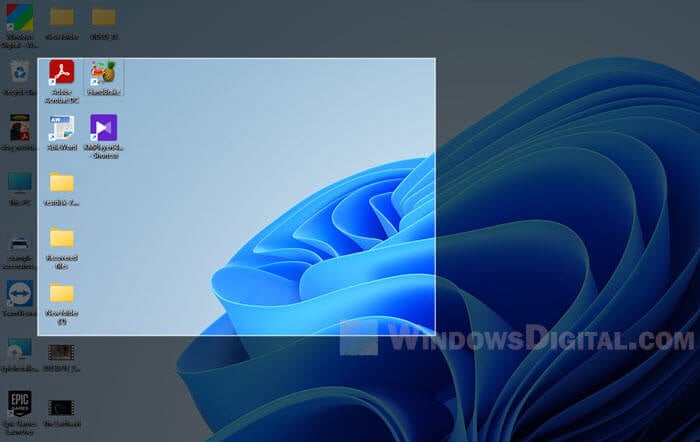
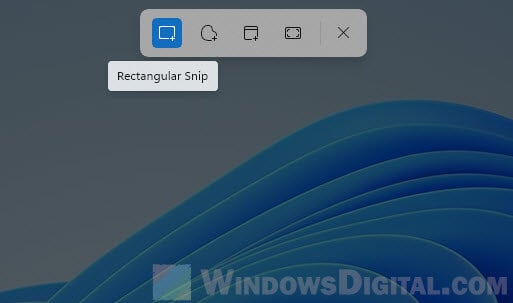
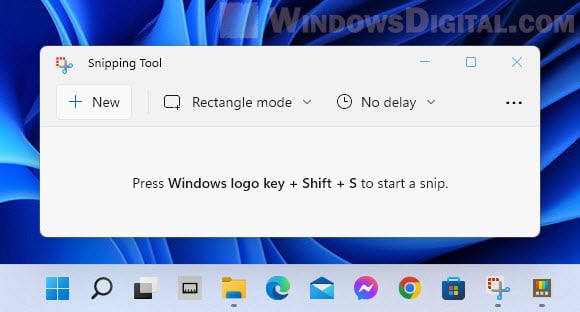
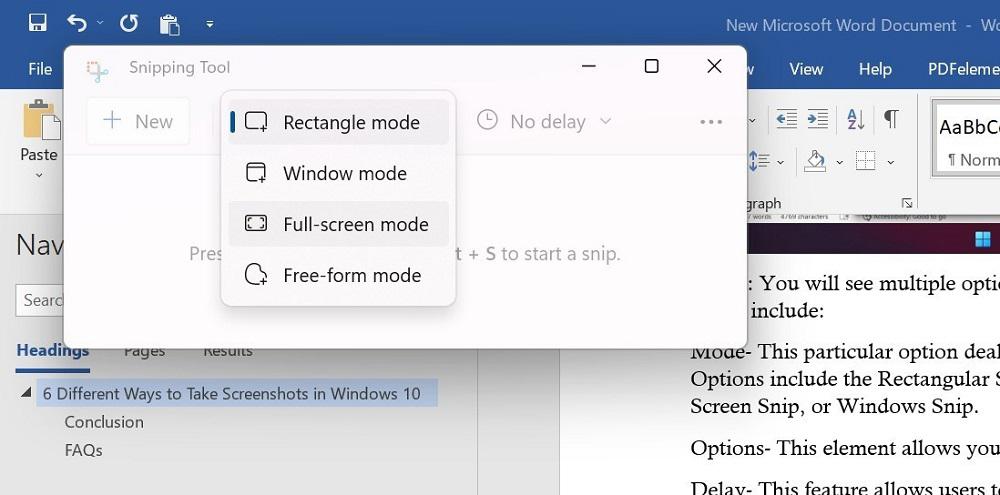
Pressing the Win + Shift + S keyboard shortcut will immediately bring up the Snipping Tool’s (Windows built-in screenshot taking app) interface where you get to select how the screenshot should be taken. By default, the “Rectangle mode” is selected where you can draw a shape and create a screen snipe instantly.
Optionally, you can select other mode such as Freeform mode (freely drawing the part of the screen you want to snipe), Window mode (screenshot only the selected window), or Fullscreen mode (print screen your entire screen).
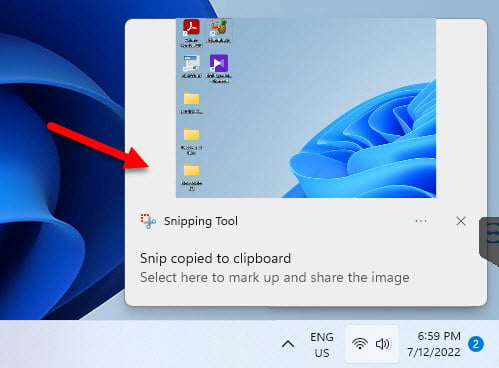
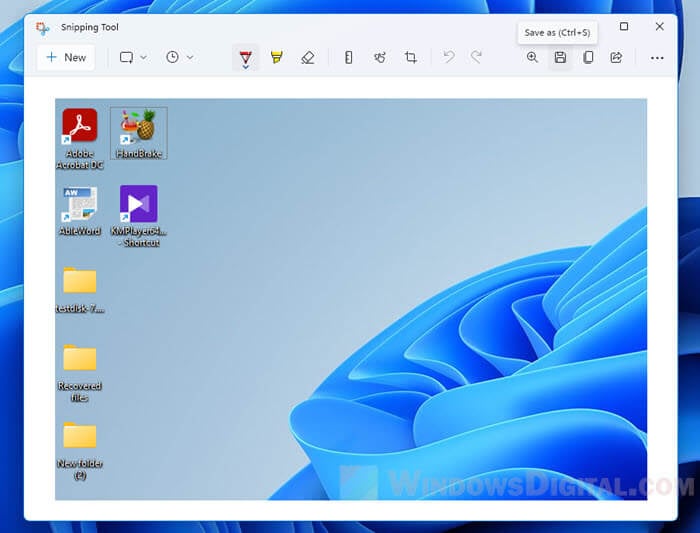
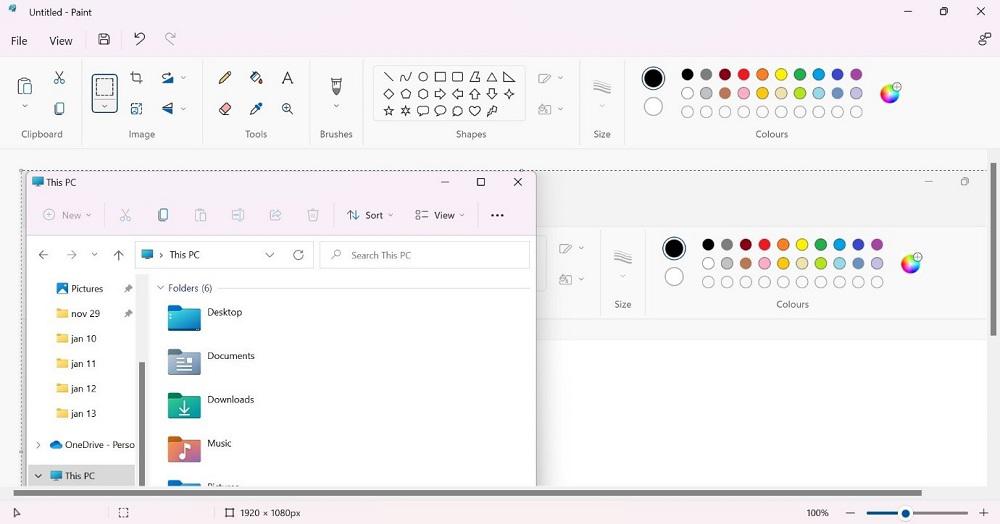
Once you have taken a screenshot, a pop up dialog will appear at the bottom right corner of the desktop, telling you that a snip has been copied to the clipboard. Click on the pop up to open the screenshot with Snipping Tool. Alternatively, you can paste (Ctrl + V) the screenshot to other apps such as Paint.
In the Snipping Tool, you can (optionally) edit your screenshot however you want, and then click the Save icon or press Ctrl + S to save the screenshot to wherever you want.
Related: How to Screenshot Only One Monitor on Windows 11
Use Snipping Tool to take screenshot without PrtScn button
As mentioned above, Snipping Tool is a built-in print screen app that comes preinstalled in Windows 11 or 10. Since the app exists on Windows by default, you don’t need to install it. Besides, you certainly don’t need the printscreen button to use Snipping Tool.
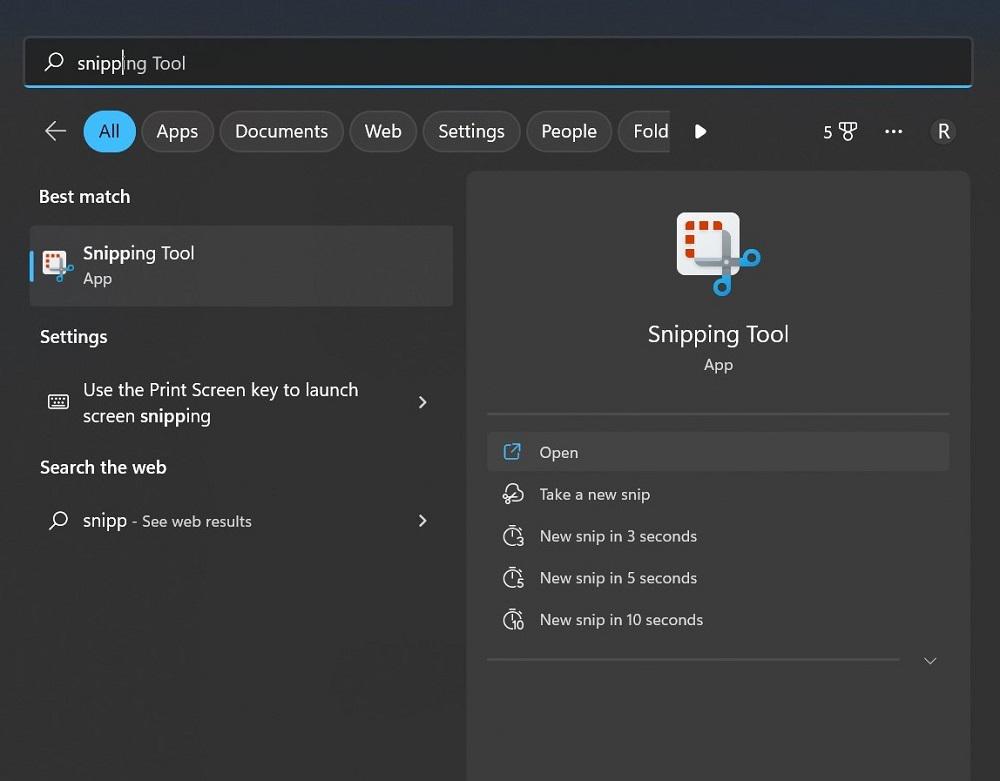
You can either use the keyboard shortcut as outlined above to immediately start a snipping session with Snipping Tool, or you can manually open the Snipping Tool app from the Start menu (Go to Start and search for “Snipping Tool”).
Optionally, if you find yourself using Snipping Tool very often, you can pin the app to the taskbar, so that you can launch the app quickly by single-clicking the Snipping Tool icon from the taskbar.
Remap the print screen key
If you insist to use the printscreen key when there is no PrtScn key on your keyboard or if the key is broken, you can use a keyboard manager tool to remap a key you don’t use to the printscreen key.
This means that you can make a key on your keyboard to act as the printscreen key. For example, you can remap the PageUp key to printscreen key so that when you press PgUp, it will execute the PrtScn key’s function instead. Note that doing so will also nullify the function of the key you remap, meaning that the PgUp key will no longer have the PgUp function until you remove the mapping.
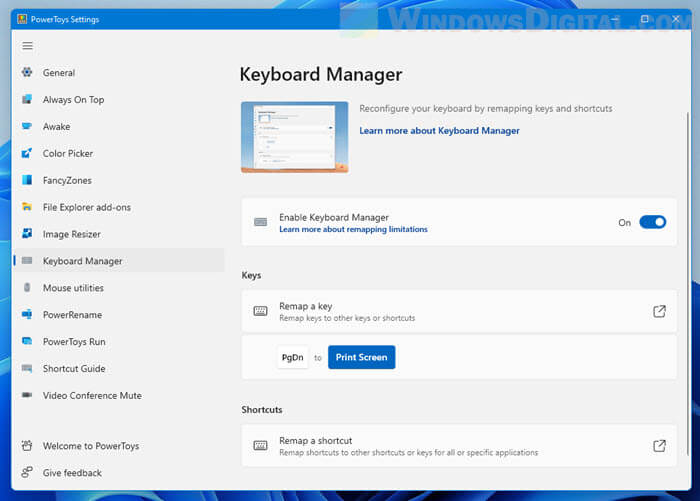
There are plenty of keyboard manager or keyboard companion apps that can remap keys on Windows. We will be using a tool called Microsoft PowerToys. PowerToys is a utility tool developed by Microsoft for power users. Keyboard manager is just one of its many features. To learn how to remap the printscreen key, go to: How to remap a key in Windows 11.
Как сделать скриншот экрана
на компьютере или ноутбуке
Скриншот экрана — это снимок определенной области дисплея или всего рабочего стола. Он может понадобиться, если необходимо продемонстрировать возможности программы, показать неполадку при обращении в техподдержку или зафиксировать содержимое страницы сайта. Иногда фотографии в браузере бывают защищены от скачивания — тогда их тоже можно просто заскринить.
Создать фото экрана в хорошем качестве можно с помощью встроенных инструментов системы или специального софта. Сегодня расскажем, как сделать скриншот на ноутбуке или компьютере разными методами.
Содержание:
Как сделать скриншот стандартными средствами Windows
1. Снимок экрана в Windows XP
2. Программа «Ножницы» в Windows 7
3. Рекомендации для ОС Windows 8.1, 10
Лучшие бесплатные приложения для создания скриншотов
1. ФотоСКРИН
2. Lightshot
3. Скриншотер
4. Яндекс.Диск
5. Screenshoter Mail.ru
Как сделать скриншот стандартными средствами Windows
Первое, что приходит на ум тут — это, конечно же, горячие клавиши и уже встроенные в систему функции. Вам не нужно устанавливать ПО, однако есть и минус. Стандартные службы не предлагают дополнительных опций для редактирования и быстрой пересылки картинки, например, вы не сможете оформить длинный скриншот с прокруткой или отправить итог в мессенджеры.
Снимок экрана в Windows XP
На Виндовс XP можно создать только скрин всего монитора. Также для сохранения картинки вам потребуется графический редактор. Для захвата контента:
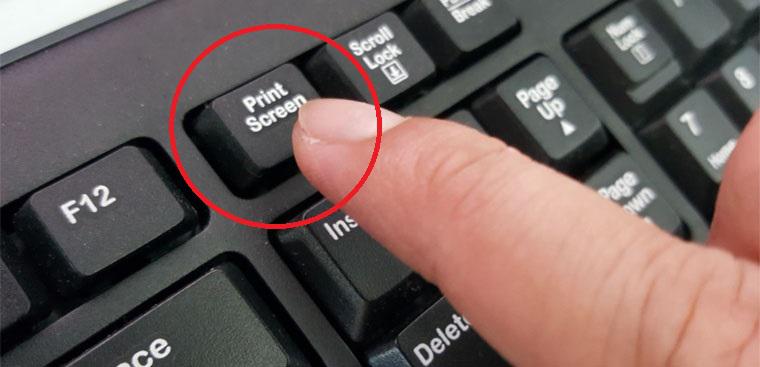
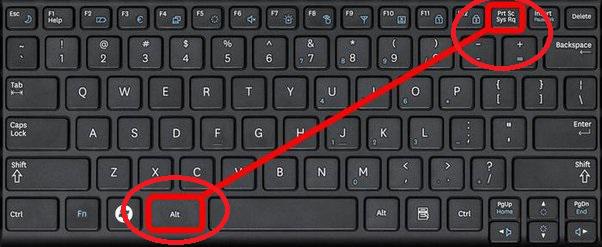
- Откройте окно, которое хотите захватить. Одновременно зажмите Alt+ Print Screen (PrtScr). Где искать кнопку? Смотрите на рисунке ниже. Чаще всего она расположена в верхней части клавиатуры между F12 и Scroll Lock.
- Запустите любой фоторедактор, например, Paint. В верхней строке меню нажмите «Правка» — «Вставить». Можно использовать комбинацию Ctrl + V.
- Кликните на меню «Файл» и экспортируйте изображение.
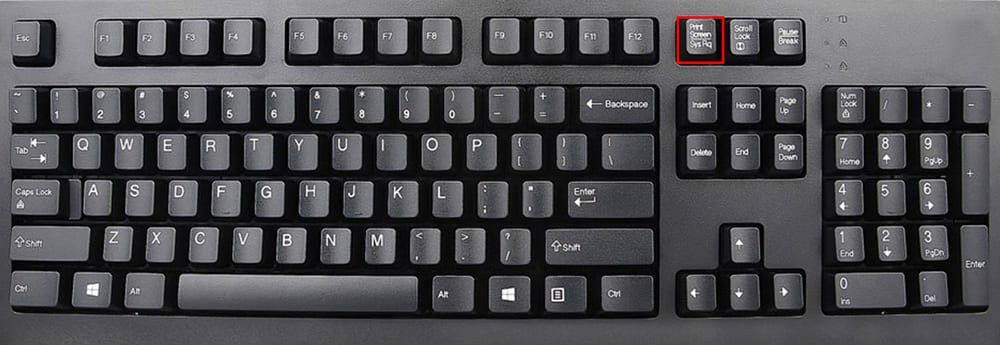
Расположение PrtScr
Программа «Ножницы» в Windows 7
Вы можете воспользоваться встроенным приложением «Ножницы». Оно позволит снять выделенную область или весь монитор. Как сделать скрин?
- Откройте инструмент «Ножницы». Для этого нажмите на «Пуск» и наберите фразу «Ножницы» в поисковой строке.
- Наведите курсор на стрелку рядом с «Создать» и выберите «Произвольная форма», «Прямоугольник» или «Весь экран».
✦ При использовании прямоугольного фрагмента выделите мышкой нужную область.
✦ В полноэкранном режиме служба снимет материал после выбора типа захвата.
- Нажмите «Сохранить как…» и выберите подходящую папку.
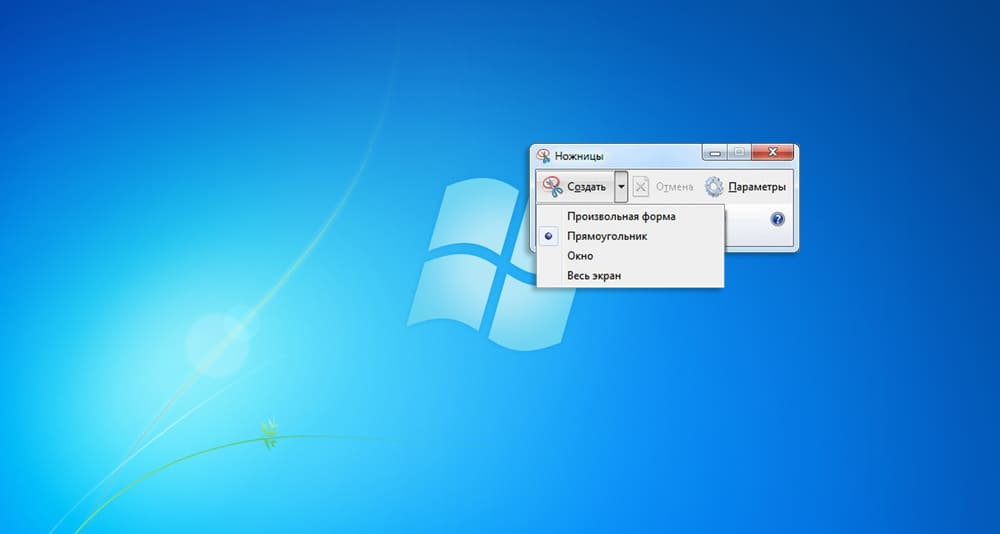
Интерфейс «Ножниц»
Рекомендации для ОС Windows 8.1, 10
Чтобы снять дисплей на Виндовс 8 и 10, вы можете использовать инструмент «Ножницы». Быстрый скриншот же можно оформить с помощью клавиатуры:
- Зажмите Win вместе с Принтскрин. Монитор на секунду потемнеет.
- Документ будет сохранен в «Изображения» — «Снимки экрана».
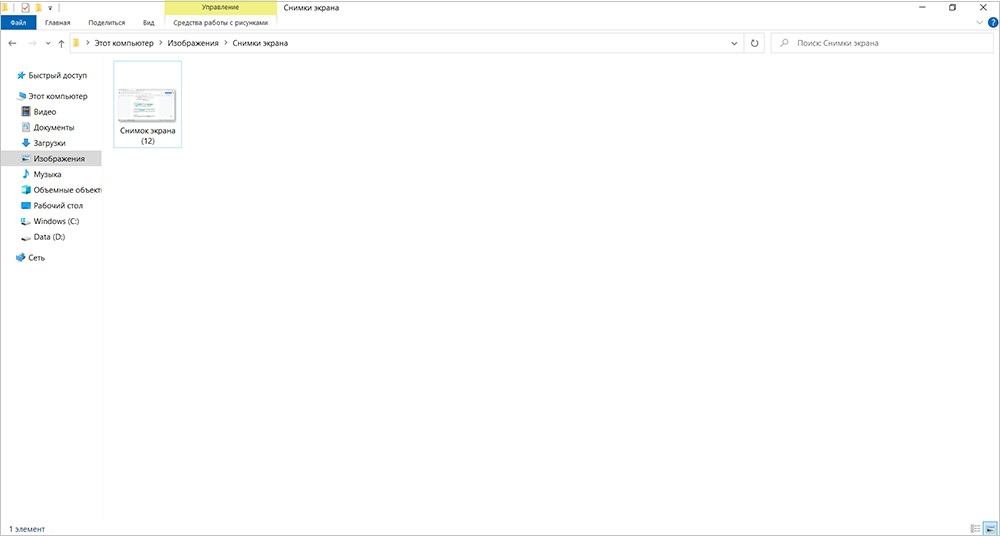
Так вы получите файл PNG
Лучшие бесплатные приложения для создания скриншотов
Если вы хотите снять выделенную область, настроить формат фотоизображения, добавить надписи или фигуры, лучше воспользоваться специальными приложениями. Они открывают больше возможностей, хоть и работают по схожему принципу.
ФотоСКРИН
Одна из лучших программ для создания снимков экрана. В ФотоСКРИНе можно заснять определенный фрагмент или весь рабочий стол. Поверх изображения можно добавить надписи и фигуры, а после загрузить контент в сеть или скачать в подходящем формате.
Как сделать скриншот:
- Скачайте ПО бесплатно на Windows 11, 10, 8, 7, Vista или XP. Запустите его и выделите мышью необходимый участок.
- Измените изображение с помощью предложенных опций.
- Для экспорта кликните по кнопке «Загрузить на сервер» или «Сохранить на диск».
ФотоСКРИН
Нужно записать видео с экрана? Приобретите премиум-версию программного обеспечения. Она позволит захватить каждое действие на рабочем столе, создать качественный ролик и экспортировать результат в подходящем формате. Про-пакет стоит 495 рублей.
Lightshot
Простой компьютерный скриншотер и расширение для браузера. Lightshot позволят захватить часть дисплея, обработать контент и экспортировать его в подходящем медиаформате. Для использования ПО:
- Загрузите софт с официального сайта.
- По завершении инсталляции откройте утилиту и выделите область рабочего стола.
- Отредактируйте принтскрин экрана, а затем кликните на значок сохранения.
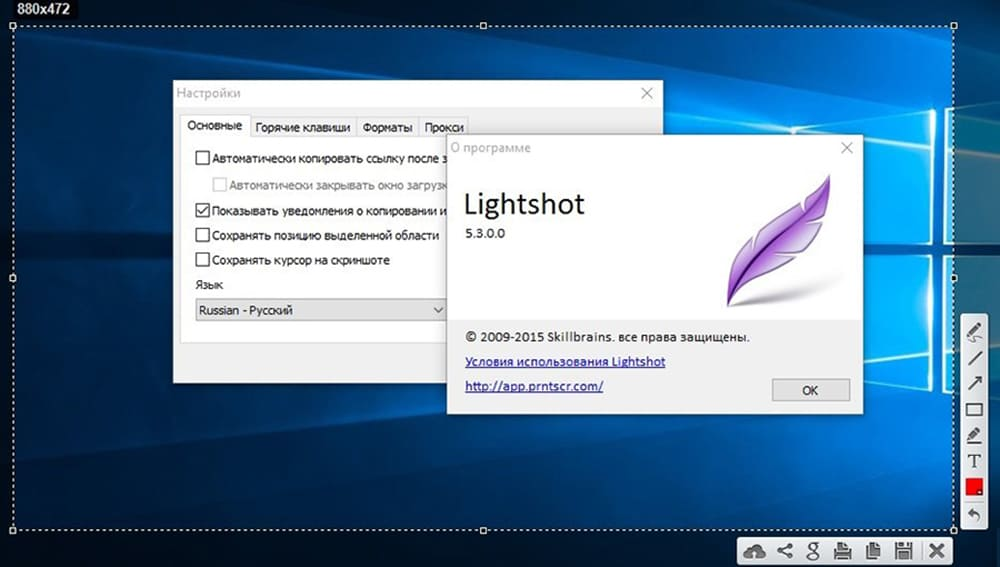
Lightshot
Скриншотер
Простое программное обеспечение, которое предлагает опции для редактирования материала и создает картинки в популярных медиаформатах. Как сделать скриншот на компьютере и сохранить его как картинку?
- Скачайте Скриншотер и откройте. Установите необходимый участок съемки.
- Скорректируйте изображение, если необходимо. Добавьте текст, стрелки, рисунок.
- Кликните по иконке сохранения. Укажите папку и формат.
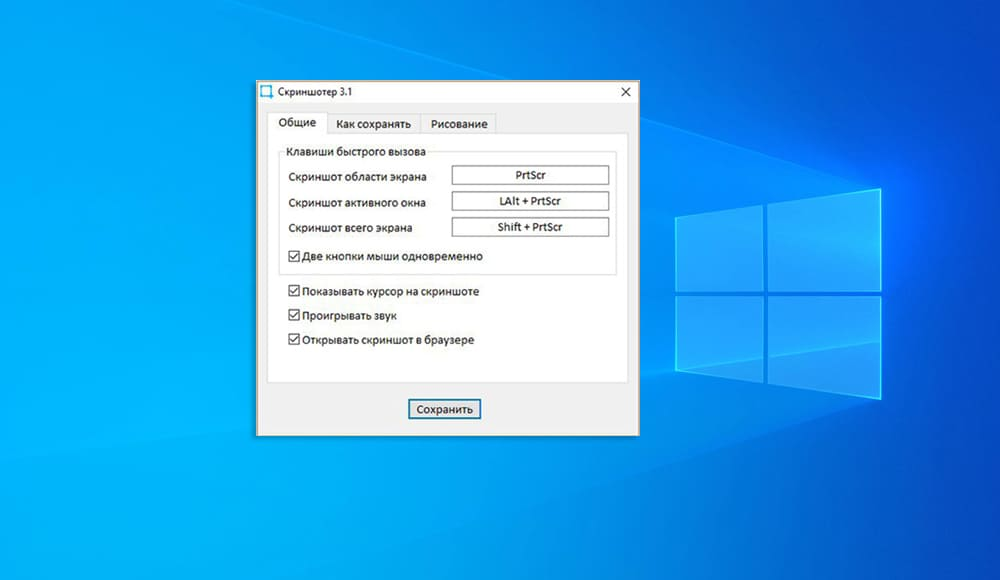
Скриншотер
Яндекс.Диск
Облачное хранилище предлагает дополнительный инструмент для создания скринов. Вы сможете снимать монитор и обрабатывать кадры во встроенном редакторе. Для использования функции Яндекс.Диска:
- Установите ПО. Зажмите комбинацию Ctrl + Shift + 1 и обведите участок.
- Кадр откроется в редакторе. Внесите изменения: разместите стрелки, текст и т.д.
- Нажмите «Сохранить». Выберите место на компьютере.
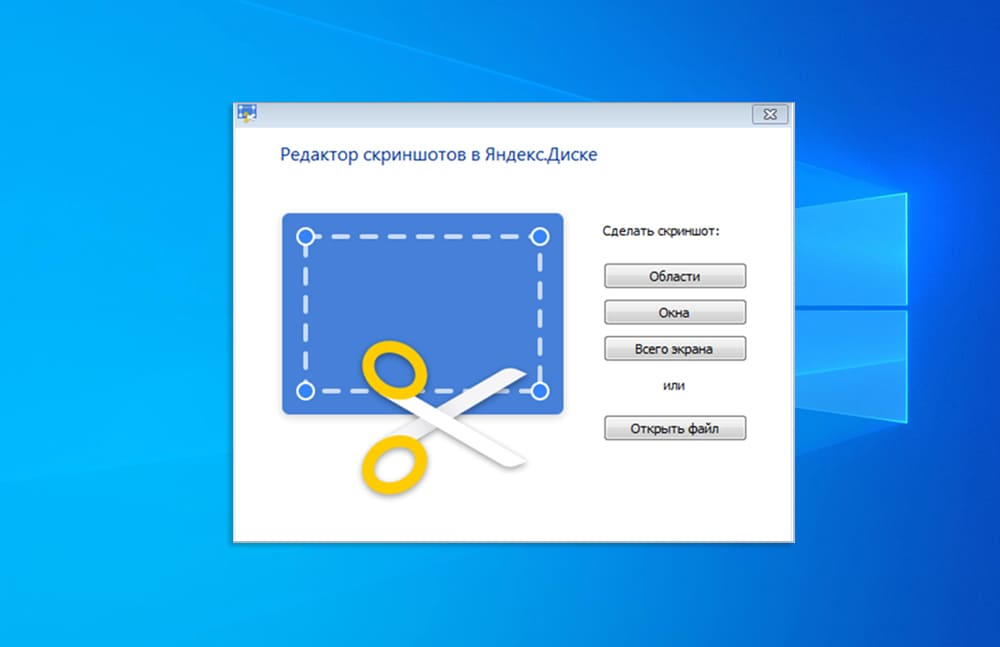
Яндекс.Диск
Screenshoter Mail.ru
Софт для съемки всего дисплея или указанного фрагмента. Screenshoter Mail.ru также предоставляет функции для размещения надписей, стикеров, нумерации и фигур.
- Загрузите софт и по завершении инсталляции запустите его.
- Выделите фрагмент рабочего стола.
- Обработайте изображение и нажмите «Готово». Экспортируйте материал на ПК в подходящем расширении.
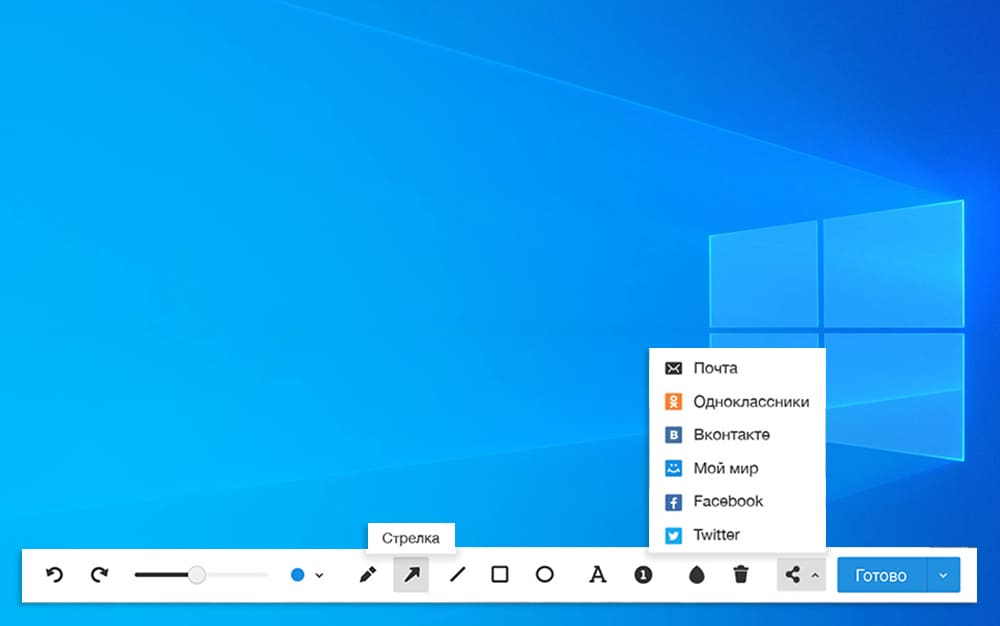
Screenshoter Mail.ru
Заключение
Теперь вы знаете, как сделать скриншот на ПК разными способами. Вы можете воспользоваться встроенными службами компьютера, однако они имеют ограниченный функционал. Для захвата части дисплея и обработки данных лучше загрузить специальный скриншотер. Оптимальным решением будет ФотоСКРИН. Он отличается понятным интерфейсом, предлагает опции для обработки снимков и поддерживает популярные расширения. Вы можете скачать приложение бесплатно, нажав на кнопку ниже.
Установите программу ФотоСКРИН прямо сейчас:
Скачать бесплатно!
Отлично работает на Windows 11, 10, 8, 7 и XP
Часто задаваемые вопросы
Как сохранить скриншот в отдельный файл?
Воспользуйтесь программой ФотоСКРИН. Примените горячие клавиши, установленные по умолчанию. Фотоснимок можно обработать, а затем экспортировать с помощью функции «Сохранить на диск». Введите название и выберите формат файла.
Где найти скриншоты?
Местоположение файлов зависит от способа создания скрина. При использовании утилит медиа хранятся в папке по умолчанию. Если вы сделали скриншот на Windows 10 горячими клавишами, результат находится в «Изображения» — «Снимки экрана».
Почему не получается сделать скриншот экрана на компьютере?
Неполадка может возникнуть по нескольким причинам:
- неисправность клавиши Принтскрин;
- сторонние ПО могут работать в фоновом режиме и мешать съемке;
- неисправные драйверы клавиатуры;
- на ПК включена функция «Fn».
Как сделать скриншот на компьютере, если нет кнопки Print screen?
Оптимальным решением будет скачать специальную программу и установить пользовательские комбинации клавиш. Вы можете применить ФотоСКРИН. Для настройки кнопок запустите ПО и перейдите в раздел «Горячие клавиши». Кликните по нужному режиму и зажмите новую кнопку.
Вам также может быть интересно:
Quick Preview to Take Screenshot on Windows 10:-
- Use the CTRL + PRT SC Keys to take a quick screenshot.
- Use ALT + PRT SC Keys to take a Screenshot of any application window.
- Use Windows + Shift + S Keys to access the Xbox Game Bar.
- Use Snip & Sketch Application as well to take screenshot
Taking Screenshots has become one of the necessary components of our daily life. Whatever device, we are using, we face the need to take screenshots there. Also no doubt, the Screenshots help to describe any action more clearly than any other means. Keep in mind that, Windows comes up with different Methods to Take Windows Screenshots.
In earlier times, there was only one way to Capture Screenshots on Windows. That is the using Windows Keyboard Shortcuts. But as the demand is increasing, there are more new ways introduced to Grab Screenshot on Windows 10. We can enlist 7 different methods to Get the Windows Screenshot.
This article is going to be a detailed guideline about the Ways to Take Screenshots in the Windows 10 operating system.

How to Take Screenshots in Windows 10? [7 Different Methods]
Methods to Take Screenshots on Windows 10
To Take Screenshots of the Windows Screen, the following methods can be used. In this guideline, we will start with the PRT SC Key execution.
Method 1: Take Screenshots on Windows using the Print Screen Button to Capture Full Screen
Step 1: When you have decided what you want to capture as a screenshot, tap on the PrtSc key on your keyboard immediately.
Step 2: The previous step will automatically get a screenshot of the screen and store it in the clipboard of your Windows PC. Since it will not save directly as an image, you can open another editor app, like Paint.
Step 3: On the clear white canvas of the Paint app, put the cursor on the page and press Ctrl + V keys. This will drop the image from the clipboard onto the page.
Step 4: Click on File > Save As. Name the screenshot and choose the location to save it in. Then, press the Save button.
Method 2: Take Screenshots on Windows of a Specific Window
Step 1: When you have many windows open on your device, press the Alt + Win + PrtSc keys together.
Step 2: The screenshot will be stored immediately in the folder named Videos > Captures once you press the Alt + Win + PrtSc keys.
Method 3: Take Screenshots on Windows Whole Screen
If you want to take a quick and accurate screenshot on your screen and avoid saving it into the clipboard, you can press the Windows and PrtScn keys together. This will bring up the thumbnail on the screen at the bottom-left side when the screenshot capture step is done.
You will find the screenshot in your device’s Pictures/Screenshots folder, accessible through the File Manager.
Method 4: Take Screenshots on Windows using the Snipping Tool
Step 1: When you need to screenshot something on the screen, tap on the Windows button (⊞ ) from the taskbar below.
Step 2: Type in the Snipping tool in the search field. Click on the first app option that comes in the result to open it.
Step 3: You will see multiple options in the app when it opens on your Windows 10 PC. These include:
- Mode – This particular option deals with the style of screenshot you choose. Options include the Rectangular Snip, a default option, Free-Form Snip, Full-Screen Snip, or Windows Snip.
- Options – This element allows you to switch between the options for the Snipping Tool.
- Delay – This feature allows users to delay the screen capture for 1-5 seconds.
Step 4: After setting up the features for the Snipping Tool to take the screenshot, press the New Option. The screen will appear with a white overlay showcasing the uncaptured area.
Step 5: The screenshot will appear in the Spinning Tool after you capture one.
Step 6: Tap on the File tab and choose the “Save As” option to move the screenshot to your preferred location on the hard drive. The app does not automatically save the screenshots anywhere.
Method 5: Take Screenshots on Windows using the Snip & Sketch Tool
Step 1: Go to the window or page you will capture. Press Win + Shift + S keyboard shortcut or click the Start menu from the taskbar > type Snip & Sketch > tap the option.
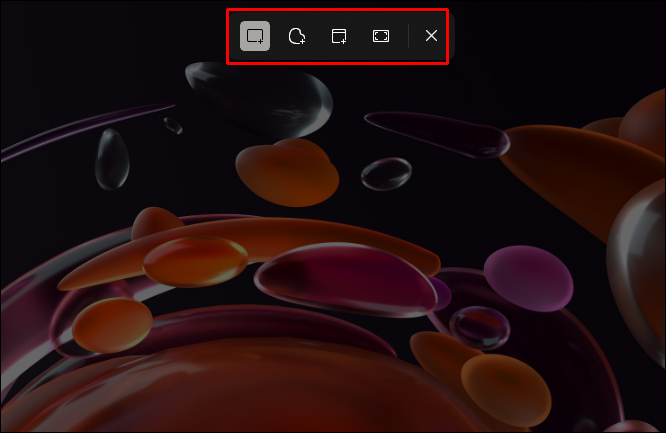
Step 2: After the tool opens, you will see many options as icons, like:
- Freeform– For drawing a custom shape that you create to screenshot.
- Rectangle– Capture a screenshot of the screen within a rectangle shape you expand or decrease with your mouse.
- Full-screen Snip– The screenshot of the entire PC screen or the screens of multiple monitors (if you are using many of them).
- Window Snip– This mode captures only the screenshot of the window you are currently using.
If you want to change your choice, tap on X to close the tool.
Step 3: After capturing the screenshot, the image will be saved in the clipboard. Click on it from the notification that pops up on your screen. Tap on it for markup/file sharing.
Step 4: If the popup notification does not appear, go to the Notifications bar at the right part of the screen to access the Snip & Sketch tool.
Step 5: Save the file in the Paint app to cut the screen size. Then save the file.
Method 6: Take Screenshots on Windows using the Game Bar
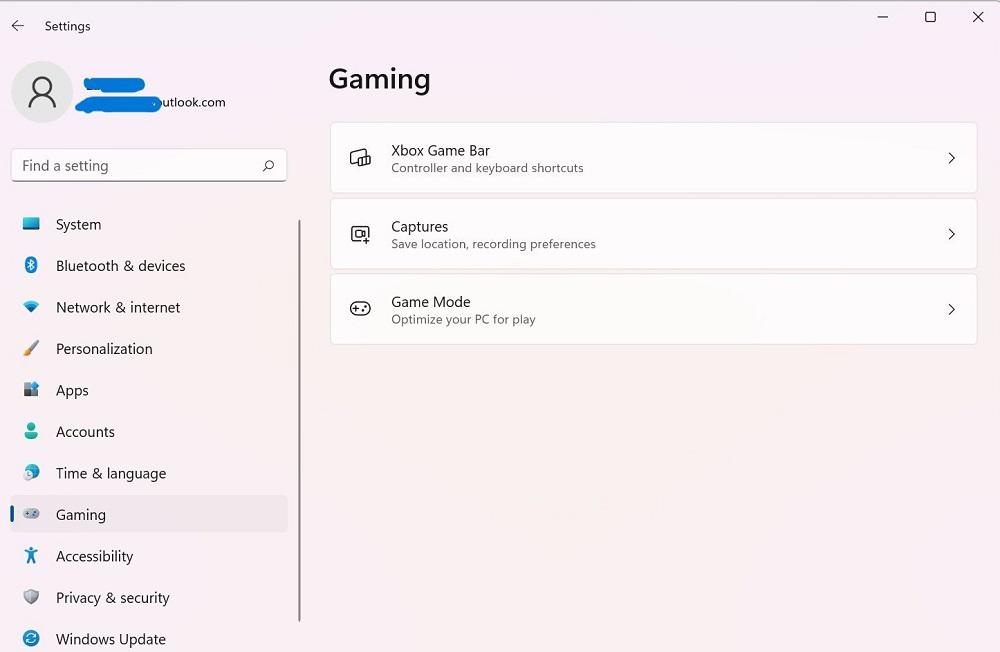
Step 1: For this app to work for screenshotting, you have to activate the Game Bar feature on your PC first. For that, go to Settings > Gaming. Then, activate the slider for the Game Bar operation in the next window.
Step 2: On your PC, tap the Win + G keys to access the Game Bar.
Step 3: Then tap on the Capture option. Or, press Win + Alt + PrtSc.
Step 4: The full-screen screenshot of the window you capture automatically saves into Videos > Captures. Click on it from File Manager to find and use it later.
Method 7: Take Screenshots on Windows using the Alt + Prt Sc
Step 1: Go to the desired screen of which you’re looking to take the screenshot and hit Alt + Prt Sc (Print screen) at the same time.
Step 2: You will be required to select the desired area in which you want to take the screenshot, click, the and save it as required.
Step 3: An image will be copied and can be pasted simply on the Paint app.
Taking a Screenshot on PC isn’t a tough task, even if you aren’t a tech-savvy person. All you need to do is follow this step-by-step Guide to Take Screenshots of anything on your PC. Use the simple PrtSc key for this process or different tools available on the device. Follow the steps correctly to avoid errors with this function on a Windows PC.
Also Read
- How to Take Screenshots Using Python?
- How to Install Windows 10 From a USB Flash Drive?
- How to Boost Performance in Windows 10?
Screenshots are super important whenever you want to capture the data on your computer’s screen. The most common way of taking a screenshot on a Windows PC is by using the print screen key. However, your keyboard breaking down or the print screen button not working doesn’t mean you can’t capture the screen of your computer.
If you’re trying to figure out how you can take a screenshot on your Windows computer without using the print screen button, you’ve come to the right place. This article will walk you through the process so you can continue to take screenshots of your computer screen more seamlessly. Keep reading to find out more.
While Windows 11 has new features that excite some users, nothing much has changed regarding how we capture our screen. Like its predecessor, the OS supports multiple ways to capture your screen without using the print screen key. Here are some of the most common ones.
How to Capture a Screenshot in Windows 11 Using Snip & Sketch Tool
Windows 11 has a built-in snipping tool called Snip & Sketch. Using this tool, it’s possible to take screenshots without needing the print screen button. It offers way more flexibility, as you can capture the entire screen or just a section. To use the feature to capture a screenshot, follow these steps.
- On your Windows 11 computer, press “Windows + Shift + S” simultaneously.

- In the new window, select the full-screen icon to capture the entire screen.

- Choose the appropriate icon depending on the kind of screenshot you want.
- Once you’ve chosen any of the icons above, the screenshot should be captured automatically.
- Click the pop-up window on the bottom-right corner of the screen.

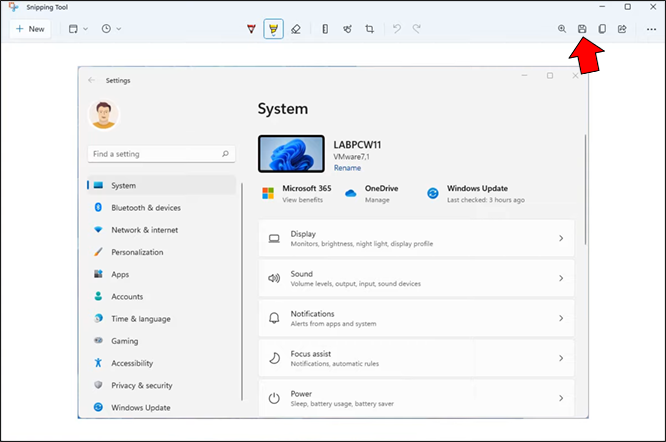
- Select “Save as” and give your screenshot a name and a file path.

- Hit the “Save” button.

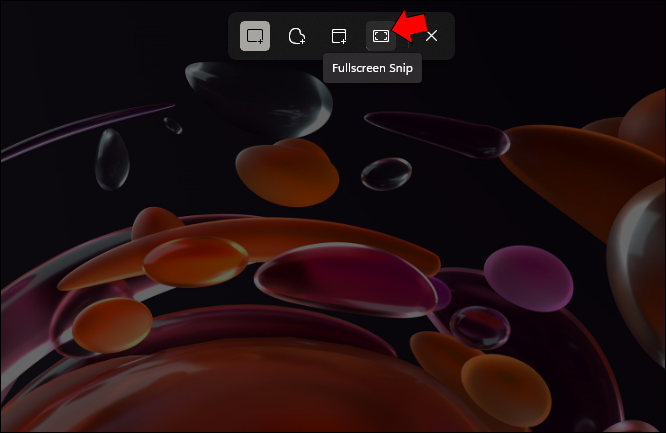


Here’s what the different icons mean in step 3.
How to Take Screenshots in Windows 11 Using the Space Bar
If your print screen key is faulty or you are just exploring different ways of capturing screenshots on your Windows 11 computer, here’s how to use the space bar to capture a screenshot.
- On your computer, press “Fn + Windows + space bar” simultaneously.

- To see the screenshot you’ve just captured, go to “This PC,” then “Pictures,” and finally the “Screenshots” folder.


How to Capture a Screenshot in Windows 11 Using the Game Bar App
The Game Bar app is an excellent way of screen-recording and taking shots of your gaming screen. The app isn’t just limited to games; you can conveniently capture your screen regardless of the currently running program. To capture a screenshot using the Game Bar, follow these steps.
- Press “Windows + G” to open the Game Bar app.
- Click the camera icon to screenshot your active window.
- To locate your screenshot, go to “This PC,” then “Videos,” and open the “Captures” folder. Alternatively, you can open the Game Bar app and go to “See my captures.”
Note: If the Game Bar app doesn’t open right after you’ve pressed the above keys, search for “Game Bar Settings” and turn on the toggle that says, “Record game clips, screenshots, and broadcast using Game Bar.”
How to Take Screenshots in Windows 10 Without Using Print Screen
Just like Windows 11, Windows 10 supports multiple ways of taking screenshots without using the print screen button. Here are some of them.
How to Take Screenshots Using the Snip & Sketch Tool on Windows 10
If you’re using Windows 10, you can use the Snip & Sketch tool to capture your computer’s screen without using the print screen button. Here’s how to go about the process.
- Press “Windows + Shift + S” simultaneously.
- Select the kind of screenshot you want by choosing from the listed icons.

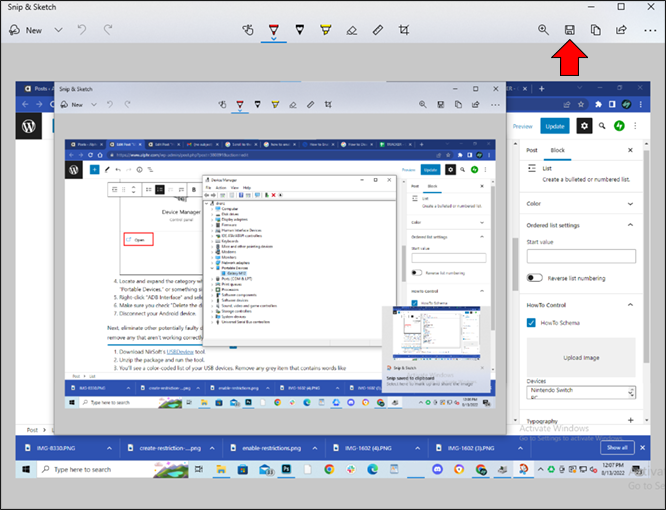
- Click the widget that pops up from the bottom-left corner of the screen.
- Select “Save as.”

- Name your screenshot and select the folder that will house your image.

- Click the “Save” button.


How to Capture an Entire Web Page Without Using Print Screen
Have you ever wanted to save a web page as a JPEG for offline viewing? Maybe you need to send a page to a friend or your boss, or maybe you just want to have a copy of your favorite article for later. There are a few ways to do this, but most of them are either complicated or time-consuming. Until now.
TinyWow is a free online tool that makes it easy and fast to convert web pages to JPEGs. In just seconds, you can have a copy of the page you want, exactly the way you want it. Try TinyWow today and see how easy it is to convert web pages to JPEGs!
Let me show you the quick steps,
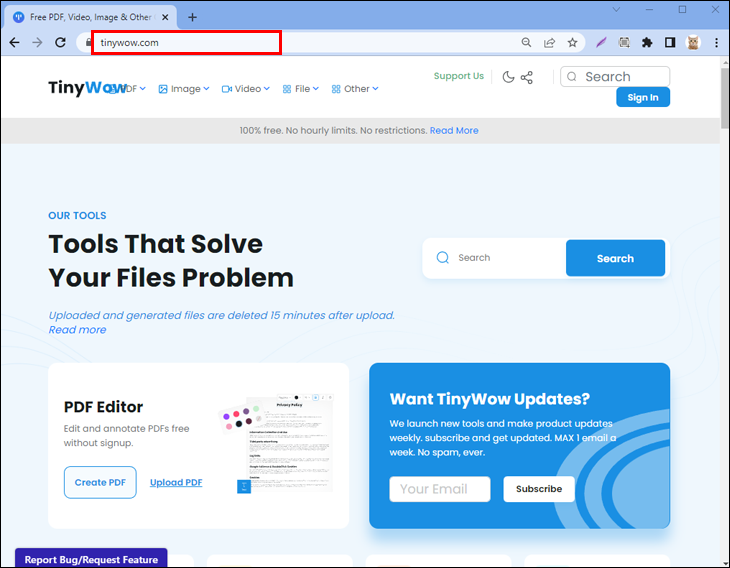
- Go to the web page you want to capture and copy the URL.

- Open a new browser tab and search for TinyWow.com.

- Hover your mouse to “Other,” then click “URL to JPG.”
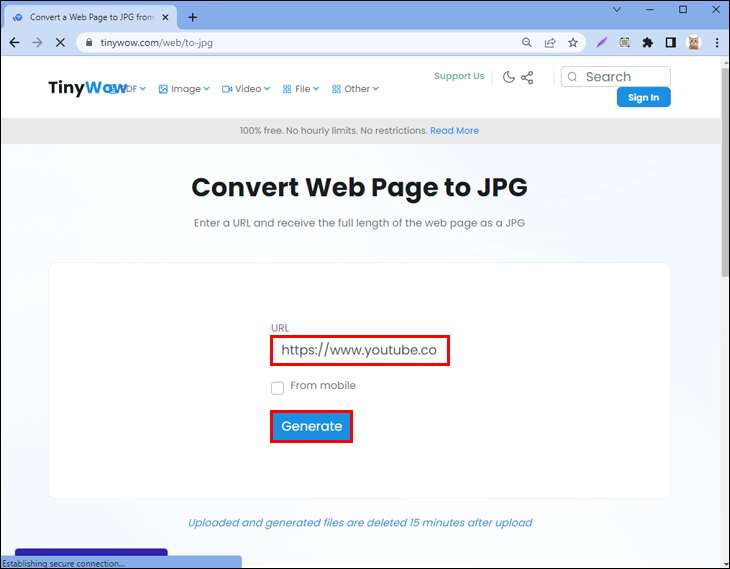
- Paste the URL you copied in the box and click “Generate.”

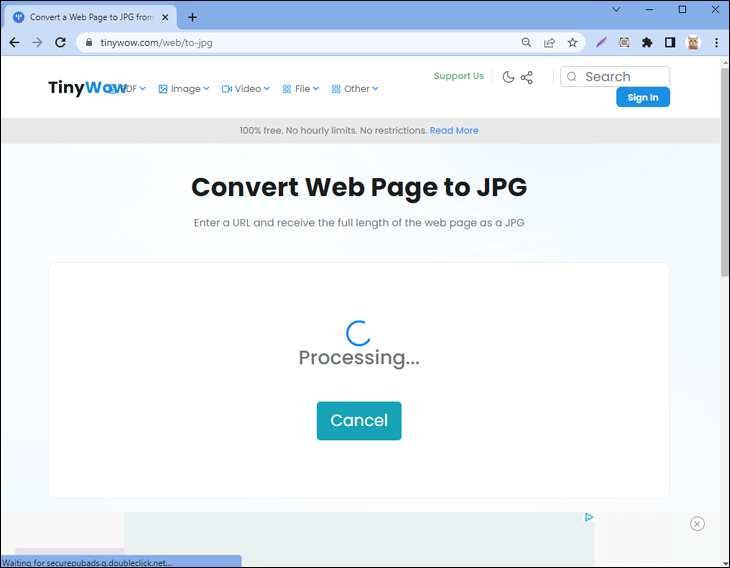
- Wait for the process to complete.
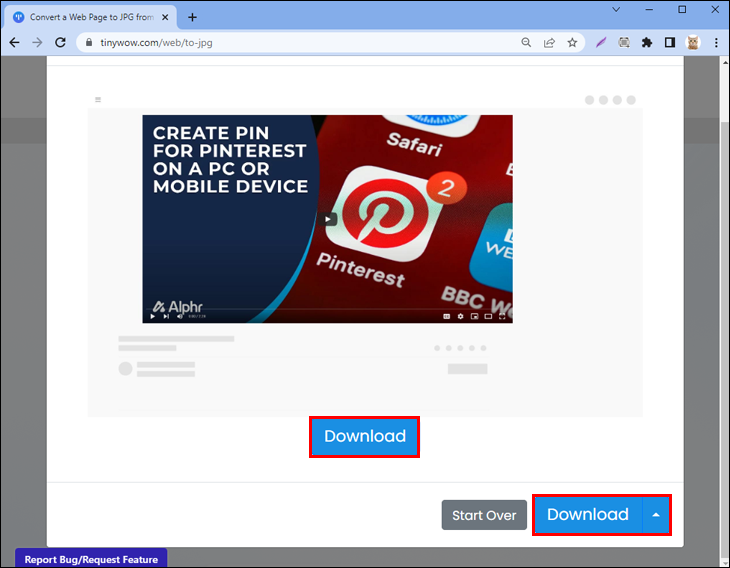
- Voila! Click “Download,” and it will save automatically on your computer download files.


How to Take Screenshots Using the Power Button on a Microsoft Device
If you’re using a Microsoft Surface device with Windows 10, here’s how to take a screenshot.
- Go to your Surface device.

- Hold down the “Power + Volume Up” buttons.

- The screen should dim, and your screenshot should be captured immediately.
- If you’re using Surface version 3 or earlier, use “Windows logo + Volume Down” to take a screenshot.

Additional FAQ
Is the Snipping Tool the same as the Snip & Sketch Tool?
Windows 10 and Windows 11 both have the Snipping Tool and the Snip & Sketch as two different apps. It’s easy to confuse the two. While both apps used to perform a similar task, the Snipping tool is now being repurposed to merge with the Snip & Sketch tool for a tailored experience specifically for Windows 11 users.
Which folder contains my screenshots?
To locate your screenshots, navigate to “This PC,” then “Pictures,” and finally open the “Screenshots” folder.
Explore the World Beyond the Native Print Screen
As you can see, taking screenshots on your Windows PC doesn’t have to be constrained to the print screen button. The built-in snipping tool feature is a reliable print screen alternative. It is free, provides more flexibility when capturing the screen, and doesn’t need any installation. However, there are still many options to explore. Whatever your preference, we hope you can now take screenshots on your Windows PC without using the print screen button.
Have you tried taking screenshots without using the print screen key? How did you go about it? Please let us know in the comments section below.