
Файловый проводник в Windows 11 — не всегда удобный инструмент для всех пользователей. Многие предпочитают использовать сторонние файловые менеджеры, предлагающие обратно совместимый или улучшенный функционал. Однако установка стороннего приложения в качестве проводника по умолчанию может вызывать затруднения у пользователей из-за отсутствия встроенных настроек в некоторых приложениях.
Поэтому в случае с Windows 11 предусмотрена возможность изменения значения по умолчанию, через изменение реестра, что может нести за собой определённые риски. Один из примеров на рынке — файловый менеджер OneCommander, который можно зарегистрировать в качестве Файлового проводника по умолчанию в разделе настроек программы, через возможность ‘Зарегистрироваться как файловый менеджер по умолчанию’. Пользователям следует помнить о важности резервного копирования данных перед внесением каких-либо изменений в реестр системы.
Помимо редактирования реестра, доступен и другой метод: использование утилиты AutoHotkey. Она позволяет переназначить сочетание клавиш Win+E, чтобы открывать сторонний файловый менеджер вместо стандартного Файлового проводника от Microsoft.
Таким образом, современная система Windows 11 предоставляет пользователю больше гибкости в выборе инструментов для управления файлами. Данная возможность позволяет адаптировать операционную систему под индивидуальные предпочтения, обеспечивая удобство и продуктивность в ежедневной работе с файлами и папками на компьютере.
Среди прочих нововведений Windows 11 — видоизмененный «Проводник», который некоторым пользователям пришелся не по душе. При желании вы можете использовать и классический вариант Проводника.
В этой инструкции подробно о способах открыть старый проводник в Windows 11 как средствами системы, так и с помощью сторонних инструментов.
Классический Проводник всё ещё есть в Windows 11 и его можно запустить прямо в системе, но для этого придётся выполнить несколько шагов:
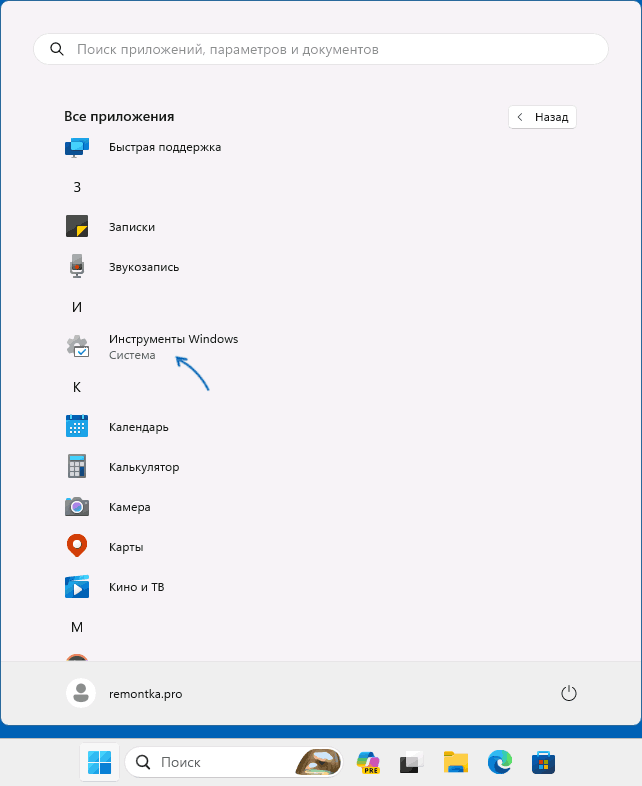
- В меню «Пуск» — «Все приложения» или в «Панели управления» откройте пункт «Инструменты Windows».

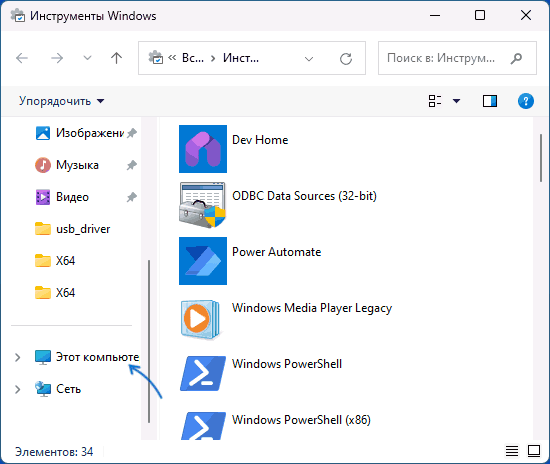
- В открывшемся окне «Инструменты Windows» откройте «Этот компьютер» в панели слева.

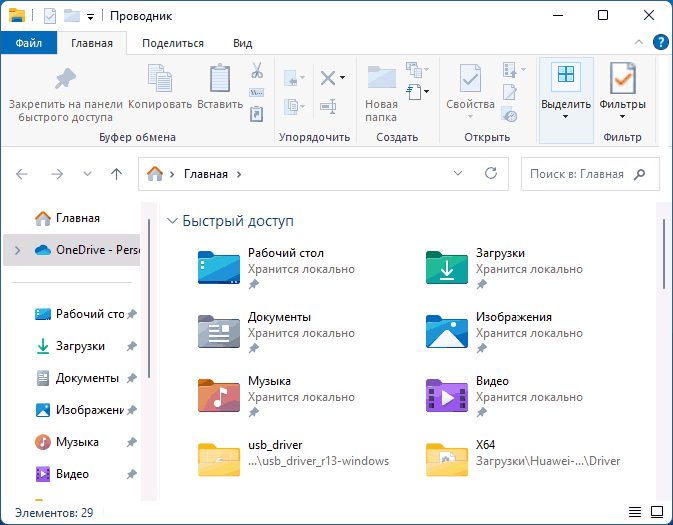
- Будет открыт Проводник, причем е его старом виде.

Неизвестно, сколько ещё проработает этот способ (предполагаю, что это не было задумано разработчиками), но в Windows 11 23H2 он функционирует.
К сожалению, способ имеет свои ограничения: необходимо каждый раз заходить в «Инструменты Windows», либо создать ярлык для них в удобном месте. Если же сделать ярлык для пункта «Этот компьютер» из указанного расположения, будет открываться уже новый проводник Windows 11.
ExplorerPatcher
Вторая возможность — использовать стороннее приложение для настройки вида элементов Windows 11 ExplorerPatcher. Шаги будут следующими:
- Скачайте последнюю версию ExplorerPatcher с GitHub https://github.com/valinet/ExplorerPatcher/releases
- Запустите загруженный файл: на некоторое время экран может стать чёрным, это нормально, также вид панели задач изменится (его можно будет вернуть).
- Нажмите правой кнопкой по панели задач и выберите пункт «Свойства».
- Если требуется вернуть прежний вид панели задач, на вкладке «Taskbar» установите стиль Windows 11, а затем нажмите «Restart File Explorer».
- Перейдите в раздел «File Explorer» и отметьте пункт «Use classic drive groupings in This PC», а ниже установите Windows 10 Ribbon в поле «Control Interface». Включите пункты «Disable the Windows 11 context menu», «Use immersive menus when displaying Windows 10 context menu», «Disable modern search bar». После этого нажмите «Restart File Explorer» внизу слева.

- Теперь, если вы запустите Проводник он будет открыт в своём старом виде:


Ключевым для настройки является включение «Windows 10 Ribbon», но без настроек остальных пунктов, например, отключения новых контекстным меню Windows 11, классический «Проводник» может закрываться с ошибками.
Учитывайте, что при выходе новых обновлений Windows 11 часть функций ExplorerPatcher могут перестать работать, такое уже случалось. А для удаления программы и сделанных ею настроек используйте «Программы и компоненты» в Панели управления.
В ранних версиях Windows 11 существовал ещё один вариант включения старого проводника: в разделе реестра
HKEY_LOCAL_MACHINE\SOFTWARE\Microsoft\Windows\CurrentVersion\Shell Extensions\Blocked
можно было создать строковый параметр
{e2bf9676-5f8f-435c-97eb-11607a5bedf7}
и перезагрузить компьютер, однако в текущих версиях системы этот способ не работает.

This tutorial will show you how to set File Explorer to open to either This PC, Home (Quick access), OneDrive, Downloads, or a custom location by default for your account in Windows 11.
File Explorer opens to Home (Quick access) by default in Window 11, but you can change File Explorer to open to This PC, OneDrive, or Downloads instead.
Starting with Windows 11 build 22593, Quick access is now called Home. The name Quick access has been repurposed for the pinned/frequent Folders section and Pinned files is now called Favorites to align with Office and OneDrive. Recent and pinned files displayed in Home are now searchable using the search box in File Explorer even if they are not local files, so you can find Office files recently shared with you.
Home (Quick access) shows your pinned and frequent folders and recent files.
- Quick access (Frequent folders) = Displays up to 11 folders that you pinned or frequently opened on the system.
- Favorites = Pinned files.
- Recent (Recent files) = Displays up to 26 files that you most recently opened.
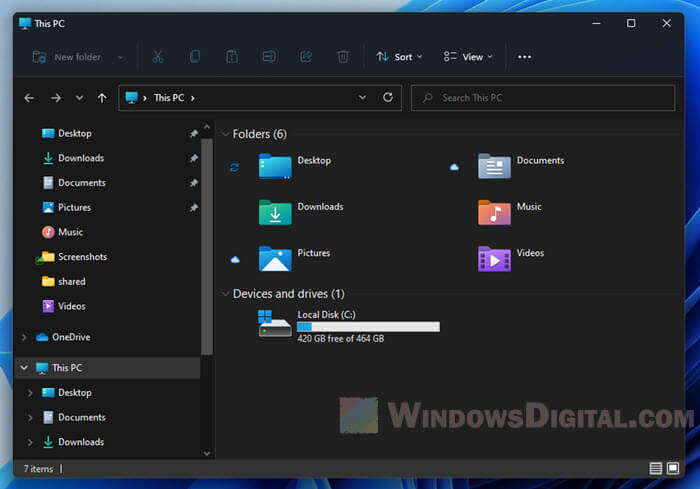
This PC displays your Desktop, Documents, Downloads, Music. Pictures, and Videos folders in addition to the usual devices and drives (hard drives, optical drives, and removable devices) and network locations.
OneDrive can sync files between your computer and the cloud, so you can get to your files from anywhere — your computer, your mobile device, and even through the OneDrive website at OneDrive.com. If you add, change, or delete a file or folder in your OneDrive folder, the file or folder is added, changed, or deleted on the OneDrive website and vice versa. You can work with your synced files directly in File Explorer and access your files even when you’re offline. Whenever you’re online, any changes that you or others make will sync automatically.
Downloads opens to your account’s Downloads folder.
Contents
- Option One: Change Folder to Open File Explorer to by Default in Folder Options
- Option Two: Change Folder to Open File Explorer to by Default using REG File
- Option Three: Set File Explorer to Open to Custom Location by Default
EXAMPLE: Open File Explorer to «Home», «This PC», «OneDrive», or «Downloads» by default


Option One
Change Folder to Open File Explorer to by Default in Folder Options
1 Open Folder Options.
2 In the General tab, select Home (Quick access — default), This PC or OneDrive in the Open File Explorer to drop menu for what you want, and click/tap on OK. (see screenshot below)
OneDrive is only available starting with Windows 11 build 22593.

Option Two
Change Folder to Open File Explorer to by Default using REG File
This option will not work when Administrator protection is turned on.
1 Do step 2 (Home), step 3 (This PC), step 4 (OneDrive), or step 5 (Downloads) below for what you would like to do.
2 To Open File Explorer to Home by Default
This is the default setting.
A) Click/tap on the Download button below to download the file below, and go to step 6 below.
Open_File_Explorer_to_Home.reg
(Contents of REG file for reference)
Code:
Windows Registry Editor Version 5.00

[HKEY_CURRENT_USER\Software\Microsoft\Windows\CurrentVersion\Explorer\Advanced]
"LaunchTo"=dword:00000002
3 To Open File Explorer to This PC by Default
A) Click/tap on the Download button below to download the file below, and go to step 6 below.
Open_File_Explorer_to_This_PC.reg
(Contents of REG file for reference)
Code:
Windows Registry Editor Version 5.00

[HKEY_CURRENT_USER\Software\Microsoft\Windows\CurrentVersion\Explorer\Advanced]
"LaunchTo"=dword:00000001
4 To Open File Explorer to OneDrive by Default
OneDrive is only available starting with Windows 11 build 22593.
A) Click/tap on the Download button below to download the file below, and go to step 6 below.
Open_File_Explorer_to-OneDrive.reg
(Contents of REG file for reference)
Code:
Windows Registry Editor Version 5.00

[HKEY_CURRENT_USER\Software\Microsoft\Windows\CurrentVersion\Explorer\Advanced]
"LaunchTo"=dword:00000004
5 To Open File Explorer to Downloads by Default
A) Click/tap on the Download button below to download the file below, and go to step 6 below.
Open_File_Explorer_to_Downloads.reg
(Contents of REG file for reference)
Code:
Windows Registry Editor Version 5.00

[HKEY_CURRENT_USER\Software\Microsoft\Windows\CurrentVersion\Explorer\Advanced]
"LaunchTo"=dword:00000003
6 Save the .reg file to your desktop.
7 Double click/tap on the downloaded .reg file to merge it.
8 When prompted, click/tap on Run, Yes (UAC), Yes, and OK to approve the merge.
9 You can now delete the downloaded .reg file if you like.
Option Three
Set File Explorer to Open to Custom Location by Default
1 Do step 2 (custom) or step 3 (undo) below for what you want.
2. Set File Explorer to Open to Custom Location by Default
This will override Option One and Option Two.
A) Click/tap on the Download button below to download the REG file below.
This REG file will add the required registry keys and values for you so you will just need to edit it starting at step 2F below for the custom folder path you want instead.
Set_File_Explorer_to_open_to_custom_location.reg
(Contents of REG file for reference)
Code:
Windows Registry Editor Version 5.00

[HKEY_CURRENT_USER\SOFTWARE\Classes\CLSID\{52205fd8-5dfb-447d-801a-d0b52f2e83e1}\shell\OpenNewWindow\command]
@="Explorer \"C:\\Windows\""
"DelegateExecute"=""
B) Save the .reg file to your desktop.
C) Double click/tap on the downloaded .reg file to merge it.
D) When prompted, click/tap on Run, Yes (UAC), Yes, and OK to approve the merge.
E) You can now delete the downloaded .reg file if you like.
F) Open Registry Editor (regedit.exe).
G) Navigate to the key below in the left pane of Registry Editor. (see screenshot below)
HKEY_CURRENT_USER\SOFTWARE\Classes\CLSID\{52205fd8-5dfb-447d-801a-d0b52f2e83e1}\shell\opennewwindow\command

H) In the right pane of the command key, double click/tap on the (Default) string value (REG_SZ) to modify it. (see screenshot above)
I) Change the red part of the Explorer «C:\Windows« path to the folder or drive path you want File Explorer to open to by default, and click/tap on OK.
For example: Explorer «C:\Users\Brink\Downloads«
or for a drive: Explorer «C:«

J) You can now close Registry Editor if you like.
3. Undo Set File Explorer to Open to Custom Location by Default
This is the default setting.
A) Click/tap on the Download button below to download the REG file below.
Undo_set_File_Explorer_to_open_to_custom_location.reg
(Contents of REG file for reference)
Code:
Windows Registry Editor Version 5.00

[-HKEY_CURRENT_USER\SOFTWARE\Classes\CLSID\{52205fd8-5dfb-447d-801a-d0b52f2e83e1}]
B) Save the .reg file to your desktop.
C) Double click/tap on the downloaded .reg file to merge it.
D) When prompted, click/tap on Run, Yes (UAC), Yes, and OK to approve the merge.
E) You can now delete the downloaded .reg file if you like.
That’s it,
Shawn Brink
Related Tutorials
- Open File Explorer in Windows 11
- Add or Remove Home in Navigation Pane of File Explorer in Windows 11
- Add and Remove Favorites in File Explorer Home in Windows 11
- Add or Remove This PC in Navigation Pane of File Explorer in Windows 11
- Add or Remove Windows C Drive in Navigation Pane of File Explorer in Windows 11
- Add or Remove D Drive in Navigation Pane of File Explorer in Windows 11
- Add or Remove E Drive in Navigation Pane of File Explorer in Windows 11
By default, when you open File Explorer on Windows 11, it will open in “Quick access” – a place where the default folders, frequently and recently visited files and folders are shown. It does not show your devices and drives like how the “My computer” or “This PC” would show you.
However, many users still do not know this, but users can actually set File Explorer to open to This PC instead of the default quick access. This short guide will show you how to make File Explorer default to This PC instead on Windows 11.
Set File Explorer to open This PC instead in Windows 11
Follow the instruction below to change File Explorer default landing page from the quick access to This PC (or often know as My computer in past Windows versions) on Windows 11.
Also see: How to Change Win + E Shortcut to Open a Different Folder or App
- Open File Explorer from the taskbar.

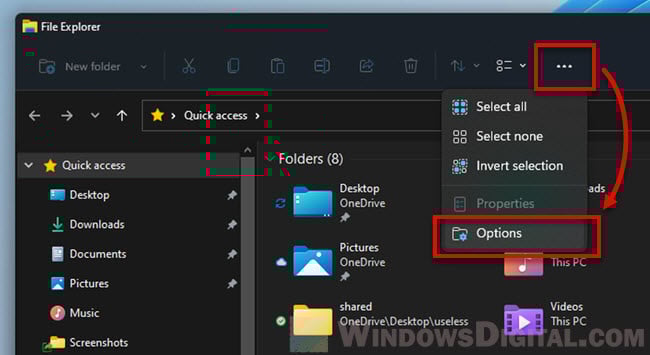
- On the menu bar, click on the triple dotted “See more” button, then select Options.

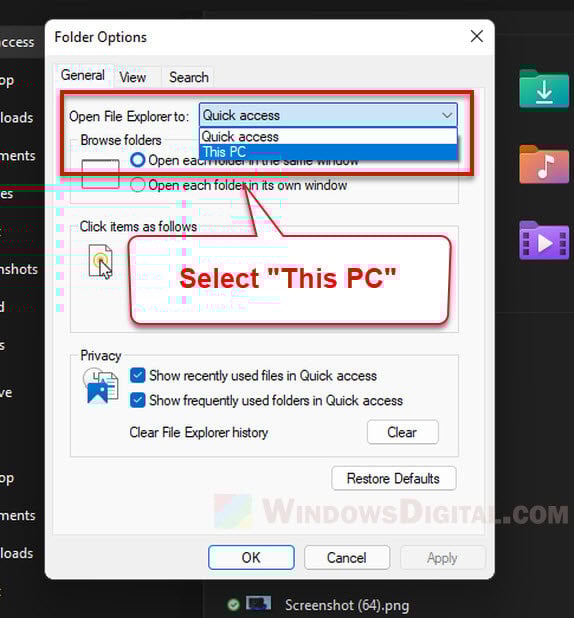
- Under General tab, click on the drop-down menu for the “Open File Explorer to” option, and select This PC (instead of Quick access).

- Click Apply, then OK.
After the change is applied, the next time you open File Explorer, it will open to This PC instead, where all your devices and hard drives, as well as the default folders are shown.
If you would like to have a “This PC” icon on the desktop instead, read this guide: How to show This PC on desktop in Windows 11.
Create File Explorer desktop shortcut on Windows 11
By default, File Explorer will only appear as a button on the taskbar. If you also want to make it accessible as a shortcut icon on the desktop, here’s how to create File Explorer desktop shortcut icon on Windows 11.
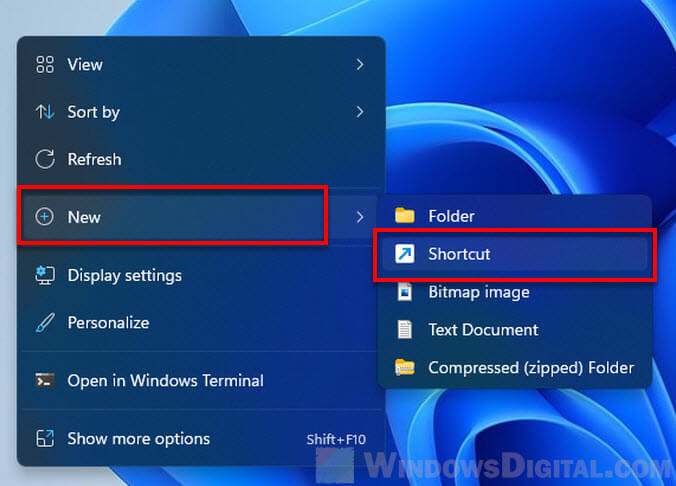
- Right-click anywhere on the desktop.
- Select New > Shortcut.

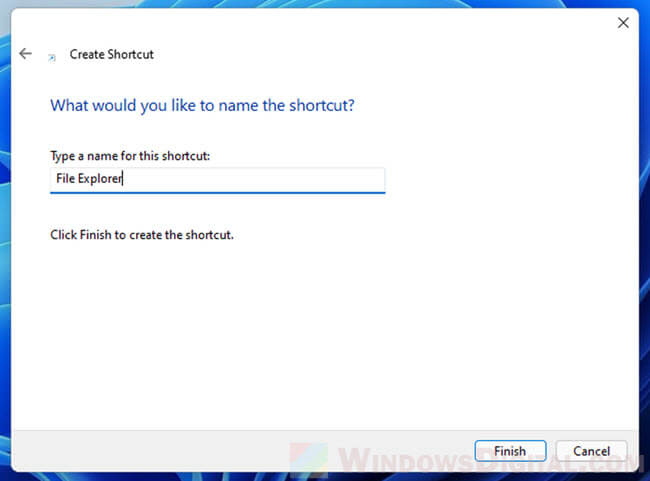
- In the “Type the location of the item” field, enter “explorer.exe” and click Next.

- When asked to type a name for this shortcut, enter any name you like, or just “File Explorer”.

- Click Finish.
Open File Explorer with keyboard shortcut
One of the most underrated keyboard shortcuts in Windows is the Win + E key. By pressing Windows + E keyboard shortcut keys, Windows 11 will open File Explorer right away.
Regardless if your screen is on a windowed or full screen mode program or software, Windows will force open File Explorer when the Win + E keyboard shortcut is executed.
Other File Explorer settings
During step 3 in the first instruction above, you can configure various other settings in the folder options in Windows 11.

Browse folders
You can select one of the following options.
- Open each folder in the same window.
- Open each folder in its own window.
Selecting the first option will make File Explorer to open any folder in the same window. On the contrary, selecting the latter will cause File Explorer to open each folder in a new window.
Click items as follows
This setting allows you to change the way a file or folder is opened in the File Explorer. You can select one of the following options.
- Single-click to open an item
- Underline icon titles consistent with my browser
- Underline icon titles only when I point at them
- Double-click to open an item
Double-click is the default method to open a file or folder in Windows 11. If you prefer to open a file or folder with single-click instead, select the first option, then select if the icon titles should be underline all the time or only when you point at them.

The screenshot above shows how it looks like when the “single-click to open an item” and “underline icon titles only when you point at them” options are selected.
You are here:
Home » Windows 10 » How To Restore File Explorer To Default Settings In Windows 10/11
The best way to manage files on your Windows 10/11 PC is with File Explorer (also known as Windows Explorer). It lets you create, organize, and delete files on your computer.
The File Explorer offers various settings and options to personalize it to your requirement. For example, you can change the default view and search to your desired settings. File Explorer settings can be managed either from File Explorer or Folder Options.
If you have changed several settings of File Explorer and want to restore it to the default settings, you can do so by resetting File Explorer to default settings. Restoring File Explorer to default settings might also help you fix issues if any.
This guide will show you how to reset the Windows 10/11 File Explorer to default settings.
NOTE: Restoring the File Explorer to default settings does not cause data loss. In other words, when you restore File Explorer to default settings, your files and folders will not be deleted.
Step 1: Open This PC or any folder located anywhere on your PC.
Step 2: In Windows 11, click on the three dots (refer to the picture below) in the toolbar and then click Options to open Folder Options. In Windows 10, click the File menu and then click Change folder and search options.


Step 3: Under the General tab of Folder Options, click the Restore Defaults button.

Step 4: Next, switch to the View tab. Here, click on the Restore Defaults button to reset File Explorer view settings to default.

Step 5: Finally, click on the Search tab to see the search settings. Once again, click on the Restore Defaults button to restore search settings to default settings.
Last but not the least, do not forget to click on the Apply button. That is it! You just restored File Explorer to default settings in Windows 10 and 11.

Tip 1: You can use the Windows + E keyboard shortcut to open File Explorer.
Tip 2: To preview an image or supported file, select the file and then use the Alt + P hotkey.
Tip 3: In Windows 10, you can use Ctrl + F1 hotkey to show or hide the ribbon.