
Способ 1: Раздел меню «Проводника»
В Windows 11 появилось быстрое включение и отключение отображения расширений, что очень удобно для тех, кто постоянно работает с большими объемами файлов.
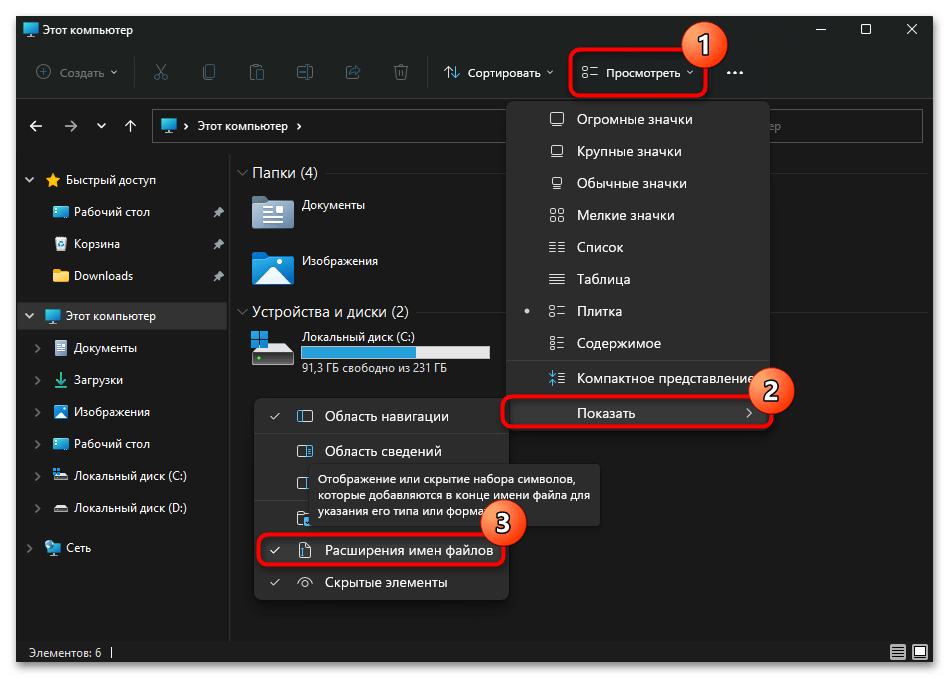
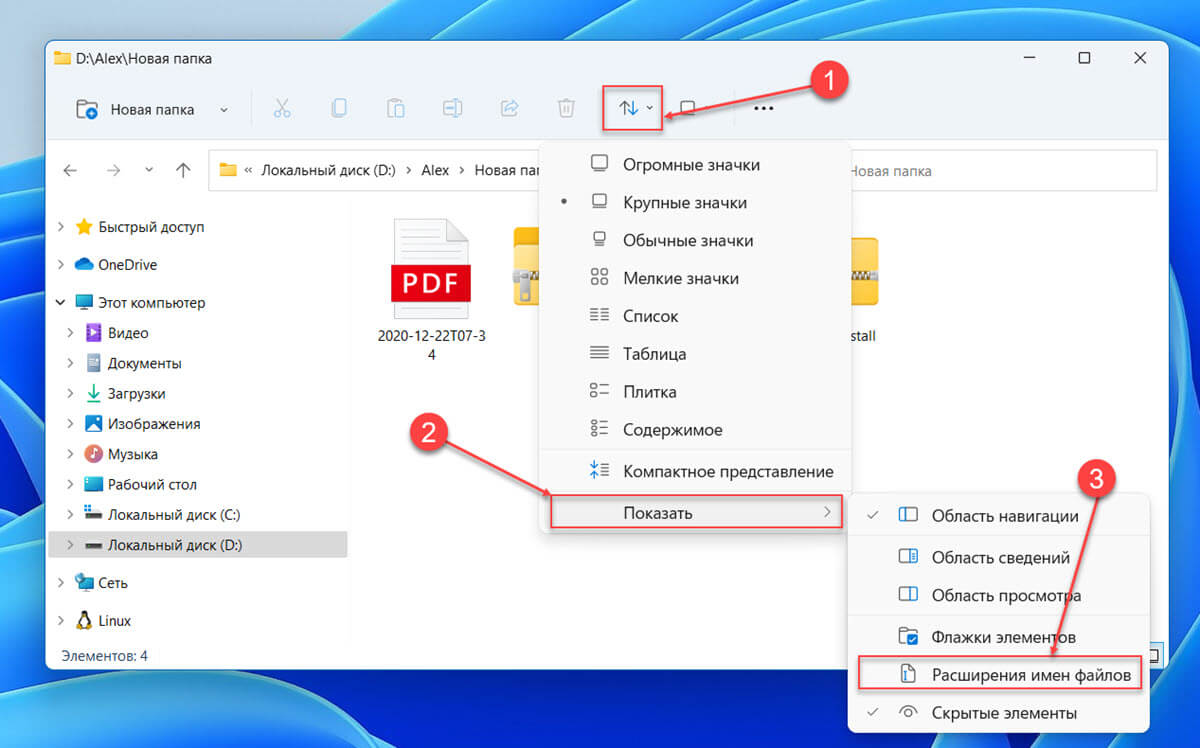
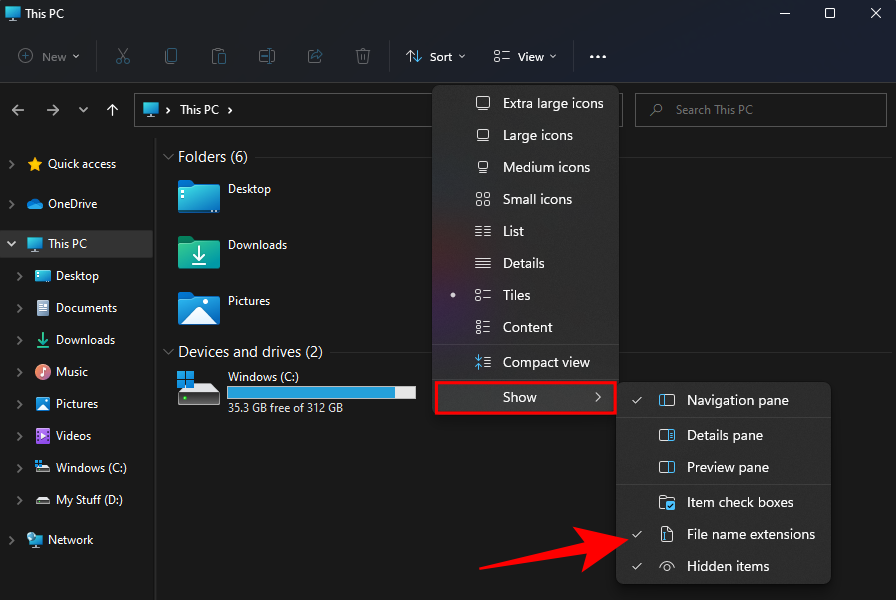
Для этого откройте любую папку в «Проводнике» и кликните по кнопке с названием «Посмотреть». Из выпадающего меню наведите курсор на строчку «Показать» для отображения дополнительного меню. В нем уже выберите пункт «Расширения имен файлов».
В будущем можете легко переключаться между значениями этого параметра. Галочка стоит — расширения отображаются, и наоборот.
Можете перейти в любую папку, где есть файлы, и посмотреть, появились ли расширения в конце их названий.
Способ 2: «Параметры папок»
Классический для всех Windows метод включения расширений заключается в вызове окна «Параметры папок».
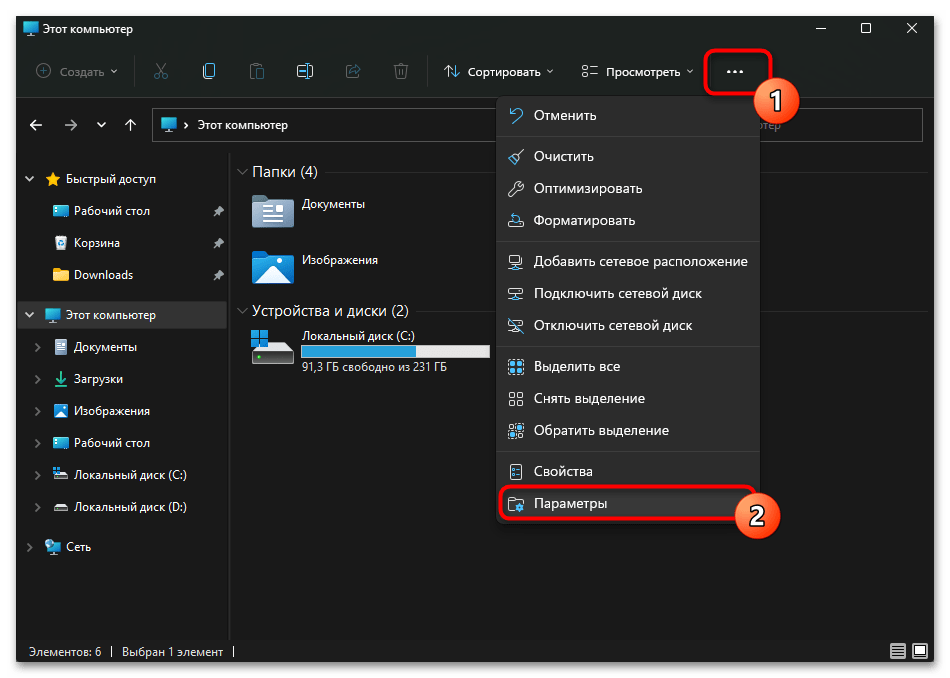
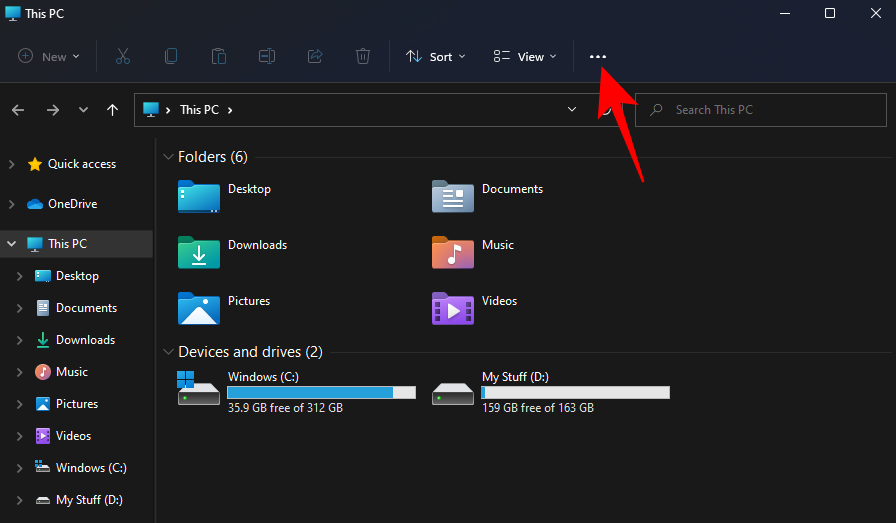
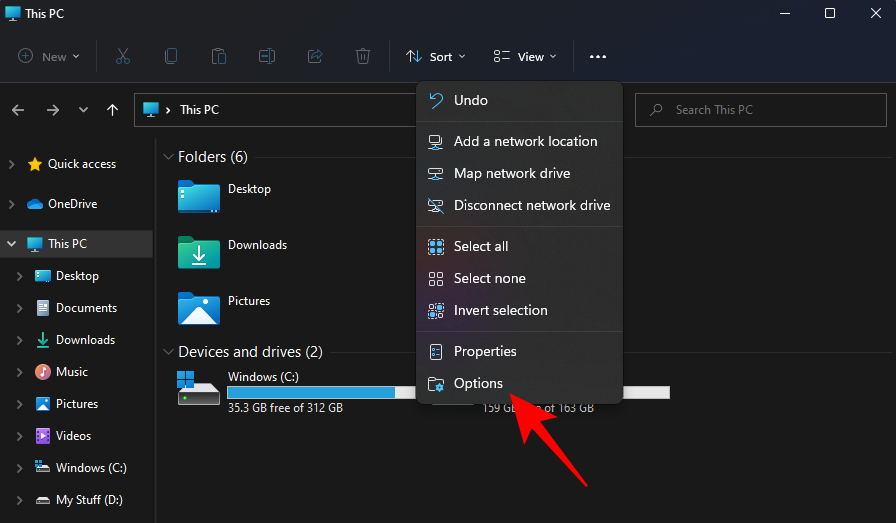
- Откройте любую папку «Проводника» и кликните по кнопке с тремя точками. Из выпадающего меню щелкните по строке «Параметры».
- Появится новое окно, в котором переключитесь на вкладку «Вид», прокрутите список дополнительных параметров в самый низ и уберите галочку с пункта «Скрывать расширения для зарегистрированных типов файлов». Примените изменения кнопкой «ОК».

Результат будет тем же, что и в предыдущем способе.
Наша группа в TelegramПолезные советы и помощь
- To show file extensions on Windows 11, open File Explorer, then click on “View,” select “Show,” and choose the “File name extensions” option to show extensions.
- Another way is to open “Folder Options” and clear the “Hide extensions for known file types” option.
- Furthermore, you can enable this feature from the Settings app or by using Command Prompt or PowerShell.
On Windows 11, you can show file extensions on File Explorer in multiple ways, and in this guide, I will show you how to complete this configuration. A file extension is the three or four letters after the period at the end of a filename. It indicates the file format type, such as .txt, .docx, or .pdf. While not strictly necessary for file functionality, extensions offer several benefits.
For example, they provide a quick visual way to identify a file’s format, making it easier to select the right application to open it, and they allow for easy modification of a file’s type, for instance, changing a .txt file to a .bat file for scripting purposes.
File Explorer hides the extensions for known file types by default because it can create a cleaner, less cluttered appearance, particularly for users who aren’t tech-savvy. However, it also helps safeguard against unintentional changes to file extensions, which could render the file unusable. In addition, historically, it was used to mask malicious files disguised as harmless ones, though this is less of a concern today.
Despite the default behavior, it’s often beneficial to display file extensions, and you can change this configuration from the File Explorer and Settings app. If you’re comfortable editing the Registry and using commands, you can also make extensions visible through Command Prompt or PowerShell.
In this guide, I will teach you the easy steps to show extensions for files on File Explorer.
- Show file extensions on Windows 11 from File Explorer
- Show file extensions on Windows 11 from Settings
- Show file extensions on Windows 11 from Command Prompt
To show file extensions on Windows 11, use these steps:
-
Open File Explorer (Windows key + E) on Windows 11.
-
Click the View menu button in the command bar.
-
Select the Show submenu and choose the “File name extensions” option.


Enable extensions from Folder Options
You can also enable file extensions from the “Folder Options” settings using these steps:
-
Open File Explorer.
-
Click the See more button and click on Options.

-
Click the View tab.
-
Clear the “Hide extensions for known file types” option under the “Advanced settings” section.
-
Click the Apply button.
-
Click the OK button.

Once you complete the steps, File Explorer will show extensions for known file types on Windows 11, such as .txt, .exe, and .docx.
Show file extensions on Windows 11 from Settings
To make file extensions visible from the Settings app, use these steps:
-
Open Settings.
-
Click on System.
-
Click the For developers page.
-
Click the File Explorer setting.
-
Turn on the “Show file extensions” toggle switch.


After you complete the steps, the file extensions will now be available on File Explorer.
Show file extensions on Windows 11 from Command Prompt
You can also use Command Prompt or PowerShell to enable extensions for files by running a command that will edit the Registry to enable the feature. This option will also come in handy when turning on extensions through a script file.
Warning: It’s crucial to note that modifying the Registry can cause serious problems if not used properly. It’s assumed you know what you’re doing and created a full backup of your system before proceeding.
To show file extensions through the Command Prompt on Windows 11, use these steps:
-
Open Start.
-
Search for Command Prompt or PowerShell, right-click the top result, and choose the Run as administrator option.
-
Type the following command to show extensions for files and press Enter:
reg add HKCU\Software\Microsoft\Windows\CurrentVersion\Explorer\Advanced /v HideFileExt /t REG_DWORD /d 0 /f


After you complete the steps, File Explorer will start displaying file extensions on Windows 11.
If you want to undo the changes, you can use the same instructions, but in step 3, run this reg add HKCU\Software\Microsoft\Windows\CurrentVersion\Explorer\Advanced /v HideFileExt /t REG_DWORD /d 1 /f command.
Update October 30, 2024: This guide has been updated to ensure accuracy and reflect changes to the process.
Легко определяйте тип файла, включив отображение расширения файла рядом с именем в проводнике в Windows 11.
Расширения файлов позволяют любой операционной системе распознавать файл и запускать его с помощью уже установленной подходящей программы или приложения. Тем не менее, поскольку большинство пользователей не очень заботит, какой тип файла они используют, Microsoft Windows не отображает расширения файлов по умолчанию.
С точки зрения безопасности рекомендуется всегда проверять расширение загруженного файла из Интернета перед его запуском, чтобы защитить свой компьютер от атак вредоносных программ или программ-вымогателей (например, PDF-файлы и форматы файлов изображений, которые содержат вирусы — могут иметь расширение .EXE).
Помимо безопасности, если вы переходите на операционную систему Windows с другой (Linux или macOS). Отображение расширений файлов также может помочь вам быстрее познакомиться с типами файлов, используемыми операционной системой.
Различные способы отображения расширения имен файлов в проводнике
Есть несколько способов показать расширение файла в проводнике Windows 11, и вы можете выбрать тот, который вам больше подходит из перечисленных ниже вариантов.
- С помощью панели команд проводника
- С помощью параметров папки проводника
- С помощью столбца проводника тип файла
- С помощью редактора реестра
- С помощью Терминала Windows
- С помощью файла .bat
Включение расширения имен файлов на панели команд проводника
Это один из самых удобных способов показать расширения файлов в проводнике в Windows 11.
- Откройте проводник Windows 11, кликнув значок папки на панели задач. Кроме того, вы также можете нажать сочетание клавиш Windows E на клавиатуре, чтобы открыть его.
- Нажмите значок «Параметры макета и просмотра» в ленте проводника.
- Теперь наведите указатель мыши на опцию «Показать» и в новом контекстном меню, нажмите на опцию «Расширения имен файлов», чтобы в дальнейшем видеть расширения для любого файла имеющихся на вашем компьютере.
Показать расширение имен файлов с помощью «Параметров папок проводника»
Хотя этот способ требует от вас на несколько кликов больше, чем предыдущий. Однако, если вам нужно изменить несколько параметров проводника, это то, что нужно.
- Сначала запустите проводник, кликнув значок папки на панели задач, или любым другим удобным вам способом.
- Затем кликните многоточие … (три горизонтальные точки) в ленте проводника и нажмите на опцию «Параметры» в выпадающем меню.
- В открывшемся окне «Параметры папок» перейдите на вкладку «Вид».
- Затем найдите в разделе «Дополнительные настройки» строку: «Скрывать расширения для зарегистрированных типов файлов», и установите флажок чтобы отменить действие параметра.
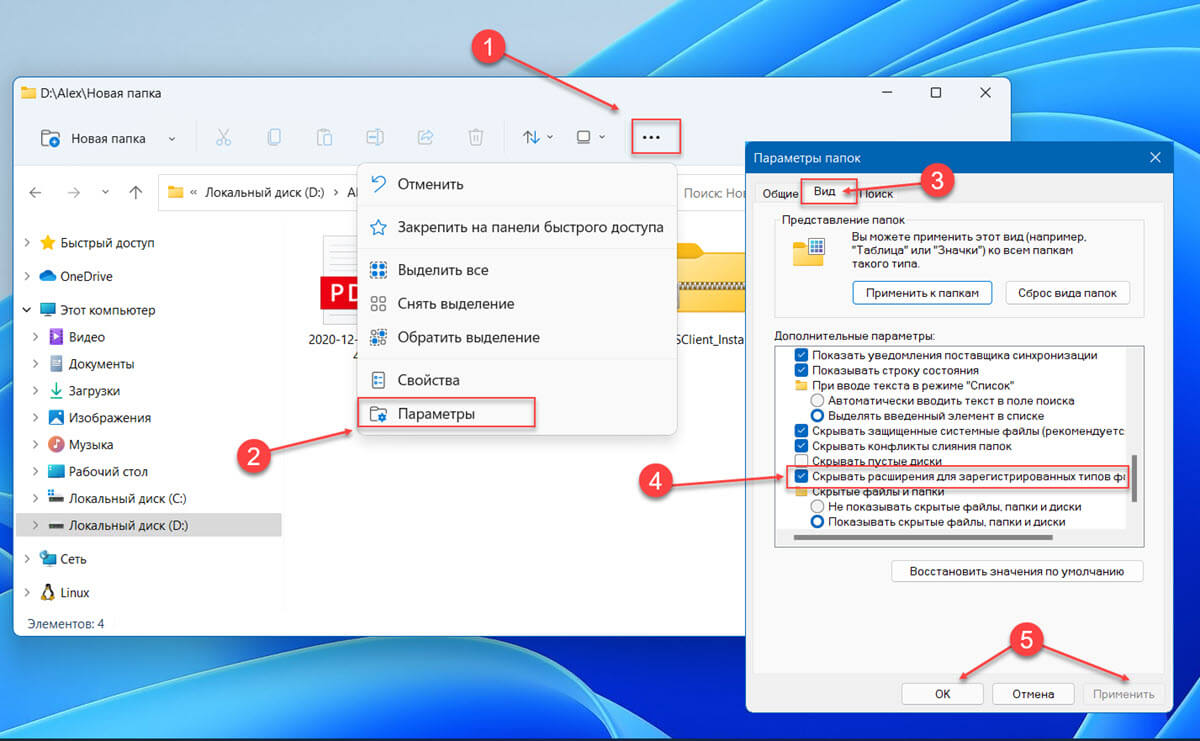
- Нажмите кнопку «Применить», чтобы применить изменения, нажмите «ОК», чтобы закрыть окно «Параметры папок».
Расширения файлов теперь будут видны на вашем ПК с Windows.
Добавить столбец «Тип файла» в проводнике
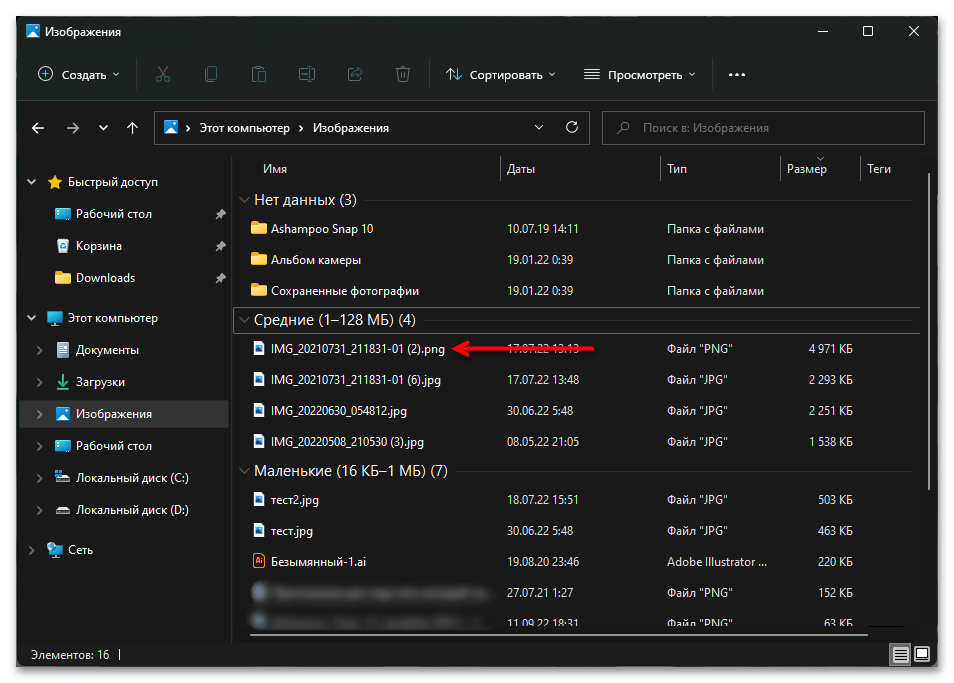
Добавление столбца «Тип» работает иначе, чем все предыдущие способы. Добавление столбца будет отображать тип файла в отдельном столбце проводника. Многие выбирают этот вариант только из соображений эстетики, поскольку этот способ не добавляет к имени файла расширения, но предоставляет вам важную информацию прямо на экране.
Примечание: Добавление столбца «Тип» не сможет отображать расширения файлов вне проводника на вашем ПК с Windows 11. В то время как все остальные способы смогут отображать расширения файлов непосредственно на рабочем столе.
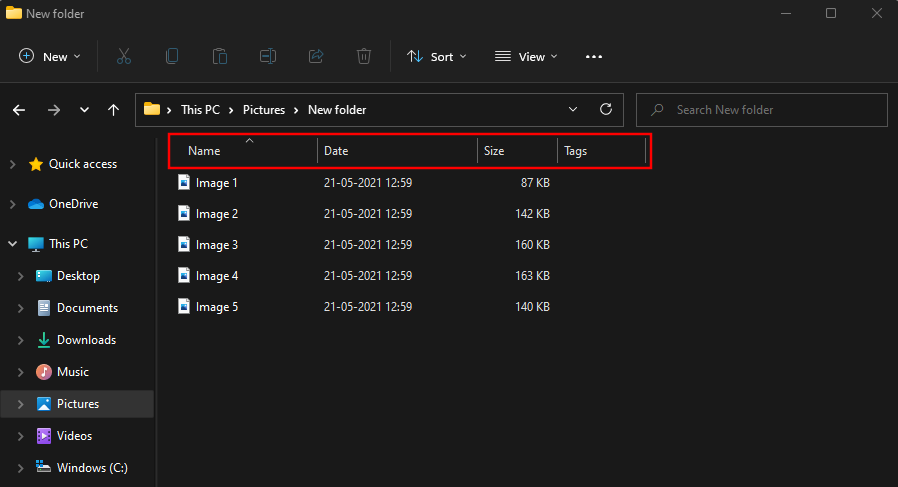
- Для этого перейдите в нужную папку с помощью проводника.
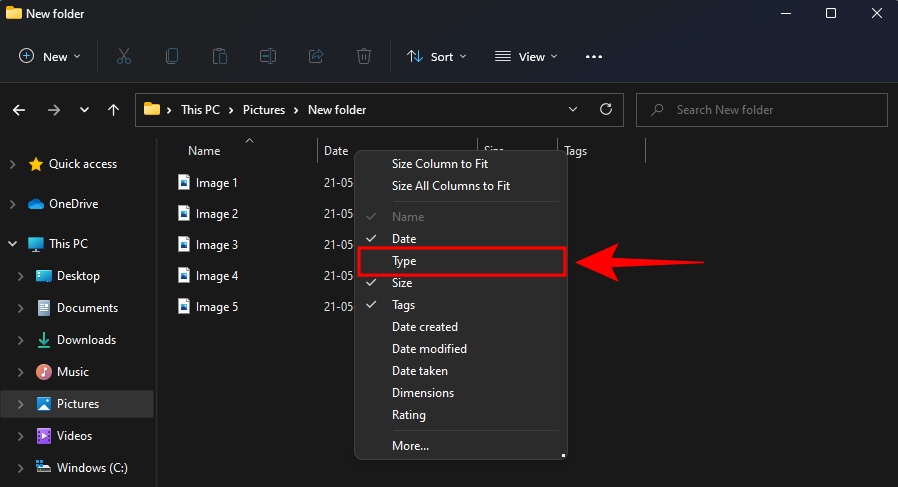
- Кликните правой кнопкой мыши строку заголовка в проводнике, расположенную прямо под адресной строкой. Затем выберите параметр «Тип» в к меню, чтобы отобразить одноименный столбец.
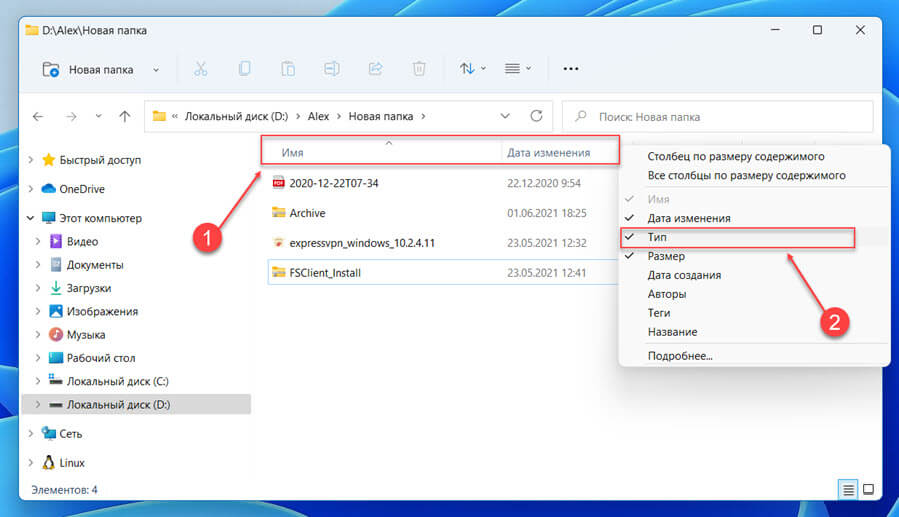
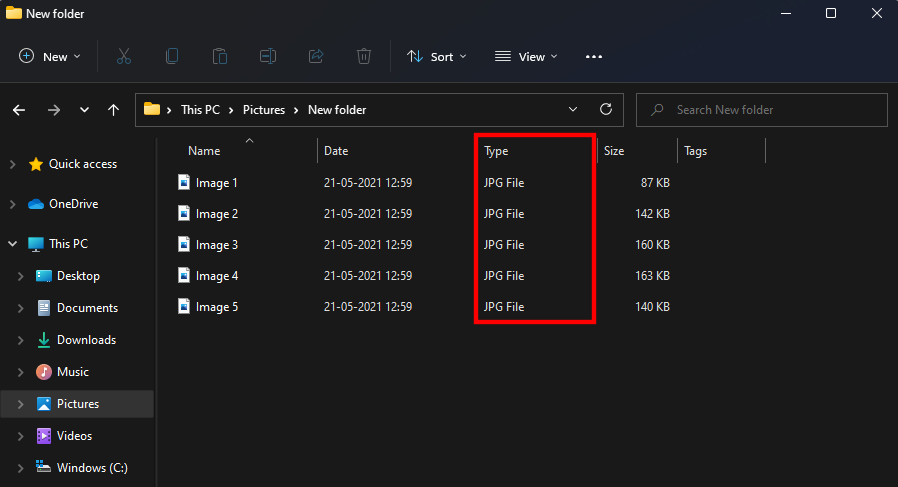
- После этого вы сможете увидеть расширения файлов для каждого из файлов в отдельном столбце на экране.
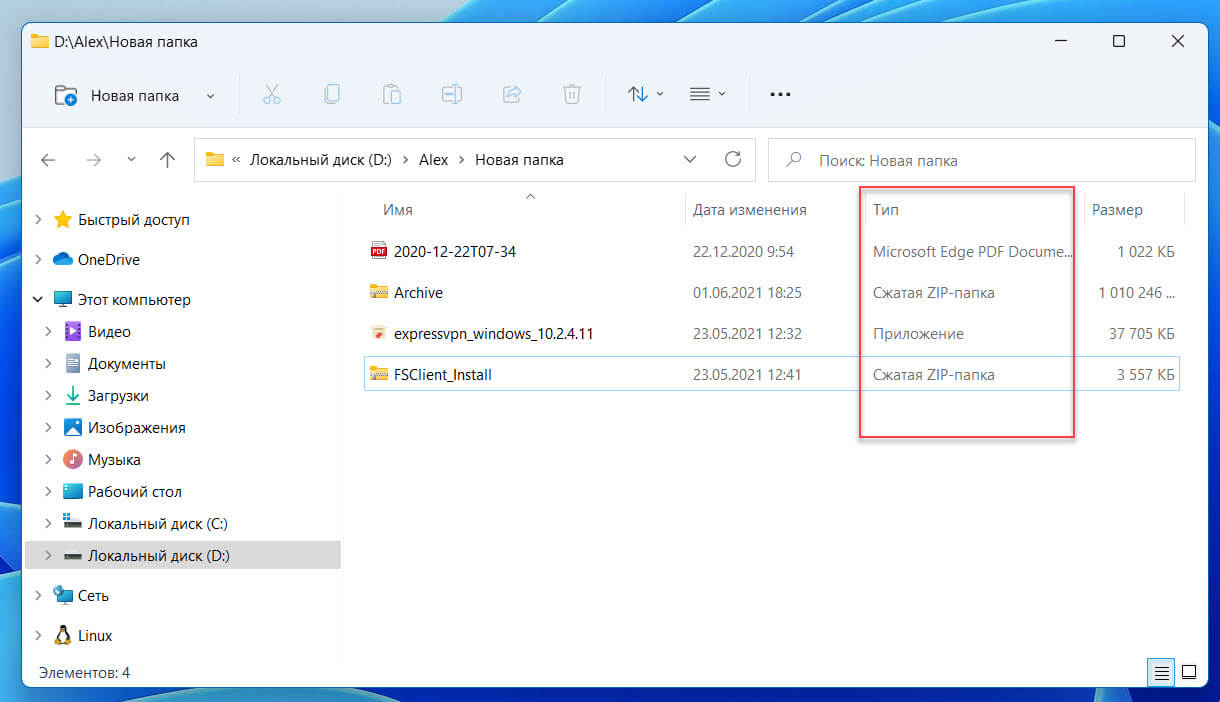
Примечание: Для некоторых файлов вместо расширений в столбце отображаются тип файла. Например: .EXE файлы будут отображаться как «Приложение».
Поскольку этот способ не отображает расширение всех файлов. Он лучше всего подходит для пользователей, уже знакомых с системой Windows и имеющих некоторые знания о расширениях и их соответствующих типах.
Если по какой-то причине ни один из вышеупомянутых вариантов не работает для вас, и вы не видите расширения файлов в Windows, редактор реестра — ваш лучший выбор.
Включить расширение файлов в проводнике с помощью редактора реестра
- Откройте редактор реестра
- Перейдите в следующий каталог. Вы также можете ввести или скопировать и вставить следующий путь в адресную строку редактора реестра:
HKEY_CURRENT_USER\Software\Microsoft\Windows\CurrentVersion\Explorer\Advanced
- Затем в правом разделе окна редактора реестра найдите и дважды кликните параметр HideFileExt.
- После этого измените значение на «0», чтобы всегда показывать расширения файлов, и нажмите «ОК» для подтверждения. Если вам когда-нибудь понадобится скрыть расширение файла, измените значение параметра «HideFileExt» на «1».

Примечание: После правки реестра может потребоваться перезапустить проводник или перезагрузить компьютер, чтобы изменения вступили в силу.
Включить расширение файлов в проводнике с Терминала Windows
Наверно один из самых быстрых способов включить отображение расширения имен файла.
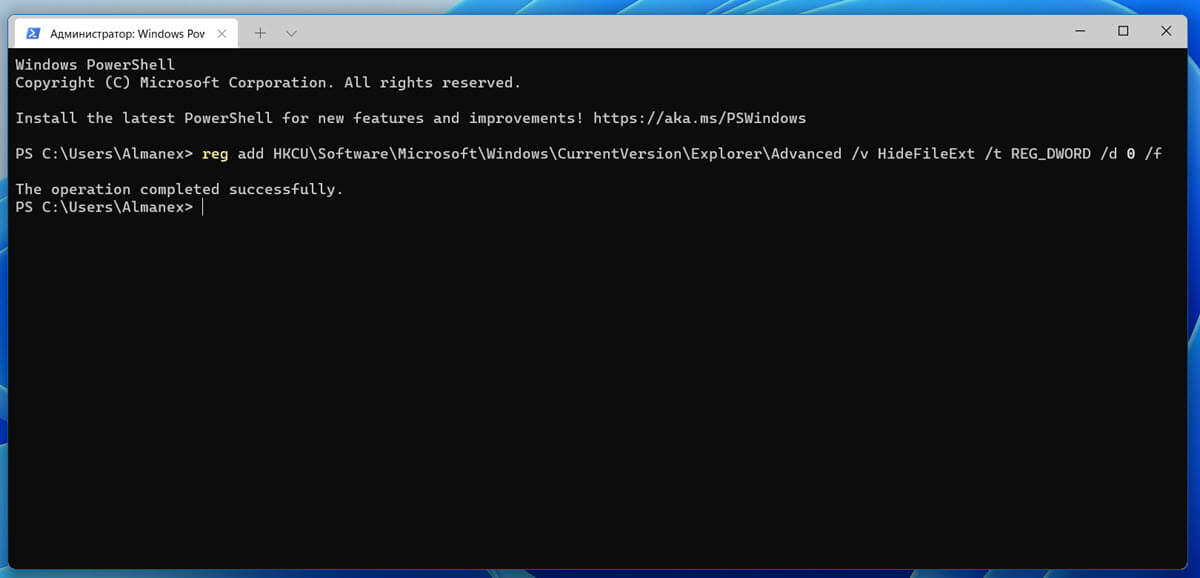
- Запустите Терминал Windows от имени администратора
- Во вкладке с «PowerShell» или Командной строки, введите или скопируйте и вставьте следующую команду чтобы включить отображение расширений файлов:
reg add HKCU\Software\Microsoft\Windows\CurrentVersion\Explorer\Advanced /v HideFileExt /t REG_DWORD /d 0 /f
- Чтобы отключить отображение расширения, выполните следующую команду:
reg add HKCU\Software\Microsoft\Windows\CurrentVersion\Explorer\Advanced /v HideFileExt /t REG_DWORD /d 1 /f
Изменения должны применится мгновенно.
Вы также можете создать командный файл .bat и использовать его, когда вам нужно показать расширения файлов на нескольких компьютерах, или вы можете создать его для своих не очень технически подкованных друзей и членов семьи.
С помощью файла .bat
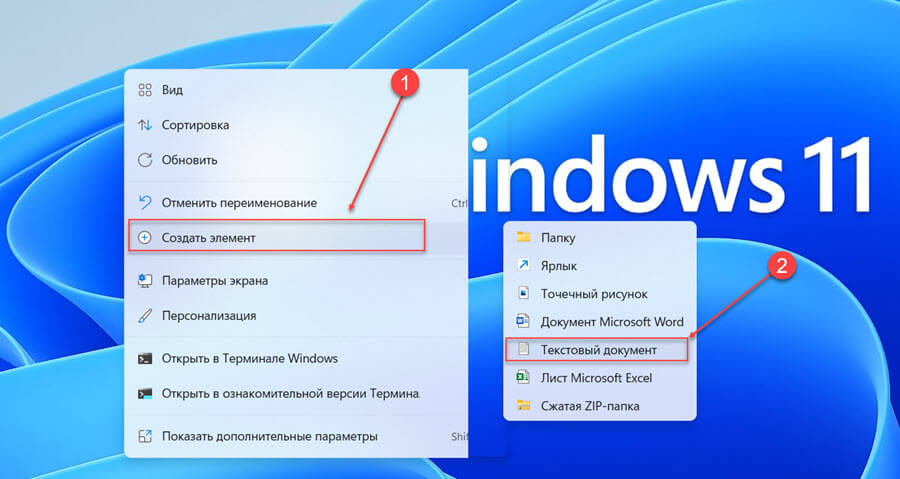
- Чтобы создать пакетный файл, кликните правой кнопкой мыши на рабочем столе и выберите в контекстном меню «Создать элемент» → «Текстовый документ». Затем дайте файлу соответствующее имя, которое поможет вам идентифицировать файл в дальнейшем, и нажмите Enter.
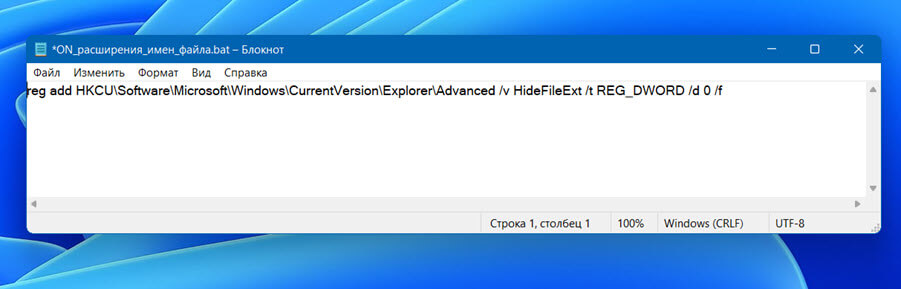
- После этого дважды кликните созданный файл. Скопируйте и вставьте следующую команду в текстовый файл, чтобы включить показ расширения файлов.
reg add HKCU\Software\Microsoft\Windows\CurrentVersion\Explorer\Advanced /v HideFileExt /t REG_DWORD /d 0 /f
- Если вы хотите скрыть расширение файлов на своем ПК с Windows, введите или вставьте следующий текст.
reg add HKCU\Software\Microsoft\Windows\CurrentVersion\Explorer\Advanced /v HideFileExt /t REG_DWORD /d 1 /f
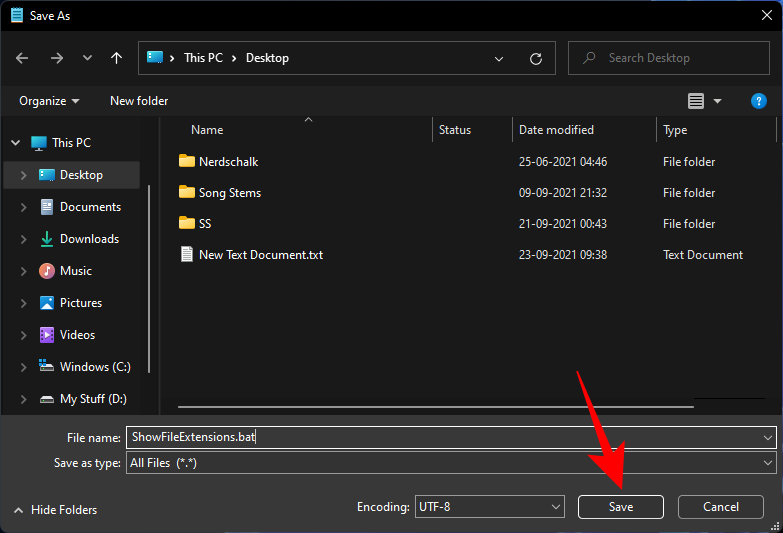
- Перейдите в меню «Файл», выберите опцию «Сохранить как…» измените расширение текстового файла с .TXT на .BAT (<Ваше имя файла> .bat). Затем в строке «Тип» выберите «Все файлы» и нажмите кнопку «Сохранить».
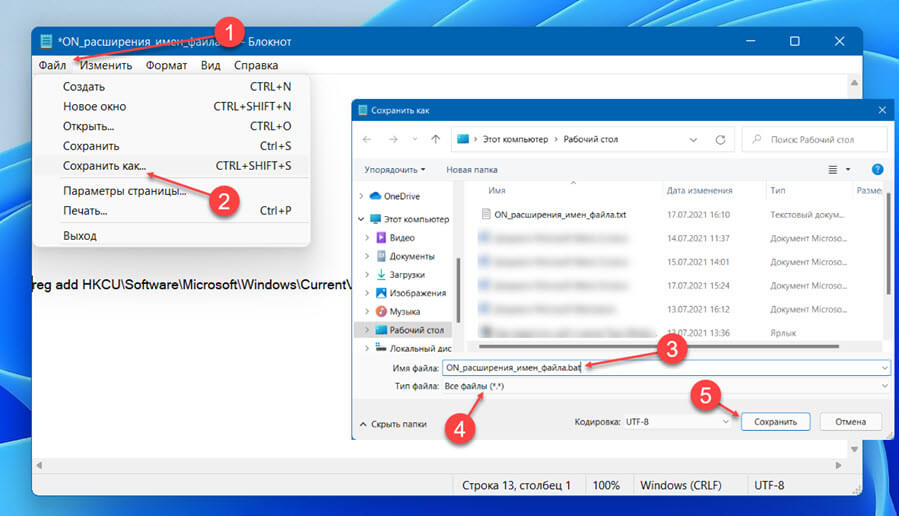
- Ваш командный файл будет создан в выбранном вами каталоге. Теперь вы можете перенести файл на другой компьютер с Windows и запустить его, дважды кликнув по нему.
Итак, теперь, вы теперь знаете, как показать расширение файла в проводнике Windows 11, и вы сможете создать командный файл для друзей.
3 марта 2025 г. 10:30
1738
Содержание:
- Что такое расширение файла и зачем его менять
- Как включить отображение расширений в Windows 11
- Как изменить расширение файла вручную
- Как изменить расширение сразу у нескольких файлов
- Как изменить формат файла в Windows 11
- Вывод
Иногда возникает необходимость изменить расширение файла, например, при работе с документами, изображениями или видео. Это может понадобиться, если файл был сохранён в неправильном формате, неправильно скачался или просто необходимо изменить его для удобства. В этой статье подробно разберём, как поменять расширение файла в Windows 11.
Что такое расширение файла и зачем его менять
Расширение файла — это часть имени файла после точки, например:
- .txt — текстовый файл;
- .jpg — изображение;
- .mp4 — видеофайл;
- .exe — исполняемый файл
Расширение помогает Windows 11 понимать, какой программой открывать файл. Например, файл .docx автоматически откроется в Microsoft Word, а .mp3 — в медиаплеере. Если расширение у файла отсутствует или указано неверно, система не сможет открыть его или запустит неправильную программу.
Как включить отображение расширений в Windows 11
Перед тем как изменить расширение файла в Windows 11, нужно убедиться, что система отображает их в проводнике. Для этого:
- Откройте «Проводник» — нажмите Win + E.
- Перейдите в папку с нужными файлами.
- В верхнем меню нажмите «Просмотреть» → «Показать».
- Поставьте галочку «Расширения имён файлов».
После этого в названиях файлов начнут отображаться их расширения, и вы сможете их изменять.
Как изменить расширение файла вручную
Изменение расширения — самый быстрый способ исправить его без использования дополнительных программ:
Выделите файл в проводнике, который хотите изменить.
Щёлкните по его имени правой кнопкой и выберите «Переименовать».
Измените расширение после точки, например .jpg→.png.
Нажмите Enter, а затем подтвердите изменение.
Файл сменит расширение, но его формат останется прежним. Например, если вы просто переименуете .txt в .jpg, это не сделает его изображением.
Как изменить расширение сразу у нескольких файлов
Если у вас много файлов с одинаковым расширением, можно изменить их одним действием с помощью командной строки:
- Откройте папку с файлами в «Проводнике».
- Щёлкните по адресной строке, введите cmd и нажмите Enter.
- В открывшемся окне введите команду для замены расширений: **ren .txt .docx
- Нажмите Enter, и все файлы .txt в папке будут автоматически переименованы в .docx.
Этот метод удобен, если нужно переименовать десятки или сотни файлов сразу.
Как изменить формат файла в Windows 11
Простая смена расширения не меняет формат файла. Например, если изменить .mp4 на .mp3, видео не превратится в аудиофайл. Чтобы изменить формат, потребуется конвертация с помощью специальных программ:
- Видео: VLC Media Player, HandBrake.
- Изображения: Paint, Photoshop, XnConvert.
- Документы: Microsoft Word, который есть в составе пакетов Microsoft Office, PDF-конвертеры.
Используйте эти инструменты, если вам нужно действительно изменить содержимое файла, а не просто его расширение.
Вывод
Изменение расширения файла в Windows 11 — это простой процесс, который можно сделать вручную или через командную строку. Однако само расширение не меняет формат файла, поэтому если нужно реально изменить тип данных, потребуется программа-конвертер. Теперь вы знаете, как правильно редактировать расширения, не повредив файлы. А если вам необходимо активировать вашу Windows 11, быстро и дешево можно приобрести лицензионный ключ ЗДЕСЬ.
Every file on your system has a file extension associated with it that lets Windows know the file’s type and the application that will be suitable to open it. However, they’re not enabled by default on Windows 11, which means your file names won’t show their extensions straight away. In this guide, we explore a few ways to show file extensions on Windows 11 and why it is a good idea to do so.
What are file extensions on Windows?
As stated earlier, file extensions highlight the type and the format of the file in which it was rendered. File extensions tend to be three or four letters long, such as PNG or DOCX, and make up the second part of a file name – the one that comes after the period.
For example, in the file “painting.jpg”, painting is the name of the file while jpg is its extension. This enables Windows to understand which application or set of applications will be ideal for opening the files.
Related: How to Change a File Type on Windows 11
Let us explore all the different ways in which you can make file extensions visible on Windows 11.
Method #01: Using File Explorer – View menu
The File Explorer on Windows has always afforded the convenience of hiding or showing file extensions with a few clicks. Here’s how to go about showing file extensions on Windows 11:
Press Win + E to open the File Explorer. Alternatively, click on it in the taskbar.
Now click on View in the toolbar above.
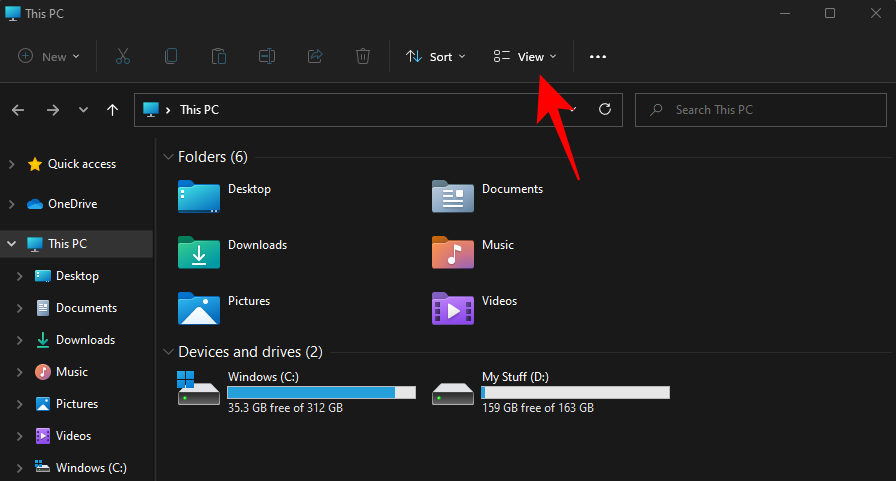
Then go to Show and then click on File name extensions so that there’s a tick next to it.
Once you do so, you will have enabled visibility for file extensions.
Method #02: Using File Explorer – Folder Options
The File Explorer lets you show file extensions from the ‘Folder Options’ option as well. Here’s how to go about it:
Open File Explorer by pressing Win + E. Then click on the three-dot icon at the top.
Choose Options.
Click on the View tab to switch to it.
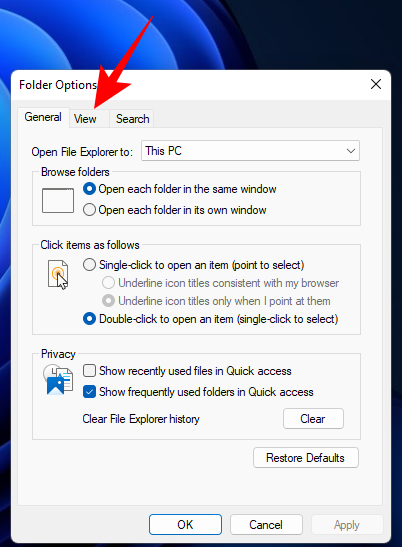
Now make sure the Hide extensions for known file types is unchecked. Then click on OK.
Method #03: Using File Explorer – File Type menu
Another way to view the file extensions is to add the file ‘Type’ column in the File Explorer. This works only if you’ve set ‘View’ to either ‘Details’ or ‘Content’. Here’s how to go about the whole process:
Open File Explorer and navigate to a folder that contains a few files. Then click on View at the top.
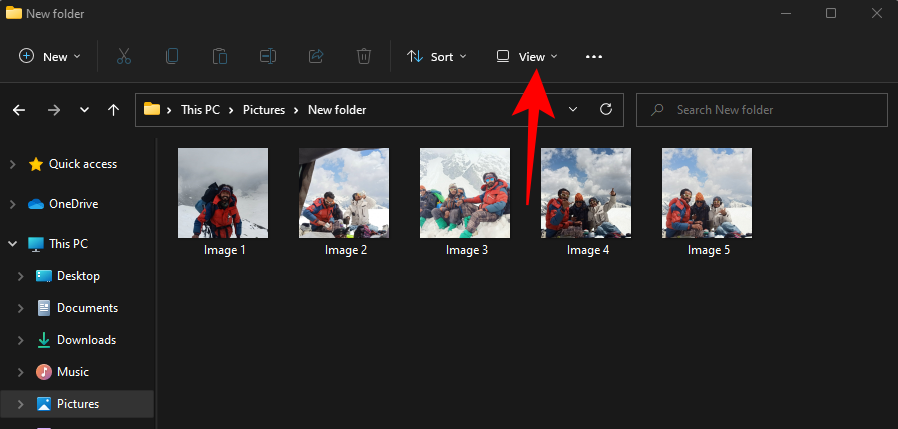
Select either Details or Content. In our example, we’re choosing the former.
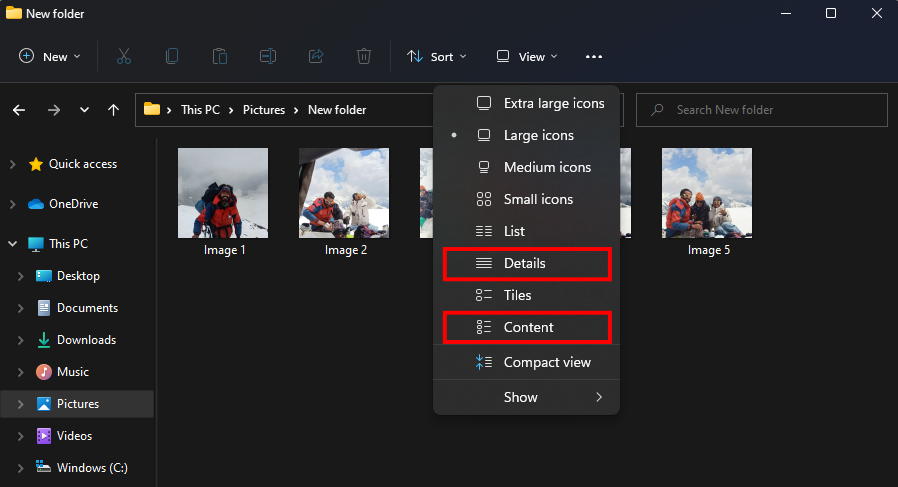
Doing so will display the details of the files. To add the ‘Type’ column, right-click on any of the columns towards the top of the files.
Then select Type.
You will now see the ‘Type’ column appear, displaying the extensions of the files.
Method #04: Using Registry Editor
If the aforementioned methods don’t work on your system, you can also make use of the Registry Editor to show file extensions. Here’s how:
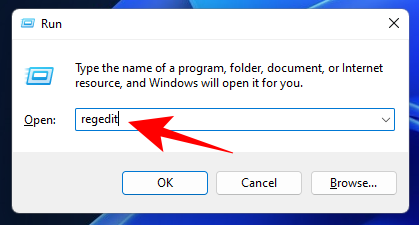
Press Win + R to open the RUN dialog box. Then type regedit and hit Enter.
Now navigate to the following address in the Registry Editor:
Computer\HKEY_CURRENT_USER\Software\Microsoft\Windows\CurrentVersion\Explorer\Advanced
Alternatively, simply copy the above and paste it into the Registry Editor’s address bar.
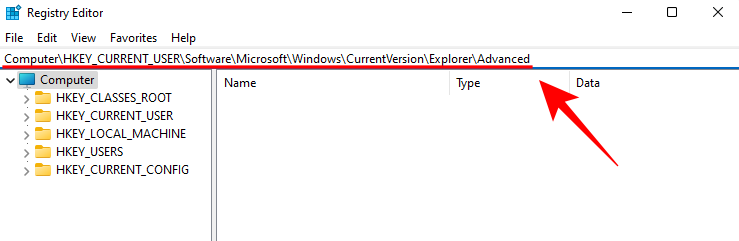
Then hit Enter. On the right, double-click on HideFileExt.
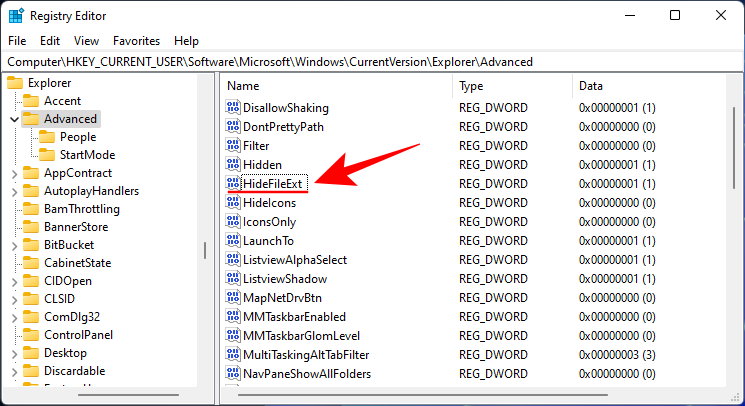
Change its value data from 1 to 0. Then click OK.
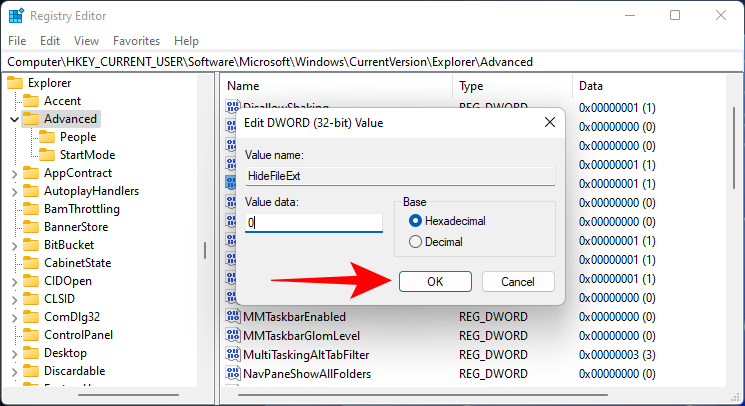
Restart Windows Explorer or your PC for the changes to take effect.
Method #5: Using Command Prompt
For those who like working on a Windows terminal like the Command Prompt, here’s how you can show file extensions with a simple command:
Firstly, press Start, type cmd, and click on Run as administrator.
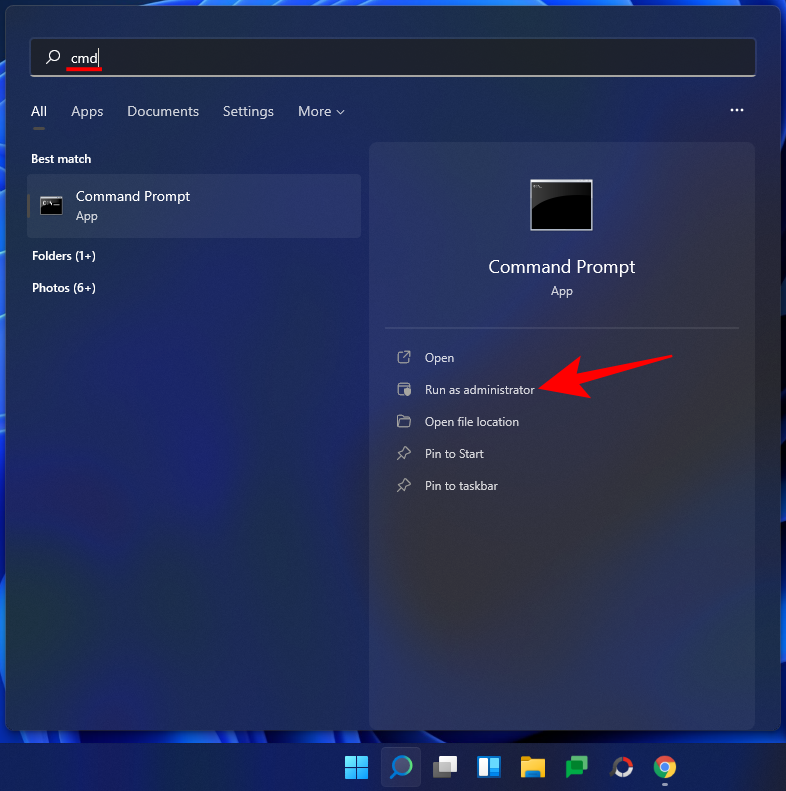
reg add HKCU\Software\Microsoft\Windows\CurrentVersion\Explorer\Advanced /v HideFilesExt /t REG_DWORD /d 0 /f
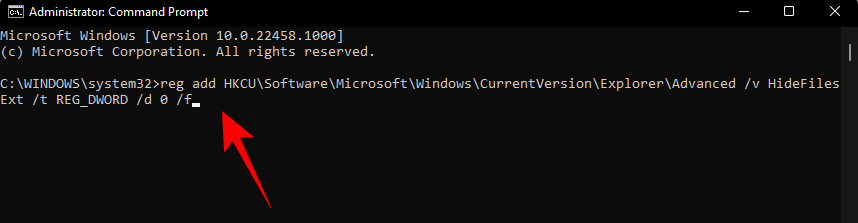
Then press Enter. You should see the “operated completed successfully” message.
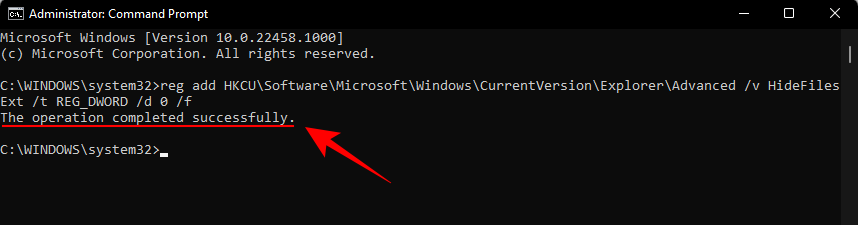
This means that the command is registered and your file extensions should now be visible.
Method #6: Using Batch Script
A batch file is another, rather simpler, way to show file extensions on Windows. Once created, this batch file can be used on any computer for the same purpose. Here’s how to create one and use it to make file extensions visible:
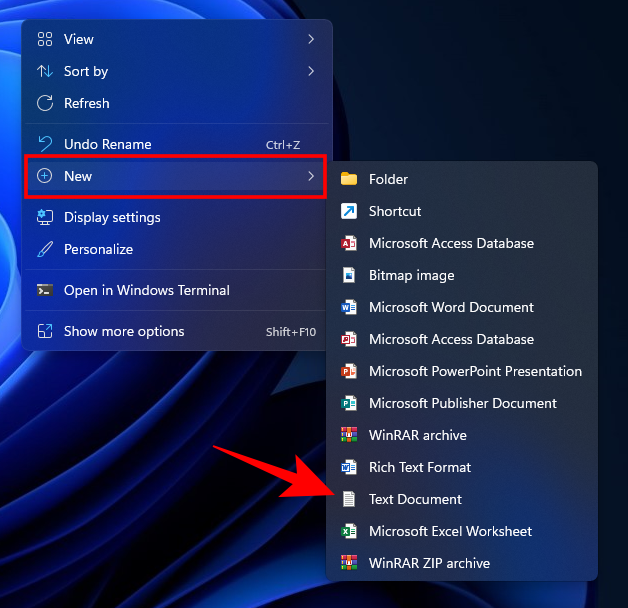
Right-click on the desktop and select New > Text document.
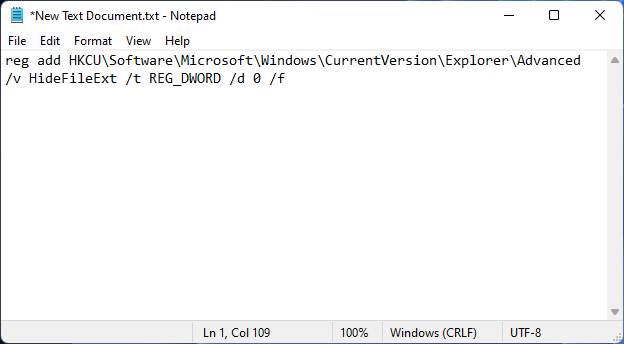
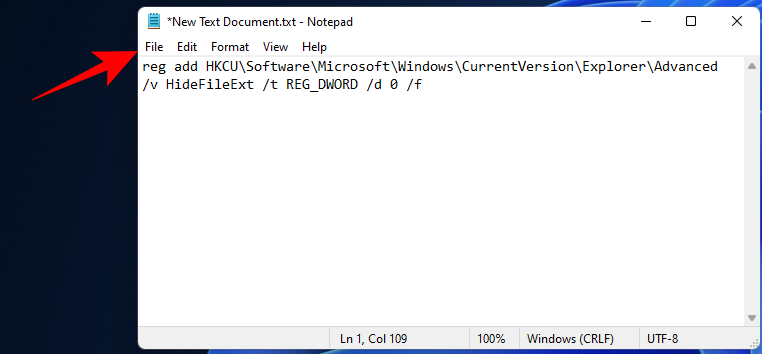
Open this Notepad file and type the following into it:
reg add HKCU\Software\Microsoft\Windows\CurrentVersion\Explorer\Advanced /v HideFileExt /t REG_DWORD /d 0 /f
Or simply copy the above and paste it into the Notepad file.
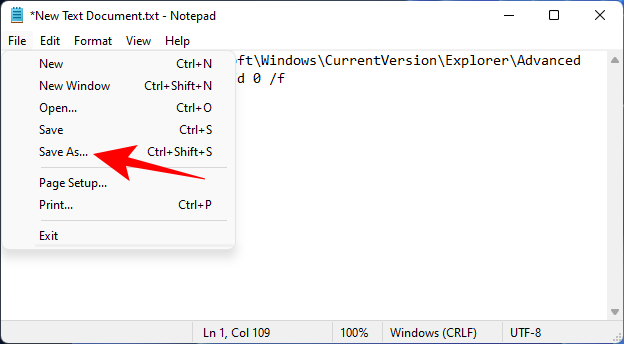
Then click on File.
Click on Save as.
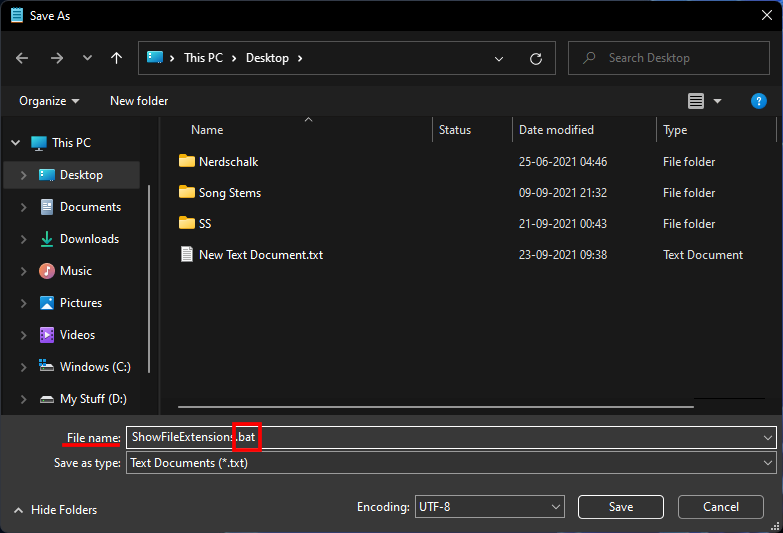
Give this file a name and make sure to add .bat at its end.
Then click on the drop-down menu next to “Save as type” and select All files.
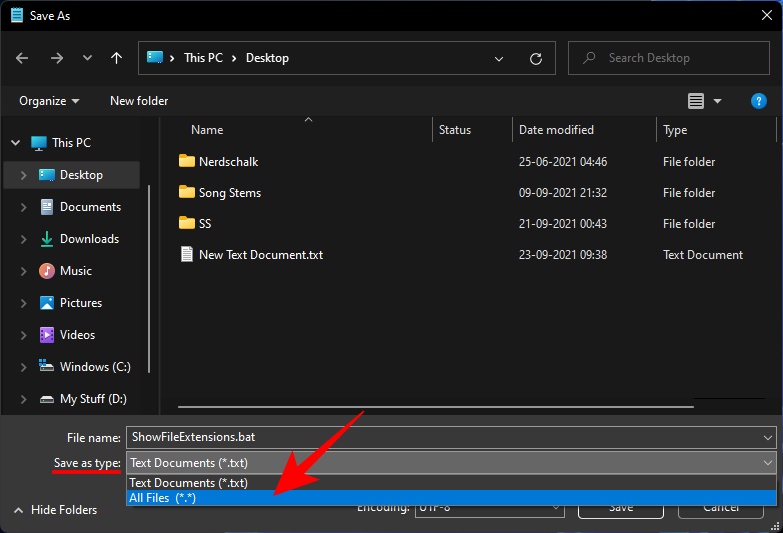
Then click on Save.
The batch file will now be saved. Double-click it to make file extensions visible.

Why should you keep file extensions visible?
Turning on file extensions visibility not only lets you know the type of a file, but also provides information that is important from a security point of view. When you download a file, having file extensions visible will ensure that you know the exact type and extension of the file being downloaded.
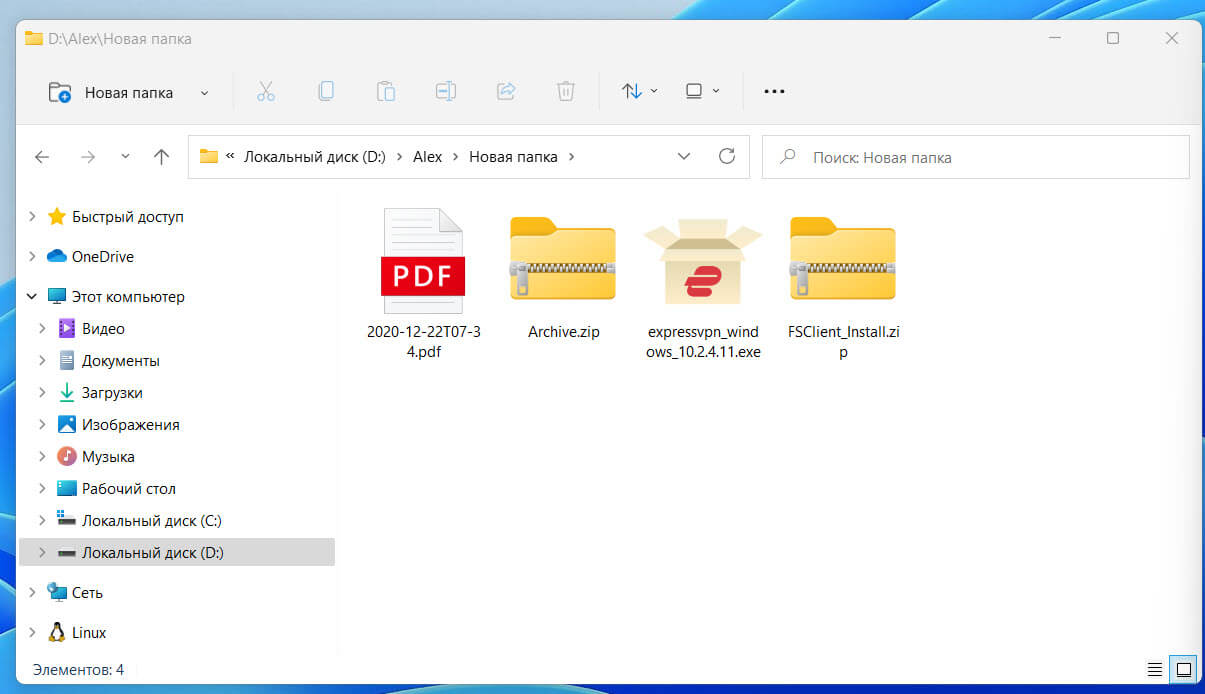
File names can also have multiple periods in them, and if you haven’t turned on file extension visibility, you may end up downloading a malware infected file. For instance, a file name called wallpaper.png may actually be wallpaper.png.exe. So, instead of a PNG file, you actually have an executable that can introduce malware to your system if you’re not careful.
Other than that, if you have file extensions visible, you can change a file’s type easily by changing the extension.
Frequently Asked Questions (FAQs)
Here we answer a few commonly asked questions concerning file extensions.
How do I change file extensions in Windows 11?
There are various ways to change file extensions in Windows 11. Refer to our guide How to Change a File Type on Windows 11: Basic and Advanced Ways to Do So! for the same.
How to hide file extensions in Windows 11?
Hiding file extensions is as easy as showing them. In our guide above, in Methods #1-3, simply select the box that says “Hide extensions for known files”. In Methods #4-6, change the value from 0 to 1. Everything else remains the same.
How to show hidden files in Windows 11?
The simplest way to show hidden files is to do so from the File Explorer option. Press Win + E to open File Explorer. Click on View at the top, select Show, then click on Hidden items to make sure there’s a tick next to it.

Related: How to show large files on Windows 11
What are some common filename extensions in Windows?
There are tons of filename extensions that are recognized by Windows. Microsoft’s support page has a dedicated page that lists all the common filename extensions and their formats.
We hope you were able to show file extensions on your PC with the methods given above. Doing so comes in handy when you have to change file types and to know exactly the extension of the file that you’re accessing.
RELATED
- How To Set 7zip as Default on Windows 10 or 11
- How to Find Which File or Folder is Currently in Use on Windows 11
- Where Are Changes Stored on a Document Saved on Your Computer
- How to Find Duplicate Files in Windows 11
- How to Uninstall Apps on Windows 11: Everything You Need to Know
- How to Fix: “Is Not Recognized as an Internal or External Command, Operable Program or Batch File” error
- Windows 11 Shortcuts List
- How to Change the Default Browser on Windows 11 | Set Google Chrome as Default