
You are here:
Home » Windows 11 » Can I Make The Start Menu Full Screen In Windows 11?
The new Start menu in Windows 11 looks very similar to the Start menu originally developed for Windows 10X. As you might have noticed by now, the Windows 11 Start menu replaces live tiles for app icons.

The Start menu displays a search bar at the top; pinned apps appear right below the search bar. At the bottom, the recommended section shows newly installed apps and recently opened files.
Although the Start menu looks much better than the one in the previous Windows version, it lacks a few features. One of them is the ability to resize it.
Many users who have upgraded to Windows 11 are now curious if it’s possible to make the Start menu full screen just like in Windows 11.
The answer is no. For reasons best known to Microsoft, the Windows 11 Start menu does not allow you to resize it. That is, you cannot resize the Start menu in Windows 11. Unlike in Windows 10, you cannot drag the edges of the Start menu to resize it as per your desire.
In the early builds of Windows 11, it was possible to restore the Windows 10 style Start menu with a minor registry edit, but it is no longer possible. So, we can conclude that there is no way out there to resize the Start menu in Windows 11.
If you do not like Windows 11’s Start menu, we suggest you downgrade to Windows 10. As you might know, Windows 10 will continue to receive updates, and Microsoft will support it until 2024.
How to Make the Start Menu Full Screen in Windows 11
If you’ve upgraded to Windows 11 and miss the full screen Start Menu from Windows 10, this guide is for you. We’ll walk you through how to make your Start Menu full screen using a third-party application called Explorer Patcher. This method is simple and quick, and by the end of it, you’ll have a Start Menu that fills your entire screen, just like in Windows 10.
Key Takeaways
- Windows 11 does not natively support a full screen Start Menu.
- Explorer Patcher is a safe and effective third-party tool to achieve this feature.
- Reverting back to the original Windows 11 Start Menu is easy if needed.
Why You Need a Third-Party App
Unlike previous versions, Windows 11 doesn’t allow you to make the Start Menu full screen out of the box. That’s where Explorer Patcher comes in. This tool lets you tweak various aspects of Windows 11, including the Start Menu, to make it more like Windows 10.
Step-by-Step Guide to Making the Start Menu Full Screen
Step 1: Download Explorer Patcher
To begin, you’ll need to download the Explorer Patcher application. Here’s how:
- Visit the Explorer Patcher Download Page: Go to the official Explorer Patcher GitHub page.

- Navigate to the Releases Tab: Scroll down until you see the “Releases” tab on the right-hand side of the page. Click on it to view the latest version.

- Download the Setup File: On the next page, scroll down to the “Assets” section and click on the
ep_setup.exefile to start the download.

Step 2: Install Explorer Patcher
Once the file is downloaded:
- Run the Setup File: Click on the downloaded file to open it. If you get any security prompts, click on “Show more details” and then select “Keep anyway.” Rest assured, Explorer Patcher is safe to use.

- Wait for Installation: The setup will automatically make the necessary tweaks to your Windows 11 system to make it resemble Windows 10.

Step 3: Configure Start Menu Settings
After installation, you’ll need to adjust a few settings to enable the full screen Start Menu:
- Access Taskbar Properties: Right-click on any empty space on the taskbar and select “Properties.” This will open the Explorer Patcher properties window.

- Change Start Menu Style: In the Explorer Patcher properties, navigate to the “Start Menu” section. Here, change the Start Menu style to “Windows 10.”

- Enable Full Screen Start: Next, set the “Display Mode” to “Full screen start” and then click on “Restart File Explorer.”

Now, when you click on your Start button, your Start Menu should appear in full screen, much like it did in Windows 10.

Step 4: Reverting to Windows 11 Start Menu
If you ever want to revert to the original Windows 11 Start Menu:
- Uninstall Explorer Patcher: Right-click on the Start button, go to “Installed apps,” find “Explorer Patcher” in the list, and click “Uninstall.”

- Confirm and Restart: Follow the prompts to uninstall the application. Once done, your Start Menu will be back to its default Windows 11 appearance.

Conclusion
With the help of Explorer Patcher, you can enjoy the full screen Start Menu on your Windows 11 system, just like in Windows 10. Whether you’re customizing your interface or seeking a familiar user experience, this tool makes it easy to get the look and feel you want.
FAQs
What is Explorer Patcher?
Explorer Patcher is a third-party tool that allows you to tweak various aspects of Windows 11 to resemble Windows 10, including the Start Menu.
Is Explorer Patcher safe to use?
Yes, Explorer Patcher is safe. However, because it’s a third-party tool, Windows may flag it during installation. You can safely bypass these warnings.
Can I revert to the original Windows 11 Start Menu after using Explorer Patcher?
Yes, you can easily uninstall Explorer Patcher to revert to the original Windows 11 Start Menu.
Does Explorer Patcher offer other customization options?
Yes, it offers several customization options for the taskbar, system tray, and other aspects of Windows 11.
Do I need to keep Explorer Patcher installed to maintain the full screen Start Menu?
Yes, to maintain the full screen Start Menu, Explorer Patcher needs to remain installed on your system.
Apart from the round-shaped corners and the multitasking functionality, what other major changes did you notice after upgrading to Windows 11? Yes, the new start menu.
To some users, the start menu should be covering the entire screen like we used to notice on previous Windows versions. And many users prefer alternatively — the present form of the start menu.
I’ll assume you belong in the earlier community that favors using a full-screen start menu on Windows 11. And trying to tweak every option in Windows settings to make that happen.
As you landed on this article, my responsibility is to supply adequate knowledge regarding Windows 11’s full-screen menu. Starting with answering your foremost query―
Check our latest post on how to Get Back Start Menu Tiles on Windows 11
Microsoft doesn’t allow you to resize Windows 11’s start menu as in previous versions. That means no longer dragging the menu screen to reshape to your desire. But, there are third-party applications that will help you to utilize the full-screen start menu.
However, I wouldn’t recommend you use any third-party applications. There was one particular method to set the Windows 11 start menu to full mask view. All you needed was to tweak some options in the registry editor. But that was for the earlier version.
With the updated version, there’s no method remaining to use the full-screen start menu in Windows 11.
Before you change anything on the Windows 11 start menu, let’s take a look at what the default version contains.
When you click on the start menu icon, the first thing you’ll notice is a search box at the very top. Followed by the pinned applications — you can access them within a second’s response. After that, you’ll notice the recommended section where recently installed applications/ most used applications will appear.
Furthermore, you’ll spot the account settings and shut down menu.
That’s pretty much it. No resizing of the app tiles, no group tiles in a folder; moreover, no reframing option to conclude.
But don’t be annoyed. I have managed some methods that may help you personalize your Windows 11 start menu by just a little bit. That’s even better than no customization option, right?
Check out our expert-recommended guide on How To Enable Telnet On Windows 11
Here’s the process of customizing the Windows 11 start menu:
The most noticeable change in the Windows 11 start menu is the location. In earlier Windows versions, it was in the left corner of the display. But now, it’s in the center.
You can change it to the conventional position with a simple alteration in the settings menu.
Here are the steps to change the start menu location in Windows 11:
Your start menu icon will appear on the left side of the display, like Windows 10. Need another change on the start menu? Check out the following sections.
Check out our latest fix for Bluetooth Toggle Missing On Windows 11
If you want to be more selective about the applications in the start menu, Windows 11 has the exact feature.
Here’s the procedure to change application order in Windows 11:
- Open the start menu and right-click on the application you want to move.
- Select the option that you want to change with the application. E.g., select unpin to remove the application from the start menu.

- Drag around the application icon to move in between.
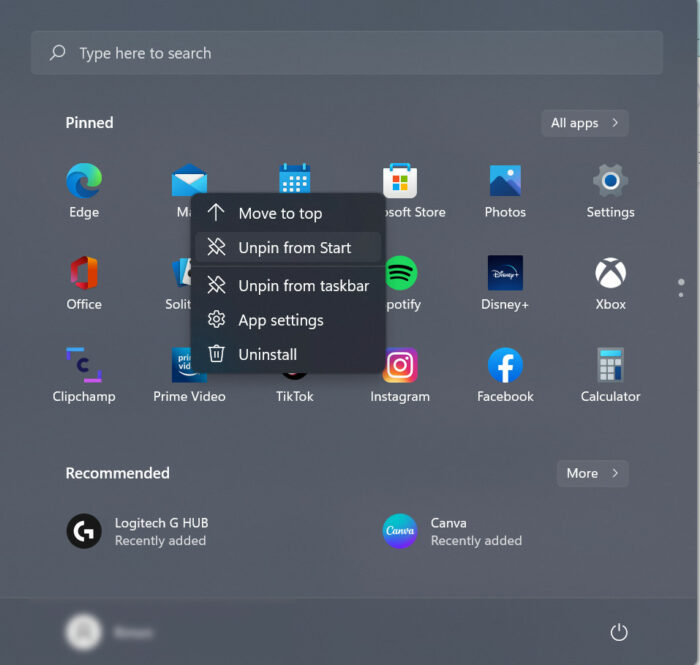
After right-clicking on the app icon, you’ll understand what’s there to change and how you can change them. So, don’t worry if you are not familiar with the Windows 11 interface.
You may like to check out our latest post on the Show Folder Size in Windows 11.
How to Resize Windows 11 Taskbar
Unlike Windows 10, you can’t just reshape the taskbar icons with a simple drag-drop strategy. You need to make certain changes if you prefer to modify the taskbar.
Here’s the procedure to resize Windows 11 taskbar:
Note: Here value for 0= small icons, 1=Medium icons, 2= Large icons. Click ok once you set the value.
Restart the computer after a successful registry edit. You’ll notice different taskbar icon sizes after a proper reboot.
Check our exclusive tutorial on How to Fix Blue Screen on Windows 11
Frequently Asked Questions
How do I enlarge the Start menu in Windows 11?
You can’t enlarge the start menu in Windows 11 unless you use any third-party applications.
Can I enable Windows 11 Full-screen with the F11 button?
Unfortunately, the F11 button doesn’t work in Windows 11 like it used to. So, you can’t enable full-screen view by just simply pressing the F11 key.
How do I change Windows 11 start menu appearance?
Go to settings > Personalization > Colors > Select your color > toggle on show accent color on start and taskbar.
Does Windows 11 have Start menu tiles?
No, Windows 11 start menu doesn’t have tiles like the previous versions.
Regardless of the customization options in the start menu, Windows 11 is not as boring as you’re thinking right now. A few customizable options in the start menu, such as changing the start menu alignment, and reshaping the taskbar to your preferred size, are pretty handy in my opinion.
After all, you did not install the Windows just to look at the start menu all day long!
So, get that detail out of your head and enjoy the clutter-free features. Contact us if you have any other queries.
Все способы:
- Шаг 1: Перенос кнопки «Пуск» на панели задач
- Шаг 2: Управление закрепленными значками
- Шаг 3: Добавление папок в меню «Пуск»
- Шаг 4: Управление рекомендациями
- Шаг 5: Изменение цвета меню «Пуск»
- Вопросы и ответы: 0
Шаг 1: Перенос кнопки «Пуск» на панели задач
В Windows 11 разработчики приняли решение и переместили кнопку «Пуск» на центр панели задач. Это не понравилось многим пользователям, поэтому они хотят вернуть стандартное расположение стартового меню. Для этого предусмотрена системная настройка, которая позволяет буквально в одно нажатие добиться необходимого результата.
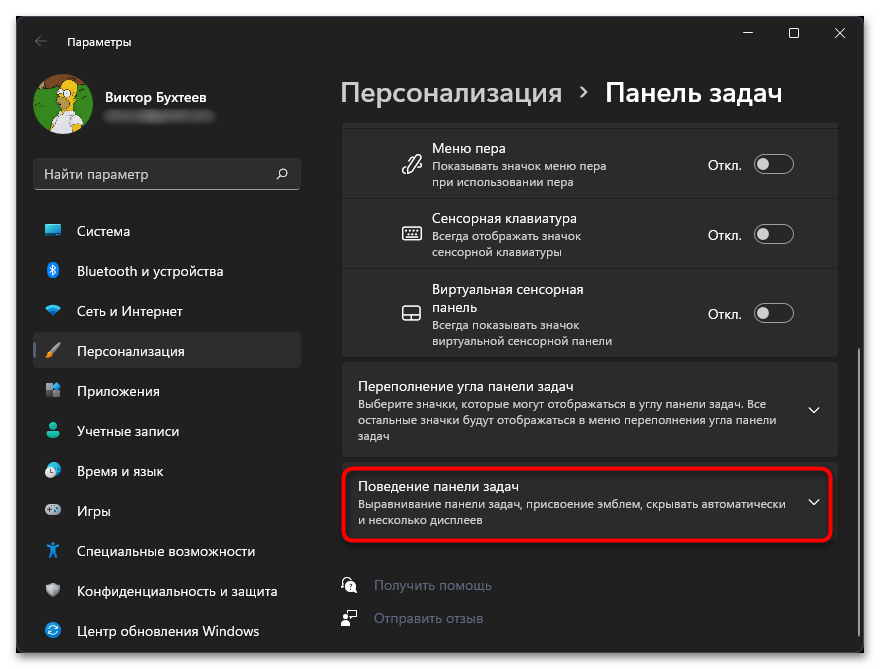
- Щелкните правой кнопкой мыши по панели задач и нажмите по появившемуся пункту «Параметры панели задач».
- В новом окне разверните настройку «Поведение панели задач».
- Откройте список «Выравнивание панели задач» и выберите вариант «Слева». Если ваша кнопка «Пуск» и так находится слева, выберите вариант «По центру», чтобы сменить ее расположение.
- Настройка вступает в силу сразу же, и вы можете ознакомиться с результатом самостоятельно.


Шаг 2: Управление закрепленными значками
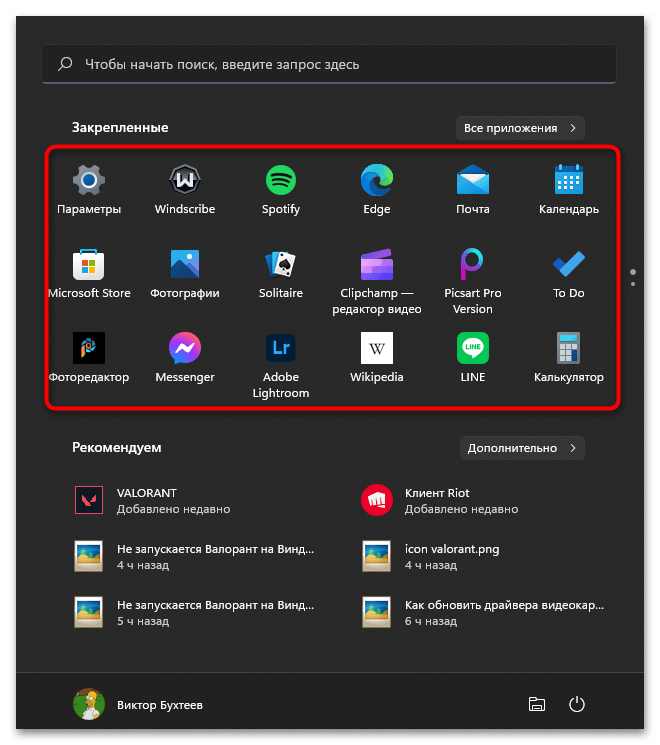
При открытии меню «Пуск» в Windows 11 на экране вы будете видеть список закрепленных значков, которые используются для быстрого доступа к необходимым приложениям. Они занимают большую часть меню, поэтому являются его основной составляющей. Вы можете вручную управлять всеми закрепленными значками приложений, перетаскивая их, открепляя или добавляя новые.
- Сначала откройте «Пуск» и ознакомьтесь с текущим списком закрепленных значков. Решите, какие из них нужно поменять, какие удалить, а какие добавить.
- Для перемещения иконки приложения в другую позицию зажмите его ЛКМ и начните перетаскивание. Если потянете значок в самый низ, произойдет переключение на второй экран со значками, если такой уже есть.
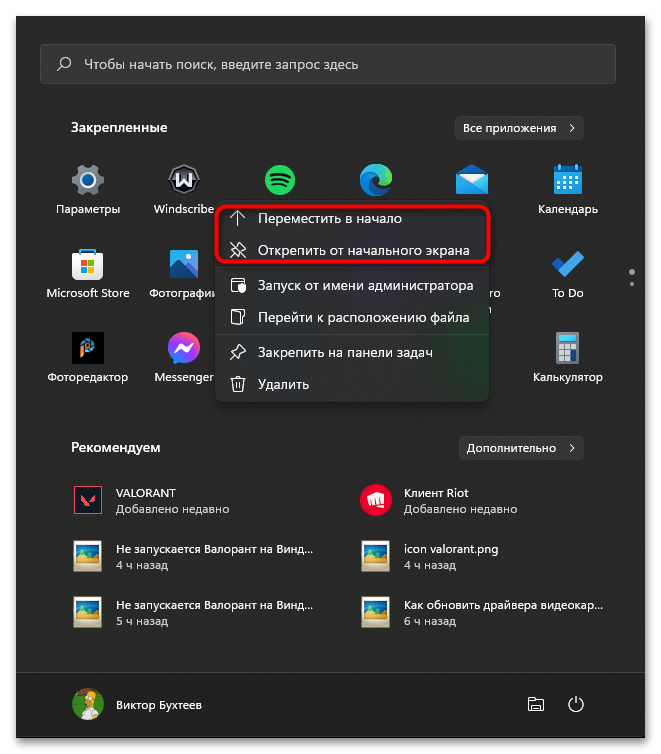
- Щелкните правой кнопкой мыши по любому из значков, чтобы переместить его в начало или открепить от начального экрана, убрав тем самым из списка.
- Теперь давайте разберемся с тем, как добавить новую программу в список закрепленных для быстрого запуска. Понадобится щелкнуть по «Все приложения».
- В списке отыщите нужный вам софт, кликните по нему ПКМ и выберите вариант «Закрепить на начальном экране». Сделайте то же самое с остальными нужными приложениями, а затем отрегулируйте их расположение так, как это было показано выше.


Вместо раздела «Все приложения» можете просто найти нужную программу или системную утилиту, введя название в «Пуске», кликнуть по совпадению правой кнопкой мыши и из контекстного меню выбрать пункт закрепления на начальном экране.
Шаг 3: Добавление папок в меню «Пуск»
Папками в меню «Пуск» называются значки для доступа к различным системным директориям и приложениям, которые будут расположены рядом с кнопкой выключения. Вы можете самостоятельно выбрать, какие из папок следует добавить, чтобы использовать их для быстрого открытия требуемых расположений.
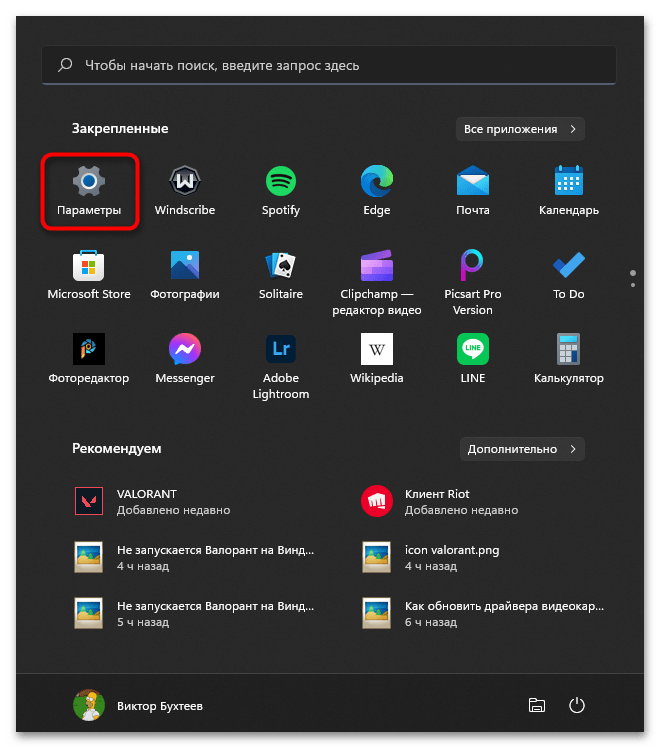
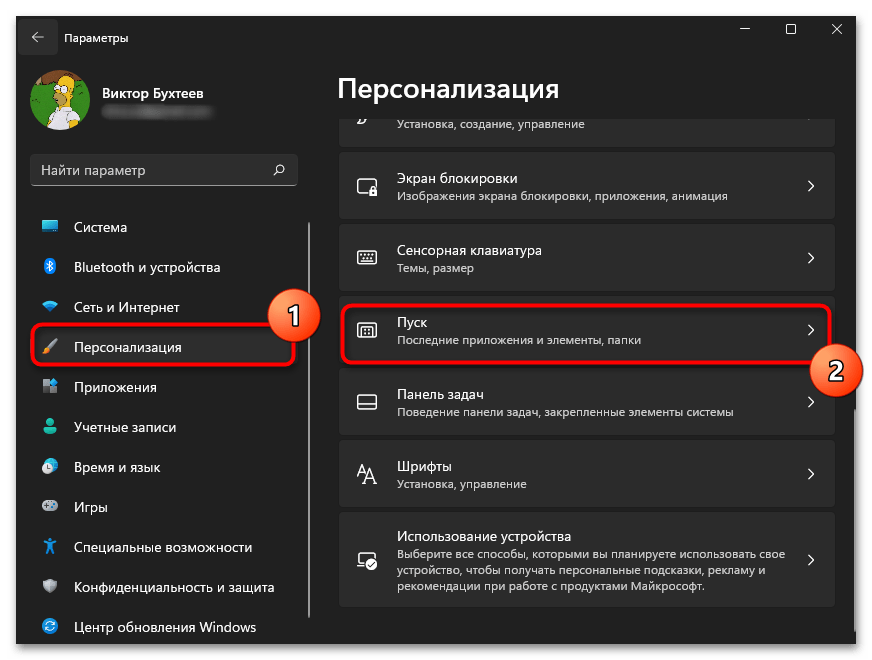
- Откройте меню «Пуск» и перейдите в «Параметры», нажав по значку с изображением шестеренки.
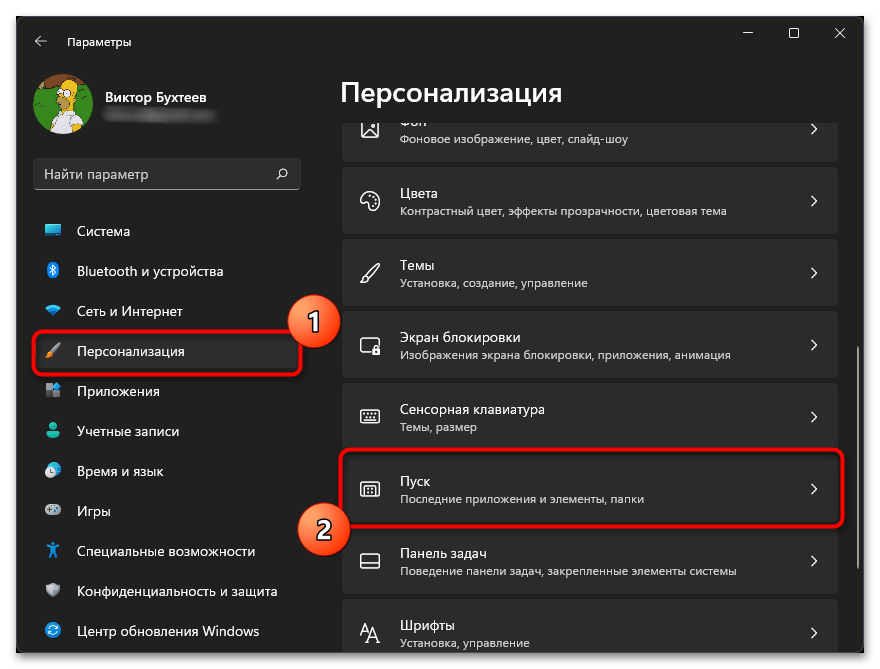
- На панели слева выберите раздел «Персонализация» и перейдите в категорию «Пуск».
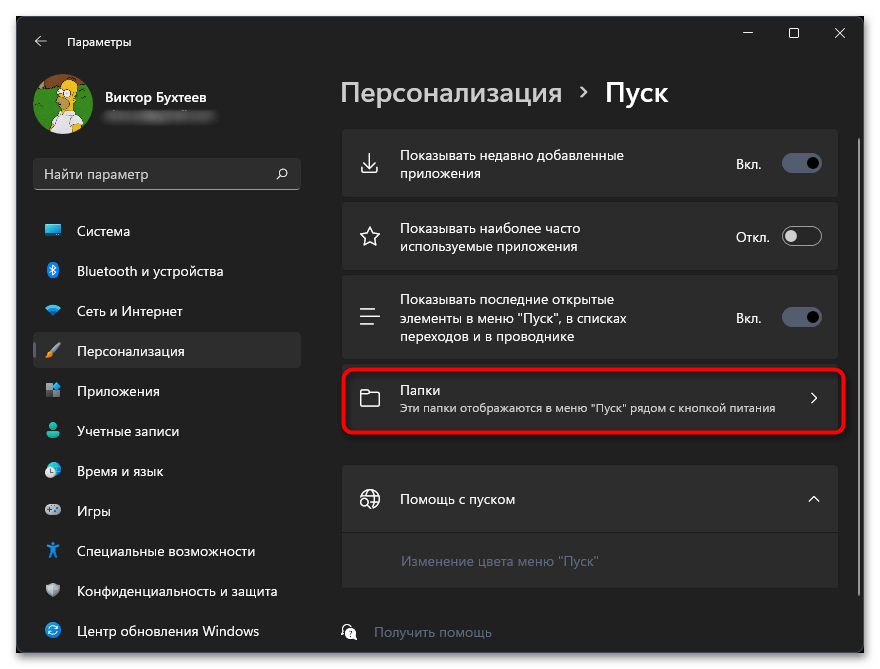
- Откройте список «Папки».
- Посмотрите, какие приложения и расположения доступны, и выберите некоторые для активации. Переключите тумблер в состояние «Вкл.» напротив нужной папки, чтобы активировать ее отображение в стартовом меню.
- После выполнения настройки снова откройте «Пуск» и посмотрите, как теперь выглядит нижняя панель. Используйте новые кнопки для быстрого открытия требуемых каталогов и системных приложений.

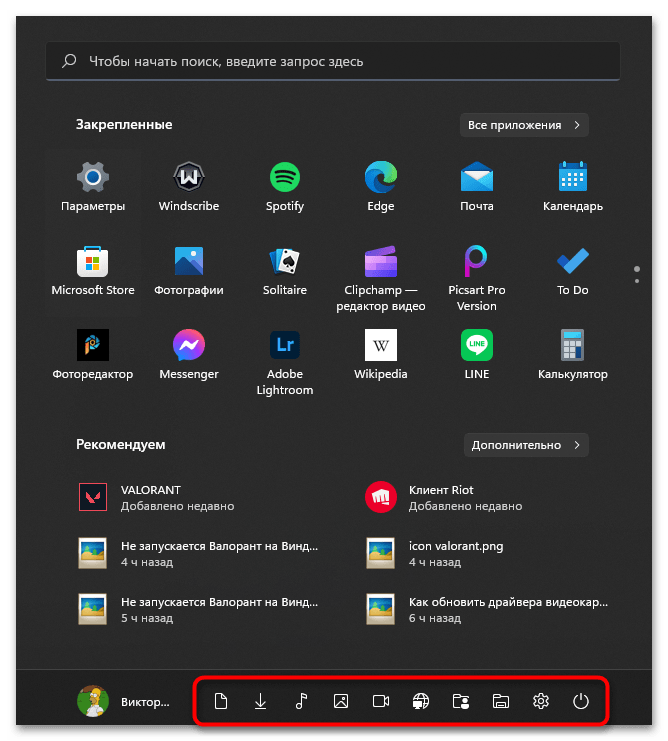
Шаг 4: Управление рекомендациями
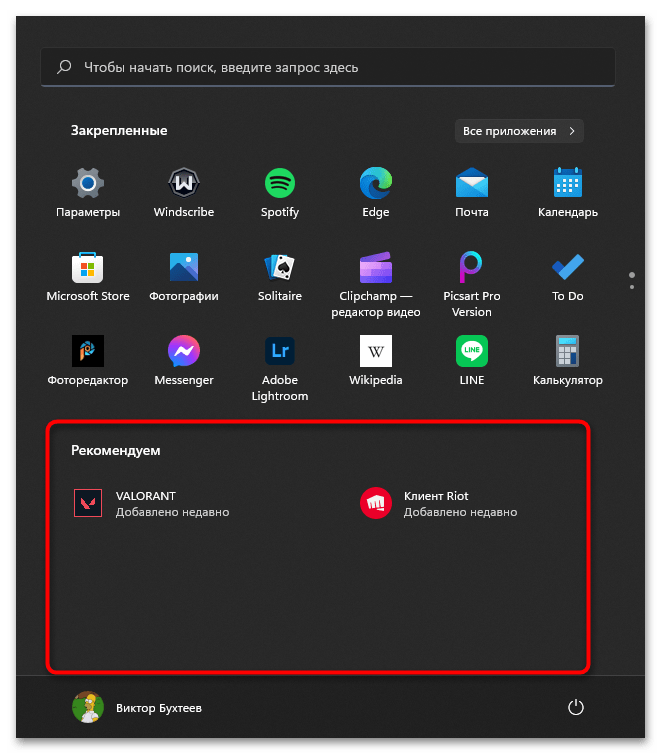
При работе с меню «Пуск» вы могли заметить, что под списком с закрепленными значками есть рекомендации, а также список недавно открытых документов и приложений. Вы можете управлять данными компонентами стартового меню, если отображение некоторых из них не требуется. Осуществляется это путем регулировки всего трех переключателей.
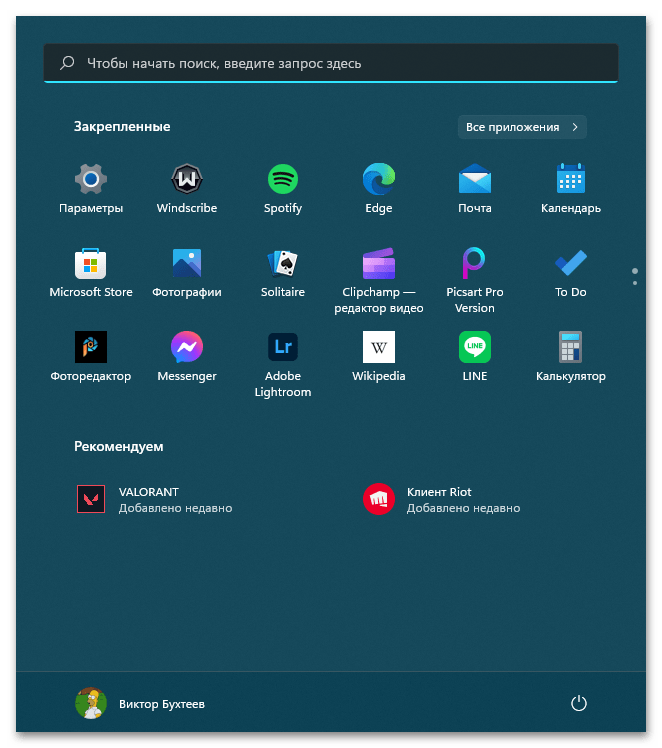
- На следующем скриншоте вы видите этот самый блок с рекомендациями, чтобы было понятнее, какую настройку будете осуществлять в дальнейшем.
- В приложении «Параметры» выберите раздел «Персонализация» и перейдите в «Пуск».
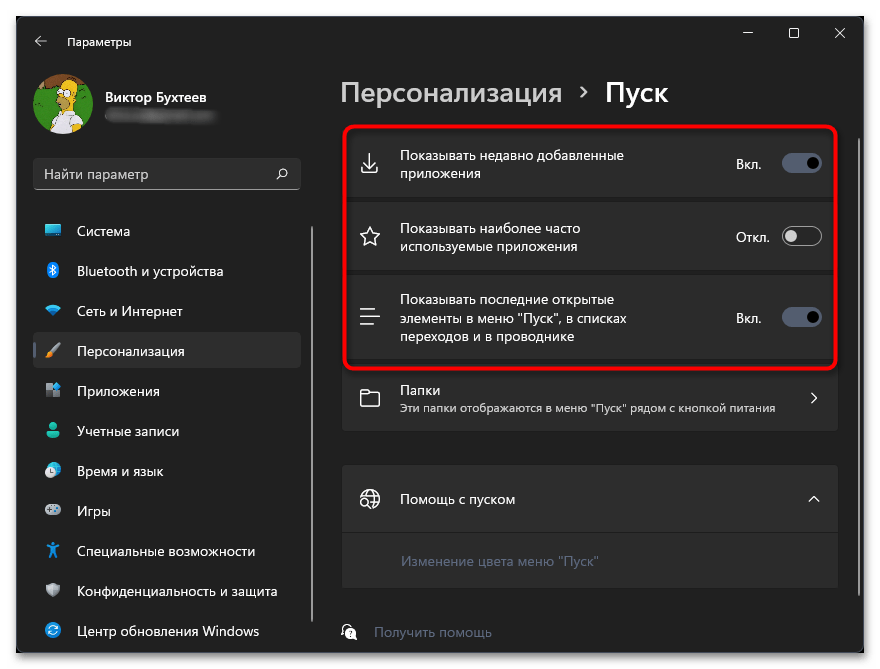
- После открытия категории с настройками решите, нужно ли показывать в том самом блоке недавно добавленные приложения, часто используемые программы и последние открытие элементы. Осуществляется настройка путем включения или отключения компонентов.
Шаг 5: Изменение цвета меню «Пуск»
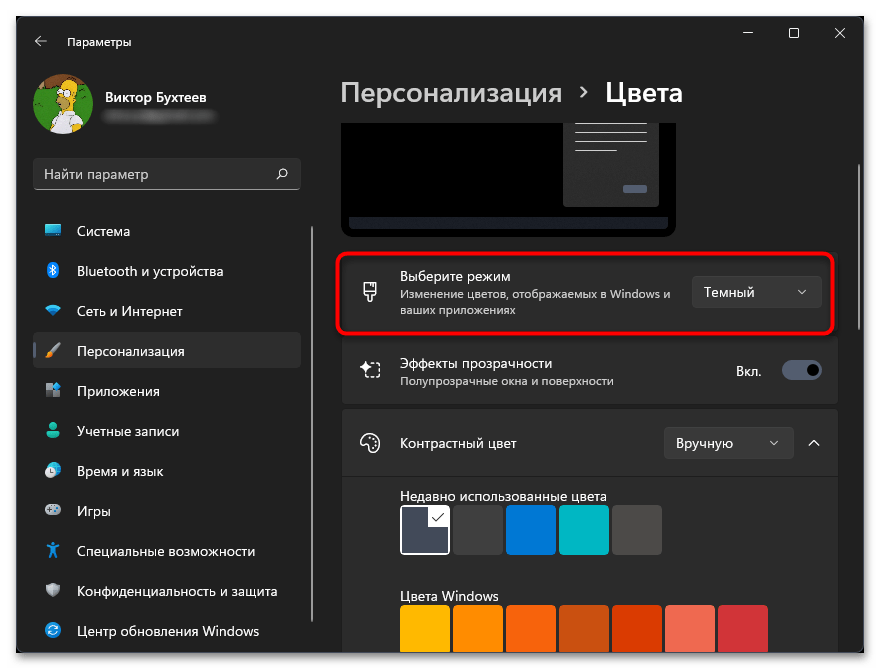
В завершение разберемся с тем, как осуществляется изменение цвета меню «Пуск» в Windows 11, если стандартный вас не устраивает. Отметим, что соответствующая настройка становится доступной только в том случае, если вы используете темную тему в операционной системе.
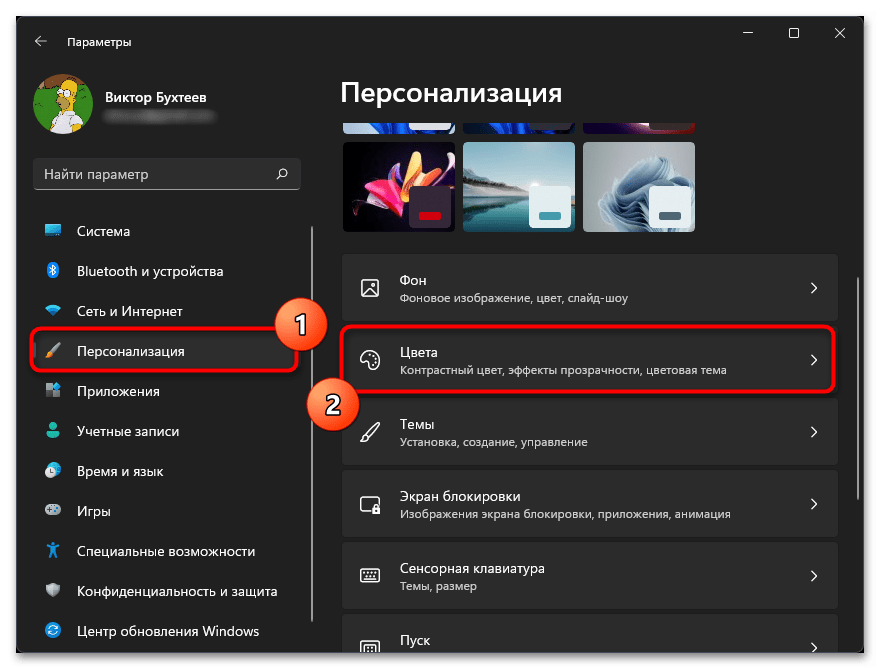
- Откройте приложение «Параметры» и в разделе «Персонализация» выберите категорию «Цвета».
- Измените режим на «Темный», выбрав соответствующий вариант из выпадающего списка.
- Далее выберите контрастный цвет, в который и будет перекрашено меню «Пуск».
- Обязательно активируйте переключатель «Показать цвет элементов в меню «Пуск» и на панели задач», а «Показать контрастный цвет для заголовков и границ окон» установите на свое усмотрение.
- По завершении настройки разверните «Пуск» и проверьте, как отображается новый цвет. Если понадобится его изменить в будущем, выполните те же самые действия, о которых шла речь выше.


Наша группа в TelegramПолезные советы и помощь