
Если вам не по душе стандартный размер, цвет или вид указателя мыши в Windows 11, который иногда называют «Курсор мыши», вы можете изменить их как в параметрах, так и в панели управления.
В этой инструкции для начинающих пошагово о том, как изменить указатель мыши, его размер или цвет в Windows 11, установить собственные курсоры и дополнительная информация, которая может оказаться полезной.
Настройки указателя мыши в Параметрах Windows 11 — цвет и размер
Как было отмечено выше в Windows 11 есть несколько доступных расположений с возможностью настроек вида указателя мыши. Первое — соответствующий раздел в «Параметрах»:
- Откройте «Параметры», используя меню Пуск или сочетание клавиш Win+I.
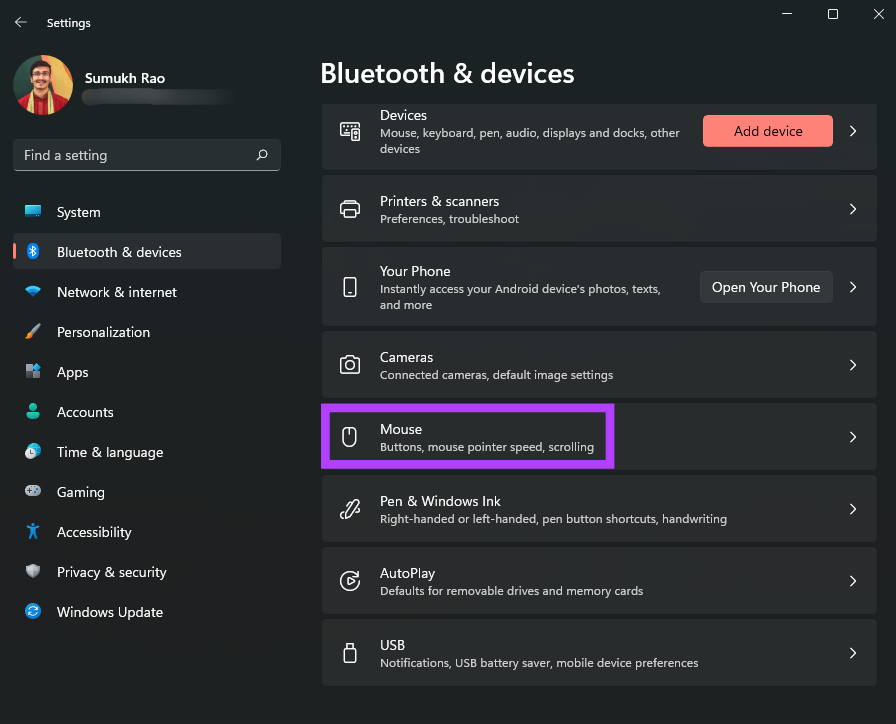
- Перейдите в раздел «Специальные возможности» — «Указатель мыши и сенсорный ввод» или «Bluetooth и устройства» — «Мышь» — «Указатель мыши».

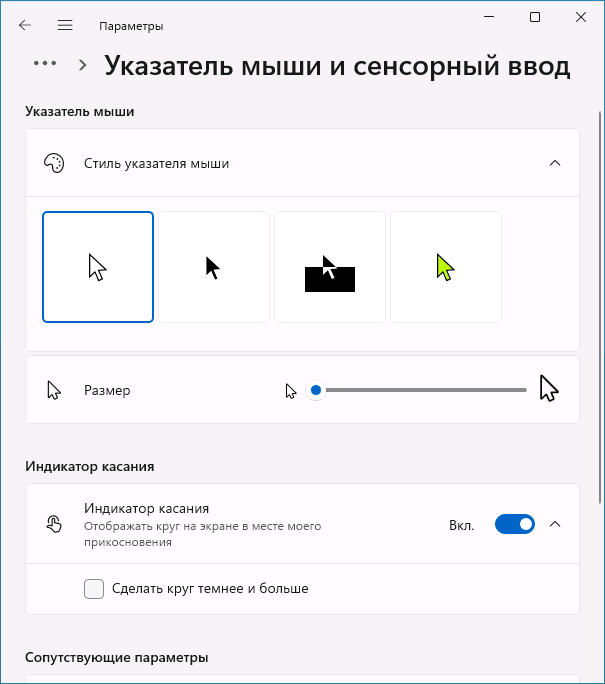
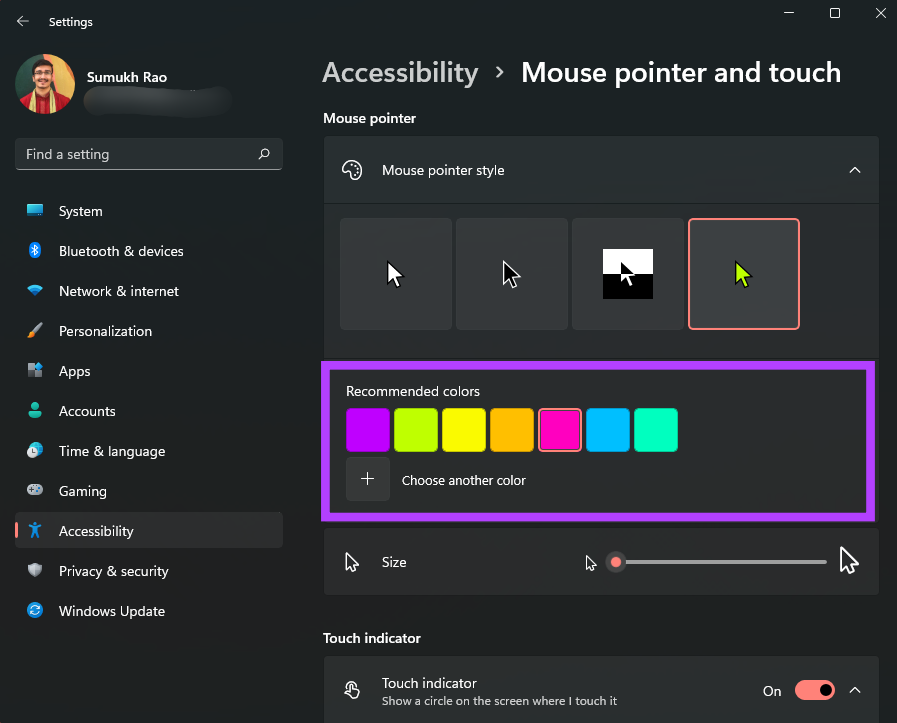
- Здесь вы можете задать размер или цвет указателя мыши.

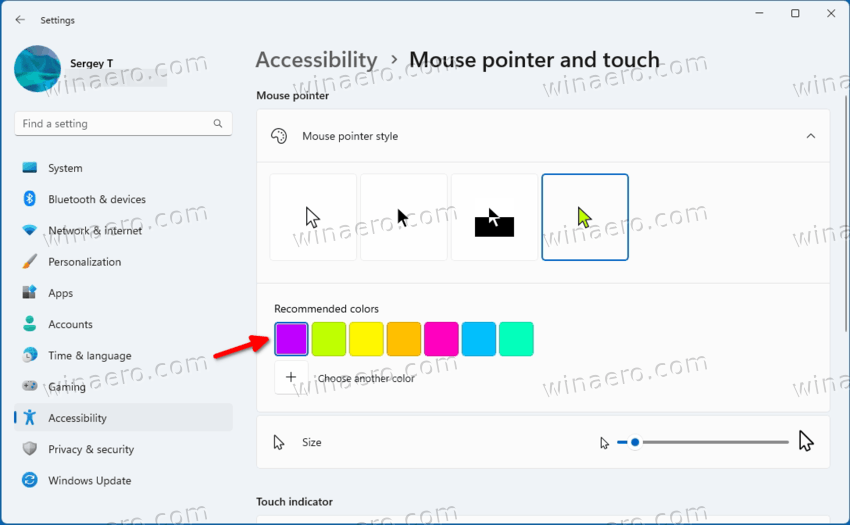
- Для выбора собственного цвета указателя, сначала выберите крайний правый вид указателя, после чего появится возможность выбора собственных цветов.


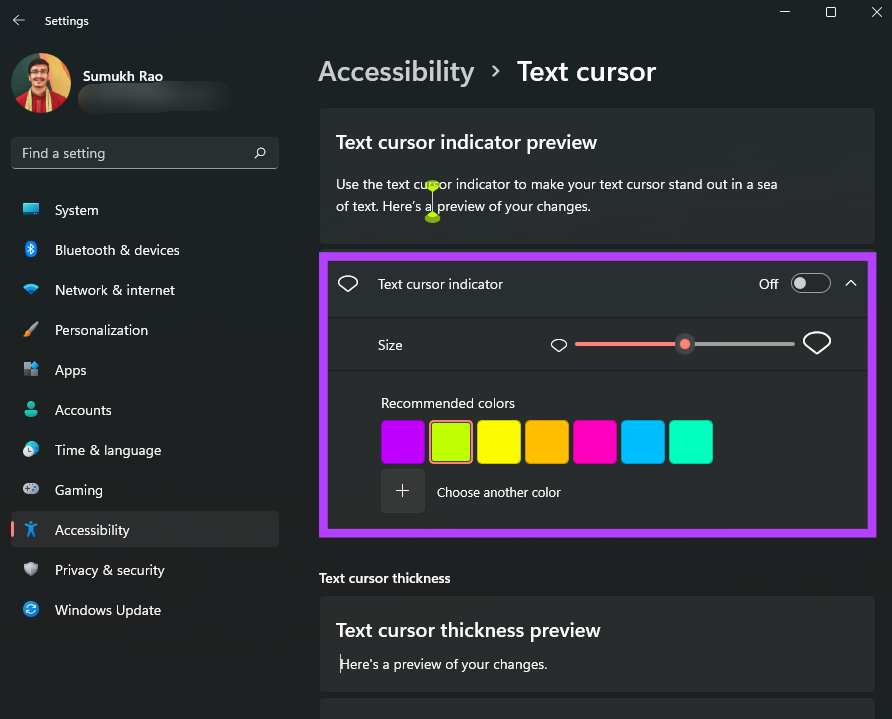
В том же разделе параметров есть ещё одна опция для настройки — «Текстовый курсор», которая также может оказаться полезной.
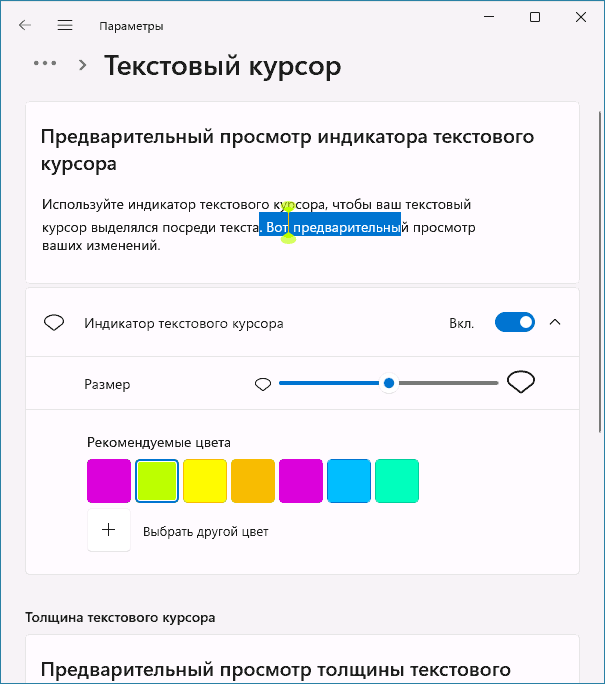
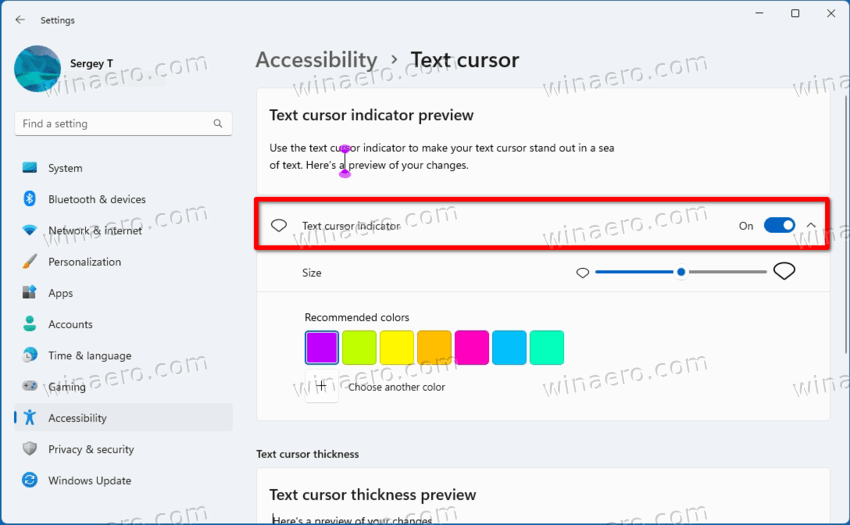
Используя параметры текстового курсора, вы можете включить особое выделение текущего места редактирования текста (пункт «Индикатор текстового курсора»), изменить его размер и цвет, чтобы сделать заметнее.
Изменение указателя мыши в Панели управления
Если открыть «Панель управления» Windows 11 (для этого можно использовать поиск в панели задач», а затем — пункт «Мышь», вы получите доступ к другим настройкам указателя мыши. В эти же настройки можно зайти и другим путём: Параметры — Bluetooth и устройства — Мышь и открыть пункт «Дополнительные параметры мыши» внизу окна.

Здесь на вкладке «Указатели» вы можете загрузить собственные указатели мыши: файлы .cur (статичные курсоры) или .ani (анимированные курсоры), можно найти в Интернете, а можно создать самостоятельно, подробнее в статье Как изменить указатель мыши в Windows. Также при желании можно включить тень для указателей мыши.

Сделанные настройки указателей мыши можно сохранить как «Схему» и в дальнейшем быстро загружать её. Также в списке доступных схем указателей присутствуют уже готовые системные схемы с разными размерами и вариантами цветов указателей.
Дополнительная информация
Некоторые дополнительные нюансы, которые могут быт полезными:
- В настройки указателя мыши можно быстро попасть через Параметры — Персонализация — Темы, нажав по пункту «Курсор мыши». Однако при экспорте/сохранении темы курсоры в файл темы не включаются. Более того, при изменении темы указатели сбрасываются, а потому разумным будет их сохранение в виде схем.

- При применении тем оформления Windows 11, параметры собственных указателей мыши могут сбрасываться (поэтому разумно сохранять их в виде схем). Чтобы запретить темам менять параметры указателей мыши, в разделе реестра
HKEY_CURRENT_USER\Software\Microsoft\Windows\CurrentVersion\Themes
создайте параметр DWORD с именем ThemeChangesMousePointers и значением 0 (ноль).
- Есть отличные сторонние программы для настройки указателя мыши с готовыми наборами красивых курсоров и возможностью создания собственных. Одна из популярных — Stardock CursorFX.

Если у вас есть, что добавить к списку — комментарии открыты и ждут.
Windows operating system from Microsoft now comes with support for Dark Mode, which comes in handy especially during the nighttime when you don’t want too much brightness on the screen.
Along with changing the system theme, the company is also allowing users to make changes to selected elements on the device and one of them is the mouse cursor. Yes, if you don’t want the Dark Mode for the whole system and just want to turn the cursor from white to black so that it’s easier to spot it, then you can do that.
In this step-by-step guide, we will show you how you can change the mouse cursor color to black in Windows 11 operating system. There are several different ways to do so but for this guide, we will be using the Accessibility settings.
Step 1: Open the Settings application on your computer. For this, press the Windows + I keys on your keyboard.
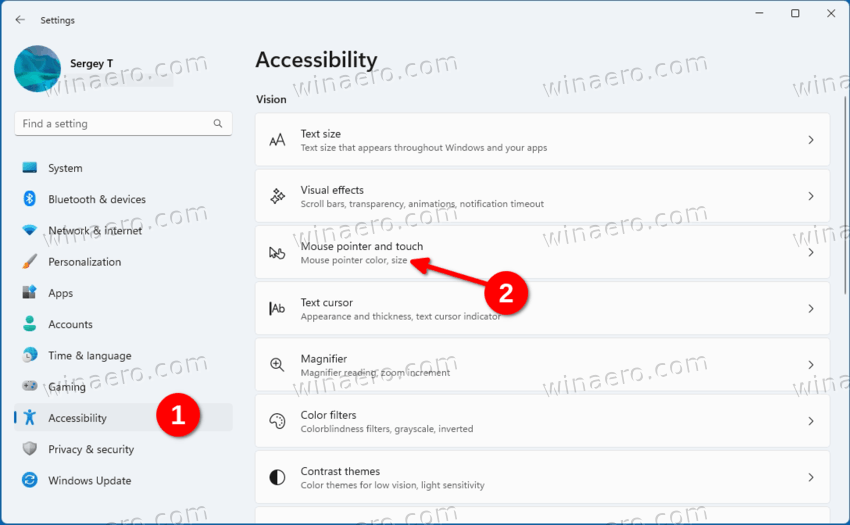
Step 2: When the Settings app opens, click on the “Accessibility setting” option from the left side panel.

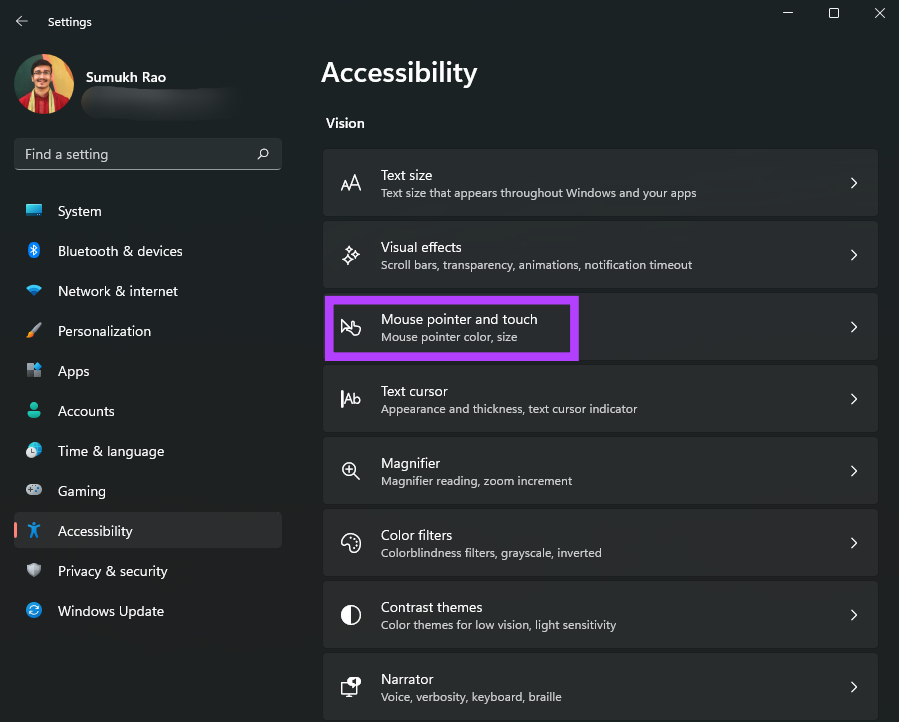
Step 3: Now, under the “Vision” section, select the “Mouse pointer and touch” option.
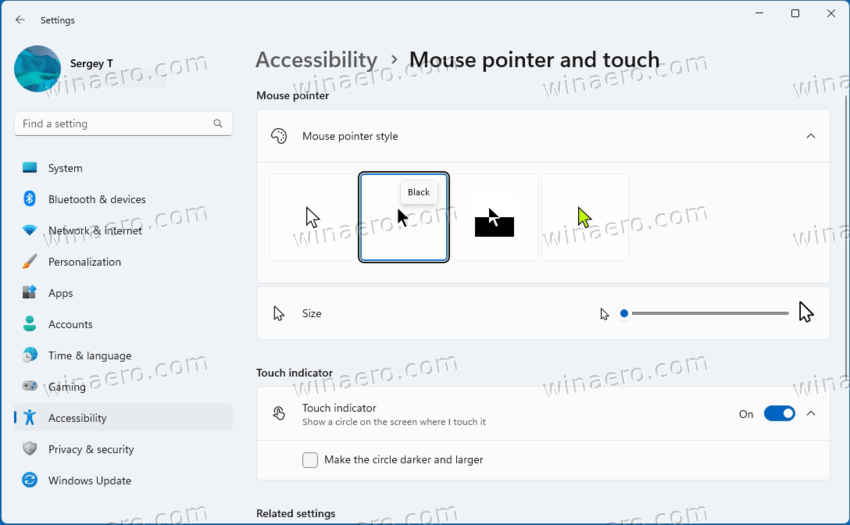
Step 4: From the “Mouse pointer style” options, click on the “Black cursor style” from the list.

That’s it. Once you have followed the above-mentioned process, the mouse cursor on your computer will turn black. If you don’t want the black color, then there are a few different options provided by the company.
One of the most appealing traits of the Windows operating system is the ability it offers its users to customize it. It has always given a ton of alternatives, such as changing the theme, desktop backdrops, and even allowing third-party software to personalize and change the interface of your system in a variety of ways. The mouse cursor in Windows 11 is white by default, just like it has always been. You may, however, easily alter the color to black or any other color you like. The black cursor adds some contrast to your screen and stands out more than the white cursor. Follow this guide to get black cursor in Windows 11 as white mouse can be lost on bright screens.

You can change mouse cursor color to black in Windows 11 in two different ways.
Method 1: Through Windows Accessibility Settings
Here’s how to get black cursor in Windows 11 using Windows Accessibility settings:
1. Press Windows + I keys simultaneously to open the Quick Link menu.
2. Click on Settings from the list, as shown.
3. Click on Accessibility in the left pane.
4. Then, select Mouse pointer and touch in the right pane, as depicted below.

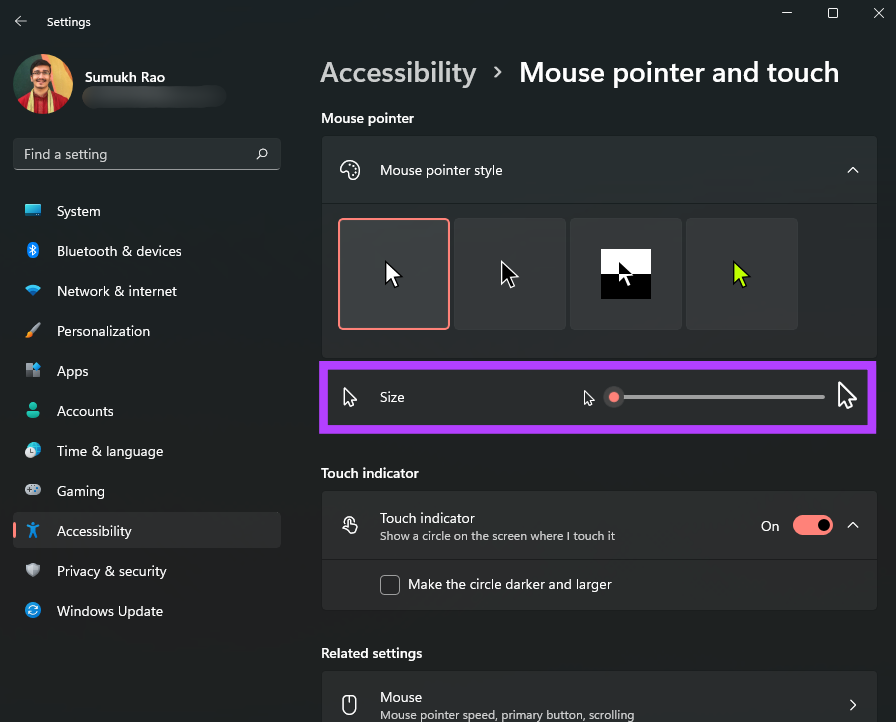
5. Click on Mouse pointer style.
6. Now, select black cursor as shown highlighted.
Note: You can choose any of the other alternatives provided, as needed.

Also Read: How to Rotate Screen in Windows 11
Method 2: Through Mouse Properties
You can also change mouse pointer color to black using an inbuilt pointer scheme in mouse properties.
1. Click on the Search icon and type Mouse settings.
2. Then, click on Open, as shown.

3. Here, select Additional mouse settings under Related settings section.

4. Switch to the Pointers tab in Mouse Properties.
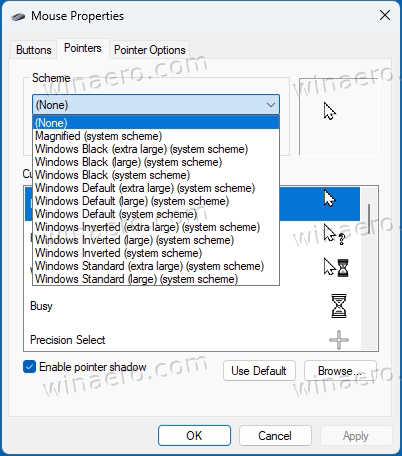
5. Now, click on the Scheme drop-down meu & select Windows Black (system scheme).
6. Click on Apply > OK to save the changes.

Also Read: How to Turn Off Adaptive Brightness in Windows 11
Pro Tip: How to Change Mouse Cursor Color
You can also change mouse pointer color to any other color of your choice. Follow the given steps to do so:
1. Go to Windows Settings > Accessibility > Mouse pointer and touch as instrcuted in Method 1.
2. Here, select the Custom cursor icon which is the 4th option.
3. Choose from the given options:
- Recommended colors shown in the grid.
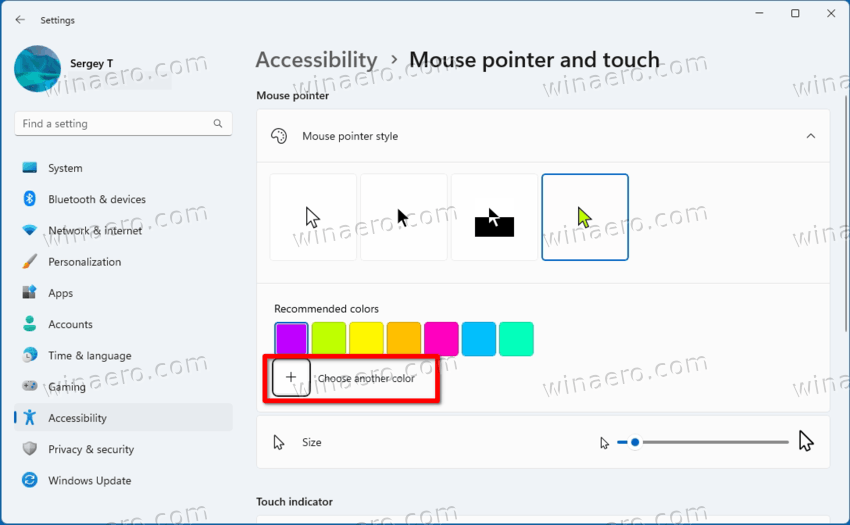
- Or, click on the (plus) + icon to Choose another color from the color spectrum.

4. Finally, click on Done after you have made your choice.

Recommended:
- How to Fix Windows 11 Webcam Not Working
- How to Change Wallpaper on Windows 11
- How to Photoshop Convert to RGB
We hope you found this article interesting and helpful about how to get black cursor or change mouse cursor color in Windows 11. You can send your suggestions and queries in the comment section down below. We would love to hear from you!
Quick Tips
- To change the color and size of your mouse pointer in Windows 11, go to Settings > Accessibility > Mouse pointer and touch.
- You also have the option to use a custom icon as your mouse pointer in Windows 11 by accessing additional mouse settings.
How to Change the Color and Size of the Mouse Cursor
There are a few default cursor options in Windows 11 if you want to change the way the mouse pointer looks. You can choose from these default options and change the color and size of the cursor. Here’s how to do it.
Step 1: Press the Windows key + I to launch the Settings app and navigate to Accessibility > Mouse pointer and touch.
Step 2: You can choose from different types of mouse pointers. Select the one you like.

Step 3: Use the slider under the cursor style options to adjust the size of the mouse pointer.
Step 4: The right-most mouse pointer style supports different colors. If the option is available, you will see a color palette to choose from.
Step 5: Scroll down and click on Text cursor to modify it.

Step 6: You can enable or disable the text cursor indicator and change the color and size.
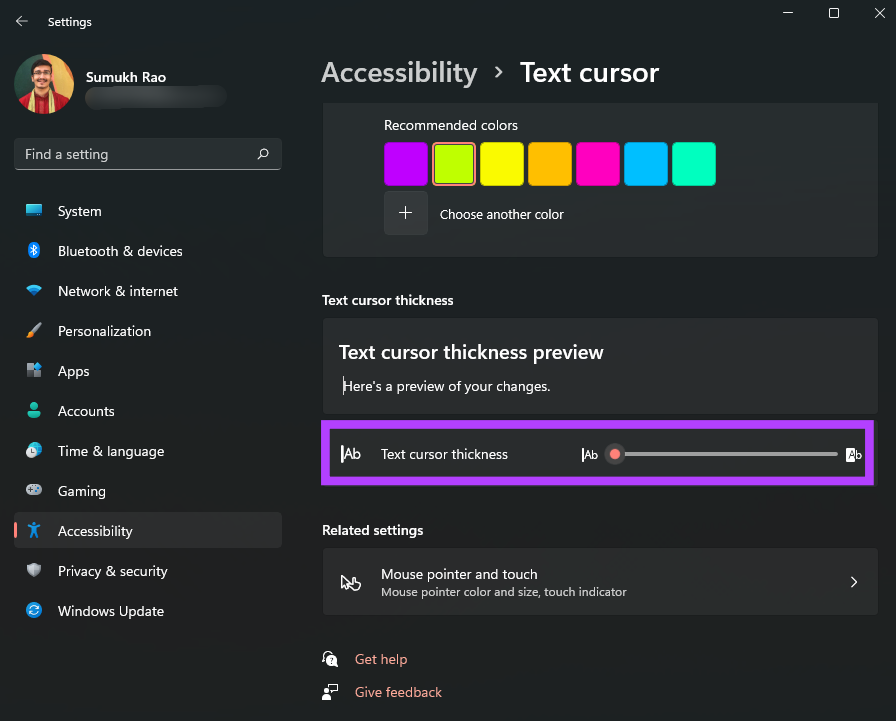
Step 7: There’s also a slider at the bottom to adjust the thickness of the text cursor.
How to Change the Mouse Cursor to a Custom Icon
If you love customizing the interface as per your choices, Windows 11 does let you completely change the mouse pointer’s look and shape as well. Here’s how to add a custom icon as your mouse pointer in Windows 11.
Step 1: Download a custom cursor pack or an icon that you wish to use as your cursor. There are plenty that you can find on the internet from various sources.
Step 2: Press the Windows key + I to launch the Settings app and navigate to Bluetooth & devices > Mouse.
Step 3: Click on Additional mouse settings.
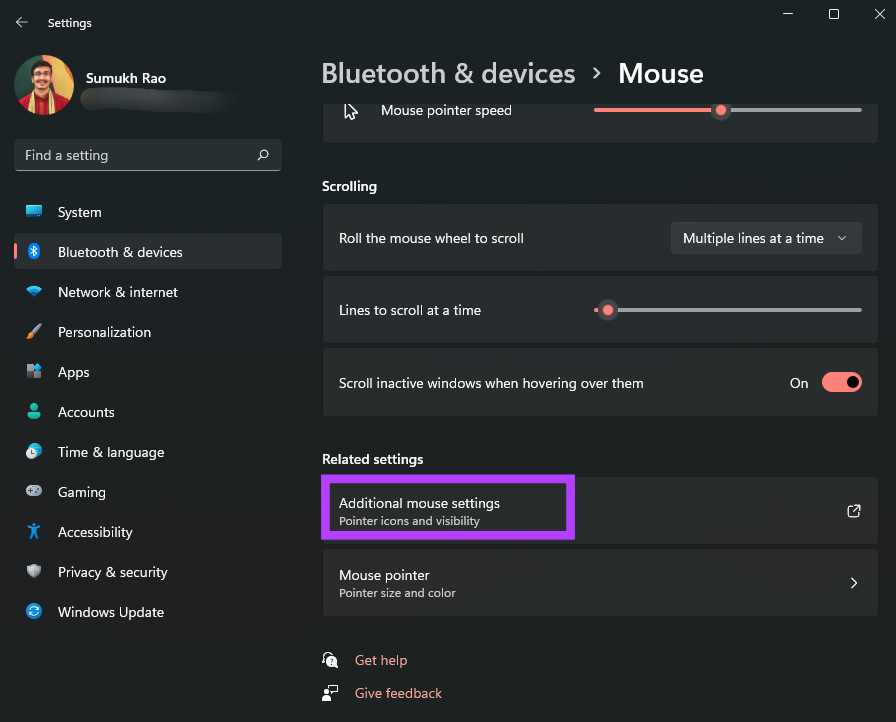
Step 4: Click on the Pointers tab at the top.
Step 5: In the Customize section, select the cursor type that you want to change. You can change all the cursor types listed here.
Step 6: Once you’ve selected the pointer to change, click on Browse.
Step 7: A file explorer window should pop up now. If you have downloaded a third-party cursor pack, you can navigate to the folder it is saved in.
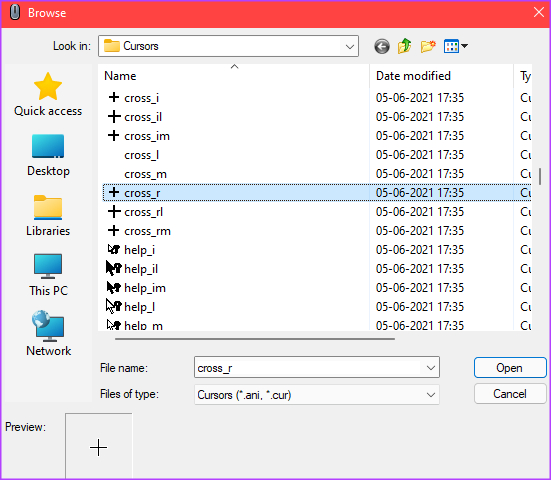
Step 8: Select the mouse pointer you want to use and then click on Open.

Step 9: Windows will change the mouse pointer to your pick. You may continue to select other options. Leave them as they are if you’re done making changes.
Step 10: After changing all the desired cursors, click on Apply and then on OK.
Windows will apply all the chosen changes to the mouse pointer. If you change your mind later, you can always follow the above steps and customize it to something else. To match your cursor customizations, check our guide on how to change icons on Windows 11 for an even more customized experience.
Was this helpful?
Thanks for your feedback!
The article above may contain affiliate links which help support Guiding Tech. The content remains unbiased and authentic and will never affect our editorial integrity.
Windows 11 allows you to change the cursor theme along the cursor size and color. Besides the appearance of the mouse pointer, you can also customize the look of the text indicator.
Since very first versions Microsoft Windows supports customizing the look and style of the mouse pointer. Traditionally, the default theme has a discreet design. But the user can change it to anything they want. It also supports animated cursors, bringing a bit of fun to your daily tasks.
At some point of time, Microsoft allowed to add extra cursor themes with a couple of clicks. You may remember the famous animated dino pointers. These days, you can download hundreds of custom cursors from the Internet.
In Windows 11, the Settings app offers rich customizations options in addition to the simple theme selection in the classic Control Panel. With a couple of clicks, you can change the cursor size, style, and even specify a custom color for the cursor. Besides, it allows you to change the size and color of the text cursor. But if you prefer the classic Control Panel, you still can use it to quickly change the cursor theme.
- Right-click the Start button and select Settings from the context menu.
- Select Accessibility on the left.
- In the right pane, click the Mouse pointer and touch item.

- On the next page, select White, Black, Inverted, or Custom under the Mouse pointer style section.
- Now, adjust the value of the Size slider. You can set it to a value from 1 to 15, where 1 is the default value.
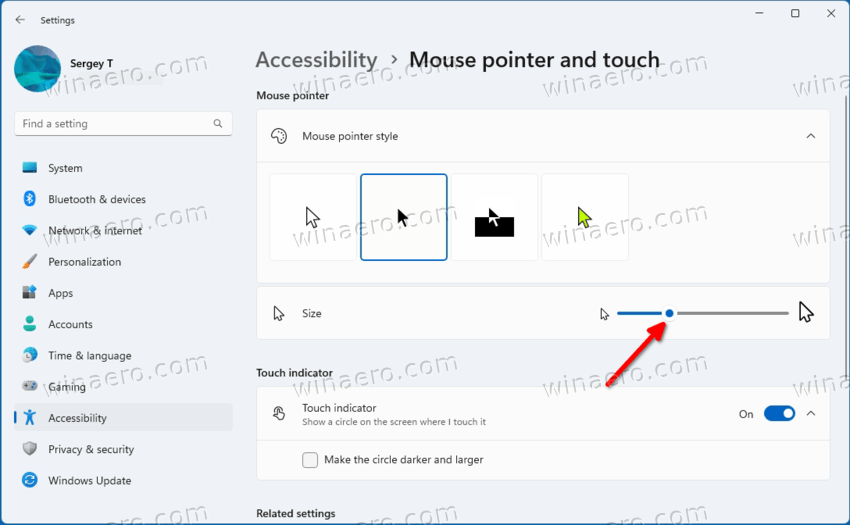
You are done.
Setting the cursor style to «Custom» will allow you to specify a color of your choice for the pointer. Windows 11 shows a few presets, and also allows you to set any other color.
Change Cursor Color in Windows 11
- Press Win + I to open Settings.
- Click Accessibility on the left side, then click Mouse pointer and touch on the right.
- Under Mouse pointer style, click on the Custom option.
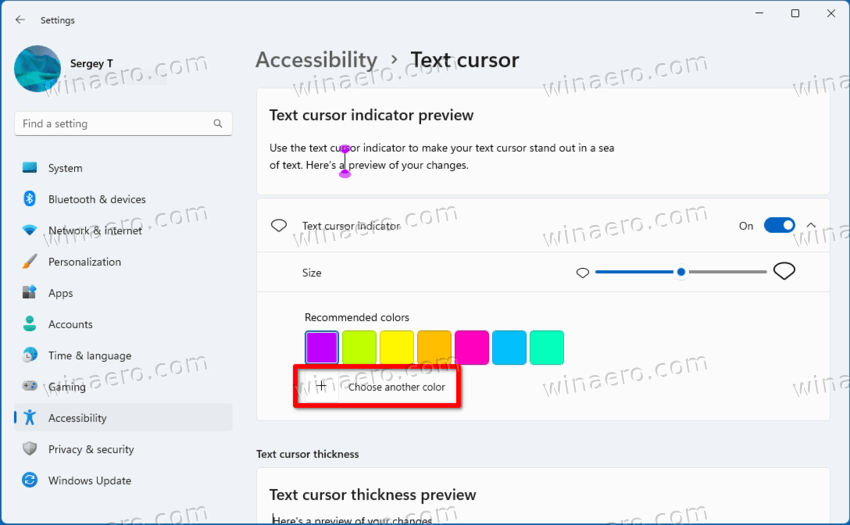
- The page will show a new section, Recommended colors. Click on the box with a color to instantly apply to the mouse pointer.
- To change the cursor color in Windows 11 to some different color, click on the Choose another color button.
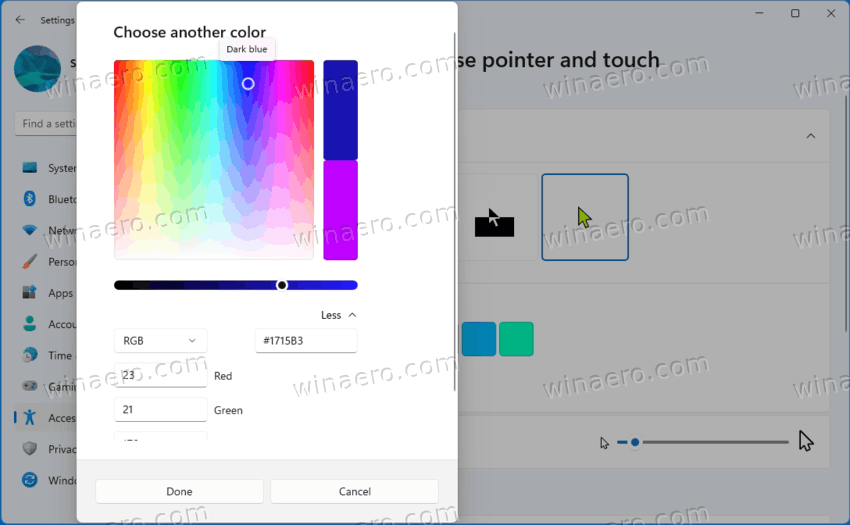
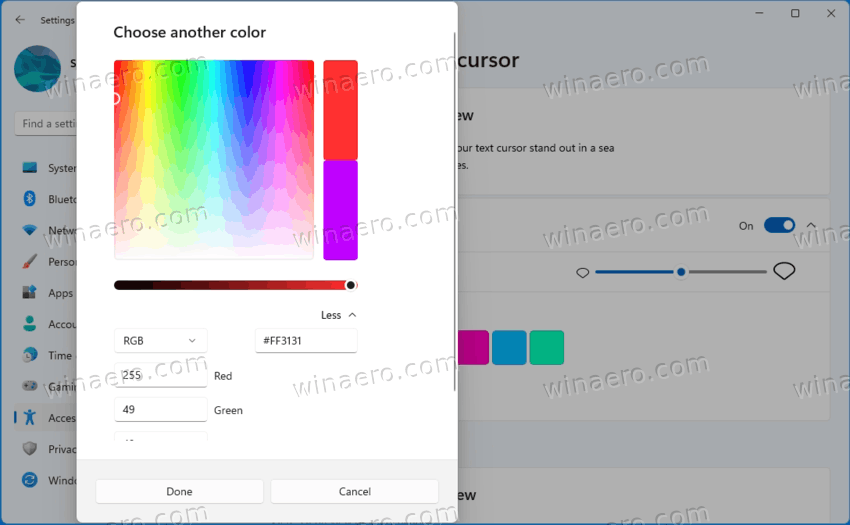
- In the next dialog, use the left area to specify a base color, then change its intensity with the slider below.
- Also, you can click on the More chevron to enter RGB or HSV values directly.
- Click Done to apply the color.
You are done. The mouse pointer will now have a custom color and size, according to your preferences.
Finally, you can change the whole cursor theme with one click in the classic Control Panel app. While the latter is well hidden in Windows 11, it still works and still contains a number of useful applets. Some of those remain exclusive to the app and don’t modern counterparts in Settings.
Change the Cursor Theme in Control Panel
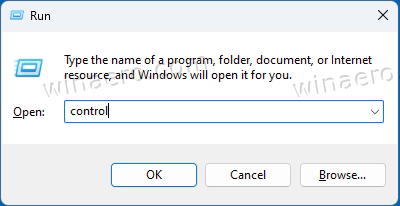
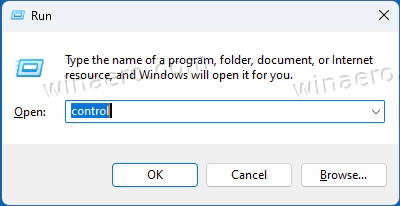
- Press Win + R and type control in the Run box to open the legacy Control Panel.

- If required, switch it to the Icons view, and find the Mouse icon.

- Go to the Pointers tab, and select the desired theme under the Scheme section.

- Click on the Apply and OK buttons to instantly enable the selected cursor theme.

Done!
Registry keys
If you are curious, Windows stores the style, size and color settings for the mouse pointer under the following Registry keys:
- HKEY_CURRENT_USER\Control Panel\Cursors
- HKEY_CURRENT_USER\Software\Microsoft\Accessibility
You can export them before changing anything, and import them later to quickly restore the modified settings.
Customize Text Cursor in Windows 11
In addition to the pointer customizations reviewed above, Windows 11 allows you to customize the text cursor indicator. By default, a text cursor appears when a text area is in focus, e.g. in a Word document, in Notepad, in the Run box etc. It looks like a tiny vertical blinking line.
To make it more noticeable, Windows includes a feature called «Text Cursor Indicator». It makes the tiny text cursor colorful. You can enable or disable it, change its color and size according to your taste. Here’s how it can be done.
Enable Text Cursor Indicator
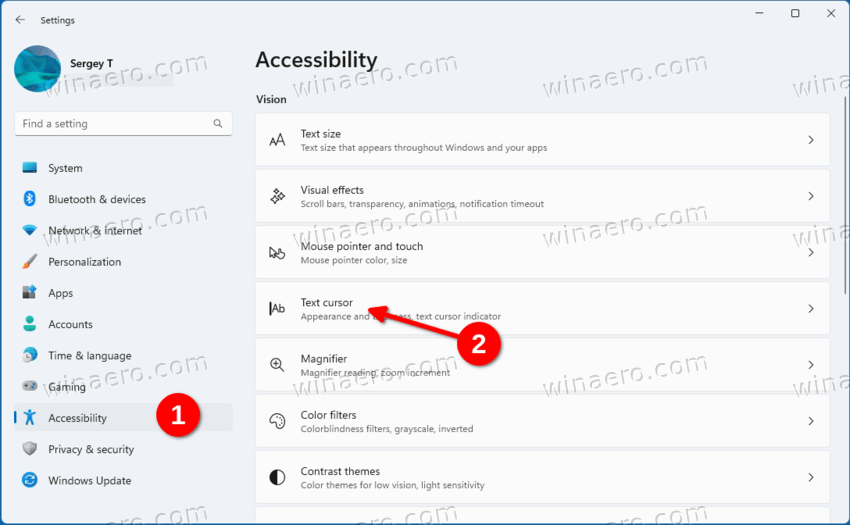
- Open Windows Settings (Win + I).
- Click on the Accessibility section on the left.
- On the right, select Text cursor.
- Turn on the Text cursor indicator option.
- Windows 11 will now highlight the cursor in text boxes and make it easier to spot.
Done! You can disable this Text Cursor Indicator at any moment later by disabling the Accessibility > Text cursor > Text cursor indicator option in Settings.
Alternatively, you can enable or disable it in the Registry.
The Registry method
The Text cursor indicator option is stored under the following key:
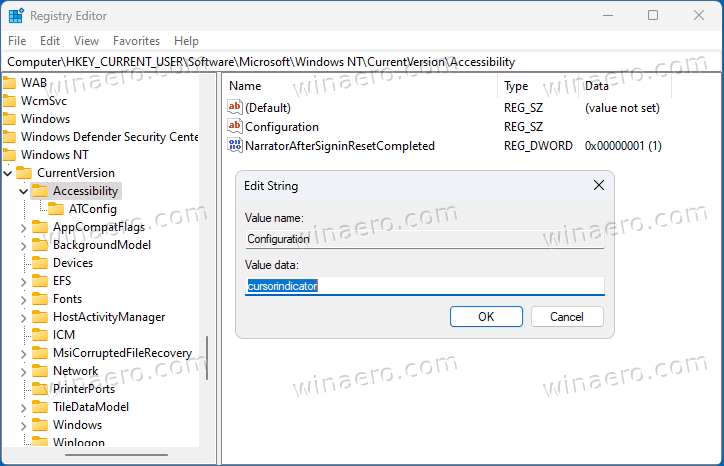
HKEY_CURRENT_USER\SOFTWARE\Microsoft\Windows NT\CurrentVersion\Accessibility
Here, you need to create or modify the following string (REG_SZ) value
-
"Configuration"="cursorindicator"— enable «Text cursor indicator». -
"Configuration"=""— disable «Text cursor indicator».
Note: This is a per-user option.
To save your time, you can download the following ready-to-use REG files.
Download REG files
Extract them from the ZIP archive to any folder of your choice. Open the Enable_text_cursor_indicator.reg file and confirm the UAC prompt to turn it on. The other file will disable the text cursor indication.
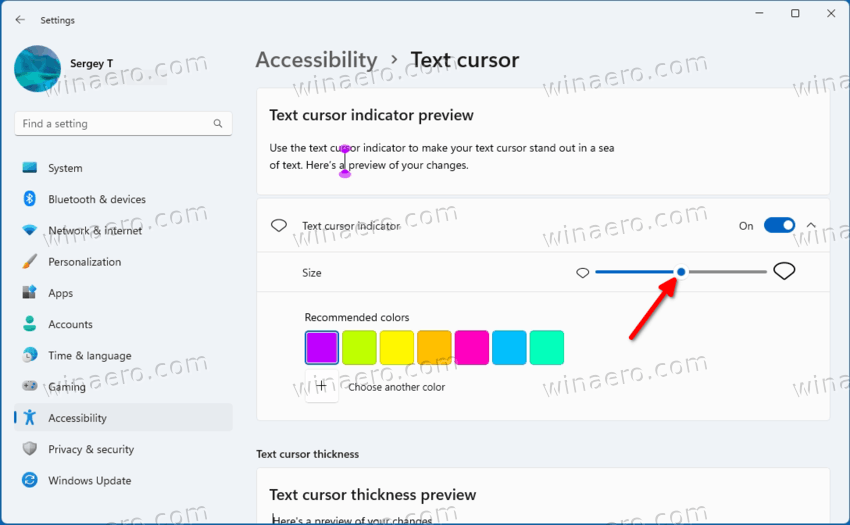
Change the Text Cursor Indicator Size
The indicator for the text cursor can be of 5 sizes. By default, it is set to the largest one, but you can reduce it. This can be useful if you find the default indication too large.
To change the text cursor indicator size in Windows 11, do the following.
- Open the Settings app with the Win + I keyboard shortcut.
- In the left panel, click on Accessibility.
- Now, click on Text Cursor in the right pane.
- On the next page, adjust the position of the Size slider for what you want.
Done!
Also, you can change the indication size by the direct Registry modification. Let’s review this method.
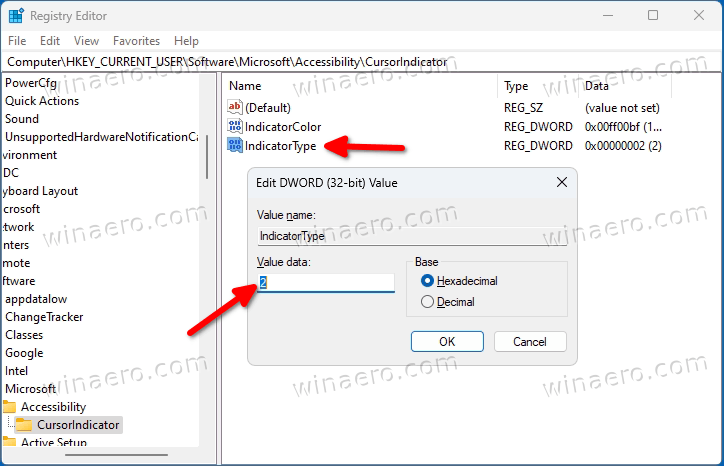
Using a Registry tweak
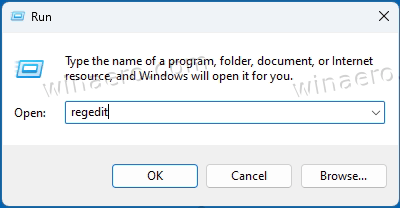
- Open the Registry editor by pressing Win + R and typing
regeditin the Run box.
- Navigate to the following key:
HKEY_CURRENT_USER\SOFTWARE\Microsoft\Accessibility\CursorIndicator. - To the right of the CursorIndicator key, modify or create a new 32-bit DWORD value named IndicatorType.
- Set its value data to a number from 1 to 5. 1 is the smallest one, 5 is the largest indicator.


You are done.
Ready-to-use REG files
You can avoid the manual Registry editing by downloading the following set of files.
Download REG files in a ZIP archive using this link.
Extract them to any folder of your choice. Now, double-click one of these REG files:
text_cursor_indicator_size_1.regtext_cursor_indicator_size_2.regtext_cursor_indicator_size_3.regtext_cursor_indicator_size_4.regtext_cursor_indicator_size_5.reg
Each of the files will change the size of the text cursor indicator to the respective value.
Finally, Windows 11 allows you to change the text cursor indicator color. Here’s how.
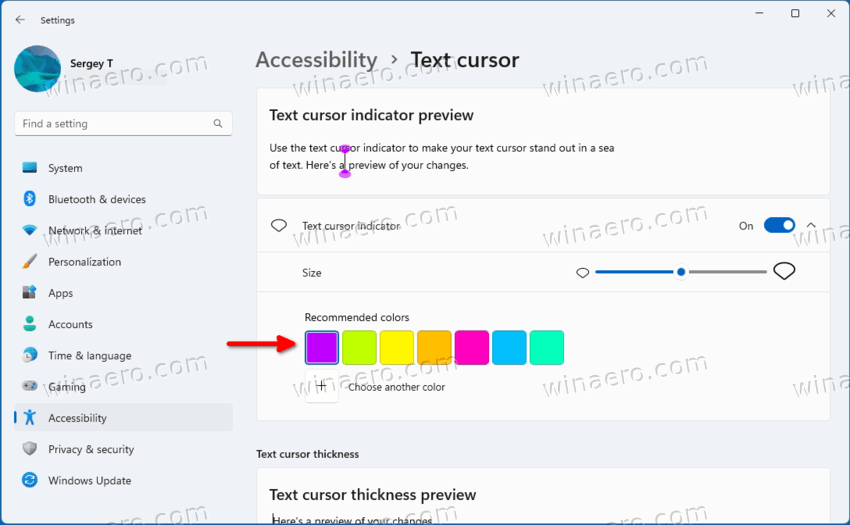
Customize the Color for the Text Cursor Indicator
- Press Win + X on the keyboard, and select Settings from the menu.
- In Settings, open the Accessibility > Text cursor page.
Windows 11 will write your new color in the Registry into the IndicatorColor DWORD value under the following key path:
HKEY_CURRENT_USER\SOFTWARE\Microsoft\Accessibility\CursorIndicator
Change Text Cursor Thickness in Windows 11
Instead of (or in addition to) the Text Cursor Indicator, you may want to increase the thickness of the text cursor. This will be useful on high resolution displays or people with low vision.
There are three methods to change the text cursor thickness. You can use Settings, Control Panel, and Registry.
Change Text Cursor Thickness with Settings
- Open the Start menu and select the Settings icon.
- In Settings, open the Accessibility category.
- On the right, click the Text cursor button.
- Go down to the Text cursor thickness slider and set its value from 1 to 20.
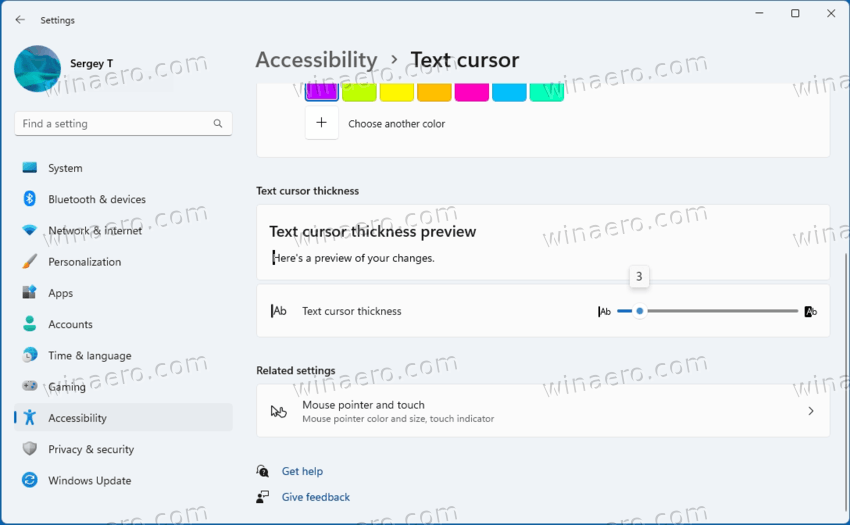
Done. But Settings is not the only method to change the cursor thickness. You can adjust it in the classic Control Panel.
Using the classic Control Panel
- Press Win + R, type
controland hit Enter to open the Control Panel.
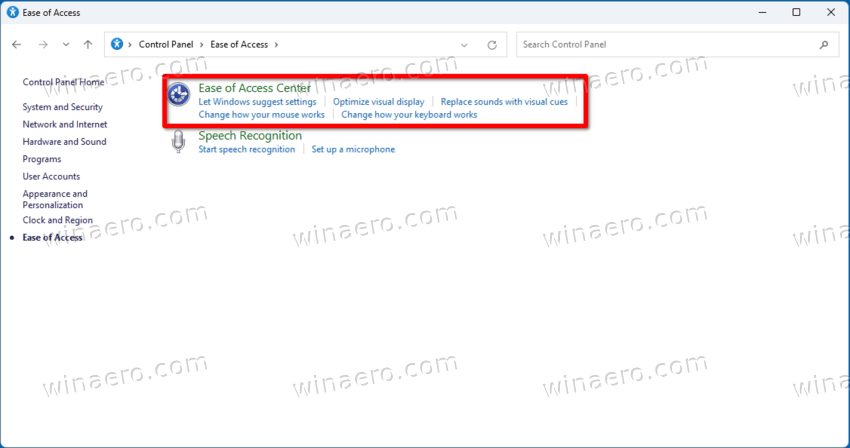
- Click the Ease of Access Center icon.
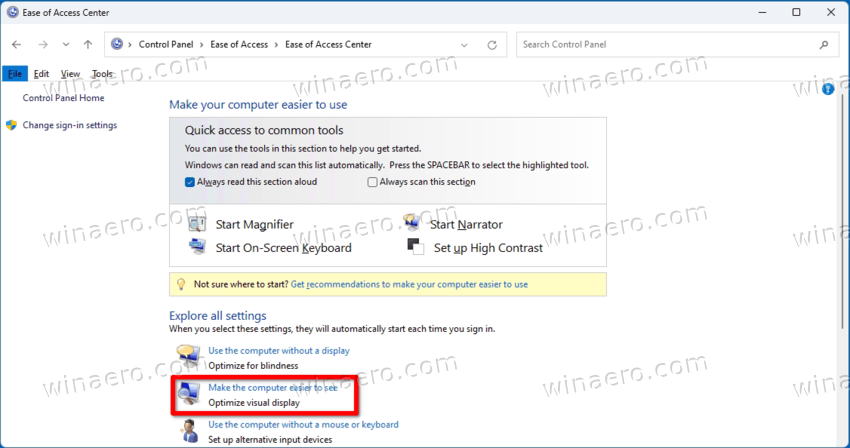
- Now, click the Make the computer easier to use link.
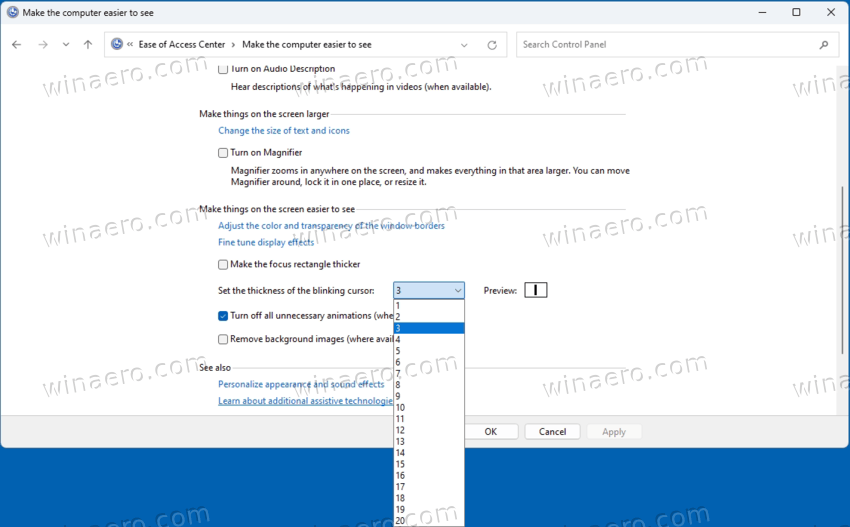
- Use the Set the thickness of the blinking cursor drop-down menu to set the thickness value you want. You can change it in a range from 1 to 20.

Finally, you can use the Registry editor to adjust the text cursor thickness. While it is not the most convenient method, it can be useful for some users. For example, you may use it to automate the setup of new user accounts. Or you can use it to quickly deploy your preferences across your devices.
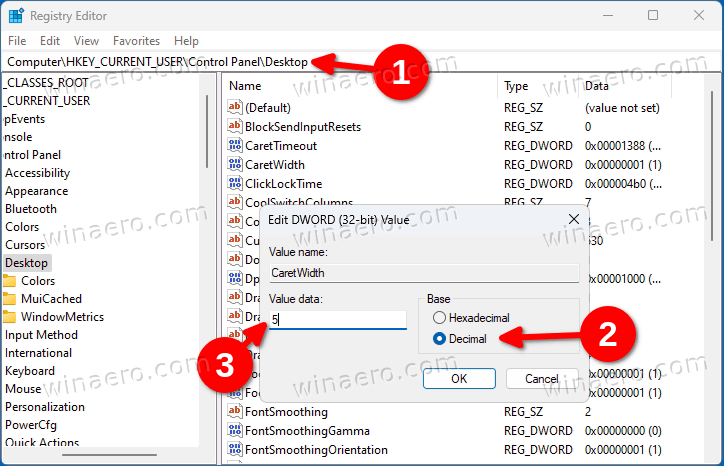
Adjust the Text Cursor Thickness in the Registry
- Open the Registry editor (
regedit.exe).
- Go go the
HKEY_CURRENT_USER\Control Panel\Desktop key. - In the right pane, double-click the 32-bit DWORD value CaretWidth.
- Select Decimal for Base, and enter a new value date in a range from 1 to 20 for the text cursor thickness. 1 pixel is the default thickness.
- Now you need to sign out from your user account, or restart Windows 11 to apply the change.
Change Text Cursor Blink Timeout
Additionally, you customize the time that the text cursor will blink before it automatically stops blinking. By default this timeout is 5 seconds. Windows 11 doesn’t include any user interface for this option, as it not that important. The blink timeout is set in milliseconds.
To change the text cursor blink timeout, do the following.
- Open the Registry editor (
regedit.exe). - Expand the left area to the
HKEY_CURRENT_USER\Control Panel\Desktop key. - In the right pane next to the desktop key, double-click the CaretTimeout value. It is a 32-bit DWORD value that you can create yourself if it is missing.
- Finally, set Decimal under Base; and specify a new text cursor blink timeout in milliseconds.
- Sign out from your user account, or restart the operating system to apply the change.
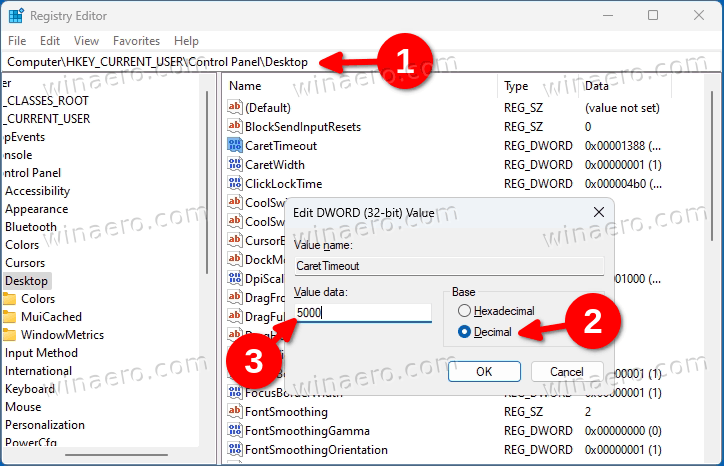
Done! The default value is 5000 milliseconds = 5 seconds. You can set it to 10000 to make it blink for 10 seconds.
That’s all about customizing the cursor appearance in Windows 11.
Support us
Winaero greatly relies on your support. You can help the site keep bringing you interesting and useful content and software by using these options:
If you like this article, please share it using the buttons below. It won’t take a lot from you, but it will help us grow. Thanks for your support!