
Время на прочтение5 мин
Количество просмотров74K
Здравствуй, %username%!
После нескольких лет молчания, решил поделиться опытом по развертыванию отказоустойчивого кластера на основе Windows Server 2012.
Постановка задачи: Развернуть отказоустойчивый кластер для размещения на нем виртуальных машин, с возможностью выделения виртуальных машин в отдельные виртуальные подсети (VLAN), обеспечить высокую надежность, возможность попеременного обслуживания серверов, обеспечить доступность сервисов. Обеспечить спокойный сон отделу ИТ.
Для выполнения выше поставленной задачи нам удалось выбить себе следующее оборудование:
- Сервер HP ProLiant DL 560 Gen8 4x Xeon 8 core 64 GB RAM 2 шт.
- SAS Хранилище HP P2000 на 24 2,5» дисков 1 шт.
- Диски для хранилища 300 Gb 24 шт. //С объемом не густо, но к сожалению бюджеты такие бюджеты…
- Контроллер для подключения SAS производства HP 2 шт.
- Сетевой адаптер на 4 1Gb порта 2 шт. //Можно было взять модуль под 4 SFP, но у нас нет оборудования с поддержкой 10 Gb, гигабитного соединения вполне достаточно.
Естественно обновляем BIOS и Firmware с официального сайта.
Организация подключений:

У нас на самом деле подключено в 2 разных коммутатора. Можно подключить в 4 разных. Я считаю, что достаточно 2х.
На портах коммутаторов, куда подключены сервера необходимо сменить режим интерфейса с access на trunk, для возможности разнесения по виртуальным подсетям.
Пока качаются обновления на свежеустановленную Windows Server 2012, настроим дисковое хранилище. Мы планируем развернуть сервер баз данных, посему решили 600 Гб использовать под базы данных, остальное под остальные виртуальные машины, такая вот тавтология.
Создаем виртуальные диски:
- Диск raid10 на основе Raid 1+0 из 4 дисков +1 spare
- Диск raid5 на основе Raid 5 из 16 дисков +1 spare
- 2 диска — ЗИП
Советую в имени диска указывать модель массива, сразу будет понятен функционал.Также HP рекомендует использовать небольшое количество виртуальных дисков, в которых будет большое количество физических, т.е. не стоит плодить кучу мелких виртуальных дисков.
Теперь необходимо создать разделы.
- raid5_quorum — Так называемый диск-свидетель (witness). Необходим для организации кластера из 2 нод.
- raid5_store — Здесь мы будем хранить виртуальные машины и их жесткие диски
- raid10_db — Здесь будет хранится жесткий диск виртуальной машины MS SQL сервера
Назначаем (map) наши разделы на порты sas контроллеров хранилища.
Обязательно необходимо включить feature Microsoft Multipath IO, иначе при сервера к обоим контроллерам хранилища в системе будет 6 дисков, вместо 3х, и кластер не соберется, выдавая ошибку, мол у вас присутствуют диски с одинаковыми серийными номерами, и этот визард будет прав, хочу я вам сказать.
Подключать сервера к хранилищу советую по очереди:
- Подключили 1 сервер к 1 контроллеру хранилища
- В хранилище появится 1 подключенный хост — дайте ему имя. Советую называть так: имясервера_номер контроллера (A или B)
- И так, пока не подключите оба сервера к обоим контроллерам.
На коммутаторах, к которым подключены сервера необходимо создать 3 виртуальных подсети (VLAN):
- ClusterNetwork — здесь ходит служебная информаци кластера (хэртбит, регулирование записи на хранилище)
- LiveMigration — тут думаю все ясно
- Management — сеть для управления
На этом подготовка инфраструктуры закончена. Переходим к настройке серверов и поднятию кластера.
Заводим сервера в домен. Устанавливаем роль Hyper-V, Failover Cluster.
В настройках Multipath IO включаем поддержку SAS устройств.
Обязательно перезагружаем.
Следующие настройки необходимо выполнить на обоих серверах.
Переименуйте все 4 сетевых интерфейса в соответствии их физическим портам (у нас это 1,2,3,4).
Настраиваем NIC Teaming — Добавляем все 4 адаптера в команду, Режим (Teaming-Mode) — Switch Independent, Балансировка нагрузки (Load Balancing) — Hyper-V Port. Даем имя команде, я так и назвал Team.
Теперь необходимо поднять виртуальный коммутатор.
Открываем powershell и пишем:
New-VMSwitch "VSwitch" -MinimumBandwidthMode Weight -NetAdapterName "Team" -AllowManagementOS 0
Создаем 3 виртуальных сетевых адаптера.
В том же powershell:
Add-VMNetworkAdapter –ManagementOS –Name "Management" Add-VMNetworkAdapter –ManagementOS –Name "ClusterNetwork"Add-VMNetworkAdapter –ManagementOS –Name "Live Migration"
Эти виртуальные коммутаторы появятся в центре управления сетями и общим доступом, именно по ним и будет ходить траффик наших серверов.
Настройте адресацию в соответствии с вашими планами.
Переводим наши адапетры в соответствующие VLAN’ы.
В любимом powershell:
Set-VMNetworkAdapterVlan -ManagementOS -Access -VlanId 2 -VMNetworkAdapterName "Management" -Confirm Set-VMNetworkAdapterVlan -ManagementOS -Access -VlanId 3 -VMNetworkAdapterName "ClusterNetwork" -Confirm Set-VMNetworkAdapterVlan -ManagementOS -Access -VlanId 4 -VMNetworkAdapterName "Live Migration" -Confirm
Теперь нужно настроить QoS.
При настройке QoS by weight (по весу), что является best practice, по заявлению Microsoft, советую расставить вес так, чтобы в общей сумме получилось 100, тогда можно считать, что значение указанное в настройке есть гарантированный процент полосы пропускания. В любом случае считается процент по формуле:
Процент полосы пропускания = установленный вес * 100 / сумма всех установленных значений веса
Set-VMSwitch “VSwitch” -DefaultFlowMinimumBandwidthWeight 15
Для служебной информации кластера.
Set-VMNetworkAdapter -ManagementOS -Name “Cluster” -MinimumBandwidthWeight 30
Для управления.
Set-VMNetworkAdapter -ManagementOS -Name "Management" -MinimumBandwidthWeight 5
Для Live Migration.
Set-VMNetworkAdapter -ManagementOS -Name “Live Migration” -MinimumBandwidthWeight 50
Чтобы трафик ходил по сетям верно, необходимо верно расставить метрики.
Трафик служебной информации кластера будет ходит по сети с наименьшей метрикой.По следующей по величине метрики сети будет ходить Live Migration.
Давайте так и сделаем.
В нашем ненаглядном:
$n = Get-ClusterNetwork “ClusterNetwork” $n.Metric = 1000 $n = Get-ClusterNetwork “LiveMigration” $n.Metric = 1050$n = Get-ClusterNetwork “Management” $n.Metric = 1100
Монтируем наш диск-свидетель на ноде, с которой будем собирать кластер, форматируем в ntfs.
В оснастке Failover Clustering в разделе Networks переименуйте сети в соответствии с нашими адаптерами.
Все готово к сбору кластера.
В оснастке Failover Clustering жмем validate. Проходим проверку. После чего создаем кластер (create cluster) и выбираем конфигурацию кворума (quorum configuration) Node and Disk majority, что также считается лучшим выбором для кластеров с четным количеством нод, а учитывая, что у нас их всего две — это единственный выбор.
В разделе Storage оснастки Failover Clustering, добавьте ваши диски. А затем по очереди добавляйте их как Cluster Shared Volume (правый клик по диску). После добавления в папке C:\ClusterStorage появится символическая ссылка на диск, переименуйте ее в соответствии с названием диска, добавленного как Cluster Shared Volume.
Теперь можно создавать виртуальные машины и сохранять их на эти разделы. Надеюсь статья была Вам полезна.
Прошу сообщать об ошибках в ПМ.
Советую к прочтению: Microsoft Windows Server 2012 Полное руководство. Рэнд Моримото, Майкл Ноэл, Гай Ярдени, Омар Драуби, Эндрю Аббейт, Крис Амарис.
P.S.: Отдельное спасибо господину Салахову, Загорскому и Разборнову, которые постыдно были забыты мною при написании данного поста. Каюсь >_< XD
Failover clustering will enable you to make you Windows Server services highly available. In this guide we will go just through simple setup of failover clustering on Windows Server 2019 without setting up any services.
Before we begin
These are the resources you will need if you are completely new to Failover Clustering – https://docs.microsoft.com/en-us/windows-server/failover-clustering/create-failover-cluster
Prerequisites
I assume you know basic things about Windows Server before you attempt to do this.
DC
LAB for this guide consists of following:
Domain: informatiker.local
Domain Controller named DC1 – 10.0.0.31
ISCSI
One Windows Server ISCSI Target server named ISCSI1 (if you don’t know how to make ISCSI target server, here is the guide)
ISCSI1 – 10.0.0.50
That machine has one additional disk of 40GBs that will be assigned to ISCSI Target.
Optionally, you don’t have to bring up iscsi target server and configure iscsi for failover cluster – you can also bring up failover cluster without storage.
Failover cluster
We will have two nodes that will have failover clustering installed. These machines will have two network cards – one for communication with network, and another one for clustering communication.
Failover1 – NIC1 10.0.0.52 NIC2 192.168.4.2
Failover2 – NIC1 10.0.0.53 NIC2 192.168.4.3
192.168.4.xx network is only for internal cluster configuration (heartbeat). On netowrk cards that will serve you as heartbeat and internal cluster communication – Control Panel | Network and Sharing Center | Change Adapter Settings | right click on network adapter that will serve for cluster communication – Properties | under Networking tab select IPv4 – Properties | click on Advanced button | under DNS tab deselect Register this connection’s addresses in DNS | WINS tab – select Disable NetBIOS over TCP/IP. Do this ONLY ON network adapters that will server for internal cluster communication!
All of these machines should be part of domain.
Be sure to enable MPIO Feature and iSCSI Initiator on both Failover1 and Failover2 machines. Be sure to follow my guide I posted above for creating ISCSI target, it has all the details in it.
MPIO is very important when you use shared storage.
Connect one 40GB disk you defined as ISCSI target to both Failover1 and Failover2, leave it offline at failover2 node.
Cluster is going to be named Cluster1
Cluster1 – 10.0.0.54
Cluster Witness. We need additional VM that will hold file share that ill be available to our cluster – Witness1
Witness1 – 10.0.0.55
Install Failover Clustering
We will go through the process on Failover1 node, you will repeat the process on Failover2 node. I will show you only important parts, I assume you know how to use Server Manager.
Open Server Manager | click on Manage | Add Roles And Features | on Features screen select Failover Clustering
Additional pop-up will appear, click on Add Features
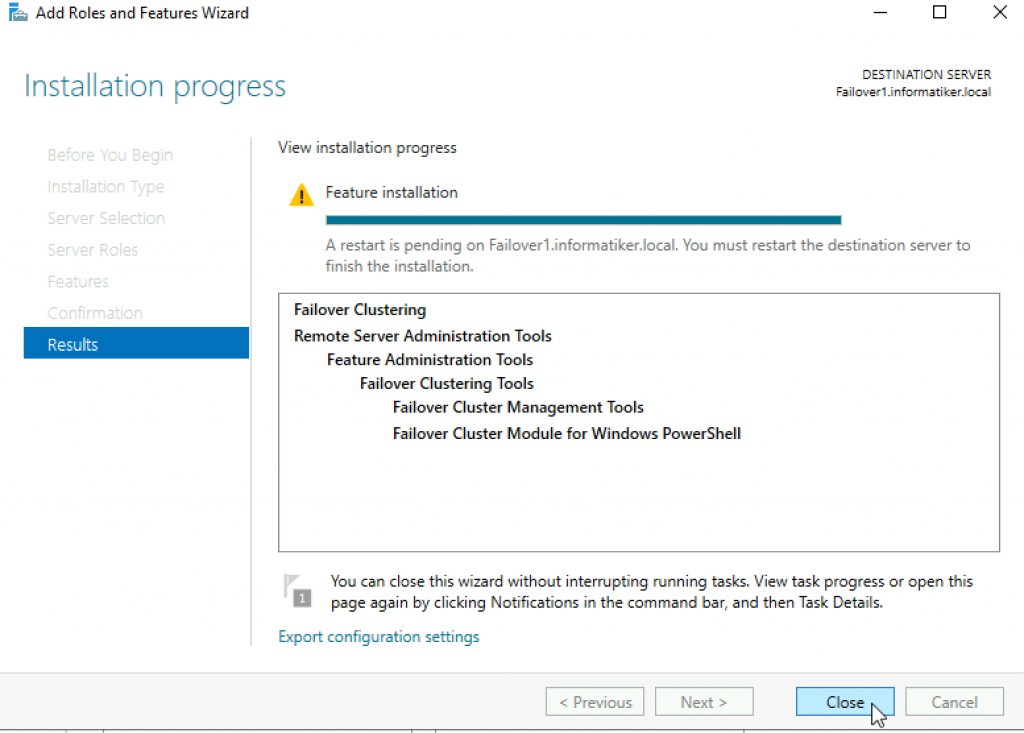
Next
Install
Close wizard and reboot server.
Repeat this process on Failover2 node.
Validate Cluster Configuration
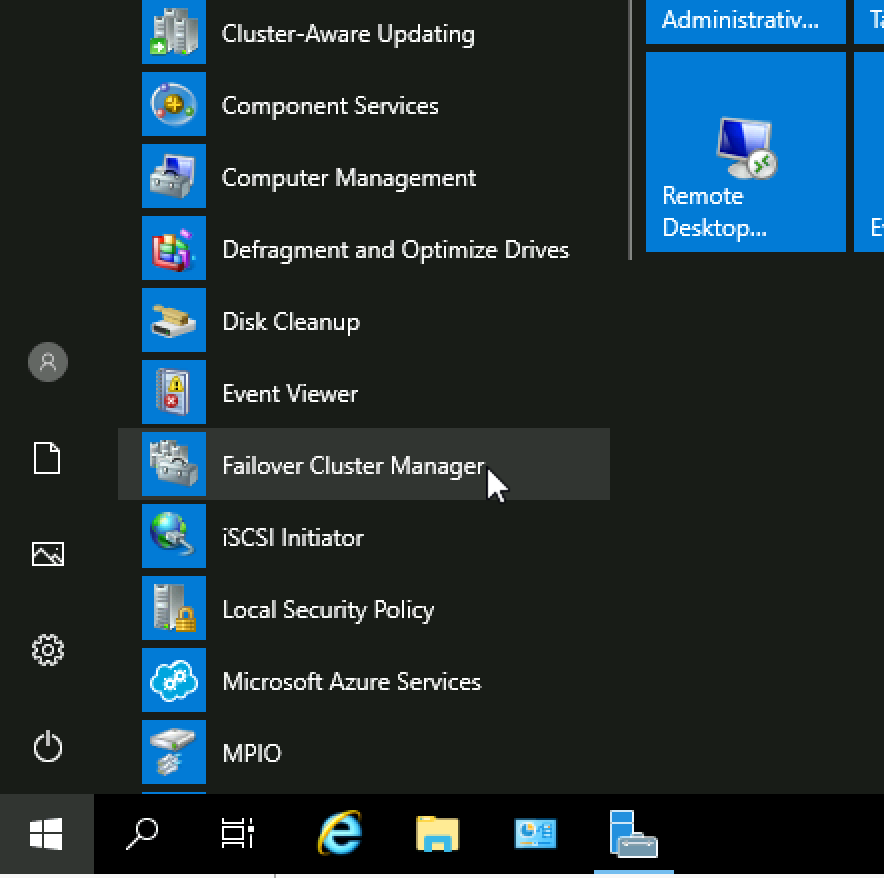
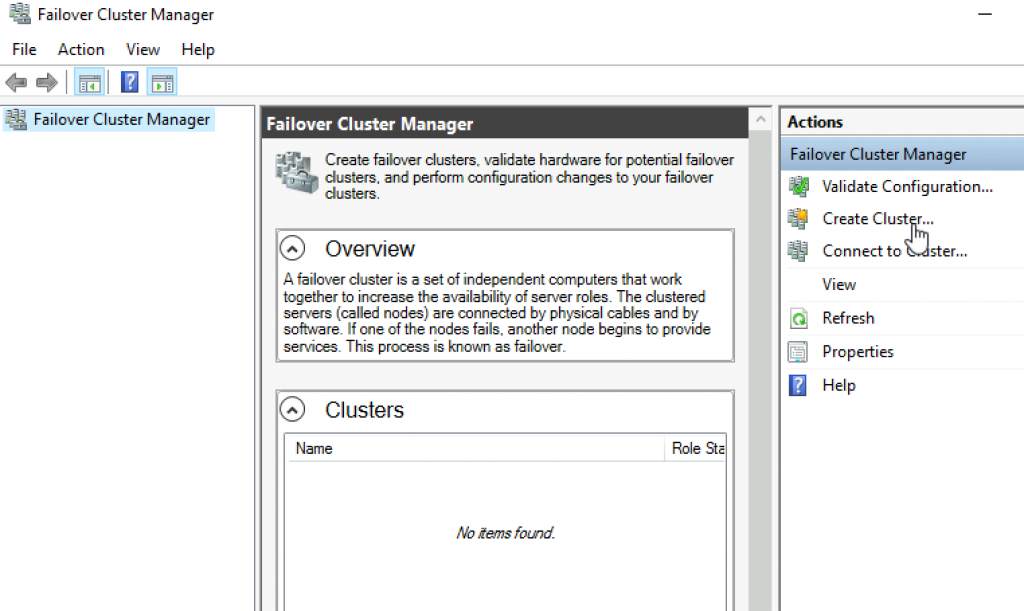
After you installed Failover Clustering on both nodes, login to Failover1 node, click on Start | Windows Administrative Tools | select Failover Cluster Manager
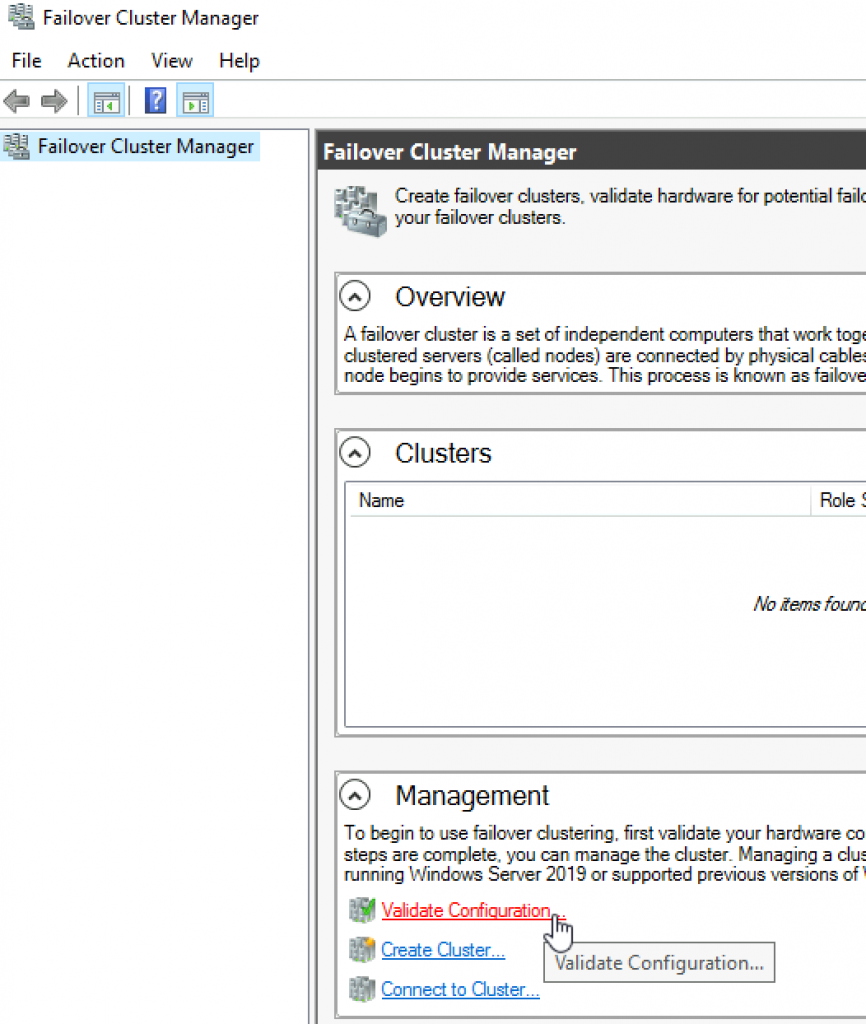
Click on Failover Cluster Manager, and from the middle screen select Validate Configuration…
Next
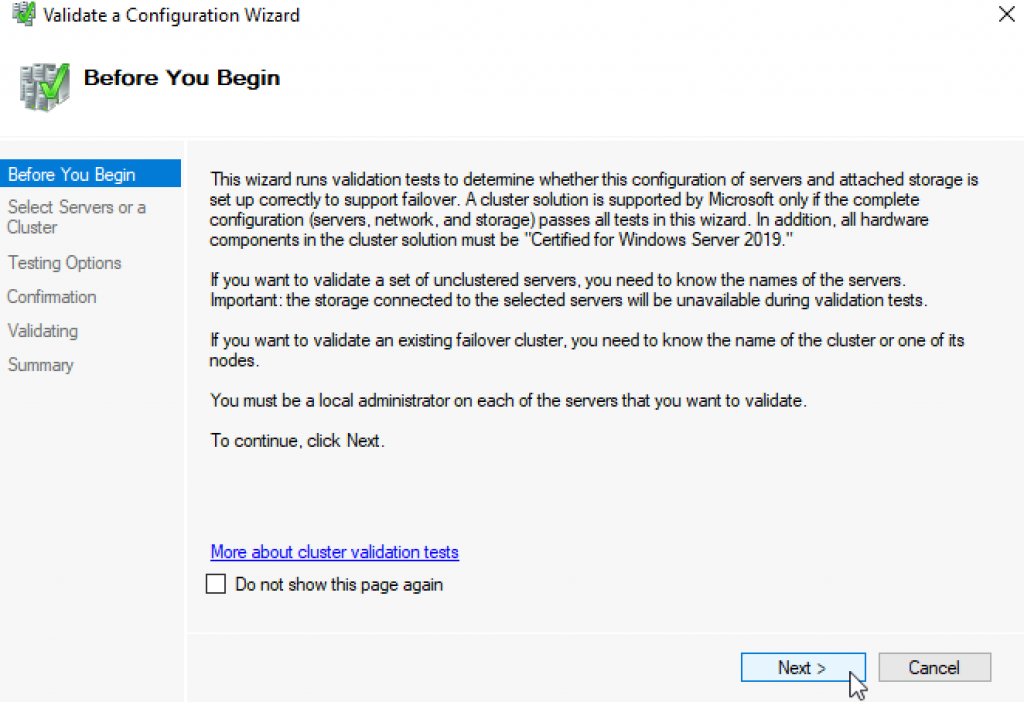
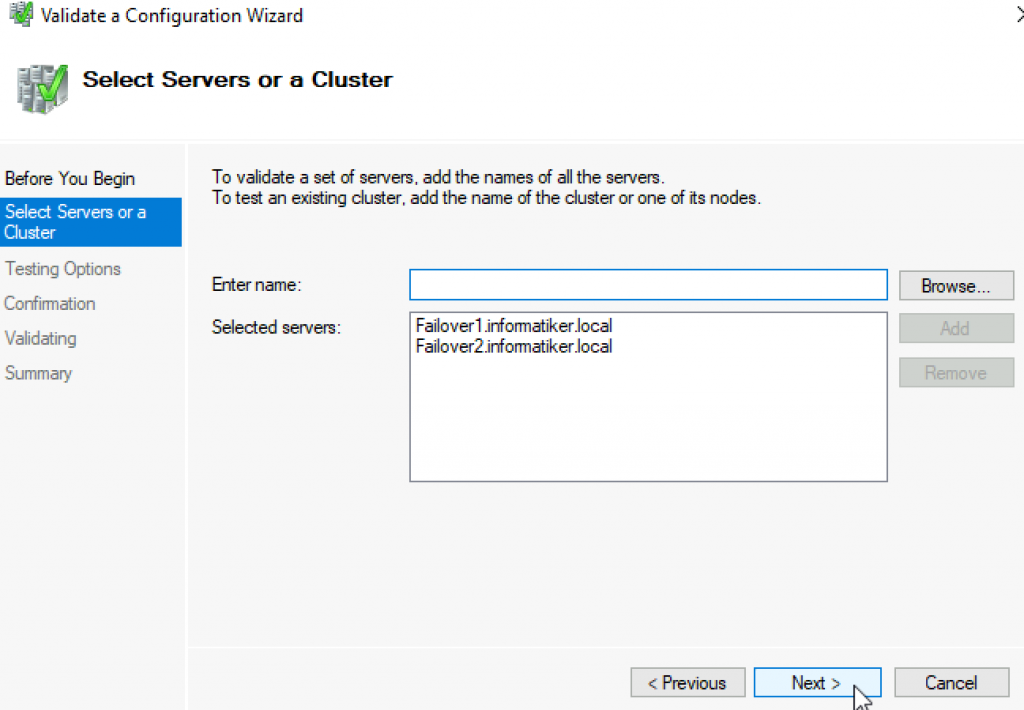
Select both servers (in my case Failover1 and Failover2) and select Next
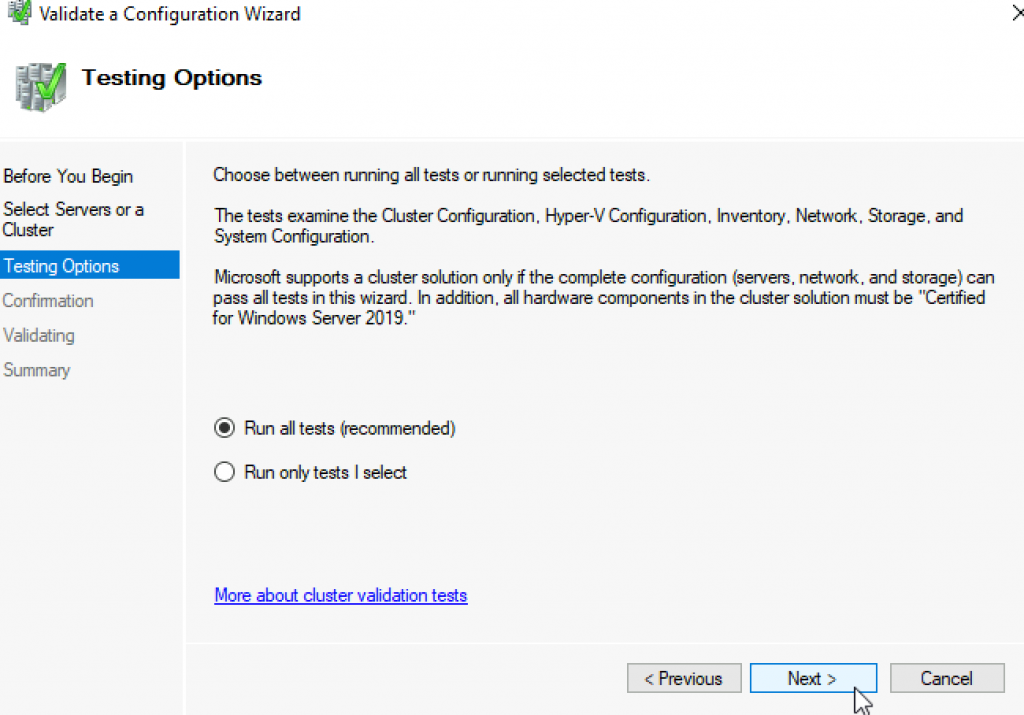
Run all tests | Next
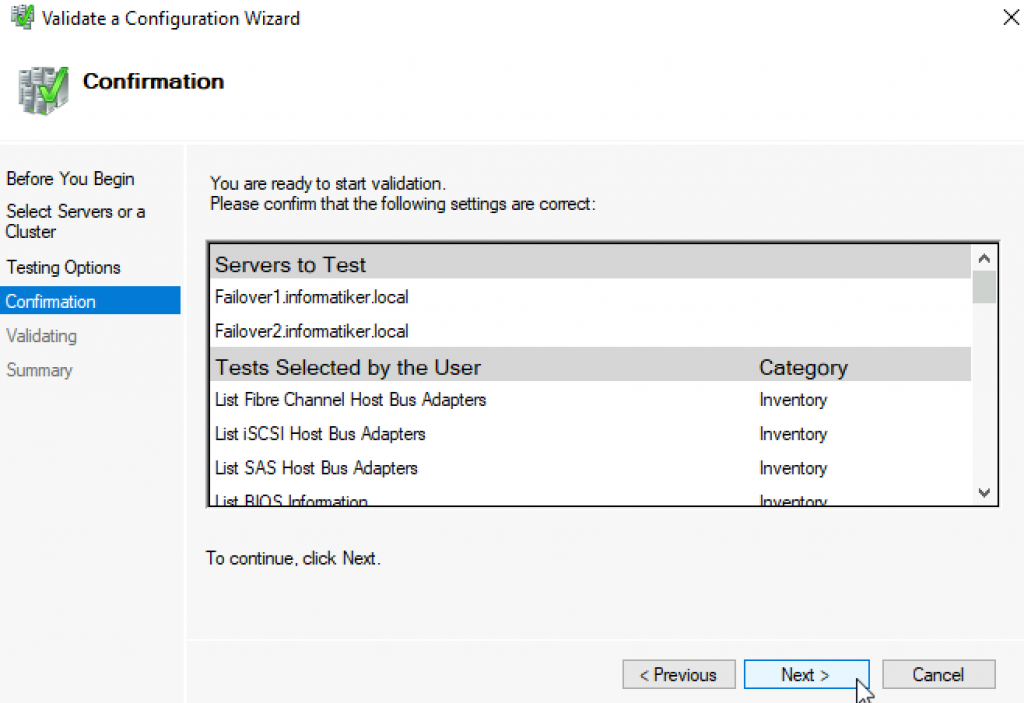
Next
…
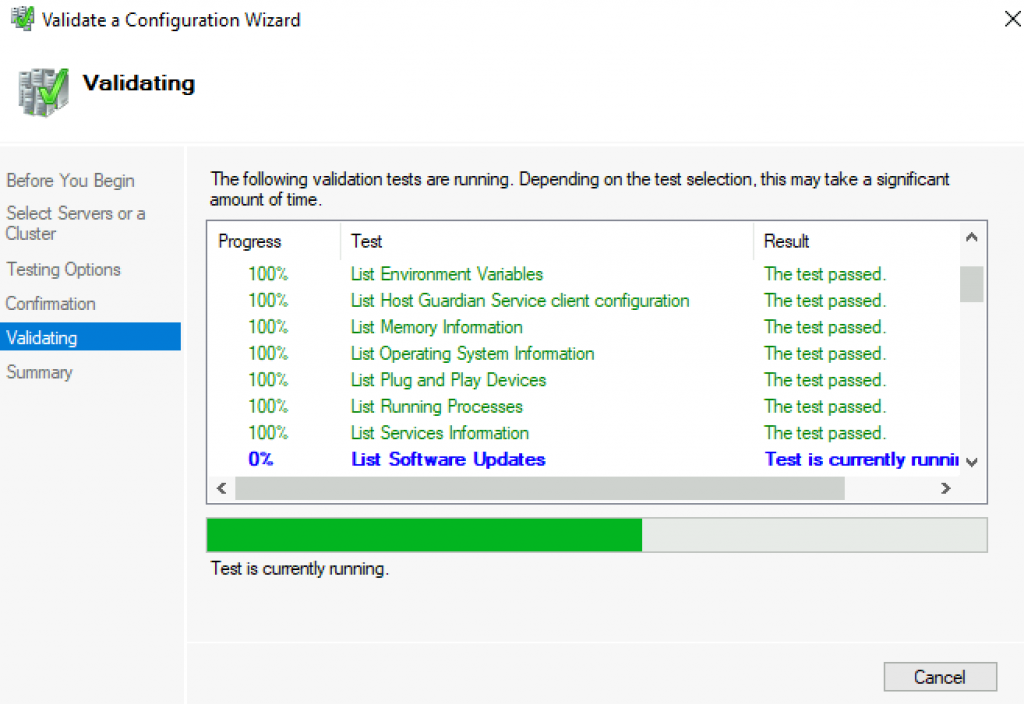
All test were success | Finish
We can proceed to creating cluster
Failover Cluster Manager | from Action screen, select Create Cluster
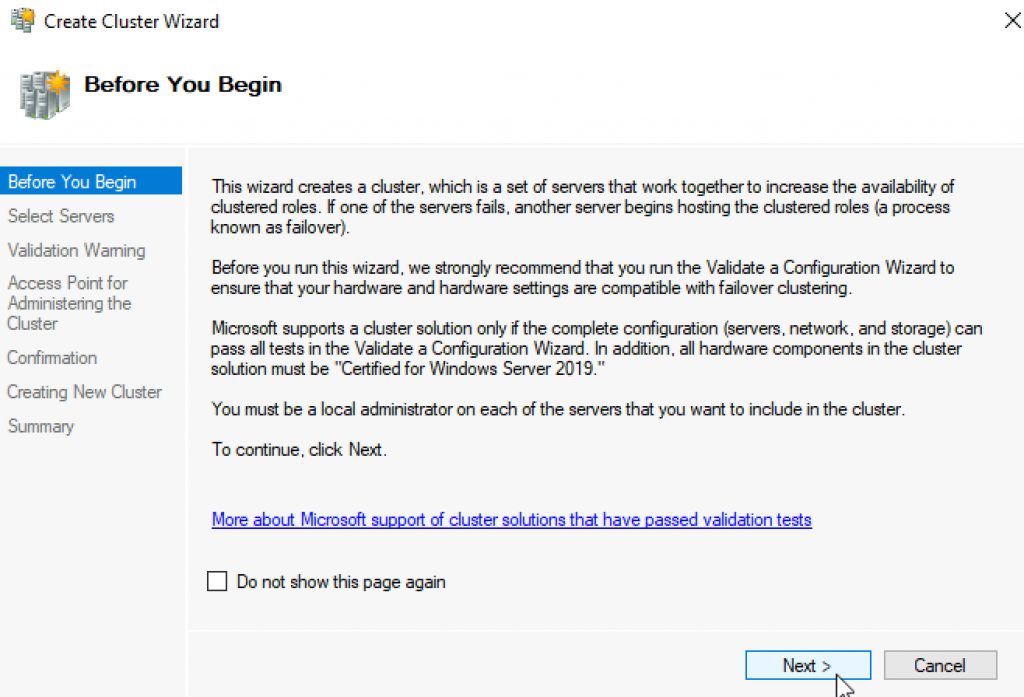
Next
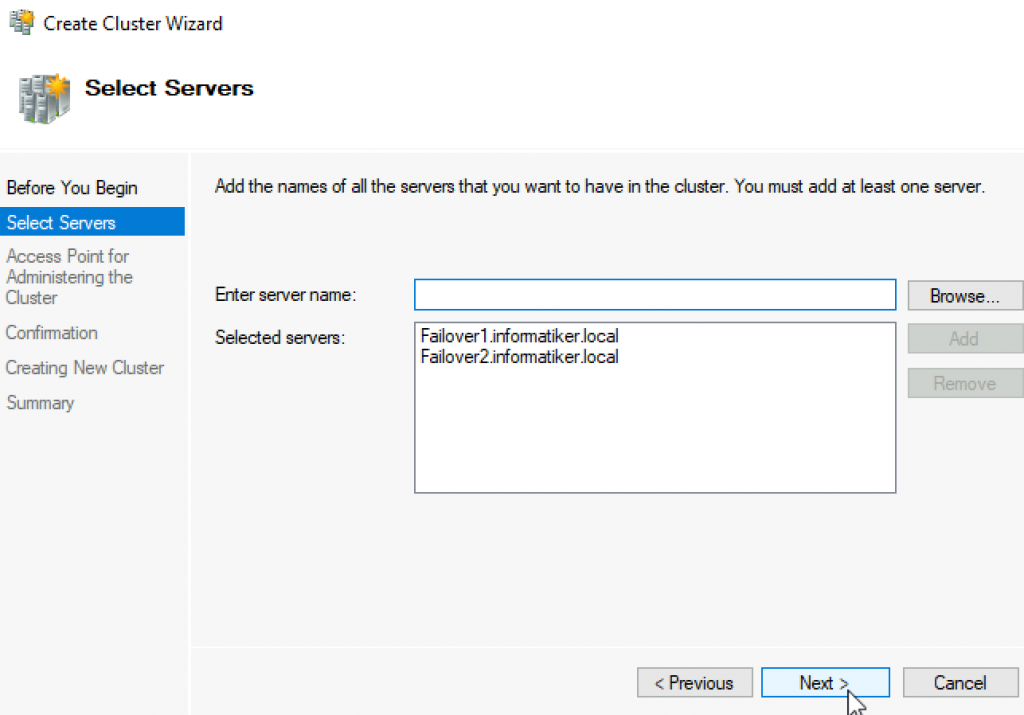
Again select both servers that will be part of the cluster | Next
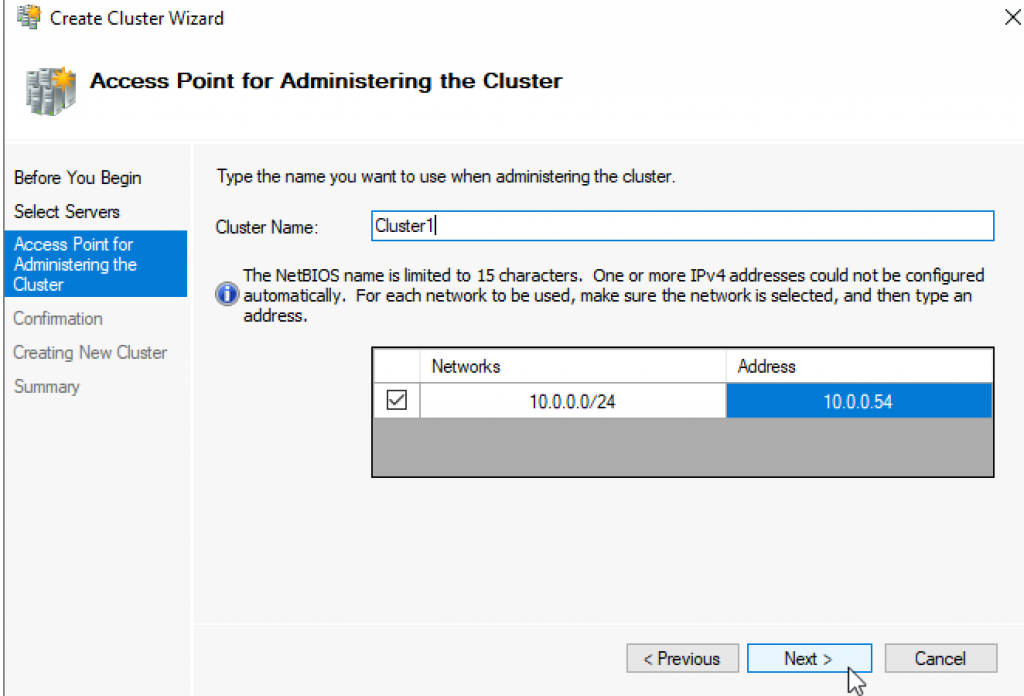
I will name cluster – Cluster1 and give it IP 10.0.54 | Next
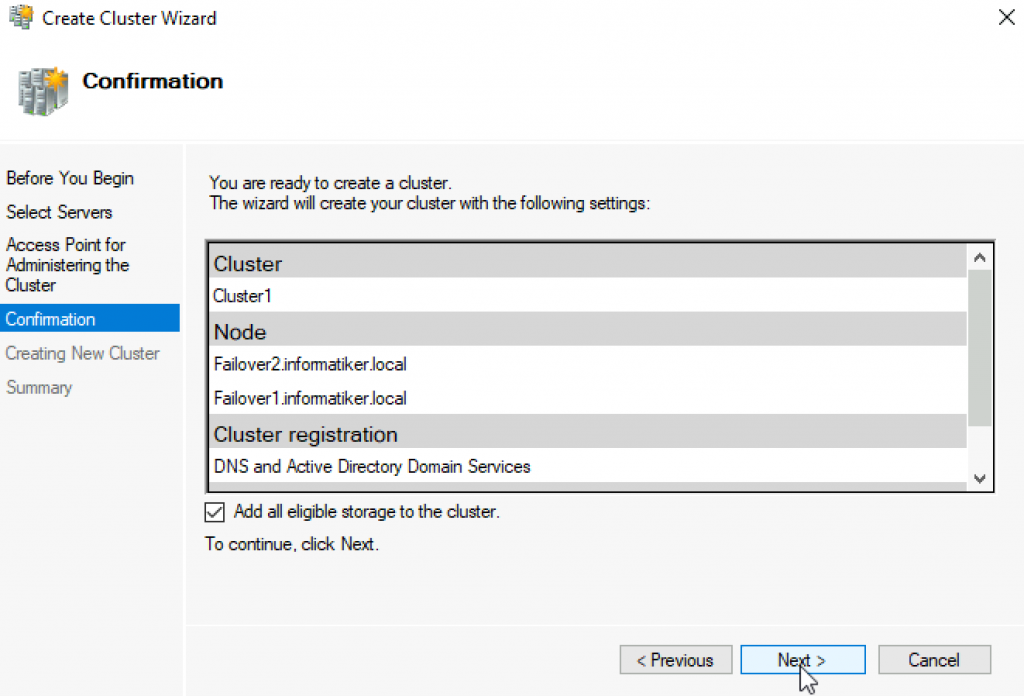
Next
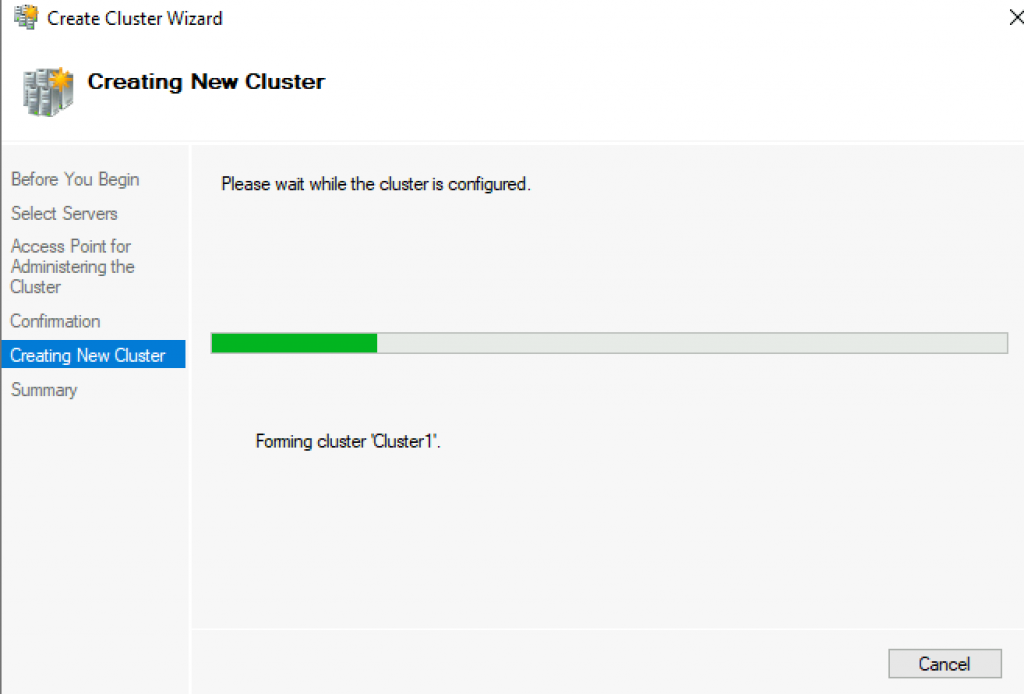
…
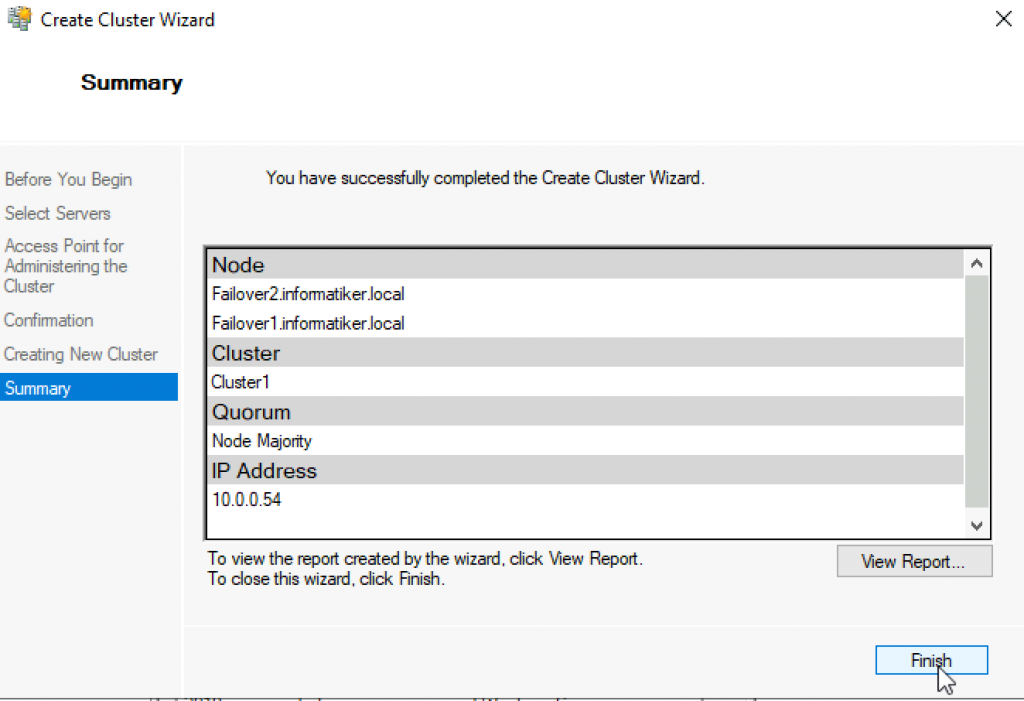
Success! Finish
We can now see created cluster1 and two nodes as part of it.
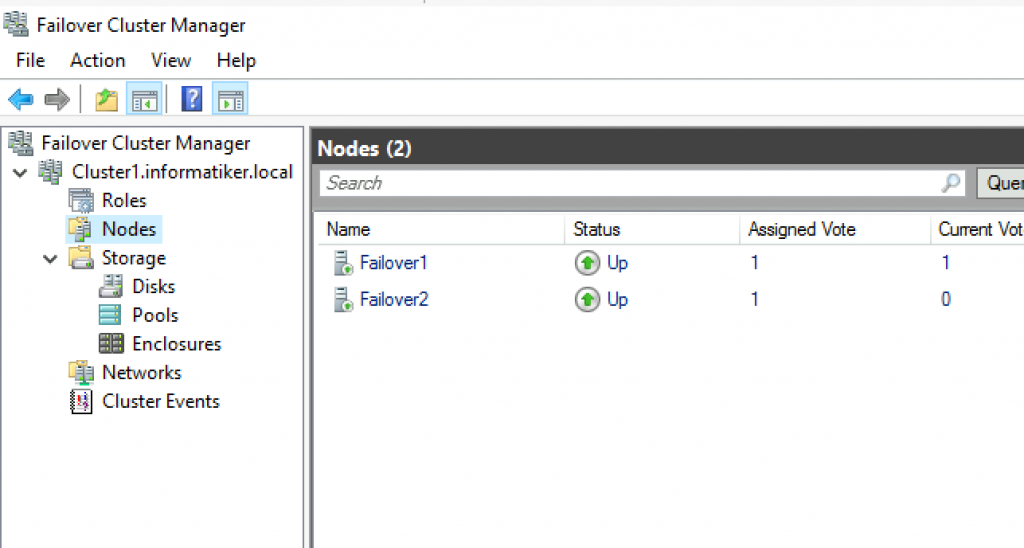
Add Cluster Quorum Witness
Cluster Quorum Witness will enhance your Failover Cluster Availability. I will not go into detail about witness role, you can find many more details here – https://docs.microsoft.com/en-us/windows-server/failover-clustering/manage-cluster-quorum
In our scenario, we will add File Share as Witness. since we have only two nodes, witness and one node will always have to be up, for cluster to be valid. So, make sure you plan you outages and patching so that you always have two nodes up.
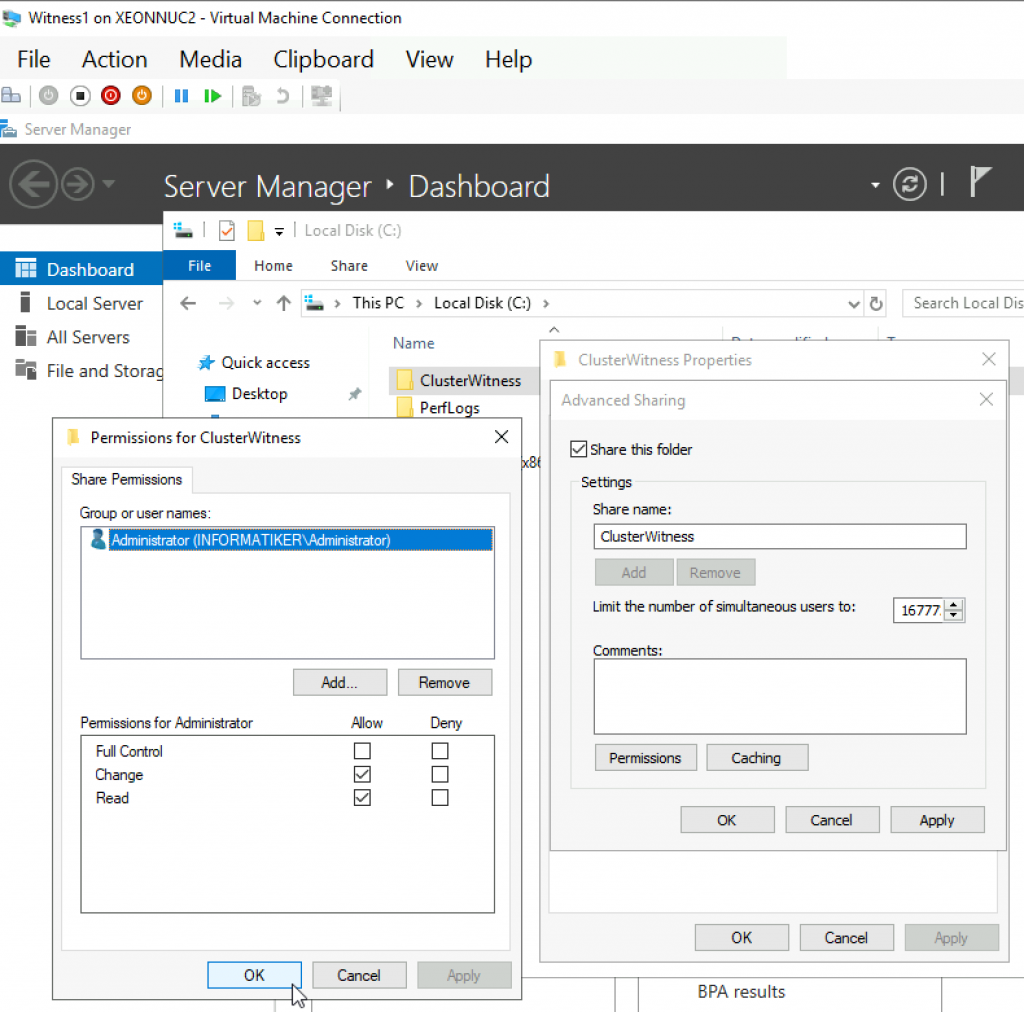
On Witness1 machine, I added folder named ClusterWitness and shared it. In the screenshot below – three things are MISSING – you should also add Failover1, Failover2 and Cluster1 computers to this fileshare with full rights. Also, visit security tab of the shared folder and repeat procedure there!!
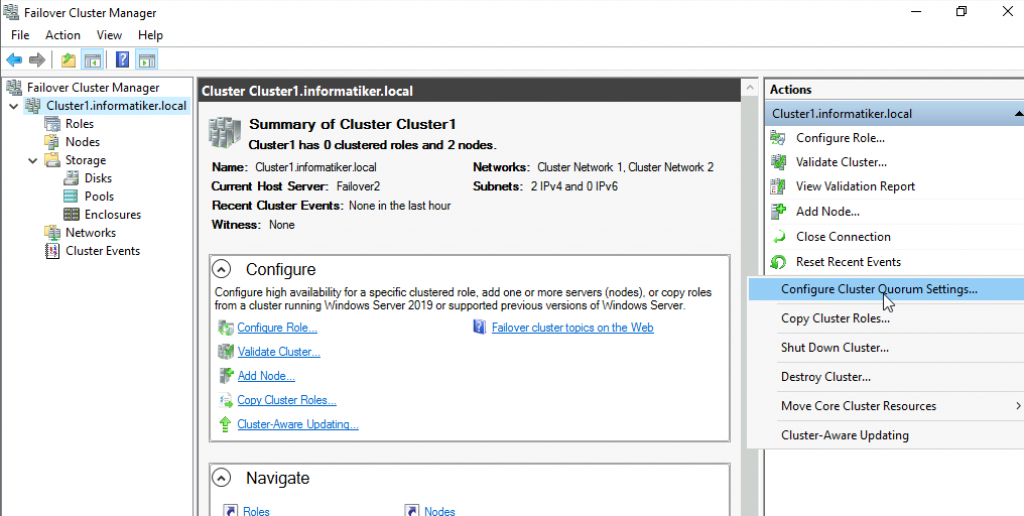
Back to Failover1 node – Open Failover Cluster Manager | select Actions | More Actions | Configure Cluster Quorum Settings
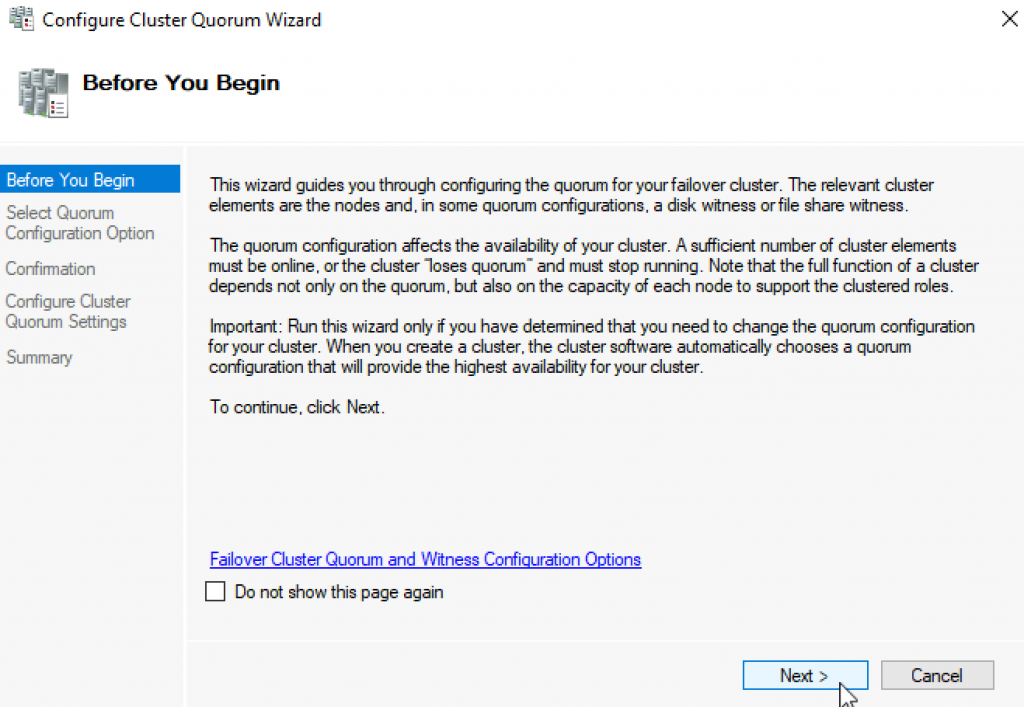
Next
Select the quorum witness | Next
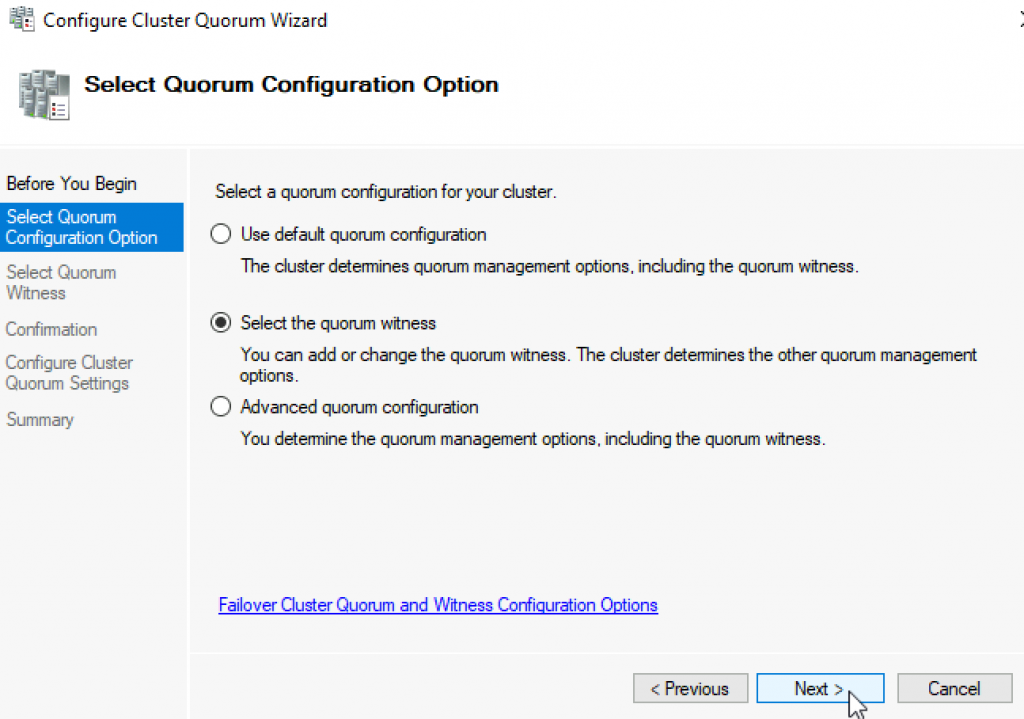
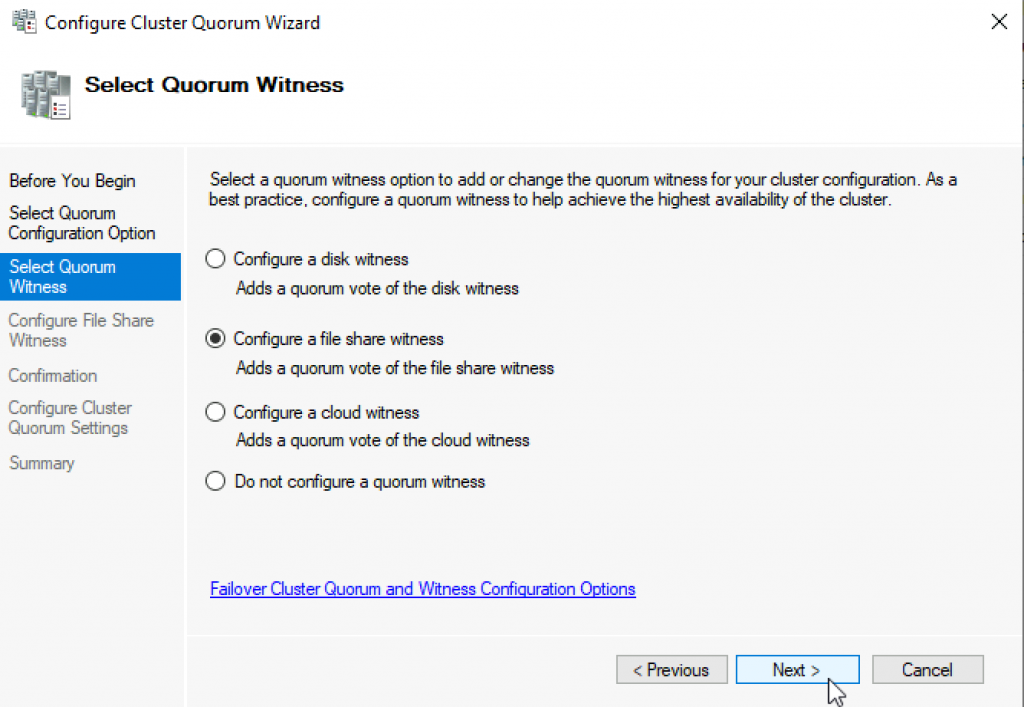
You have many options, today we will select “Configure a file share witness” Next
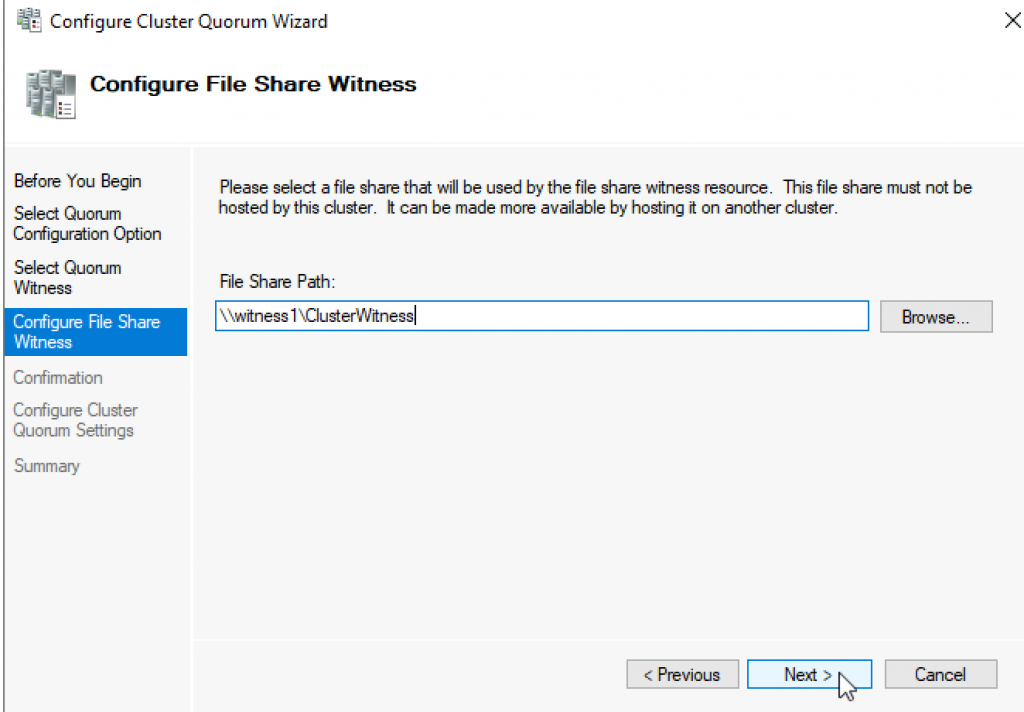
Enter FQDN to your file share on witness1. In my case it is \witness1\ClusterWitness | Next
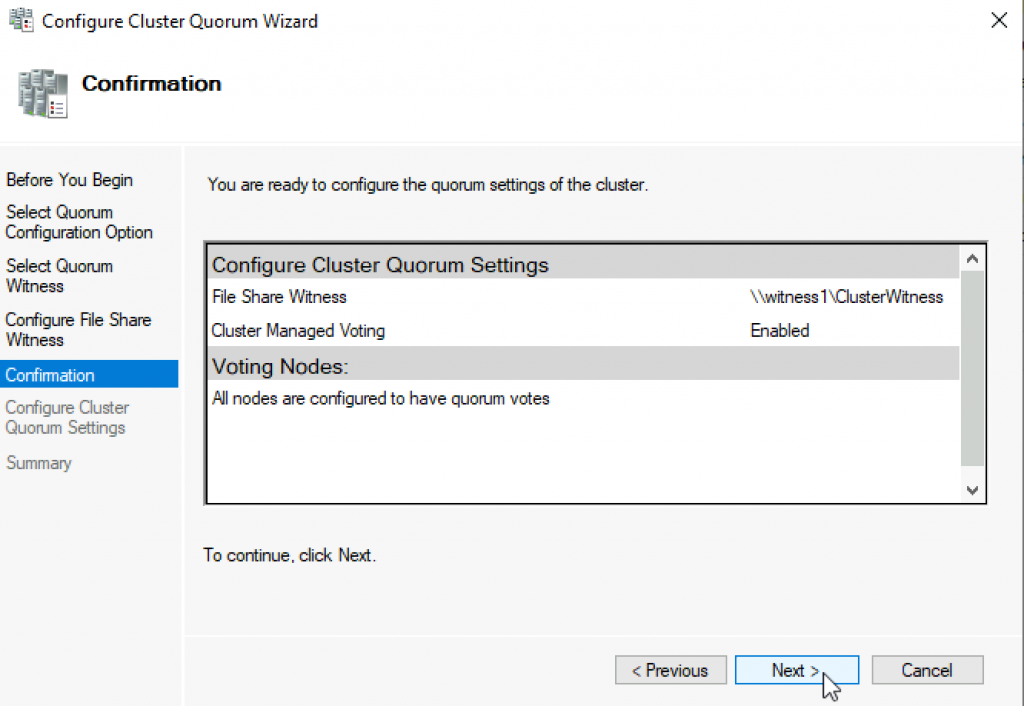
Review and click Next
Success! Finish
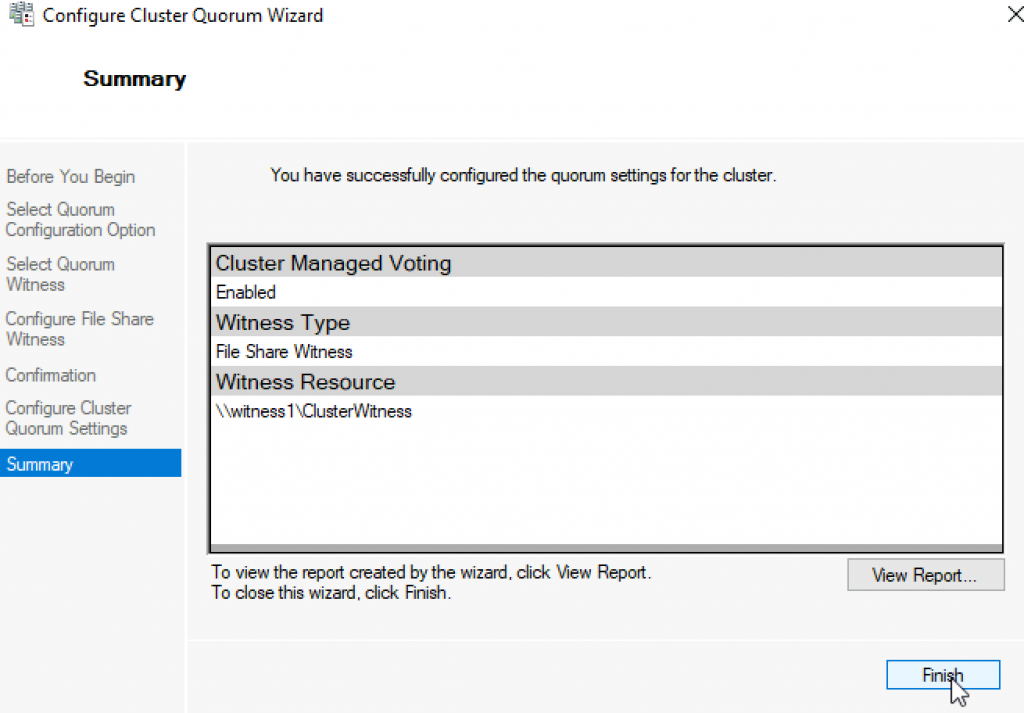
Now, we can see in Failover Cluster Manager that Witness is available.
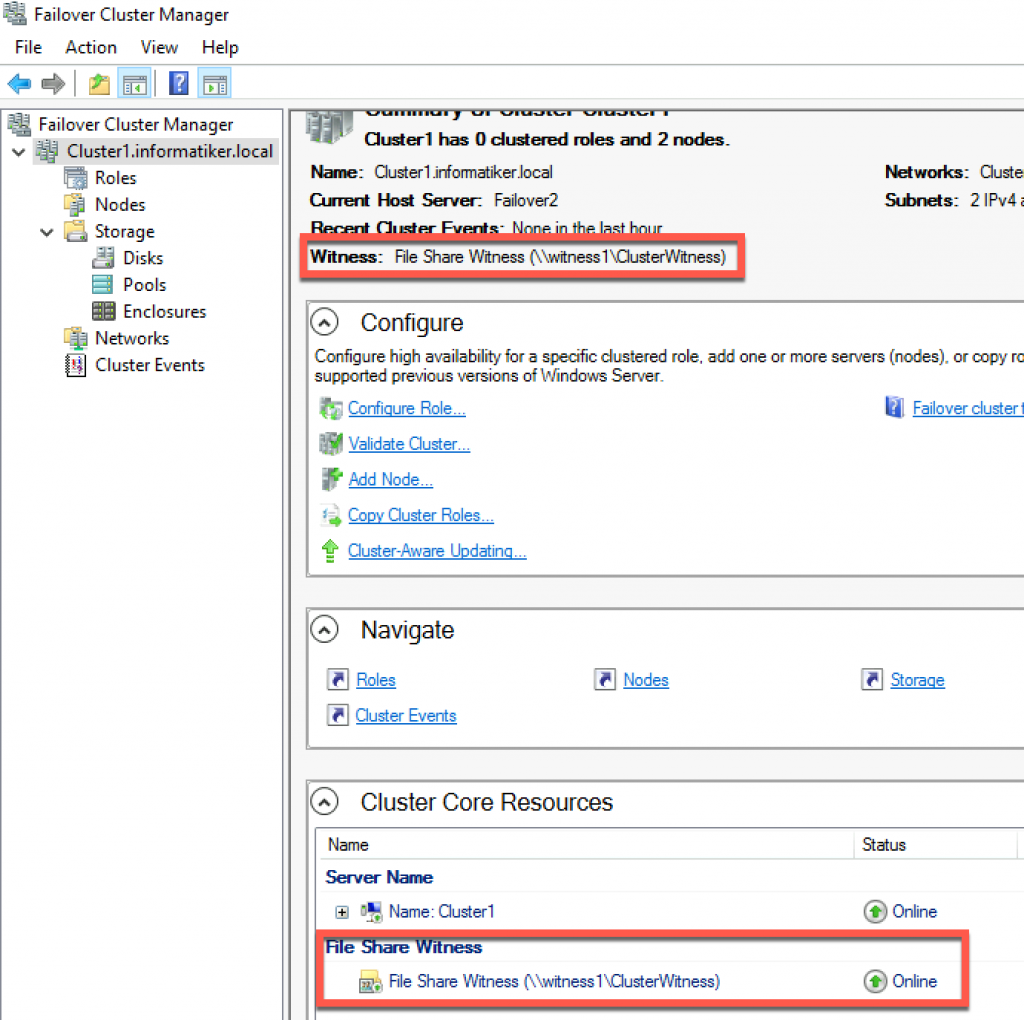
That is it, we covered the basics and we can now start deploying various services in our clustered scenario.
Disclaimer
Problem
I want to upgrade and migrate my SQL Server failover clusters to SQL Server 2022 running on Windows Server 2022. What is the process for building a Windows Server 2022 Failover Cluster step by step for SQL Server 2022?
Solution
Windows Server 2022, Microsoft’s latest version of its server operating system, has been branded as a “cloud ready” operating system. There are many features introduced in this version that make working with Microsoft Azure a seamless experience, specifically the Azure Extended Network feature. For decades, Windows Server Failover Clustering (WSFC) has become the platform of choice for providing high availability for SQL Server workloads – both for failover clustered instances and Availability Groups.
Listed below are two Windows Server 2022 failover clustering features that I feel are relevant to SQL Server. This is in addition to the features introduced in previous versions of Windows Server. And while there are many features added to Windows Server 2022 Failover Clustering, not all of them are designed with SQL Server in mind.
Clustering Affinity and AntiAffinity
Affinity is a failover clustering rule that establishes a relationship between two or more roles (or resource groups) to keep them together in the same node. AntiAffinity is the opposite, a rule that would keep two or more roles/resource groups in different nodes. While this mostly applies to virtual machines running on a WSFC, particularly VM guest clusters, this has been a long-awaited feature request for SQL Server failover clustered instances (FCI) that take advantage of the Distributed Transaction Coordinator (DTC). In the past, workarounds such as a SQL Server Agent job that moves the clustered DTC in the same node as the FCI were implemented to achieve this goal. Now, it’s a built-in feature.
AutoSites
This feature takes advantage of Active Directory sites and applies to multi-data center, stretched WSFCs. When configuring a WSFC, the setup process will check if an Active Directory site exists for the IP-subnet that the nodes belong to. If there is an existing Active Directory site, the WSFC will automatically create site fault domains and assign the nodes accordingly. If no Active Directory sites exist, the IP-subnets will be evaluated, and, similar to when Active Directory sites exist, site fault domains will be created based on the IP-subnet. While this is a great feature for local high availability and disaster recovery before SQL Server 2016, I no longer recommend a stretched WSFC for SQL Server. There are too many external dependencies that can impact local high availability.
In this series of tips, you will install a SQL Server 2022 failover clustered instance on a Windows Server 2022 failover cluster the traditional way – with Active Directory-joined servers and shared storage. Configuring TCP/IP and joining the servers to your Active Directory domain is beyond the scope of this tip. Consult your systems administrators on how to perform these tasks. It is assumed that the servers that you will add to the WSFC are already joined to an Active Directory domain and that the domain user account that you will use to perform the installation and configuration has local Administrative privileges on all the servers.
Similar to the previous tip, you need to provision your shared storage depending on your requirement. Talk to your storage administrator regarding storage allocation for your SQL Server failover clustered instances. This tip assumes that the underlying shared storage has already been physically attached to all the WSFC nodes and that the hardware meets the requirements defined in the Failover Clustering Hardware Requirements and Storage Options. Managing shared storage requires an understanding of your specific storage product, which is outside the scope of this tip. Consult your storage vendor for more information.
The environment used in this tip is configured with four (4) iSCSI shared storage volumes – SQL_DISK_R, SQL_DISK_S, and SQL_DISK_T allocated for the SQL Server databases and WITNESS for the witness disk.

NOTE: Don’t be alarmed if the WITNESS disk does not have a drive letter. It is not necessary. This frees up another drive letter for use with volumes dedicated to SQL Server databases. It also prevents you from messing around with it. I mean, you won’t be able to do anything with it if you cannot see it in Windows Explorer.
The goal here is to provide shared storage both for capacity and performance. Perform the necessary storage stress tests to make sure that you are getting the appropriate amount of IOPS as promised by your storage vendor. You can use the DiskSpd utility for this purpose.
Adding the Failover Clustering Feature
Before you can create a failover cluster, you must install the Failover Clustering feature on all servers that you want to join in the WSFC. The Failover Clustering feature is not enabled by default.
Add the Failover Clustering feature using the following steps.
Step 1
Open the Server Manager Dashboard and click the Add roles and features link. This will run the Add Roles and Features Wizard.

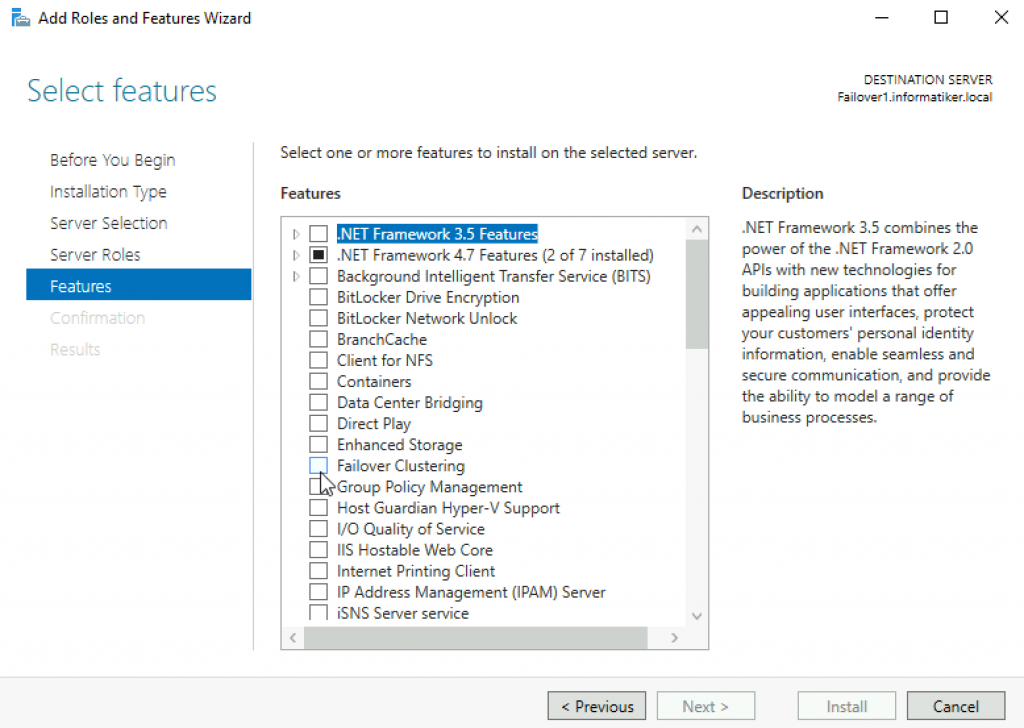
Step 2
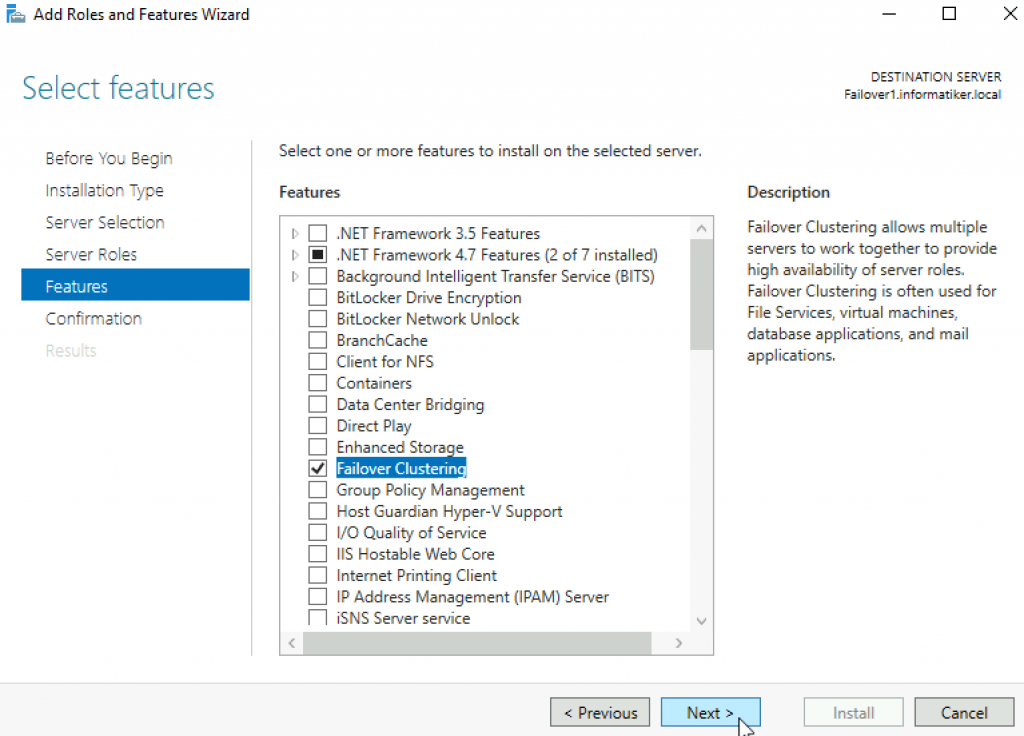
Click through the different dialog boxes until you reach the Select features dialog box. In the Select features dialog box, select the Failover Clustering checkbox.

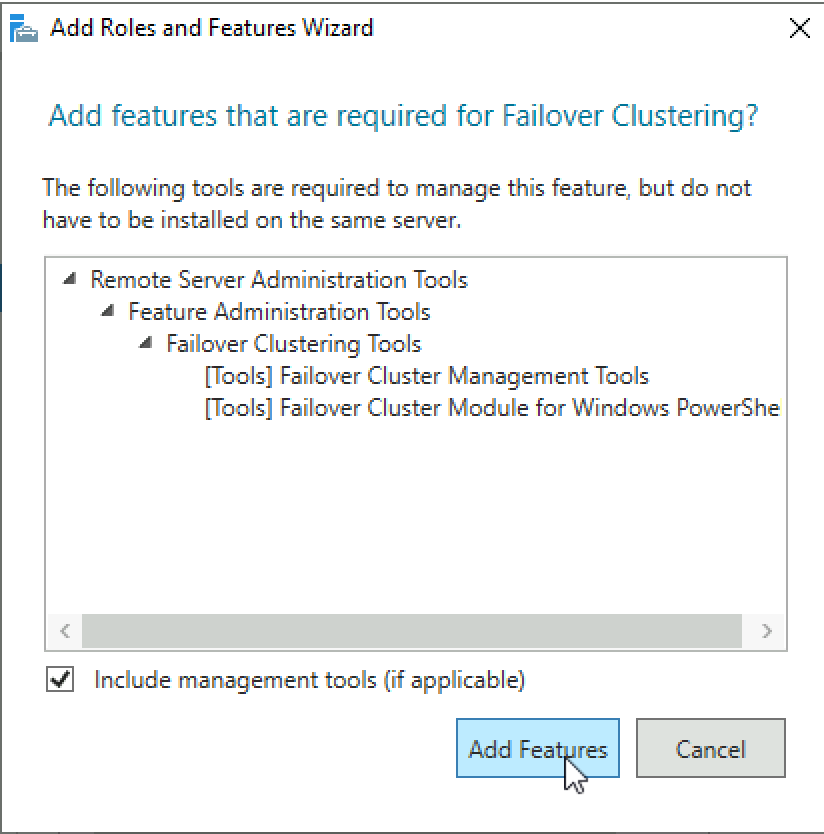
When prompted with the Add features that are required for Failover Clustering dialog box, click Add Features. Click Next.

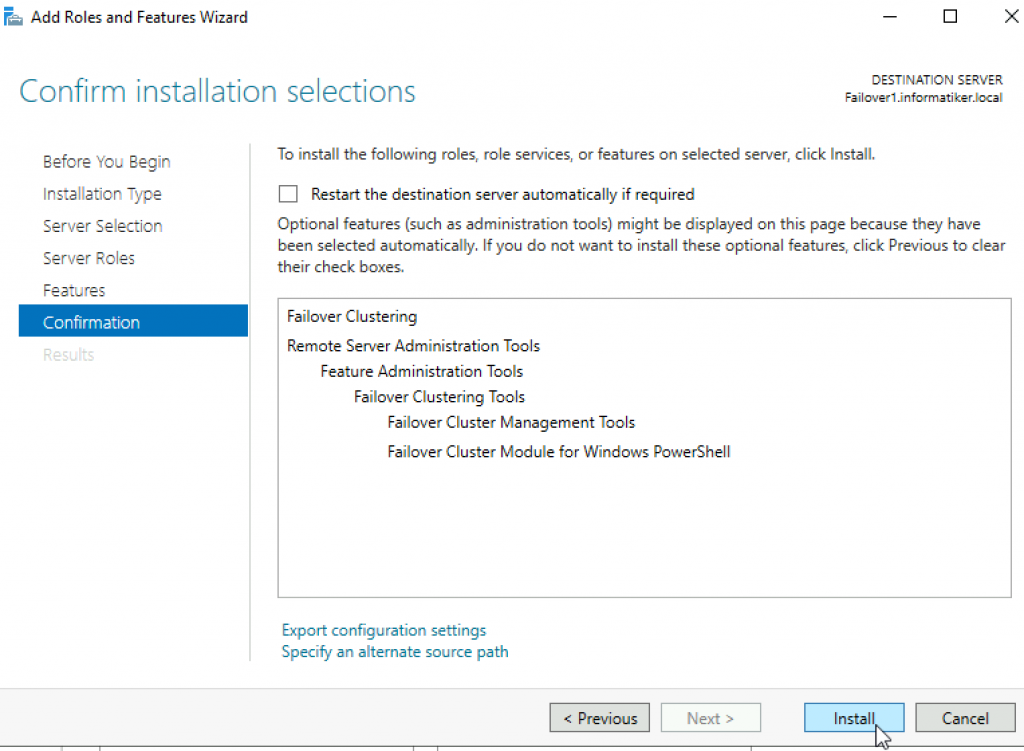
Step 3
In the Confirm installation selections dialog box, click Install to confirm the selection and proceed to do the installation. You may need to reboot the server after adding this feature.

Alternatively, you can run the PowerShell command below using the Install-WindowsFeature PowerShell cmdlet to install the Failover Clustering feature.
Install-WindowsFeature -Name Failover-Clustering -IncludeManagementToolsNOTE: Perform these steps on all the servers you intend to join in your WSFC before proceeding to the next section.
Running the Failover Cluster Validation Wizard
Next, you need to run the Failover Cluster Validation Wizard from the Failover Cluster Management console. You can launch the tool from the Server Manager dashboard, under Tools, and select Failover Cluster Manager.

NOTE: These steps can be performed on any servers that will serve as nodes in your WSFC.
Step 1
In the Failover Cluster Management console, under the Management section, click the Validate Configuration link. This will run the Validate a Configuration Wizard.

Step 2
In the Select Servers or a Cluster dialog box, enter the hostnames of the servers that you want to add as nodes in your WSFC. Click Next.

Step 3
In the Testing Options dialog box, accept the default option, Run all tests (recommended), and click Next. This will run all the necessary tests to validate whether the nodes are OK for the WSFC.

Step 4
In the Confirmation dialog box, click Next. This will run all the necessary validation tests.

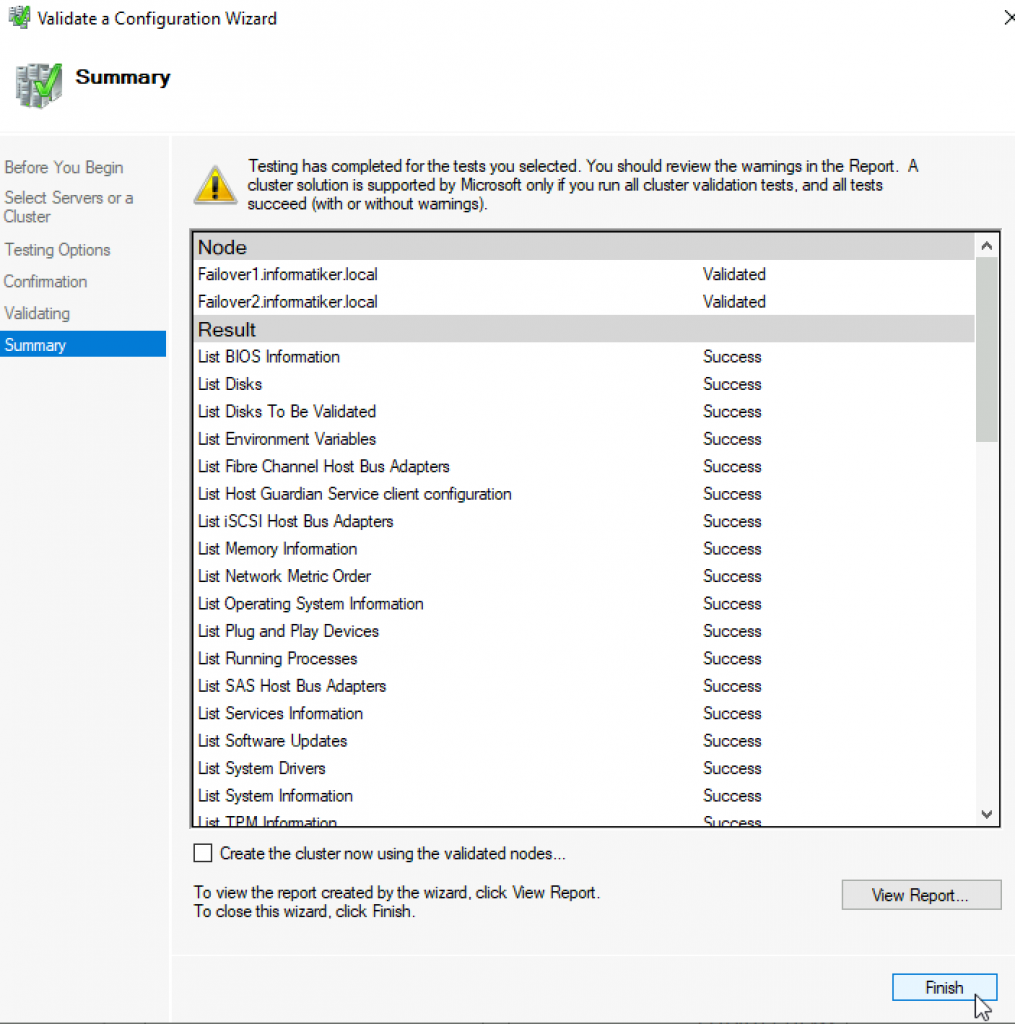
Step 5
In the Summary dialog box, verify that all the selected checks return successful results. Click the View Report button to open the Failover Cluster Validation Report.

A note on the results: The icons in the Summary dialog box can be confusing. In the past, the Cluster Validation Wizard may report Warning messages pertaining to network and disk configuration issues, missing security updates, incompatible drivers, etc. The general recommendation has always been to resolve all errors and issues that the Cluster Validation Wizard reports before proceeding with the next steps. And it still is.
With Windows Server 2016 and later, the Cluster Validation Wizard checks for Storage Spaces Direct. Despite choosing the Run all tests (recommended) option, the Cluster Validation Wizard will exclude those checks.

Hence, why you will get a Warning message in the cluster validation report despite having all selected default checks return successful results. Having both the Warning (yellow triangle with an exclamation mark) and Successful (green check mark) icons in the same result is confusing indeed. It is what it is.

Another issue that you might encounter involves the warnings regarding signed drivers and software update levels.


You can resolve the warning regarding signed drivers for the Microsoft Remote Display Adapter using the latest Windows Server 2022 installation media or downloading the latest updates from the Windows Update Center. Using the Windows Update Center to download the latest updates also resolves the warning on the software update levels. This assumes that your servers can access the internet. Work with your network administrators on enabling internet access to your servers.
Step 6
To create the WSFC using the servers you’ve just validated, select the Create the cluster now using the validated nodes… checkbox and click Finish.
Alternatively, run the PowerShell command below using the Test-Cluster PowerShell cmdlet to run Failover Cluster Validation.
Test-Cluster -Node TDPRD081, TDPRD082Creating the Windows Server 2022 Failover Cluster (WSFC)
After validating the servers, create the WSFC using the Failover Cluster Manager console. You can launch the tool from the Server Manager dashboard, under Tools, and select Failover Cluster Manager. Alternatively, you can run the Create Cluster Wizard immediately after running the Failover Cluster Validation Wizard. Be sure to check the Create the cluster now using the validated nodes… checkbox.

NOTE: Perform these steps on any servers that will serve as nodes in your WSFC.
Step 1
Within the Failover Cluster Manager console, under the Management section, click the Create Cluster… link. This will run the Create Cluster Wizard.

Step 2
In the Select Servers dialog box, enter the hostnames of the servers that you want to add as nodes of your WSFC. Click Next.

Step 3
In the Access Point for Administering the Cluster dialog box, enter the virtual hostname and IP address you will use to administer the WSFC. Click Next. Note that because the servers are within the same network subnet, only one virtual IP address is needed. This is a typical configuration for local high availability.

Step 4
In the Confirmation dialog box, click Next. This will configure Failover Clustering on both servers that will act as nodes in your WSFC, add the configured shared storage, and add Active Directory and DNS entries for the WSFC virtual server name.

A word of caution before proceeding: Before clicking Next, be sure to coordinate with your Active Directory domain administrators on the appropriate permissions you need to create the computer name object in Active Directory. It will save you a lot of time and headaches troubleshooting if you cannot create a WSFC. Local Administrator permission on the servers that you will use as nodes in your WSFC is not enough. Your Active Directory domain account needs the following permissions in the Computers Organizational Unit. By default, this is where the computer name object that represents the virtual hostname for your WSFC will be created.
- Create Computer objects
- Read All Properties
For additional information, refer to Configuring cluster accounts in Active Directory.
In a more restrictive environment where your Active Directory domain administrators are not allowed to grant you those permissions, you can request them to pre-stage the computer name object in Active Directory. Provide the Steps for prestaging the cluster name account documentation to your Active Directory domain administrators.
Step 5
In the Summary dialog box, verify that the report returns successful results. Click Finish.

Step 6
Verify that the quorum configuration is using Node and Disk Majority – Witness: Cluster Disk n, using the appropriate drive that you configured as the witness disk.

Alternatively, you can run the PowerShell command below using the New-Cluster PowerShell cmdlet to create a new WSFC.
New-Cluster -Name TDPRD080 -Node TDPRD081, TDPRD082 -StaticAddress 172.16.0.80As a best practice, you should rename your shared storage resources before installing SQL Server 2022. This makes it easy to identify what the disks are used for – data, log, backups, etc. – during the installation and later when troubleshooting availability issues. And while you may have renamed the disks using the Disk Management console, you still have to rename them from the point-of-view of the WSFC. The default names of the shared storage will be Cluster Disk n, where n is the number assigned to the disks.

Step 1
Within the Failover Cluster Manager console, under the Storage navigation option, select Disks. This will display all of the shared storage resources added to the WSFC.

Step 2
Right-click one of the shared disks and select Properties. This will open the Properties page for that specific disk.

Step 3
In the Properties page, on the General tab, type the appropriate name for the shared disk in the Name textbox. Click OK.
Do this on all of the shared storage resources available on your WSFC. Make sure the names of the shared disks in the WSFC reflect those you assigned using the Disk Management console.

PowerShell Alternative
Alternatively, you can use the PowerShell script below to identify the clustered disks and their corresponding disk properties. The DiskGuid property of the cluster disk is used to identify the Path property of the physical disk. The Path property of the physical disk is used to identify the DiskPath and DriveLetter properties of the logical partition. The DriveLetter property of the logical partition is used to identify the FileSystemLabel property of the disk volume.
ForEach ($a in (Get-ClusterResource | Where {$_.ResourceType -eq "Physical Disk"} | Get-ClusterParameter -Name DiskGuid))
{
$ClusterDiskGuid=$a.Value.ToString()
$Disk=Get-Disk | where {$_.Path -like "*$ClusterDiskGuid"} | Select DiskNumber, Path
$Partition=Get-Partition | where {$_.DiskPath -like $Disk.Path} | Select DriveLetter, DiskPath
$Volume=Get-Volume | where {$_.DriveLetter -eq $Partition.DriveLetter} | Select FileSystemLabel

"Cluster Disk Name: " + $a.ClusterObject + " , Disk Number: " + $Disk.DiskNumber + " , Drive Letter: " + $Partition.DriveLetter  + " , Volume Label: " + $Volume.FileSystemLabel
}
Once you’ve mapped the cluster disks with the corresponding physical disks, you can rename them accordingly using the sample PowerShell commands below, replacing the appropriate values. Note that the disk without the drive letter is the witness disk. Make sure that it is also renamed accordingly.
(Get-ClusterResource -Name "Cluster Disk 1").Name = "SQL_DISK_T"
(Get-ClusterResource -Name "Cluster Disk 2").Name = "WITNESS"
(Get-ClusterResource -Name "Cluster Disk 3").Name = "SQL_DISK_R"
(Get-ClusterResource -Name "Cluster Disk 4").Name = "SQL_DISK_S"
Renaming Cluster Network Resources
Similarly, you should rename your cluster network resources before installing SQL Server 2022. And while you may have renamed the network adapters using the Network Connections management console, you still have to rename them from the point-of-view of the WSFC. The default names of the cluster network resources will be Cluster Network n, where n is the number assigned to the cluster network adapter.

Step 1
Within the Failover Cluster Manager console, select the Networks navigation option. This will display all the cluster network resources added to the WSFC.

Step 2
Right-click one of the cluster network adapters and select Properties. This will open the Properties page for that specific cluster network resource.

Step 3
In the Properties page, type the appropriate name for the cluster network resource in the Name textbox. Click OK.
NOTE: The WSFC will automatically detect whether client applications can connect through the specific cluster network resource. This is determined by whether a network adapter has a default gateway and can be identified via network discovery. Thus, it is important to get your network administrators involved in properly assigning the IP address, the subnet mask, and the default gateway values of all the network adapters used on the WSFC nodes before creating the WSFC. An example of this is the network adapter configured for inter-node communication.
Other network adapters also need to be appropriately configured. The network adapter used for iSCSI in the example cluster has the Do not allow cluster network communication on this network option selected.
Update Cluster Network Resources
Do this on all the cluster network resources available on your WSFC.

All available network adapters will be used for inter-node communication, including the network adapter you configure for production network traffic. How the WSFC prioritizes which network adapter is used for private/heartbeat communication traffic is determined by using the cluster network adapter’s Metric property value. You can identify the cluster network adapter’s Metric property value by running the PowerShell command below.
Get-ClusterNetwork | Sort Metric
The cluster network adapter with the lowest Metric property value will be used for private/heartbeat communication (and cluster shared volume if configured). In the example provided, the Heartbeat cluster network adapter will be used for inter-node communication. And since the LAN cluster network adapter has a Role property value of ClusterAndClient, the WSFC will use it if the Heartbeat cluster network adapter becomes unavailable. This is described in more detail in the Configuring Network Prioritization on a Failover Cluster blog post from Microsoft.
PowerShell Alternative
Alternatively, you can use the sample PowerShell script below to identify the clustered network resources and rename them accordingly.
#Display all cluster network resources
Get-ClusterNetworkInterface

#Rename cluster network resources accordingly based on the results of Get-ClusterNetworkInterface
(Get-ClusterNetwork –Name "Cluster Network 1").Name = "LAN"
(Get-ClusterNetwork –Name "Cluster Network 2").Name = "Heartbeat"
(Get-ClusterNetwork –Name "Cluster Network 3").Name = "iSCSI1"
(Get-ClusterNetwork –Name "Cluster Network 4").Name = "iSCSI2"
Congratulations! You now have a working Windows Server 2022 failover cluster. Proceed to validate whether your WSFC is working or not. A simple test to do would be a continuous PING test on the virtual hostname or IP address that you have assigned to your WSFC. Reboot one of the nodes and see how your PING test responds. At this point, you are now ready to install SQL Server 2022.
Summary
In this tip, you’ve:
- Seen some of the new Windows Server 2022 failover clustering features that are relevant to SQL Server workloads,
- Had an idea of how to provision shared storage for your WSFC,
- Added the Failover Clustering feature on all the servers that you intend to join in a WSFC,
- Ran the Failover Cluster Validation Wizard and resolved potential issues before creating the failover cluster,
- Seen how the validation checks for Storage Spaces Direct that can cause a Warning message when running the Failover Cluster Validation Wizard,
- Created the WSFC,
- Renamed the shared storage resources,
- Renamed the cluster network resources, and
- Viewed network prioritization for cluster network adapters.
In the next tip in this series, you will go through the process of installing a SQL Server 2022 failover clustered instance on your WSFC.
Next Steps
- Review the previous tips on Install SQL Server 2008 on a Windows Server 2008 Cluster Part 1, Part 2, Part 3, and Part 4 to see the difference in the setup experience between a SQL Server 2008 FCI on Windows Server 2008 and a SQL Server 2022 FCI on Windows Server 2022.
- Read more on the following topics:
- Installing, Configuring and Managing Windows Server Failover Cluster using PowerShell Part 1
- Validating a Windows Cluster Prior to Installing SQL Server 2014
- New features of Windows Server 2022 Failover Clustering
В версиях Windows Server, предшествующих Windows Server 2016, создать отказоустойчивый кластер из нескольких серверов можно было только между серверами одного домена Active Directory. В новой версии теперь можно создавать двух (и более) узловой failover кластер между серверами в разных доменах, и даже между серверами рабочей группы (вообще без домена Active Directory).
Естественно, что на всех узлах кластера нужно устаровить Windows Server 2016. Поддерживаются следующие сценарии кластеризации:
| Служба | Статус | Комментарий |
| SQL server | Поддерживается | Рекомендуется использовать встроенную аутентификацию SQL Server |
| Файловый сервер | Поддерживается, но не рекомендуется | Не поддерживается Kerberos-аутентфикация для SMB |
| Hyper-V | Поддерживается, но не рекомендуется | Не поддерживается режим Live Migration, доступна только Quick migration |
| Message Queuing (MSMQ) | Не поддерживается | MSMQ хранит свои свойства в Active Directory. |
На всех будущих узлах кластера нужно
- Установить роль Failover Clustering:
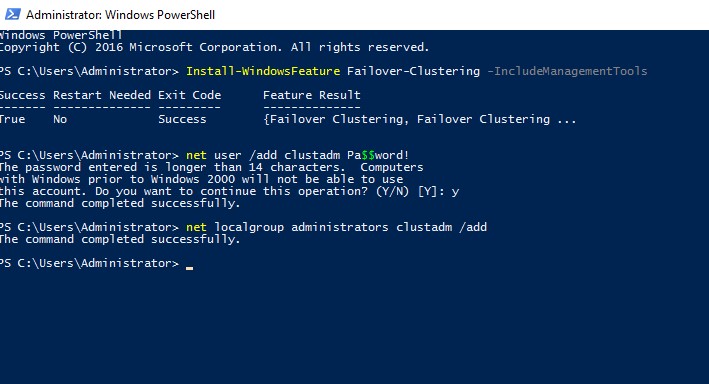
Install-WindowsFeature Failover-Clustering –IncludeManagementTools - На каждой кластерной ноде нужно создать локальную учетную запись с правами администратора (или использовать встроенную учетку администратора) с одинаковыми паролями.
net user /add clustadm Pa$$word!
net localgroup administrators clustadm /add
- При появлении ошибки Requested Registry access is not allowed, необходимо изменить в реестре параметр удаленного UAC — Данный ключ разрешает удаленный доступ к административным шарам.
New-ItemProperty -Path HKLM:\SOFTWARE\Microsoft\Windows\CurrentVersion\Policies\System -Name LocalAccountTokenFilterPolicy -Value 1 - На всех узлах кластера нужно задать одинаковой первичный DNS суффикс (Primary DNS suffix). Это нужно для того, чтобы сервера кластера могли обращаться друг к другу по FQDN именам
- Также нужно снять галку Register DNS connection addresses
- В файл hosts на всех узлах кластера нужно внести изменения, чтобы сервера могли отрезолвить имена других членов кластера, а также имя кластера (в том числе FQDN имена). Добавить имена в файл c:\windows\system32\drivers\etc\hosts можно так:
Set file="%windir%\System32\drivers\etc\hosts"
echo 192.168.1.21 clust-host1 >> %file%
echo 192.168.1.21 clust-host1.mylocal.net >> %file%
echo 192.168.1.22 clust-host2 >>  %file%
echo 192.168.1.22 clust-host2.mylocal.net >> %file%
echo 192.168.1.20 cluster1 >> %file%
echo 192.168.1.20 cluster1.mylocal.net>> %file%

Для предварительной валидации узлов кластера можно воспользоваться командой:
test-cluster -node "clust-host1.mylocal.net"," clust-host2.mylocal.net"
Для создания кластера через PowerShell, нужно выполнить такую команду:
New-Cluster -Name cluster1 -Node clust-host1.mylocal.net, clust-host2.mylocal.net -AdministrativeAccessPoint DNS -StaticAddress 192.168.1.20
Теперь можно проверить статус кластера и его компонентов командлетами get-cluster и get-clusterresource.
Для подключения (и удаленного управления) кластером через GUI нужно воспользоваться оснасткой Failover Cluster Manager (входит в состав) RSAT для Windows 10.
Теперь с помощью пункта меню Connect to cluster можно подключаться к созданному кластеру. В том случае, если в кластере четное количество серверов, придется настроить ресурс-свидетель. Отметим, что в качестве кворумного свидетеля нельзя использовать сетевую папку SMB. Поддерживается режим Disk Witness — общий диск (с одновременным доступом к нему с обоих узлов), либо Cloud Witness — облачный дисковый ресурс в Azure.