
Большинство современных браузеров позволяют создать ссылку на сайт на рабочем столе или установить его «как приложение», что уже описывалось на сайте: для Windows, для Android и iPhone. Но работа этих вариантов зависит от наличия браузера, в котором это действие производилось и не позволяет перенести такое «приложение» куда-либо.
Nativefier — бесплатный инструмент, позволяющий сделать «нативное» приложение для Windows, MacOS или Linux с настраиваемыми параметрами, открывающее выбранный вами сайт, о нём и пойдёт речь далее.
Использование Nativefier
В зависимости от установленной ОС, шаги по установке Nativefier будут отличаться. В случае Windows, потребуется выполнить следующие шаги:
- Установить Node.js с официального сайта
- В командной строке ввести команду
npm install -g nativefier
и дождаться завершения установки.


Для других операционных систем:
- MacOS — потребуется установить Homebrew, после чего использовать команду
brew install nativefier
- В Linux (Debian) — две команды:
sudo apt install nodejs npm
npm install -g nativefier
После этого можно переходить к созданию приложения «из сайта». Заранее отмечу, что оно не будет включать самого содержимого сайта и для работы требуется доступ в Интернет.
Далее приводится пример для Windows:
- Запустите командную строку.
- Введите команду, которая в базовом варианте может выглядеть следующим образом:
nativefier "https://адрес_сайта.ком"
и нажмите Enter, дождитесь завершения создания приложения.
- Приложение по умолчанию будет создано в текущей папке командной строки (той, которая отображается слева от вводимых вами команд). На изображении — пример запущенного приложения:


Однако, такой вариант может быть не совсем подходящим и лучше использовать дополнительные параметры, например:
nativefier --name "remontka.pro" --portable --icon "C:\remontka.pro\1.ico " https://remontka.pro "C:\remontka.pro"

Этот вариант команды создаст портативное (можно переносить между компьютерами) приложение с именем remontka.pro, установленным вручную значком, которое будет открывать сайт remontka.pro, а само приложение будет сохранено в папке C:\remontka.pro. Последние два параметра определяют сайт и место сохранения приложения, перед ними идут параметры, определяющие его настройки.
Полный список доступных параметров, которые включают в себя включение или отключение показа меню, добавление собственных закладок в приложение, ограничение запуска одним экземпляром, внедрение своих CSS, запуск в трее или полноэкранном режиме и другие доступен на официальной странице.
Создаваемое приложение достаточно объёмное, поскольку работает на Electron и при создании первого будут дополнительно скачаны необходимые файлы. Последующее выполнение команд происходит очень быстро.
Большинству пользователей подобный инструмент вряд ли понадобится, но в некоторых случаях может быть полезным: например, для создания приложения из сайта компании для работы в режим киоска (терминала) Windows.
Не исключено, что кто-то найдёт и другие применения, в таком случае, будет отлично, если вы сможете поделиться ими в комментариях.
Quick Links
-
Turn a Website into an App Using Google Chrome
-
Create an App for a Website with Microsoft Edge
-
Create a Desktop Shortcut for Your Apps
-
How to Create a Taskbar Shortcut for Your Apps
-
How to Assign an Icon to Your Website Apps
-
How to Uninstall Website Apps
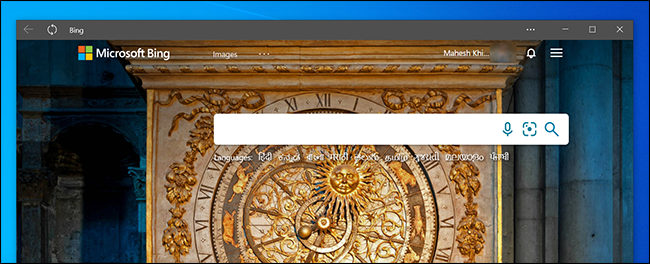
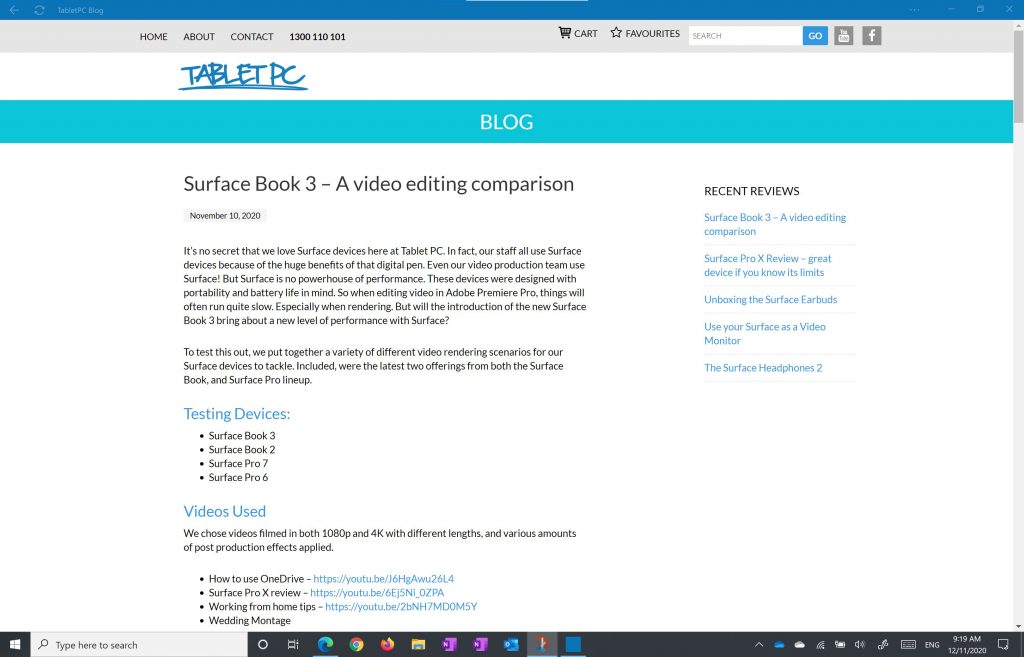
If you access certain websites regularly, you can turn them into native Windows 10 apps. This lets you use your sites as if they were normal apps. You can use Google Chrome or Microsoft Edge to create these apps, and we’ll show you how.
How Website Apps Work
Your website looks and works exactly the same in your app as it does in your web browser. The only difference you’ll see is that there won’t be any browser elements in your app window, such as the bookmarks bar, address bar, and other toolbar elements.
If you use Chrome, the website app will be using Chrome in the background. If you use Edge, the browser app will use Microsoft Edge. However, normal browser elements are stripped off so that you get the actual app-like experience. These web apps get their own separate windows, taskbar icons, and desktop shortcuts.
Turn a Website into an App Using Google Chrome
You can use Chrome’s main menu to turn any website into a Windows app.
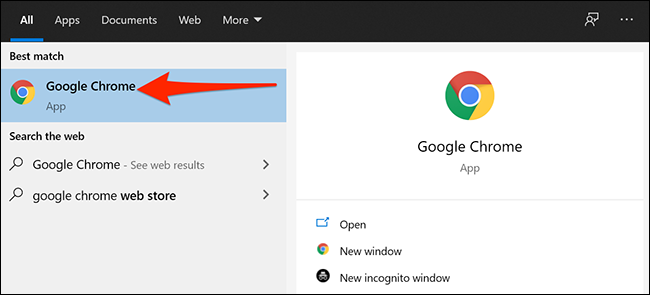
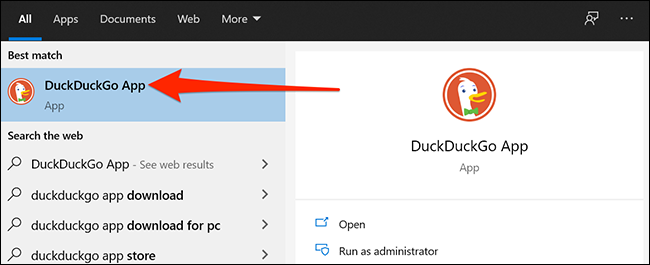
To start making your app, open the «Start» menu, search for «Google Chrome,» and click the browser in the results.
First, open any website that you want to turn into an app. Navigate to the specific web page that you want your app to start with.
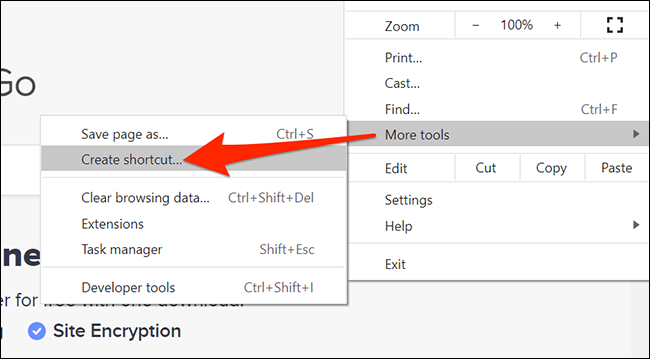
When the site has loaded, click the menu button (three dots) in the top-right corner of the window and select More Tools > Create Shortcut.
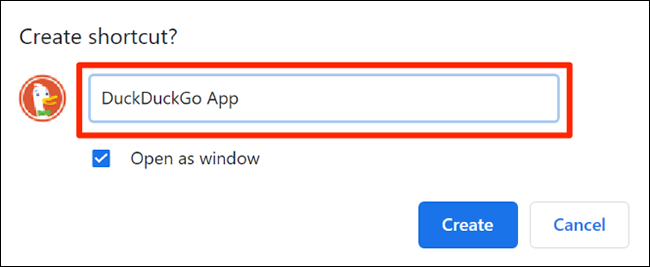
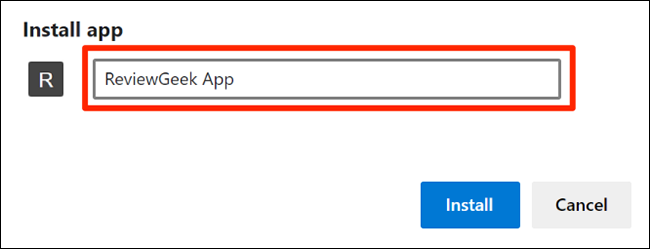
A prompt will appear asking for your new app name. Enter a name for your new app, enable the «Open as window» checkbox, and click «Create.»
Chrome will create the app for your site and add it to the Start menu. You can now search and launch your app using your PC’s Start menu.
Create an App for a Website with Microsoft Edge
You can also use Microsoft Edge to make a website into an app. This creates the exact same kind of app that Chrome does. After all, Microsoft Edge and Chrome are both based on the same underlying open-source Chromium code.
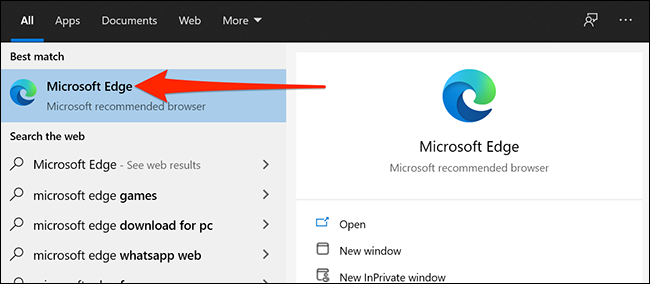
To create your app in this browser, launch the «Start» menu, search for «Microsoft Edge,» and click the browser.
Navigate to the website that you want to make an app for, then navigate to the specific page that you want to use for the app.
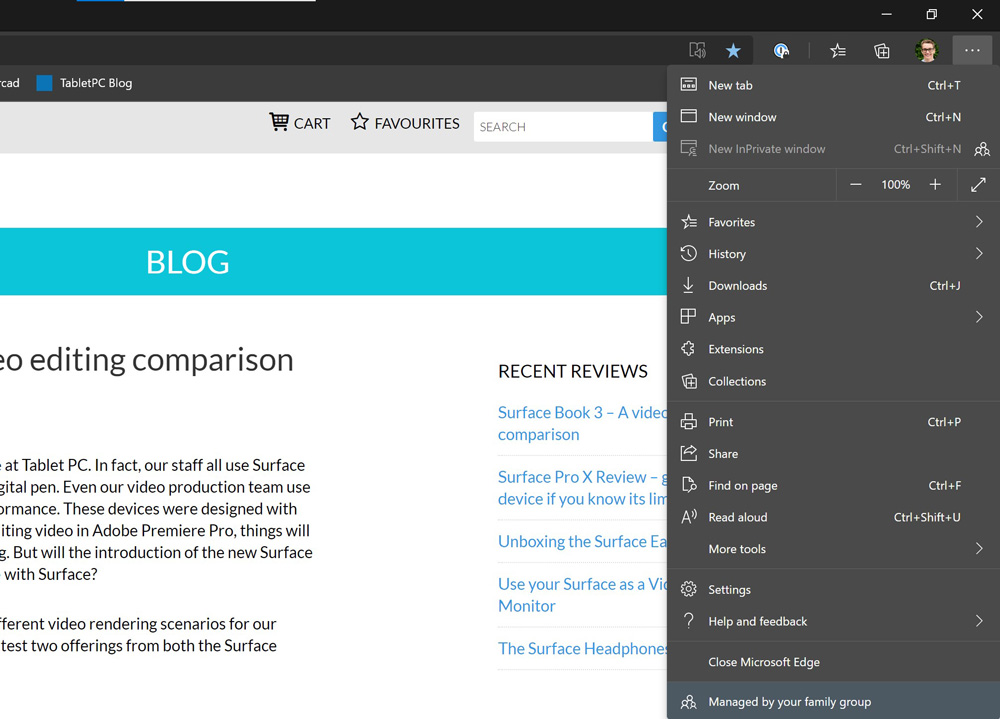
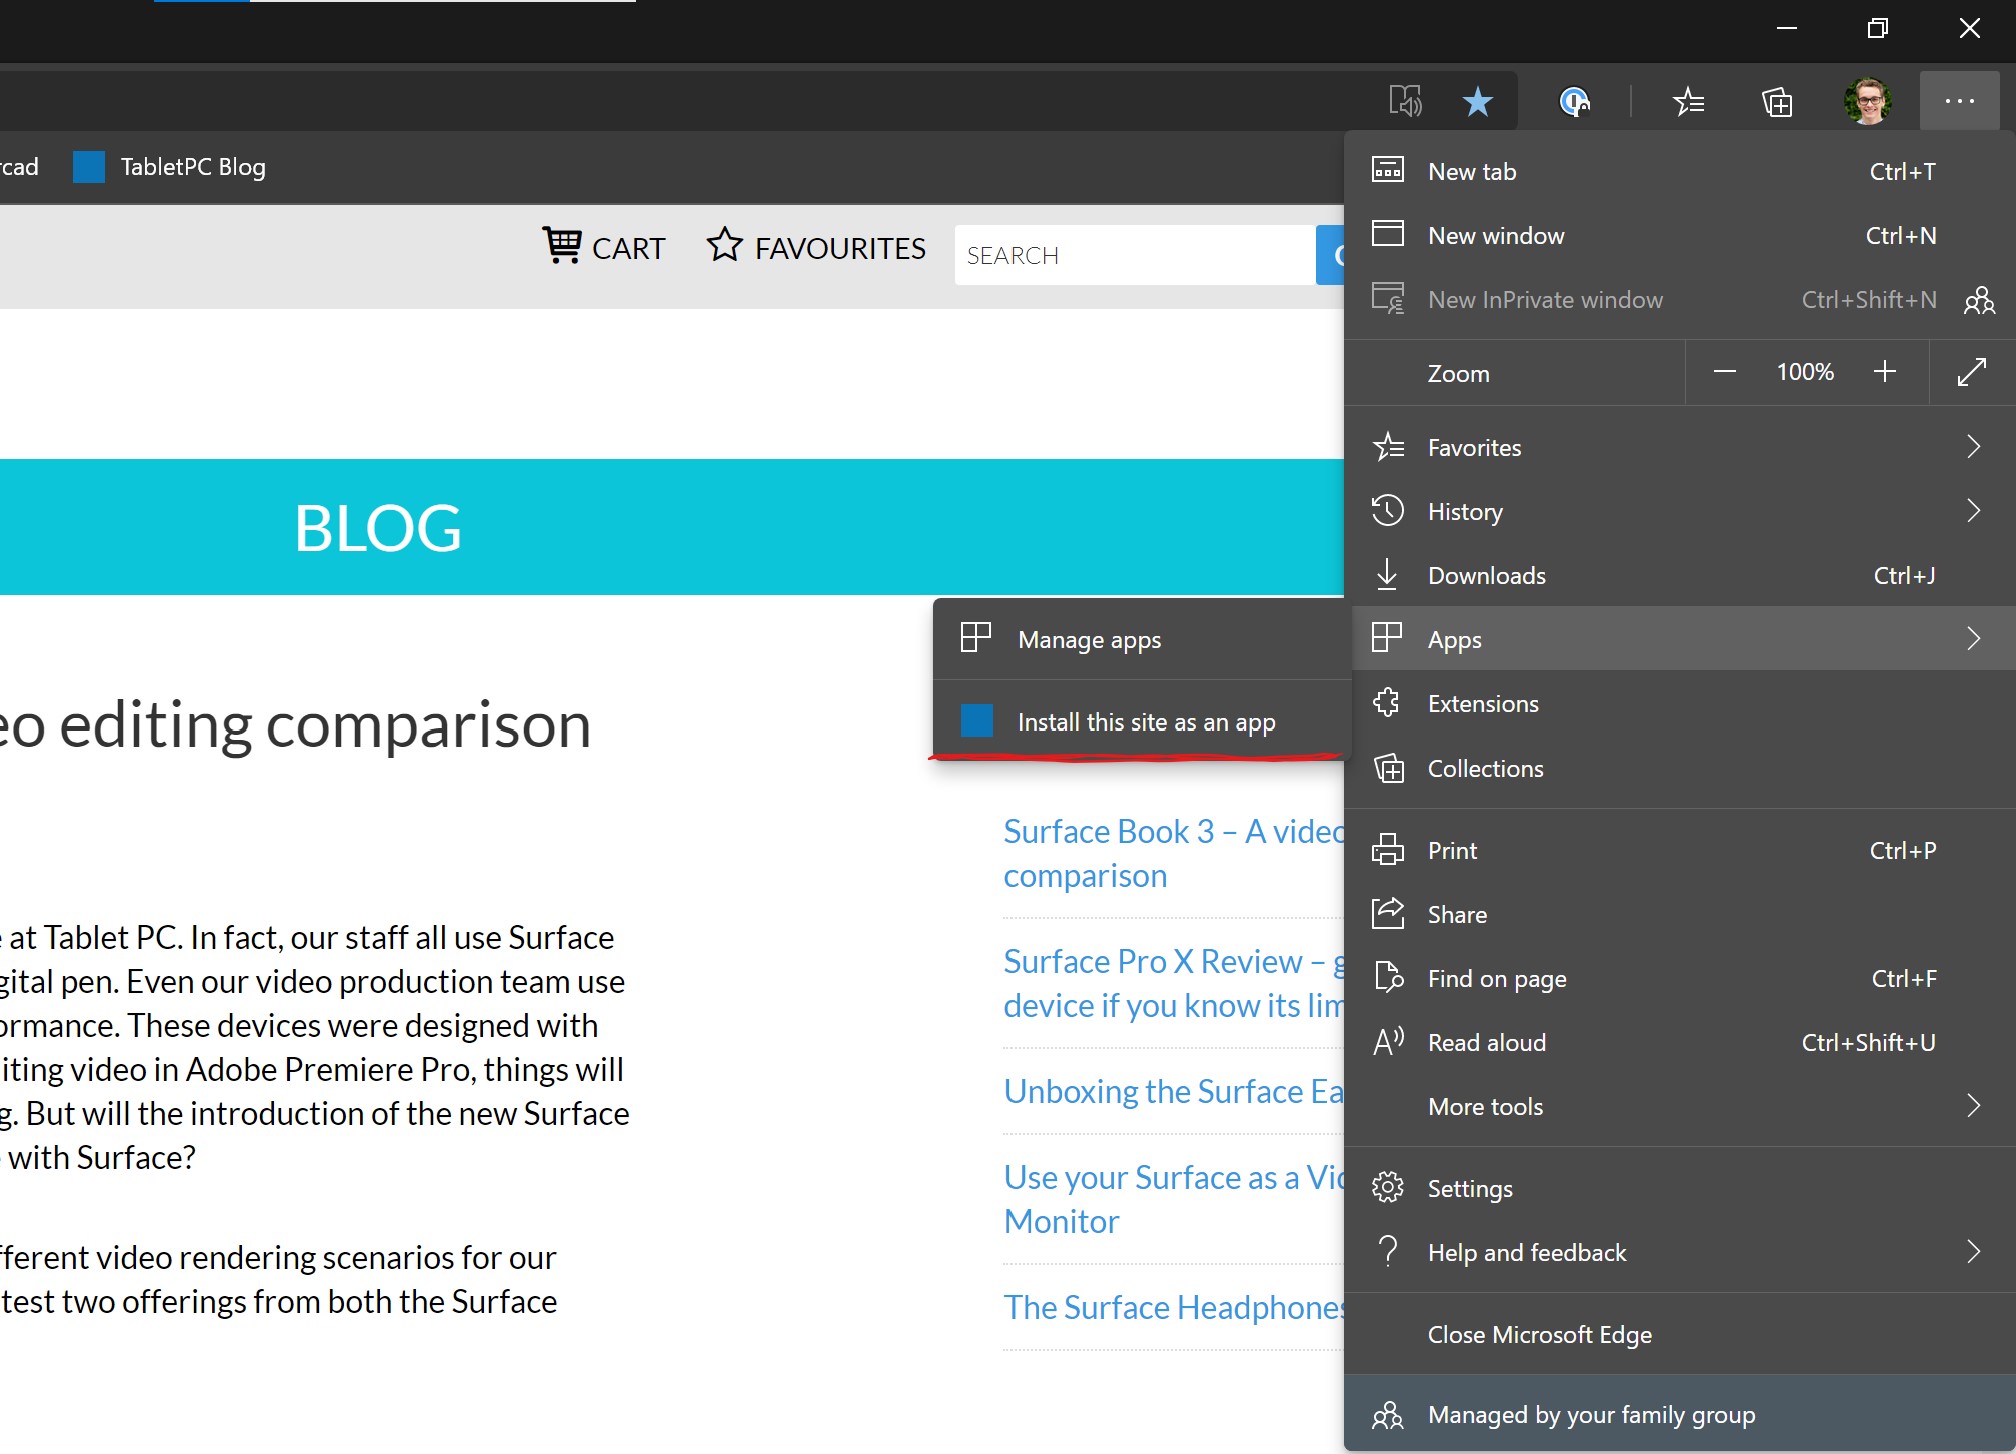
Now, click the menu button (three dots) in the top-right corner of the window and select Apps > Install this site as an app.

Type a name for your new app, then click «Install.»
You can now launch your newly created app from the Start menu.
Create a Desktop Shortcut for Your Apps
Your website apps will have their own shortcuts in your Start menu’s All Apps list. You can also create a desktop shortcut for your apps in order to quickly access them on your PC’s desktop, if you like.
If you used Chrome to make your apps, your desktop shortcuts are already created. But if you used Microsoft Edge, you’ll need to manually add shortcuts to your desktop.
To do this, open the «Start» menu and search for your newly created app. Right-click your app and select «Pin to Start.»
You need to do this because Windows doesn’t let you directly make a shortcut for this kind of app.

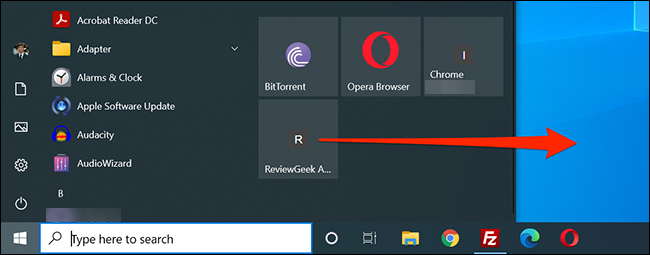
Open the «Start» menu again, and you’ll see your app on the right. Drag it over to your desktop and a shortcut for it will be created.
How to Create a Taskbar Shortcut for Your Apps
You can also make a taskbar shortcut for your website apps.
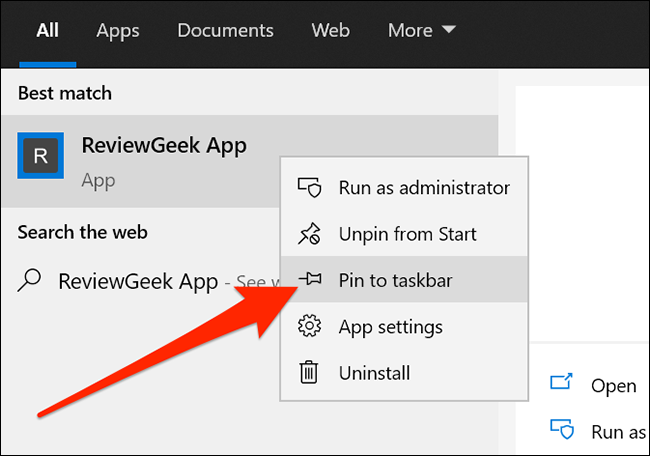
To do this, open the «Start» menu, search for your app, right-click your app, and select «Pin to taskbar.»
How to Assign an Icon to Your Website Apps
By default, Windows uses your website’s favicon as the icon for your app. You can change this icon if you want to give a little makeover to your new app.
You can use an icon file from your computer or one of Windows 10’s built-in icons for your new app.
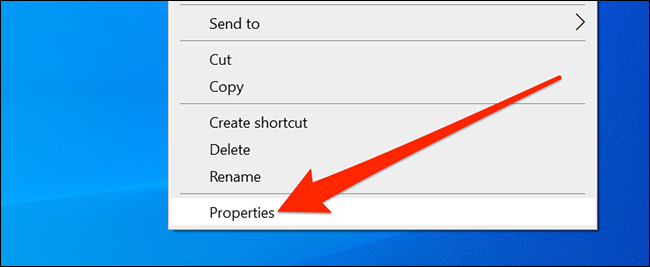
To change your app’s icon, right-click your app shortcut on your desktop and select «Properties.»
In the Properties box, click «Shortcut» at the top, and then click «Change Icon.»
Click «Browse» in the window that opens and select the icon that you want to use for your app.
If you want to use one of Windows 10’s stock icons, browse to the C:\Windows\System32 folder and double-click the «imageres.dll» file in this folder.
You’ll see a list of Windows 10’s built-in icons. Select the one that you want to use and click «OK.»
To save your settings, click «Apply» and then select «OK.»
How to Uninstall Website Apps
Like with other regular apps, you can uninstall a website app if you no longer plan to use it. This won’t affect your account with the website, and you’ll continue to be able to use the site from your web browser.
To begin removing your app, first, launch the app on your PC.
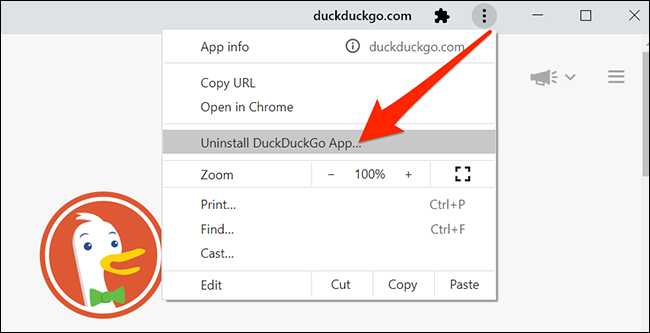
Click the three dots on the title bar at the top of the window and select «Uninstall.»
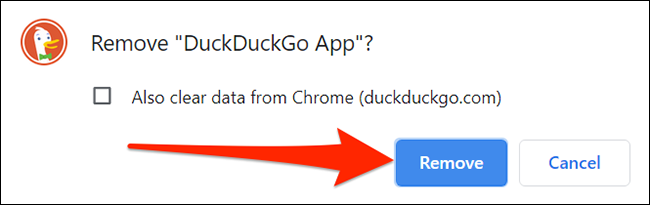
Click «Remove» in the prompt to remove the app.
Did you know that you can use this method to access Apple Notes on your Windows PC? This makes an app that works and feels just like the actual Notes app found on Apple’s iPhone, iPad, and Mac devices.

Хабровчане, привет!
В предыдущей статье мы с вами познакомились с шаблоном для создания универсальных веб-приложений – Web Application Template. Если кратко, то Web Application Template позволяет вам «превратить» сайт в приложение для Windows, Windows Phone или Android, добавив в него возможности интеграции с ОС и механизм распространения через магазин приложений.
Сегодня мы рассмотрим практический пример: как при помощи Web Application Template быстро и просто создать веб-приложение для Windows и Windows Phone на основе сайта habrahabr.ru.
Создание универсального веб-приложения для сайта Habrahabr.ru
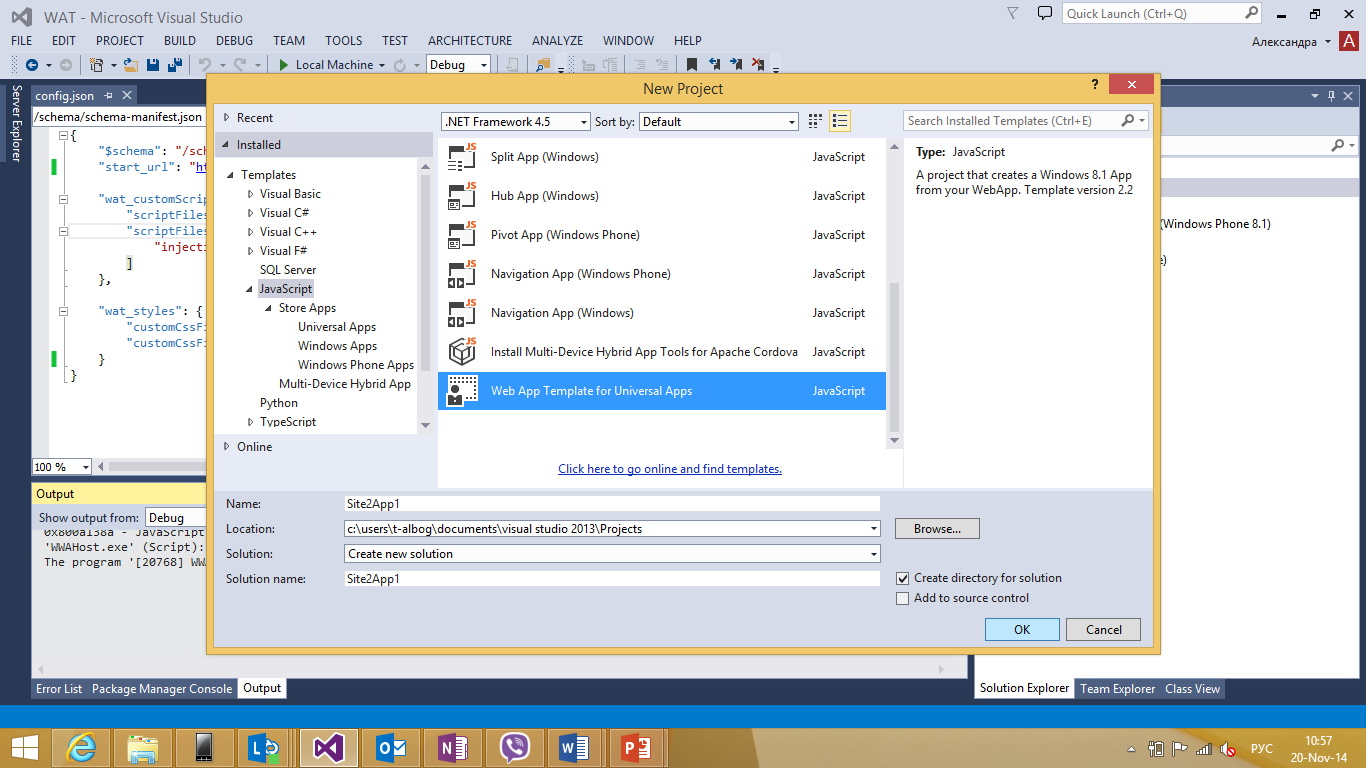
Для начала создадим в Visual Studio новый WAT проект. Напомню, он находится по пути: File> New > Project > Templates > JavaScript > Web App Template for Universal Apps
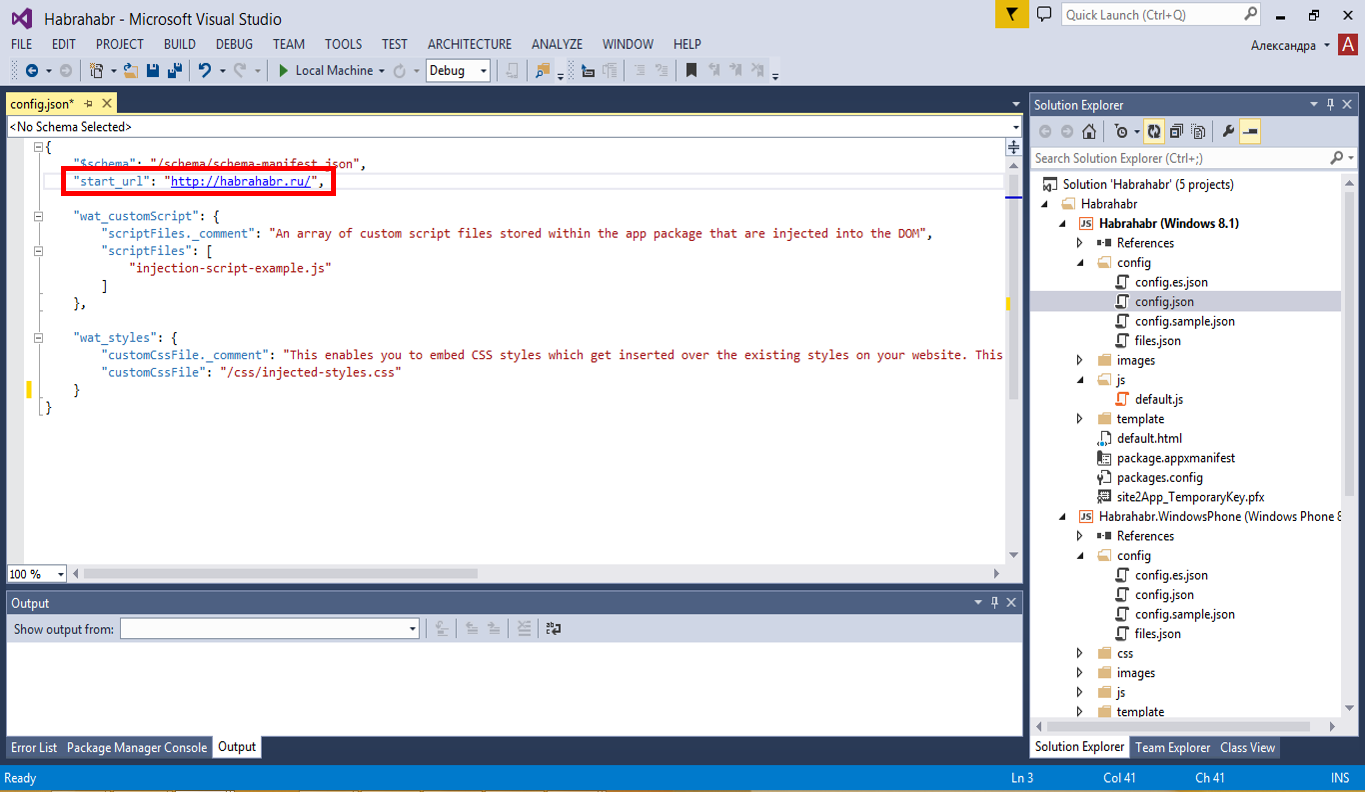
Сразу перейдем к файлу config.json и поменяем start_url на адрес habrahabr.ru.
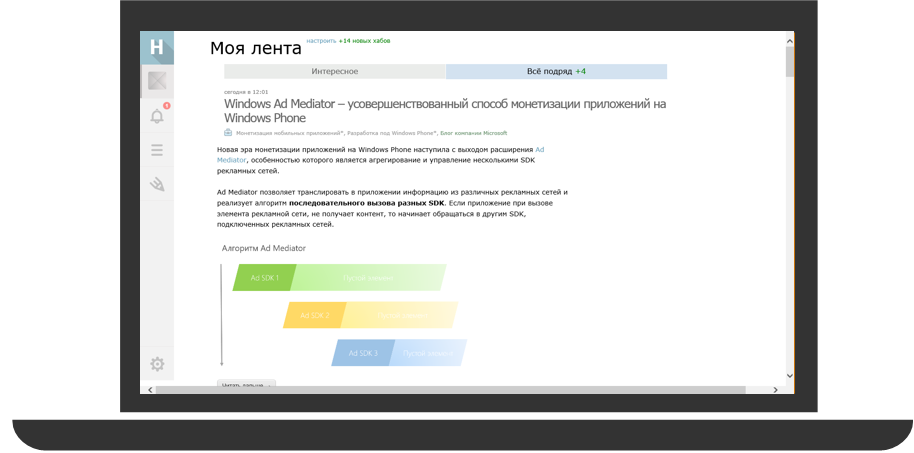
В качестве стартового проекта укажем проект Windows. Запускаем приложение и, вот, что мы видим на экране:
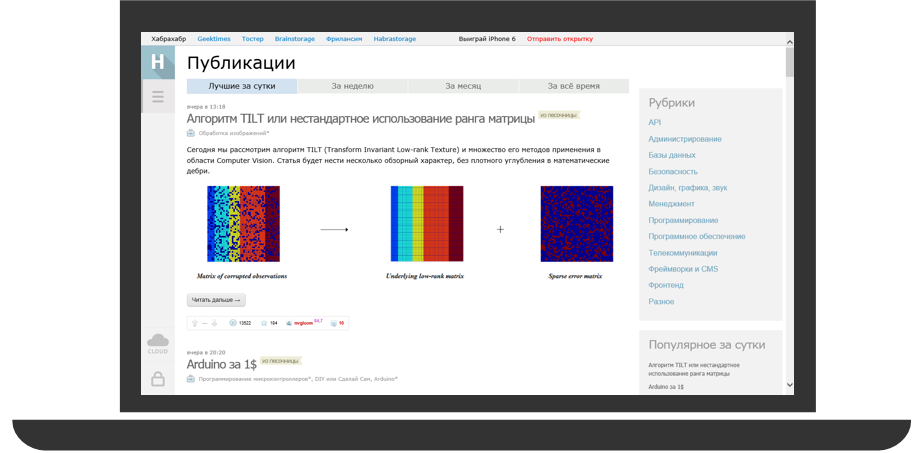
Все вроде бы неплохо, но на экране, помимо текста статей, отображается много лишнего. Красным я выделила то, без чего, на мой взгляд, можно обойтись:

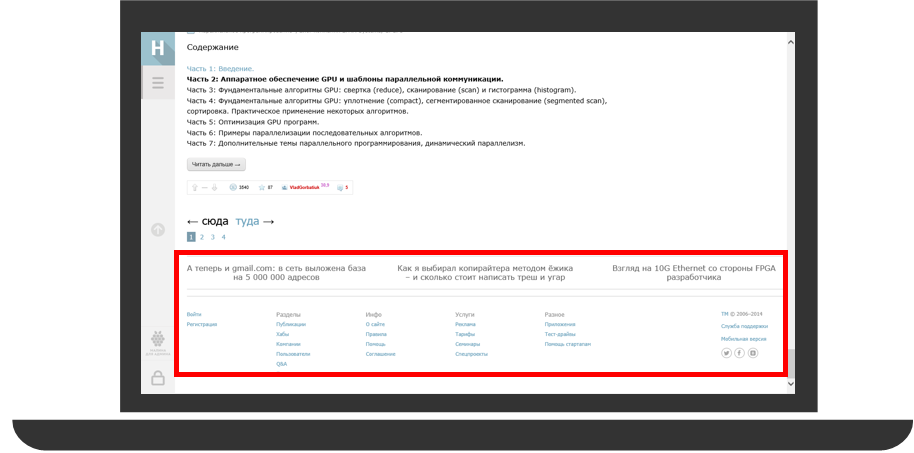
Для того, чтобы убрать лишние элементы со страницы, я прописала дополнительные css настройки стилей в файле injected-styles.css. Например, чтобы убрать панель «Рубрика» и «Популярное за сутки», не потребовалось ничего, кроме следующего кода:
.sidebar_right{
    display:none;
}
Теперь приложение выглядит лучше, не правда ли?!
Но на этом модификация не закончена. Я хочу упростить навигацию по сайту при помощи панели навигации. Для того, чтобы ее добавить, в config.json вставьте следующий код:
    "wat_navBar": {
        "enabled": true,
        "maxRows": 2,
        "makeSticky": false,
        "buttons": [
            {
                "label": "Main",
                "icon": "street",
                "action": "http://habrahabr.ru/"
            },
            {
                "label": "Hubs",
                "icon": "list",
                "action": "http://habrahabr.ru/hubs/"
            },
            {
                "label": "Companies",
                "icon": "people",
                "action": "http://habrahabr.ru/companies/"
            },
            {
                "label": "Users",
                "icon": "contact",
                "action": "http://habrahabr.ru/users/"
            }

        ]
    },
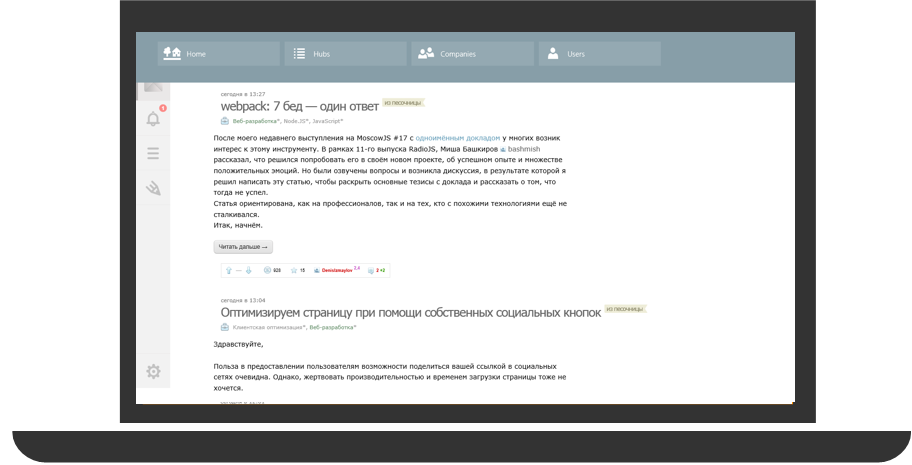
Мы создали панель навигации с четырьмя кнопками, которые будут располагаться в один ряд.
Обратите внимание, что вы можете настроить navbar так, чтобы он отображался постоянно («makeSticky»: true). Теперь поменяем цвет добавленной панели, переопределив ее стиль в файле wrapper-styles.css:
.win-navbar{
    background-color: rgb(135,158,168);
}
Также, для удобства, вынесем ссылки на «пользовательское соглашение», «правила» и «помощь» на боковую панель, в раздел настроек. Добавим в config.json следующий блок кода:
     "wat_settings": {
        "enabled": true,
        "privacyUrl": "http://habrahabr.ru/info/agreement/",
        "items": [
            {
                "title": "Help",
                "page": "http://habrahabr.ru/info/help/"
            },
            {
                "title": "Rules",
                "page": "http://habrahabr.ru/info/help/rules/"
            }
        ]
    }
Теперь на панели настроек появились прописанные выше ссылки:

Оффлайн режим приложения
Очень важно, чтобы у пользователя была возможность работать с приложением в случае, если интернет соединение отсутствует. Шаблон Web Application Template поддерживает работу с оффлайн режимом приложения.
Есть несколько вариантов обработки события перехода приложения в оффлайн режим:
- Отобразить страницу-заглушку с сообщением об ошибке в связи с отсутствием интернета и предупреждением о невозможности дальнейшей работы приложения.
- Заранее закэшировать отдельные страницы (режим SuperCache), вывести сообщение об отсутствии интернет соединения. Таким образом приложение продолжит свою работу в режиме ограниченной функциональности.
Для того, чтобы добавить поддержку оффлайн режима, вставьте в файл config.json блок wat_offline.
    "wat_offline": {
        "enabled": true,
        "message": "There is no internet connection",
        "superCache": {
            "enabled": false,
            "baseDomainURL": "http://habrahabr.ru/",
            "addIndexedDBSupport": true,
            "imagesGuardBand": true,
            "preCacheURLs": [ ],
            "ignoreURLs": [ ]
        }
    }
Для включения поддержки оффлайн режима, присвойте свойству enabled значение true.
Для настройки страницы – заглушки, которую пользователь увидит на экране в случае потери соединения, используйте файл offline.html, расположенный по адресу template > offline.html. Если корневой адрес не определен, то укажите в message сообщение-заглушку, которое вы хотите вывести на экране в случае потери соединения.
Если вы хотите, чтобы работа с вашим приложением сохранялась и при отсутствии соединения, включите режим SuperCache (внутри настройки SuperCache присвойте свойству enabled значение true).
Укажите адреса тех страниц, которые вы хотите закэшировать заранее в настройке preCacheURLs, а в случае, если вы не хотите, чтобы кэш страницы создавался – пропишите необходимые адреса в ignoreURLs.
Web Application Template поддерживает работу с базами данных IndexedDB (свойство addIndexedDBSupport), а также встроенные (inline) изображения (свойство imagesGuardBand).
С основными необходимыми настройками для приложения Windows мы закончили, теперь перейдем к созданию приложения для Windows Phone.
Создаем приложение для Windows Phone
Теперь пришло время для Windows Phone версии приложения. Поскольку у ресурса Habrahabr.ru есть специальная мобильная версия сайта, то создать веб-приложение для мобильного будет еще проще, чем Windows версию. Скопируем папку config из shared-проекта отдельно в Windows и в Windows Phone проект. Откроем файл config.json в Windows Phone проекте, удалим все лишнее и изменим start_url на сайт мобильной версии хабра: m.habrahabr.ru.
Сразу после запуска, приложение выглядит неплохо, но, давайте, модифицируем его.
В Windows приложении мы вынесли основные ссылки на панель навигации и на панель настроек.
Для удобства, добавим панель приложения и поместим на нее некоторые ссылки, например, на профиль, хабы и правила сайта.
Обратите внимание, что, если вы делаете приложение для стороннего ресурса, вам необходимо дать ссылку на пользовательское соглашение (privacy policy).
Прежде чем добавить панель приложения, добавьте следующую настройку:
    "wat_cortana": {
        "enabled": true,
        "appBar": true,
    }
Далее добавляем блок wat_appBar и указываем необходимые кнопки.
     "wat_appBar": {
        "enabled": true,
        "makeSticky": false,
  "buttons": [
            {
                "label": "Main",
                "icon": "street",
                "action": "http://m.habrahabr.ru/"
            },
            {
                "label": "Hubs",
                "icon": "list",
                "action": "http://m.habrahabr.ru/hubs/"
            },
            {
                "label": "Companies",
                "icon": "people",
                "action": "http://m.habrahabr.ru/companies/"
            },
            {
                "label": "Privacy Policy",
                "icon": "people",
                "action": http://m.habrahabr.ru/info/agreement/"
            }
        ]
    }
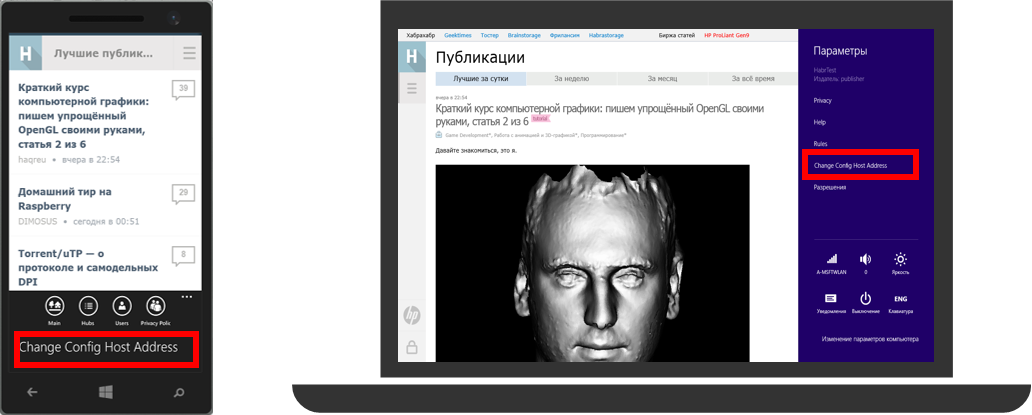
Вот, что получилось:
Обратите внимание на ссылку “Сhange Config Host Address”, которая появляется при добавлении панели приложения в Windows Phone версию, а также является стандартной для панели настроек в Windows приложении. Вы можете менять config файл вашего приложения удаленно. О том, как это сделать, смотрите в MVA курсе «Создание универсальных веб-приложений при помощи Web App Template» или в статье Создание универсальных веб-приложений при помощи Web App Template.
Наше универсальное приложение почти готово, осталось поменять иконки в приложении.
Меняем иконки в приложении
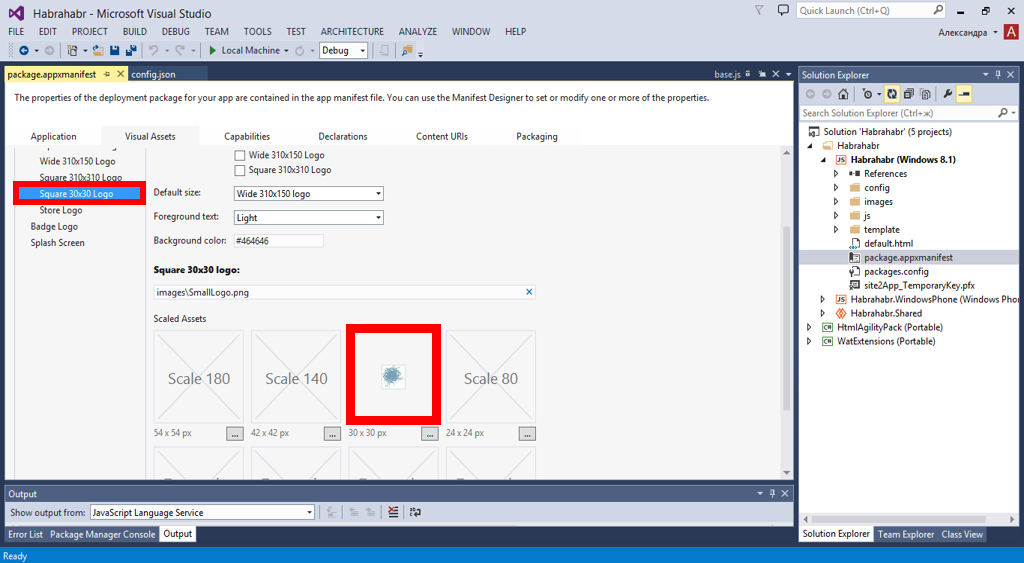
Со стандартными иконками приложение выглядит очень неэстетичным. Давайте посмотрим, как поменять иконки (бейджи, тайлы, картинку стартового экрана).
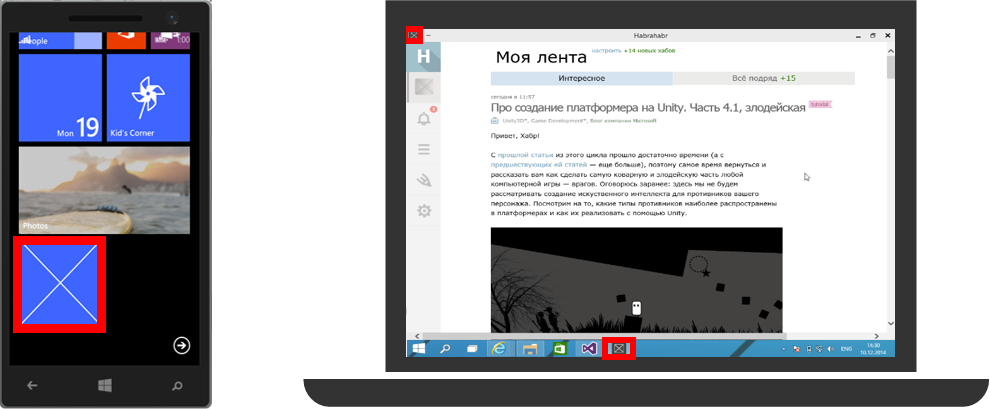
Откройте файл package.appxmanifest (он свой для каждого Windows и Windows Phone проекта, необходимо добавлять изображения отдельно для каждого проекта). Перейдите во вкладку Visual Assets и прикрепите необходимые изображения. Например, если вы хотите поменять иконку, которая расположена слева в окне приложения, то меняем картинку Square 30×30 Logo, для изменения картинки toolbar’a – Square 150×150 Logo, а для картинки экрана загрузки меняем изображение Splash Screen.
Обратите внимание на возможность добавления живых плиток. Для того, чтобы добавить их, загрузите соответствующие картинки в манифест приложения (вкладка Visual Assets), затем перейдите во вкладку Application и в разделе Tile Update укажите частоту обновления плитки и ссылку на RSS поток, с которого будет подгружаться информация для обновления плитки.

Также в файл config.json необходимо добавить следующий код:
        "wat_livetile": {
        "enabled": true,
        "periodicUpdate": 1,
        "enableQueue": true,
        "tilePollFeed": "http://habrahabr.ru/rss/hubs/"
    }
Теперь на плитке приложения будет отображаться информация о новых постах.
На этом основная работа с приложением закончена. Можно заполнять манифест и готовить приложение к публикации.
В заключение про будущее
В Windows 10 мы анонсировали идею «Web apps» как часть платформы. Подробности о том, как это работает можно посмотреть в руководстве для разработчиков (см. серию «Evolving the Web Platform, начиная с 16 минуты).

Манифест WAT, сделанный на базе стандарта Manifest for Web Apps (W3C) хранится на вашем сайте, в настройках приложения вы указываете политики доступа к WinRT API. Готовое приложение можно будет разместить в магазине приложений.
Вы можете начать создавать веб-приложения сегодня с помощью WAT, публикуя приложения для Windows 8.1, Windows Phone 8.1 или Android, и переключиться на модель Windows 10 Web Apps, как только новая ОС выйдет в релиз.
Дополнительные ссылки
Создание универсальных веб-приложений при помощи Web App Template
MVA курс по созданию универсальных веб-приложений при помощи Web App Template
Скачать Web App Template
Документация по Web App Template
Загрузить бесплатную или пробную Visual Studio
Попробовать Microsoft Azure
Изучить курсы Microsoft Virtual Academy
The new Microsoft Edge browser – which is now based on the open source chromium engine – includes the ability to turn any website into its own app on your Windows 10 machine.
But why would you want to turn a website into an app?
Many apps that we use today, are not much more than websites in a wrapper. With the latest web technologies, websites can act very much like apps do. They can cache the user interface to run faster, be personalized to your needs, track your location, and annoy you with notifications.
But a website can sometimes get lost in the web browser interface. It’s always underneath the browser address bar and the toolbar, and it’s probably one of dozens of tabs that you have open at any time. Not to mention, managing all these different sites through a single app can lead to a very cluttered work space.
So it would be nice to have a direct way to get to that website as an app. This is especially true on Windows, where many apps developers don’t bother to make their app available in the Windows store.
But thanks to the new Microsoft Edge; we can turn any website into an app ourselves. No more waiting for the devs to support our favorite app.
Install a website as an App
To install a website as an app on your Surface; start by opening the new Microsoft Edge and navigating to the website that you want to use.
Click on the 3 dot menu in the top right corner of the browser, and point to apps. Click on Install Website as an app.
The website will open in it’s own dedicated window – without the browser interface.
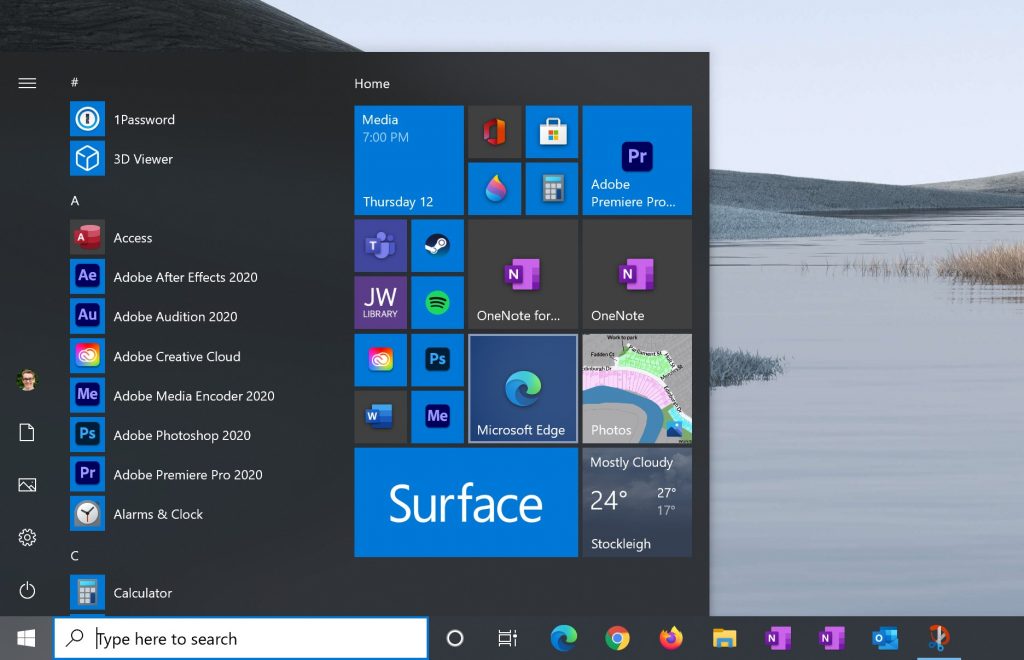
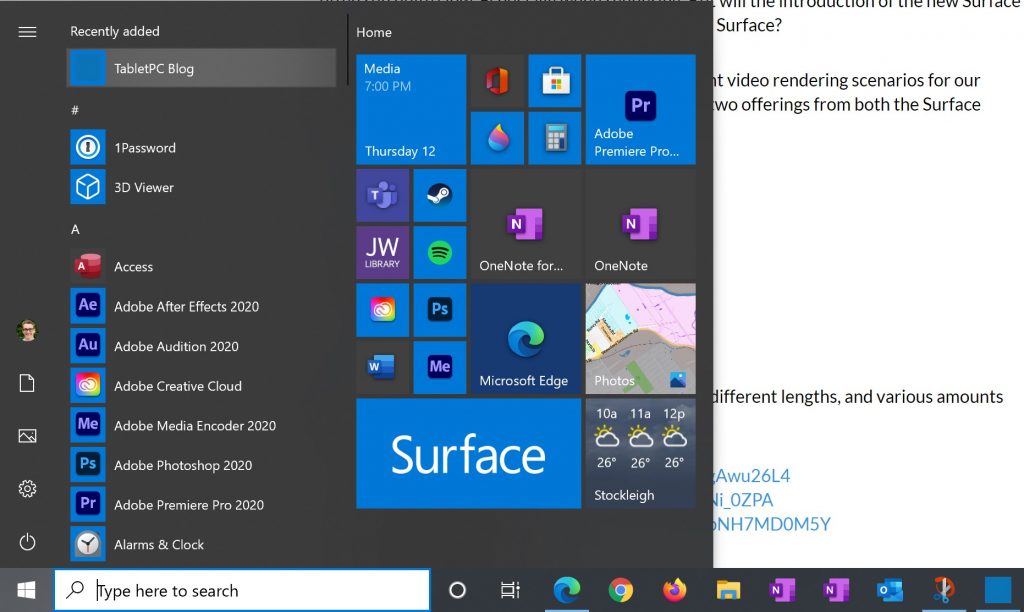
On the Windows Start Menu, you’ll see the app appear in the programs list, and you can now pin it to your start menu or your task bar.
Now that you can run that website as an app directly from its own shortcut, it’s no longer lost in your sea of browser tabs. It’s in it’s own window. Any notifications that come from this website will appear as coming from the app itself. Making it very easy to turn them on or off for that one specific app.
Progressive Web Apps
So we’ve turned a website into an app. But is a website really the same as an app? Well, sometimes, and maybe…
On some websites, you’ll see an icon in the address bar when you visit them – saying an app is available. If you see this, the website you’re visiting is purpose built to be an app. It is a progressive web app, or a PWA. In fact, many apps that you’ll download from the Windows Store, and even the store on your mobile device are progressive web apps.
If you are using a website that was built as a PWA, you will see this small popup in both Edge, and Chrome.

PWAs can run just like apps do on your device – even when you’re not online.
Our top list of PWAs
Here are some examples of PWAs that you can install on your Windows 10 device.
Twitter – twitter.com
Again, you can get this one through the Windows store, or just through the browser. It’s the same app.
Outlook.com – outlook.office.com/mail/inbox
If you’re choosing an email client on Windows 10, this one is a great option. Outlook.com has come a long way in recent years in Office 365. It now supports dragging and dropping emails – for example, I could drag an email from my inbox over to my calendar or task list, just like I can do in the desktop version of outlook. So on Windows there are dozens of good email clients – Not just Outlook Desktop and the inbuilt mail app… But now you can even use outlook.com as an app too.
The Office App – www.office.com
This is a handy dashboard for Office 365 users – and you can install it from Windows Store, or just directly through your Microsoft Edge browser because it is a PWA. It shows all of your recent docs in OneDrive, and it gives you easy access to all of the 365 apps.
Sketch.io – sketchpad.app
Sketch.io is a pretty interesting online drawing app that can be installed directly on your device as a PWA. It even supports pressure sensitivity for drawing with your Surface Pen.
Spotify open.spotify.com
The Spotify Web player can be installed as an app. This is a good option for the Surface Pro X where the desktop Spotify client can be a little bit sluggish.
Uber – uber.com
It’s been a while since I’ve called an Uber this year, but it’s nice to have this option on my Surface just in case!
Pinterest – www.pinterest.com.au
I don’t really use Pinterest, but there is a PWA for it. Check it out at the Pinterest Website.
Google Photos – photos.google.com
Google Photos is one of the few PWAs that Google have created from their suite of apps. It’s a bit strange because Google really led the introduction of PWAs, but they have not created many of their own. For example, unlike Outlook, Gmail does not have a PWA. Nor does Google Docs. It’s a shame really, although you could install them as apps anyway through Microsoft Edge.
Starbucks – app.starbucks.com
Starbuck never really made it big here in Australia. We have very particular coffee tastes down under, and their initial push to set up Starbucks stores everywhere here fell flat. There are a few Starbucks stores around. But I know it’s on every street corner in the US, so this will be handy for those in the US especially.
2048 Game – 2048.love2dev.com
In poking around the web, I found this developer who created the 2048 game as a PWA.
Sound Slice – www.soundslice.com
In doing research for this video I found a number of PWA lists, and Sound Slice caught my attention. I haven’t it yet, but it looks to be quite an interesting music learning app. So that’s probably worth a look too.
Google News news.google.com
And lastly, there is Google news that you can use on your Surface as a PWA. Many of the news sites open in the Google News PWA as mobile sites. So it’s quite a good option for reading the news on your Surface.
For any of these PWAs, just visit one of those websites in Edge, or Chrome, and look for the prompt to install. The apps will then show up on the programs list on your start menu.
Beyond PWAs
Beyond Progressive Web Apps, here are some handy regular websites that I have installed as an app to give you some ideas:
Tinkercad – www.tinkercad.com
TinkerCad is a simple 3D design tool from AutoDesk. It works really well with touch on Surface! And the large screen and proper mouse support on Surface really lends itself to this kind of app far better than a smaller tablet does. Even though it’s not a PWA, it’s great to get the browser interface out of the way and reclaim some design space.
Kindle Cloud Reader – read.amazon.com
Unfortunately Amazon’s PC based Kindle Reader app is garbage. It’s a clunky mouse and keyboard app that looks like it was designed in 1985. It’s an embarrassment, and it’s the sole reason that I started buying eBooks on Kobo. Fortunately the web reader for Kindle is not too bad, however you must be connected to get started with your Kindle reading.
BOM – www.bom.gov.au
I’ve installed the Australian government weather service website as an app. It’s a handy to have a quick shortcut for us here in Melbourne, because one of our favorite things to do is talk about the weather! We’re famous down here for our four seasons in one day!
Messenger – messenger.com
That’s Facebook Messenger’s app. Even though it’s not a PWA, getting the browser out of the way helps me to focus on video calls in messenger!
So there’s my quick list of PWA’s and websites that you can install as apps on your surface. One benefit of using a Windows 10 device as a tablet is you don’t have to be restricted to apps from the store. You can run Windows that way if you want to, but you have the choice. You can now get apps through the store, download them from company websites, or install PWAs and websites as apps through your browser.
If you have any use cases or other PWAs that you use, subscribe to our YouTube Channel and comment on our video on this topic.
I can’t think of any better way to start the day than by creating a desktop app. Can you? Today, I will be giving you the ✊power to convert any website into a desktop application.
Step 1:
Download the LTS of Node JS: https://nodejs.org/en/
Then open command prompt(On windows) or the equivalent on your operating system(terminal for mac).

Note: It does not matter what OS you are using.
Step 2:
Now we will need to install a github tool called nativefier to your device globally.
To do so, type in the following script into the command prompt(or the equivalent) and hit enter:
npm install -g nativefier
Enter fullscreen mode
Exit fullscreen mode
Give it a minute to install.
Step 3:
After nativefier has been installed, type the following code, replacing the words your website with the website domain you want to convert into an app.
nativefier 'your website'
Here is an example:
nativefier 'dev.to'
After that, hit enter and wait for it to load. This time, it might take several minutes.
Step 4:
Finally, when it has finished loading, all that is left to do is to test out your own desktop app.
To do so, open the path that has been shown on the command prompt. You can do so from the file opener of your OS. File explorer for windows or finder for MacBook’s.
Once you are in the path provided, open up the executable file and your app should pop up.
Conclusion:
Thanks for finishing this post, I hope it helped you. If you have any questions, please comment below. I will respond ASAP.
Note: This post was first published on https://freetechnologyhelp.com/how-to-convert-any-website-into-a-desktop-applicationin-30-seconds/
You can read another post a wrote here:
https://dev.to/freebeliever/you-can-build-anything-with-these-6-characters—3623