
Последняя версия Windows 10 поставляется с новым приложением «Безопасность Windows». Приложение, ранее известное как «Панель Защитника Windows» и «Центр безопасности Защитника Windows», создано, чтобы помочь пользователю в понятном и удобном виде управлять своими настройками безопасности и конфиденциальности.
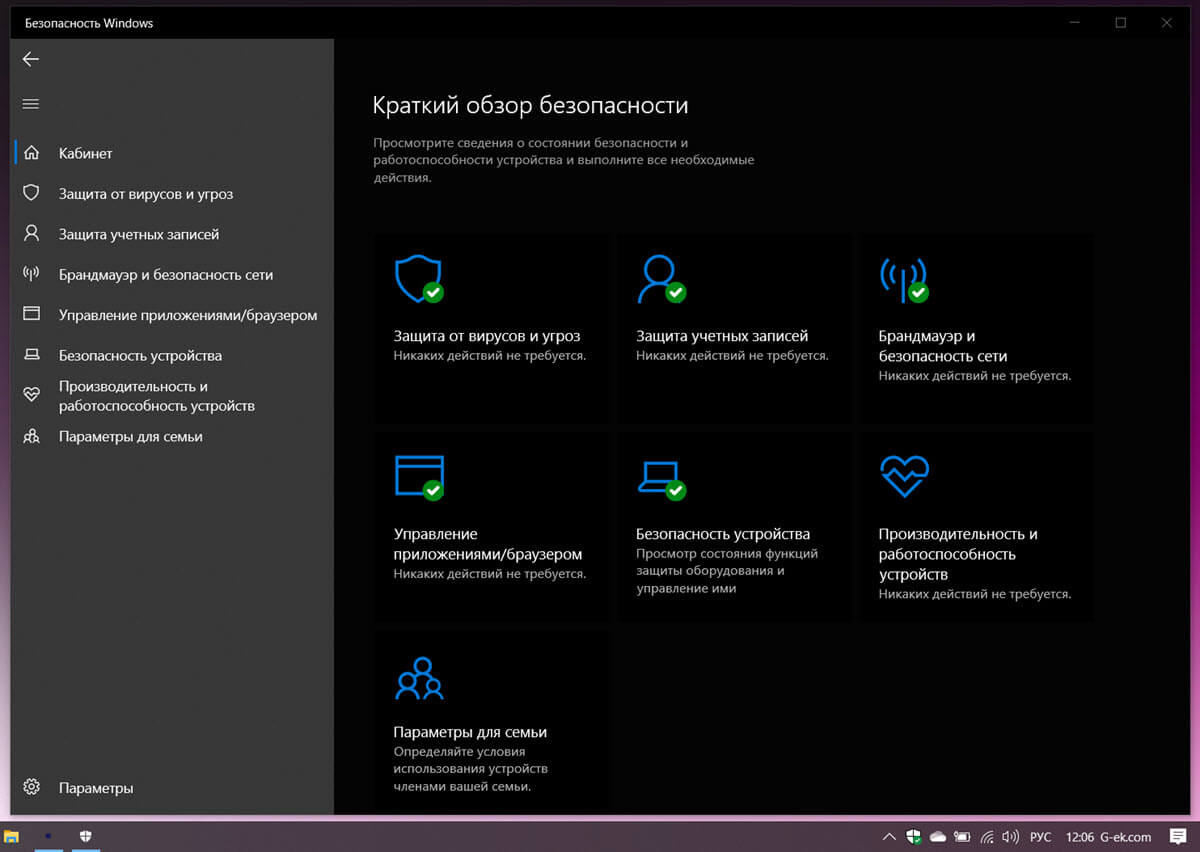
Оно включает в себя все настройки антивируса, связанные с «Защитником», и многое другое. Приложение объединяет множество полезных параметров безопасности, которые вы, возможно, захотите отслеживать и контролировать. Пользовательский интерфейс приложения «Безопасность Windows» имеет панель инструментов слева и основную область, которая занимает оставшуюся часть окна. Как только вы откроете приложение, вы увидите стартовую страницу, с настройками разделённые на категории, такими как, Защита от вирусов и угроз, Защита учетных записей, Брандмауэр и безопасность сети, Управление приложениями и браузером, Безопасность устройства, Производительность и работоспособность устройства, Параметры для семьи и многое другое.
Вы можете открыть приложение «Безопасность Windows» из меню «Пуск» или с помощью специального ярлыка. Кроме того, вы можете получить к нему доступ, используя его значок приложения в трее.
Если приложение «Безопасность Windows» не открывается, дает сбой или не работает должным образом, вы можете попробовать сбросить его, используя один из следующих способов.
Чтобы сбросить приложение Безопасности Windows в Windows 10,
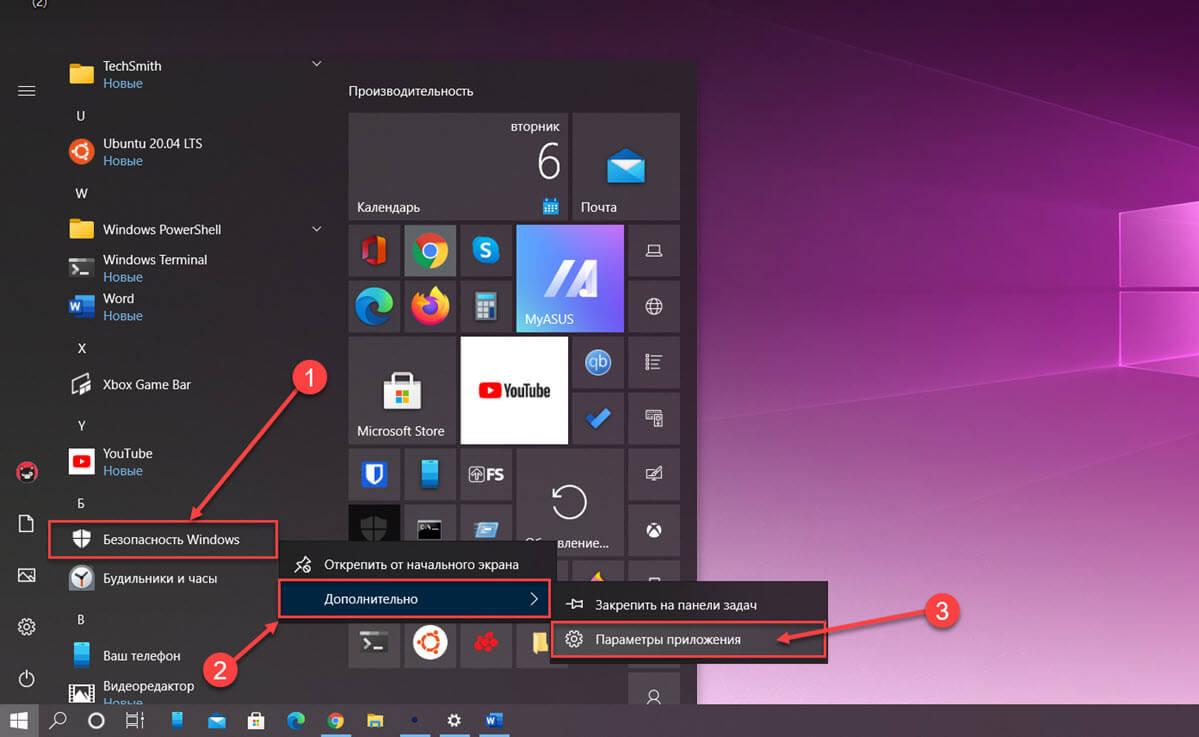
Шаг 1: Откройте меню «Пуск».
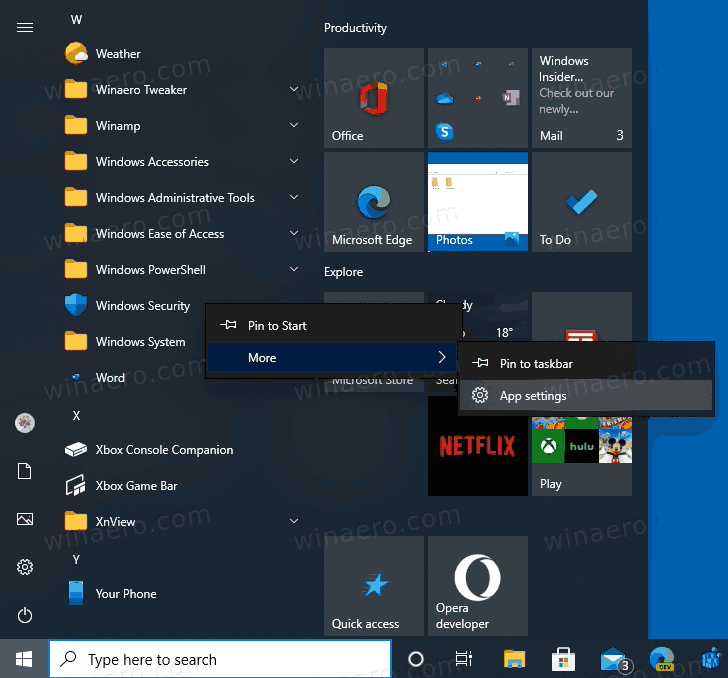
Шаг 2: Найдите ярлык \ значок «Безопасность Windows» и кликните на нем правой кнопкой мыши.
Шаг 3: В контекстном меню выберите: «Дополнительно» → «Параметры приложения».
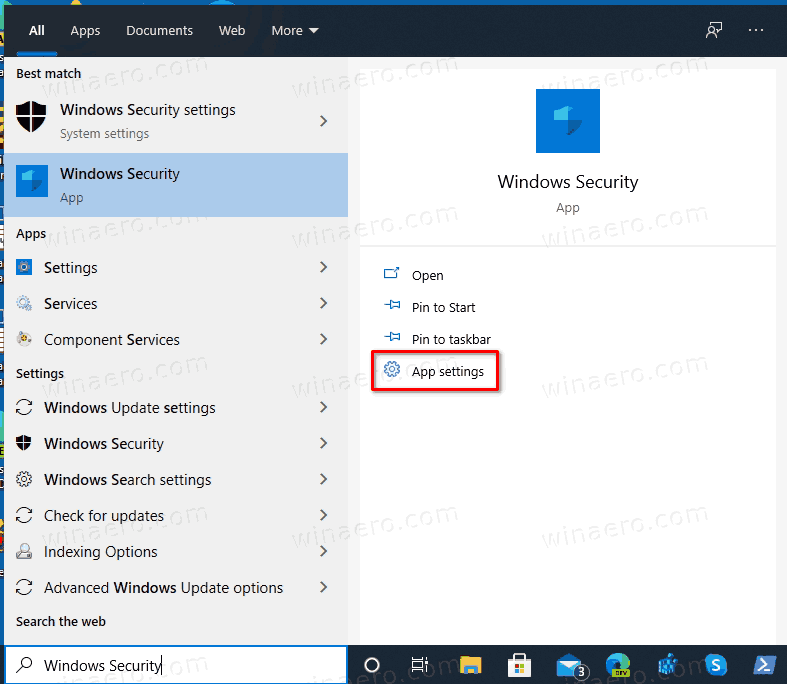
Альтернатива: Если вы введете текст «Безопасность» в поле поиска на панели задач, вы сможете напрямую открыть страницу дополнительных параметров для приложения, кликнув ссылку «Параметры приложения».

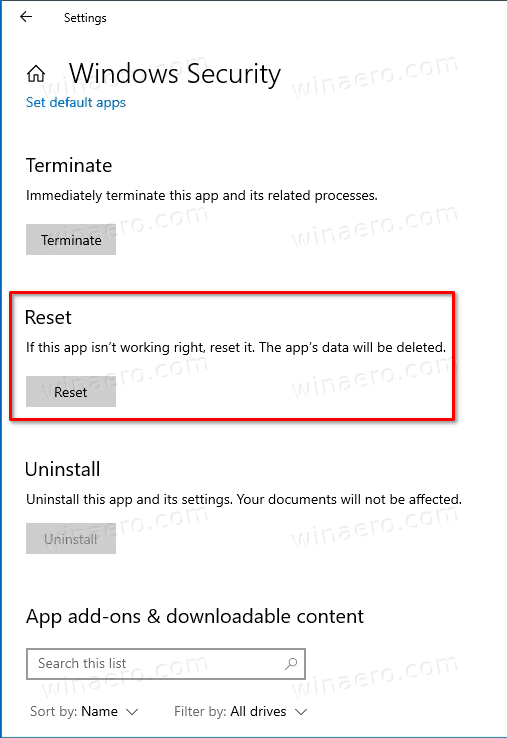
Шаг 4: Откроется страница дополнительных параметров для приложения безопасности Windows. Найдите на странице раздел «Сбросить».
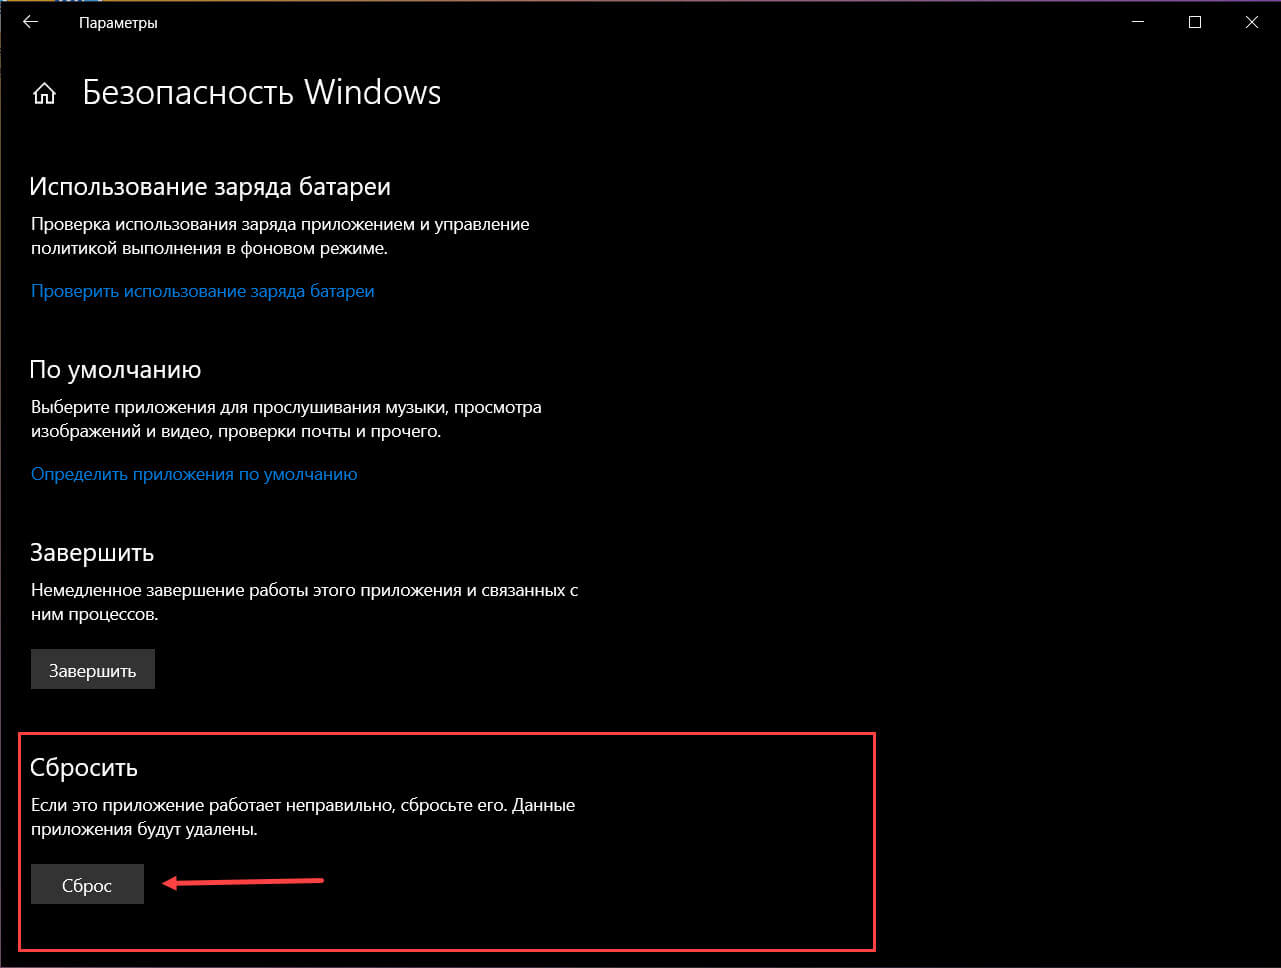
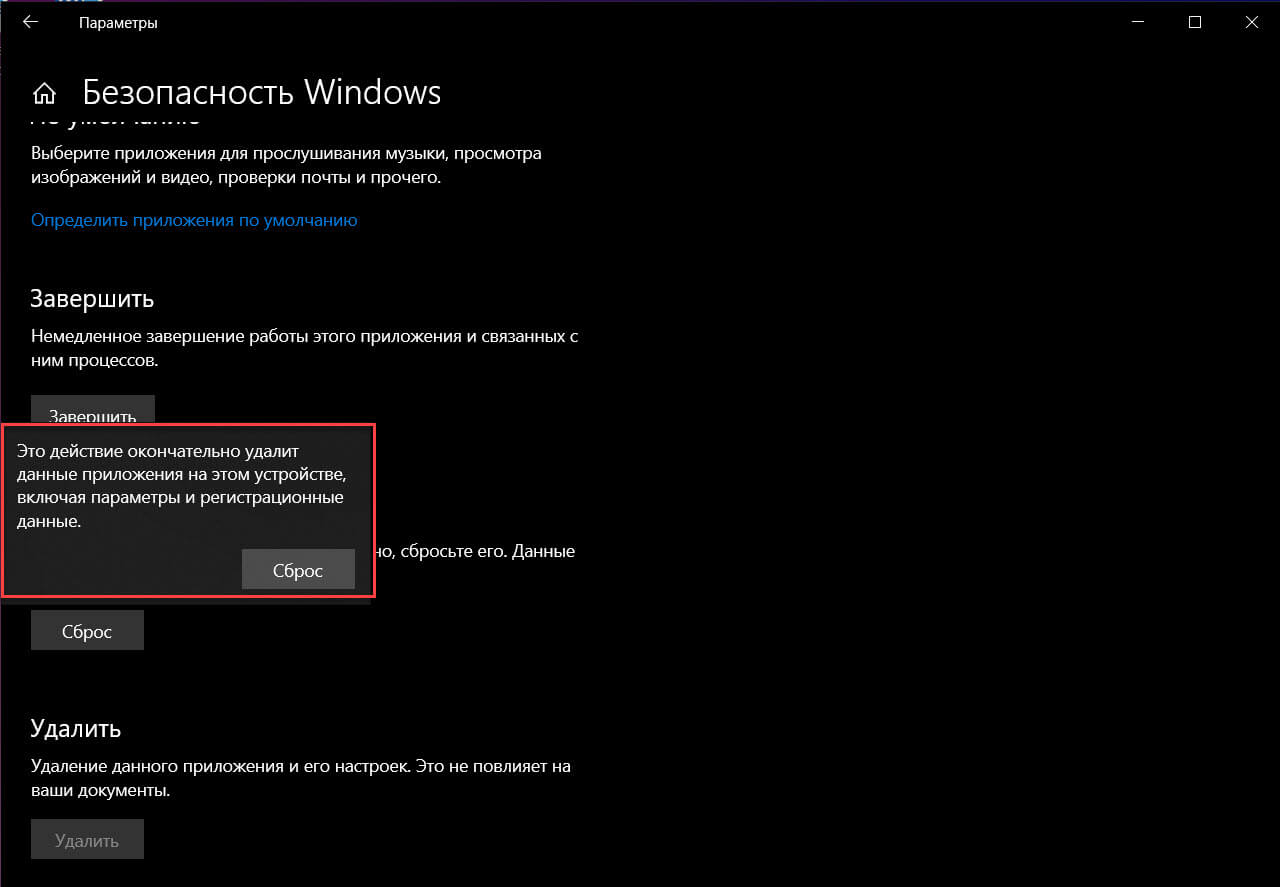
Шаг 5: Здесь нажмите кнопку «Сброс» и подтвердите операцию.
Шаг 6: Теперь вы можете закрыть приложение «Параметры».
Все.
Кроме того, вы можете использовать PowerShell для сброса приложения Безопасность Windows.
Сброс безопасности Windows в Windows 10 с помощью PowerShell
Шаг 1: Откройте PowerShell от имени администратора.
Шаг 2: Введите или скопируйте и вставьте следующую команду:
Get-AppxPackage *Microsoft.Windows.SecHealthUI* | Reset-AppxPackage
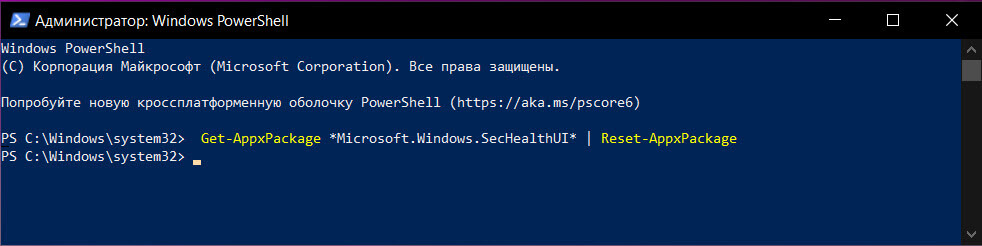
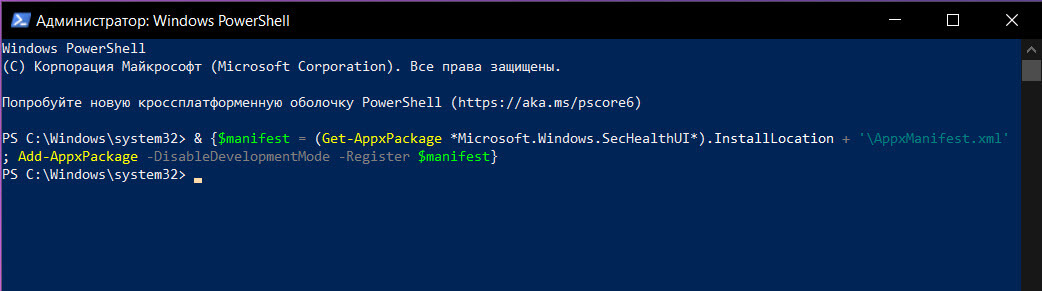
Эта команда работает, начиная с Windows 10 сборки 20175, так что если она не доступна в вашей системе, используйте следующую альтернативу:
& {$manifest = (Get-AppxPackage *Microsoft.Windows.SecHealthUI*).InstallLocation + '\AppxManifest.xml' ; Add-AppxPackage -DisableDevelopmentMode -Register $manifest}
Шаг 3: Перезагрузите Windows 10. В принципе, обе команды должны работать без перезагрузки ПК.
Вот и все.
Рекомендуем: Сбросить настройки приложения Параметры в Windows 10.
Как исправить — Защитник Windows: Некоторыми параметрами управляет ваша организация.
Как Отключить Защитник Windows в Windows 10.
This wikiHow will teach you how to restore Windows Defender to default settings in Windows 10 using Windows Security settings or Control Panel.
-

Press Win + I (that’s an uppercase i) to open Settings, then click Update & Security > Windows Security > Open Windows Security.
-
It’s in the tile with the signal icon.
-
This will restore any changes you’ve made to the default settings for Windows Defender.


-

You can search for this by pressing the Windows key then typing «Control Panel» and then clicking the app result.
-
It’s next to an icon of a brick wall in front of a globe.
-
You’ll need to click Restore defaults again when prompted, then click Yes to confirm. Once you have done that, your default settings will be restored to your Windows Defender settings.[1]


Ask a Question
200 characters left
Include your email address to get a message when this question is answered.
Submit
References
About this article
Article SummaryX
1. Open Windows Security.
2. Click Firewall & network protection.
3. Click Restore firewalls to default.
Did this summary help you?
Thanks to all authors for creating a page that has been read 10,511 times.
Is this article up to date?
How to Reset the Windows Security app in Windows 10
Recent Windows 10 version come with is a new app called Windows Security. The application, formerly known as «Windows Defender Dashboard» and «Windows Defender Security Center», has been created to help the user control his security and privacy settings in a clear and useful way.
It includes all the settings related to the Defender antivirus, and much more. The application unifies many useful security options you might want to track and control. The user interface of the Windows Security app comes with a toolbar on the left and the main area which occupies the rest of window area. Once you open the application, it shows a special start page, that organizes settings into categories like Virus & threat protection, Device performance & health, Firewall & network protection, Family options, and more.

You can launch Windows Security from the Start menu or with a special shortcut. Alternatively, you can access it using its tray icon.
If the Windows Security app doesn’t open, is crashing, or doesn’t work properly, you can try to reset it using one of the following methods.
- Open the Start menu.
- Locate the Windows Security shortcut and right-click on it.
- Select More > App Settings from the context menu.

- The Advanced options page for the Windows Security app will open. There, go to the Reset section.

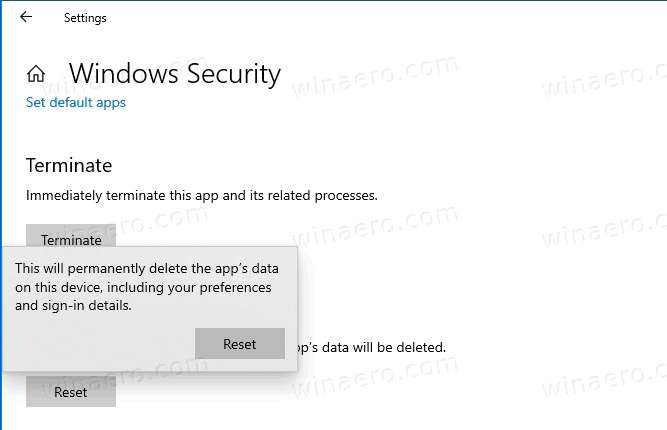
- There, click on the Reset button, and confirm the operation.

- You can now close the Settings app.
You are done.
Tip: If you type Windows Security in the search box in the taskbar, you will be able to directly open the Advanced options page for the app by clicking on the App settings link.
Alternatively, you can use PowerShell to reset the Windows Security app.
Reset Windows Security in Windows 10 using PowerShell
- Open PowerShell as Administrator. Tip: You can add «Open PowerShell As Administrator» context menu.
- Type or copy-paste the following command:
Get-AppxPackage *Microsoft.Windows.SecHealthUI* | Reset-AppxPackage. - The above command works starting in Windows 10 Build 20175, so if it is not available in your Windows 10, use the following alternative:
& {$manifest = (Get-AppxPackage *Microsoft.Windows.SecHealthUI*).InstallLocation + '\AppxManifest.xml' ; Add-AppxPackage -DisableDevelopmentMode -Register $manifest}. - Restart Windows 10. Actually, both the commands should work without restarting the PC.
That’s it.
Support us
Winaero greatly relies on your support. You can help the site keep bringing you interesting and useful content and software by using these options:
If you like this article, please share it using the buttons below. It won’t take a lot from you, but it will help us grow. Thanks for your support!
Download Windows Speedup Tool to fix errors and make PC run faster
There may come a time when you may want to or need to reset your Windows Security settings to default values. Maybe you messed them up while configuring them manually or maybe your PC just recovered from malware infection. If for some reason you’d like to reset all your Windows 11 or Windows 10 security settings to their default values, you may do so as follows.

Open an elevated command prompt and type the following command:
secedit /configure /cfg %windir%\inf\defltbase.inf /db defltbase.sdb /verbose
Hit Enter.
After you run this, the standard user accounts may no longer appear on the login screen when you restart your computer or try to switch users.
This occurs because standard user accounts are removed from the Users group when you reset Windows security settings.
To add the affected user’s accounts back to the Users group, follow these steps.
Open an elevated command prompt. In the Command Prompt window, type net users and hit Enter. A list of user accounts will be displayed.
For each account name listed in the Command Prompt that is missing from the log on or switch user screen, type the following command and hit Enter.
net localgroup users accountname /add
In Windows11/10, the Defltbase.inf file is a Security configuration template for the default security. You can view the settings for this file in the following location:
%windir%\inf\defltbase.inf
You will see all changes made in a newly created log file situated at the following location:
C:\Windows\security\logs\scesrv.log
If you don’t want to do it manually, you can use this Microsoft Fix it 50198 to let do all this, automatically.
Related: How to repair Windows Security or reinstall Windows Defender
NOTE: Security settings consist of settings defined in deftbase.inf augmented by settings applied by the operating installation process and server role installation. Because there is no supported process to replay the permissions made by the operating system setup, the use of secedit /configure /cfg %windir%\inf\defltbase.inf /db defltbase.sdb /verbose command-line may no longer be capable of resetting all security defaults.
Related read: How to Reset Windows Firewall settings to defaults.
Anand Khanse is the Admin of TheWindowsClub.com, a 10-year Microsoft MVP (2006-16) & a Windows Insider MVP (2016-2022). Please read the entire post & the comments first, create a System Restore Point before making any changes to your system & be careful about any 3rd-party offers while installing freeware.
Home
Security
By
Bhishu Acharya
Windows Security is an in-built antivirus program that prevents your PC from any security threat. With this feature turned on, you do not necessarily require other third-party software.
Due to a corrupted registry or issues in Windows service, Windows Defender may not work. This will leave your computer vulnerable to several malware and viruses. In this case, it’s best to reset Windows Security.
So, if there are any underlying issues and you want to reset this program, we have included four methods to do it correctly.
Terminate, Repair, and Reset in Windows Settings
The most convenient way to reset Windows Security is from the Settings application. Interestingly, there are few other options than just resetting the program. So, let’s discuss them first:
- Terminate: Terminating will simply bring Windows Security to an end. Basically, it ends the process running with or without your knowledge.
- Repair: Repairing Windows Security will simply try to fix any underlying issues within the antivirus software. So, running a repair won’t affect any data.
- Reset: If you’re suspicious regarding the data, you can remove it all at once using the Reset option. Interestingly, resetting erases everything and starts from the beginning. Thus, this should be the last option you should try.
Now, you can move ahead with the following steps that will guide you on how to reset, repair, or terminate Windows Security on your PC:
- Using Windows + I, navigate to Settings.
- From the left panel, choose Apps, and now click on Apps & Features from the right.

- Under App list, search for Windows Security.
- Once you see the program, tap on the Kebab menu beside it. Here, choose Advanced options.

Alternatively, you can directly search for Windows Security in the Start Menu, right-click on it, and choose App Settings.
- Scroll down, and you’ll find two options – one for Terminate and another for Reset. Click on the Terminate button if you wish to stop Windows Security processes.
- Well, you’ll find two options under Reset – Repair and Reset. We recommend repairing the antivirus first. If it doesn’t solve your issue, press the Reset button.

- Again, click on the Reset button to confirm.


Note: Although there’s an Uninstall option, the button is unclickable. This is because Windows Security is directly associated with the operating system, and there’s no possible way to remove it completely from your PC.
Restore Default Settings From Control Panel
If you’re looking to restore all settings within the Windows Defender Firewall, it’s possible from Control Panel. However, doing so might make some of your apps stop working and erases every setting you have tweaked. Here’s what you need to do:
- Open Control Panel from the Start Menu.
- Next, choose System and Security.

- Then, click on Windows Defender Firewall.

- From the left panel, select Restore defaults.
- Now, click on the Restore defaults button.

- Once the confirmation message appears, choose Yes.


Reset Appx Package in Windows Powershell
Well, another technique of resetting Windows Security is from Windows Powershell. Here, all you have to do is input command, and the process begins itself.
But before proceeding, you need to understand what Appx Package is about. Basically, it is a file format that installs and distributes certain application packages in Windows.
So, in this method, we will reset the Windows Security package and restore it to default. Here’s how you can do just that:
- First of all, right-click on the Start Menu and choose Windows Terminal (Admin). This runs Windows Powershell as the administrator.

- Now, copy and paste the following command there:
Get-AppxPackage Microsoft.Windows.SecHealthUI | Reset-AppxPackage
Or, if you want to restore the Windows Defender Firewall, here’s what you need to type:
(New-Object -ComObject HNetCfg.FwPolicy2).RestoreLocalFirewallDefaults() - Then, wait for a few moments until the Appx Package is reset, which restores the Windows Security to its default.
- Finally, restart your computer and check for the changes.


Reset Windows Security in Command Prompt
Like in Windows Powershell, it’s possible to reset Windows Security in the Command Prompt. If you’re looking to know their difference, here’s our article on PowerShell vs. CMD.
Go through the following steps on how to reset Windows Security in CMD:
- Click on the magnifying icon and search for Command Prompt.
- Then, run it as an administrator.
- Once you navigate to the CMD window, type the following command:
secedit /configure /cfg %windir%\inf\defltbase.inf /db defltbase.sdb /verbose
However, if you want to reset the Windows Defender Firewall, here’s the appropriate command for it:netsh advfirewall reset - Hit Enter and wait until the reset is complete.
- Finally, restart your device, and you’ll notice that all the Windows Security settings are restored to default.
When Should I Reset Windows Security or Windows Defender?
If Windows Security or Windows Defender is turned off, your device may be vulnerable to multiple threats. So, if this program has a problem, we recommend resetting it to resolve everything and restarting the service from scratch.
Unfortunately, all basic services, like user accounts, sign-in details, family controls, etc., will be erased. Nonetheless, Windows Security will function smoothly if you do so. Here, we have listed when you should reset Windows Security:
- Windows Security or Windows Defender is not turning on
- One or many Windows Security features stops working
- You need to troubleshoot a network connectivity issue
- You want to remove all standard users from the Users group
- Windows Troubleshooter isn’t working