
Provide feedback
Saved searches
Use saved searches to filter your results more quickly
Sign up
Appearance settings
Since I usually use macOS, in some specific situations, such as using the full version of the Office, I need to temporarily use the Windows. My solution is to use a Windows virtual machine, but the image is one of the most simplified version.
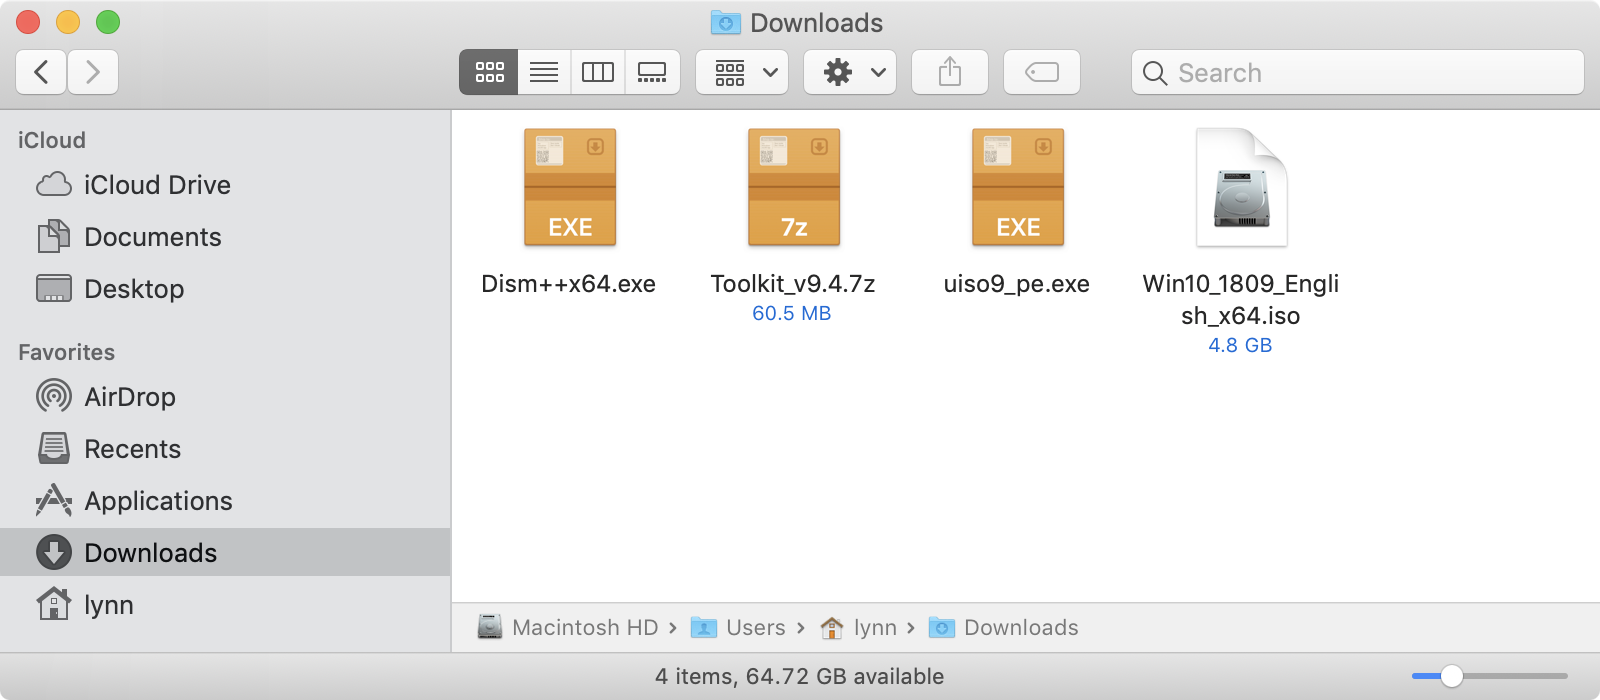
We need an official Windows 10 image (you can find the official download URL from TechBench by WZT) and several other tools to rebuild that image.
- Windows 10
- UltraISO
- Dism++
- MSMG Toolkit
Rebuild Windows 10 Image
Find a Windows PC to complete the following steps.
Remove Redundant Windows Versions
If the Windows image contains multiple versions, we can reduce the size of the image by removing the extra versions.
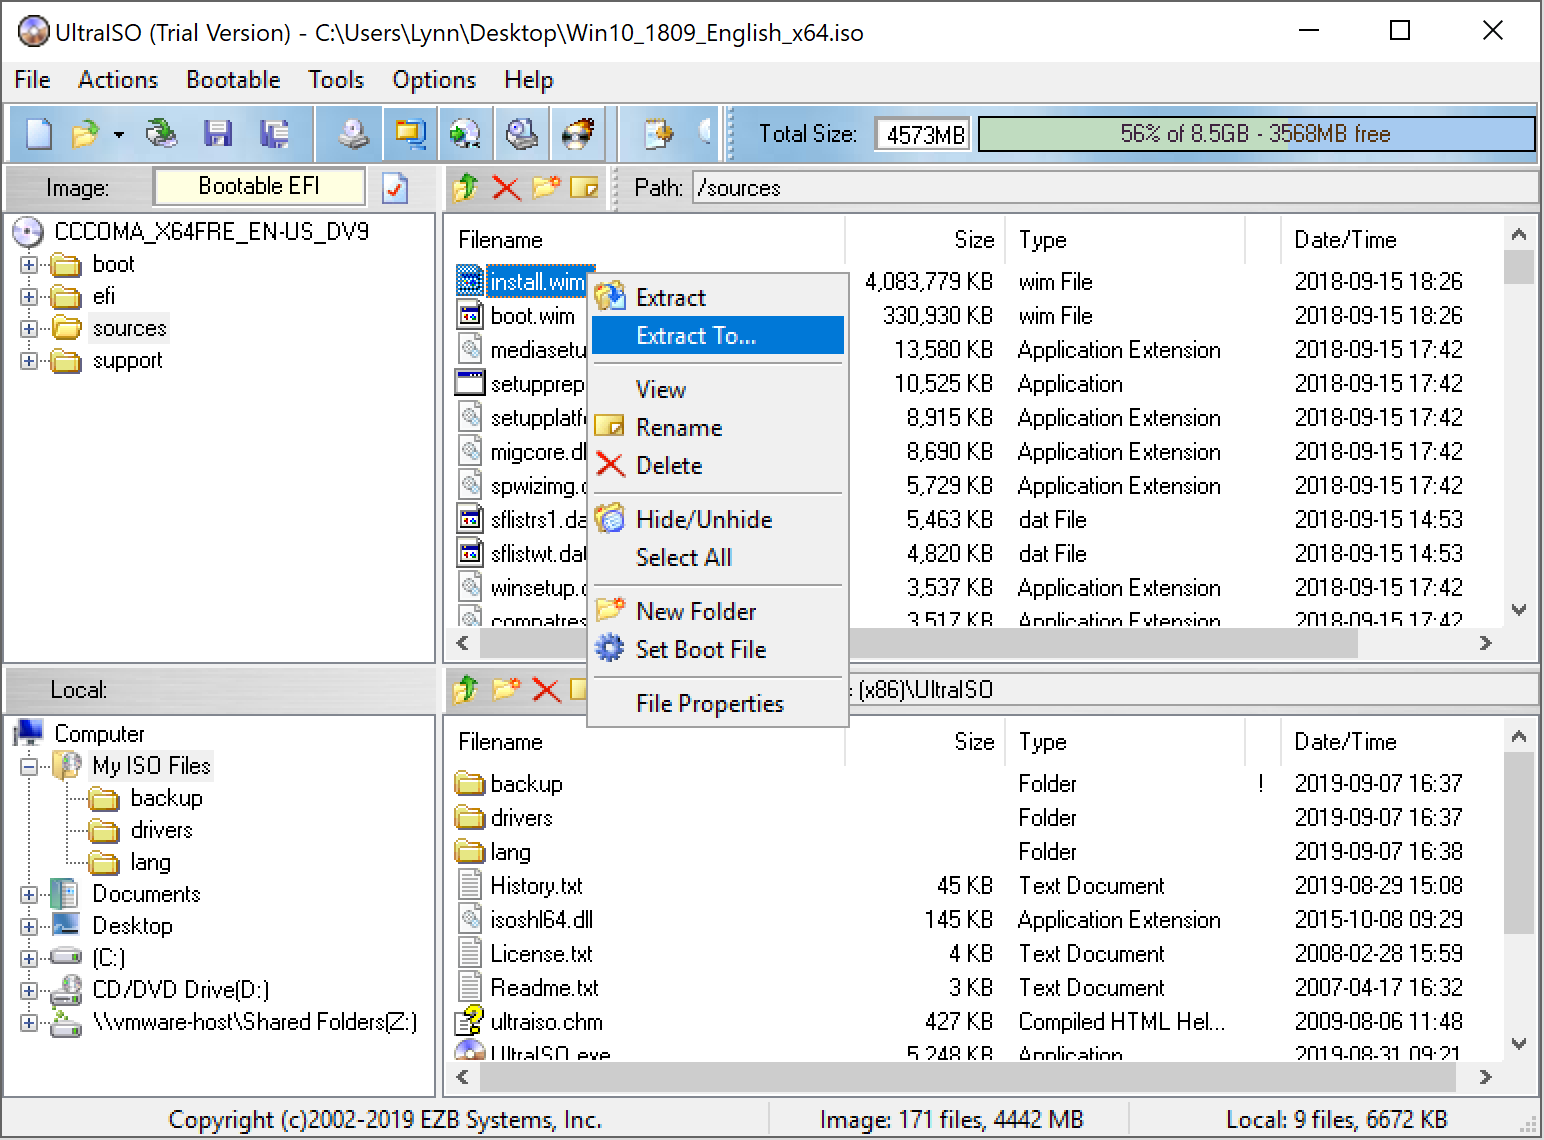
- Open the Windows ISO image from UltraISO using
File -> Open... -
Extract
install.winfromsourcesfolder usingExtract To...
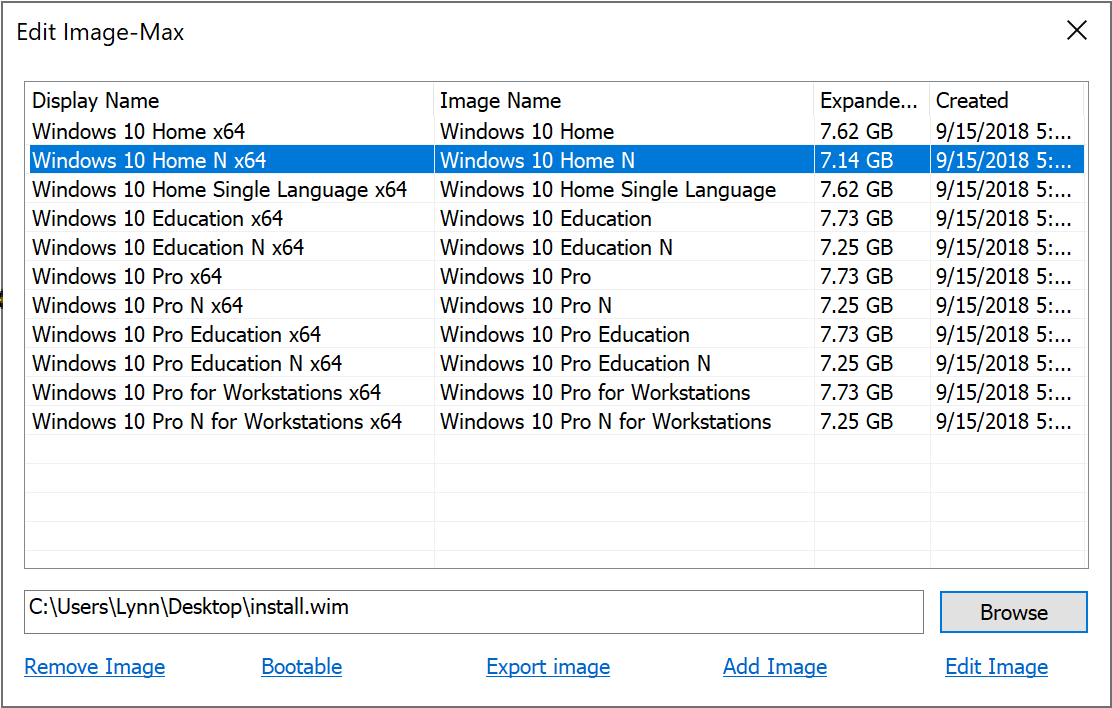
- Open
install.winfrom Dism++ usingFile -> Open Image File -
Extract the smallest image using
Export image(ChooseMaxinSave as type)
- Replace the original
install.winwith the new extracted small installation image in UltraISO usingActions -> Add Files... - Save the Windows image using
File -> Save
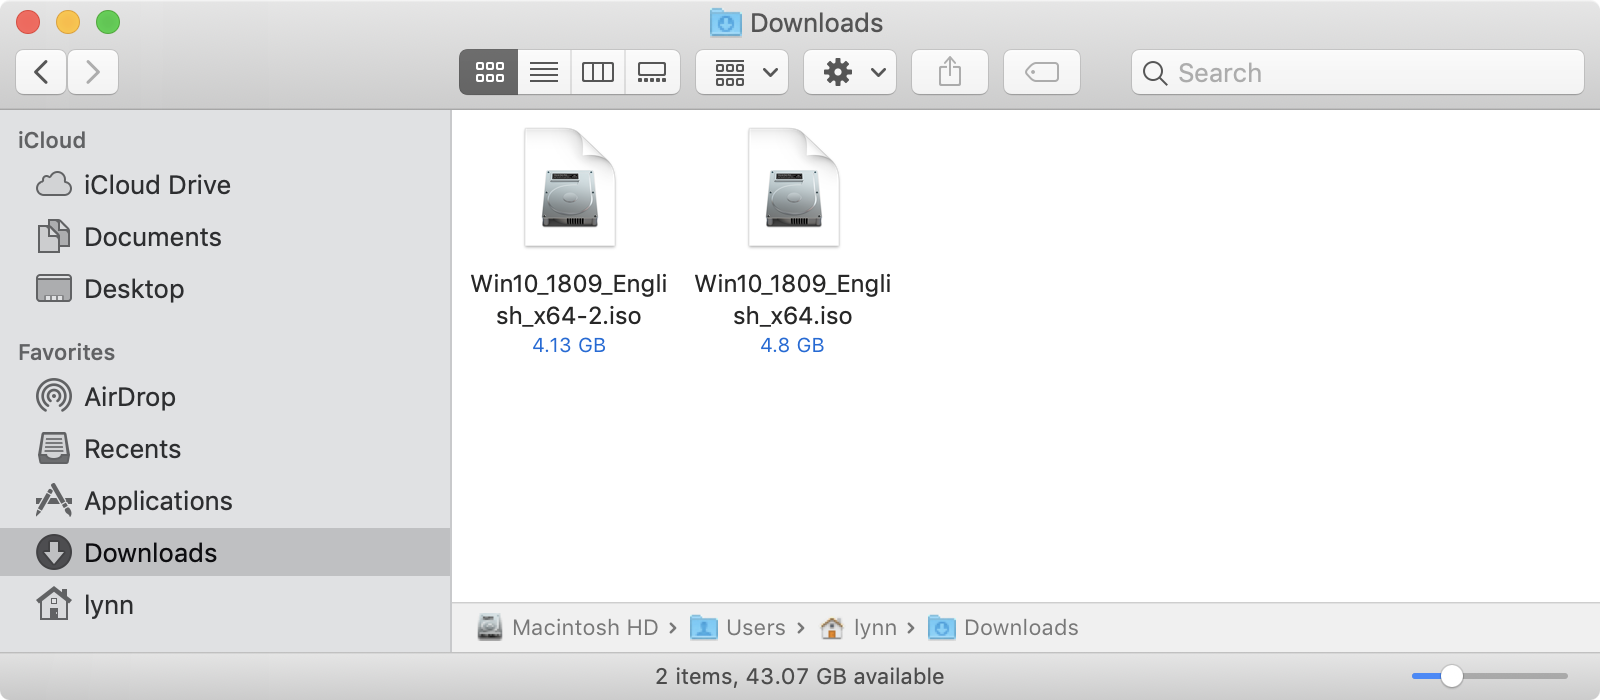
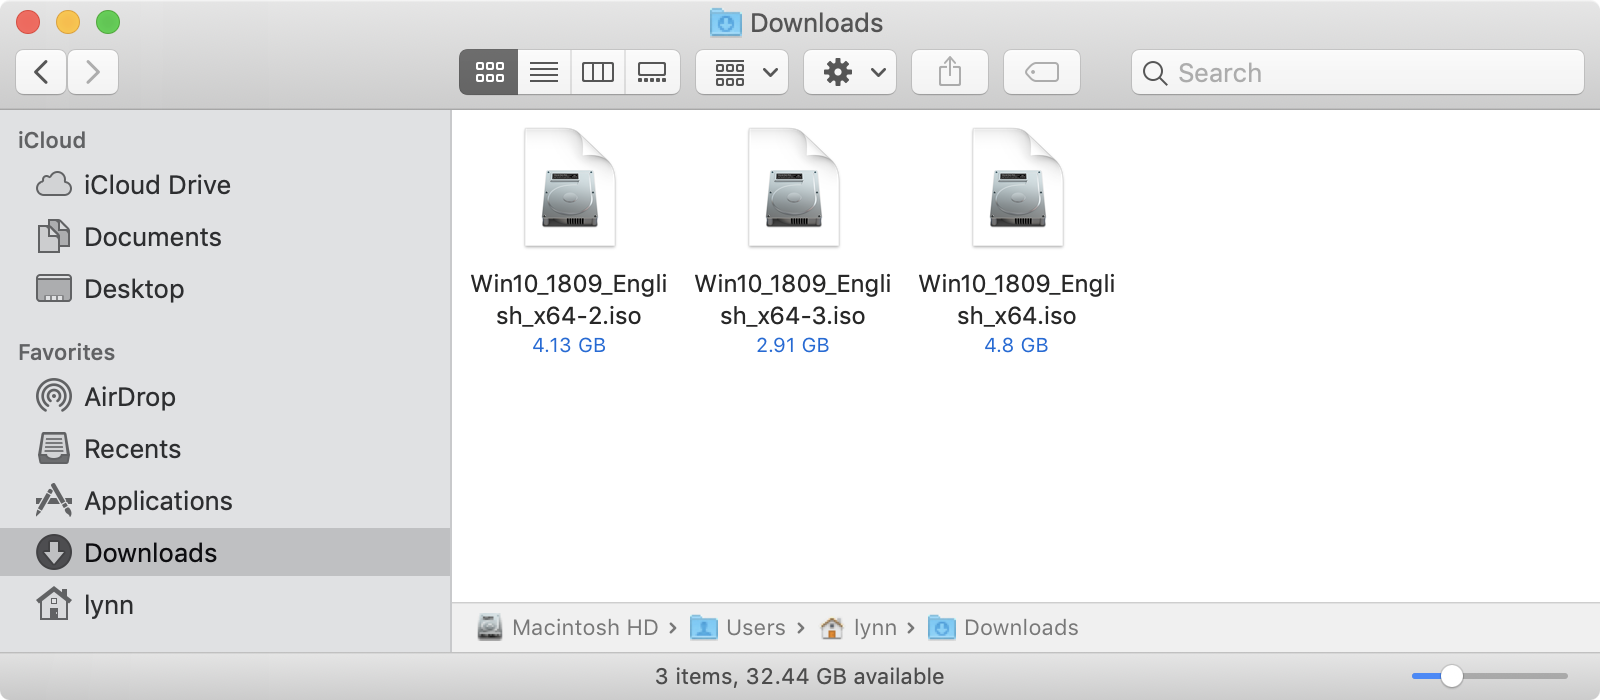
The new image (the first) is a few hundred megabytes smaller than the original image.
Remove Redundant Windows Components
Next, we need to remove the extra Windows components to further reduce the storage after the operating system is installed.
- Extract downloaded ToolKit archive file
- Copy your new Windows ISO image to ToolKit’s
ISOfolder - Run
Start.cmdas administrator - Agree to ToolKit’s EULA by pressing
Akey - Press
Enterkey to continue - Extract the source image using
Source -> Extract Source from DVD ISO Imagemenu - Select the source image using
Source -> Select Source from <DVD> Foldermenu - Cleanup the source image using
Apply -> Cleanup Source Imagesmenu - Remove all required Windows components using
Remove -> Remove Windows Componentsmenu (This could take hours depends on how many components you want to remove) - Cleanup the source image using
Apply -> Cleanup Source Imagesmenu - Apply & save changes to source image using
Apply -> Apply & Save Changes to Source Imagesmenu - Rebuild source image using
Apply -> Rebuild Source Imagesmenu - Export source image to a ISO image
Target -> Make a DVD ISO Imagemenu
You will find the new ISO image (the second) in ToolKit’s ISO folder which is much smaller than the original image (the third).
Test in VM
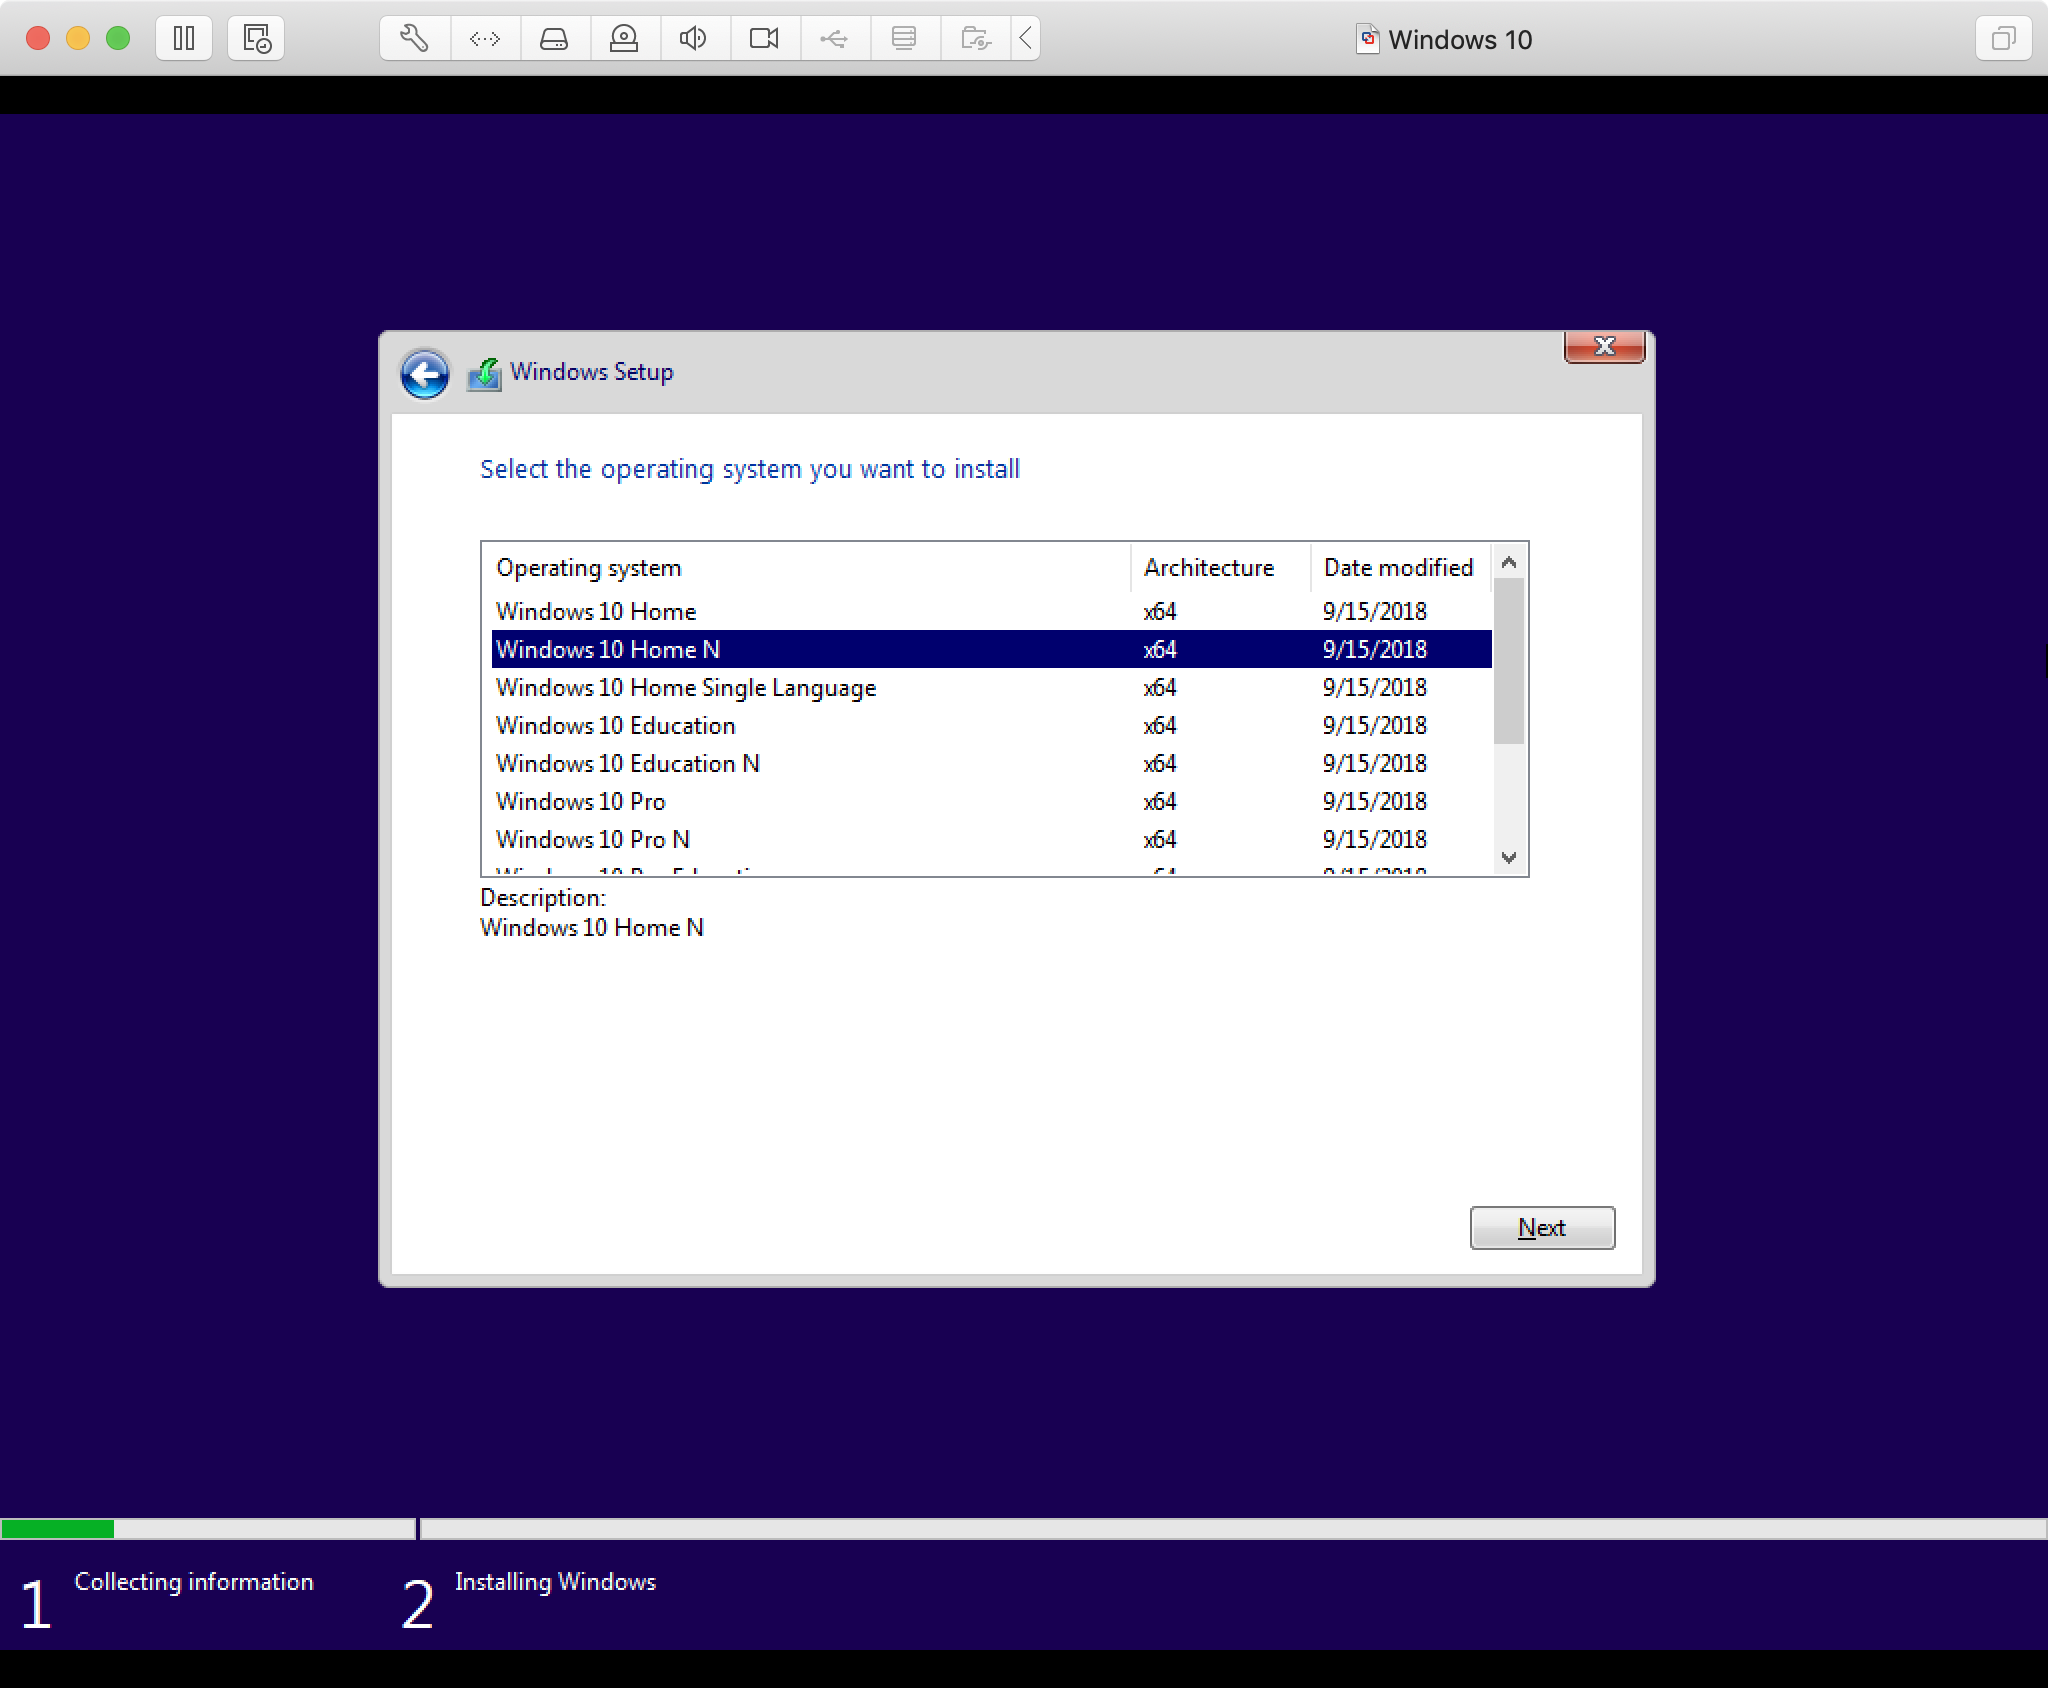
I create two virtual machines with the original image and the new lite image, then compare their resource usage. I choose Windows 10 Home N for the original version of Windows 10 virtual machine which is the same Windows version in the lite image.
Result
We can see from the picture below that virtual machines created with the lite image take up less storage and use less memory at runtime.
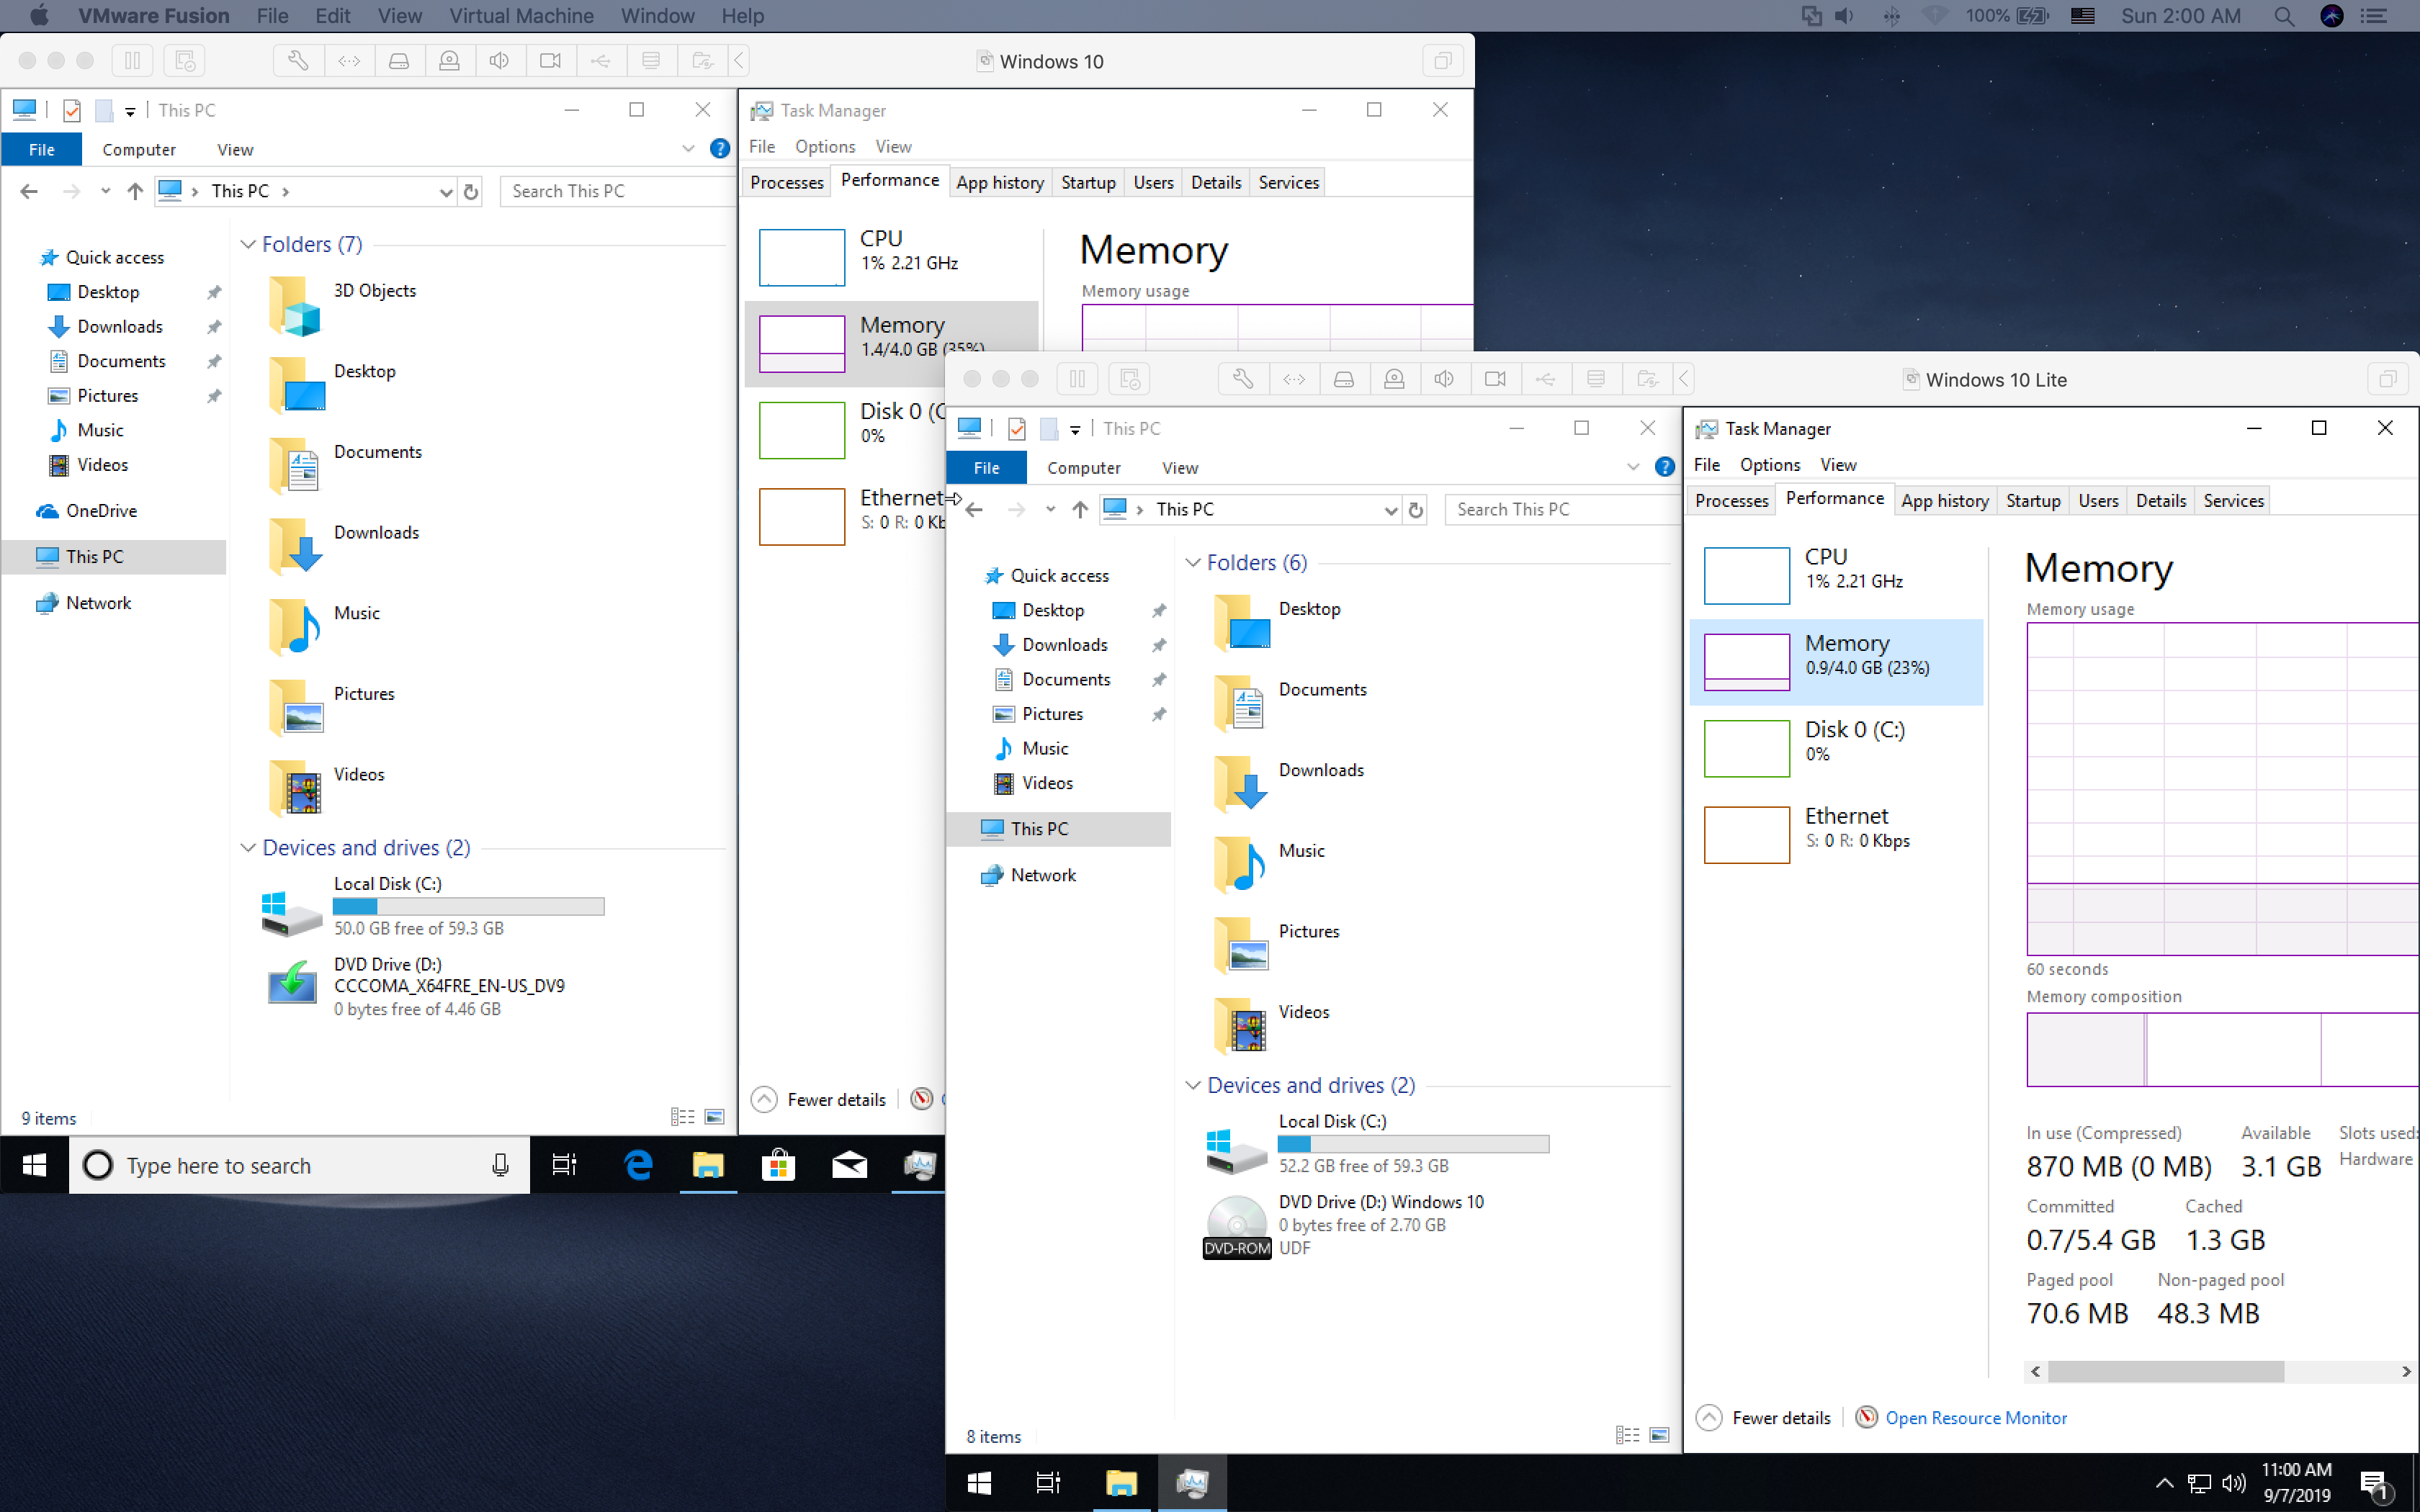
This is mainly because the system only contains the necessary system applications.

As you can see from the comparison, the lite virtual machine is indeed lighter and certainly faster.
Making Windows 10 Lite Edition May 29, 2022
Posted by haryoktav in Interest.
trackback
Time flies, my laptops are outdated, but I wonder if they still survive. So, I found a handy tutorial on Youtube “How to Create A Windows 10 Lite Edition” from Britec09 (https://www.youtube.com/watch?v=WxMqtyNJOkk). [Note, I smashed the Subscribe and Like buttons already *smile*]. Here I followed the instructions and wrote it for my purpose.
- Download Rufus for creating bootable USB drives. https://rufus.ie/
- Download Media creating tool. https://www.microsoft.com/en-gb/software-download/windows10, run Media creating tool, connect to internet, and create an DVD ISO file of your Windows. You need to remember the product number key for further installation. Also check the Windows version in Setting-System-About, mine was 21H2. Why Media Creation Tool using internet? Because it downloads the ISO! You can consume about 4GiB internet data.
- Download MSMG Toolkit. https://msmgtoolkit.in/ then extract it. I got folder named Toolkit_v12.2.
- Put the Windows ISO file (#2) in MSMG Toolkit folder Toolkit_v12.2\DVD\ then remove (or move) the Windows ISO file.
- Run Start.cmd in Toolkit_v12.2
- Type A for Accept, it shows something then Enter.
- Type 1 for Source, then type 7 for Extract Source from Custom Windows ESD Image, then type 6 for Windows 10 Pro (mine also the same), it processes a while then Enter.
- Type 7 for Tools, then type 1 for WIM Manager, then type A for Display, you can see one version of Windows, the others were removed, then type X for Exit.
- Type 1 for Source, then type 1 for Select Source from Folder, then type Q for go back a while, we need the other 2 files.
- Go to https://www.catalog.update.microsoft.com/ and search “servicing stack update 21h2” (mine was 21H2). Download for x64-based System only. In my case, it showed “2022-05 Servicing Stack Update for Windows 10 Version 21H2 for x64-based Systems (KB5014032)” and the file is “ssu-19041.1704-x64_70e350118b85fdae082ab7fde8165a947341ba1a.msu”
- Still in https://www.catalog.update.microsoft.com/, search “cumulative update 21h2 x64”. Im my case it showed “Cumulative Update for Windows 10 Version 21H2 for x64-based Systems (KB5015020)” and the file is “windows10.0-kb5015020-x64_5a735e4c21ca90801b3e0b019ac210147a978c52.msu”
- Put 2 files (#10, #11) in Toolkit_v12.2\Updates\w10\x64
- Go back to MSMG command window.
- Type 1 for Source, then type 1 for Select Source from Folder, then type 1, then type y twice for:
Do you want to mount Windows Setup Boot Image ? [‘Y’es/’N’o] : Y
Do you want to mount Windows Recovery Image ? [‘Y’es/’N’o] : Y
then it processes a while.. when finish press Enter - Back to main, type 2 for Integrate, meanwhile..
- Go to https://msmgtoolkit.in/downloads.html and browse the MSMG Toolkit Packs. They inform that they lost all the Toolkit Pack contents, so I just picked the VCRuntime from \Toolkit\Packs\VCRuntime in their Mediafire. After downloaded, put those files into our folder \Toolkit_v12.2\Packs\VCRuntime\w10
- Now back to Integrate menu, type 3 for Windows Features, then type Q for integrating Microsoft Visual C++ Runtime… processing.. then hit Enter. Type X for back to Integrate menu
- Type 4 for integrating Windows Updates, klik Y for
Do you want to Continue ? [‘Y’es/’N’o] : Y
type 1 for Integrate Windows Updates.. processing… press Enter when finish, then type X to go back to main menu. - Type 3 for Remove, then type 1 for Remove Windows Components, then type 1 for Select Windows Components, remove unused components, type X until go back to Remove Windows Components Menu.
- Type 2 for Start Removing Windows Components… processing.. finish, then type X twice to go back to Main menu.
- If we happy with the changes and finish, we can type 5 for Apply, type 2 for Apply & Save Changes to Source Images, then type N for not cleaning up Image folder:
Do you want to cleanup Image folder ? [‘Y’es/’N’o] : N
then processing… be patient.. then type X when finish to go back to Main menu. - Type 6 for Target, type 1 for Make a DVD ISO Image, enter the ISO Volume Label and enter the ISO File Name. Press any key when finish.
- Type X for Quit. Yey! We got ISO lite edition!
- Use Rufus to burn the ISO into a bootable USB drive. Choose the right partition scheme for your case. I picked MBR for booting through BIOS.
- Done. Your ISO is in \Toolkit_v12.2\ISO.
I will update my two-old-laptops: HP Pavilion SleekBook 14-b009AU (https://haryoktav.wordpress.com/2013/10/05/hp-pavilion-sleekbook-14-b009au-yang-menantang/) and Lenovo Ideapad S10-3t (https://haryoktav.wordpress.com/2013/10/04/windows-8-1/). See you!
Edited, April 23, 2023:
Doesn’t work as expected.. lol
На форумах сломано немало копий в спорах о Windows 10 LTSC, считающейся одной из самых легких и быстрых версий Windows 10. Но постепенно LTSC становится неактуальной, лишаясь поддержки новых игр, о чем я писал в блоге «Игры все чаще требуют новую версию Windows 10 или почему Windows 10 LTSC не годится для игр«.
Да и оптимизации под новое железо приходят в LTSC с большим опозданием, в Windows 10 версии 1903 оптимизации подтянули производительность процессоров AMD Ryzen, а архитектуру графических драйверов WDDM подняли до версии 2.6. С ними в DX12 появилась поддержка технологии Variable Rate Shading для видеокарт GeForce GTX 1660 и выше.

Но обычная Windows 10 Pro становится все тяжелее и неповоротливее, что я показал наглядно в блоге «Сравниваем производительность Windows 10 Pro и LTSC — загрузку процессора, ОЗУ и накопителя«. Разница между системами очень большая, и если на слабом ПК она будет видна явно, то на мощном железе может проявится в виде небольших фризов, лагов и задержек в работе и играх.
Способов получить быстрый отклик системы и низкую загрузку на «железо» на обычной Windows 10 Pro есть несколько: готовые игровые сборки ОС, пакетные оптимизаторы, отключающие лишнее, твики и настройки уже установленной ОС вручную, и подготовка настроенного под себя образа Windows 10. Для создания настроенных образов обычно используются утилиты MSMG ToolK, Dism++ или NTLite.

Готовые игровые сборки ОС стоит отмести сразу, ведь мы не знаем, что с системой сделал сборщик и что мог туда добавить. Пользоваться такими сборками крайне небезопасно. Пакетные оптимизаторы, гуляющие по сети в виде Powershell скриптов, таких как Windows 10 Sophia Script — средство довольно действенное, особенно если вы умеете их настраивать, но довольно быстро теряющие актуальность, ведь Windows 10 быстро меняется.

Настройка уже установленной Windows, с ручным вырезанием лишнего — неплохой способ, но его приходится делать каждый раз после переустановки ОС. А вот создание настроенного под себя образа Windows 10 позволит использовать его в течении всего жизненного цикла версии (October 2020 Update или 20H2 будет поддерживаться до мая 2023 года) и дает возможность использовать образ многократно и на разных ПК.
Этим мы сегодня и займемся, с помощью утилиты NTLite, которая довольно проста по сравнению с аналогами. Как выяснилось, при создании образа при помощи утилиты NTLite мы получаем еще несколько увесистых плюсов, но обо всем по порядку.
Подготовка образа Windows 10
Все действия мы произведем на Windows 10 Pro 20H2, самой актуальной версии на сегодня. Образ ее получить довольно просто — с сайта Microsoft надо скачать средство установки.

И с его помощью сохранить iso-файл Windows 10 на диск.


Теперь нам понадобится программа NTLite, скачать которую можно с официального сайта. Программа может работать с бесплатной, ограниченной некоммерческой лицензией, функций которой нам вполне хватит.
Добавление образа Windows 10 в NTLite
NTLite не умеет работать с iso-файлами напрямую, поэтому скачанный образ Windows надо распаковать в папку архиватором или смонтировать, и затем скопировать в папку его содержимое. Добавить наш Windows 10 в NTLite можно через меню «Образ» — «Добавить» — «Каталог образов», указав папку с распакованным iso-файлом.

Выбрав нужную редакцию, надо в контекстном меню нажать «Загрузить», щелкнув ПКМ по Windows 10 Pro в нашем случае. Процесс обработки образа довольно ресурсоемкий даже при использовании шестиядерного процессора и SSD.

Настройка Windows 10
После загрузки образа слева в NTLite появится меню для работы. Я начал с удаления лишних компонентов, вырезав почти все UWP-приложения.

Там же можно вырезать клиент Hyper-V, adobe flash для internet explorer и многое другое. В меню удаления функций можно удалить Windows Media Player и то, что вы никогда не используете в Windows, заменяя сторонними программами. Но особо усердствовать в вырезании всего и вся не стоит, это может сказаться на стабильности системы.

Гораздо интереснее в NTLite меню «Настройки», дающее доступ к огромному количеству функций, которые мы обычно настраиваем после установки Windows 10 с помощью твиков реестра и групповых политик. Здесь все собрано в удобные списки и требует всего пары кликов мышью.


Есть и настройки приватности.

Настройки меню Пуск.

Множество настроек Проводника, в том числе и возвращение старого средства просмотра изображений.

И даже настройки файла подкачки и гибернации.

Далее идут настройки служб, где вы можете выключить все ненужные службы.

Есть возможность интегрировать обновления, драйверы и ветки реестра.

После окончания настройки результаты работы можно сохранить прямо в iso-файл. В моем случае настройки были довольно щадящими, чтобы не повредить стабильности системы, но все равно удалось удалить 37 компонентов, отключить 3 функции и 3 службы, и применить 48 настроек.

Что дало экономию около гигабайта места на накопителе после установки Windows 10, что NTLite сразу подсчитывает.

Сравнение сборки Windows 10 с обычной Windows 10 и с Windows 10 LTSC
Сравнение производилось на виртуальной машине, идентичной для всех трех систем — два ядра, 4 ГБ ОЗУ и 60 ГБ на системном диске. Но для начала посмотрим, применились ли настройки, что мы сделали в образе Windows 10 Pro.
Меню Пуск чистое, без рекламного мусора и Candy Crush Saga.

Стандартное средство просмотра изображений сразу доступно, надо только ассоциировать с ним файлы.

А вот OneDrive удалить средствами NTLite не удалось или ОС сама «подтянула» его после установки. Остальные вырезанные UWP-приложения отсутствуют.

Загрузка ОЗУ составила 1.2 ГБ, что заметно меньше, чем на дефолтной Windows 10, и на 200 МБ больше, чем у Windows 10 LTSC. Но я не стремился к максимальному урезанию, а пытался соблюсти баланс между функциями, скоростью и стабильностью ОС.

Дефолтная Windows 10 «кушает», напомню, 1.7 ГБ ОЗУ после загрузки.

Количество запущенных процессов в сборке составляет 103, на дефолтной Windows 10 — 130, на Windows 10 LTSC — 92.

Итоги
На работу с образом Windows 10 через NTLite у меня ушло около получаса, а результат по степени облегчения получился гораздо ближе к Windows 10 LTSC, чем к дефолтной Windows 10. Дополнительный плюс утилиты NTLite — возможность изменения огромного количества настроек Windows 10 с удобным доступом. Но OneDrive, который отключить не удалось, немного испортил впечатление.
Пишите в комментарии, используете ли вы Windows 10 с настройками по умолчанию, или стараетесь ускорить ее работу и сделать ее более удобной?
Telegram-канал @overclockers_news — теперь в новом формате. Подписывайся, чтобы быть в курсе всех новостей!