
Как обрезать скриншот
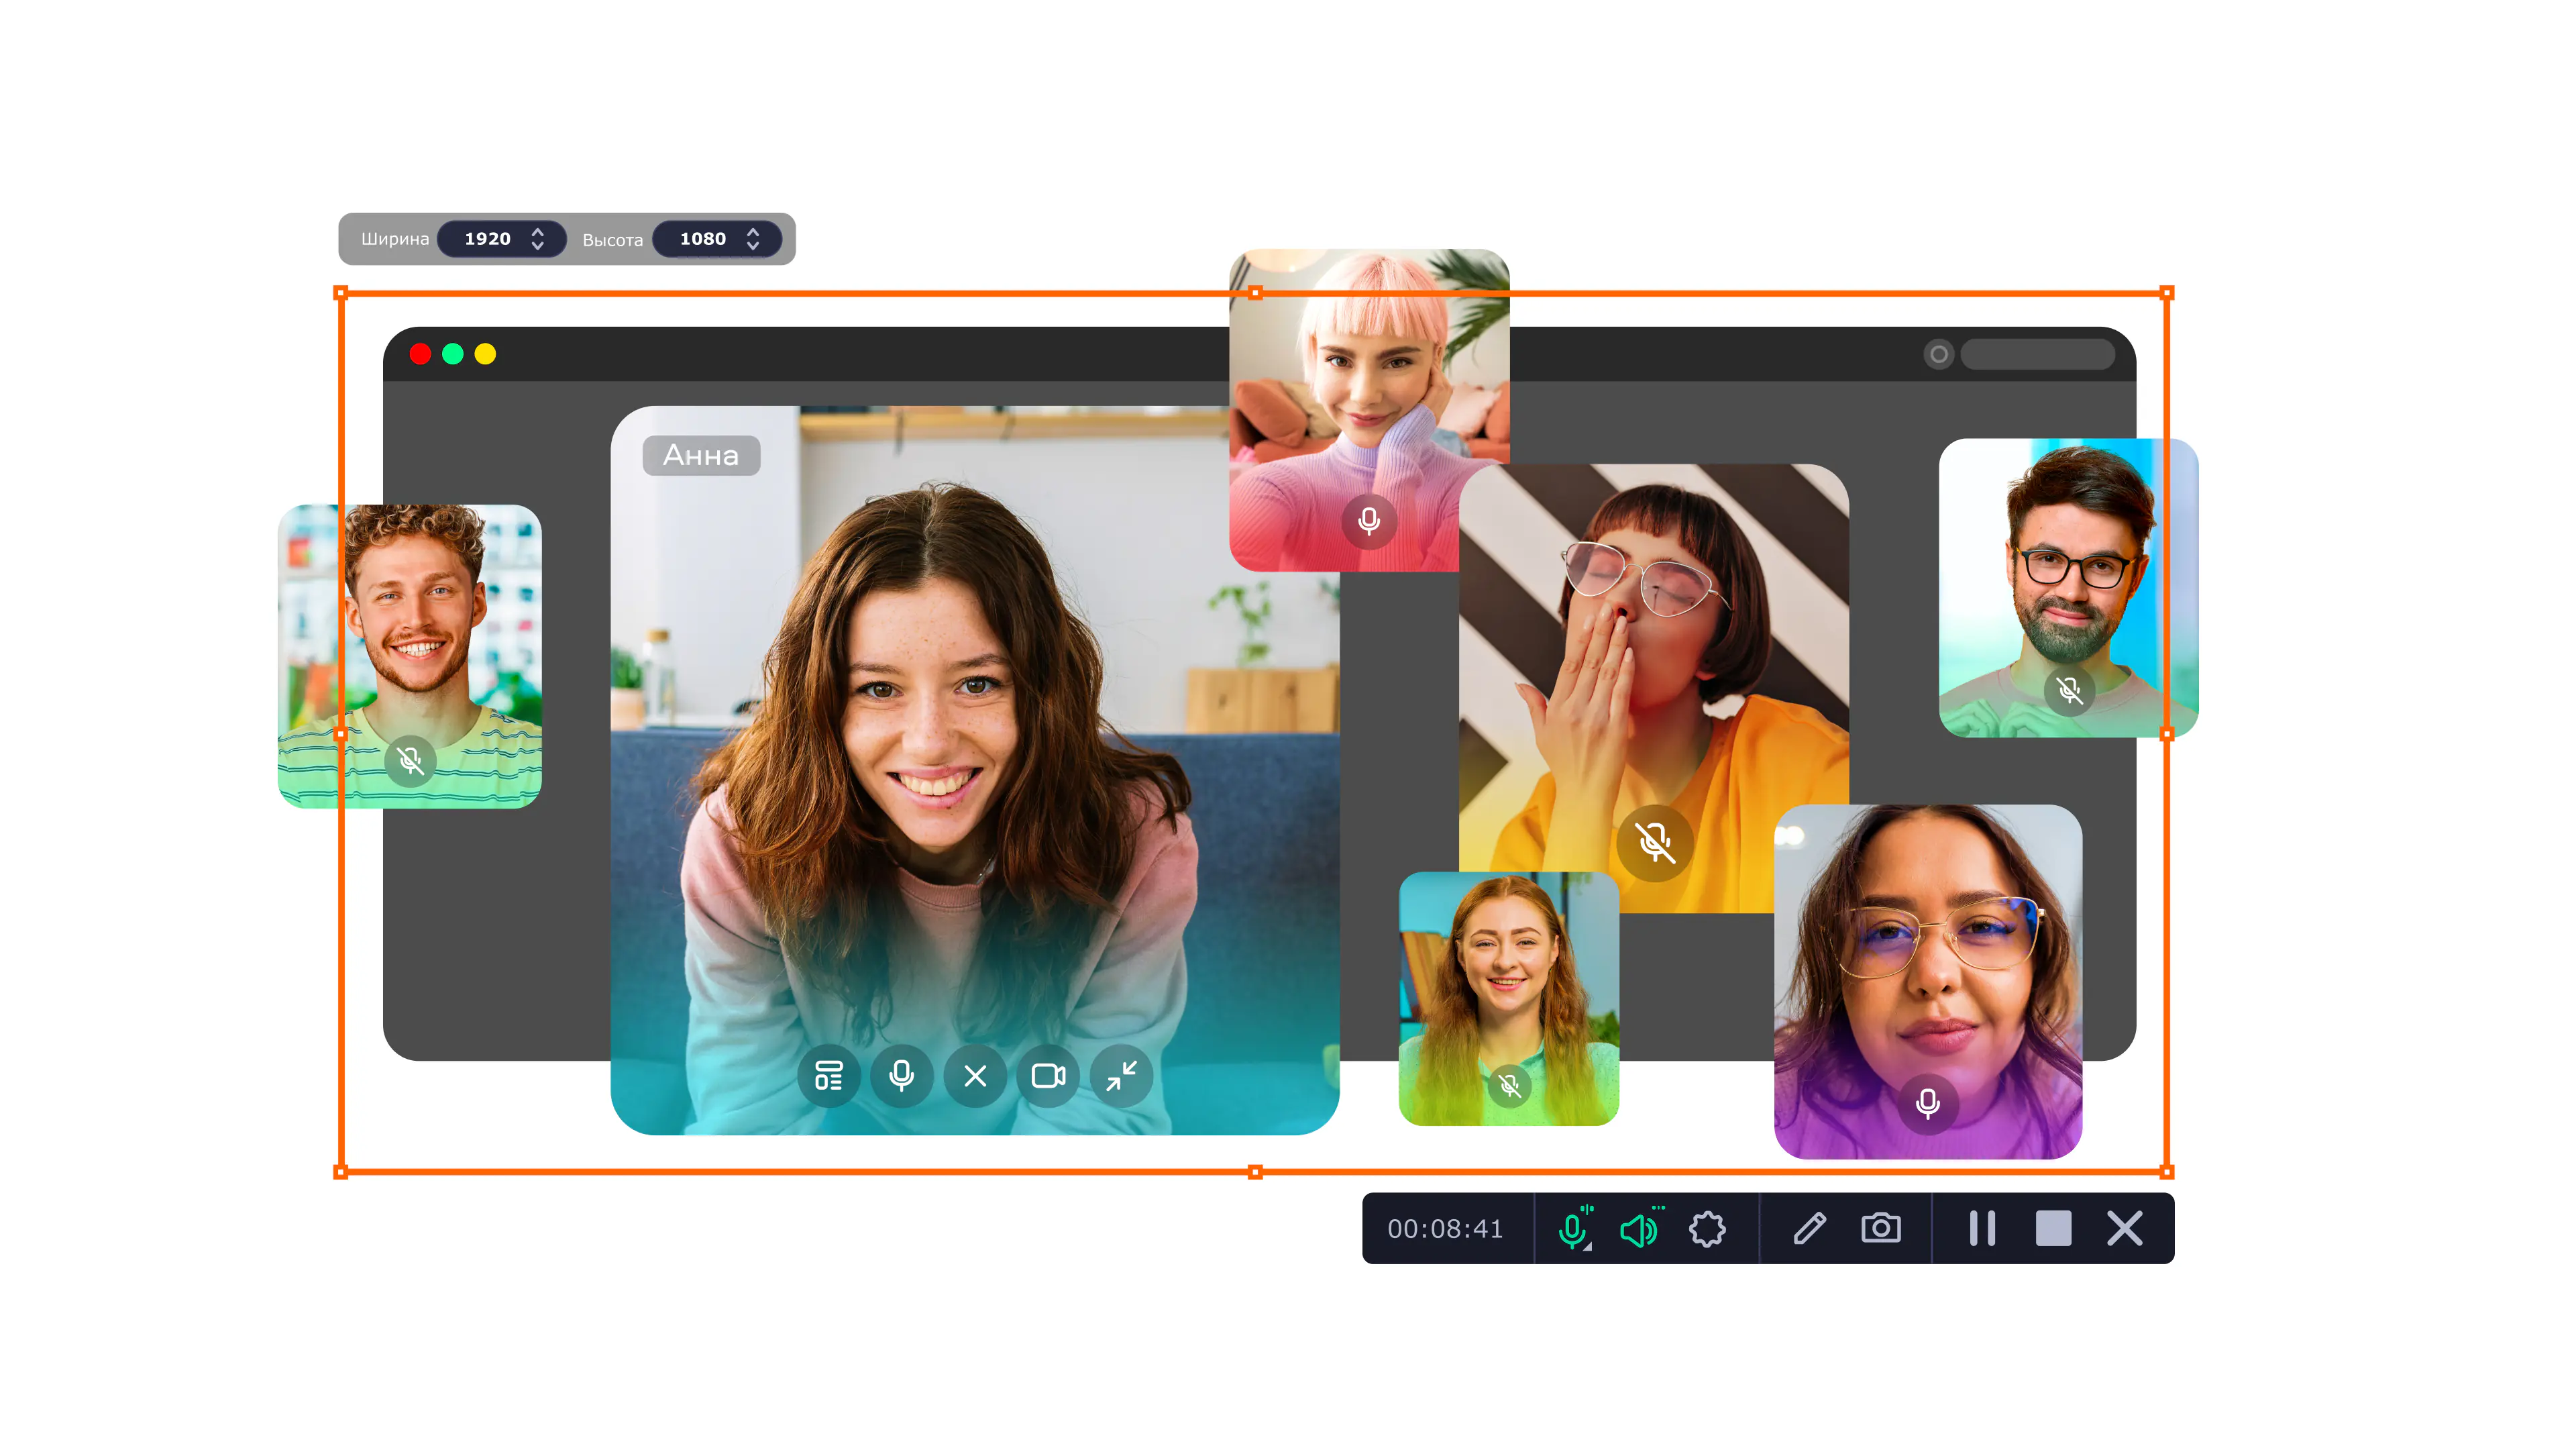
Для создания скриншотов используйте Мовавика Запись экрана!
- Создавайте скриншоты всего в два клика
- Добавляйте текст и пометки
- Сохраняйте изображение на свой компьютер или на Google Диск
Как обрезать скриншот на компьютере

Редактировать скриншот можно как при помощи стандартных предустановленных программ, так и посредством выбора специального софта. В первом случае получится только обрезать скрин, добавить текст, стрелки и другие примитивные графические объекты. Во втором случае можно использовать более прогрессивный софт и получать больше инструментов, чтобы отредактировать снимок экрана. Поговорим о том, как обрезать скриншот на компьютере каждым из этих способов и какие комбинации клавиш можно использовать для упрощения процесса.
Стандартный способ: кнопка PrtScr и программа Paint
Главный принцип процесса заключается в сохранении скриншота в буфер обмена и в дальнейшей обрезке снимка экрана в стандартной программе Paint.
Как это сделать:
-
Если вы хотите сразу редактировать скриншот на Windows 10, нажмите на кнопку PrtScr – снимок экрана попадет в буфер обмена. Если необходимо сначала сделать несколько скриншотов и только потом их обрезать, используйте горячие клавиши – например, Win + PrtScr. В последнем случае компьютер автоматически сохранит снимок экрана в формате PNG. Его можно будет найти в папке Снимки экрана, вложенной в стандартную папку Изображения.
-
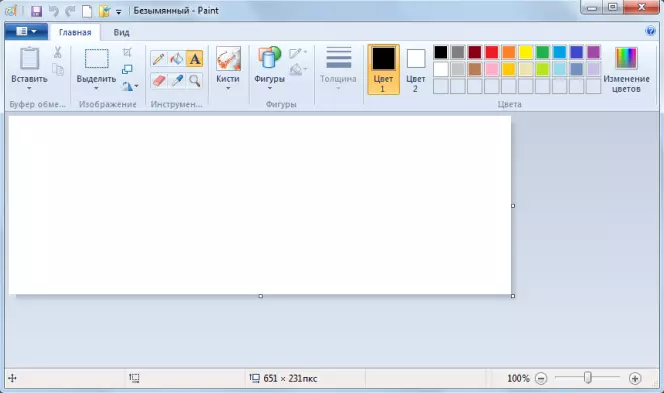
Откройте программу Paint и перенесите туда созданный скриншот. Если он находится в буфере обмена – используйте комбинацию клавиш Ctrl + V. Если же нужно поместить на рабочее поле ранее сохраненные скриншоты, то перетащите их в окно программы или нажмите на кнопку Открыть, после чего укажите путь к нужным изображениям.
-
Выделите область изображения, которую нужно оставить и нажмите на кнопку Обрезать. После этого вы сможете сохранить обрезанный скриншот в одном из предложенных форматов, предварительно указав путь к папке, в которой будет храниться изображение.
Альтернативный вариант – обрезать скриншот в Ворде. Это особенно удобно при вставке скриншота сразу на страницу текстового редактора. Для обрезки изображения необходимо щелкнуть на него, а затем на вкладку Работа с рисунками в верхней части страницы. Здесь нужно нажать на кнопку Размер и выбрать инструмент Обрезка. На изображении появятся границы – сужая их, вы будете обрезать все выходящее за пределы.
Мовавика Запись экрана – лучший способ обрезать скриншот на компьютере

Программа помогает быстро сохранять уже обрезанные скриншоты или полные снимки экрана на ПК и ноутбуках, а также использовать расширенные настройки и инструменты для редактирования изображения в высоком качестве.
Мовавика Запись экрана подходит для компьютеров на базе Windows и MacOS – проблем с софтом не возникает даже при установке на Mac или MacBook. Достаточно выбрать версию, скачать установочный файл и запустить программу. Обычно это занимает не более 1-2 минут.
Как сделать скриншот с помощью программы:
Шаг 1
После установки программы значок скриншота появится на панели управления – чтобы сделать снимок экрана, нажмите на него или на клавишу F8.
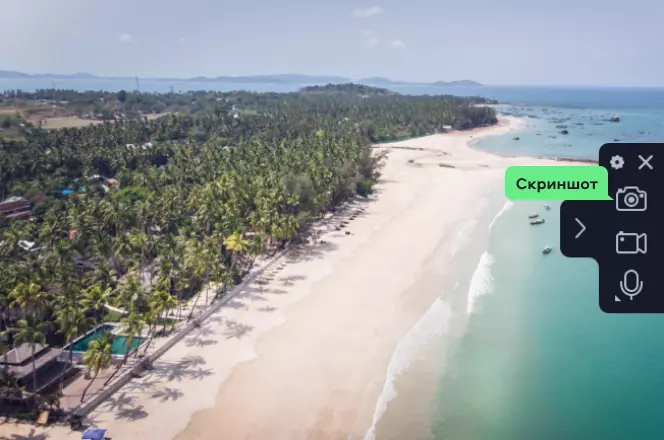
Шаг 2
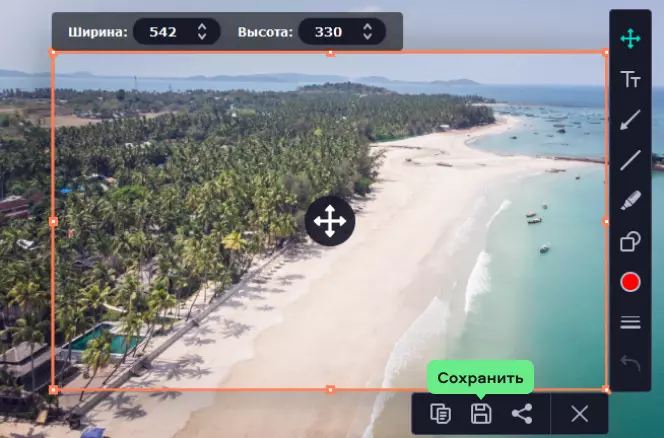
Выделите рамкой область экрана, которая должна войти в готовый скриншот. Если вы хотите снять весь экран – зажмите Пробел и кликните мышью на любой пустой участок области стола.
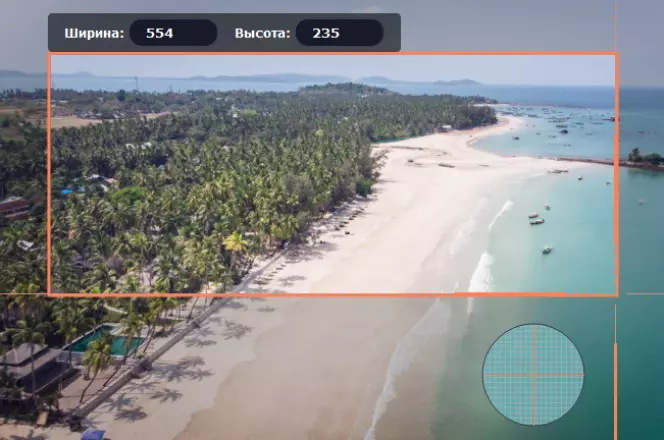
Шаг 3
Нажмите на кнопку Сохранить, чтобы записать файл в память компьютера. По умолчанию скриншот будет сохраняться в папке Мовавика Запись экрана, вложенной в Мои видеозаписи. Вы можете указать другой путь для сохранения файла в настройках.
Параллельно с созданием уже обрезанного скриншота программа позволяет изменять изображение без предварительного сохранения и переноса в рабочее окно. Сразу после того, как вы создадите скриншот выделенной области, вы сможете добавить текст и графические объекты, изменить настройки сохранения и отредактировать изображение по своему усмотрению.
Как обрезать скриншот на телефоне

Обрезать скриншот на телефоне можно при помощи стандартных и установленных приложений. Все будет зависеть от марки смартфона и установленной операционной системы. Рассмотрим процессы обрезки скриншотов на iPhone и на телефонах с ОС Android.
Как обрезать скриншот на iPhone
Достаточно открыть альбом и использовать предустановленные инструменты. С их помощью можно не только обрезать скриншот, но и провести базовое редактирование изображения.
Как это сделать:
-
Откройте приложение Фото и выберите нужное изображение.
-
В правом верхнем углу нажмите на кнопку Править, а затем на значок Обрезать и повернуть в нижней части экрана.
-
Поместите нужную область в появившуюся рамку, передвигая ее или перетягивая границы, после чего нажмите на кнопку Готово.
Если результат вам не понравится, нажмите на кнопку Отмена и пройдите всю процедуру еще раз. При необходимости скриншот можно дополнительно отредактировать, изменить его положение и соотношение сторон.
Как обрезать скриншот на телефоне с ОС Android
Алгоритм зависит от модели телефона. На некоторых устройствах кнопка Изменить появляется сразу после создания скриншота. На других необходимо перейти в раздел Галерея и открыть нужное изображение.
Как обрезать скриншот:
-
Откройте нужное изображение в разделе Галерея.
-
Нажмите на кнопку Изменить, а затем на кнопку Обрезать.
-
Установите границы нужного фрагмента и нажмите на кнопку ОК.
После этого вы сможете сохранить изображение или поделиться им в социальных сетях, в зависимости от возможностей вашего телефона. Если вы остались недовольны результатом – отмените действия и попробуйте обрезать скриншот еще раз.
Скриншот можно обрезать на компьютере, ноутбуке и смартфоне путем использования стандартных инструментов или установленных программ. Самые простые способы позволяют только удалить с изображения лишние, вырезав нужный фрагмент.
Более функциональные программы также открывают возможность для редактирования скриншотов, добавления текста и графики, изменения яркости снимка экрана. Лучший способ обрезать скриншот и добавить визуальные эффекты – программа Мовавика Запись экрана, которая позволяет редактировать изображение еще до его сохранения в памяти устройства.
Удобная запись экрана для эффективной работы или учебы
Обратите внимание: программа Мовавика Запись экрана не предназначена для записи видео и других материалов, защищенных от копирования.
Похожие инструкции
-
Как записать онлайн-видео? | 8 программ для захвата потокового видео
-
Лучшие программы для записи встреч на компьютере и телефоне
-
Как сделать скрин на macOS – 4 быстрых способа сделать скриншот экрана
-
Как скачать музыку на флешку
-
Программы для записи звука на Mac OS | Как записать звук на Mac
-
Обзор OBS Studio – скачать бесплатно на русском
-
8 сервисов для записи видео с экрана онлайн и бесплатно – ТОП 2025
-
Диктофон онлайн | 10 лучших сервисов для записи голоса и звука с компьютера
-
Как записать конференцию в Zoom с телефона и на компьютере – 4 способа
-
Программа FastStone Capture: скачать бесплатно русскую версию

Остались вопросы?
Если вы не можете найти ответ на свой вопрос, обратитесь в нашу службу поддержки.
Подпишитесь и получайте скидки, советы по монтажу и идеи для контента
На нашу рассылку подписалось уже более 1,5 млн. пользователей
You can edit screenshot Windows 10 tools capture by using third-party applications, PowerPoint, or within the snipping tool.

While there are different methods of taking screenshots on your Windows PC, editing depends on the screenshot tool.
This post teaches you the nitty-gritty of screenshot editing on your Windows 10 PC.
Contents
- 1 How To Edit Screenshot on Windows 10?
- 1.1 – Take the Screenshot
- 1.2 – Save the Screenshot
- 1.3 – Edit Your Screenshot
- 1.4 – Save
- 2 How To Use Snipping Tools to Edit Windows 10 Screenshots?
- 2.1 – Use Paint To Add Text
- 2.2 – Using Powerpoint to Add Text
- 3 How To Use Third-party Apps To Edit Windows 10 Screenshots
- 3.1 – Snagit
- 3.2 – Lightshot
- 3.3 – Picpick
- 3.4 – Greenshot
- 4 Conclusion
How To Edit Screenshot on Windows 10?
You can edit your screenshot on Windows 10 using the Snip & Sketch tool provided within the PC. To do so, launch the tool and navigate to the Toolbar and select an editing option. The editing options at your disposal include cropping, drawing, and highlighting.
Here is how to edit screenshots on PC:
– Take the Screenshot
The first step is to go and take a screenshot of your PC if you do not have one saved. To do so, you will need to launch the Snip & Sketch tool. The easier way to launch it is to type it in the windows search bar, and when it pops up, you click on it.

However, you can also use a shortcut – the Snip and Sketch shortcut Windows 10 offers is pressing the Win key + Shift + S simultaneously on the keyboard. When the tool pops up, use the menu at the top pane of your screen to choose the correct mode for screenshotting.
After picking one of the above selections, the screenshot of the active window will pop up from the lower right side of your screen with a preview of the screenshot. Click on it to allow you to edit the screenshot.
– Save the Screenshot
Click on the Copy button at the top panel of the screenshot. Alternatively, you can press Ctrl + C on your keyboard.

This action saves a copy of the original screenshot before you change anything.
– Edit Your Screenshot
Go to the Toolbar at the top panel of the screenshot to begin editing. The options available for editing are:
- Crop Function: To use this function, click the Crop button at the right end. This will create a rectangle with circles on the four corners of your screenshot. Place your cursor on one corner and drag inward or outwards depending on your needs.
- Highlight Text: Use the highlighter to highlight the text of interest. Click the Highlighter button. Find a sentence you wish to highlight, place the cursor, click and hold, and then drag toward the desired direction.
- Writing and drawing: Click the ballpoint pen or pencil button and move your mouse’s cursor to where you wish to write. Left-click and hold, then start writing whatever you wish. You may also draw images or figures with this tool.
- Erase: Click the Eraser button to activate it and move your cursor to the point you wish to erase. Left-click and hold, then hover over the statement, word, or anything you wish to erase.
You can also use a ruler or a protractor to make straight lines or precise angles. Just click on the ruler button and select either ruler or protractor to create perfect lines and angles.
– Save
When you complete editing your screenshot, press the Control + S button. Alternatively, you can press the printer-like button on the top right to save the changes.
Select a location to save the file, name the screenshot, select the file format, and click the Save button. Typically, Snip & Sketch will name your screenshot in the “screenshot-date-time” format to make it easier for you to identify.
For subsequent saving, you will not need to select the location, as Snip & Sketch will automatically remember it and save screenshots. But if you do not want to save your edited screenshots, press Control + C (Copy) to store them on the clipboard. To paste it, press Control + V. These keyboard shortcuts save you a lot of time.
How To Use Snipping Tools to Edit Windows 10 Screenshots?
To use snipping tools to edit Windows 10 screenshots, you first need to capture a screenshot and then edit it using either Paint or Powerpoint. The snipping tool allows you to capture and edit screenshots easily. You can edit an image to highlight something or add annotation within the capture.
– Use Paint To Add Text
Your screenshot is already saved on the clipboard. Follow these steps next:
- Tap the Windows key and type “Paint,” click on it when it pops up to launch the paint app.
- When the paint app opens, press Ctrl + V keys to paste the screenshot.
- Select the Home tab and go to Tools. Select the A icon, which is the Text Icon.
- Go to the area you wish to add text, click and start typing in the text box. You can move the text box to any place by clicking and dragging it. You can change color, font, and other attributes by clicking the Text icon.
- Click on the space and press Control + S, or use the print screen function to capture the screen.
Alternatively, you can click on the “Edit with Paint 3D” icon on the snipping too l— type on the icon to launch 3D and go to Text Icon on the top menu. Select the font type, size, and color to edit the screenshot. With the procedure above, you add text to the screenshot Windows screen capture tools take.
– Using Powerpoint to Add Text
To use PowerPoint to edit screenshot Windows 11, follow the steps below:

- Launch PowerPoint on your PC and press Control + V to paste the snip.
- Select the Insert tab and click where you wish to insert text.
- Type your statements and edit from the Home tab.
- Click anywhere outside the box and save your changes.
This is almost similar to how to edit screenshot in Word but with minor changes.
How To Use Third-party Apps To Edit Windows 10 Screenshots
To use third-party apps to edit Windows 10 screenshots, you can use Snagit, Lightshot, Picpick, or Greenshot. These third party apps are helpful for those who want to add text, highlight, annotate, or draw on their captured screenshots. In addition, it’s relatively simple to use these apps.
Different screenshot apps offer different procedures for taking screenshots, as shown below:
– Snagit
You can use the Snagit (proprietary software) third-party screenshot software to edit your screen captures with the steps below:
- Go to the Capture window, click the Image tab, and select Grab Text from the selection drop-down.
- Select the Capture button or Print Screen on Windows.
- When the orange crosshair appears, click and drag to choose the desirable area on your screen.
- The Grab Text Results dialog box opens in Snagit Editor. Click Copy All and paste the text into another application.
With the above steps, you have removed text from your snip.
– Lightshot
LightShot(Freeware) is a powerful photo editing solution that allows professionals to capture screenshots in JPG, PNG, and BMP file formats. You can use it to adjust the borders and share captured screenshots across different social media platforms.

This free screenshot software has an editor that allows you to add text annotations, lines, and arrows to images in a few steps.
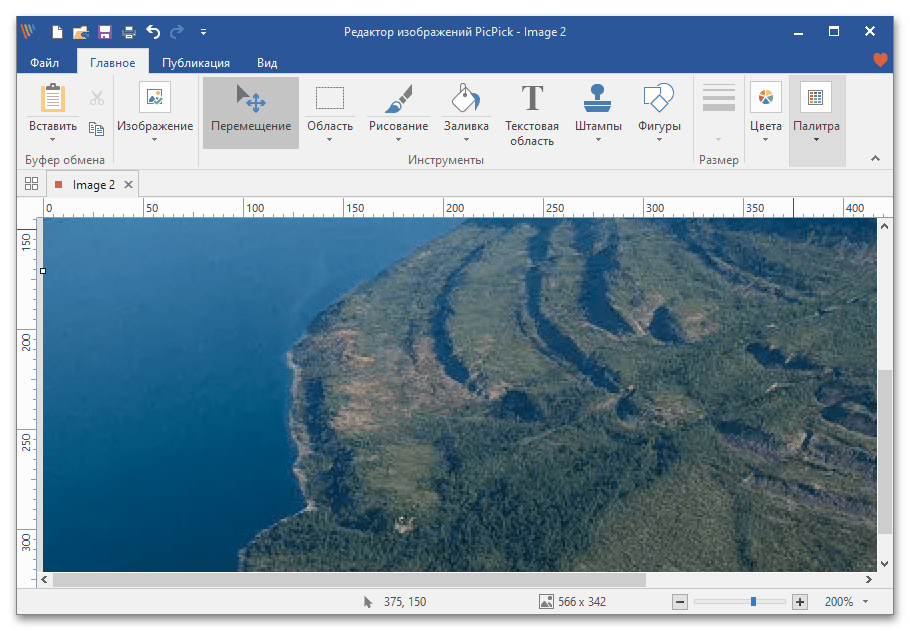
– Picpick
Picpick (Freeware) screen capture freeware tool has a basic image editor, color palette, color picker, and screen tools like a screen magnifier, protractor, screen ruler, and whiteboard.
All screen snips open in the image editor, which has a tabbed interface, making it easy to operate. You can change color, using the color palette feature by going to the Color Picker and then choosing any element on the screen you wish to take the color from, then get the HTML/RGB code of that color.
You can take Windows 10 screenshot, add text to the image, and transfer them to MS Word, MS PowerPoint, MS Excel, or any external program.
– Greenshot
Greenshot (GNU general public license) is a screenshot software tool for Windows. The tool creates a screenshot of a selected area, fullscreen, or window. You can use its interface to highlight, annotate, or obfuscate parts of the screenshot.
- To draw: Select a drawing tool from the toolbar in the editor, click and hold your mouse button and then move it on the screenshot to draw a defined image.
- Adding Text: Use the Text Tool T. You only need to draw text elements to a specific shape and type your text. To edit the text, double-click on the text element. Greenshot is a perfect tool if you need to add text to screenshot Windows OS takes.
Conclusion
We have shown you how to edit text on a screenshot on WIndows 10 and the different techniques for editing screenshots.
Let’s take a look at the main points:
- The best way to edit your screenshot on Windows 10 is by using the Snip & Sketch tool provided within the PC.
- The extent of editing a screenshot depends on the feature set of a screenshot tool.
- You can use the print screen button, screen recorder app, or Windows inbuilt tools to capture awesome screenshots.
- Third-party software and modern-day snipping tools offer more flexible and powerful tools to annotate a snip.
You can now edit your snips using the steps and apps in this complete guide, so go ahead and give it a try today!
Все способы:
- Вариант 1: Встроенные средства
- Способ 1: Paint
- Способ 2: «Набросок на фрагменте экрана»
- Вариант 2: Сторонние программы
- Способ 1: FastStone Capture
- Способ 2: Microsoft Office Picture Manager
- Вопросы и ответы: 0
Вариант 1: Встроенные средства
В операционной системе Windows 10 предусмотрены фирменные средства для работы с изображениями и скриншотами. Чтобы их обрезать, предполагается, что приложение оснащено редактором со специальными инструментами. Рассмотрим несколько самых простых решений, позволяющих быстро отредактировать снимок экрана.
Способ 1: Paint
Paint – простой редактор, располагающий базовыми инструментами для редактирования различных изображений, в том числе скриншотов.
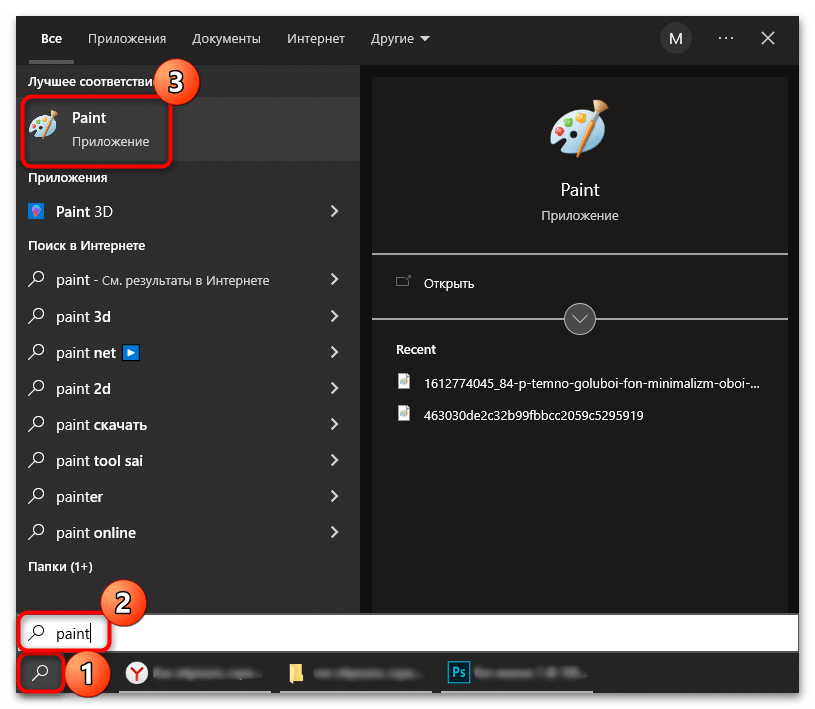
- Запустите приложение Paint. Найти его можно в списке установленного софта в главном меню или через поиск по системе.
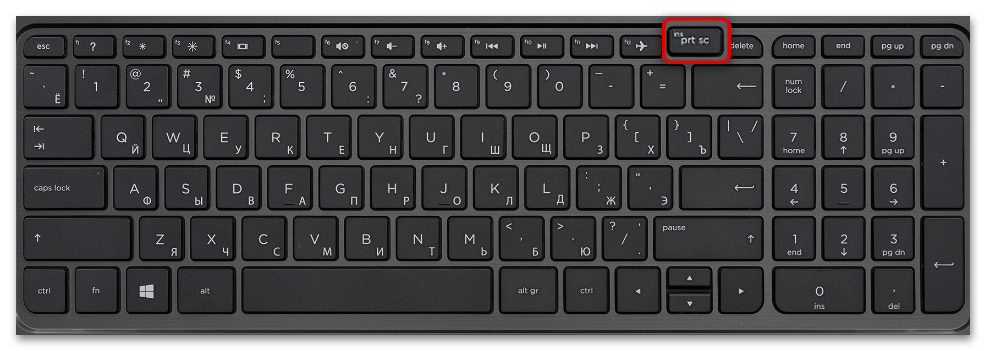
- Если хотите отредактировать готовый скрин, переходите к Шагу 3. А если снимка экрана еще нет — сделайте его. Проще всего использовать специальную клавишу на клавиатуре – «PrtSc» («Print Screen»). Созданный скриншот всего окна временно разместится в буфере обмена Windows. После этого пропустите Шаг 3 и переходите к Шагу 4.
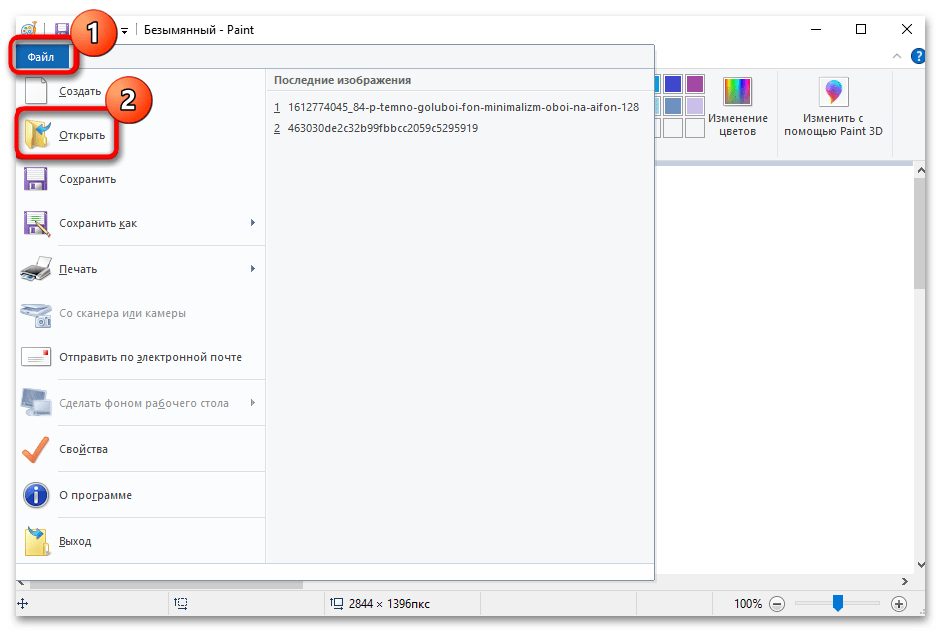
- Кликните по вкладке «Файл» и из появившегося меню выберите пункт «Открыть». Запустится системный «Проводник», через который нужно указать изображение, отыскав его в папках.
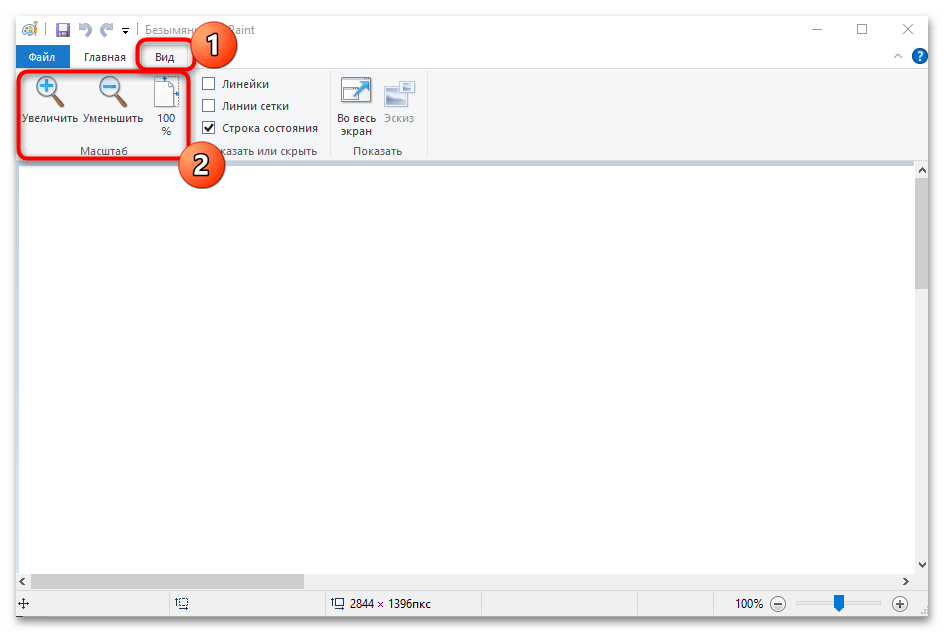
- Созданный только что скриншот вставьте, используя одноименную кнопку на панели вверху, или вместо этого нажмите сочетание клавиш «Ctrl + V». Изображение, скорее всего, не поместится на экране, поэтому уменьшите его масштаб. На вкладке «Вид» воспользуйтесь предназначенными для этого параметрами или покрутите колесико мыши с зажатой клавишей «Ctrl». Если покрутить колесо вверх, то картинка увеличится, а если вниз – уменьшится.
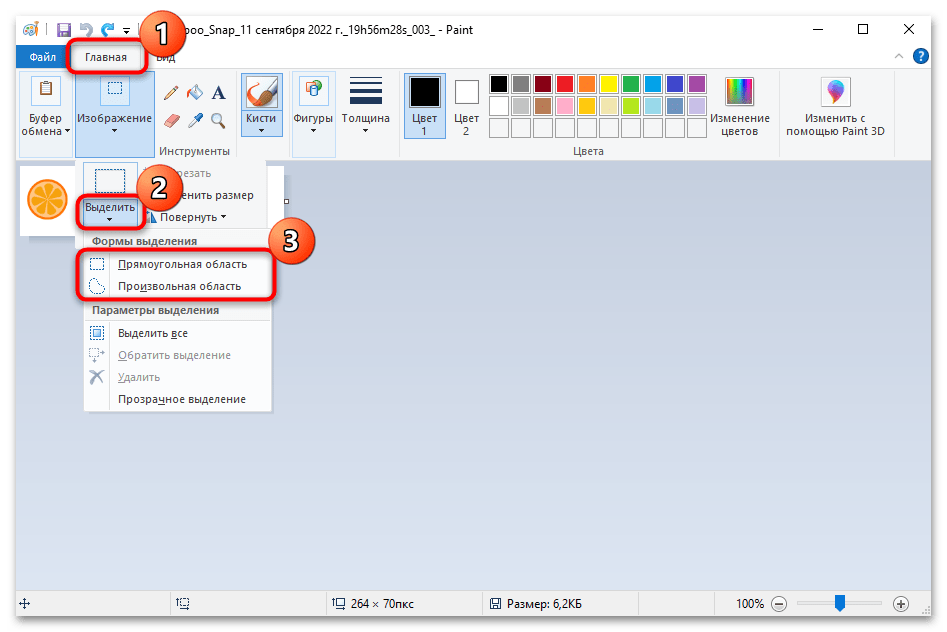
- В разделе «Главная» кликните по стрелочке под кнопкой «Выделить», чтобы выбрать один из доступных вариантов. Можно использовать прямоугольное и произвольное выделение.
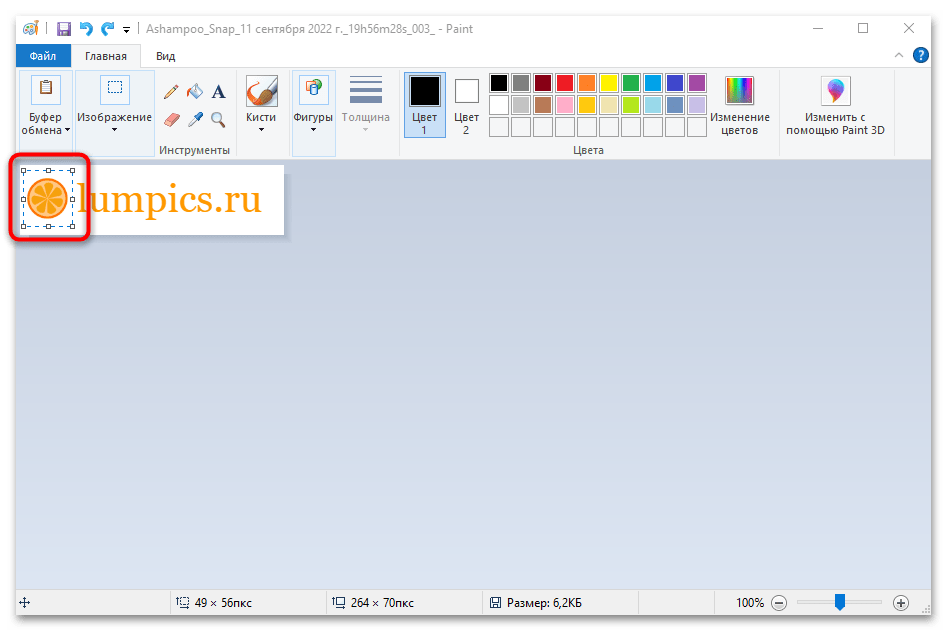
- После выбора функции с помощью зажатой левой кнопкой мыши выделите ту область, которая должна остаться после обрезки скрина. Отпустите кнопку мыши, и границы отметятся пунктирными линиями.
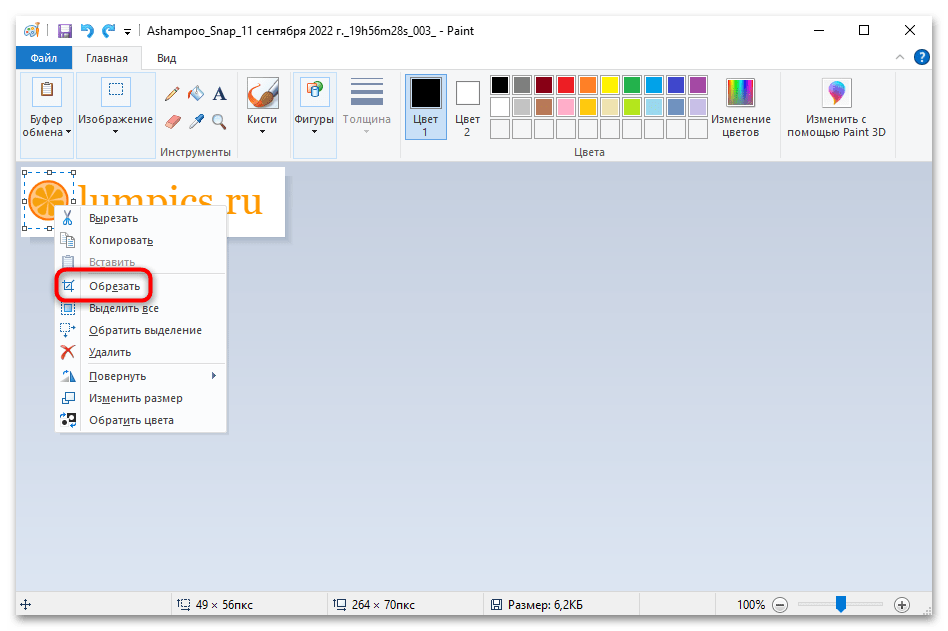
- Щелкните правой кнопкой мыши по выделенной области и из контекстного меню выберите пункт «Обрезать».
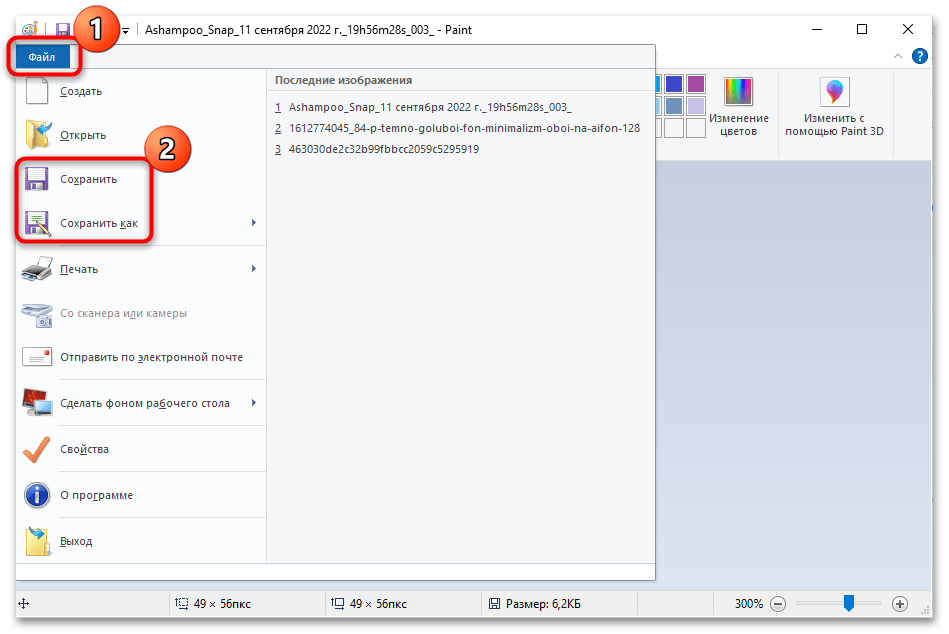
- На этом редактирование завершено. В главном окне Paint останется только та часть скрина, которая была выделена пользователем. После этого полученный результат можно сохранить через вкладку «Файл». При выборе пункта «Сохранить» оригинальное изображение будет заменено отредактированным, а при «Сохранить как…» появится возможность указать другой путь через «Проводник», причем тогда первоначальный вариант снимка останется неизменным.
Читайте также: Делаем прозрачной картинку в Paint
Способ 2: «Набросок на фрагменте экрана»
В «десятке» предусмотрено собственное решение для создания скриншотов – «Набросок на фрагменте экрана» и, в отличие от «Ножниц», оно позволяет открыть уже созданный снимок экрана.
- Запустите «Набросок на фрагменте экрана». Это встроенное приложение легко находится через главное меню Windows.
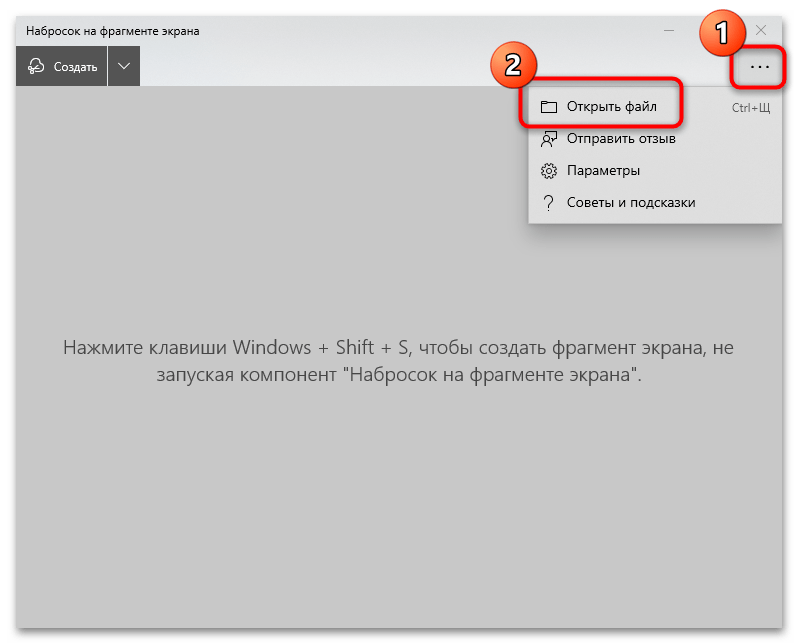
- Если надо отредактировать снимок, который уже хранится на жестком диске или съемном накопителе, щелкните по трем вертикальным точкам, расположенным в верхнем правом углу, и выберите пункт «Открыть». После чего достаточно отыскать изображение через штатный «Проводник». Если это ваш случай, пропустите следующий шаг и переходите к Шагу 4.
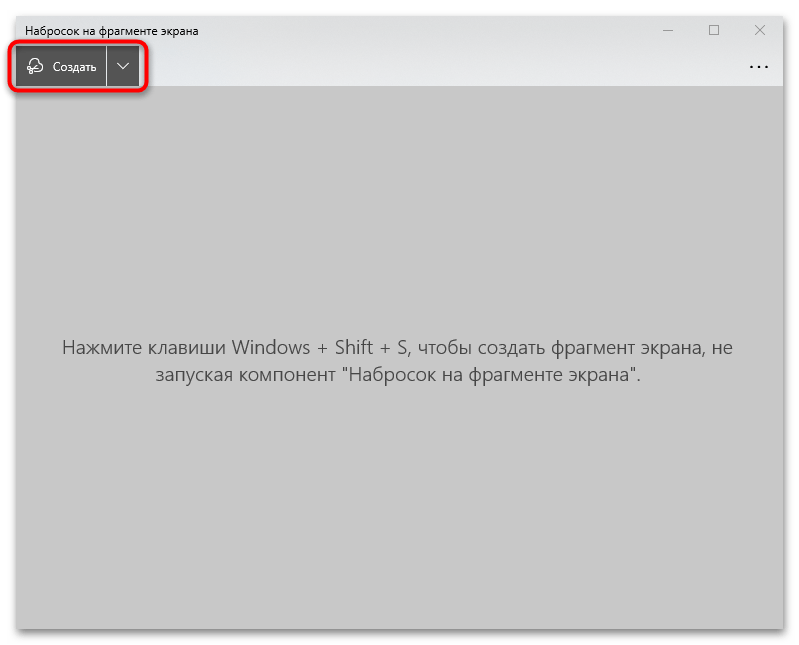
- Если скрин только планируется сделать, то нажмите на «Создать». Экран затемнится, а вверху появится новая рабочая панель, где можно выбрать способы выделения фрагмента. Снимок делается с помощью перетаскивания курсора по нужным областям экрана с зажатой левой кнопкой мыши.
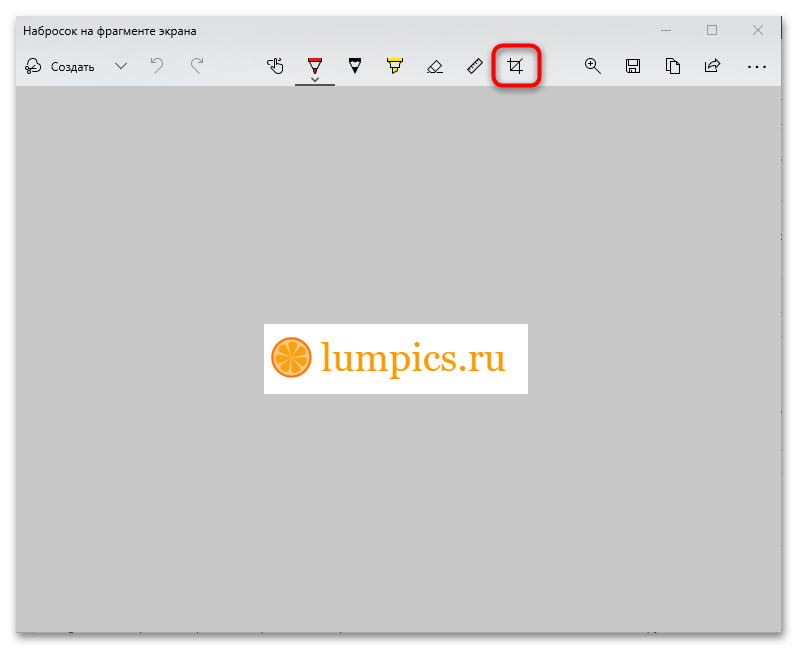
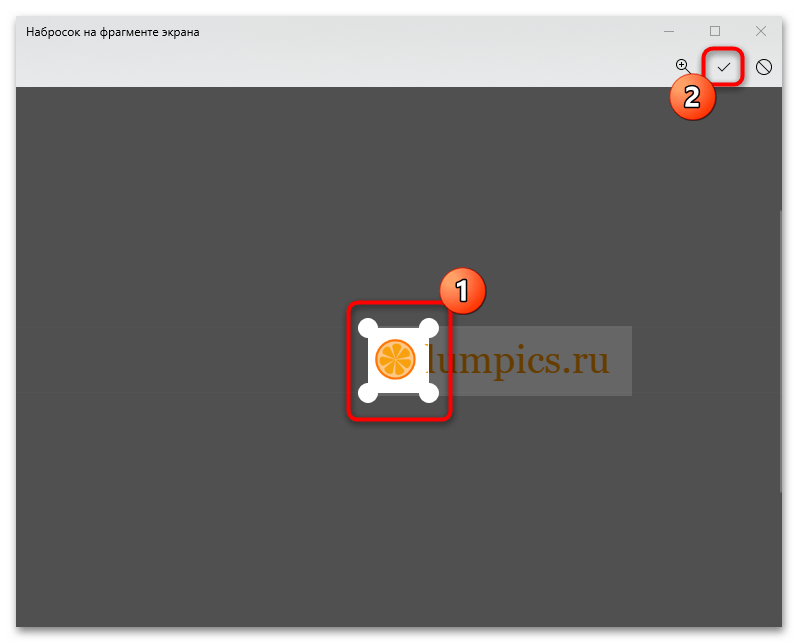
- Изображение появится в главном окне. Вверху доступны инструменты встроенного редактора. Чтобы обрезать скриншот, нажмите на кнопку «Обрезать», расположенную на верхней панели.
- Фиксаторами обрежьте скрин, перетаскивая их в нужное место. Как только редактирование закончено, кликните по значку в виде галочки вверху.
Чтобы сделать скриншот через средство «Набросок на фрагменте экрана», а затем обрезать его, также можно использовать сочетание клавиш «Windows + Shift + S» и нажать на всплывающее окно со снимком, чтобы запустить редактор.
Останется сохранить полученное изображение, нажав на кнопку в виде дискеты на верхней панели. В запустившемся «Проводнике» укажите путь.
Вариант 2: Сторонние программы
Если возможности системы не подходят, можете дополнительно установить программное обеспечение, которое совмещает в себе не только функции создания снимка экрана, но и простой редактор графических файлов.
Способ 1: FastStone Capture
Программа FastStone Capture – многофункциональный инструмент, позволяющий не только делать скриншоты, но и сразу их редактировать. Она платная, но доступен ознакомительный период, в течение которого можно ознакомиться со всеми функциями приложения.
- Установите скриншотер и запустите его. В программе реализовано плавающее окно с основными инструментами. Через него можно открыть существующий снимок экрана. Для этого нажмите на иконку в виде открытой папки и в новом меню выберите нужное.
- Чтобы создать скриншот, выберите способ захвата. На панели доступно несколько вариантов, включая прямоугольную область, активное окно или экран с прокруткой.
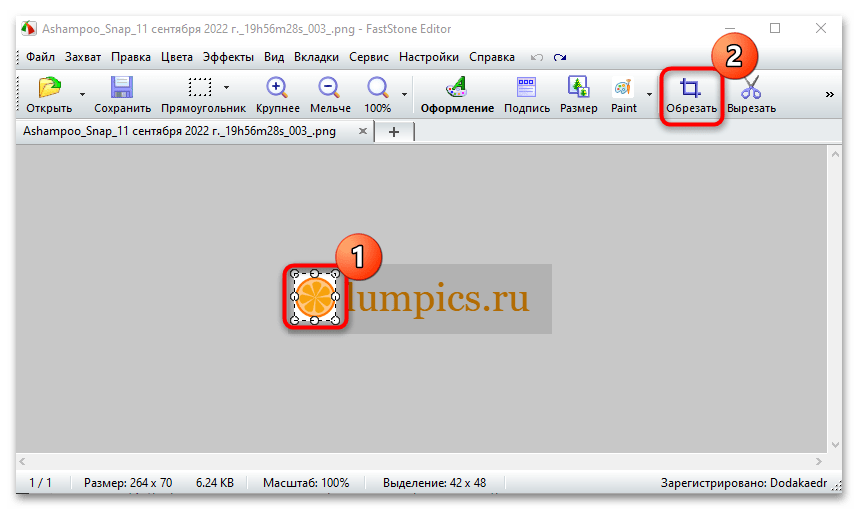
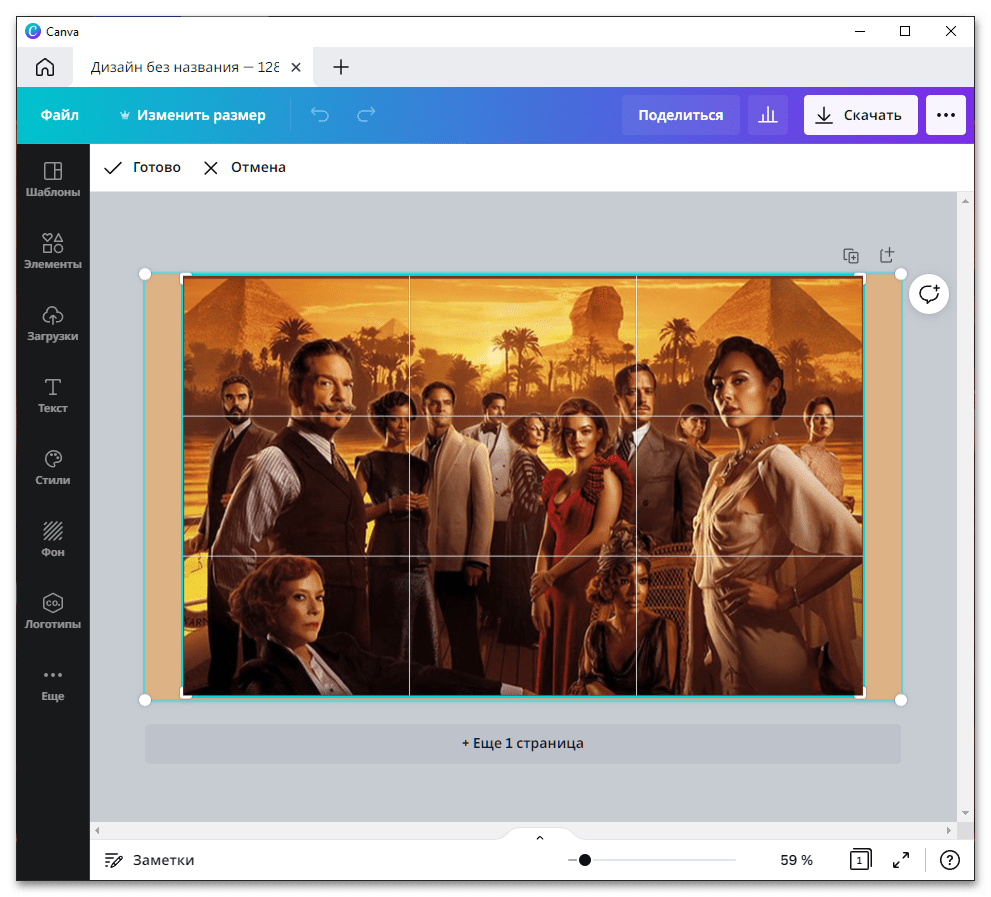
- Созданный скриншот автоматически откроется во встроенном редакторе. Чтобы обрезать его, выделите область, которую надо оставить, с помощью зажатой левой кнопкой мыши и перетаскивания. Выбранный фрагмент выделится пунктирной линией. Нажмите по кнопке «Обрезать» на верхней панели инструментов.
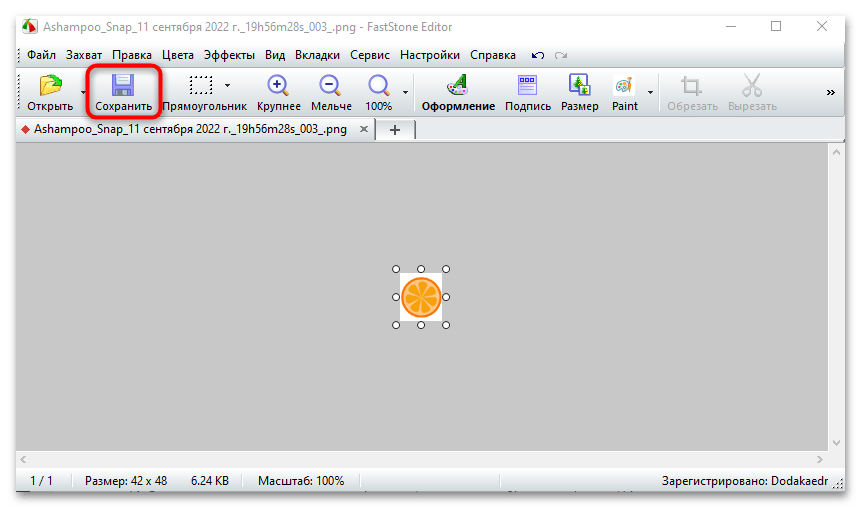
- Сохраните готовый результат, нажав на значок в виде дискеты, и выберите путь сохранения через «Проводник».
Во многие программы для создания скриншотов интегрирован простой редактор, с помощью которого можно выделять элементы на изображении, добавлять различные объекты, изменять цвет картинки и в том числе обрезать ее.
Способ 2: Microsoft Office Picture Manager
Просмотрщик графических файлов от компании Microsoft содержит встроенный редактор изображений с базовыми инструментами, включая обрезку. В отличие от предыдущих вариантов, в нем не реализована функция создания скринов, но он подойдет, если надо изменить готовый снимок экрана.
Программа бесплатная, но чаще всего требуется дополнительная установка, поскольку в «чистой» версии Windows ее нет. Используя простой редактор (Picture Manager является частью SharePoint Designer 2010), можно обрезать любую картинку, в том числе скриншот:
Скачать Microsoft Office Picture Manager с официального сайта
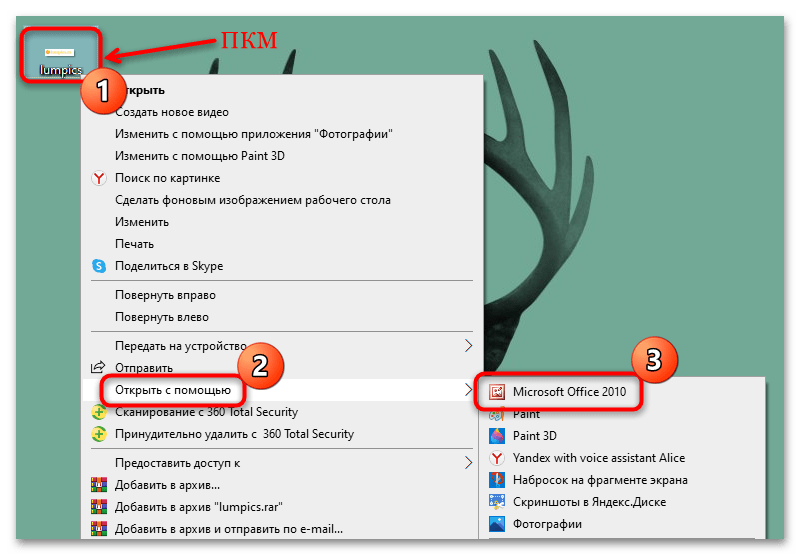
- Скачайте и установите диспетчер картинок. Щелкните правой кнопкой мыши по файлу, наведите курсор на пункт «Открыть с помощью» и из дополнительного контекстного меню выберите «Microsoft Office 2010».
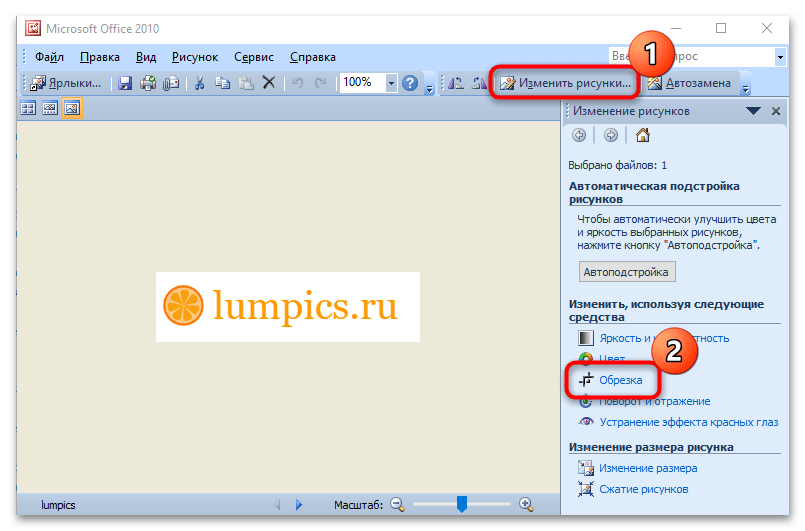
- В запустившемся приложении нажмите по кнопке «Изменить рисунки» на панели с инструментами. Справа появится список, где кликните по функции «Обрезка».
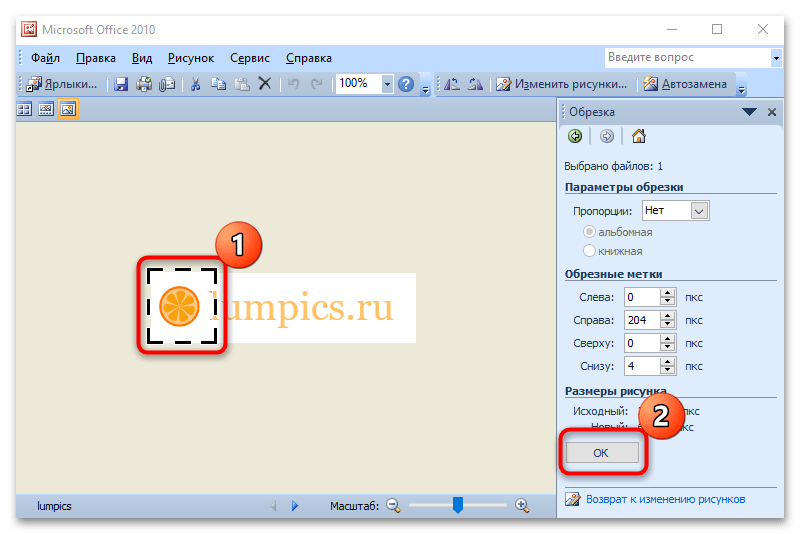
- Фиксаторами по краям скрина выберите область, которую нужно оставить. Нажмите на «ОК» справа.
Принцип работы таких редакторов схож, поэтому, чтобы обрезать готовый скриншот, можно использовать любые программы для работы с графическими файлами.
Наша группа в TelegramПолезные советы и помощь
Applies ToWindows 11 Windows 10
С помощью снимков можно копировать слова или изображения со всего экрана ПК или его части. Используйте приложение «Ножницы», чтобы вносить изменения, добавлять заметки, а также сохранять и отправлять снимки.
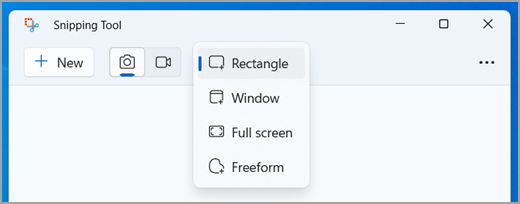
Поддерживаются следующие типы фрагментов:
|
Свободное поле |
Нарисуйте фигуру свободной формы вокруг объекта. |
|
Прямоугольник |
Обведите указатель вокруг объекта, чтобы образовать прямоугольник. |
|
Окно |
Выберите окно, которое требуется захватить, например диалоговое окно. |
|
Полноэкранный режим |
Захват всего экрана. |
|
Фрагмент видео |
Запишите видеоклип прямоугольного фрагмента любой части экрана, который вам нравится. |
После того как снимок экрана сделан, он автоматически копируется в окно приложения «Ножницы», где его можно изменить, сохранить и отправить.
Открытие приложения «Ножницы»
Существует четыре способа открыть ножницы:
-
Нажмите кнопку Пуск , введите ножницы, а затем выберите Инструмент ножницы в результатах.
-
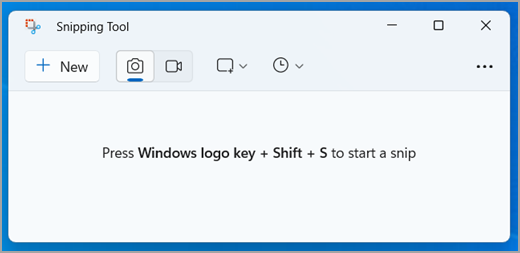
Нажмите клавишу с логотипом Windows +SHIFT+S для статического фрагмента изображения.
-
Нажмите кнопку Print Screen (PrtSc) для статического фрагмента изображения.
-
Нажмите клавишу с логотипом Windows + SHIFT + R для фрагмента видео.
Работа со снимками экранов
Открыв ножницы, выберите один из следующих вариантов, чтобы создать снимки экрана и работать с ним.
В средстве ножницы выберите Режим. В более ранних версиях Windows щелкните стрелку рядом с кнопкой Создать. Затем, когда вы выберете нужный тип фрагмента, вы увидите, что весь экран немного изменится на серый. После выбора любого элемента на экране выберите область экрана, которую требуется захватить.
После захвата фрагмента изображения вы можете:
-
Напишите или рисуйте на или вокруг него, нажав кнопки Перо или Маркер.
-
Добавьте фигуры или эмодзи в фрагмент, нажав кнопку Фигуры .
-
Выберите Ластик, чтобы удалить добавленные линии или фигуры.
-
Обрезка изображения, нажав кнопку Обрезка изображения .
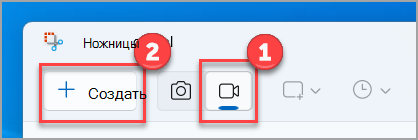
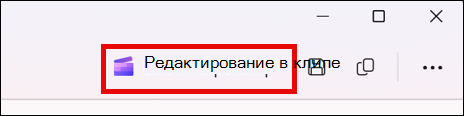
Чтобы записать фрагмент видео, откройте ножницы, нажмите кнопку Записать , а затем выберите Создать запись или нажмите клавишу с логотипом Windows +SHIFT+ R. Выберите область экрана, которую вы хотите записать, а затем нажмите кнопку Пуск. По завершении нажмите кнопку Остановить. На этом этапе вы можете сохранить запись как есть или выбрать Изменить в Clipchamp , чтобы работать с ней в видеоредакторе Clipchamp.
Завершив запись фрагмента видео, нажмите кнопку Изменить в Clipchamp , чтобы добавить субтитры или аудио.
Создание и добавление субтитров
-
Перейдите на вкладку Субтитры и нажмите кнопку Транскрибировать мультимедиа .
-
Выберите язык и параметры фильтрации во всплывающем окне.
-
Перейдите и выберите Transcribe media (Транскрибировать носитель), чтобы создать субтитры.
Добавление и отключение звука из фрагмента видео
-
Выберите вкладку Звук на боковой панели.
-
Настройте громкость в диапазоне от 0 до 200 %.
-
Чтобы скачать звук отдельно, нажмите кнопку Отсоединить звук .
-
Чтобы открыть скачанный аудиофайл, нажмите клавишу с логотипом Windows + R и введите «downloads» в диалоговом окне.
Дополнительные сведения см. в статье Добавление субтитров и звукового описания к фрагменту видео.
Примечания:
-
Чтобы добавить автозаголовок в фрагмент видео, см . статью Использование автозаголовок в Clipchamp.
-
Сведения о том, как использовать функцию преобразования текста в речь, см. в статье Использование функции преобразования текста в речь.
-
После записи фрагмента нажмите кнопку Сохранить как.
-
В поле Сохранить как введите имя файла, расположение и введите, а затем нажмите кнопку Сохранить.
После записи фрагмента выберите меню Дополнительно в правом верхнем углу и выберите Поделиться.
После захвата фрагмента нажмите кнопку Действия текста , чтобы активировать функцию оптического распознавания символов (OCR). Это позволяет извлекать текст непосредственно из изображения. Здесь вы можете выбрать и скопировать определенный текст или использовать инструменты для копирования всего текста или быстро отредактировать все адреса электронной почты или номера телефонов в фрагменте. Все процессы распознавания текста выполняются локально на вашем устройстве.
|
Сочетание клавиш |
Действие |
|---|---|
|
ALT + M |
Выбор режима ножниц. |
|
ALT + N |
Создание нового фрагмента в том же режиме, что и последний. |
|
SHIFT +клавиши со стрелками |
Перемещение курсора для выбора различных типов фрагментов. |
|
ALT + D |
Задержка захвата на 1-5 секунд |
|
CTRL + C |
Копирование фрагмента в буфер обмена |
|
CTRL + S |
Сохранение фрагмента |
Открыв запись в инструменте ножницы, выберите Изменить > Изменить с помощью paint, чтобы использовать функции для изменения размера, цвета, текста и многих других улучшений.
В папке, в которую вы сохранили фрагмент, щелкните правой кнопкой нужный фрагмент. Выберите Печать из параметров и выберите способ печати изображения.
В поле поиска на панели задач введите ножницы. Вы увидите приложение «Ножницы» и список действий, которые можно выполнить. Выберите Закрепить на панели задач.
Сначала определите меню или другие компоненты, которые требуется записать. В инструменте ножницы выберите Задержка , а затем выберите, например, 5 секунд. Выберите Режим, чтобы начать 5-секундный обратный отсчет. В течение 5 секунд откройте меню или составьте изображение иным образом. Через 5 секунд, когда вы увидите, что экран становится серым, используйте мышь для рисования вокруг нужной области.
Нужна дополнительная помощь?
Нужны дополнительные параметры?
Изучите преимущества подписки, просмотрите учебные курсы, узнайте, как защитить свое устройство и т. д.
Download Article
Simple ways to edit your screen captures
Download Article
- Using the Windows Snipping Tool
- Using Microsoft Paint (Windows)
- Using Mac Preview
- Using Google Photos for Android
- Using a Samsung Galaxy
- Using the iPhone or iPad Screenshot Markup Tool
- Using the iPhone or iPad Photos App
|
|
|
|
|
|
If you’ve taken a screenshot on your computer, phone, or tablet, you may need to make some final edits before sharing it with others. Fortunately, it’s easy to crop, resize, and annotate screenshots on any device. This wikiHow article teaches you how to capture and edit a screenshot on an Android, iPhone, iPad, Mac, or Windows PC.
-

You can usually open the search bar by clicking the circle or magnifying glass to the right of the Start menu.
-
Advertisement
-
It’s at the top-left corner of the window. The screen will appear slightly faded and mouse cursor will change to a selection tool.
-
When you release the cursor, the image will be captured and open in the Snipping Tool.
-
It’s at the top of the tool. You can use this to write simple notes or circle areas of interest.
- To select a color, click the small arrow next to the icon, then choose a color.
-
You can then click and drag the tool to highlight text.
-
With the eraser tool selected, click a pen or highlighter marked to remove it.
-
It’s at the top-left corner of the tool.
-
-
This saves your edited screenshot.


Advertisement
-
This key will copy the contents of your screen to your clipboard.
- If your keyboard doesn’t have this key, you can use the one on the on-screen keyboard. Here’s how:
- Click the circle or magnifying glass to the right of the Start menu to open the search bar.
- Type on screen keyboard, and then click On-Screen Keyboard in the search results.
- Click the PrtScn key.
- If your keyboard doesn’t have this key, you can use the one on the on-screen keyboard. Here’s how:
-
The Windows Run tool will launch Microsoft Paint upon pressing “OK”.
-
- You can also paste by right-clicking the paint area and selecting «Paste».
-
This button is located in the “Image” section of the toolbar and will open a menu to with different rotation options, such as vertical, horizontal, or 90 degree rotation.
-
This button is located in the «Image» section of the toolbar and will open a window to set a new window size. Enter a new size value (e.g. 200% size) and press “OK”.
- You can select to adjust the size by pixel or percentage. Use pixel adjustments if you need a more precise change.
- Changing the size to be larger than the original will result in a loss of picture quality.
-
Click the «Select» option from “Image” section of the toolbar. Click and drag to select the area of the screenshot you want to use then click the «Crop» button on the right of the “Select” tool.
-
This button is located in the tools section on the toolbar. Click and drag to select a text area and type to enter your desired text.[1]
-
Both options can be selected from the “Shapes” section. Brushes can be used for freehand marking and shapes will make markings in the shape selected.
- You can change the color of the shapes and markers by selecting a color palette from the “Color” section.
-
You will be prompted to name the screenshot and browse for a save location. Clicking “Save” will confirm your changes.


Advertisement
-
A screenshot will be taken of your current screen and saved to your desktop.
- If you’d like to capture a single window, press ⇧ Shift+⌘ Command+4, press the space bar, then click the window you want to capture.[2]
- To take a screenshot of a certain part of the screen, press ⇧ Shift+⌘ Command+4, and then click and drag the mouse to select the desired part of the screen.
- If you’d like to capture a single window, press ⇧ Shift+⌘ Command+4, press the space bar, then click the window you want to capture.[2]
-
It’s the new image file that contains date and time you took the screenshot.
- If your images open with a different app, press ⌘ Command as you click the file, select Open With and choose Preview.
-
You can click the rotate button (the rectangle with a curved arrow near the top of Preview) to rotate the image 90 degrees.
-
Click the Tools menu at the top of the screen, and then select Adjust Size. This allows you to change the height, width, and resolution as needed.
-
If you want to save just part of the screenshot, click the selection tool (the dotted box near the top-left corner), and then click and drag the area you want to keep. Once selected, click the Tools menu at the top of the screen, and then Crop to cut out everything but the selected area.
-
If you want to get crafty, click the Tools menu and select Adjust Color. You can use the sliders to adjust the exposure, contrast, highlights, shadows, saturation, temperature, tint, and sharpness.
- Your screenshot will reflect your changes as you make them, allowing you to experiment and find the right mix of settings.
- Exposure, contrast, highlights, and shadows will affect the brightness and black/white balance of the colors.
- Saturation, temperature, and tint will affect the intensity of the colors.
-
[3]
- Click the A button near the top-right corner to open the text tool, and then click anywhere on the screenshot to type.
- Click the pen tool to draw.
- Click the icon of a square and rectangle to insert shapes like triangles and circles.
-
It’s at the top-left corner of the screen.
-
-
Your edited screenshot is now saved.


Advertisement
-
After 1-2 seconds the screen will flash indicated a screenshot was taken.
- The key combination may vary depending on your phone or tablet. On some Android models, you’ll have to hold the Home and Power buttons.
- If you’re using Android 9.0 or later, you can also take a screenshot by holding down the power button until a menu appears, and then tapping Screenshot.[4]
- If you only need to crop or draw on your screenshot, you may be able to do this immediately after you take the screenshot on Android. Simply click the pencil icon on the preview of the screenshot to draw on it or the crop symbol to change the size of the screenshot before you save it.
-
It’s the white icon with a multicolored flower inside (labeled Photos or Google Photos).[5]
- If you don’t have Google Photos on your Android, you can download it now from the Play Store.
-
-
It’s the second icon at the bottom (the three lines with sliders) of Google Photos.
-
If you’d like to apply one of Google Photos’ preset color/lighting filters, select an option from the row at the bottom of the screen. Swipe left across the examples and tap the one you want to use.
-
- Crop: The screenshot is surrounded by a border with white dots at each corner. Drag the dots until only the part of the image you want to keep is surrounded. The crop will happen automatically (though you can drag the dots back outward to undo your changes.
- Rotate: Tap the curved arrow icon at the bottom-right corner until the image appears as you like.
-
If you’d like to edit the colors and lighting effects, continue with this method.
-
It’s at the bottom of the screen (the one with sliders and knobs). This opens the lighting and color options.
-
Use the sliders to adjust the lighting and color of the screenshot if desired.
- Slide the “Light” slider left to make the image darker, or right to increase its brightness.
- Slide the “Color” slider left to decrease the intensity of the colors, or right to make the colors very saturated.
-
If you didn’t make any changes (or don’t want to save them), tap the X at the top-left corner, and tap Discard if prompted.


Advertisement
-
After 1-2 seconds the screen will flash indicating a screenshot was taken. The image will be saved to your gallery.
- The key combination may vary depending on your phone or tablet. On some Android models, you’ll have to hold the Home and Power buttons.
- If you use Google Photos on your Galaxy, see this method instead.
- If you only need to crop or draw on your screenshot, you may be able to do this immediately after you take the screenshot on Android. Simply click the pencil icon on the preview of the screenshot to draw on it or the crop symbol to change the size of the screenshot before you save it.
-
The icon usually has a yellow flower, and you’ll find it in the app drawer.
- If you see a preview of the screenshot right after you take it, you can tap it to open it in the editor without having to open the Gallery.
-
Several options will appear along the bottom of the screen.
- The remaining settings will vary depending on your version of the Gallery app, as well as which model of Galaxy you own.
-
The option you see will look different depending on your version.
- If you already see some editing tools at the bottom of the screen, you won’t need to complete this step.
-
Tap the crop icon (a square with two longer lines at two of its corners) at the bottom of the screen, or the Adjustment option. Drag the box to surround only the part of the screenshot you want to keep, and then tap SAVE or the check mark.[6]
-
To do this, tap the ⁝ menu at the top-right corner, then select Rotate Left or Rotate Right as needed.
-
The remaining options vary by model, but you’ll usually find options to choose a filter (usually under Effect), adjust colors (often called Tone), and draw on the image using a tool called Drawing.
-
This saves the changes to your screenshot.


Advertisement
-
If you haven’t already done so, press the side and volume up buttons at the same time (if your device has Face ID), or press the Home and power buttons (if your device has Touch ID) to capture a screenshot. The screen will flash briefly and a preview of the screenshot will appear at the bottom-left corner of the screen.
-
It’s the small image at the bottom-left corner. This opens the screenshot in the Markup tool, which displays several editing icons at the bottom.
- The preview will only stay at the bottom-left corner for a few seconds before disappearing. If it disappears before you tap it, follow these steps to open it in the Markup tool:
- Open the Photos app.
- Tap the screenshot.
- Tap Edit at the top-right corner.
- Tap the three dots icon.
- Tap Markup (the icon of a marker at the bottom).
- The preview will only stay at the bottom-left corner for a few seconds before disappearing. If it disappears before you tap it, follow these steps to open it in the Markup tool:
-
Drag the blue lines to surround only the part of the screenshot you want to save, if desired.
-
Here’s how:
- Tap one of the drawing tools (the marker, highlighter, and pencil icons at the bottom-left corner) to select it.
- Tap the tool again to choose a line width and weight.
- Tap the filled-in circle to select a color.
- Use your finger to draw on or highlight certain areas.
- Tap the drawing tool you select at the bottom-left corner to return to the tools list.
- If you made a mistake in your drawing, tap the pencil eraser tool at the bottom and then tap the error to delete it.
-
If you don’t see the “T” at the bottom of the screen, tap the + at the bottom-right corner to expand more options, and then tap Text.
- Tap the filled-in circle to choose a text color.
- Tap aA icon to choose a font face, size, and alignment.
-
Tap the + at the bottom-right corner, then tap the square, circle, chat bubble, or arrow to add these shapes to the screenshot.
- Use the filled-in circle at the bottom to select a color.
-
If you need to sign the screenshot, here’s how you can do that:
- Tap the + at the bottom-right corner
- Tap Signature.
- Use your finger to sign your name at the bottom (or select your signature if you’ve already created one).
- Tap Done at the top.
- If your signature doesn’t appear, tap Signature again, then tap your signature to place it.
- Drag your signature to the desired position.
-
If you’d like to increase the size of one area of the screenshot, tap the + and select Magnifier. You can then use your fingers to position or change the size of the enlarged area.
-
It’s at the top of the screen. A menu will expand at the bottom.
-
This saves the screenshot to the Photos app.


Advertisement
-
If you haven’t already done so, press the side and volume up buttons at the same time (if your device has Face ID), or press the Home and power buttons (if your device has Touch ID) to capture a screenshot. The screen will flash briefly and a preview of the screenshot will appear at the bottom-left corner of the screen.
-
Your screenshot is saved to this location by default.
-
-
This button is located in the upper right corner of the screenshot and will bring up a variety of editing tools.
-
5
Tap the marker icon to add text, lines, highlighting, and drawing. If you want to annotate, redact, or bring attention to part of your screenshot, tap this icon at the top to access the Markup tools.
- Use the pen and pencil tools to draw. You can tap the colored circle to select a color.
- Use the highlighter tool to highlight certain areas in a different color.
- Tap + to access more tools, including the option to add your signature, type text or a description, add shapes, and even magnify areas of the screenshot.
- When you’re finished, tap Done to return to the standard editing tools.
-
This button is in the upper right corner of the screen and will automatically make color and lightning adjustments to the screenshot.
-
This button appears in the bottom toolbar and will bring up 3 menus: “Light”, “Color”, and “B&W”.
- Each category will have a submenu with a number of options that can be adjusted with a slider.
-
This icon is represented by 3 overlapping circles and is located on the bottom toolbar.
- Filters like Mono, Tonal, and Noir will add a black and white stylized filter.
- Filters like Fade or Instant will give the screenshot a washed out, retro look.
-
This icon is located on the right of the bottom toolbar.
- Tap and drag the corners of the picture space to crop the picture.
- Adjust the slider to manually rotate the photo or press the “Rotate” icon (square with a curved arrow) to automatically rotate 90 degrees.
- Reverse pinch the photo to zoom.
-
This button appears in the lower right corner after changes have been made.
- You can undo your changes by tapping “Cancel” in the lower left corner and selecting “Discard Changes”.
- You can undo changes after saving by selecting “Revert” which appears in place of the “Done” button.


Advertisement
How do I crop a screenshot?
On Windows, use the Snipping Tool to take a custom snapshot of your screen (rather than the entire screen).[7]
On Mac, pull up your screenshot using «Preview» and use Shift+Command+5 to create a smaller selection box.[8]
How can you edit text in a screenshot?
Edit your screenshot with a specialized editing app, like SnagIt (Windows/Mac). SnagIt
offers a free trial to new users and provides comprehensive screenshot-editing tools, including the ability to edit text within a screenshot.
How do I turn a screenshot into an editable document?
Open up your screenshot on your device, and choose to print or export it as a PDF.[9]
Using Adobe Acrobat Pro, use the Edit PDF tool to make your screenshot-turned-PDF into an editable document.[10]
Thanks for submitting a tip for review!
References
About This Article
Article SummaryX
1. Take the screenshot.
2. Open Google Photos.
3. Tap the screenshot.
4. Tap the edit button.
5. Use filters and tools.
6. Tap Done.
Did this summary help you?
Thanks to all authors for creating a page that has been read 223,750 times.