
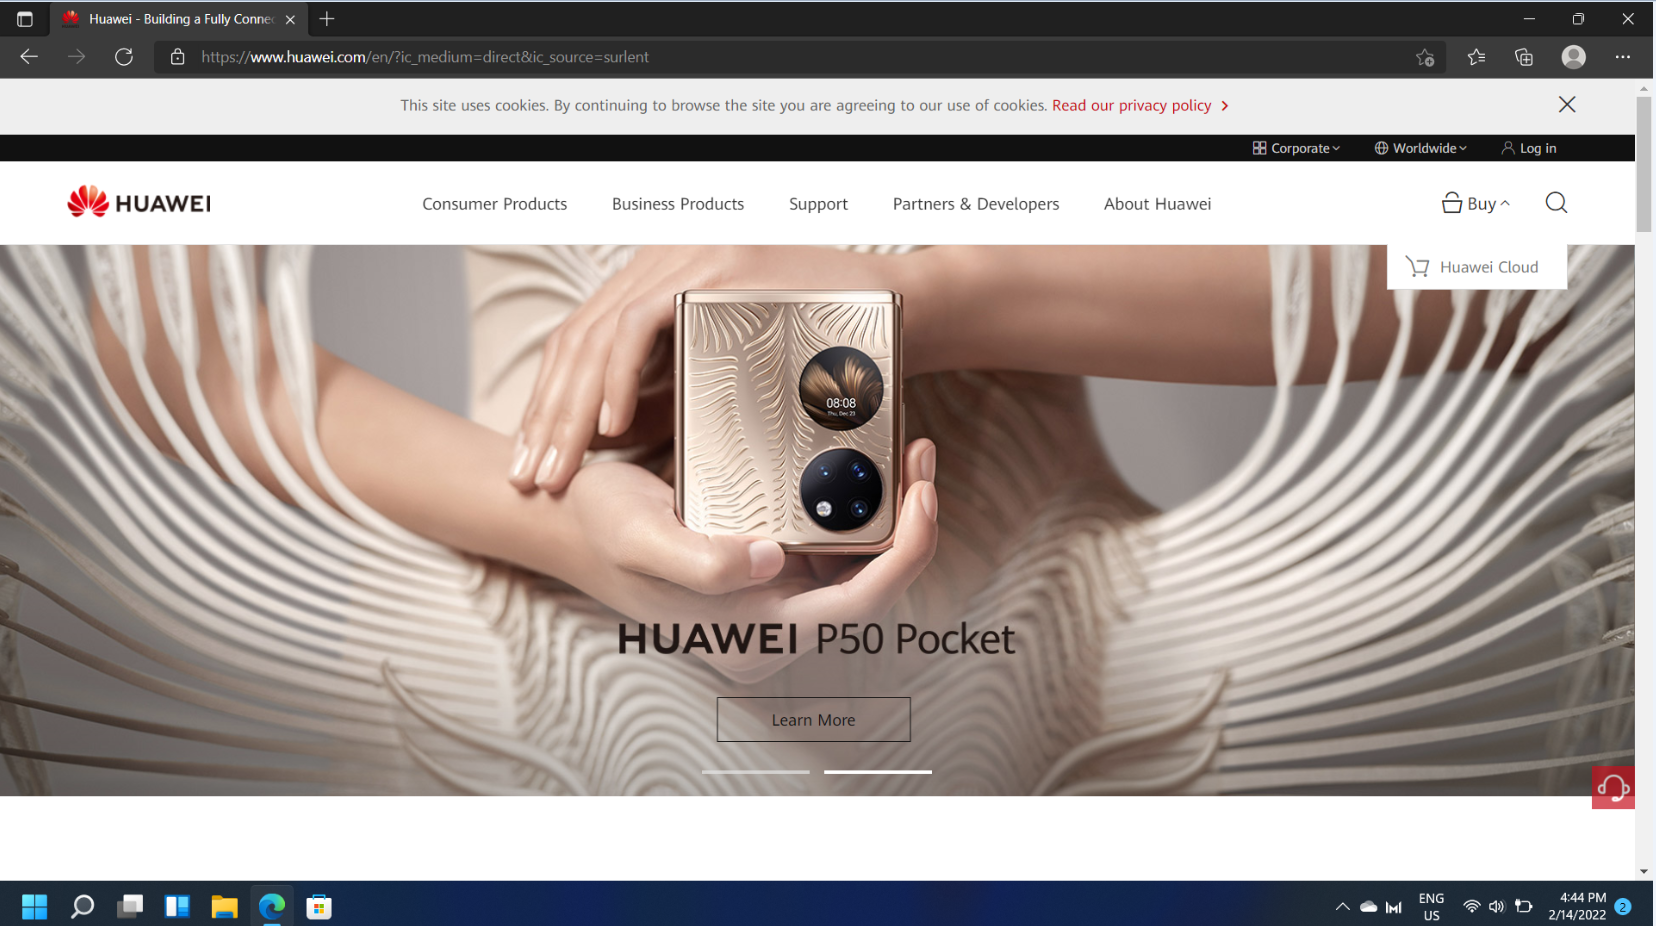
Если сравнивать Windows 11 и предыдущую версию системы, разделение экрана для удобной работы с несколькими приложениями стало проще: вы легко можете разделить рабочую область на 2, 4 или иное количество частей, используя встроенные средства системы.
В этой простой инструкции подробно о способах разделения экрана на части в Windows 11 как с помощью системных средств, так и с помощью сторонних инструментов, позволяющих выполнять более тонкую настройку. В части организации рабочего процесса также может быть полезным: Виртуальные рабочие столы Windows 11.
Разделение экрана с помощью встроенных средств прикрепления окон

В Windows 11 присутствуют встроенные параметры многозадачности, обычно включенные по умолчанию, позволяющие разделять экран между несколькими окнами программ. Прежде чем приступить к использованию, рекомендую проверить, что все необходимые параметры включены:
- Откройте «Параметры», сделать это можно, нажав клавиши Win+I на клавиатуре.
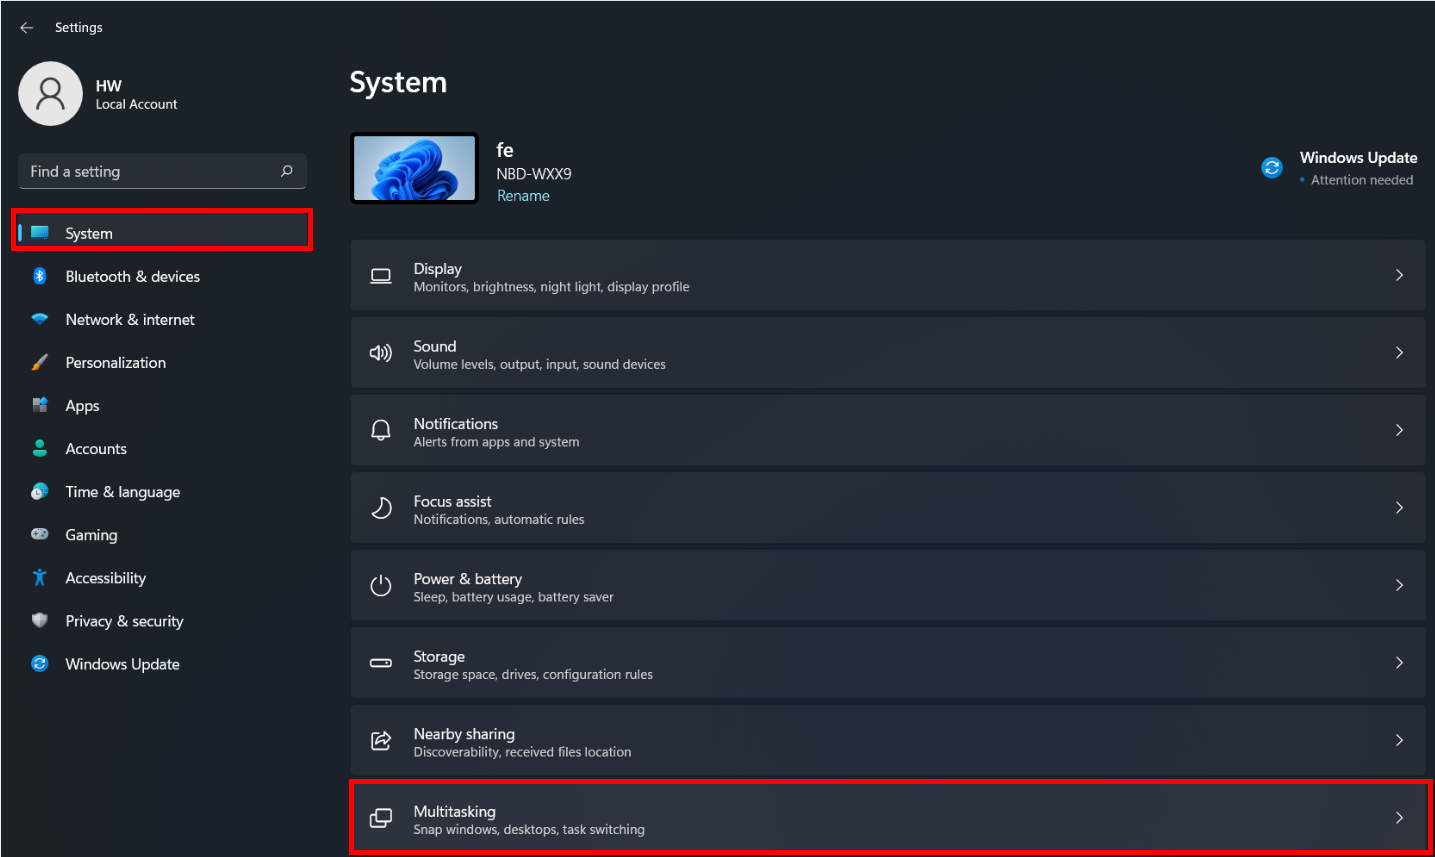
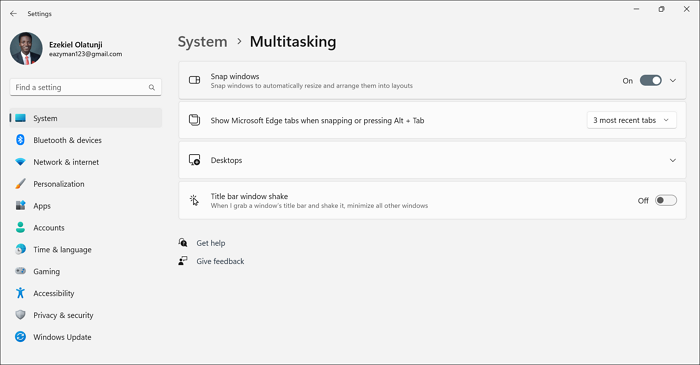
- Перейдите в раздел Система — Многозадачность.

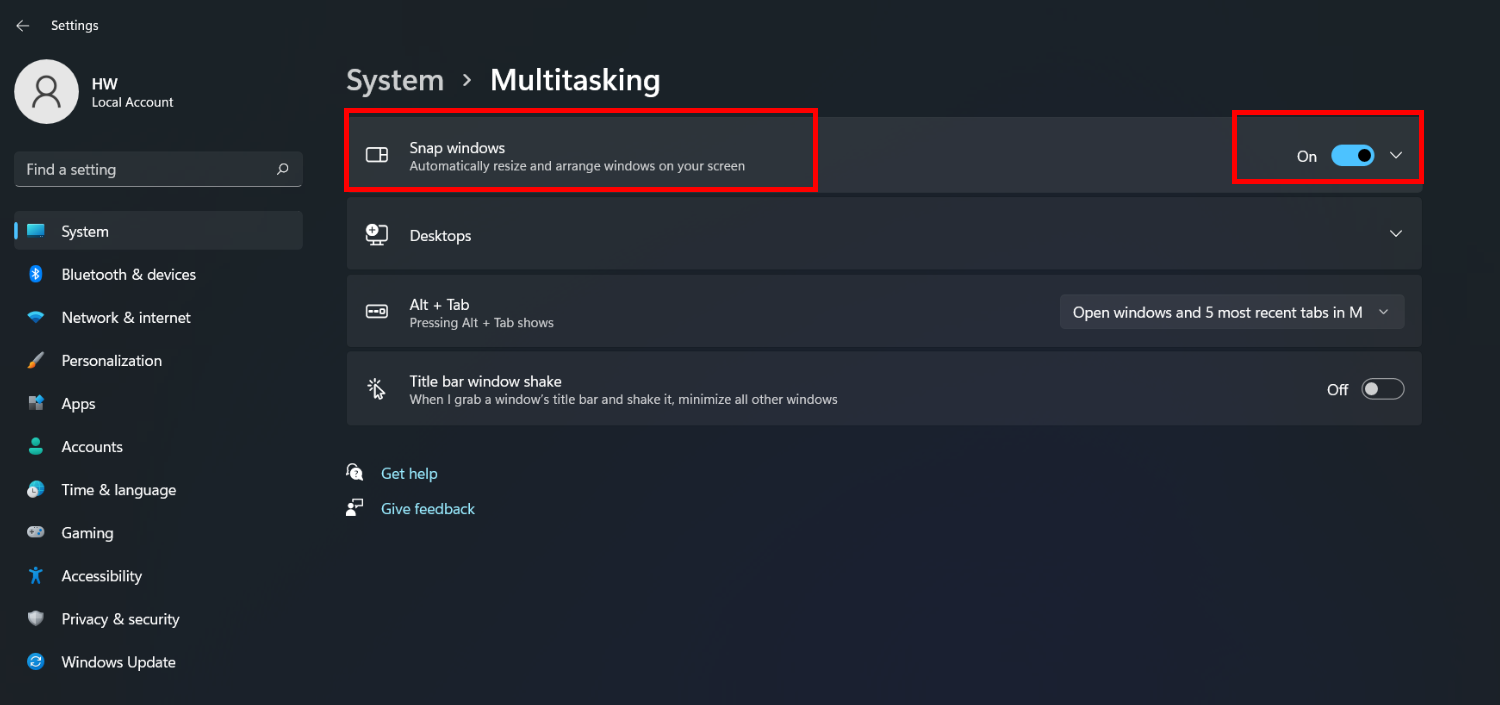
- Убедитесь, что пункт «Прикрепить окна» включен.
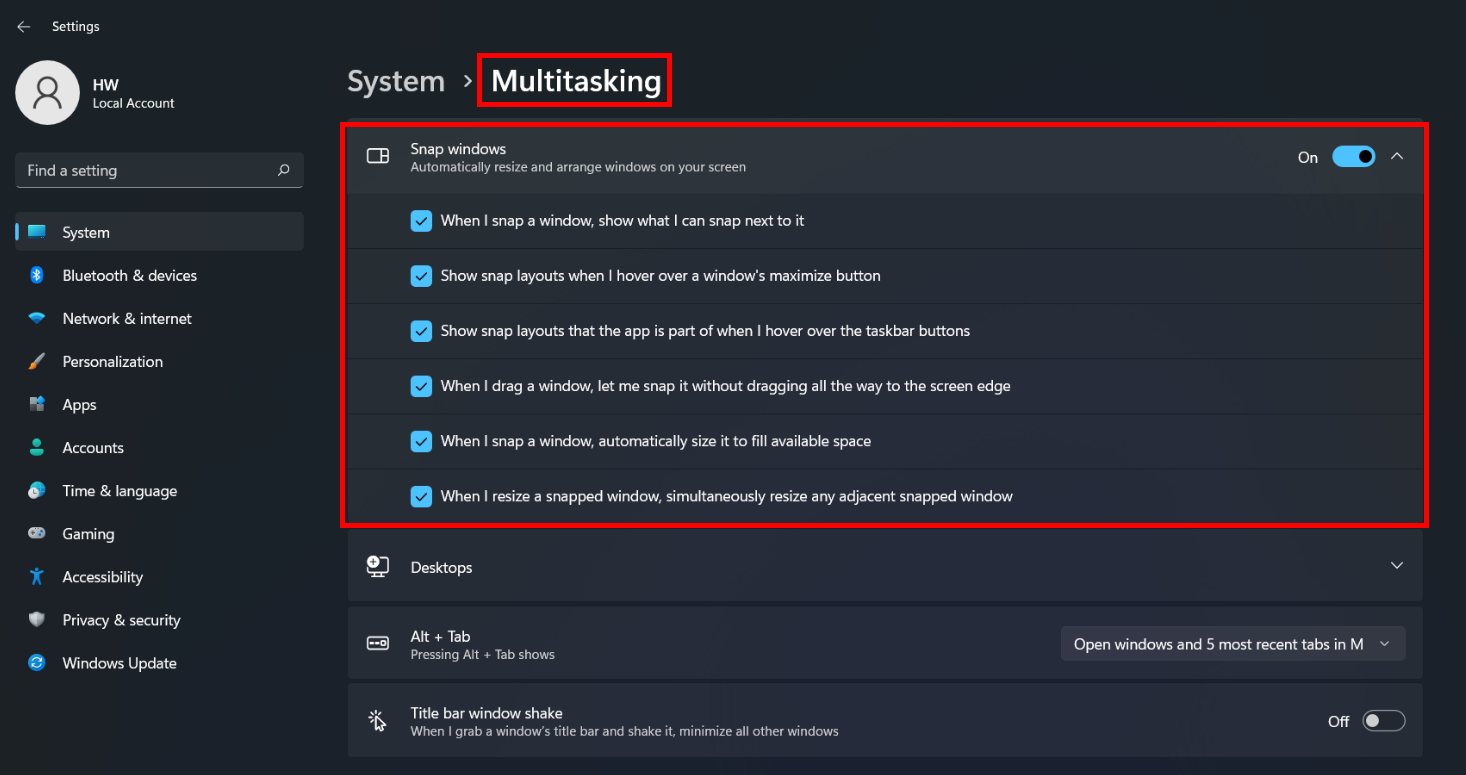
- Этот пункт можно также «раскрыть», используя стрелку справа, чтобы настроить отдельные параметры прикрепления окон.


Само разделение экрана в случае, если все опции в разделе «Прикрепить окна» включены, возможно следующими способами:
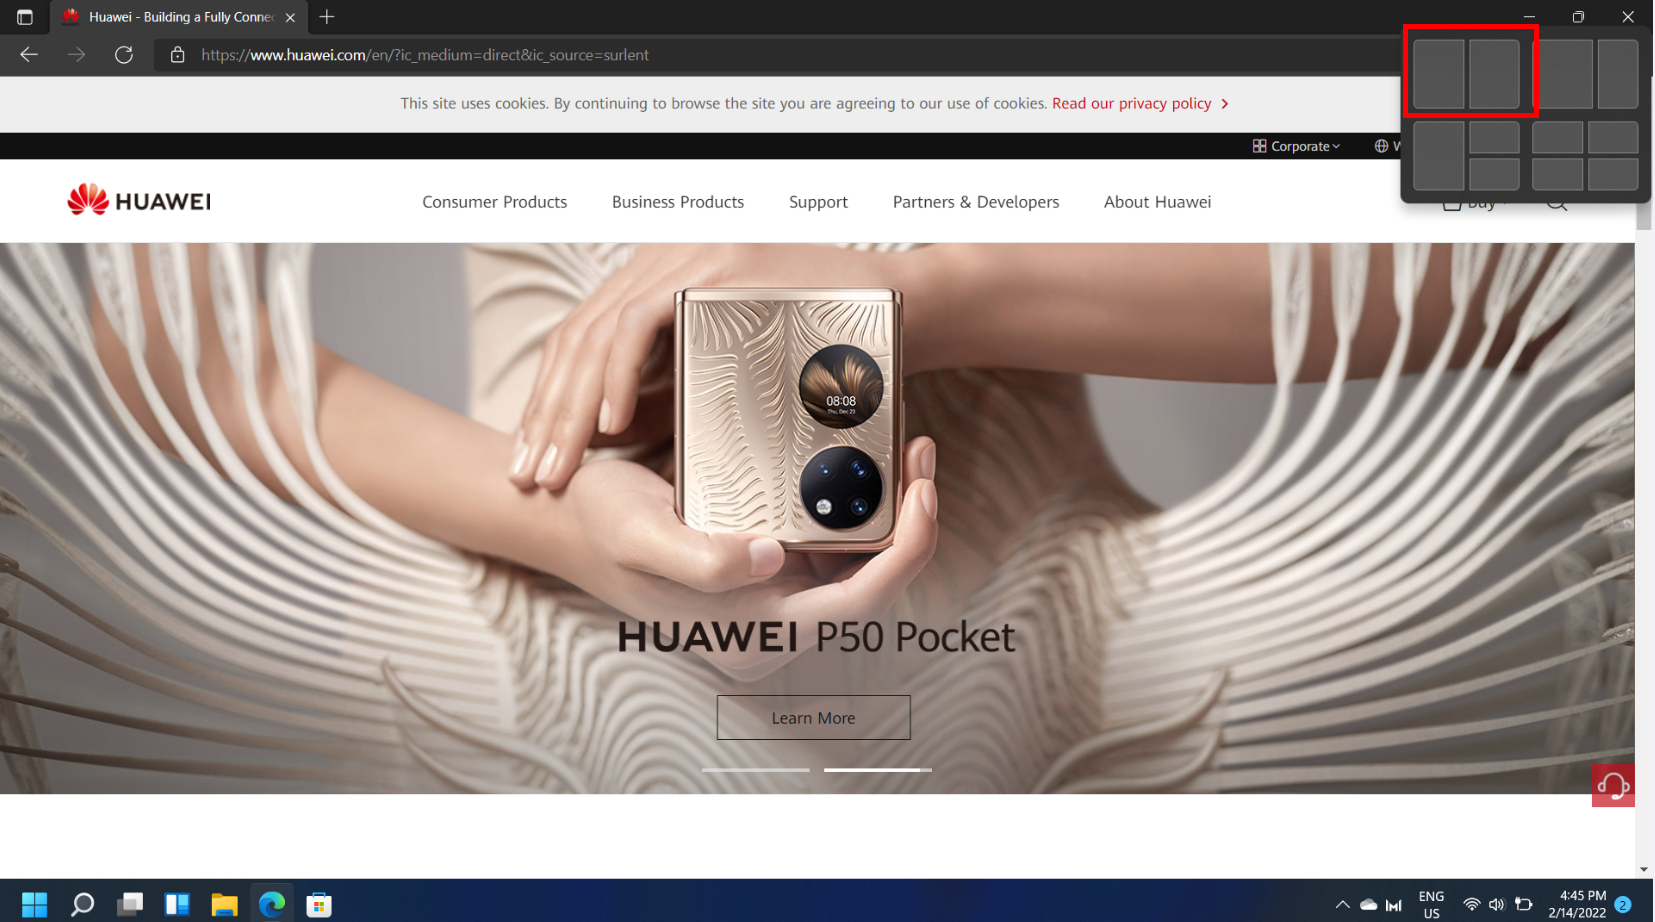
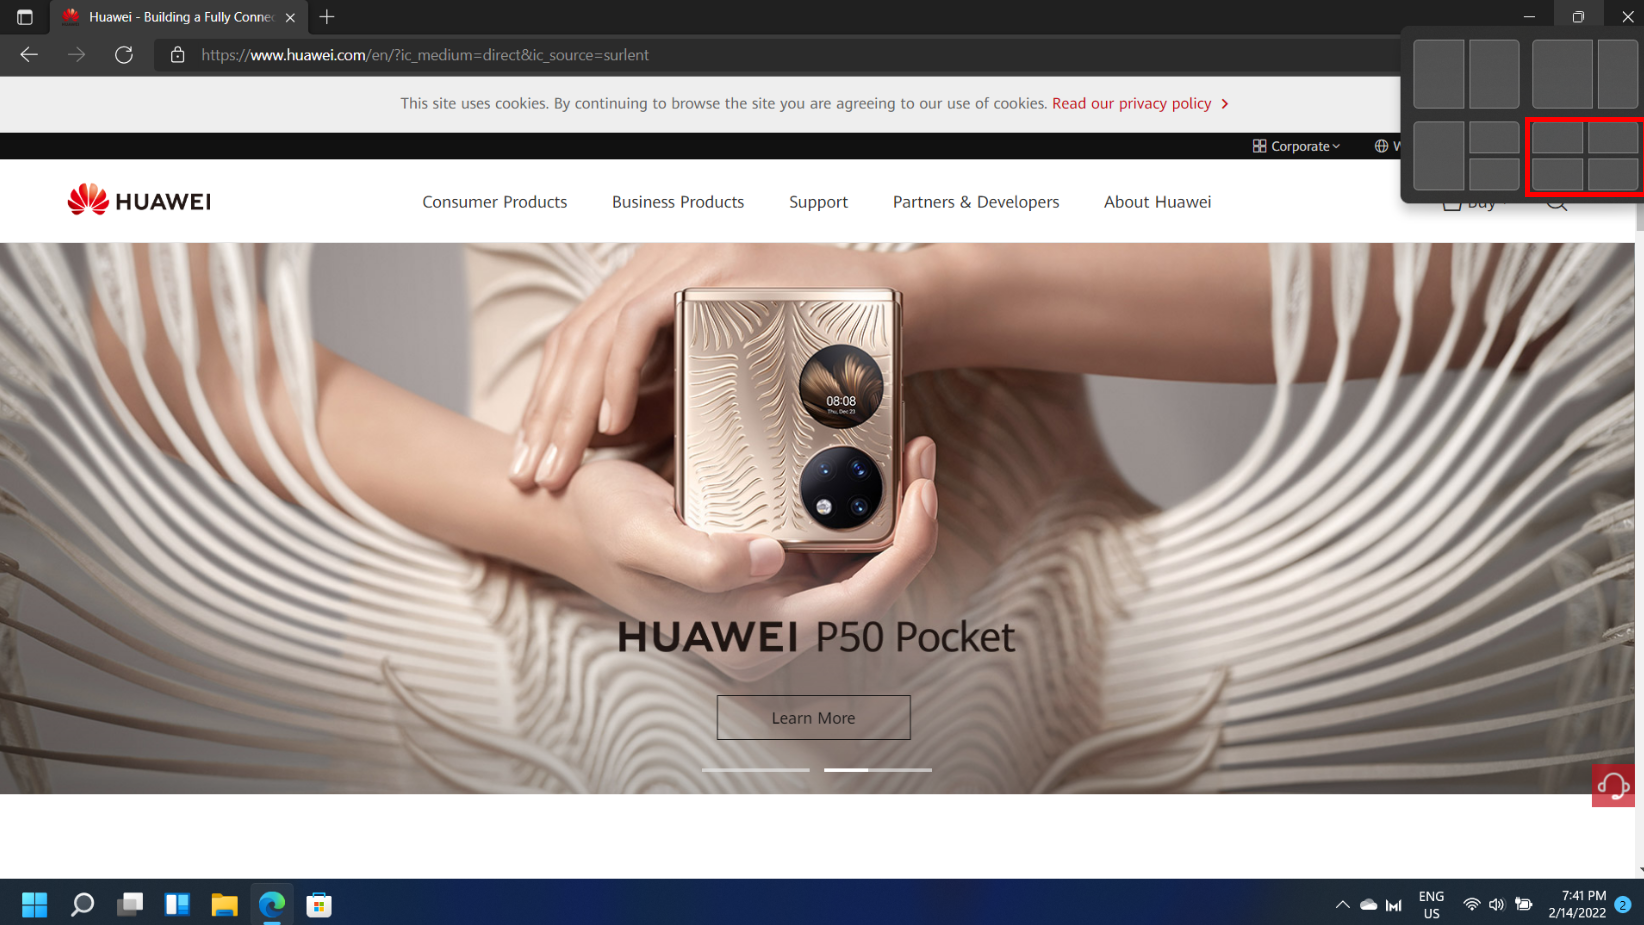
- Подведите указатель мыши к кнопке «Развернуть» в заголовке окна и выберите область, куда поместить текущее окно в одном из доступных шаблонов прикрепления. Затем те же действия можно повторить с последующими окнами.

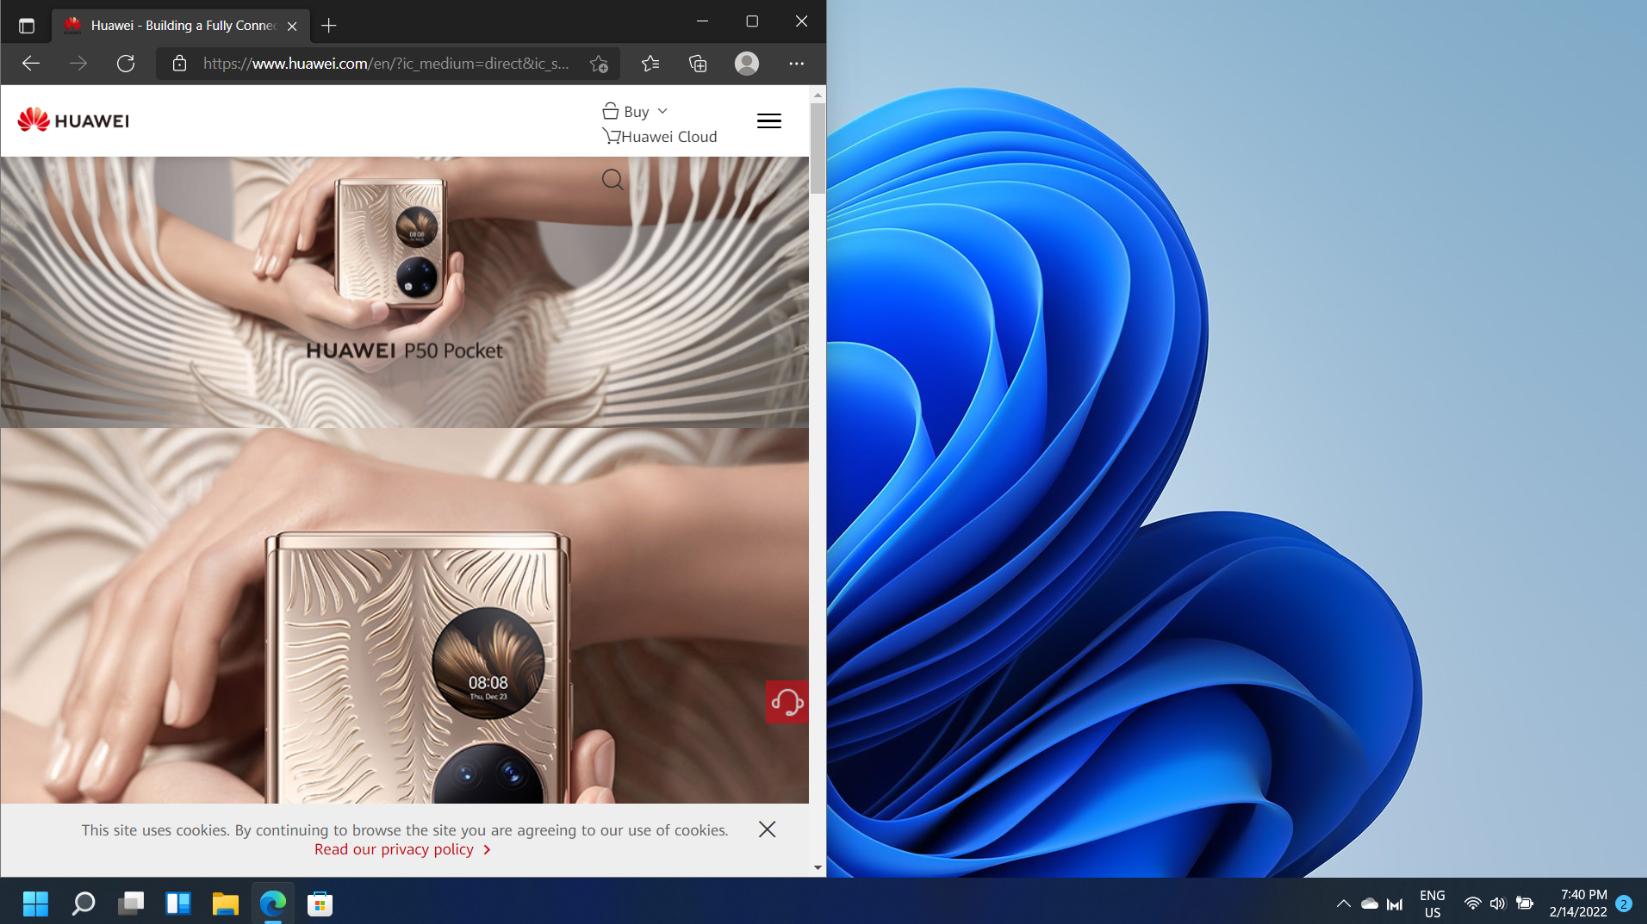
- Удерживая окно за заголовок, перетащите его к одному из углов экрана (если нужно разделить экран на 3 или 4 части) или к одной из сторон (если нужно разделить на две части по вертикали). Во втором случае вам автоматически будет предложено выбрать другое приложение из открытых для использования в оставшейся части экрана. По умолчанию экран делится поровну между приложениями, но разделитель можно перемещать мышью, чтобы изменить соотношение.
- Если нажать клавиши Windows+Z на клавиатуре, когда активно какое-либо окно, откроется меню доступных шаблонов прикрепления и с помощью стрелок вы сможете выбрать, как именно прикрепить текущее окно, подтверждение выбора — клавишей Enter. В новых сборках Windows 11 в шаблонах прикрепления также отображаются цифры для быстрого выбора путем нажатия соответствующей клавиши.

- Нажатие клавиш Windows + Стрелка_влево или Windows + Стрелка_вправо закрепляет окно с соответствующей стороны экрана. Если после этого нажать Windows + стрелка вверх или вниз, размер окна уменьшится вдвое.
- Текущая предварительная сборка Windows 11 содержит ещё один метод: перетаскивание окна в центральную верхнюю часть экрана, а затем — его сброс в нужное расположение в появившейся панели прикрепления.


Обычно, имеющихся возможностей бывает достаточно для того, чтобы удобно организовать окна приложений в Windows 11 в соответствии с текущими задачами.
Дополнительные возможности
Помимо встроенных средств системы для разделения экрана на несколько частей, вы можете использовать и сторонние утилиты. Например, функция Fancy Zones в Microsoft PowerToys позволяет легко создать собственные шаблоны прикрепления окон. Достаточно скачать приложение из Microsoft Store, после чего:
- Зайти в параметры Fancy Zones и включить опцию, если она отключена.

- При необходимости — запустить редактор макета и настроить собственный макет расположения окон, либо выбрать один из имеющихся.

- После включения опции достаточно будет перетаскивать окна, удерживая клавишу Shift, чтобы закрепить окно в нужном расположении — зоны закрепления будут отображаться на экране.


Некоторые производителя мониторов на официальной странице поддержки предлагают скачать собственные решения для организации окон на рабочем столе Windows — проверьте, есть ли что-то подобное для вашей модели монитора, если встроенные средства системы по какой-то причине не подошли.
- Нажмите комбинацию клавиш Win+I, чтобы открыть раздел Настройки, перейдите в раздел Система (System), а затем перейдите в раздел Многозадачность (Multitasking).

- Включите переключатель функции Прикрепление окон (Snap windows), нажмите на стрелку, чтобы открыть выпадающий список, а затем выберите шесть опций в разделе Прикрепление окон (Snap windows), чтобы включить режим нескольких окон.
Чтобы отключить этот режим, выключите переключатель функции Прикрепление окон (Snap windows).


После включения данного режима вы сможете менять размер окон и перемещать их, перетаскивая в любой из четырех углов экрана. Вы можете развернуть окно на весь экран или расположить от 2 до 4 окон рядом друг с другом.
Чтобы развернуть окно на весь экран:
- Нажмите на значок разворачивания, расположенный в верхнем правом углу окна, чтобы развернуть его на весь экран.

Чтобы развернуть окно на пол-экрана:
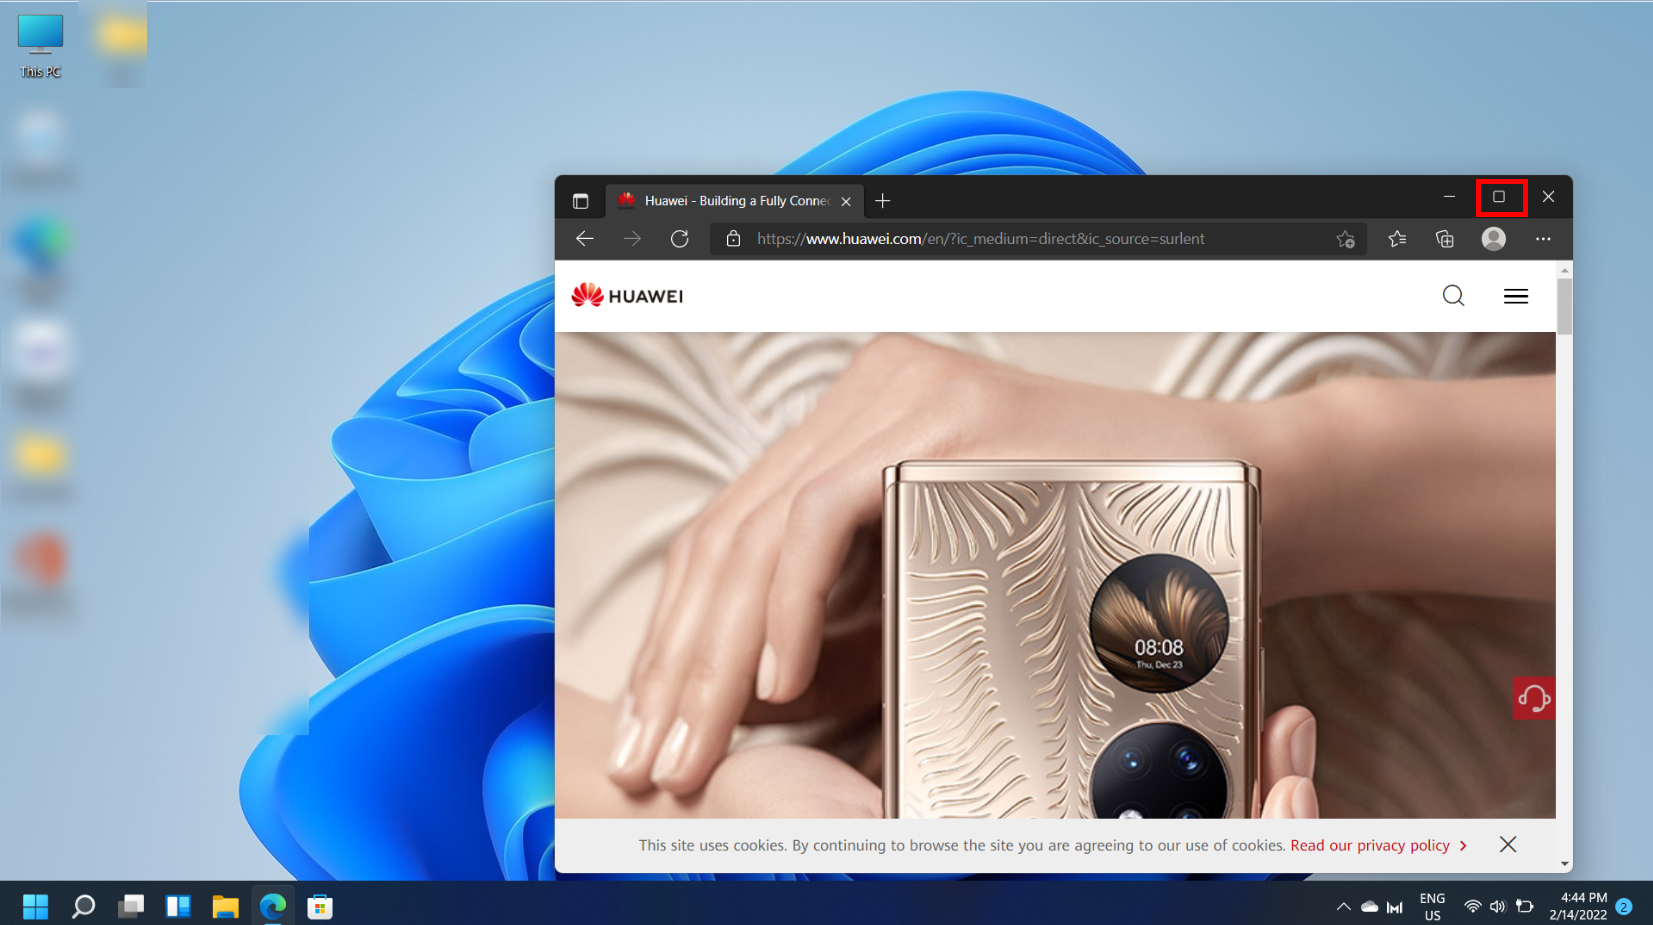
- Наведите курсор на значок разворачивания, расположенный в верхнем правом углу окна, чтобы посмотреть опции отображения нескольких окон.

- Нажмите правой кнопкой мыши на верхнюю левую опцию.

- Окно будет развернуто на пол-экрана.
Если вы открыли несколько окон одновременно, другие окна автоматически откроются в свободной части экрана.


Чтобы развернуть окно на четверть экрана:
- Наведите курсор на значок разворачивания, расположенный в верхнем правом углу окна, чтобы посмотреть опции отображения нескольких окон.

- Наведите курсор на опцию отображения четырех окон и нажмите на нее правой кнопкой мыши.
- Окно отобразится на четверть экрана.

Вы также можете использовать сочетания клавиш, чтобы прикрепить окна к углам экрана.
- Одновременно нажмите на кнопку Пуск и на стрелку вверх, чтобы развернуть окно на весь экран. Одновременно нажмите на кнопку Пуск и на стрелку вниз, чтобы вернуть окно в исходное положение.
- Одновременно нажмите на кнопку Пуск и на стрелку влево/вправо, чтобы развернуть окно на пол-экрана. Одновременно нажмите на кнопку Пуск и на стрелку вправо/влево, чтобы вернуть окно в исходное положение.
- Одновременно нажмите на кнопку Пуск, на стрелку влево/вправо и на стрелку вверх/вниз, чтобы развернуть окно на четверть экрана. Снова одновременно нажмите на кнопку Пуск, на стрелку вправо/влево и на стрелку вверх/вниз, чтобы вернуть окно в исходное положение.
Usually, displaying a single program on a screen in full size suffices. But what if you need to switch back and forth between two or more applications? In that case, you can use the Windows 11 split-screen function to split the screen. We’ll show you how to use the feature via mouse click, Snap Assist or using keyboard shortcuts.
Windows 11: how to split the screen via mouse click
Displaying multiple windows at the same time can be useful. Suppose you want to view a Word document at the same time as a web browser. You could align the two applications on the screen side by side, but it’s much easier to split the screen into four equal sections. Splitting your Windows 11 screen is easily done using your mouse. Just follow the steps below.
Step 1: Align the window of the active application
First, align the active window so that it forms the basis for either the two-split or the four-split screen view. For this purpose, click the left mouse button in the title bar of the active program and click the button.
To split the screen into two sections, simply drag the window to the right or left edge of the screen until you get a corresponding preview for the split screen with a gray background. Release the left mouse button.
")
If you want to divide your screen into four sections, drag the window of the active application to any corner of the screen. A suitable preview with a gray background will launch:
")
Want to create your own videos and pictures from Word, Firefox, etc.? Read our guide on how to create screen recordings in Windows 11 conveniently and without additional software.
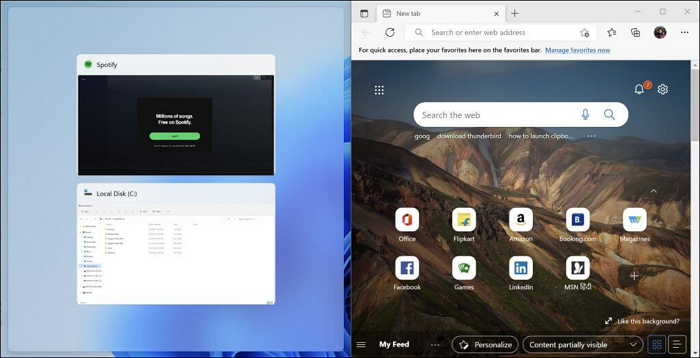
Step 2: Add windows for splitting the screen in Windows 11
Once you assigned the active window to the left or right side of the screen, Windows 11 automatically presents a thumbnail preview of all other open applications or windows. By left-clicking on the preview of an image, you can rearrange them in second, third, or fourth position.

Once you’ve made a selection, you can work in both applications without having to switch back and forth across the taskbar.

Windows 11: split the screen using a key combination
When using a mouse to split a screen in Windows 11, dragging the active window to the desired location to trigger the split-screen function can be a bit tedious. For greater convenience use keyboard shortcuts instead.
Step 1: Align the window of the active application
First position the window of the active application in the desired position. The table summarizes the relevant shortcuts, all of which are based on a combination of the Windows key and arrow keys:
| Position of active window | Key combination |
|---|---|
| left half of screen | Windows key + left arrow |
| right half of screen | Windows key + right arrow |
| upper left corner | Windows key + left arrow, then Windows key + up arrow |
| lower left corner | Windows key + left arrow, then Windows key + down arrow |
| upper right corner | Windows key + right arrow, then Windows key + up arrow |
| lower right corner | Windows key + right arrow, then Windows key + down arrow |
Step 2: Add windows
Once you’ve set the initial position of the window of your active application, the images of available programs for splitting are previewed. Make a selection using the keyboard arrow keys.
The selected window will be framed with a black border – press Enter to move it to second, third, or fourth position on the screen.

Split screen in Windows 11 with Snap Assist
Snap Assist is a third option in Windows 11 to split the screen. The feature is not available for screen-splitting in Windows 10. Once activated, you can choose from six different split-screen variants activated in a single click.
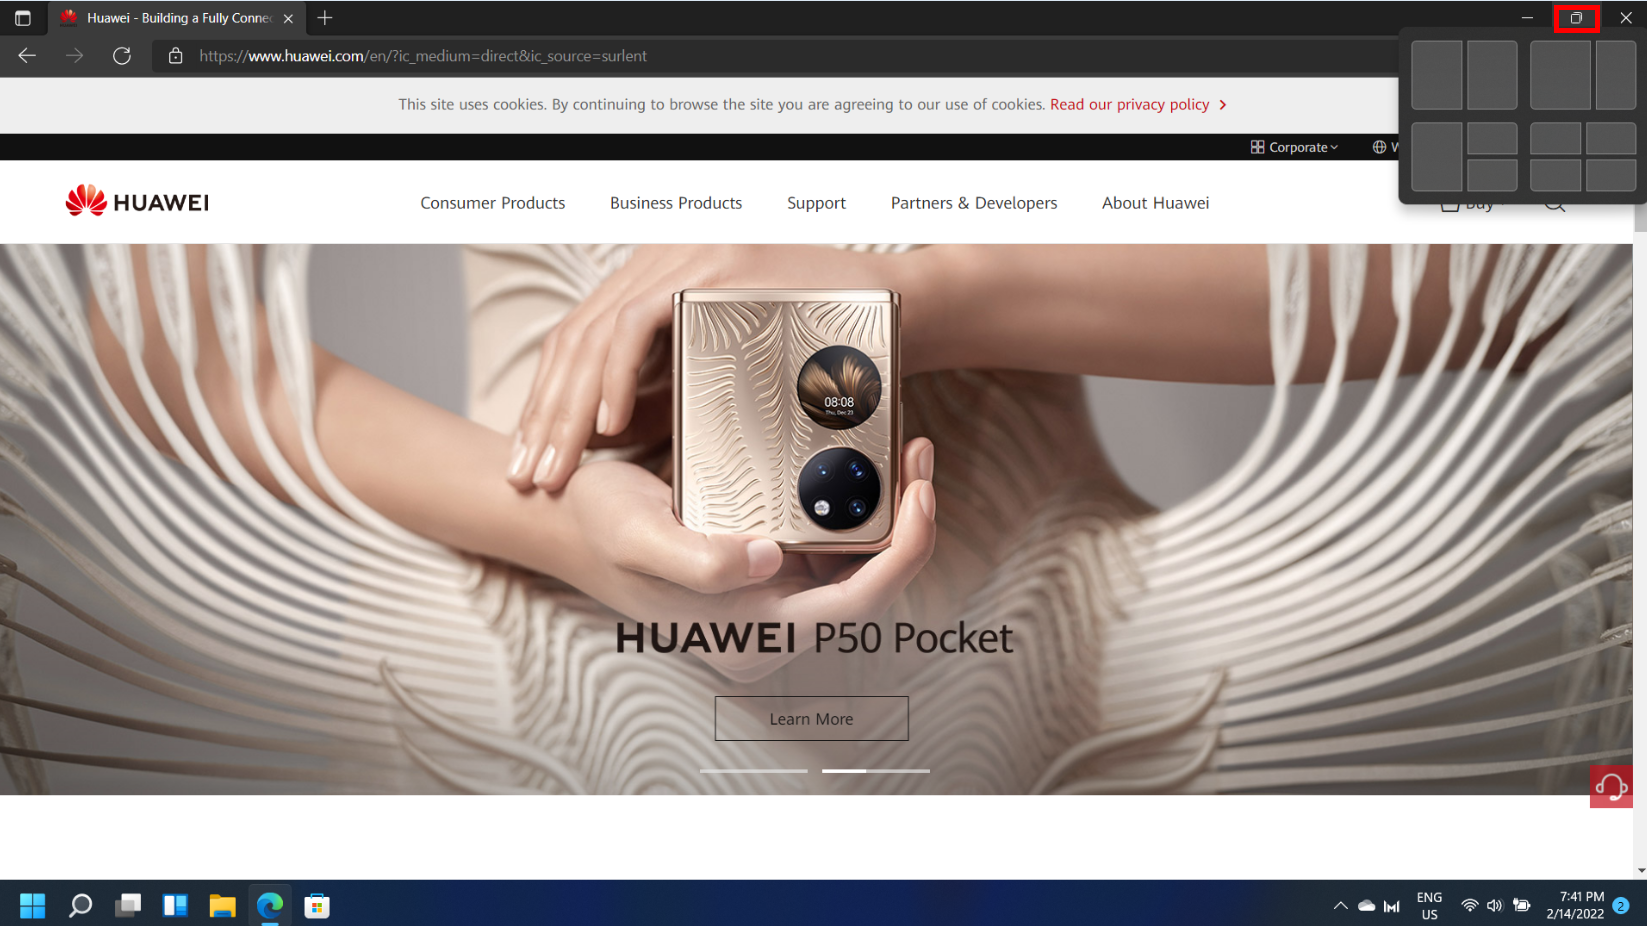
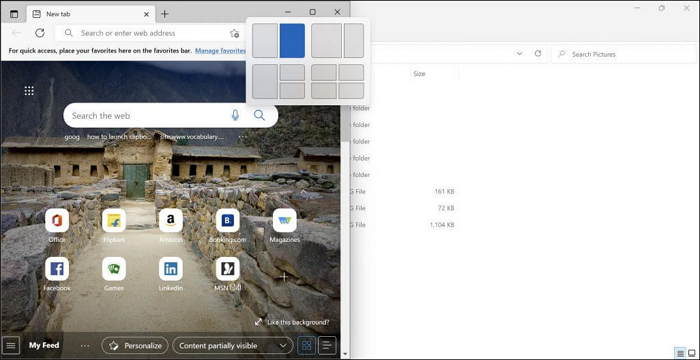
To split the Windows 11 screen using Snap Assist, move the mouse pointer across the “Maximize/Minimize” icon in the title bar of the active window. The system then automatically displays the available layouts for screen splitting. Simply left-click on your selection and choose the second, third, or fourth window in the usual manner.

In case Windows 11 doesn’t display the Split Screen layout menu when you hover over the window’s maximization/minimization icon, Snap Assist is likely disabled. Simply enable the feature from the system settings:
- Launch the Settings from the Start menu or using the key combination [Windows] + [i].
- Select the “Multitasking” menu item in the “System” section.
- Expand the “Snap windows” menu.
- Activate the option “Show snap layouts when I hover over a window’s maximize button”.
- You can enable the “Snap windows” options by moving the slider to “On”.

Was this article helpful?
If you like to work on many tasks at a time or keep an eye on one screen while working on the other, this article is for you. The splitting screen on Windows enables you to multitask without minimizing and maximizing one screen at a time.
This article will teach you how to split screen on Windows using snap layouts and shortcuts. Let’s begin by looking at how to split screen on Windows 10/11 PC.
Windows 10 and 11 support the ability to split screens into more than two screens, and the process is similar in both versions. To get started, you first must ensure you enable the split screen feature on your computer. Follow the steps below to activate it:
Step 1. Go to the Start Menu search bar, then type «Settings» and select the first or best match result
Step 2. Head to the Multitasking in your Windows 10 and toggle on the «Snap windows» switch. For Windows 11, select «System,» then click «multitasking» to toggle on the «Snap windows» feature.
After turning on the snap feature, let’s continue splitting your Windows into several screens.
On Windows 10:
Step 1. Drag an open window to a corner by holding down your left mouse button until the screen won’t move anymore.
Step 2. Release the mouse; you will notice the screen split in half. Then, select any other window you want on the other side of the screen.
Step 3. Drag the middle (dividing) line between both windows to resize them to fit your needs.
On Windows 11:
Step 1. Drag your preferred window to a corner and leave it there. You will see your window split into two.
Step 2. Pick the second window from the remaining windows that pops up. This works if you have multiple windows open; you need to open the second window.
How to Split Screen into Three Parts?
Similar to how you split the screen into two parts.
Step 1. Start by snapping a window into the corner of your screen.
Step 2. Then, drag any window of choice to the screen’s other side, bottom, or top corner.
Immediately, you will see other available windows to fill the third part of your screen. Doing this splits your screen into three parts.
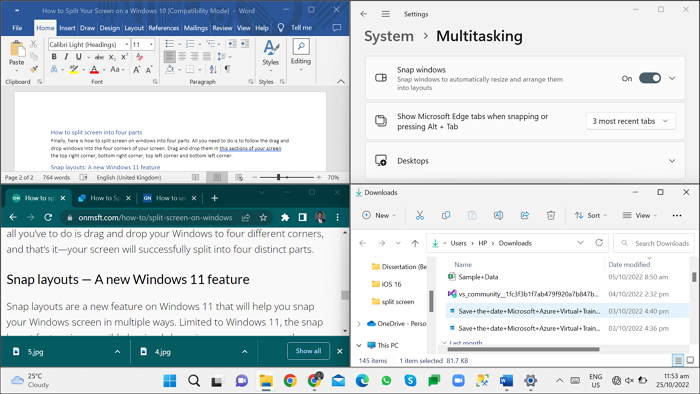
How to Split Screen into Four Parts?
Finally, here is how to split the screen on windows into four parts.
Step 1. Drag and drop them in these sections of your screen: the top right corner, bottom right corner, top left corner, and bottom left corner.
Step 2. All you need to do is to follow the drag-and-drop windows into the four corners of your screen.
Snap Layouts: A New Windows 11 Feature
Recently, Microsoft introduced a different snap layout feature for Windows 11. You can access this function by hovering over the minimize feature on your screen or using the Windows key + Z concurrently.
Immediately you press these keys, a transparent option to select your preferred snap pops up at the top right corner of your screen. After selecting your preferred screen, your active window gets adjusted to one side with options to set and select other available windows.
How to Do Split Screen on Windows through Shortcuts?
Splitting screens on Windows can be done using a keyboard shortcut since Microsoft has a way of incorporating shortcuts into everything.
Step 1. Press the Windows key simultaneously with the right or left arrow key from any active window. Depending on your selection, your active screen will snap to either the right or left side of your screen.
Step 2. In addition, depending on the number of screens you want, you can use the Windows key + up or down (arrow) key to place the window in the top or bottom corner. This is most useful when splitting screens into many sections.
Step 3. To split into four screens, you must first split using the Windows key + right or left arrow key before using the Windows key + up or down arrow key. For example, to place a screen at the top right corner, use the Windows key + right arrow key, then click on that window to make it active before pressing the Windows key + up arrow key.
Final Thoughts
No doubt that splitting screen makes multitasking easy for you. You can use the shortcut for one screen and drag others; there is no fast rule about how to split screens on Windows. For shortcuts to work, the screen must first be activated by clicking on it.
Windows 11 builds on the excellent Windows 10 multitasking functions with many different ways to split your screen to enjoy maximum productivity. If you’re a seasoned Windows 10 user, a lot of this will feel familiar. However, it’s helpful to learn about the many small and large changes to window management in Windows 11. In this article, you’ll learn how to use split-screen on Windows 11.

Using Windows Snap to Split Your Screen
Windows 7 first introduced the Snap function. Snap lets you quickly arrange your windows by simply pushing them against the edges or corners of the screen.

If you want to maximize a window, grab it by the title bar and then push it against the top-center of the screen. You’ll see a translucent shade form to show you which space the window will take up. Release the mouse button to complete the process.

Carefully push the window against the center of the screen. If you don’t, you’ll shift the windows to one of the one-third screen positions.

The one-third screen snap positions are great for sites and apps that work well in vertical mode and don’t need lots of horizontal space. For example, you can snap Twitter’s web page into the one-third screen position and use the two-thirds space for your primary application.

Snapping With the Maximize Button
Windows 11 takes all the guesswork out of arranging your windows into productive snapped positions. All you have to do is hover the mouse pointer over any window’s maximize button, and you’ll see a selection of preset Snap Layouts:

- A 50-50 percent left to right split, which is perfect for two browser windows or a browser and word processor side-by-side.
- A 75-25 percent split, which is suitable for the website above and social media split. It’s also great if you have a messaging program such as Telegram or WhatsApp that you need to watch as you work.
- A 33/33/33 split, which would be helpful for social media management or data entry between multiple spreadsheets.
- 50% left split, with stacked right-hand quadrants. Perhaps you want to watch some Netflix, work on your project, and keep an eye on your chats?
- Split into four quadrants; crypto traders most likely use this, stock market investors, and the Architect from The Matrix.
- A 25/50/25 split. We’re not sure what this one is for, but someone out there will use it.
You can easily mix and match the different elements by clicking which percentage split you want in each window. Simply highlight any of the separate window split examples and select them.

Bringing Back Aero Shake
Aero Shake is a Windows Snap feature that isn’t on by default in Windows 11. It works to split the screen in Windows 11 by minimizing all windows besides the one you’re currently moving by its title bar. Just “shake” the windows left and right to make everything else minimize.
It’s a neat trick, but some users found it too easy to accidentally trigger Aero Shake, which led to some mild annoyance. If you’re a fan, turning it back on in Windows 11 is easy:
- Open the Start Menu.
- Type Snap Settings and select the option when it appears.
- Switch the Title bar windows shake option toggle to On.

One drawback is that you can’t just bring all the minimized windows back with an additional shake. You can get a similar effect to Aero Shake by using the shortcut Win + D. This will minimize all windows to the taskbar, and then you can click on the window you want to use. While this has an additional step to reach the same result, you’re much less likely to press Win + D than trigger Aero shake.
Using Snapped Groups
Using the Snap feature to split your screen in Windows 11 is intuitive, but there’s an additional feature that can make it even better for your productivity.
Windows 11 groups snapped windows with their friends. So if you’ve, for example, snapped two sets of windows into 50/50 arrangements, you can switch between them as linked groups instead of clicking on each video individually. This makes it easy to change between different arrangements.
For example, if you’ve set up the four-quadrant arrangement to monitor four different market indicators, you can switch between that and a 50/50 productivity app group with a single click.

All you have to do is hover over the taskbar icon of any window that’s part of a given group and then click on the group representation to the right of the individual window popup.
Window Split Keyboard Shortcuts
If you’re looking for speed and efficiency when splitting the screen in Windows 11, then you’ll want to learn the following keyboard shortcuts:
- Win + Up Arrow will maximize the selected window. Press the combo again to switch to a 50/50 horizontal split.
- Win + Left or Right Arrow will split the selected window 50% left or right.
- Win + Up + Left or Right Arrow will split the selected windows into an upper quadrant.
- Win + Down + Left or Right Arrow will split the selected windows into a lower quadrant.
- Win + Down Arrow will minimize the selected window.
These shortcuts may take a little getting used to, and some combinations or repeat-press behaviors feel a little unintuitive, but playing around with the different combos will be helpful.
Moving Windows Across Virtual Desktops
Windows 11 supports virtual desktops, which can be another way to “split” your screen into different configurations.
To create additional desktops, hover the mouse pointer of this icon in the taskbar.

Next, select the plus symbol to add a desktop. To close a desktop, select the X button at the top right of its preview.
To switch to any desktop, hover over the icon and then select it. You can have different snap layouts with different applications on each desktop, which is less confusing than switching between Snap groups. If you close a desktop with open applications, those app windows will simply move over to the next desktop.
To manually assign windows to a specific desktop:
- Select the desktops icon on the taskbar, which will show you all the open windows on a given desktop.
- Hover the mouse over the desktop with the window you want to move to another desktop.

Right-click on that window and select Move to > Desktop X, where X is the desktop number of your choice.

Now you’re ready to split your screen left, right, and center as you please!
Related Posts
- How to Fix a “This file does not have an app associated with it” Error on Windows
- How to Add OneDrive to Windows File Explorer
- How to Fix an Update Error 0x800705b4 on Windows
- How to Resolve “A JavaScript error occured in the main process” Error on Windows
- How to Fix the Network Discovery Is Turned Off Error on Windows