
Представьте, что работаете с электронной таблицей и в то же время ожидаете важного письма. Чтобы не переключаться между приложениями, можно открыть два окна рядом — так вы сразу увидите, что письмо пришло.
В Windows 10 есть два способа разделить экран: с помощью мыши и сочетаний клавиш. Рассмотрим каждый из них.
Как разделить экран в Windows 10 с помощью мыши
Разделяем экран на два окна
Откройте как минимум два окна. Уменьшите одно из них до размера, при котором его можно перемещать по экрану. Нажмите на заголовок окна и тяните его к правому или левому краю экрана, пока курсор мыши не исчезнет. Появится контур, показывающий, где окажется окно. Отпустите курсор, и окно заполнит это пространство.
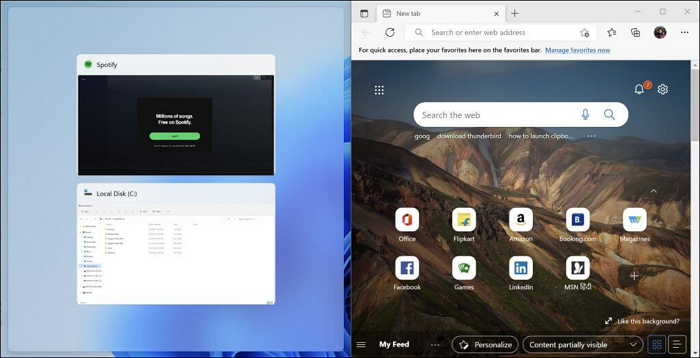
Функция Snap Assist сразу предложит разместить на другой половине экрана приложения, которые уже открыты. Нажмите на нужное окно, и оно заполнит оставшееся пространство.
Чтобы сменить приложение, просто откройте его и переместите на окно, которое хотите заменить.
Разделяем экран на несколько окон
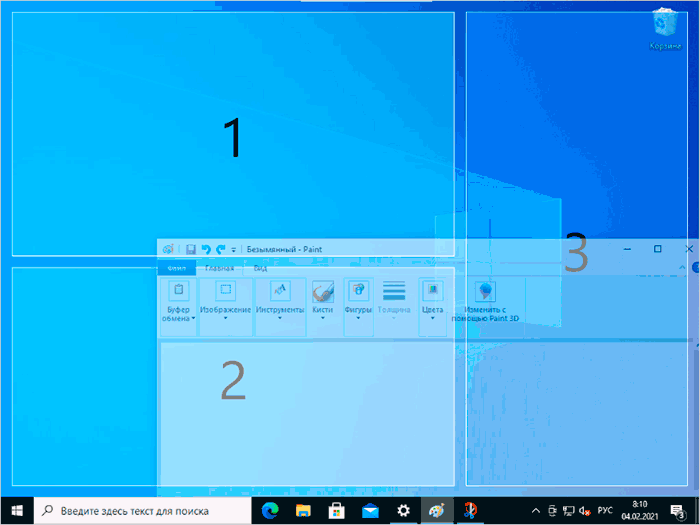
Windows 10 позволяет разместить на одном экране до четырех окон. Действия те же, только окно нужно переместить в угол экрана, а не в сторону. Снова появится контур, показывающий, какую часть экрана будет занимать каждое окно.
Snap Assist запустится в одном из двух случаев.
- Первые два окна полностью занимают либо правую, либо левую сторону экрана. Snap Assist заполнит оставшуюся половину одним окном, и на экране будет три окна.
- На экране размещено три окна, и только одна четверть остается пустой. Snap Assist поможет заполнить четвертое окно.
Обратите внимание, что если экран разделен на три окна, одна из программ будет крупнее других, а если на четыре — все окна будут одинакового размера.
Как разделить экран в Windows 10 с помощью клавиатуры
Разделяем экран на два окна
Откройте как минимум два окна. Выделите то, которое хотите переместить первым, и нажмите Windows + стрелка влево или вправо.
Когда главное окно встанет на место, Snap Assist предложит заполнить оставшуюся половину экрана. Выберите нужный вариант с помощью клавиш со стрелками и нажмите Enter для подтверждения.
Разделяем экран на несколько окон
Для этого нужно выполнить еще несколько действий с помощью клавиш со стрелками. Например, можно разместить окно в правом верхнем углу экрана, нажав Windows + стрелка вверх + стрелка вправо или Windows + стрелка вверх, а затем Windows + стрелка вправо.
Читайте по теме:
6 способов вернуть исчезающий курсор на Windows
Как изменить цвет и размер указателя мыши на Windows 10
Переключитесь на другое окно и расположите его так, чтобы заполнить оставшуюся часть экрана слева или справа. Snap Assist запустится и предложит заполнить другую половину экрана. Выберите один из вариантов, чтобы разделить экран на три части, или еще раз воспользуйтесь клавишами со стрелками, заполнив экран четырьмя окнами.
Как отключить функцию Snap Assist
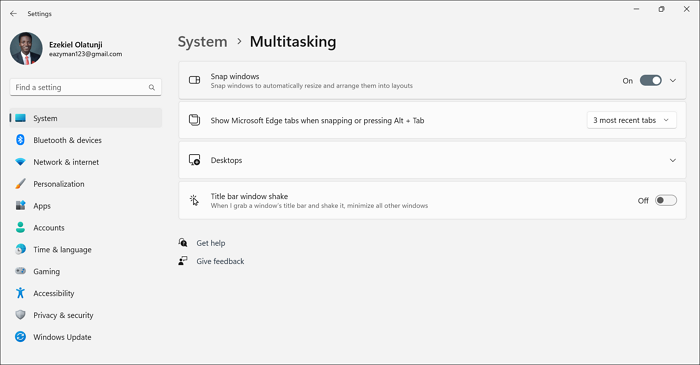
Для этого нажмите Windows + I, чтобы открыть «Параметры». Перейдите в «Система» → «Многозадачность». Отключите опцию «При прикреплении окна показывать, что можно прикрепить рядом с ним».
Snap Assist упрощает переход от одного окна к другому. Кроме того, окна разделенного экрана можно перемещать на все подключенные мониторы, используя любой из методов выше.
Источник.
Фото на обложке: Wachiwit / Shutterstock
Last Updated :
03 Apr, 2023
Sometimes, you need to use the split screen on Windows 10. This helps in dividing the portion of the screen into some parts for working on different applications simultaneously. While answering the question of how to split screen in Windows 10, you will find two different methods.
Methods To Use Split Screen On Windows 10
Method 1: Using Manual Dragging
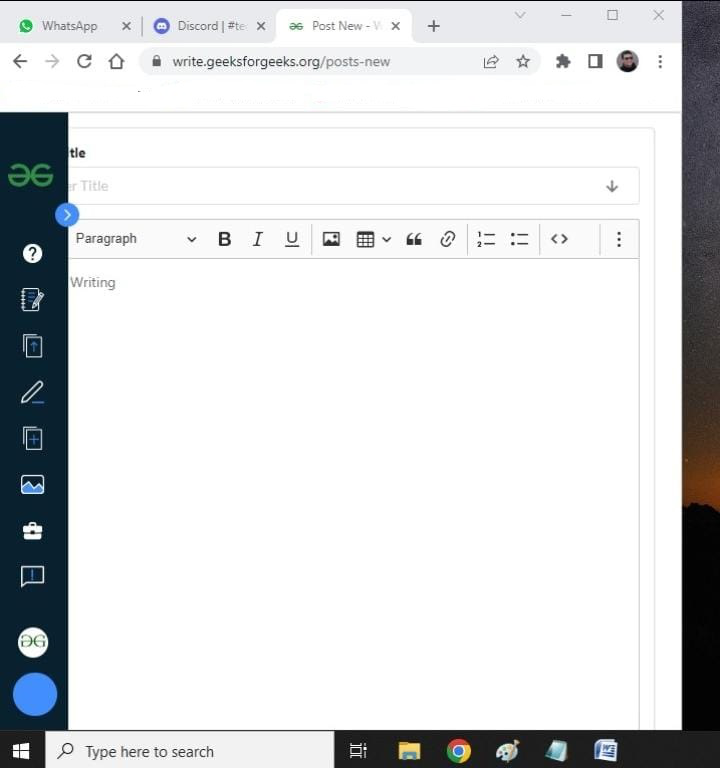
Step 1: To split the screen on Windows 10, first minimize the window and hold onto the side that needs to be placed at the corner. (hold any of the sides of the screen.)
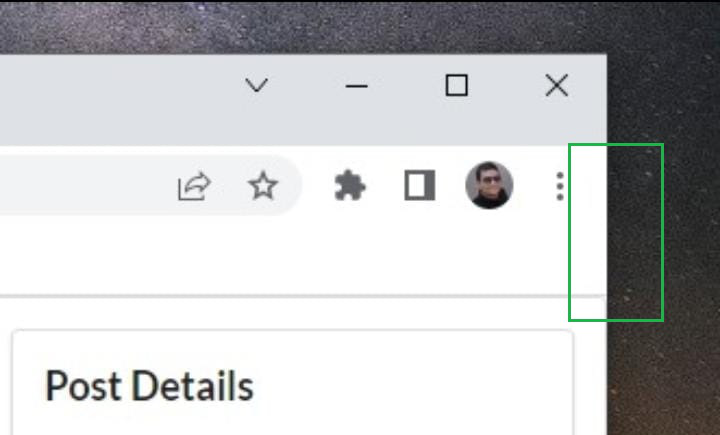
Step 2: Now place that corner in the respective corner of the screen. If users hold the upper right corner of the application window, then that needs to be placed at the same corner of the screen. And the size will shrink. It will now allow holding the different applications on the same screen.
Hence, by following this 2-step procedure, we can easily split the screen on Windows 10.
Method 2: Using Shortcut Keys
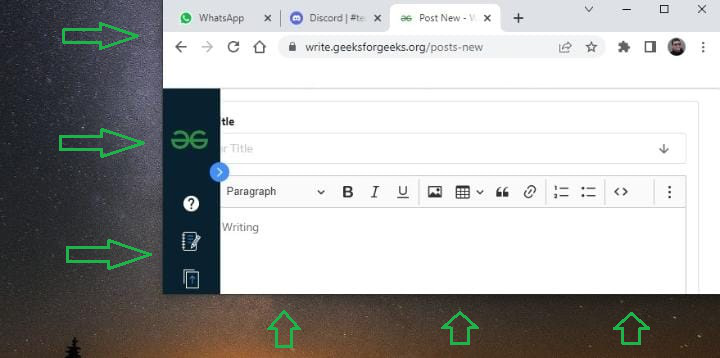
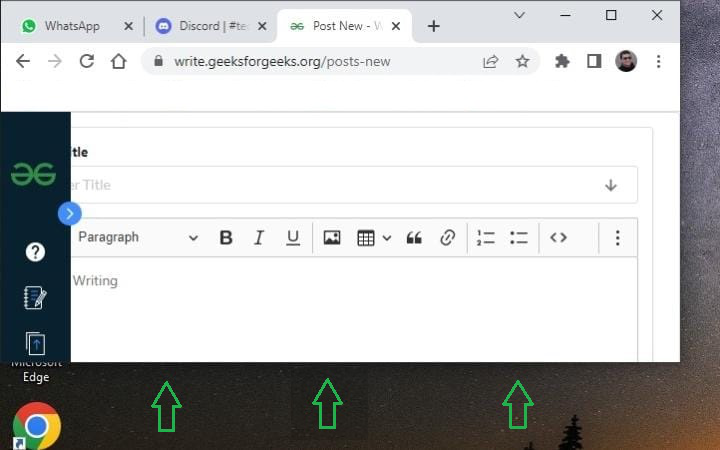
Step 1: In this case, press two keys simultaneously Windows + Arrow keys (the arrow keys will be the Left or Right arrow). If the window needs to be placed on the right-hand side, then use the Right Arrow, else press the Left Arrow.
Step 2: After that, enter two different sets of keys by pressing the Windows + Arrow keys simultaneously. In this case, the arrow will be a different one (Left & Right) as per preference.
Hence, by following this 2-step procedure, we can easily split the screen on Windows 10.
На сегодняшних мониторах с большой диагональю для работы может быть удобным разделить экран на 2 или большее количество частей, каждая из которых содержала бы своё окно с каким-либо содержимым. Функции для этого предусмотрены на уровне системы в Windows 10, а при желании реализуемы и с помощью сторонних программ.
В этой инструкции подробно о том, как разделить экран Windows 10 различными способами для того, чтобы расположить разные программы в разных его частях. Дополнительно, для организации рабочего процесса вы можете использовать виртуальные рабочие столы Windows 10.
- Встроенные функции разделения экрана Windows 10
- FancyZones в Microsoft PowerToys
- Программы производителей мониторов
- Видео
Делим экран с помощью функции «Прикрепить окна» в Windows 10
Для упрощения работы с несколькими окнами в Windows 10 предусмотрена встроенная функция «Прикрепить окна», которая позволяет автоматически делить экран между несколькими окнами: на две части — слева и справа; или на четыре — по углам экрана. Обычно эта опция включена по умолчанию, но можно проверить её состояние, зайдя в Параметры — Система — Многозадачность — пункт «Прикрепить окна» и отметки ниже этой опции.

Когда функция включена вы можете очень быстро делить экран между двумя и более окнами программ следующим образом:
- Когда два и более окон программ открыто, перетащите любое окно за заголовок к левой или правой границе экрана, либо к одному из углов экрана и когда будет показана область закрепления, отпустите кнопку мыши.

- При разделении на две части (при перетаскивании влево или вправо) вы увидите предложение выбрать окно для оставшейся части экрана из списка открытых, выберите его и оно займёт всё свободное пространство.

- При разделении экрана на 4 части, окна для каждого угла потребуется перетащить вручную, как на первом шаге.
- Если вы хотите изменить соотношение размеров областей на экране, сделайте это мышью, передвигая разделитель между окнами.
- Чтобы «перестать делить» экран, просто потащите за заголовок закрепленного таким образом окна и перенесите его в другое место.
- Если вам нужно закреплять окна по краям экрана с помощью клавиатуры, используйте комбинации клавиш Windows + стрелка влево, Windows + вправо, Windows + вверх, Windows + вниз. Последние две комбинации работают после того, как вы закрепили окно слева или справа: иначе они же либо свернут окно в панель задач, либо развернут его на весь экран.


Для многих пользователей встроенной функциональности будет вполне достаточно, но, если требуется более сложная настройка зон на экране (например, для очень широкого монитора), описываемые возможности могут не подойти. В этом случае можно использовать Microsoft PowerToys, а также сторонние утилиты.
Microsoft PowerToys FancyZones
Microsoft PowerToys представляет собой набор полезных утилит для Windows 10, среди которых присутствует FancyZones — инструмент для создания «зон» на экране Windows 10 и размещения окон в них.

С помощью FancyZones можно использовать готовые макеты, а также создавать свои собственные в FancyZones Editor для того, чтобы разделить экран Windows 10 на произвольное количество частей. Создание областей экрана может показаться не интуитивным, но ниже в видео инструкции процесс продемонстрирован наглядно.

После активации функции и настройки областей экрана для окон, при перетаскивании любого окна достаточно будет удерживать клавишу Shift, чтобы отобразились доступные области для закрепления выбранного окна.
Подробно о программе, других её функциях и официальный сайт для скачивания в обзоре: Microsoft PowerToys — набор полезных утилит для Windows 10.
Программы от производителей мониторов
Многие производители мониторов предлагают собственные утилиты для того, чтобы разделить монитор на части — их можно скачать с официального сайта поддержки вашего монитора (впрочем, не исключено, что эти же программы будут работать и на мониторах других марок). Примеры таких программ:
- Samsung Easy Setting Box
- Dell Display Manager
- LG 4-Screen Split (или просто LG ScreenSplit)
- Acer Display Widget
С большой вероятностью и для других производителей вы также сможете найти подобные программы.
Видео инструкция
Также, на схожую тему вам может быть полезной статья Как разделить экран на Android.
See multiple windows and applications on your screen
Updated on March 21, 2022
What to Know
- Turn on Snap Windows: Start > Settings > System > Multitasking. Should be on by default.
- Drag a window to one side of the screen, release the mouse, then select a window to snap to the other side.
- In Windows 11, hover your mouse over the Maximize icon to choose between different snap window layouts.
This article explains how to use a split screen in Windows so that you can look at two windows at once. The instructions apply to Windows 11, 10, 8.1, and 7.
Split Your Screen in Windows 11 and 10 With Snap Windows
There are several ways to split a screen in Windows 11 and 10, but the easiest is with Snap Windows (known as Snap Assist in Windows 10). Snap Windows lets you drag a window to a corner or side of the screen to “snap” it there, which in turn makes room for other windows to be snapped in the resulting empty screen space.
To turn on this feature, go to Start > Settings > System > Multitasking. Select the toggle next to Snap Windows to turn it on, although Snap Windows should be on by default. Select Snap Windows to see additional options.
Split Screen Using Mouse
To split your screen with Snap Windows using the mouse:
-
Open two or more windows or applications.
-
Place your mouse on an empty area at the top of one of the windows. Long-press the left mouse button, and drag the window to the right side of the screen. Move it all the way over, as far as you can go, until your mouse won’t move anymore.
-
Release the mouse to snap that window to the right side of the screen. It should now fill half the screen, or the corner if you dragged it there.
-
Select any of the other windows that are open on the left side to snap them to the left side of the screen.
-
Now that the two screens are beside each other, drag the dividing line that separates them to resize both windows simultaneously. This is helpful if you need to see more of one and can manage a smaller view for the other.
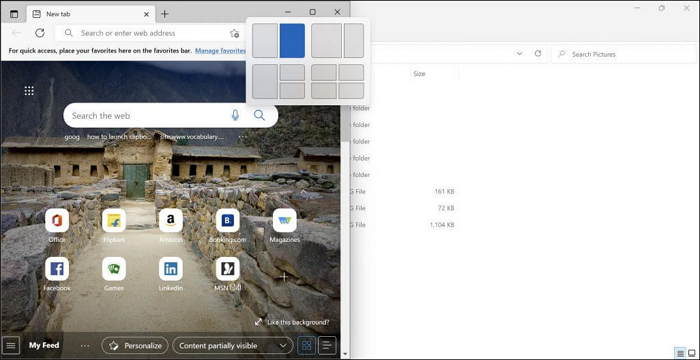
Choose a Layout in Windows 11
In Windows 11, hover your mouse over the Maximize icon in the upper-right corner to select between several snap window layouts.
Stack Side-by-Side in Windows 10
In Windows 10, you can stack all the windows side-by-side by right-clicking the taskbar and choosing Show windows side by side. If there are several windows open, they’ll all resize appropriately to fit on the screen.
You can also use the Windows key + left arrow and Windows key + right arrow to snap windows.
Windows Split Screen in Windows 8 and 8.1
Microsoft assumed with Windows 8 and 8.1 that most people would use a touchscreen device. If you have a touchscreen, use the snap feature to position two windows on the screen at one time using your finger. Otherwise, use a mouse.
To use split screen with Windows 8.1:
-
Open two or more windows and/or applications.
-
Place your mouse in an empty area at the top of one of the windows. Long-press the left mouse button, and drag the window to the left side of the screen. Move it all the way over, as far as possible.
On a touchscreen, swipe in from the left and hold your finger on the screen until the second window is docked on the left side of the screen.
-
Release the mouse to snap that window to the left side of the screen.
-
Select any of the other windows to snap to the right side of the screen.
-
Drag the dividing line to resize the windows. When you move the line between the windows or apps, only one screen is resized at a time, not both as in Windows 11 and 10.
If your screen resolution is high enough and your video card supports it, you can position three windows on the screen.
How to Do Split Screen in Windows 7
Windows 7 was the first version of Windows to support the Snap feature, and Snap should be on by default. To position two windows side-by-side in Windows 7:
-
Open two windows.
-
Place your mouse in an empty area at the top of any open window. Long-press the left mouse button, and drag the window to the left half of the screen.
-
Release the mouse. The window will take up half the screen.
-
Repeat Step 2 for the second window, this time dragging it to the right side of the screen before releasing the mouse. The window will take up the right half of the screen.
Other Ways to Split Screen in Windows 7
To stack all the windows side-by-side, right-click the taskbar and choose Show windows side by side. If there are several windows open, they’ll all resize to fit on the screen.
You can also long-press the Windows key and the left or right arrow key to move windows around.
Using Alt+Tab to Switch Between Windows
You can use one of the standard methods for switching between windows and apps, like Alt+Tab, but you may prefer Windows Split Screen.
Thanks for letting us know!
Get the Latest Tech News Delivered Every Day
Subscribe
If you like to work on many tasks at a time or keep an eye on one screen while working on the other, this article is for you. The splitting screen on Windows enables you to multitask without minimizing and maximizing one screen at a time.
This article will teach you how to split screen on Windows using snap layouts and shortcuts. Let’s begin by looking at how to split screen on Windows 10/11 PC.
Windows 10 and 11 support the ability to split screens into more than two screens, and the process is similar in both versions. To get started, you first must ensure you enable the split screen feature on your computer. Follow the steps below to activate it:
Step 1. Go to the Start Menu search bar, then type «Settings» and select the first or best match result
Step 2. Head to the Multitasking in your Windows 10 and toggle on the «Snap windows» switch. For Windows 11, select «System,» then click «multitasking» to toggle on the «Snap windows» feature.
After turning on the snap feature, let’s continue splitting your Windows into several screens.
On Windows 10:
Step 1. Drag an open window to a corner by holding down your left mouse button until the screen won’t move anymore.
Step 2. Release the mouse; you will notice the screen split in half. Then, select any other window you want on the other side of the screen.
Step 3. Drag the middle (dividing) line between both windows to resize them to fit your needs.
On Windows 11:
Step 1. Drag your preferred window to a corner and leave it there. You will see your window split into two.
Step 2. Pick the second window from the remaining windows that pops up. This works if you have multiple windows open; you need to open the second window.
How to Split Screen into Three Parts?
Similar to how you split the screen into two parts.
Step 1. Start by snapping a window into the corner of your screen.
Step 2. Then, drag any window of choice to the screen’s other side, bottom, or top corner.
Immediately, you will see other available windows to fill the third part of your screen. Doing this splits your screen into three parts.
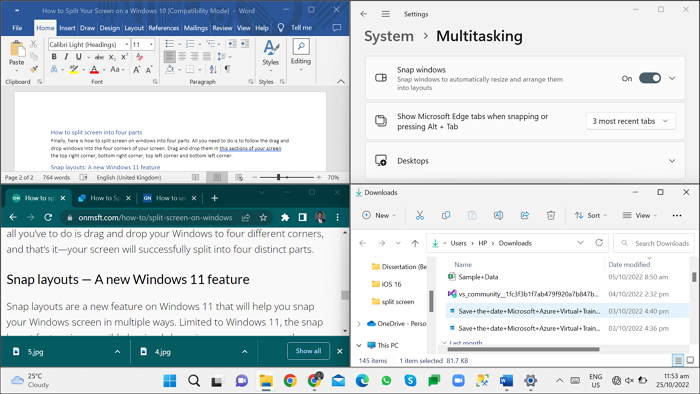
How to Split Screen into Four Parts?
Finally, here is how to split the screen on windows into four parts.
Step 1. Drag and drop them in these sections of your screen: the top right corner, bottom right corner, top left corner, and bottom left corner.
Step 2. All you need to do is to follow the drag-and-drop windows into the four corners of your screen.
Snap Layouts: A New Windows 11 Feature
Recently, Microsoft introduced a different snap layout feature for Windows 11. You can access this function by hovering over the minimize feature on your screen or using the Windows key + Z concurrently.
Immediately you press these keys, a transparent option to select your preferred snap pops up at the top right corner of your screen. After selecting your preferred screen, your active window gets adjusted to one side with options to set and select other available windows.
How to Do Split Screen on Windows through Shortcuts?
Splitting screens on Windows can be done using a keyboard shortcut since Microsoft has a way of incorporating shortcuts into everything.
Step 1. Press the Windows key simultaneously with the right or left arrow key from any active window. Depending on your selection, your active screen will snap to either the right or left side of your screen.
Step 2. In addition, depending on the number of screens you want, you can use the Windows key + up or down (arrow) key to place the window in the top or bottom corner. This is most useful when splitting screens into many sections.
Step 3. To split into four screens, you must first split using the Windows key + right or left arrow key before using the Windows key + up or down arrow key. For example, to place a screen at the top right corner, use the Windows key + right arrow key, then click on that window to make it active before pressing the Windows key + up arrow key.
Final Thoughts
No doubt that splitting screen makes multitasking easy for you. You can use the shortcut for one screen and drag others; there is no fast rule about how to split screens on Windows. For shortcuts to work, the screen must first be activated by clicking on it.