
Download Windows Speedup Tool to fix errors and make PC run faster
If you want to print to the Microsoft XPS Document Writer on a Windows 11/10 PC, here is how you can do that. The Microsoft XPS Document Writer (MXDW) is a print-to-file driver that enables a Windows application to create XML Paper Specification (XPS) document files. It allows you to create .oxps files in any program that has a print option.
To print to the Microsoft XPS Document Writer on a Windows PC, follow these steps:
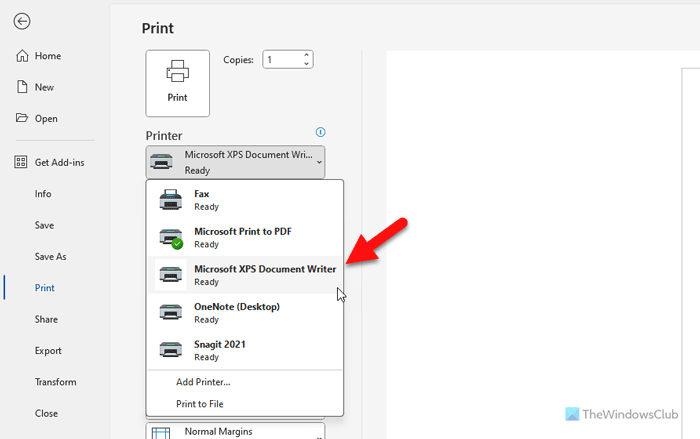
- Click on the File menu.
- Switch to the Print tab.
- Expand the drop-down list and select Microsoft XPS Document Writer.
- Select all the settings as per your requirements.
- Click the Print button.
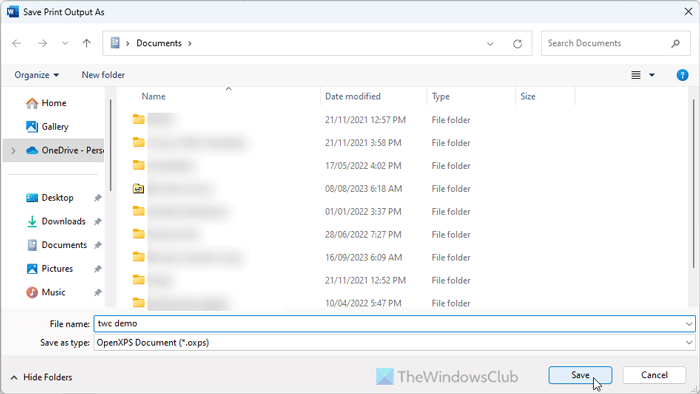
- Select a location and give it a name.
- Click the Save button.
To learn more about these steps, continue reading.
Note: We have shown this example with Microsoft Word. However, you can try it with any other program.
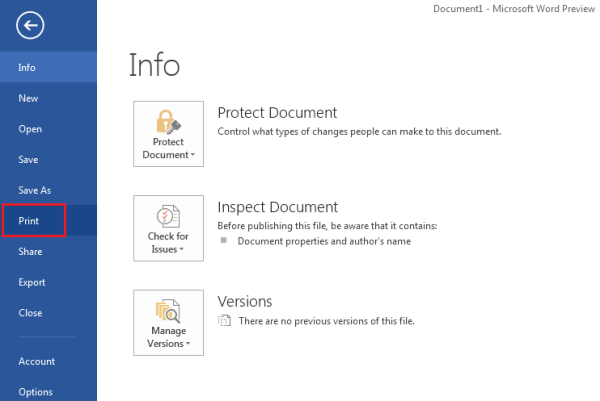
First, you need to write down the document and click the File menu. Then, switch to the Print tab. Alternatively, you can press Ctrl+P to do the same thing.
Next, you need to choose the Microsoft XPS Document Writer and change settings as per your requirements.
Click the Print button, choose a location where you want to save the file, and give it a name.
Finally, click the Save button to save the file.
However, if you use an older version of Windows, you can go through these steps:
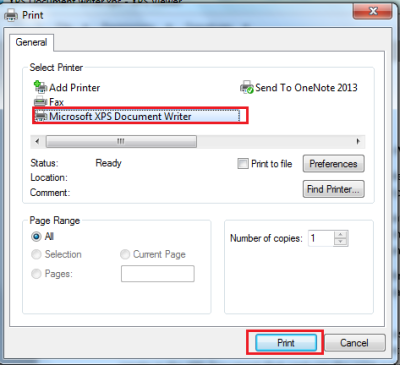
Click on the File menu of a document or a file you want to print to .xps format and then click Print.
A Print dialog box will be visible on your computer screen. From it choose Microsoft XPS Document Writer. Here, I tried this with my Word 2013 file.

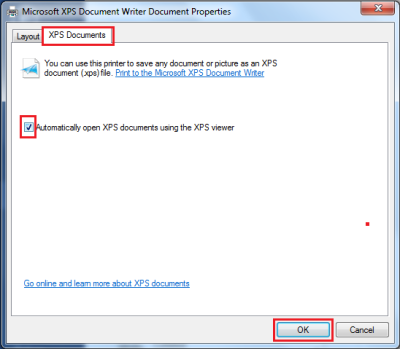
Now, to view the document using the XPS Viewer after you print it, click Preferences and then from the 2 tabs visible choose the ‘XPS Documents’ tab.
Next, check the box that says ‘Automatically open XPS documents using the XPS viewer’ if it is unchecked, and then click OK.
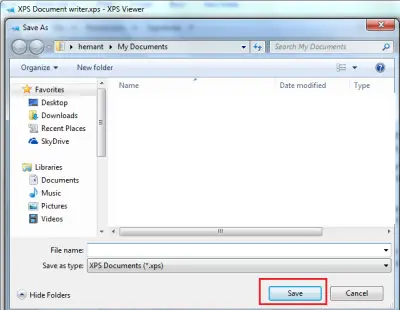
Click Print to print the document or file.
When requested, enter a file name and browse to the location where you want to save the .xps file. Click Save. Windows will save .xps files in your Documents folder by default.
If you would like to attach a digital signature to an XPS document before you send or share it, you can do so. Attaching a signature helps to identify the creator of the XPS document and prevents anyone from modifying it.
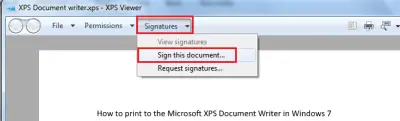
Additionally, you can also choose who can view the document and for how long by applying permissions before sharing the document.
Hope this helps.
How do I enable Microsoft XPS Document Writer?
To enable Microsoft XPS Document Writer in Windows 11/10, you need to search for turn windows features on or off in the Taskbar search box and open the respective panel. Then, tick the Microsoft XPS Document Writer checkbox and click the OK button. Let it be finished and restart your computer.
Is Microsoft XPS Document Writer the same as Microsoft Print to PDF?
No, Microsoft XPS Document Writer is not the same as Microsoft Print to PDF in terms of options, features, and workflow. The main difference is that the former one saves files in OXPS format whereas the latter one saves the file in PDF. Apart from that, PDFs are PostScript whereas XPS files carry XML patterns.
Read:
- Fix Microsoft XPS Document Writer not working
- How to Add or Remove Microsoft XPS Document Writer Printer.
Anand Khanse is the Admin of TheWindowsClub.com, a 10-year Microsoft MVP (2006-16) & a Windows Insider MVP (2016-2022). Please read the entire post & the comments first, create a System Restore Point before making any changes to your system & be careful about any 3rd-party offers while installing freeware.
Формат XPS был разработан компанией Microsoft в 2006 году как альтернатива формату PDF. Файлы данного типа основаны на XML (английская аббревиатура XPS расшифровывается как «XML Paper Specification») и представляют собой формат для работы с графическими документами. По сравнению с популярным форматом PDF файлы XPS проще и легче, а еще считаются более безопасными, так как не поддерживают скрипты.
Ввиду того, что XPS не самый распространенный формат документов, у многих пользователей возникает вопрос: в какой программе можно открыть файл этого типа? Мы расскажем о стандартных средствах для просмотра XPS-файлов, имеющихся в операционной системе Windows 10, а также рассмотрим, какими сторонними приложениями можно воспользоваться для этих целей.
Формат XPS поддерживается по умолчанию во всех версиях Microsoft, включая Windows 10. Просмотреть файл этого формата проще всего при помощи стандартного приложения «Средство просмотра XPS».
- Для его открытия воспользуемся системным поиском. Нажимаем иконку с лупой в панели задач или клавиши «Windows» + «S». В строке ввода начинаем набирать название программы и, когда оно появится в результатах поиска, кликаем на него.
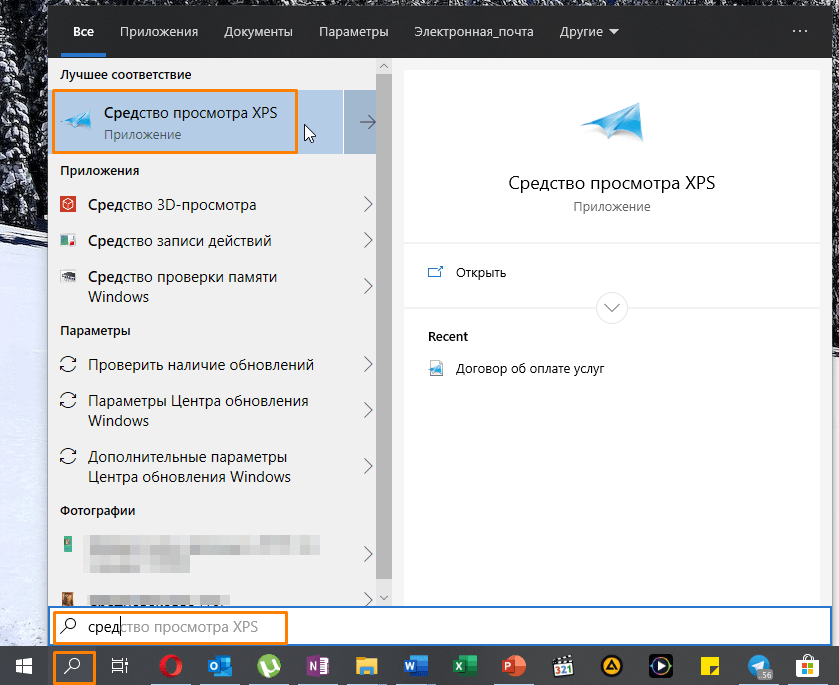
Ищем «Средство просмотра XPS» в Windows 10
- После запуска программы выбираем команду «Файл» — «Открыть».
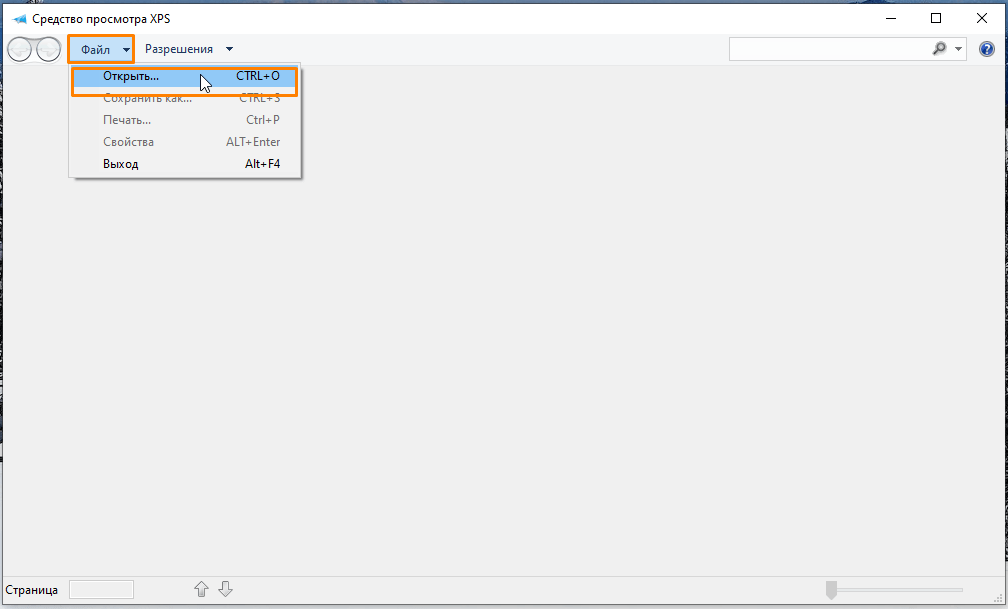
Выбираем команду для открытия документа
- В окне «Открытие» переходим на нужный диск и открываем папку, где хранится искомый XPS-файл, выделяем его и нажимаем кнопку «Открыть».
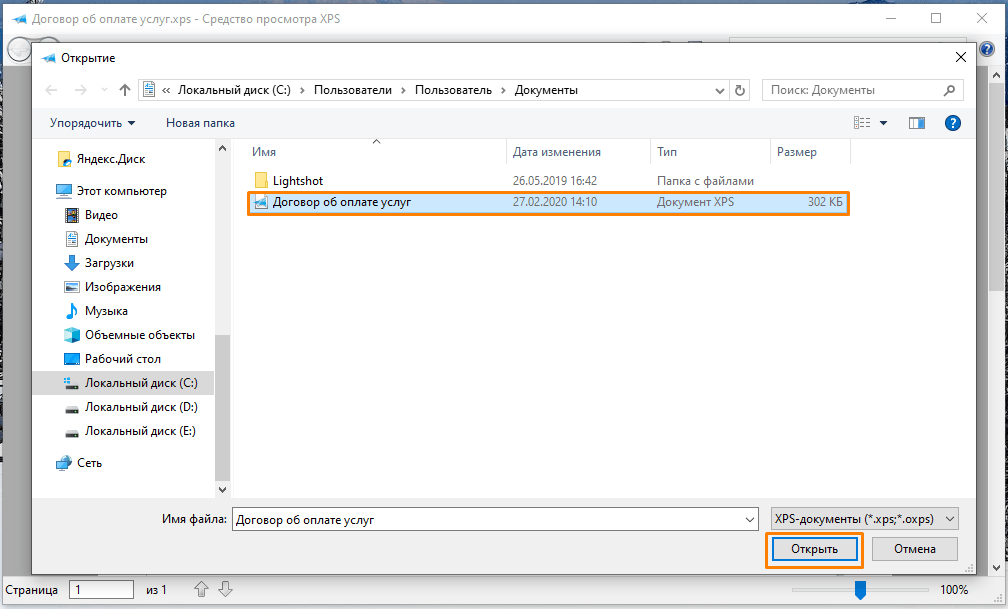
Находим и открываем файл XPS
- Выбранный файл отобразится в окне программы «Средство просмотра XPS».
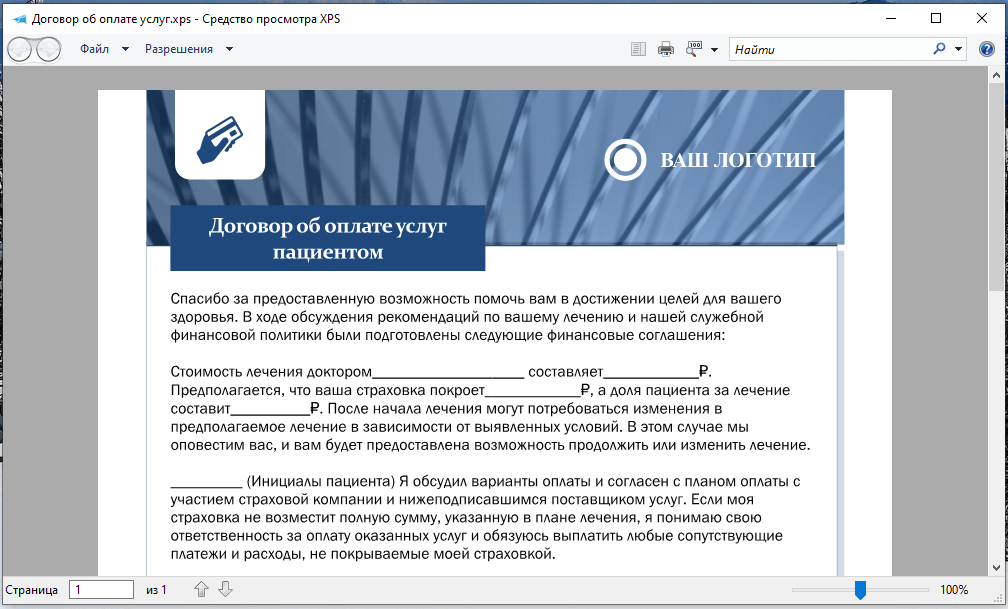
Файл XPS открыт для просмотра
- Если на этапе 1 вам не удалось найти приложение «Средство просмотра XPS», нужно установить его в «Параметрах» Windows. Кликнем правой клавишей мыши на кнопку «Пуск» и выберем в списке пункт «Приложения и возможности».
Открываем «Приложения и возможности»
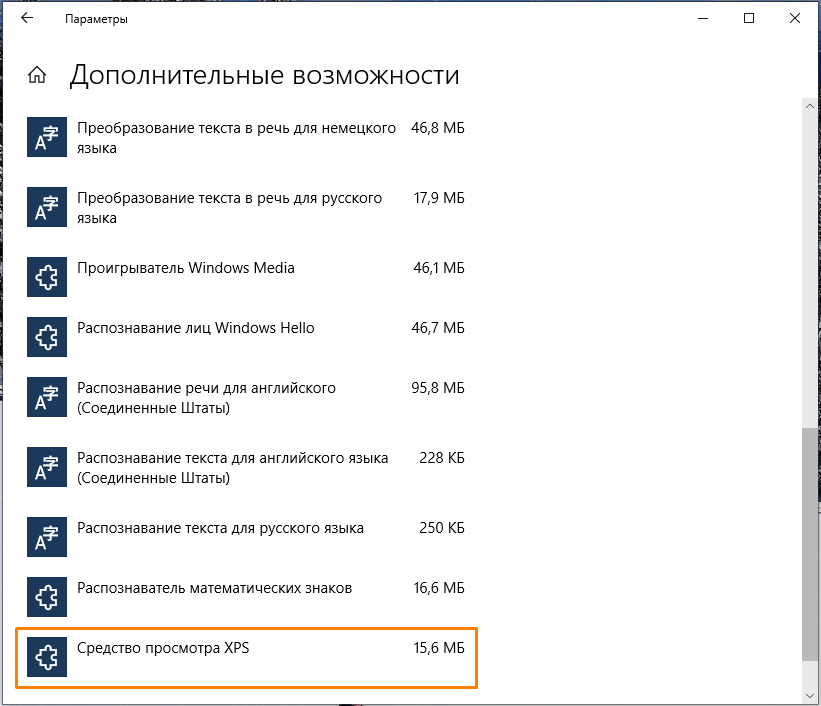
- В открывшемся окне жмем на ссылку «Дополнительные возможности».
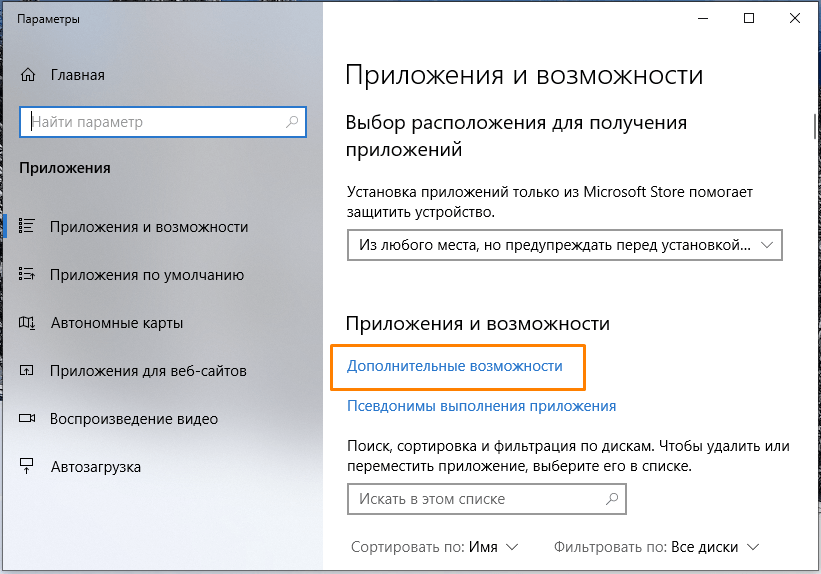
Переходим в категорию настроек «Дополнительные возможности»
- Пролистываем список до пункта «Средство просмотра XPS», кликаем на него и нажимаем кнопку «Установить». Теперь приложение «Средство просмотра XPS» будет доступно.
Находим и устанавливаем приложение «Средство просмотра XPS»
Браузер «Internet Explorer»
Во всех версиях Windows имеется стандартный веб-браузер «Internet Explorer», который при наличии в системе установленного компонента «.NET Framework» версии 3 или выше также можно использовать в качестве средства просмотра файлов XPS.
- Ищем «Internet Explorer» через системный поиск, описанным ранее способом, и запускаем браузер.
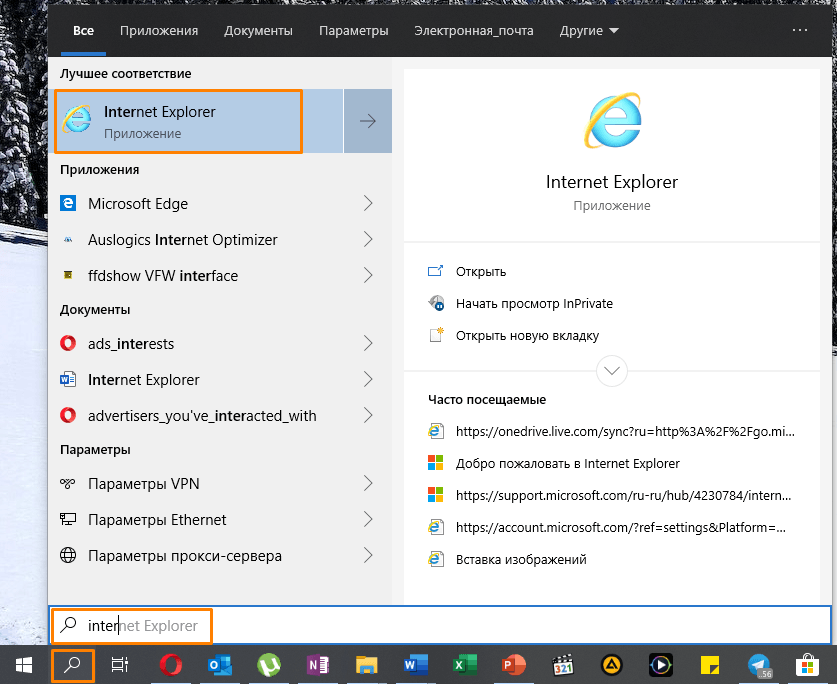
Находим «Internet Explorer» через системный поиск
- Вы можете просто перетащить XPS-файл из окна «Проводника» Windows в окно браузера.
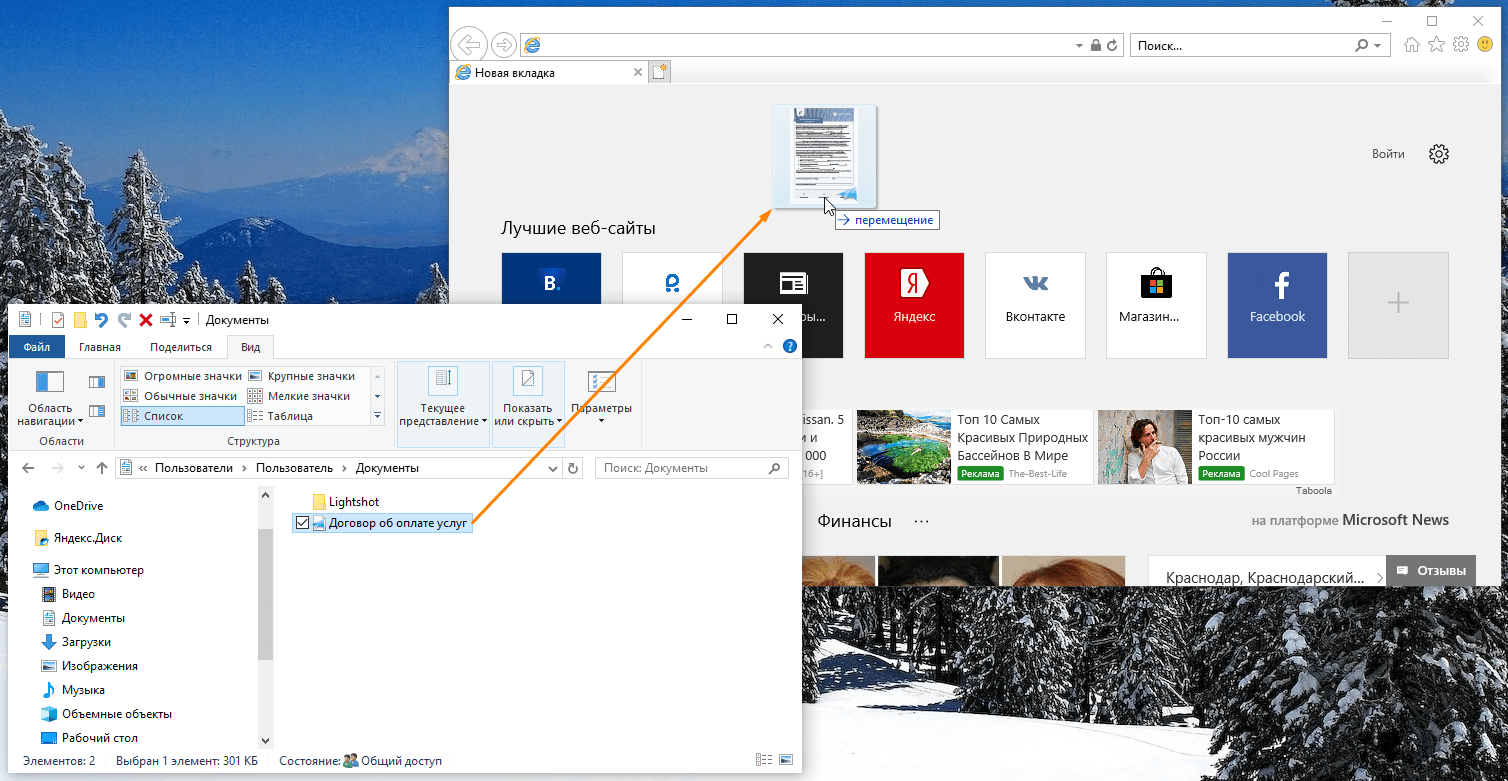
Открываем XPS-файл в «Internet Explorer»
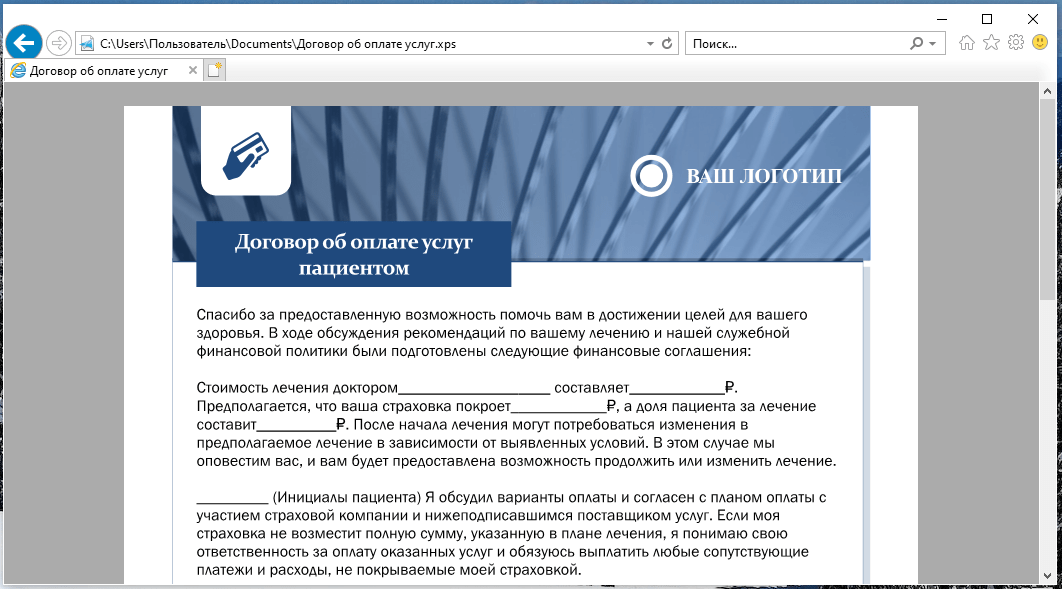
Просматриваем файл XPS в браузере
Программы из магазина приложений «Microsoft Store»
Многие приложения для работы с форматом PDF позволяют открывать и XPS-файлы. Большой выбор таких программ представлен в официальном магазине приложений Windows 10 «Microsoft Store».
- Кликаем на файл XPS в «Проводнике» Windows правой кнопкой мыши и выбираем в его контекстном меню команду «Открыть с помощью».
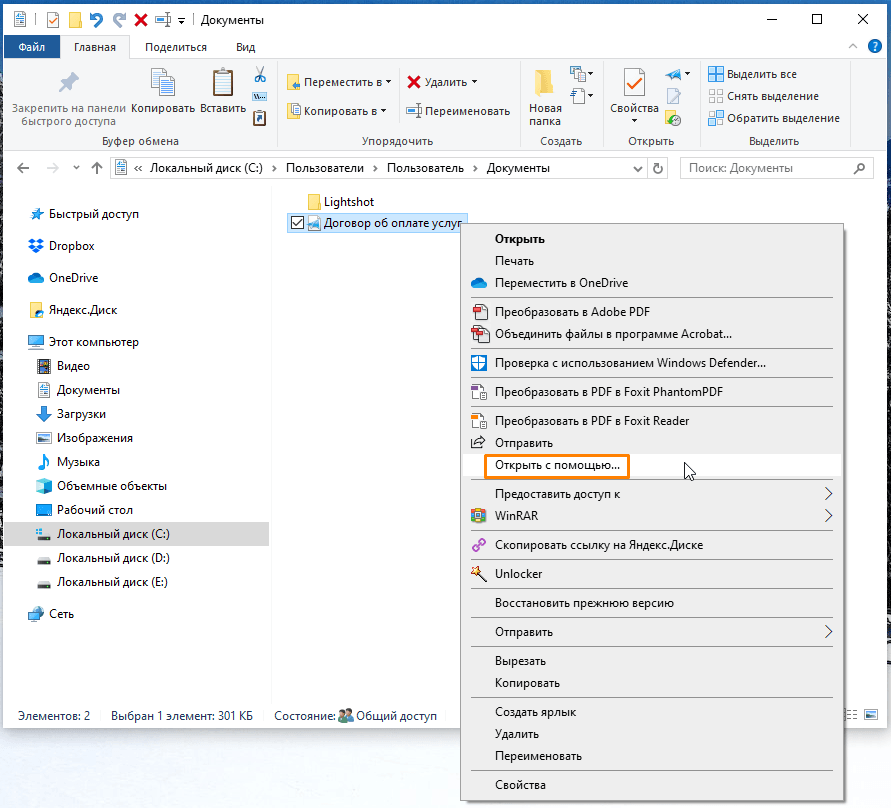
Кликаем команду «Открыть с помощью»
- Далее указываем, что для открытия этого файла мы хотим найти приложения в «Microsoft Store», и нажимаем кнопку «ОК».
Выбираем «Поиск приложения в Microsoft Store»
- Запустится магазин приложений с подборкой программ, поддерживающих формат XPS. Выбираем одну из них, например, «Perfect PDF Reader».
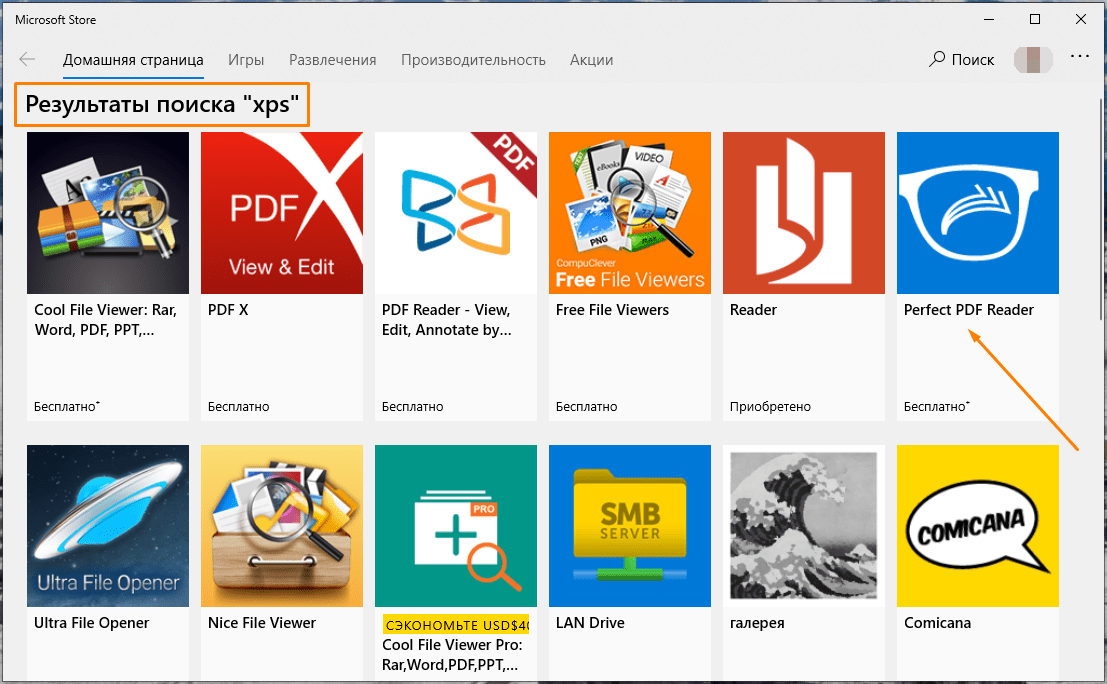
Выбираем одну из программ из результатов поиска «XPS»
- В описании программы указаны форматы, с которыми она работает. Для установки приложения нажимаем кнопку «Получить».
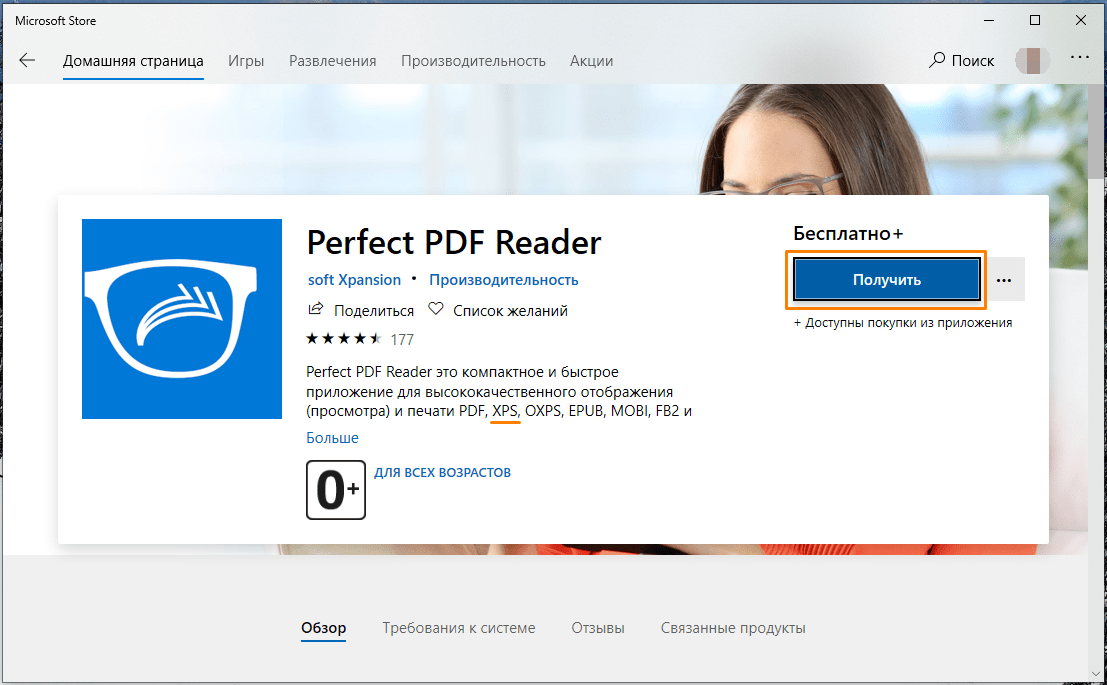
Жмем на кнопку «Получить» для скачивания и установки приложения
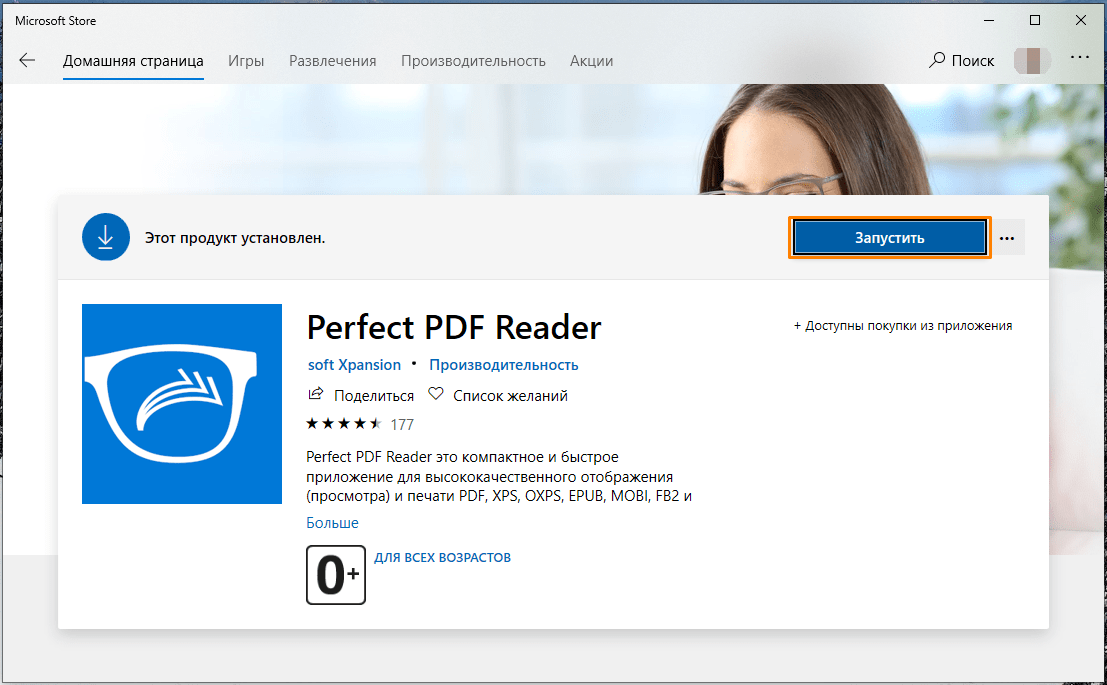
- После окончания установки становится доступной кнопка «Запустить».
Запускаем установленное приложение
- В окне программы «Perfect PDF Reader» кликаем на стрелку в кружке, а затем на появившейся слева панели выбираем команду «Открыть».
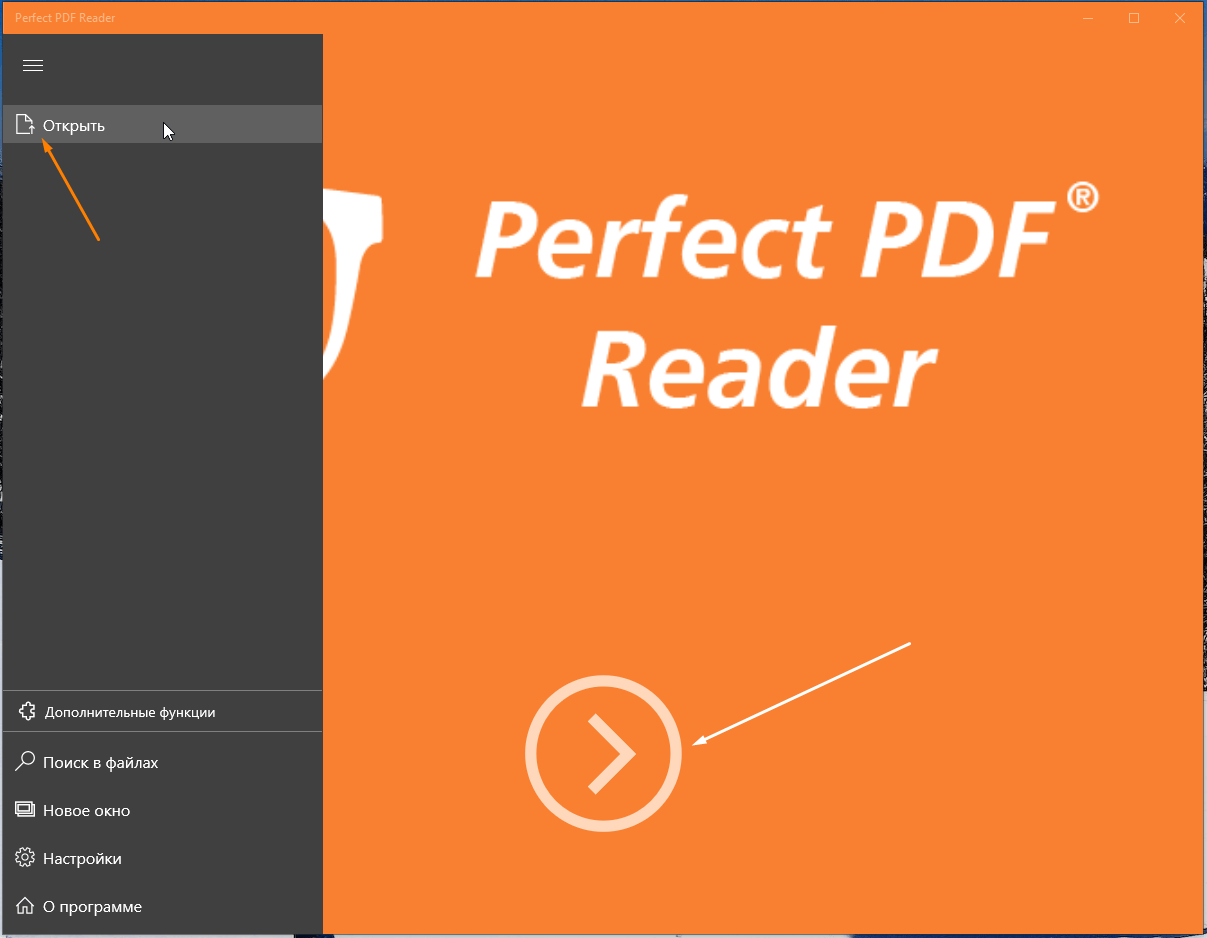
Выбираем команду «Открыть»
- Переходим к расположению нужного файла в формате XPS и дважды кликаем по нему. Файл откроется в окне программы «Perfect PDF Reader».
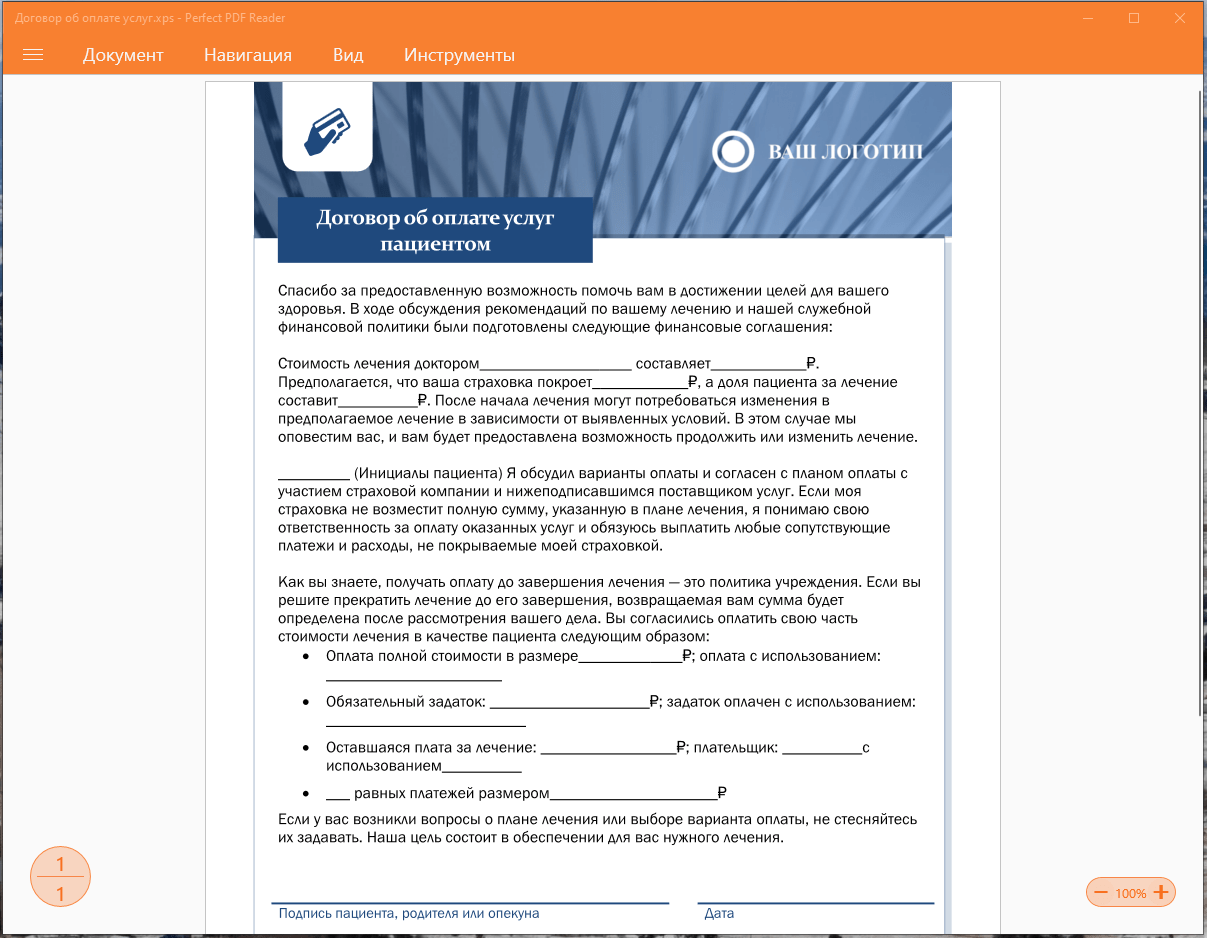
Просматриваем XPS-файл в приложении «Perfect PDF Reader»
Мы разобрали три способа открытия файлов XPS в Windows 10 — в вашем распоряжении как стандартные средства просмотра, так и сторонние приложения.
Загрузка …
Post Views: 41 279
XPS (XML Paper Specification) files are Microsoft’s competitor to Adobe’s PDF files. Although the XPS file format is less popular than PDF, it’s still used today.
Since XPS was never a successful file format, Microsoft abandoned it and removed the default XPS file viewer from Windows in the April 2018 update.
However, if you still use the XPS format or have a file saved in XPS format, you can revive Windows’s default XPS file viewer.
1. Enable the XPS Viewer
In this method, we will revive the old Windows XPS file viewer. Follow some simple steps below to enable XPS viewer on Windows 10/11.
1. First, click on the Start button and select Settings.
2. On the Settings page, click on the Apps option.
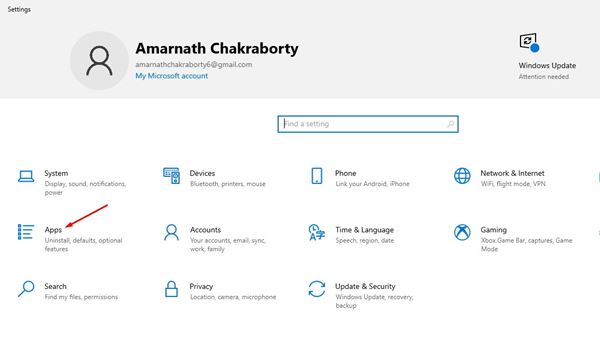
3. Click on the Apps & Features option on the left pane.
4. Now, click on the Optional Features on the right pane.

5. Click the (+) button behind the Add a Feature option.
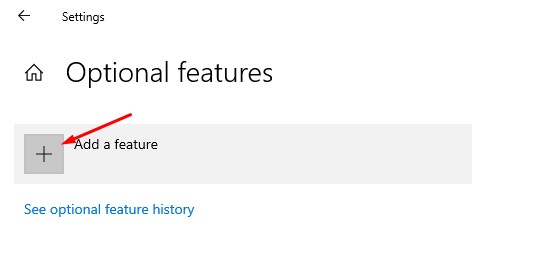
6. On the Add, a feature screen, type in XPS Viewer.
7. Select the XPS viewer from the list and click the Install button.
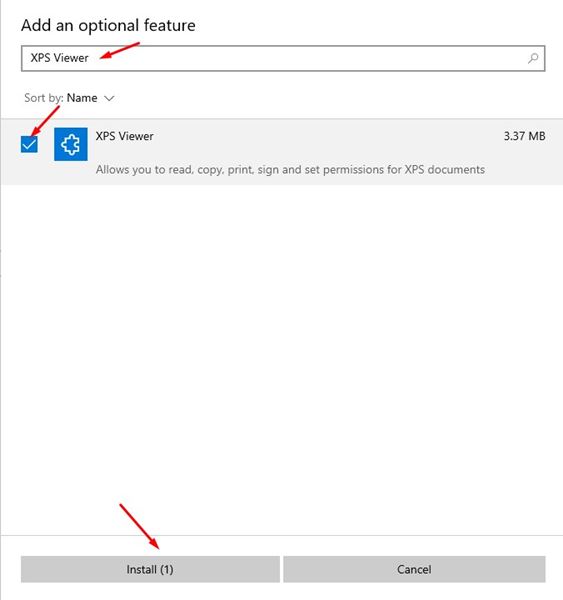
XPS Viewer will be installed on your PC. You can now open XPS documents directly on Windows 10.
2. Install XPS Viewer from RUN Command
If you cannot access the Windows settings page, you must implement this method. We will use the RUN Dialog box on Windows to install the XPS viewer application.
1. Open Windows Search and type in Run. Then, select Run from the list and open the Run dialog box.
2. On the Run dialog box, type in xpsrchvw and enter.
The above command will activate your Windows 10 PC’s XPS viewer. You can now open XPS files directly on your system.
3. Convert XPS files to PDF format
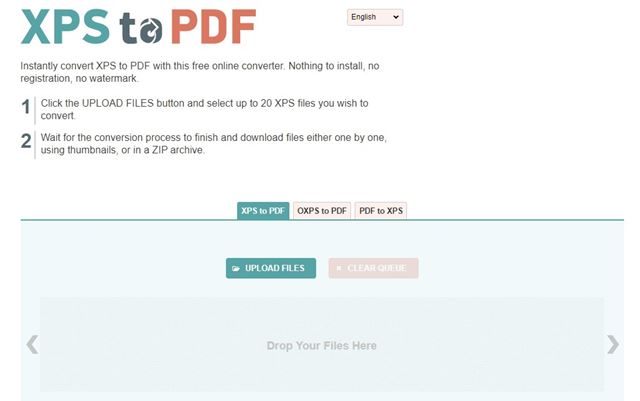
Another good method for opening an XPS file on an unsupported operating system is to convert it to PDF format. If you have Adobe Reader installed on your PC, you can convert XPS files into PDF format and open them with Adobe Reader.
You can use online PDF converter websites to convert XPS files into PDF format. Search for Convert XPS into PDF on Google, and you will find several websites.
Any website can convert your XPS files and documents into PDF format. Once converted, you can utilize Adobe Reader or any PDF viewer app to view the converted files.
4. Use XPS Viewer Online
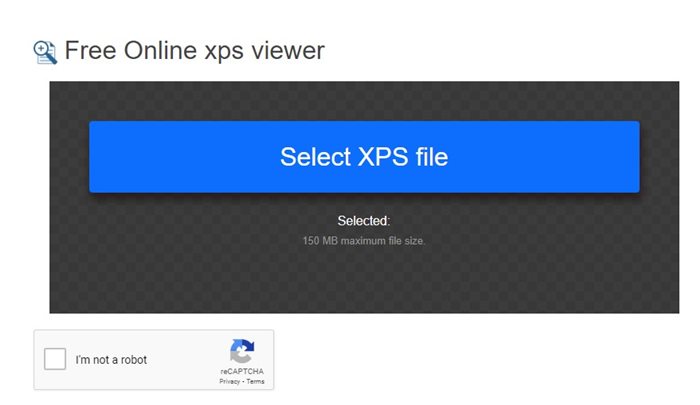
If you have access to the internet, you can use the XPS Viewer Online to open the XPS files. The good thing about online XPS viewers is that they work with every web browser and device.
Let’s say you have an XPS file on your mobile device. You can use your favorite web browser to access the online XPS viewer and then read your XPS Files.
There’s no shortage of Online XPS Viewers; you must pick the right web app. Then, you can search on Google ‘XPS Viewer Online’ and select the one that fits best for your purpose.
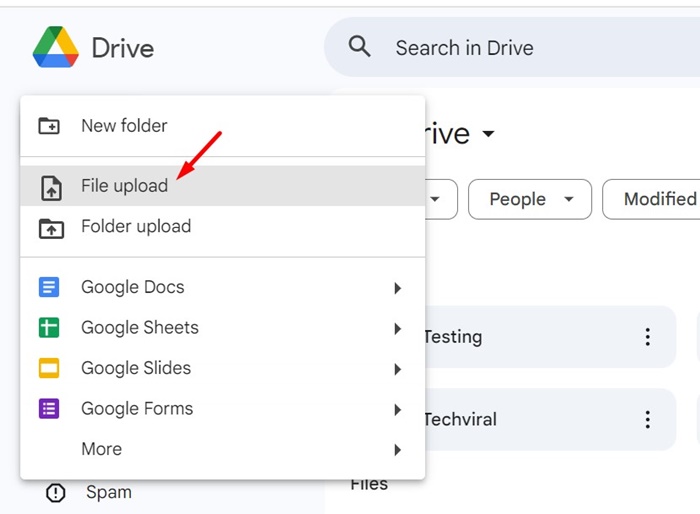
5. Open the XPS File in Windows using Google Drive
While Google Drive is a cloud storage service, you can still read an XPS file on Windows. Opening an XPS file with Google Drive is easy because the cloud storage readily supports the file format. Here’s how you can open an XPS file in Google Drive.
1. Open your favorite web browser and visit the Google Drive website. Next, log in with your Google Account.
2. On the left side, click on the New button.
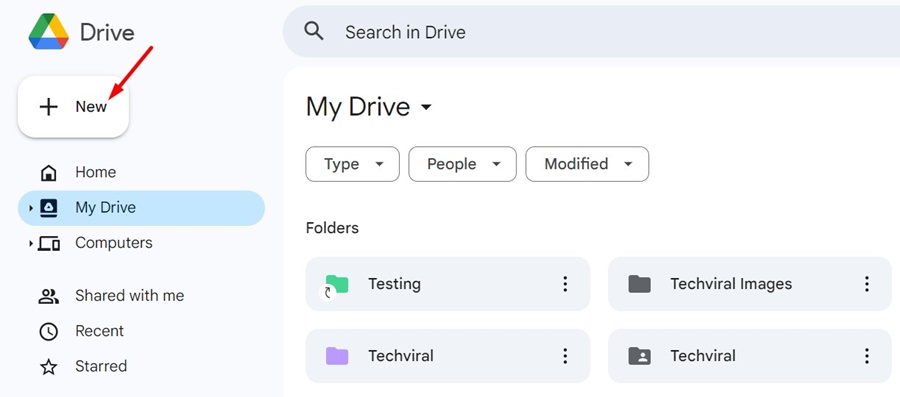
3. Next, select File Upload and pick the XPS file you want to open.
4. Once the XPS file is uploaded, open the file directly.
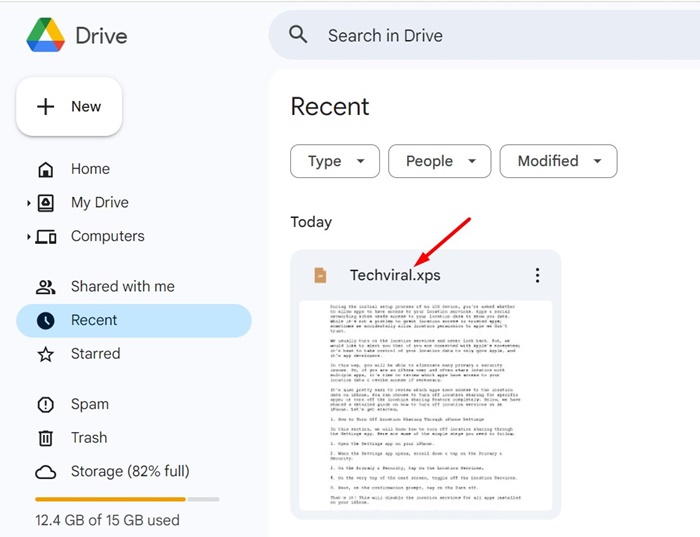
5. The XPS file will open within the Google Drive. You can now print, share, or leave comments on the file type.
This guide covers viewing XPS files in Windows. I hope this article helps you. Please share it with your friends. If you have any questions, let us know in the comment box below.
Online document publishing is dominated by the PDF format. Regardless of what type of file you download; a brochure, a magazine, a report, a prospectus, chances are high that it will be in the PDF format. A PDF document will look the same no matter what device or app you view it on and it will print the same no matter what device you print it from.
PDF isn’t the only format that does this. There is also the XPS file format.
XPS files
Microsoft developed the XPS file format to rival PDF. The format didn’t quite take off but that’s not to say you will never run into an XPS file ever. To create an XPS file, you need a document editor that can save to this format. Microsoft Office apps can all save to the XPS format but they cannot read it once the file has been created. Neither can any modern browser but you will find that some PDF readers support the format.
XPS viewer – Sumatra PDF reader
A good PDF reader will support the XPS format. There are lots of great third-party PDF readers that you can try. We suggest you give Sumatra PDF Reader a try. It’s free, has an installable and portable version, and it supports the XPS file format.
- Download Sumatra PDF reader (select any version of your choice).
- Install and run Sumatra PDF reader.
- Drag & drop the XPS file onto the app and it will open.
XPS viewer – Google Drive
If you do not want to install an app to view an XPS file, go with Google Drive. You can upload the XPS file to Google drive and it will display its contents.
- Visit Google Drive and sign in with your account.
- Click the New button and select File Upload.
- Select the XPS file and wait for it to upload.
- Double-click to open the file in Google Drive and it will open.
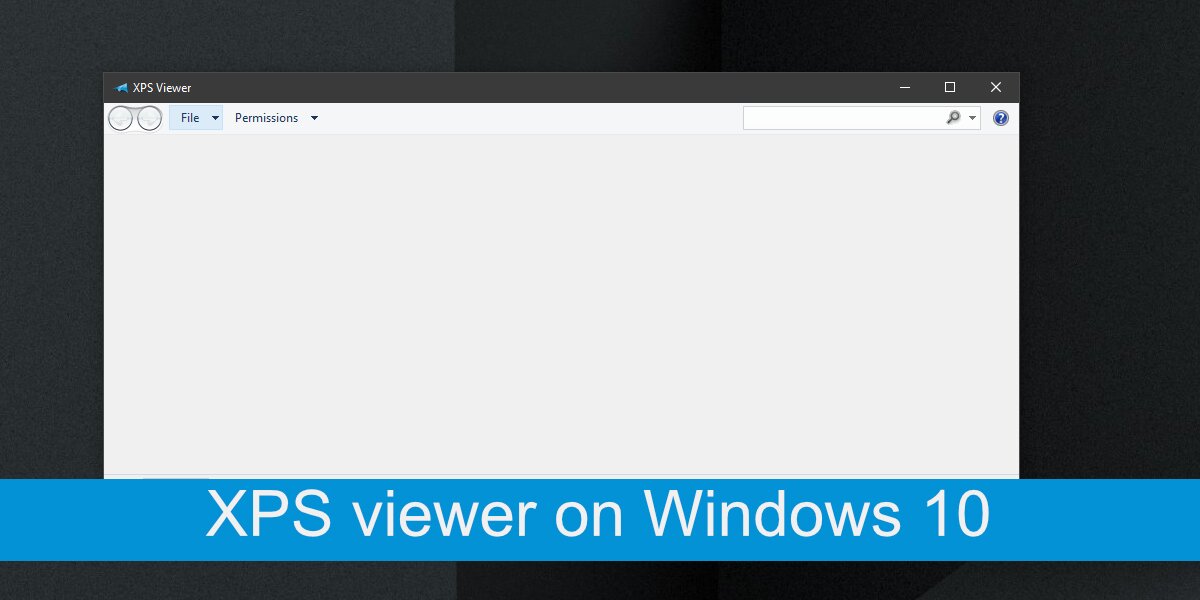
XPS viewer – Windows 10 stock app
Windows 10 used to come with its own XPS viewer app. Unfortunately, Microsoft decided to discontinue it. Newer versions of Windows 10 won’t have the app installed out of the box but you can still install it.
- Open the Settings app with the Win+I keyboard shortcut.
- Go to Apps.
- Select the Apps & Features tab.
- Click Optional features.
- Click Add a feature.
- Select XPS viewer from the list.
- Select Install (installation takes some time).
- Once installed, right-click an XPS file and select Open with.
- Select XPS viewer from the context menu to open the file.
Conclusion
XPS doesn’t enjoy wide support, not even with Microsoft’s own products. Unless this changes, the format is unlikely to become more common. With our tests, we found that the stock Windows 10 XPS viewer was often unable to open certain types of XPS files, even those that were created in Microsoft Word. Sumatra PDF reader on the other hand was able to handle the format without issue, regardless of what the document contained. If you’re looking to open an XPS file, and you don’t want to use the suggested apps here, look for a good PDF viewer and it should be able to do the job.

Fatima Wahab
Fatima has been writing for AddictiveTips for six years. She began as a junior writer and has been working as the Editor in Chief since 2014.
Fatima gets an adrenaline rush from figuring out how technology works, and how to manipulate it. A well-designed app, something that solves a common everyday problem and looks