
Node.js comes with a variety of CLI options. These options expose built-in
debugging, multiple ways to execute scripts, and other helpful runtime options.
To view this documentation as a manual page in a terminal, run man node.
Synopsis#
node [options] [V8 options] [<program-entry-point> | -e "script" | -] [--] [arguments]
node inspect [<program-entry-point> | -e "script" | <host>:<port>] …
node --v8-options
Execute without arguments to start the REPL.
For more info about node inspect, see the debugger documentation.
Program entry point#
The program entry point is a specifier-like string. If the string is not an
absolute path, it’s resolved as a relative path from the current working
directory. That path is then resolved by CommonJS module loader. If no
corresponding file is found, an error is thrown.
If a file is found, its path will be passed to the
ES module loader under any of the following conditions:
- The program was started with a command-line flag that forces the entry
point to be loaded with ECMAScript module loader, such as--import. - The file has an
.mjsor.wasm(with--experimental-wasm-modules)
extension. - The file does not have a
.cjsextension, and the nearest parent
package.jsonfile contains a top-level"type"field with a value of
"module".
Otherwise, the file is loaded using the CommonJS module loader. See
Modules loaders for more details.
ECMAScript modules loader entry point caveat#
When loading, the ES module loader loads the program
entry point, the node command will accept as input only files with .js,
.mjs, or .cjs extensions. With the following flags, additional file
extensions are enabled:
--experimental-wasm-modulesfor files with.wasmextension.--experimental-addon-modulesfor files with.nodeextension.
Options#
All options, including V8 options, allow words to be separated by both
dashes (-) or underscores (_). For example, --pending-deprecation is
equivalent to --pending_deprecation.
If an option that takes a single value (such as --max-http-header-size) is
passed more than once, then the last passed value is used. Options from the
command line take precedence over options passed through the NODE_OPTIONS
environment variable.
-#
Added in: v8.0.0
Alias for stdin. Analogous to the use of - in other command-line utilities,
meaning that the script is read from stdin, and the rest of the options
are passed to that script.
--#
Added in: v6.11.0
Indicate the end of node options. Pass the rest of the arguments to the script.
If no script filename or eval/print script is supplied prior to this, then
the next argument is used as a script filename.
--abort-on-uncaught-exception#
Added in: v0.10.8
Aborting instead of exiting causes a core file to be generated for post-mortem
analysis using a debugger (such as lldb, gdb, and mdb).
If this flag is passed, the behavior can still be set to not abort through
process.setUncaughtExceptionCaptureCallback() (and through usage of the
node:domain module that uses it).
--allow-addons#
Added in: v21.6.0, v20.12.0
When using the Permission Model, the process will not be able to use
native addons by default.
Attempts to do so will throw an ERR_DLOPEN_DISABLED unless the
user explicitly passes the --allow-addons flag when starting Node.js.
Example:
// Attempt to require an native addon
require('nodejs-addon-example');
$ node --permission --allow-fs-read=* index.js
node:internal/modules/cjs/loader:1319
return process.dlopen(module, path.toNamespacedPath(filename));
^
Error: Cannot load native addon because loading addons is disabled.
at Module._extensions..node (node:internal/modules/cjs/loader:1319:18)
at Module.load (node:internal/modules/cjs/loader:1091:32)
at Module._load (node:internal/modules/cjs/loader:938:12)
at Module.require (node:internal/modules/cjs/loader:1115:19)
at require (node:internal/modules/helpers:130:18)
at Object.<anonymous> (/home/index.js:1:15)
at Module._compile (node:internal/modules/cjs/loader:1233:14)
at Module._extensions..js (node:internal/modules/cjs/loader:1287:10)
at Module.load (node:internal/modules/cjs/loader:1091:32)
at Module._load (node:internal/modules/cjs/loader:938:12) {
code: 'ERR_DLOPEN_DISABLED'
} --allow-child-process#
Added in: v20.0.0
When using the Permission Model, the process will not be able to spawn any
child process by default.
Attempts to do so will throw an ERR_ACCESS_DENIED unless the
user explicitly passes the --allow-child-process flag when starting Node.js.
Example:
const childProcess = require('node:child_process');
// Attempt to bypass the permission
childProcess.spawn('node', ['-e', 'require("fs").writeFileSync("/new-file", "example")']);
$ node --permission --allow-fs-read=* index.js
node:internal/child_process:388
const err = this._handle.spawn(options);
^
Error: Access to this API has been restricted
at ChildProcess.spawn (node:internal/child_process:388:28)
at node:internal/main/run_main_module:17:47 {
code: 'ERR_ACCESS_DENIED',
permission: 'ChildProcess'
} Unlike child_process.spawn, the child_process.fork API copies the execution
arguments from the parent process. This means that if you start Node.js with the
Permission Model enabled and include the --allow-child-process flag, calling
child_process.fork() will propagate all Permission Model flags to the child
process.
--allow-fs-read#
This flag configures file system read permissions using
the Permission Model.
The valid arguments for the --allow-fs-read flag are:
*— To allow allFileSystemReadoperations.- Multiple paths can be allowed using multiple
--allow-fs-readflags.
Example--allow-fs-read=/folder1/ --allow-fs-read=/folder1/
Examples can be found in the File System Permissions documentation.
The initializer module also needs to be allowed. Consider the following example:
$ node --permission index.js

Error: Access to this API has been restricted
    at node:internal/main/run_main_module:23:47 {
  code: 'ERR_ACCESS_DENIED',
  permission: 'FileSystemRead',
  resource: '/Users/rafaelgss/repos/os/node/index.js'
}
The process needs to have access to the index.js module:
node --permission --allow-fs-read=/path/to/index.js index.js --allow-fs-write#
This flag configures file system write permissions using
the Permission Model.
The valid arguments for the --allow-fs-write flag are:
*— To allow allFileSystemWriteoperations.- Multiple paths can be allowed using multiple
--allow-fs-writeflags.
Example--allow-fs-write=/folder1/ --allow-fs-write=/folder1/
Paths delimited by comma (,) are no longer allowed.
When passing a single flag with a comma a warning will be displayed.
Examples can be found in the File System Permissions documentation.
--allow-wasi#
Added in: v22.3.0, v20.16.0
When using the Permission Model, the process will not be capable of creating
any WASI instances by default.
For security reasons, the call will throw an ERR_ACCESS_DENIED unless the
user explicitly passes the flag --allow-wasi in the main Node.js process.
Example:
const { WASI } = require('node:wasi');
// Attempt to bypass the permission
new WASI({
  version: 'preview1',
  // Attempt to mount the whole filesystem
  preopens: {
    '/': '/',
  },
});
$ node --permission --allow-fs-read=* index.js
Error: Access to this API has been restricted
at node:internal/main/run_main_module:30:49 {
code: 'ERR_ACCESS_DENIED',
permission: 'WASI',
} --allow-worker#
Added in: v20.0.0
When using the Permission Model, the process will not be able to create any
worker threads by default.
For security reasons, the call will throw an ERR_ACCESS_DENIED unless the
user explicitly pass the flag --allow-worker in the main Node.js process.
Example:
const { Worker } = require('node:worker_threads');
// Attempt to bypass the permission
new Worker(__filename);
$ node --permission --allow-fs-read=* index.js
Error: Access to this API has been restricted
at node:internal/main/run_main_module:17:47 {
code: 'ERR_ACCESS_DENIED',
permission: 'WorkerThreads'
} --build-snapshot#
Added in: v18.8.0
Generates a snapshot blob when the process exits and writes it to
disk, which can be loaded later with --snapshot-blob.
When building the snapshot, if --snapshot-blob is not specified,
the generated blob will be written, by default, to snapshot.blob
in the current working directory. Otherwise it will be written to
the path specified by --snapshot-blob.
$ echo "globalThis.foo = 'I am from the snapshot'" > snapshot.js

# Run snapshot.js to initialize the application and snapshot the
# state of it into snapshot.blob.
$ node --snapshot-blob snapshot.blob --build-snapshot snapshot.js

$ echo "console.log(globalThis.foo)" > index.js

# Load the generated snapshot and start the application from index.js.
$ node --snapshot-blob snapshot.blob index.js
I am from the snapshot
The v8.startupSnapshot API can be used to specify an entry point at
snapshot building time, thus avoiding the need of an additional entry
script at deserialization time:
$ echo "require('v8').startupSnapshot.setDeserializeMainFunction(() => console.log('I am from the snapshot'))" > snapshot.js
$ node --snapshot-blob snapshot.blob --build-snapshot snapshot.js
$ node --snapshot-blob snapshot.blob
I am from the snapshot
For more information, check out the v8.startupSnapshot API documentation.
Currently the support for run-time snapshot is experimental in that:
- User-land modules are not yet supported in the snapshot, so only
one single file can be snapshotted. Users can bundle their applications
into a single script with their bundler of choice before building
a snapshot, however. - Only a subset of the built-in modules work in the snapshot, though the
Node.js core test suite checks that a few fairly complex applications
can be snapshotted. Support for more modules are being added. If any
crashes or buggy behaviors occur when building a snapshot, please file
a report in the Node.js issue tracker and link to it in the
tracking issue for user-land snapshots.
--build-snapshot-config#
Added in: v21.6.0, v20.12.0
Specifies the path to a JSON configuration file which configures snapshot
creation behavior.
The following options are currently supported:
builder<string> Required. Provides the name to the script that is executed
before building the snapshot, as if--build-snapshothad been passed
withbuilderas the main script name.withoutCodeCache<boolean> Optional. Including the code cache reduces the
time spent on compiling functions included in the snapshot at the expense
of a bigger snapshot size and potentially breaking portability of the
snapshot.
When using this flag, additional script files provided on the command line will
not be executed and instead be interpreted as regular command line arguments.
-c, --check#
Syntax check the script without executing.
--completion-bash#
Added in: v10.12.0
Print source-able bash completion script for Node.js.
node --completion-bash > node_bash_completion
source node_bash_completion
-C condition, --conditions=condition#
Provide custom conditional exports resolution conditions.
Any number of custom string condition names are permitted.
The default Node.js conditions of "node", "default", "import", and
"require" will always apply as defined.
For example, to run a module with «development» resolutions:
node -C development app.js --cpu-prof#
Starts the V8 CPU profiler on start up, and writes the CPU profile to disk
before exit.
If --cpu-prof-dir is not specified, the generated profile is placed
in the current working directory.
If --cpu-prof-name is not specified, the generated profile is
named CPU.${yyyymmdd}.${hhmmss}.${pid}.${tid}.${seq}.cpuprofile.
$ node --cpu-prof index.js
$ ls *.cpuprofile
CPU.20190409.202950.15293.0.0.cpuprofile
If --cpu-prof-name is specified, the provided value will be used as-is; patterns such as
${hhmmss} or ${pid} are not supported.
$ node --cpu-prof --cpu-prof-name 'CPU.${pid}.cpuprofile' index.js
$ ls *.cpuprofile
'CPU.${pid}.cpuprofile' --cpu-prof-dir#
Specify the directory where the CPU profiles generated by --cpu-prof will
be placed.
The default value is controlled by the
--diagnostic-dir command-line option.
--cpu-prof-interval#
Specify the sampling interval in microseconds for the CPU profiles generated
by --cpu-prof. The default is 1000 microseconds.
--cpu-prof-name#
Specify the file name of the CPU profile generated by --cpu-prof.
--diagnostic-dir=directory#
Set the directory to which all diagnostic output files are written.
Defaults to current working directory.
Affects the default output directory of:
--cpu-prof-dir--heap-prof-dir--redirect-warnings
--disable-proto=mode#
Added in: v13.12.0, v12.17.0
Disable the Object.prototype.__proto__ property. If mode is delete, the
property is removed entirely. If mode is throw, accesses to the
property throw an exception with the code ERR_PROTO_ACCESS.
--disable-sigusr1#
Added in: v23.7.0, v22.14.0
Disable the ability of starting a debugging session by sending a
SIGUSR1 signal to the process.
--disable-warning=code-or-type#
Added in: v21.3.0, v20.11.0
Disable specific process warnings by code or type.
Warnings emitted from process.emitWarning() may contain a
code and a type. This option will not-emit warnings that have a matching
code or type.
List of deprecation warnings.
The Node.js core warning types are: DeprecationWarning and
ExperimentalWarning
For example, the following script will not emit
DEP0025 require('node:sys') when executed with
node --disable-warning=DEP0025:
import sys from 'node:sys';const sys = require('node:sys');
For example, the following script will emit the
DEP0025 require('node:sys'), but not any Experimental
Warnings (such as
ExperimentalWarning: vm.measureMemory is an experimental feature
in <=v21) when executed with node --disable-warning=ExperimentalWarning:
import sys from 'node:sys';
import vm from 'node:vm';

vm.measureMemory();const sys = require('node:sys');
const vm = require('node:vm');

vm.measureMemory();
--disable-wasm-trap-handler#
Added in: v22.2.0, v20.15.0
By default, Node.js enables trap-handler-based WebAssembly bound
checks. As a result, V8 does not need to insert inline bound checks
int the code compiled from WebAssembly which may speedup WebAssembly
execution significantly, but this optimization requires allocating
a big virtual memory cage (currently 10GB). If the Node.js process
does not have access to a large enough virtual memory address space
due to system configurations or hardware limitations, users won’t
be able to run any WebAssembly that involves allocation in this
virtual memory cage and will see an out-of-memory error.
$ ulimit -v 5000000
$ node -p "new WebAssembly.Memory({ initial: 10, maximum: 100 });"
[eval]:1
new WebAssembly.Memory({ initial: 10, maximum: 100 });
^

RangeError: WebAssembly.Memory(): could not allocate memory
    at [eval]:1:1
    at runScriptInThisContext (node:internal/vm:209:10)
    at node:internal/process/execution:118:14
    at [eval]-wrapper:6:24
    at runScript (node:internal/process/execution:101:62)
    at evalScript (node:internal/process/execution:136:3)
    at node:internal/main/eval_string:49:3
--disable-wasm-trap-handler disables this optimization so that
users can at least run WebAssembly (with less optimal performance)
when the virtual memory address space available to their Node.js
process is lower than what the V8 WebAssembly memory cage needs.
--disallow-code-generation-from-strings#
Added in: v9.8.0
Make built-in language features like eval and new Function that generate
code from strings throw an exception instead. This does not affect the Node.js
node:vm module.
--dns-result-order=order#
Set the default value of order in dns.lookup() and
dnsPromises.lookup(). The value could be:
ipv4first: sets defaultordertoipv4first.ipv6first: sets defaultordertoipv6first.verbatim: sets defaultordertoverbatim.
The default is verbatim and dns.setDefaultResultOrder() have higher
priority than --dns-result-order.
--enable-fips#
Added in: v6.0.0
Enable FIPS-compliant crypto at startup. (Requires Node.js to be built
against FIPS-compatible OpenSSL.)
--enable-network-family-autoselection#
Added in: v18.18.0
Enables the family autoselection algorithm unless connection options explicitly
disables it.
--enable-source-maps#
Enable Source Map v3 support for stack traces.
When using a transpiler, such as TypeScript, stack traces thrown by an
application reference the transpiled code, not the original source position.
--enable-source-maps enables caching of Source Maps and makes a best
effort to report stack traces relative to the original source file.
Overriding Error.prepareStackTrace may prevent --enable-source-maps from
modifying the stack trace. Call and return the results of the original
Error.prepareStackTrace in the overriding function to modify the stack trace
with source maps.
const originalPrepareStackTrace = Error.prepareStackTrace;
Error.prepareStackTrace = (error, trace) => {
  // Modify error and trace and format stack trace with
  // original Error.prepareStackTrace.
  return originalPrepareStackTrace(error, trace);
};
Note, enabling source maps can introduce latency to your application
when Error.stack is accessed. If you access Error.stack frequently
in your application, take into account the performance implications
of --enable-source-maps.
--entry-url#
Added in: v23.0.0, v22.10.0
When present, Node.js will interpret the entry point as a URL, rather than a
path.
Follows ECMAScript module resolution rules.
Any query parameter or hash in the URL will be accessible via import.meta.url.
node --entry-url 'file:///path/to/file.js?queryparams=work#and-hashes-too'
node --entry-url 'file.ts?query#hash'
node --entry-url 'data:text/javascript,console.log("Hello")' --env-file-if-exists=config#
Added in: v22.9.0
Behavior is the same as --env-file, but an error is not thrown if the file
does not exist.
--env-file=config#
Loads environment variables from a file relative to the current directory,
making them available to applications on process.env. The environment
variables which configure Node.js, such as NODE_OPTIONS,
are parsed and applied. If the same variable is defined in the environment and
in the file, the value from the environment takes precedence.
You can pass multiple --env-file arguments. Subsequent files override
pre-existing variables defined in previous files.
An error is thrown if the file does not exist.
node --env-file=.env --env-file=.development.env index.js The format of the file should be one line per key-value pair of environment
variable name and value separated by =:
PORT=3000 Any text after a # is treated as a comment:
# This is a comment
PORT=3000 # This is also a comment
Values can start and end with the following quotes: `, " or '.
They are omitted from the values.
USERNAME="nodejs" # will result in `nodejs` as the value. Multi-line values are supported:
MULTI_LINE="THIS IS
A MULTILINE"
# will result in `THIS IS\nA MULTILINE` as the value.
Export keyword before a key is ignored:
export USERNAME="nodejs" # will result in `nodejs` as the value. If you want to load environment variables from a file that may not exist, you
can use the --env-file-if-exists flag instead.
-e, --eval "script"#
Evaluate the following argument as JavaScript. The modules which are
predefined in the REPL can also be used in script.
On Windows, using cmd.exe a single quote will not work correctly because it
only recognizes double " for quoting. In Powershell or Git bash, both '
and " are usable.
It is possible to run code containing inline types unless the
--no-experimental-strip-types flag is provided.
--experimental-addon-modules#
Added in: v23.6.0
Enable experimental import support for .node addons.
--experimental-config-file=config#
Added in: v23.10.0
If present, Node.js will look for a configuration file at the specified path.
Node.js will read the configuration file and apply the settings. The
configuration file should be a JSON file with the following structure. vX.Y.Z
in the $schema must be replaced with the version of Node.js you are using.
{
  "$schema": "https://nodejs.org/dist/vX.Y.Z/docs/node-config-schema.json",
  "nodeOptions": {
    "import": [
      "amaro/strip"
    ],
    "watch-path": "src",
    "watch-preserve-output": true
  }
}
In the nodeOptions field, only flags that are allowed in NODE_OPTIONS are supported.
No-op flags are not supported.
Not all V8 flags are currently supported.
It is possible to use the official JSON schema
to validate the configuration file, which may vary depending on the Node.js version.
Each key in the configuration file corresponds to a flag that can be passed
as a command-line argument. The value of the key is the value that would be
passed to the flag.
For example, the configuration file above is equivalent to
the following command-line arguments:
node --import amaro/strip --watch-path=src --watch-preserve-output The priority in configuration is as follows:
- NODE_OPTIONS and command-line options
- Configuration file
- Dotenv NODE_OPTIONS
Values in the configuration file will not override the values in the environment
variables and command-line options, but will override the values in the NODE_OPTIONS
env file parsed by the --env-file flag.
If duplicate keys are present in the configuration file, only
the first key will be used.
The configuration parser will throw an error if the configuration file contains
unknown keys or keys that cannot used in NODE_OPTIONS.
Node.js will not sanitize or perform validation on the user-provided configuration,
so NEVER use untrusted configuration files.
--experimental-default-config-file#
Added in: v23.10.0
If the --experimental-default-config-file flag is present, Node.js will look for a
node.config.json file in the current working directory and load it as a
as configuration file.
--experimental-eventsource#
Added in: v22.3.0, v20.18.0
Enable exposition of EventSource Web API on the global scope.
--experimental-import-meta-resolve#
Enable experimental import.meta.resolve() parent URL support, which allows
passing a second parentURL argument for contextual resolution.
Previously gated the entire import.meta.resolve feature.
--experimental-network-inspection#
Added in: v22.6.0, v20.18.0
Enable experimental support for the network inspection with Chrome DevTools.
--experimental-print-required-tla#
Added in: v22.0.0, v20.17.0
If the ES module being require()‘d contains top-level await, this flag
allows Node.js to evaluate the module, try to locate the
top-level awaits, and print their location to help users find them.
--experimental-shadow-realm#
Added in: v19.0.0, v18.13.0
Use this flag to enable ShadowRealm support.
--experimental-test-coverage#
When used in conjunction with the node:test module, a code coverage report is
generated as part of the test runner output. If no tests are run, a coverage
report is not generated. See the documentation on
collecting code coverage from tests for more details.
--experimental-test-module-mocks#
Enable module mocking in the test runner.
This feature requires --allow-worker if used with the Permission Model.
--experimental-transform-types#
Added in: v22.7.0
Enables the transformation of TypeScript-only syntax into JavaScript code.
Implies --enable-source-maps.
--experimental-vm-modules#
Added in: v9.6.0
Enable experimental ES Module support in the node:vm module.
--experimental-wasi-unstable-preview1#
Enable experimental WebAssembly System Interface (WASI) support.
--experimental-wasm-modules#
Added in: v12.3.0
Enable experimental WebAssembly module support.
--experimental-webstorage#
Added in: v22.4.0
Enable experimental Web Storage support.
--expose-gc#
Added in: v22.3.0, v20.18.0
Stability: 1 — Experimental. This flag is inherited from V8 and is subject to
change upstream.
This flag will expose the gc extension from V8.
if (globalThis.gc) {
  globalThis.gc();
} --force-context-aware#
Added in: v12.12.0
Disable loading native addons that are not context-aware.
--force-fips#
Added in: v6.0.0
Force FIPS-compliant crypto on startup. (Cannot be disabled from script code.)
(Same requirements as --enable-fips.)
--force-node-api-uncaught-exceptions-policy#
Added in: v18.3.0, v16.17.0
Enforces uncaughtException event on Node-API asynchronous callbacks.
To prevent from an existing add-on from crashing the process, this flag is not
enabled by default. In the future, this flag will be enabled by default to
enforce the correct behavior.
--frozen-intrinsics#
Added in: v11.12.0
Enable experimental frozen intrinsics like Array and Object.
Only the root context is supported. There is no guarantee that
globalThis.Array is indeed the default intrinsic reference. Code may break
under this flag.
To allow polyfills to be added,
--require and --import both run before freezing intrinsics.
--heap-prof#
Starts the V8 heap profiler on start up, and writes the heap profile to disk
before exit.
If --heap-prof-dir is not specified, the generated profile is placed
in the current working directory.
If --heap-prof-name is not specified, the generated profile is
named Heap.${yyyymmdd}.${hhmmss}.${pid}.${tid}.${seq}.heapprofile.
$ node --heap-prof index.js
$ ls *.heapprofile
Heap.20190409.202950.15293.0.001.heapprofile --heap-prof-dir#
Specify the directory where the heap profiles generated by --heap-prof will
be placed.
The default value is controlled by the
--diagnostic-dir command-line option.
--heap-prof-interval#
Specify the average sampling interval in bytes for the heap profiles generated
by --heap-prof. The default is 512 * 1024 bytes.
--heap-prof-name#
Specify the file name of the heap profile generated by --heap-prof.
--heapsnapshot-near-heap-limit=max_count#
Added in: v15.1.0, v14.18.0
Writes a V8 heap snapshot to disk when the V8 heap usage is approaching the
heap limit. count should be a non-negative integer (in which case
Node.js will write no more than max_count snapshots to disk).
When generating snapshots, garbage collection may be triggered and bring
the heap usage down. Therefore multiple snapshots may be written to disk
before the Node.js instance finally runs out of memory. These heap snapshots
can be compared to determine what objects are being allocated during the
time consecutive snapshots are taken. It’s not guaranteed that Node.js will
write exactly max_count snapshots to disk, but it will try
its best to generate at least one and up to max_count snapshots before the
Node.js instance runs out of memory when max_count is greater than 0.
Generating V8 snapshots takes time and memory (both memory managed by the
V8 heap and native memory outside the V8 heap). The bigger the heap is,
the more resources it needs. Node.js will adjust the V8 heap to accommodate
the additional V8 heap memory overhead, and try its best to avoid using up
all the memory available to the process. When the process uses
more memory than the system deems appropriate, the process may be terminated
abruptly by the system, depending on the system configuration.
$ node --max-old-space-size=100 --heapsnapshot-near-heap-limit=3 index.js
Wrote snapshot to Heap.20200430.100036.49580.0.001.heapsnapshot
Wrote snapshot to Heap.20200430.100037.49580.0.002.heapsnapshot
Wrote snapshot to Heap.20200430.100038.49580.0.003.heapsnapshot

<--- Last few GCs --->

[49580:0x110000000]     4826 ms: Mark-sweep 130.6 (147.8) -> 130.5 (147.8) MB, 27.4 / 0.0 ms  (average mu = 0.126, current mu = 0.034) allocation failure scavenge might not succeed
[49580:0x110000000]     4845 ms: Mark-sweep 130.6 (147.8) -> 130.6 (147.8) MB, 18.8 / 0.0 ms  (average mu = 0.088, current mu = 0.031) allocation failure scavenge might not succeed


<--- JS stacktrace --->

FATAL ERROR: Ineffective mark-compacts near heap limit Allocation failed - JavaScript heap out of memory
.... --heapsnapshot-signal=signal#
Added in: v12.0.0
Enables a signal handler that causes the Node.js process to write a heap dump
when the specified signal is received. signal must be a valid signal name.
Disabled by default.
$ node --heapsnapshot-signal=SIGUSR2 index.js &
$ ps aux
USER       PID %CPU %MEM    VSZ   RSS TTY      STAT START   TIME COMMAND
node         1  5.5  6.1 787252 247004 ?       Ssl  16:43   0:02 node --heapsnapshot-signal=SIGUSR2 index.js
$ kill -USR2 1
$ ls
Heap.20190718.133405.15554.0.001.heapsnapshot -h, --help#
Added in: v0.1.3
Print node command-line options.
The output of this option is less detailed than this document.
--icu-data-dir=file#
Added in: v0.11.15
Specify ICU data load path. (Overrides NODE_ICU_DATA.)
--import=module#
Added in: v19.0.0, v18.18.0
Preload the specified module at startup. If the flag is provided several times,
each module will be executed sequentially in the order they appear, starting
with the ones provided in NODE_OPTIONS.
Follows ECMAScript module resolution rules.
Use --require to load a CommonJS module.
Modules preloaded with --require will run before modules preloaded with --import.
Modules are preloaded into the main thread as well as any worker threads,
forked processes, or clustered processes.
--input-type=type#
Added in: v12.0.0
This configures Node.js to interpret --eval or STDIN input as CommonJS or
as an ES module. Valid values are "commonjs", "module", "module-typescript" and "commonjs-typescript".
The "-typescript" values are not available with the flag --no-experimental-strip-types.
The default is "commonjs".
If --input-type is not provided,
Node.js will try to detect the syntax with the following steps:
- Run the input as CommonJS.
- If step 1 fails, run the input as an ES module.
- If step 2 fails with a SyntaxError, strip the types.
- If step 3 fails with an error code
ERR_UNSUPPORTED_TYPESCRIPT_SYNTAX
orERR_INVALID_TYPESCRIPT_SYNTAX,
throw the error from step 2, including the TypeScript error in the message,
else run as CommonJS. - If step 4 fails, run the input as an ES module.
To avoid the delay of multiple syntax detection passes, the --input-type=type flag can be used to specify
how the --eval input should be interpreted.
The REPL does not support this option. Usage of --input-type=module with
--print will throw an error, as --print does not support ES module
syntax.
--insecure-http-parser#
Added in: v13.4.0, v12.15.0, v10.19.0
Enable leniency flags on the HTTP parser. This may allow
interoperability with non-conformant HTTP implementations.
When enabled, the parser will accept the following:
- Invalid HTTP headers values.
- Invalid HTTP versions.
- Allow message containing both
Transfer-Encoding
andContent-Lengthheaders. - Allow extra data after message when
Connection: closeis present. - Allow extra transfer encodings after
chunkedhas been provided. - Allow
\nto be used as token separator instead of\r\n. - Allow
\r\nnot to be provided after a chunk. - Allow spaces to be present after a chunk size and before
\r\n.
All the above will expose your application to request smuggling
or poisoning attack. Avoid using this option.
Warning: binding inspector to a public IP:port combination is insecure#
Binding the inspector to a public IP (including 0.0.0.0) with an open port is
insecure, as it allows external hosts to connect to the inspector and perform
a remote code execution attack.
If specifying a host, make sure that either:
- The host is not accessible from public networks.
- A firewall disallows unwanted connections on the port.
More specifically, --inspect=0.0.0.0 is insecure if the port (9229 by
default) is not firewall-protected.
See the debugging security implications section for more information.
--inspect-brk[=[host:]port]#
Added in: v7.6.0
Activate inspector on host:port and break at start of user script.
Default host:port is 127.0.0.1:9229. If port 0 is specified,
a random available port will be used.
See V8 Inspector integration for Node.js for further explanation on Node.js debugger.
--inspect-port=[host:]port#
Added in: v7.6.0
Set the host:port to be used when the inspector is activated.
Useful when activating the inspector by sending the SIGUSR1 signal.
Except when --disable-sigusr1 is passed.
Default host is 127.0.0.1. If port 0 is specified,
a random available port will be used.
See the security warning below regarding the host
parameter usage.
--inspect-publish-uid=stderr,http#
Specify ways of the inspector web socket url exposure.
By default inspector websocket url is available in stderr and under /json/list
endpoint on http://host:port/json/list.
--inspect-wait[=[host:]port]#
Added in: v22.2.0, v20.15.0
Activate inspector on host:port and wait for debugger to be attached.
Default host:port is 127.0.0.1:9229. If port 0 is specified,
a random available port will be used.
See V8 Inspector integration for Node.js for further explanation on Node.js debugger.
--inspect[=[host:]port]#
Added in: v6.3.0
Activate inspector on host:port. Default is 127.0.0.1:9229. If port 0 is
specified, a random available port will be used.
V8 inspector integration allows tools such as Chrome DevTools and IDEs to debug
and profile Node.js instances. The tools attach to Node.js instances via a
tcp port and communicate using the Chrome DevTools Protocol.
See V8 Inspector integration for Node.js for further explanation on Node.js debugger.
-i, --interactive#
Added in: v0.7.7
Opens the REPL even if stdin does not appear to be a terminal.
--jitless#
Added in: v12.0.0
Stability: 1 — Experimental. This flag is inherited from V8 and is subject to
change upstream.
Disable runtime allocation of executable memory. This may be
required on some platforms for security reasons. It can also reduce attack
surface on other platforms, but the performance impact may be severe.
--localstorage-file=file#
Added in: v22.4.0
The file used to store localStorage data. If the file does not exist, it is
created the first time localStorage is accessed. The same file may be shared
between multiple Node.js processes concurrently. This flag is a no-op unless
Node.js is started with the --experimental-webstorage flag.
--max-http-header-size=size#
Specify the maximum size, in bytes, of HTTP headers. Defaults to 16 KiB.
--napi-modules#
Added in: v7.10.0
This option is a no-op. It is kept for compatibility.
--no-addons#
Added in: v16.10.0, v14.19.0
Disable the node-addons exports condition as well as disable loading
native addons. When --no-addons is specified, calling process.dlopen or
requiring a native C++ addon will fail and throw an exception.
--no-async-context-frame#
Added in: v24.0.0
Disables the use of AsyncLocalStorage backed by AsyncContextFrame and
uses the prior implementation which relied on async_hooks. The previous model
is retained for compatibility with Electron and for cases where the context
flow may differ. However, if a difference in flow is found please report it.
--no-deprecation#
Added in: v0.8.0
Silence deprecation warnings.
--no-experimental-detect-module#
Disable using syntax detection to determine module type.
--no-experimental-global-navigator#
Added in: v21.2.0
Disable exposition of Navigator API on the global scope.
--no-experimental-repl-await#
Added in: v16.6.0
Use this flag to disable top-level await in REPL.
--no-experimental-sqlite#
Disable the experimental node:sqlite module.
--no-experimental-strip-types#
Disable experimental type-stripping for TypeScript files.
For more information, see the TypeScript type-stripping documentation.
--no-experimental-websocket#
Added in: v22.0.0
Disable exposition of WebSocket on the global scope.
--no-extra-info-on-fatal-exception#
Added in: v17.0.0
Hide extra information on fatal exception that causes exit.
--no-force-async-hooks-checks#
Added in: v9.0.0
Disables runtime checks for async_hooks. These will still be enabled
dynamically when async_hooks is enabled.
--no-global-search-paths#
Added in: v16.10.0
Do not search modules from global paths like $HOME/.node_modules and
$NODE_PATH.
--no-network-family-autoselection#
Disables the family autoselection algorithm unless connection options explicitly
enables it.
--no-warnings#
Added in: v6.0.0
Silence all process warnings (including deprecations).
--node-memory-debug#
Added in: v15.0.0, v14.18.0
Enable extra debug checks for memory leaks in Node.js internals. This is
usually only useful for developers debugging Node.js itself.
--openssl-config=file#
Added in: v6.9.0
Load an OpenSSL configuration file on startup. Among other uses, this can be
used to enable FIPS-compliant crypto if Node.js is built
against FIPS-enabled OpenSSL.
--openssl-legacy-provider#
Added in: v17.0.0, v16.17.0
Enable OpenSSL 3.0 legacy provider. For more information please see
OSSL_PROVIDER-legacy.
--openssl-shared-config#
Added in: v18.5.0, v16.17.0, v14.21.0
Enable OpenSSL default configuration section, openssl_conf to be read from
the OpenSSL configuration file. The default configuration file is named
openssl.cnf but this can be changed using the environment variable
OPENSSL_CONF, or by using the command line option --openssl-config.
The location of the default OpenSSL configuration file depends on how OpenSSL
is being linked to Node.js. Sharing the OpenSSL configuration may have unwanted
implications and it is recommended to use a configuration section specific to
Node.js which is nodejs_conf and is default when this option is not used.
--pending-deprecation#
Added in: v8.0.0
Emit pending deprecation warnings.
Pending deprecations are generally identical to a runtime deprecation with the
notable exception that they are turned off by default and will not be emitted
unless either the --pending-deprecation command-line flag, or the
NODE_PENDING_DEPRECATION=1 environment variable, is set. Pending deprecations
are used to provide a kind of selective «early warning» mechanism that
developers may leverage to detect deprecated API usage.
--permission#
Enable the Permission Model for current process. When enabled, the
following permissions are restricted:
- File System — manageable through
--allow-fs-read,--allow-fs-writeflags - Child Process — manageable through
--allow-child-processflag - Worker Threads — manageable through
--allow-workerflag - WASI — manageable through
--allow-wasiflag - Addons — manageable through
--allow-addonsflag
--preserve-symlinks#
Added in: v6.3.0
Instructs the module loader to preserve symbolic links when resolving and
caching modules.
By default, when Node.js loads a module from a path that is symbolically linked
to a different on-disk location, Node.js will dereference the link and use the
actual on-disk «real path» of the module as both an identifier and as a root
path to locate other dependency modules. In most cases, this default behavior
is acceptable. However, when using symbolically linked peer dependencies, as
illustrated in the example below, the default behavior causes an exception to
be thrown if moduleA attempts to require moduleB as a peer dependency:
{appDir}
 ├── app
 │   ├── index.js
 │   └── node_modules
 │       ├── moduleA -> {appDir}/moduleA
 │       └── moduleB
 │           ├── index.js
 │           └── package.json
 └── moduleA
     ├── index.js
     └── package.json
The --preserve-symlinks command-line flag instructs Node.js to use the
symlink path for modules as opposed to the real path, allowing symbolically
linked peer dependencies to be found.
Note, however, that using --preserve-symlinks can have other side effects.
Specifically, symbolically linked native modules can fail to load if those
are linked from more than one location in the dependency tree (Node.js would
see those as two separate modules and would attempt to load the module multiple
times, causing an exception to be thrown).
The --preserve-symlinks flag does not apply to the main module, which allows
node --preserve-symlinks node_module/.bin/<foo> to work. To apply the same
behavior for the main module, also use --preserve-symlinks-main.
--preserve-symlinks-main#
Added in: v10.2.0
Instructs the module loader to preserve symbolic links when resolving and
caching the main module (require.main).
This flag exists so that the main module can be opted-in to the same behavior
that --preserve-symlinks gives to all other imports; they are separate flags,
however, for backward compatibility with older Node.js versions.
--preserve-symlinks-main does not imply --preserve-symlinks; use
--preserve-symlinks-main in addition to
--preserve-symlinks when it is not desirable to follow symlinks before
resolving relative paths.
See --preserve-symlinks for more information.
-p, --print "script"#
Identical to -e but prints the result.
--prof#
Added in: v2.0.0
Generate V8 profiler output.
--prof-process#
Added in: v5.2.0
Process V8 profiler output generated using the V8 option --prof.
--redirect-warnings=file#
Added in: v8.0.0
Write process warnings to the given file instead of printing to stderr. The
file will be created if it does not exist, and will be appended to if it does.
If an error occurs while attempting to write the warning to the file, the
warning will be written to stderr instead.
The file name may be an absolute path. If it is not, the default directory it
will be written to is controlled by the
--diagnostic-dir command-line option.
--report-compact#
Added in: v13.12.0, v12.17.0
Write reports in a compact format, single-line JSON, more easily consumable
by log processing systems than the default multi-line format designed for
human consumption.
--report-dir=directory, report-directory=directory#
Location at which the report will be generated.
--report-exclude-env#
Added in: v23.3.0, v22.13.0
When --report-exclude-env is passed the diagnostic report generated will not
contain the environmentVariables data.
--report-exclude-network#
Added in: v22.0.0, v20.13.0
Exclude header.networkInterfaces from the diagnostic report. By default
this is not set and the network interfaces are included.
--report-filename=filename#
Name of the file to which the report will be written.
If the filename is set to 'stdout' or 'stderr', the report is written to
the stdout or stderr of the process respectively.
--report-on-fatalerror#
Enables the report to be triggered on fatal errors (internal errors within
the Node.js runtime such as out of memory) that lead to termination of the
application. Useful to inspect various diagnostic data elements such as heap,
stack, event loop state, resource consumption etc. to reason about the fatal
error.
--report-on-signal#
Enables report to be generated upon receiving the specified (or predefined)
signal to the running Node.js process. The signal to trigger the report is
specified through --report-signal.
--report-signal=signal#
Sets or resets the signal for report generation (not supported on Windows).
Default signal is SIGUSR2.
--report-uncaught-exception#
Enables report to be generated when the process exits due to an uncaught
exception. Useful when inspecting the JavaScript stack in conjunction with
native stack and other runtime environment data.
-r, --require module#
Preload the specified module at startup.
Follows require()‘s module resolution
rules. module may be either a path to a file, or a node module name.
Modules preloaded with --require will run before modules preloaded with --import.
Modules are preloaded into the main thread as well as any worker threads,
forked processes, or clustered processes.
--run#
This runs a specified command from a package.json’s "scripts" object.
If a missing "command" is provided, it will list the available scripts.
--run will traverse up to the root directory and finds a package.json
file to run the command from.
--run prepends ./node_modules/.bin for each ancestor of
the current directory, to the PATH in order to execute the binaries from
different folders where multiple node_modules directories are present, if
ancestor-folder/node_modules/.bin is a directory.
--run executes the command in the directory containing the related package.json.
For example, the following command will run the test script of
the package.json in the current folder:
$ node --run test You can also pass arguments to the command. Any argument after -- will
be appended to the script:
$ node --run test -- --verbose Intentional limitations#
node --run is not meant to match the behaviors of npm run or of the run
commands of other package managers. The Node.js implementation is intentionally
more limited, in order to focus on top performance for the most common use
cases.
Some features of other run implementations that are intentionally excluded
are:
- Running
preorpostscripts in addition to the specified script. - Defining package manager-specific environment variables.
Environment variables#
The following environment variables are set when running a script with --run:
NODE_RUN_SCRIPT_NAME: The name of the script being run. For example, if
--runis used to runtest, the value of this variable will betest.NODE_RUN_PACKAGE_JSON_PATH: The path to thepackage.jsonthat is being
processed.
--secure-heap-min=n#
Added in: v15.6.0
When using --secure-heap, the --secure-heap-min flag specifies the
minimum allocation from the secure heap. The minimum value is 2.
The maximum value is the lesser of --secure-heap or 2147483647.
The value given must be a power of two.
--secure-heap=n#
Added in: v15.6.0
Initializes an OpenSSL secure heap of n bytes. When initialized, the
secure heap is used for selected types of allocations within OpenSSL
during key generation and other operations. This is useful, for instance,
to prevent sensitive information from leaking due to pointer overruns
or underruns.
The secure heap is a fixed size and cannot be resized at runtime so,
if used, it is important to select a large enough heap to cover all
application uses.
The heap size given must be a power of two. Any value less than 2
will disable the secure heap.
The secure heap is disabled by default.
The secure heap is not available on Windows.
See CRYPTO_secure_malloc_init for more details.
--snapshot-blob=path#
Added in: v18.8.0
When used with --build-snapshot, --snapshot-blob specifies the path
where the generated snapshot blob is written to. If not specified, the
generated blob is written to snapshot.blob in the current working directory.
When used without --build-snapshot, --snapshot-blob specifies the
path to the blob that is used to restore the application state.
When loading a snapshot, Node.js checks that:
- The version, architecture, and platform of the running Node.js binary
are exactly the same as that of the binary that generates the snapshot. - The V8 flags and CPU features are compatible with that of the binary
that generates the snapshot.
If they don’t match, Node.js refuses to load the snapshot and exits with
status code 1.
--test#
Starts the Node.js command line test runner. This flag cannot be combined with
--watch-path, --check, --eval, --interactive, or the inspector.
See the documentation on running tests from the command line
for more details.
--test-concurrency#
Added in: v21.0.0, v20.10.0, v18.19.0
The maximum number of test files that the test runner CLI will execute
concurrently. If --test-isolation is set to 'none', this flag is ignored and
concurrency is one. Otherwise, concurrency defaults to
os.availableParallelism() - 1.
--test-coverage-branches=threshold#
Added in: v22.8.0
Require a minimum percent of covered branches. If code coverage does not reach
the threshold specified, the process will exit with code 1.
--test-coverage-exclude#
Added in: v22.5.0
Excludes specific files from code coverage using a glob pattern, which can match
both absolute and relative file paths.
This option may be specified multiple times to exclude multiple glob patterns.
If both --test-coverage-exclude and --test-coverage-include are provided,
files must meet both criteria to be included in the coverage report.
By default all the matching test files are excluded from the coverage report.
Specifying this option will override the default behavior.
--test-coverage-functions=threshold#
Added in: v22.8.0
Require a minimum percent of covered functions. If code coverage does not reach
the threshold specified, the process will exit with code 1.
--test-coverage-include#
Added in: v22.5.0
Includes specific files in code coverage using a glob pattern, which can match
both absolute and relative file paths.
This option may be specified multiple times to include multiple glob patterns.
If both --test-coverage-exclude and --test-coverage-include are provided,
files must meet both criteria to be included in the coverage report.
--test-coverage-lines=threshold#
Added in: v22.8.0
Require a minimum percent of covered lines. If code coverage does not reach
the threshold specified, the process will exit with code 1.
--test-force-exit#
Added in: v22.0.0, v20.14.0
Configures the test runner to exit the process once all known tests have
finished executing even if the event loop would otherwise remain active.
--test-global-setup=module#
Added in: v24.0.0
Specify a module that will be evaluated before all tests are executed and
can be used to setup global state or fixtures for tests.
See the documentation on global setup and teardown for more details.
--test-isolation=mode#
Configures the type of test isolation used in the test runner. When mode is
'process', each test file is run in a separate child process. When mode is
'none', all test files run in the same process as the test runner. The default
isolation mode is 'process'. This flag is ignored if the --test flag is not
present. See the test runner execution model section for more information.
--test-name-pattern#
A regular expression that configures the test runner to only execute tests
whose name matches the provided pattern. See the documentation on
filtering tests by name for more details.
If both --test-name-pattern and --test-skip-pattern are supplied,
tests must satisfy both requirements in order to be executed.
--test-only#
Configures the test runner to only execute top level tests that have the only
option set. This flag is not necessary when test isolation is disabled.
--test-reporter#
A test reporter to use when running tests. See the documentation on
test reporters for more details.
--test-reporter-destination#
The destination for the corresponding test reporter. See the documentation on
test reporters for more details.
--test-shard#
Added in: v20.5.0, v18.19.0
Test suite shard to execute in a format of <index>/<total>, where
index is a positive integer, index of divided parts
total is a positive integer, total of divided part
This command will divide all tests files into total equal parts,
and will run only those that happen to be in an index part.
For example, to split your tests suite into three parts, use this:
node --test --test-shard=1/3
node --test --test-shard=2/3
node --test --test-shard=3/3 --test-skip-pattern#
Added in: v22.1.0
A regular expression that configures the test runner to skip tests
whose name matches the provided pattern. See the documentation on
filtering tests by name for more details.
If both --test-name-pattern and --test-skip-pattern are supplied,
tests must satisfy both requirements in order to be executed.
--test-timeout#
Added in: v21.2.0, v20.11.0
A number of milliseconds the test execution will fail after. If unspecified,
subtests inherit this value from their parent. The default value is Infinity.
--test-update-snapshots#
Regenerates the snapshot files used by the test runner for snapshot testing.
--throw-deprecation#
Added in: v0.11.14
Throw errors for deprecations.
--title=title#
Added in: v10.7.0
Set process.title on startup.
--tls-cipher-list=list#
Added in: v4.0.0
Specify an alternative default TLS cipher list. Requires Node.js to be built
with crypto support (default).
--tls-keylog=file#
Added in: v13.2.0, v12.16.0
Log TLS key material to a file. The key material is in NSS SSLKEYLOGFILE
format and can be used by software (such as Wireshark) to decrypt the TLS
traffic.
--tls-max-v1.2#
Added in: v12.0.0, v10.20.0
Set tls.DEFAULT_MAX_VERSION to ‘TLSv1.2’. Use to disable support for
TLSv1.3.
--tls-max-v1.3#
Added in: v12.0.0
Set default tls.DEFAULT_MAX_VERSION to ‘TLSv1.3’. Use to enable support
for TLSv1.3.
--tls-min-v1.0#
Added in: v12.0.0, v10.20.0
Set default tls.DEFAULT_MIN_VERSION to ‘TLSv1’. Use for compatibility with
old TLS clients or servers.
--tls-min-v1.1#
Added in: v12.0.0, v10.20.0
Set default tls.DEFAULT_MIN_VERSION to ‘TLSv1.1’. Use for compatibility
with old TLS clients or servers.
--tls-min-v1.2#
Added in: v12.2.0, v10.20.0
Set default tls.DEFAULT_MIN_VERSION to ‘TLSv1.2’. This is the default for
12.x and later, but the option is supported for compatibility with older Node.js
versions.
--tls-min-v1.3#
Added in: v12.0.0
Set default tls.DEFAULT_MIN_VERSION to ‘TLSv1.3’. Use to disable support
for TLSv1.2, which is not as secure as TLSv1.3.
--trace-deprecation#
Added in: v0.8.0
Print stack traces for deprecations.
--trace-env#
Added in: v23.4.0, v22.13.0
Print information about any access to environment variables done in the current Node.js
instance to stderr, including:
- The environment variable reads that Node.js does internally.
- Writes in the form of
process.env.KEY = "SOME VALUE". - Reads in the form of
process.env.KEY. - Definitions in the form of
Object.defineProperty(process.env, 'KEY', {...}). - Queries in the form of
Object.hasOwn(process.env, 'KEY'),
process.env.hasOwnProperty('KEY')or'KEY' in process.env. - Deletions in the form of
delete process.env.KEY. - Enumerations inf the form of
...process.envorObject.keys(process.env).
Only the names of the environment variables being accessed are printed. The values are not printed.
To print the stack trace of the access, use --trace-env-js-stack and/or
--trace-env-native-stack.
--trace-env-js-stack#
Added in: v23.4.0, v22.13.0
In addition to what --trace-env does, this prints the JavaScript stack trace of the access.
--trace-env-native-stack#
Added in: v23.4.0, v22.13.0
In addition to what --trace-env does, this prints the native stack trace of the access.
--trace-event-categories#
Added in: v7.7.0
A comma separated list of categories that should be traced when trace event
tracing is enabled using --trace-events-enabled.
--trace-event-file-pattern#
Added in: v9.8.0
Template string specifying the filepath for the trace event data, it
supports ${rotation} and ${pid}.
--trace-events-enabled#
Added in: v7.7.0
Enables the collection of trace event tracing information.
--trace-exit#
Added in: v13.5.0, v12.16.0
Prints a stack trace whenever an environment is exited proactively,
i.e. invoking process.exit().
--trace-require-module=mode#
Added in: v23.5.0, v22.13.0, v20.19.0
Prints information about usage of Loading ECMAScript modules using require().
When mode is all, all usage is printed. When mode is no-node-modules, usage
from the node_modules folder is excluded.
--trace-sigint#
Added in: v13.9.0, v12.17.0
Prints a stack trace on SIGINT.
--trace-sync-io#
Added in: v2.1.0
Prints a stack trace whenever synchronous I/O is detected after the first turn
of the event loop.
--trace-tls#
Added in: v12.2.0
Prints TLS packet trace information to stderr. This can be used to debug TLS
connection problems.
--trace-uncaught#
Added in: v13.1.0
Print stack traces for uncaught exceptions; usually, the stack trace associated
with the creation of an Error is printed, whereas this makes Node.js also
print the stack trace associated with throwing the value (which does not need
to be an Error instance).
Enabling this option may affect garbage collection behavior negatively.
--trace-warnings#
Added in: v6.0.0
Print stack traces for process warnings (including deprecations).
--track-heap-objects#
Added in: v2.4.0
Track heap object allocations for heap snapshots.
--unhandled-rejections=mode#
Using this flag allows to change what should happen when an unhandled rejection
occurs. One of the following modes can be chosen:
throw: EmitunhandledRejection. If this hook is not set, raise the
unhandled rejection as an uncaught exception. This is the default.strict: Raise the unhandled rejection as an uncaught exception. If the
exception is handled,unhandledRejectionis emitted.warn: Always trigger a warning, no matter if theunhandledRejection
hook is set or not but do not print the deprecation warning.warn-with-error-code: EmitunhandledRejection. If this hook is not
set, trigger a warning, and set the process exit code to 1.none: Silence all warnings.
If a rejection happens during the command line entry point’s ES module static
loading phase, it will always raise it as an uncaught exception.
--use-bundled-ca, --use-openssl-ca#
Added in: v6.11.0
Use bundled Mozilla CA store as supplied by current Node.js version
or use OpenSSL’s default CA store. The default store is selectable
at build-time.
The bundled CA store, as supplied by Node.js, is a snapshot of Mozilla CA store
that is fixed at release time. It is identical on all supported platforms.
Using OpenSSL store allows for external modifications of the store. For most
Linux and BSD distributions, this store is maintained by the distribution
maintainers and system administrators. OpenSSL CA store location is dependent on
configuration of the OpenSSL library but this can be altered at runtime using
environment variables.
See SSL_CERT_DIR and SSL_CERT_FILE.
--use-largepages=mode#
Added in: v13.6.0, v12.17.0
Re-map the Node.js static code to large memory pages at startup. If supported on
the target system, this will cause the Node.js static code to be moved onto 2
MiB pages instead of 4 KiB pages.
The following values are valid for mode:
off: No mapping will be attempted. This is the default.on: If supported by the OS, mapping will be attempted. Failure to map will
be ignored and a message will be printed to standard error.silent: If supported by the OS, mapping will be attempted. Failure to map
will be ignored and will not be reported.
--use-system-ca#
Node.js uses the trusted CA certificates present in the system store along with
the --use-bundled-ca option and the NODE_EXTRA_CA_CERTS environment variable.
On platforms other than Windows and macOS, this loads certificates from the directory
and file trusted by OpenSSL, similar to --use-openssl-ca, with the difference being
that it caches the certificates after first load.
On Windows and macOS, the certificate trust policy is planned to follow
Chromium’s policy for locally trusted certificates:
On macOS, the following settings are respected:
- Default and System Keychains
- Trust:
- Any certificate where the “When using this certificate” flag is set to “Always Trust” or
- Any certificate where the “Secure Sockets Layer (SSL)” flag is set to “Always Trust.”
- Distrust:
- Any certificate where the “When using this certificate” flag is set to “Never Trust” or
- Any certificate where the “Secure Sockets Layer (SSL)” flag is set to “Never Trust.”
- Trust:
On Windows, the following settings are respected (unlike Chromium’s policy, distrust
and intermediate CA are not currently supported):
- Local Machine (accessed via
certlm.msc)- Trust:
- Trusted Root Certification Authorities
- Trusted People
- Enterprise Trust -> Enterprise -> Trusted Root Certification Authorities
- Enterprise Trust -> Enterprise -> Trusted People
- Enterprise Trust -> Group Policy -> Trusted Root Certification Authorities
- Enterprise Trust -> Group Policy -> Trusted People
- Trust:
- Current User (accessed via
certmgr.msc)- Trust:
- Trusted Root Certification Authorities
- Enterprise Trust -> Group Policy -> Trusted Root Certification Authorities
- Trust:
On Windows and macOS, Node.js would check that the user settings for the certificates
do not forbid them for TLS server authentication before using them.
On other systems, Node.js loads certificates from the default certificate file
(typically /etc/ssl/cert.pem) and default certificate directory (typically
/etc/ssl/certs) that the version of OpenSSL that Node.js links to respects.
This typically works with the convention on major Linux distributions and other
Unix-like systems. If the overriding OpenSSL environment variables
(typically SSL_CERT_FILE and SSL_CERT_DIR, depending on the configuration
of the OpenSSL that Node.js links to) are set, the specified paths will be used to load
certificates instead. These environment variables can be used as workarounds
if the conventional paths used by the version of OpenSSL Node.js links to are
not consistent with the system configuration that the users have for some reason.
--v8-options#
Added in: v0.1.3
Print V8 command-line options.
--v8-pool-size=num#
Added in: v5.10.0
Set V8’s thread pool size which will be used to allocate background jobs.
If set to 0 then Node.js will choose an appropriate size of the thread pool
based on an estimate of the amount of parallelism.
The amount of parallelism refers to the number of computations that can be
carried out simultaneously in a given machine. In general, it’s the same as the
amount of CPUs, but it may diverge in environments such as VMs or containers.
-v, --version#
Added in: v0.1.3
Print node’s version.
--watch#
Starts Node.js in watch mode.
When in watch mode, changes in the watched files cause the Node.js process to
restart.
By default, watch mode will watch the entry point
and any required or imported module.
Use --watch-path to specify what paths to watch.
This flag cannot be combined with
--check, --eval, --interactive, or the REPL.
node --watch index.js --watch-path#
Starts Node.js in watch mode and specifies what paths to watch.
When in watch mode, changes in the watched paths cause the Node.js process to
restart.
This will turn off watching of required or imported modules, even when used in
combination with --watch.
This flag cannot be combined with
--check, --eval, --interactive, --test, or the REPL.
node --watch-path=./src --watch-path=./tests index.js This option is only supported on macOS and Windows.
An ERR_FEATURE_UNAVAILABLE_ON_PLATFORM exception will be thrown
when the option is used on a platform that does not support it.
--watch-preserve-output#
Added in: v19.3.0, v18.13.0
Disable the clearing of the console when watch mode restarts the process.
node --watch --watch-preserve-output test.js --zero-fill-buffers#
Added in: v6.0.0
Automatically zero-fills all newly allocated Buffer instances.
Environment variables#
FORCE_COLOR=[1, 2, 3]#
The FORCE_COLOR environment variable is used to
enable ANSI colorized output. The value may be:
1,true, or the empty string''indicate 16-color support,2to indicate 256-color support, or3to indicate 16 million-color support.
When FORCE_COLOR is used and set to a supported value, both the NO_COLOR,
and NODE_DISABLE_COLORS environment variables are ignored.
Any other value will result in colorized output being disabled.
NODE_DEBUG=module[,…]#
Added in: v0.1.32
','-separated list of core modules that should print debug information.
NODE_DEBUG_NATIVE=module[,…]#
','-separated list of core C++ modules that should print debug information.
NODE_DISABLE_COLORS=1#
Added in: v0.3.0
When set, colors will not be used in the REPL.
NODE_EXTRA_CA_CERTS=file#
Added in: v7.3.0
When set, the well known «root» CAs (like VeriSign) will be extended with the
extra certificates in file. The file should consist of one or more trusted
certificates in PEM format. A message will be emitted (once) with
process.emitWarning() if the file is missing or
malformed, but any errors are otherwise ignored.
Neither the well known nor extra certificates are used when the ca
options property is explicitly specified for a TLS or HTTPS client or server.
This environment variable is ignored when node runs as setuid root or
has Linux file capabilities set.
The NODE_EXTRA_CA_CERTS environment variable is only read when the Node.js
process is first launched. Changing the value at runtime using
process.env.NODE_EXTRA_CA_CERTS has no effect on the current process.
NODE_ICU_DATA=file#
Added in: v0.11.15
Data path for ICU (Intl object) data. Will extend linked-in data when compiled
with small-icu support.
NODE_NO_WARNINGS=1#
Added in: v6.11.0
When set to 1, process warnings are silenced.
NODE_OPTIONS=options...#
Added in: v8.0.0
A space-separated list of command-line options. options... are interpreted
before command-line options, so command-line options will override or
compound after anything in options.... Node.js will exit with an error if
an option that is not allowed in the environment is used, such as -p or a
script file.
If an option value contains a space, it can be escaped using double quotes:
NODE_OPTIONS='--require "./my path/file.js"' A singleton flag passed as a command-line option will override the same flag
passed into NODE_OPTIONS:
# The inspector will be available on port 5555
NODE_OPTIONS='--inspect=localhost:4444' node --inspect=localhost:5555
A flag that can be passed multiple times will be treated as if its
NODE_OPTIONS instances were passed first, and then its command-line
instances afterwards:
NODE_OPTIONS='--require "./a.js"' node --require "./b.js"
# is equivalent to:
node --require "./a.js" --require "./b.js"
Node.js options that are allowed are in the following list. If an option
supports both —XX and —no-XX variants, they are both supported but only
one is included in the list below.
--allow-addons--allow-child-process--allow-fs-read--allow-fs-write--allow-wasi--allow-worker--conditions,-C--cpu-prof-dir--cpu-prof-interval--cpu-prof-name--cpu-prof--diagnostic-dir--disable-proto--disable-sigusr1--disable-warning--disable-wasm-trap-handler--dns-result-order--enable-fips--enable-network-family-autoselection--enable-source-maps--entry-url--experimental-abortcontroller--experimental-addon-modules--experimental-detect-module--experimental-eventsource--experimental-import-meta-resolve--experimental-json-modules--experimental-loader--experimental-modules--experimental-print-required-tla--experimental-require-module--experimental-shadow-realm--experimental-specifier-resolution--experimental-test-isolation--experimental-top-level-await--experimental-transform-types--experimental-vm-modules--experimental-wasi-unstable-preview1--experimental-wasm-modules--experimental-webstorage--force-context-aware--force-fips--force-node-api-uncaught-exceptions-policy--frozen-intrinsics--heap-prof-dir--heap-prof-interval--heap-prof-name--heap-prof--heapsnapshot-near-heap-limit--heapsnapshot-signal--http-parser--icu-data-dir--import--input-type--insecure-http-parser--inspect-brk--inspect-port,--debug-port--inspect-publish-uid--inspect-wait--inspect--localstorage-file--max-http-header-size--napi-modules--network-family-autoselection-attempt-timeout--no-addons--no-async-context-frame--no-deprecation--no-experimental-global-navigator--no-experimental-repl-await--no-experimental-sqlite--no-experimental-strip-types--no-experimental-websocket--no-extra-info-on-fatal-exception--no-force-async-hooks-checks--no-global-search-paths--no-network-family-autoselection--no-warnings--node-memory-debug--openssl-config--openssl-legacy-provider--openssl-shared-config--pending-deprecation--permission--preserve-symlinks-main--preserve-symlinks--prof-process--redirect-warnings--report-compact--report-dir,--report-directory--report-exclude-env--report-exclude-network--report-filename--report-on-fatalerror--report-on-signal--report-signal--report-uncaught-exception--require,-r--secure-heap-min--secure-heap--snapshot-blob--test-coverage-branches--test-coverage-exclude--test-coverage-functions--test-coverage-include--test-coverage-lines--test-global-setup--test-isolation--test-name-pattern--test-only--test-reporter-destination--test-reporter--test-shard--test-skip-pattern--throw-deprecation--title--tls-cipher-list--tls-keylog--tls-max-v1.2--tls-max-v1.3--tls-min-v1.0--tls-min-v1.1--tls-min-v1.2--tls-min-v1.3--trace-deprecation--trace-env-js-stack--trace-env-native-stack--trace-env--trace-event-categories--trace-event-file-pattern--trace-events-enabled--trace-exit--trace-require-module--trace-sigint--trace-sync-io--trace-tls--trace-uncaught--trace-warnings--track-heap-objects--unhandled-rejections--use-bundled-ca--use-largepages--use-openssl-ca--use-system-ca--v8-pool-size--watch-path--watch-preserve-output--watch--zero-fill-buffers
V8 options that are allowed are:
--abort-on-uncaught-exception--disallow-code-generation-from-strings--enable-etw-stack-walking--expose-gc--interpreted-frames-native-stack--jitless--max-old-space-size--max-semi-space-size--perf-basic-prof-only-functions--perf-basic-prof--perf-prof-unwinding-info--perf-prof--stack-trace-limit
--perf-basic-prof-only-functions, --perf-basic-prof,
--perf-prof-unwinding-info, and --perf-prof are only available on Linux.
--enable-etw-stack-walking is only available on Windows.
NODE_PATH=path[:…]#
Added in: v0.1.32
':'-separated list of directories prefixed to the module search path.
On Windows, this is a ';'-separated list instead.
NODE_PENDING_DEPRECATION=1#
Added in: v8.0.0
When set to 1, emit pending deprecation warnings.
Pending deprecations are generally identical to a runtime deprecation with the
notable exception that they are turned off by default and will not be emitted
unless either the --pending-deprecation command-line flag, or the
NODE_PENDING_DEPRECATION=1 environment variable, is set. Pending deprecations
are used to provide a kind of selective «early warning» mechanism that
developers may leverage to detect deprecated API usage.
NODE_PENDING_PIPE_INSTANCES=instances#
Set the number of pending pipe instance handles when the pipe server is waiting
for connections. This setting applies to Windows only.
NODE_PRESERVE_SYMLINKS=1#
Added in: v7.1.0
When set to 1, instructs the module loader to preserve symbolic links when
resolving and caching modules.
NODE_REDIRECT_WARNINGS=file#
Added in: v8.0.0
When set, process warnings will be emitted to the given file instead of
printing to stderr. The file will be created if it does not exist, and will be
appended to if it does. If an error occurs while attempting to write the
warning to the file, the warning will be written to stderr instead. This is
equivalent to using the --redirect-warnings=file command-line flag.
NODE_REPL_EXTERNAL_MODULE=file#
Path to a Node.js module which will be loaded in place of the built-in REPL.
Overriding this value to an empty string ('') will use the built-in REPL.
NODE_REPL_HISTORY=file#
Added in: v3.0.0
Path to the file used to store the persistent REPL history. The default path is
~/.node_repl_history, which is overridden by this variable. Setting the value
to an empty string ('' or ' ') disables persistent REPL history.
NODE_SKIP_PLATFORM_CHECK=value#
Added in: v14.5.0
If value equals '1', the check for a supported platform is skipped during
Node.js startup. Node.js might not execute correctly. Any issues encountered
on unsupported platforms will not be fixed.
NODE_TEST_CONTEXT=value#
If value equals 'child', test reporter options will be overridden and test
output will be sent to stdout in the TAP format. If any other value is provided,
Node.js makes no guarantees about the reporter format used or its stability.
NODE_TLS_REJECT_UNAUTHORIZED=value
If value equals '0', certificate validation is disabled for TLS connections.
This makes TLS, and HTTPS by extension, insecure. The use of this environment
variable is strongly discouraged.
NODE_USE_ENV_PROXY=1#
Added in: v24.0.0
When enabled, Node.js parses the HTTP_PROXY, HTTPS_PROXY and NO_PROXY
environment variables during startup, and tunnels requests over the
specified proxy.
This currently only affects requests sent over fetch(). Support for other
built-in http and https methods is under way.
NODE_V8_COVERAGE=dir#
When set, Node.js will begin outputting V8 JavaScript code coverage and
Source Map data to the directory provided as an argument (coverage
information is written as JSON to files with a coverage prefix).
NODE_V8_COVERAGE will automatically propagate to subprocesses, making it
easier to instrument applications that call the child_process.spawn() family
of functions. NODE_V8_COVERAGE can be set to an empty string, to prevent
propagation.
Coverage output#
Coverage is output as an array of ScriptCoverage objects on the top-level
key result:
{
  "result": [
    {
      "scriptId": "67",
      "url": "internal/tty.js",
      "functions": []
    }
  ]
}
Source map cache#
If found, source map data is appended to the top-level key source-map-cache
on the JSON coverage object.
source-map-cache is an object with keys representing the files source maps
were extracted from, and values which include the raw source-map URL
(in the key url), the parsed Source Map v3 information (in the key data),
and the line lengths of the source file (in the key lineLengths).
{
  "result": [
    {
      "scriptId": "68",
      "url": "file:///absolute/path/to/source.js",
      "functions": []
    }
  ],
  "source-map-cache": {
    "file:///absolute/path/to/source.js": {
      "url": "./path-to-map.json",
      "data": {
        "version": 3,
        "sources": [
          "file:///absolute/path/to/original.js"
        ],
        "names": [
          "Foo",
          "console",
          "info"
        ],
        "mappings": "MAAMA,IACJC,YAAaC",
        "sourceRoot": "./"
      },
      "lineLengths": [
        13,
        62,
        38,
        27
      ]
    }
  }
} NO_COLOR=<any>#
NO_COLOR is an alias for NODE_DISABLE_COLORS. The value of the
environment variable is arbitrary.
OPENSSL_CONF=file#
Added in: v6.11.0
Load an OpenSSL configuration file on startup. Among other uses, this can be
used to enable FIPS-compliant crypto if Node.js is built with
./configure --openssl-fips.
If the --openssl-config command-line option is used, the environment
variable is ignored.
SSL_CERT_DIR=dir#
Added in: v7.7.0
If --use-openssl-ca is enabled, or if --use-system-ca is enabled on
platforms other than macOS and Windows, this overrides and sets OpenSSL’s directory
containing trusted certificates.
Be aware that unless the child environment is explicitly set, this environment
variable will be inherited by any child processes, and if they use OpenSSL, it
may cause them to trust the same CAs as node.
SSL_CERT_FILE=file#
Added in: v7.7.0
If --use-openssl-ca is enabled, or if --use-system-ca is enabled on
platforms other than macOS and Windows, this overrides and sets OpenSSL’s file
containing trusted certificates.
Be aware that unless the child environment is explicitly set, this environment
variable will be inherited by any child processes, and if they use OpenSSL, it
may cause them to trust the same CAs as node.
TZ#
The TZ environment variable is used to specify the timezone configuration.
While Node.js does not support all of the various ways that TZ is handled in
other environments, it does support basic timezone IDs (such as
'Etc/UTC', 'Europe/Paris', or 'America/New_York').
It may support a few other abbreviations or aliases, but these are strongly
discouraged and not guaranteed.
$ TZ=Europe/Dublin node -pe "new Date().toString()"
Wed May 12 2021 20:30:48 GMT+0100 (Irish Standard Time) UV_THREADPOOL_SIZE=size#
Set the number of threads used in libuv’s threadpool to size threads.
Asynchronous system APIs are used by Node.js whenever possible, but where they
do not exist, libuv’s threadpool is used to create asynchronous node APIs based
on synchronous system APIs. Node.js APIs that use the threadpool are:
- all
fsAPIs, other than the file watcher APIs and those that are explicitly
synchronous - asynchronous crypto APIs such as
crypto.pbkdf2(),crypto.scrypt(),
crypto.randomBytes(),crypto.randomFill(),crypto.generateKeyPair() dns.lookup()- all
zlibAPIs, other than those that are explicitly synchronous
Because libuv’s threadpool has a fixed size, it means that if for whatever
reason any of these APIs takes a long time, other (seemingly unrelated) APIs
that run in libuv’s threadpool will experience degraded performance. In order to
mitigate this issue, one potential solution is to increase the size of libuv’s
threadpool by setting the 'UV_THREADPOOL_SIZE' environment variable to a value
greater than 4 (its current default value). However, setting this from inside
the process using process.env.UV_THREADPOOL_SIZE=size is not guranteed to work
as the threadpool would have been created as part of the runtime initialisation
much before user code is run. For more information, see the libuv threadpool documentation.
Useful V8 options#
V8 has its own set of CLI options. Any V8 CLI option that is provided to node
will be passed on to V8 to handle. V8’s options have no stability guarantee.
The V8 team themselves don’t consider them to be part of their formal API,
and reserve the right to change them at any time. Likewise, they are not
covered by the Node.js stability guarantees. Many of the V8
options are of interest only to V8 developers. Despite this, there is a small
set of V8 options that are widely applicable to Node.js, and they are
documented here:
--abort-on-uncaught-exception#
--disallow-code-generation-from-strings#
--enable-etw-stack-walking#
--expose-gc#
--harmony-shadow-realm#
--interpreted-frames-native-stack#
--jitless#
--max-old-space-size=SIZE (in MiB)#
Sets the max memory size of V8’s old memory section. As memory
consumption approaches the limit, V8 will spend more time on
garbage collection in an effort to free unused memory.
On a machine with 2 GiB of memory, consider setting this to
1536 (1.5 GiB) to leave some memory for other uses and avoid swapping.
node --max-old-space-size=1536 index.js --max-semi-space-size=SIZE (in MiB)#
Sets the maximum semi-space size for V8’s scavenge garbage collector in
MiB (mebibytes).
Increasing the max size of a semi-space may improve throughput for Node.js at
the cost of more memory consumption.
Since the young generation size of the V8 heap is three times (see
YoungGenerationSizeFromSemiSpaceSize in V8) the size of the semi-space,
an increase of 1 MiB to semi-space applies to each of the three individual
semi-spaces and causes the heap size to increase by 3 MiB. The throughput
improvement depends on your workload (see #42511).
The default value depends on the memory limit. For example, on 64-bit systems
with a memory limit of 512 MiB, the max size of a semi-space defaults to 1 MiB.
For memory limits up to and including 2GiB, the default max size of a
semi-space will be less than 16 MiB on 64-bit systems.
To get the best configuration for your application, you should try different
max-semi-space-size values when running benchmarks for your application.
For example, benchmark on a 64-bit systems:
for MiB in 16 32 64 128; do
    node --max-semi-space-size=$MiB index.js
done --perf-basic-prof#
--perf-basic-prof-only-functions#
--perf-prof#
--perf-prof-unwinding-info#
--prof#
--security-revert#
--stack-trace-limit=limit#
The maximum number of stack frames to collect in an error’s stack trace.
Setting it to 0 disables stack trace collection. The default value is 10.
node --stack-trace-limit=12 -p -e "Error.stackTraceLimit" # prints 12 - JS
- JavaScript
- Количеству голосов ▼
- Дата создания
Для того чтобы узнать версию Node.js, можно воспользоваться командной строкой. Вот как это делается:
-
Откройте командную строку (Command Prompt) на вашем компьютере.
-
Введите команду
node -vи нажмите Enter. -
В ответ вы увидите версию установленного Node.js на вашем компьютере.
Пример использования:
$ node -v
v14.15.1
В данном примере версия Node.js на компьютере пользователя — v14.15.1.
Таким образом, вы можете легко узнать версию Node.js на вашем компьютере с помощью командной строки.
Чтобы узнать версию Node.js, нужно в командной строке ввести команду
node --version
или её короткий вариант
node -v

Похожие вопросы
Перед тем как рассматривать полезные команды при работе с Node.js, её необходимо установить.
Команды помогают узнать версию Node.js,
node -h — показывает список всех доступных команд Node.js.
node -v, node --version — показывает установленную версию Node.js.
npm -h — показывает список всех доступных команд пакетного менеджера npm.
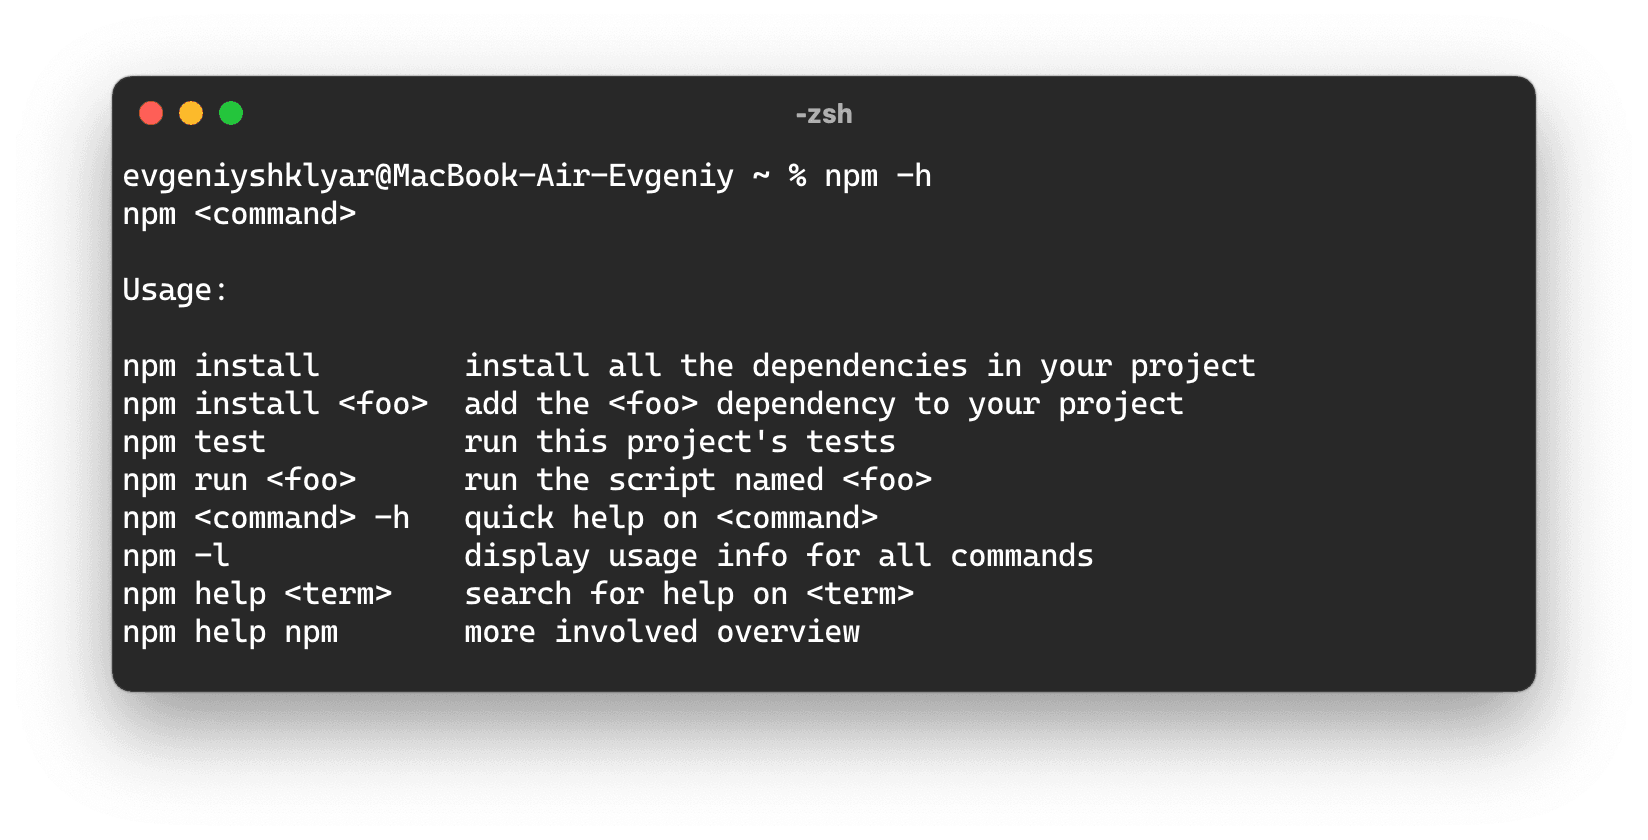
npm -v, npm --version — показывает установленную версию npm.
Команда npm update npm -g позволяет обновить версию npm.
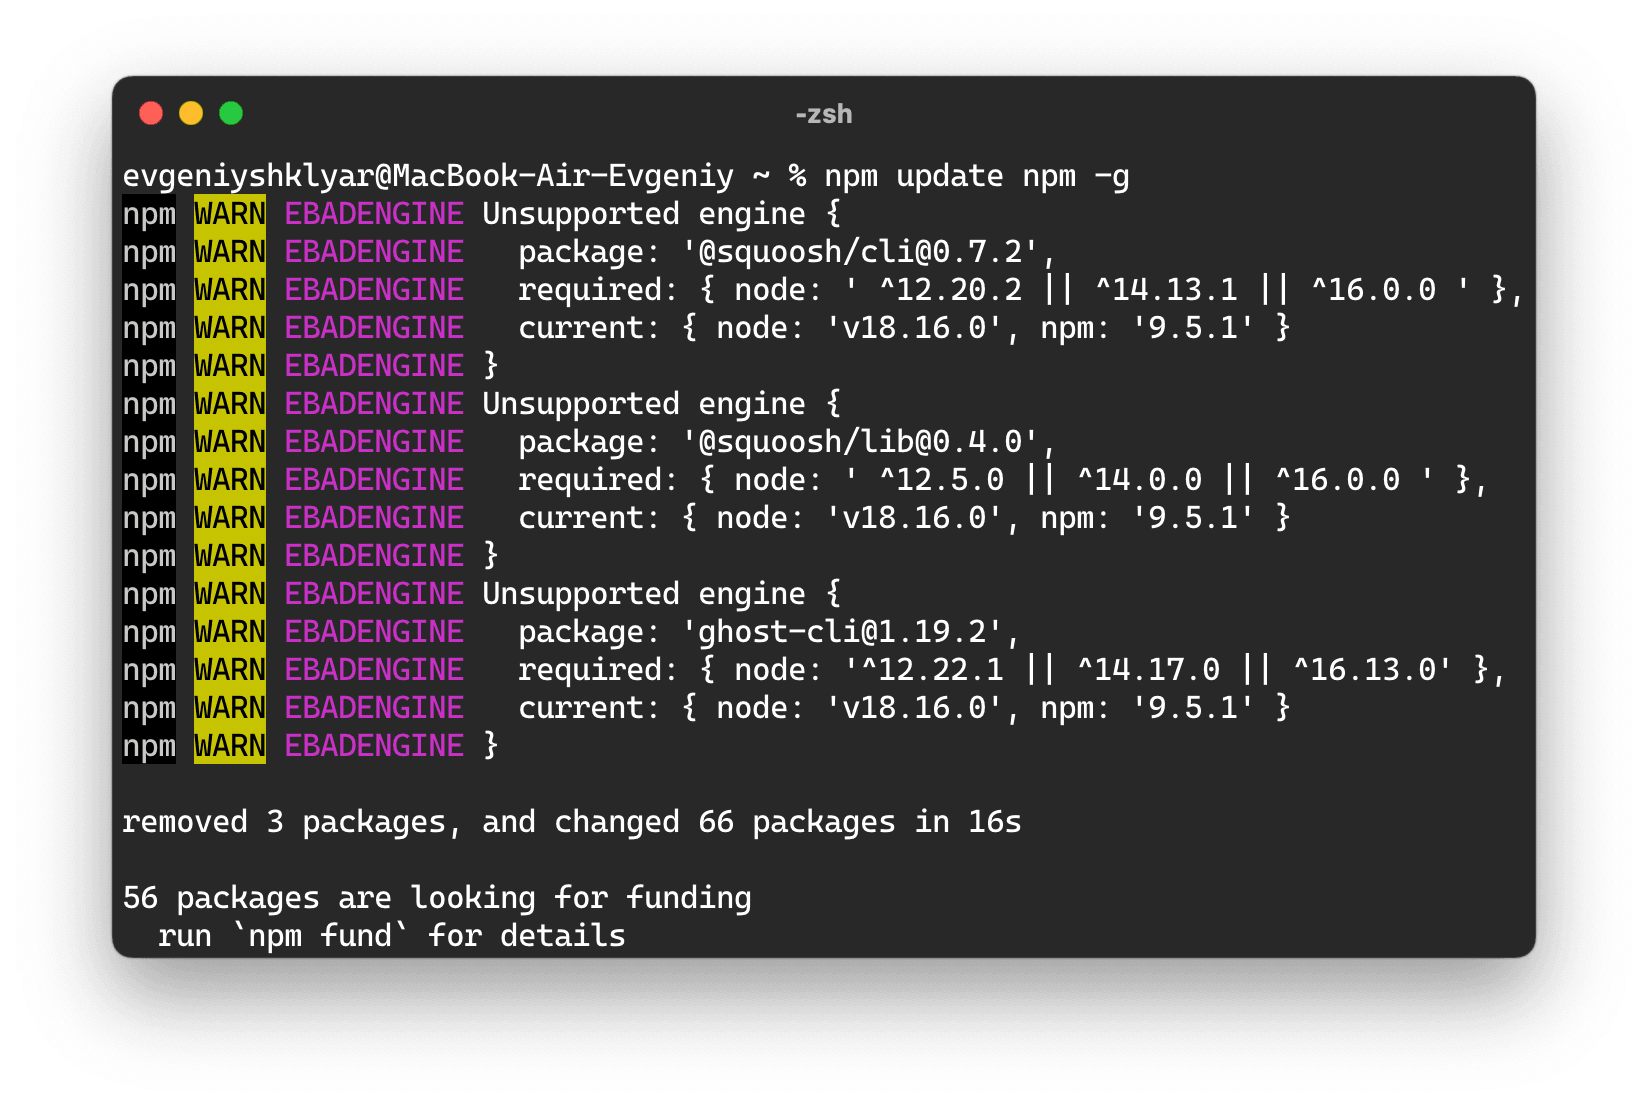
npm list --depth=0 показывает список установленных пакетов.
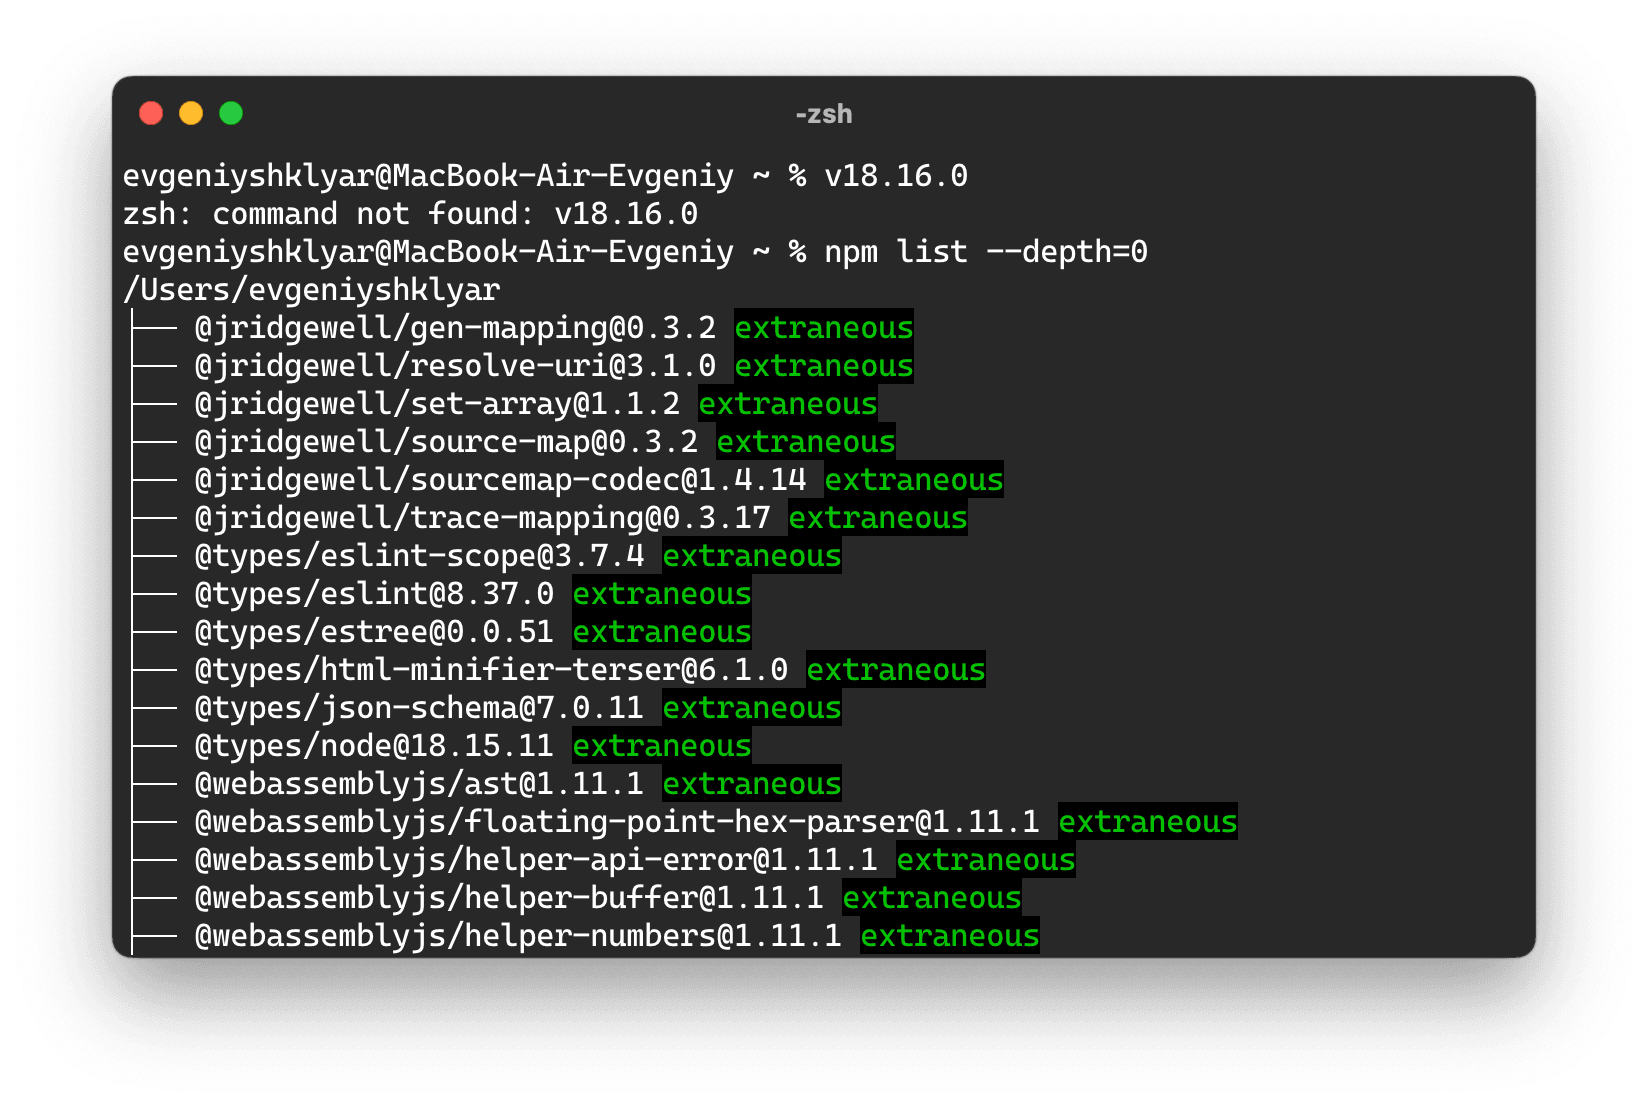
Команда npm outdated --depth=0 покажет список установленных пакетов, которые требуют обновления. Если все пакеты обновлены, список будет пустым.
npm install package — позволяет установить любой пакет по его имени. Если при этом к команде добавить префикс -g пакет будет установлен глобально на весь компьютер.
Команда npm i package является укороченной альтернативой предыдущей команды.
Если вы хотите установить конкретную версию пакета, воспользуйтесь префиксом @ с номером версии. Например, npm install package@1.0.1.
npm uninstall package — удаляет установленный пакет по имени.
Команда npm list package — покажет версию установленного пакета, а команда npm view package version — последнюю версию пакета, которая существует.
Для работы с пакетным менеджером также пригодится файл package.json, который должен лежать в директории, с которой происходит работа в консоли.
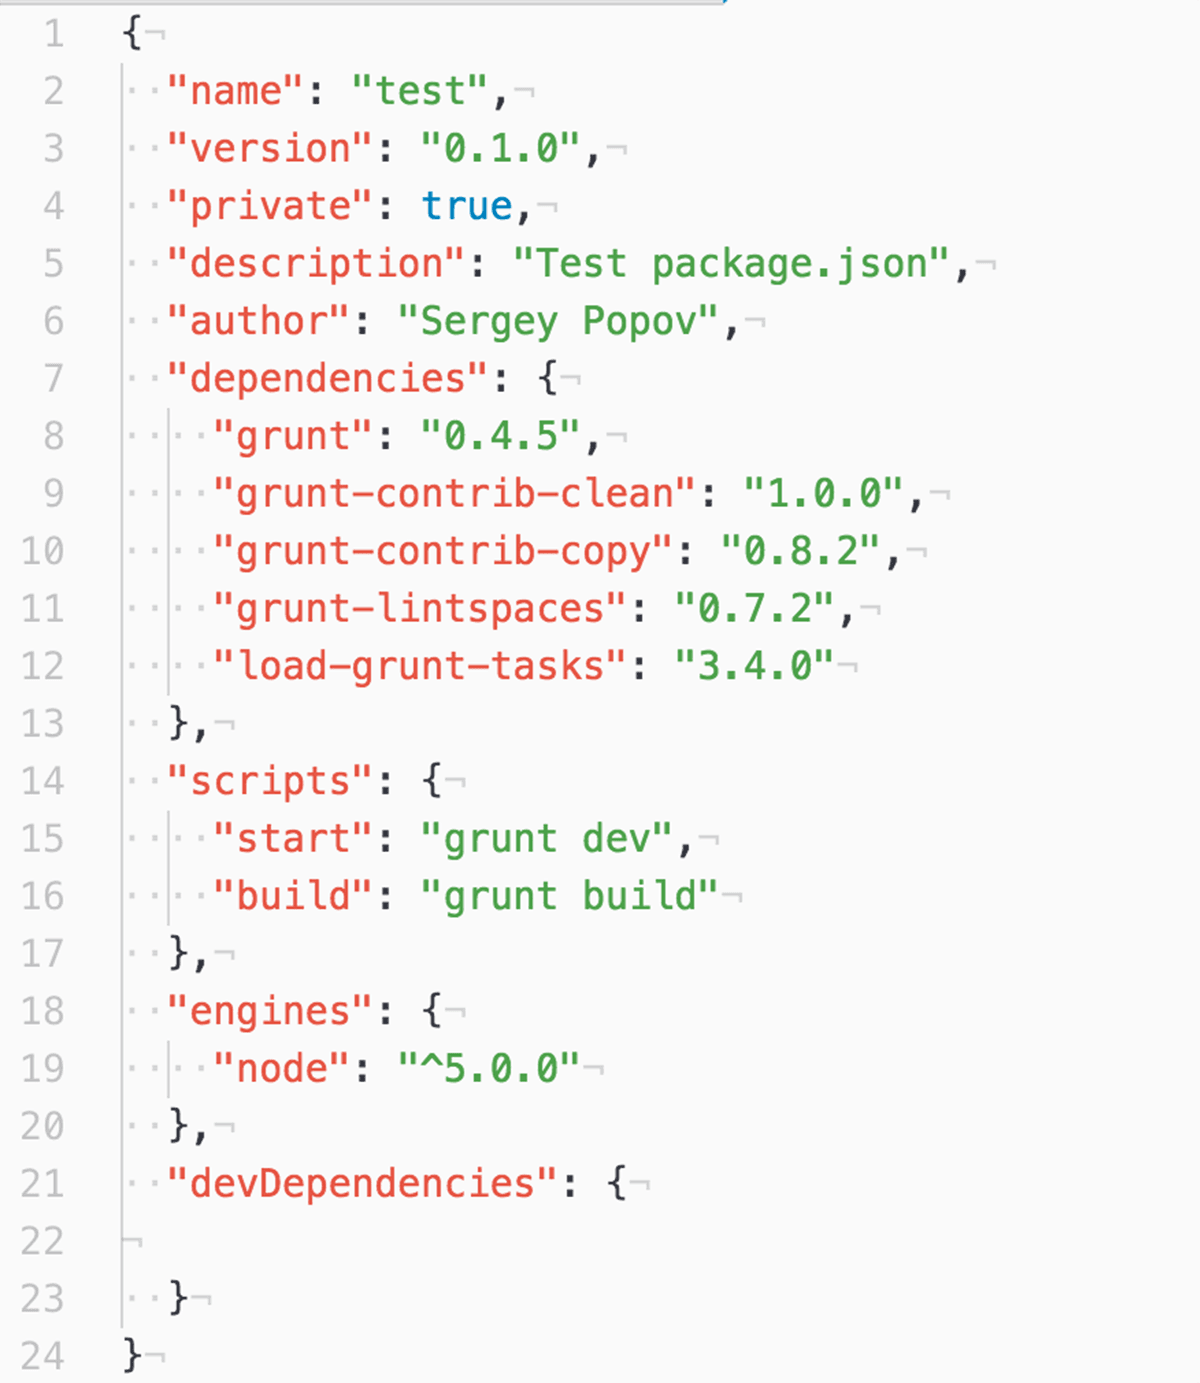
Он содержит различные мета-данные, например, имя проекта, версия, описания и автор. Также он содержит список зависимостей, которые будут установлены, если вызвать из этой папки команду npm install.
Кроме этого он ещё имеет скрипты, которые вызывают другие команды консоли. Например, для этого файла вызов команды npm start вызовет запуск задачи Grunt с именем dev. А команда npm run build вызовет скрипт build, который запустит задачу в Grunt с именем build.
Во время работы часто возникает необходимость установить некоторые пакеты. Если установить пакет с префиксом --save, то он автоматически запишется в package.json в раздел dependencies. Такая же команда с префиксом --save-dev запишет пакет в раздел devDependencies.
Что такое nvm
nvm (или Node Version Manager) — утилита, которая позволяет быстро менять версии Node.js.
Чтобы её установить, достаточно запустить скрипт
curl -o- https://raw.githubusercontent.com/creationix/nvm/v0.31.0/install.sh | bash
Теперь можно установить последнюю версию Node.js, например,5.0 с помощью команды nvm install 5.0. Чтобы начать использовать её, введите команду nvm use 5.0. Таким образом, можно быстро переключаться между версиями, например, для тестирования.
«Доктайп» — журнал о фронтенде. Читайте, слушайте и учитесь с нами.
ТелеграмПодкастБесплатные учебники

Все (ну или почти все) способы автоматически перезагрузить страницу раз в N секунд
Иногда страницу нужно просто перезагрузить. Полностью. Не компонент, не блок, а именно целиком. Без обсуждений, без лишней логики. Например, чтобы:
- экран с результатами обновлялся каждые 10 секунд;
- интерфейс на стенде показывал последние данные без кнопок;
- страницы в интранете не устаревали, пока никто не смотрит.
Это можно сделать в любой связке: HTML, JS, Python, PHP, Go, Node.js — не важно. Ну и если говорить совсем прямо, то совсем разных способов всего три, а остальное просто вариации.
Читать дальше
Поиск с конца массива в JavaScript: findLast и findLastIndex в JavaScript
С недавних пор в JavaScript появились два полезных метода для массивов: findLast и findLastIndex. Они делают то же, что и привычные find и findIndex, только проходят массив с конца.
Читать дальше

Vite 6: Новый этап в развитии фронтенд-разработки
Vite — это современный инструмент сборки, который значительно ускоряет процесс разработки фронтенда, благодаря своим невероятно быстрым и удобным функциям. И вот, наконец, вышел новый релиз Vite 6, который приносит массу улучшений и новых возможностей для разработчиков. Давайте посмотрим, что нового появилось в Vite 6 и как это может повлиять на вашу работу.
Читать дальше

Всё, что нужно знать о работе с API в JavaScript: пошаговый разбор
Работа с API — это основа веб-разработки. Если вы хотите получать данные с сервера, отправлять информацию или взаимодействовать с внешними сервисами (например, картами Google, платёжными системами или погодными сервисами), вам не обойтись без этого навыка. Разберём работу с API на практике: от базовых запросов до обработки ошибок и аутентификации.
Читать дальше
Ошибка JavaScript «Uncaught TypeError: Cannot read property of undefined». Что делать?
Описание проблемы
Эта ошибка возникает, когда вы пытаетесь получить доступ к свойству объекта, который в данный момент имеет значение undefined. Например:
let obj = undefined;
console.log(obj.property); // Uncaught TypeError: Cannot read property 'property' of undefined
Возможные причины
- Объект не был инициализирован. Возможно, переменная еще не была объявлена или ей не присвоено значение.
- Неправильный путь к данным. Вы пытаетесь обратиться к свойству объекта, но объект отсутствует в цепочке.
- Асинхронность. Данные могли еще не загрузиться или быть доступны в момент обращения.
- Опечатка в названии свойства. Вы могли неверно написать имя свойства объекта.
Шаги по исправлению
1. Проверка объекта перед доступом к свойствам
Убедитесь, что объект существует, прежде чем пытаться получить его свойства.
if (obj !== undefined && obj !== null) {
    console.log(obj.property);
}

// Или современный способ:
console.log(obj?.property); // Вернет undefined, если obj равен null или undefined
2. Инициализация объекта перед использованием
Если переменная должна содержать объект, убедитесь, что он инициализирован.
Неверный код:
let data;
console.log(data.user.name); // Ошибка
Исправление:
let data = { user: { name: "Иван" } };
console.log(data.user.name); // "Иван"
3. Проверка API или данных с сервера
Если данные загружаются с сервера, добавьте проверку, что ответ корректен.
fetch('https://api.example.com/data')
    .then(response => response.json())
    .then(data => {
        if (data?.user?.name) {
            console.log(data.user.name);
        } else {
            console.error('Данные пользователя отсутствуют');
        }
    });
4. Использование значений по умолчанию
Для предотвращения ошибок можно задавать значения по умолчанию.
let user = undefined;
let userName = user?.name || "Гость";
console.log(userName); // "Гость"
5. Отладка с помощью console.log
Проверяйте промежуточные значения переменных в консоли браузера.
console.log(obj); // Убедитесь, что объект определен Пример из жизни
Вы пишете код для отображения имени пользователя из объекта user:
let user = null; // Данные еще не загружены
console.log(user.name); // Uncaught TypeError: Cannot read property 'name' of null
Исправление:
let user = null;
console.log(user?.name || "Имя пользователя не найдено"); // "Имя пользователя не найдено"
Итог
Следуя этим рекомендациям, вы сможете избежать ошибок, связанных с доступом к свойствам undefined или null. Если ошибка продолжает появляться, убедитесь, что данные корректно загружаются, и используйте инструменты отладки.
Как исправить ошибку JavaScript «Uncaught ReferenceError: variable is not defined»
Эта ошибка возникает, когда вы пытаетесь обратиться к переменной, которая не была объявлена в текущей области видимости. Например:
console.log(myVariable); // Uncaught ReferenceError: myVariable is not definedВозможные причины
- Вы пытаетесь обратиться к переменной до ее объявления.
- Переменная объявлена внутри функции и недоступна за ее пределами.
- Ошибка в написании имени переменной (опечатка).
Шаги по исправлению
1. Проверка объявления переменной
Убедитесь, что переменная объявлена перед ее использованием.
Неверный код:
console.log(myVariable); // ОшибкаИсправление:
let myVariable = 10;
console.log(myVariable); // 10
2. Правильное определение области видимости переменной
Если переменная объявлена внутри функции, она недоступна за ее пределами.
Неверный код:
function myFunction() {
    let localVariable = "Привет";
}
console.log(localVariable); // Ошибка
Исправление:
function myFunction() {
    let localVariable = "Привет";
    console.log(localVariable); // "Привет"
}
myFunction();
3. Использование глобальных переменных
Если переменная должна быть доступна везде, объявляйте ее глобально (но избегайте этого, если возможно).
let globalVariable = "Глобальная переменная";
function showVariable() {
    console.log(globalVariable);
}
showVariable(); // "Глобальная переменная"
4. Проверка имени переменной на ошибки
Проверьте, нет ли опечаток в имени переменной.
Неверный код:
let myVariable = "Данные";
console.log(myVarible); // Ошибка
Исправление:
let myVariable = "Данные";
console.log(myVariable); // "Данные"
5. Использование typeof для проверки существования переменной
Вы можете использовать оператор typeof, чтобы проверить, объявлена ли переменная.
if (typeof myVariable !== "undefined") {
    console.log(myVariable);
} else {
    console.log("Переменная не определена");
}
Пример из жизни
Вы пишете функцию для проверки данных пользователя:
function checkUser() {
    if (userName) {
        console.log(`Добро пожаловать, ${userName}!`);
    }
}
checkUser(); // Ошибка: userName не определен
Исправление:
let userName = "Иван";
function checkUser() {
    if (userName) {
        console.log(`Добро пожаловать, ${userName}!`);
    }
}
checkUser(); // "Добро пожаловать, Иван!"
Итог
Эта ошибка часто возникает из-за опечаток или неверной области видимости. Убедитесь, что переменные объявлены и доступны в нужных местах. Если необходимо, используйте typeof для проверки их существования.
Как исправить ошибку JavaScript «Uncaught TypeError: Cannot set property of undefined»
Эта ошибка возникает, когда вы пытаетесь присвоить значение свойству объекта, который не существует (имеет значение undefined или null). Например:
let obj;
obj.property = "value"; // Uncaught TypeError: Cannot set property 'property' of undefined
Возможные причины
- Объект не был инициализирован.
- Вы обращаетесь к объекту, который уже удален или еще не создан.
- Ошибка в цепочке данных, например, промежуточное свойство объекта равно
undefined.
Шаги по исправлению
1. Инициализация объекта перед использованием
Убедитесь, что объект объявлен и инициализирован перед тем, как вы присваиваете его свойствам значения. Неверный код:
let obj;
obj.property = "value"; // Ошибка
Исправление:
let obj = {};
obj.property = "value"; // Работает
2. Проверка существования объекта перед доступом
Проверяйте объект на null или undefined, чтобы избежать ошибок. Пример:
let obj;
if (obj) {
    obj.property = "value";
} else {
    console.log("Объект не определен");
}
3. Использование опциональной цепочки
Если ошибка возникает в глубоко вложенных объектах, используйте опциональную цепочку. Пример:
let obj;
obj?.nestedProperty?.subProperty = "value"; // Не вызовет ошибку
4. Проверка асинхронных данных
Если объект формируется после загрузки данных, убедитесь, что данные доступны перед их использованием.
let obj;
setTimeout(() => {
    obj = { property: "value" };
    console.log(obj.property); // Работает
}, 1000);

// Нельзя обращаться к obj до инициализации:
console.log(obj.property); // Ошибка
Пример из жизни
Вы загружаете данные пользователя с сервера и пытаетесь установить свойство объекта:
let user;
user.name = "Иван"; // Ошибка
Исправление:
let user = {};
user.name = "Иван"; // Работает
Итог
Чтобы избежать ошибки «Cannot set property of undefined», убедитесь, что объект существует и инициализирован. Используйте проверки на null, опциональную цепочку или инициализируйте объект перед работой с его свойствами.
Как исправить ошибку JavaScript «Uncaught SyntaxError: Unexpected token»
Эта ошибка возникает, когда интерпретатор JavaScript сталкивается с неожиданным токеном (символом) в коде, который нарушает синтаксические правила. Например:
let obj = { key: "value", }; // Uncaught SyntaxError: Unexpected token }Возможные причины
- Лишние или пропущенные символы, такие как запятые, точки с запятой, кавычки или скобки.
- Неправильное использование синтаксиса, например, забытые конструкции или операторы.
- Смешение разных типов кавычек (например, двойных и одинарных) без соблюдения правил их вложенности.
Шаги по исправлению
1. Проверка корректности синтаксиса
Убедитесь, что все запятые, точки с запятой и кавычки находятся на своих местах. Неверный код:
let obj = { key: "value", }; // Лишняя запятаяИсправление:
let obj = { key: "value" }; // Правильный синтаксис2. Проверка закрытия скобок
Проверьте, закрыты ли все фигурные, круглые и квадратные скобки. Неверный код:
if (true {
    console.log("Ошибка!");
}
Исправление:
if (true) {
    console.log("Исправлено!");
}
3. Проверка типов кавычек
Не смешивайте одинарные и двойные кавычки. Неверный код:
let str = "Привет'; // ОшибкаИсправление:
let str = "Привет"; // Или let str = 'Привет';4. Использование отладчика
Откройте консоль браузера или отладчик в вашей IDE, чтобы найти строку с ошибкой. Она будет указана в сообщении об ошибке.
// В консоли может быть указано:
Uncaught SyntaxError: Unexpected token } at script.js:10
Исправьте строку, где произошла ошибка.
5. Проверка работы кода в строгом режиме
Добавьте "use strict"; в начало вашего файла или функции, чтобы браузер проверял ваш код на соответствие строгому синтаксису.
"use strict";
let obj = { key: "value" };
console.log(obj);
Пример из жизни
Вы пытаетесь использовать стрелочную функцию, но забыли закрыть скобки:
const add = (a, b => {
    return a + b;
};
Исправление:
const add = (a, b) => {
    return a + b;
};
Итог
Чтобы избежать ошибок «Unexpected token», всегда проверяйте синтаксис вашего кода на наличие лишних или пропущенных символов, используйте инструменты отладки и следите за правильным использованием конструкций JavaScript.

300кк в наносекунду
Игра, где нужно забрать своё и продержаться ещё один день.
Читать дальше

9 книг по JavaScript для начинающих в 2024
Все вокруг говорят, что книги — прошлый век. Но вовремя прочитанная хорошая книжка может здорово помочь в изучении нового языка или технологии, а то и вообще целиком объяснить какую-нибудь важную штуку. Например, какие бывают алгоритмы, или зачем нужен рефакторинг. К тому же, хоть фреймворки меняются каждый год, основы обычно долго не меняются.
Мы опросили знакомых разработчиков, узнали, что читают они сами, и предлагаем вам подборку хороших книг по JavaScript.
Читать дальше
Knowing what Node.jsNode.js is an asynchronous event-driven JavaScript runtime and is the most effective when building scalable network applications. Node.js is free of locks, so there’s no chance to dead-lock any process. version you have in a project is vital because it affects the Node and JavaScript language features you can use. Also, you might not want to miss out on essential security patches or experience compatibility problems.
There are several ways to check the Node version you’re using. You can use basic command line prompts, npmnpm is a software registry that serves over 1.3 million packages. npm is used by open source developers from all around the world to share and borrow code, as well as many businesses. There are three components to npm: the website the Command Line Interface (CLI) the registry Use the website to discover and download packages, create user profiles, and…, or nvm as well to do it. In this article below, we list ways for you to check your Node version with different methods, on different operating systems.
Check your Node version in one step
To check the version of Node.js on your computer (may it run MacOS, Windows or a Linux distro such as Ubuntu), run the following command:
$ node -v
This will return the current version of node that is installed on your system.
If you want to learn more about Node.js, you can find instructions and official docs on the node website. https://nodejs.org/en/download/
To check the latest version of Node for both the LTSLTS means long-term support. The acronym is often used to mark Node.js release lines that will be maintained and supported for an extended period. There are two separate kinds of LTS releases: Active and Maintenance. The Active release line often gets new features and other improvements beside security patches and bug fixes, and the Maintenance only gets the latter. It… and Current versions, check out our blog post that collects and lists all major updates.

Using npm to check your node version (and also update it)
Alternatively, you can use a package manager like npm to update Node.
https://docs.npmjs.com/cli/update-node
$ npm install -g npm@latest
then
$ npm update -g node
will update node and npm.
If you are having issues with your node installation, you can try the following commands:
$ npm cache clean
$ npm install -g --unsafe-perm node
These commands will try to clean up any issues with your npm cache and install Node with permissions that may help resolve any installation issues.
To only check your npm version, you can use the following command:
$ npm -v
Managing your Node versions with nvm
NVM (Node Version Manager) is a bash script that allows you to manage multiple active versions of Node.js. It allows you to install, uninstall, list, and switch between node versions.
The preferred way for managing your local node.js versions is to use nvm, which can be installed like this:
curl https://raw.githubusercontent.com/creationix/nvm/v0.33.3/install.sh | bash
Then, use this to install node.js:
$ nvm install node
To use a specific version of node.js, you can do:
$ nvm use node
If you want to uninstall node.js, you can type:
$ nvm uninstall node
To update Node to the latest LTS version, you can use the nvm update node command.
For further details on how to install specific versions, see the nvm docs: https://github.com/nvm-sh/nvm
If you’re using Windows, you’ll need to use nvm-windows, which has almost the same API as nvm, but is a completely different project, and has a different philosophy. https://github.com/coreybutler/nvm-windows
What is Node.js?
If you are already familiar with Node, but need a quick refresher about it, we’ve got you covered:
Node.js is a platform built on Chrome’s JavaScript runtime for easily building fast, scalable network applications. It uses an event-driven, non-blocking I/O model that makes it lightweight and efficient, perfect for data-intensive real-time applications that run across distributed devices.
Node.js is open-source and free to use. It also provides a first-class development experience, making it an ideal platform for web-based applications. Node.js also has a large community of developers who are constantly creating new modules and libraries to make development easier.
Node.js applications are written in JavaScript, and can be run on Mac OS X, Windows, and Linux which makes it fully cross-platform. Node.js has an event-driven architecture and a non-blocking I/O model that makes it lightweight and efficient. These features make it perfect for data-intensive, real-time applications that run across distributed devices.
There are a few things to keep in mind when writing Node.js applications. First, since Node.js is asynchronous, you need to use promises, asyncAsynchrony, in software programming, refers to events that occur outside of the primary program flow and methods for dealing with them. External events such as signals or activities prompted by a program that occur at the same time as program execution without causing the program to block and wait for results are examples of this category. Asynchronous input/output is an… functions, callbacks or events to handle data flow. Second, Node.js is single-threaded, so you need to be careful not to block the thread with long computations.
How the Node release schedule works
A few words about the Node.js release schedule:

Node.js releases are identified by a major and minor version number, e.g. v4.2.0. Minor version releases (e.g. v4.2.1) are made every few weeks and contain new features and bug fixes. Major version releases (e.g. v5.0.0) are made every six months or so and may contain breaking changes.
Nowadays, the LTS (long-term support) Node.js versions get an even number, like 16.14.0, while Current releases have an odd version number, like 17.5.0.

Node.js is an open-source server-side JavaScript runtime environment built on Chrome’s V8 JavaScript engine. Node.js is suitable for creating scripts that generate and render dynamic content and also read, open and close files on the server.
Node.js follows the event-driven architecture. It is also nonblocking, asynchronous, and lightweight, making it suitable for creating event-driven applications. Furthermore, Node.js is also cross-platform, single-threaded, and memory efficient.
Node.js can be downloaded from its official website nodejs.org.
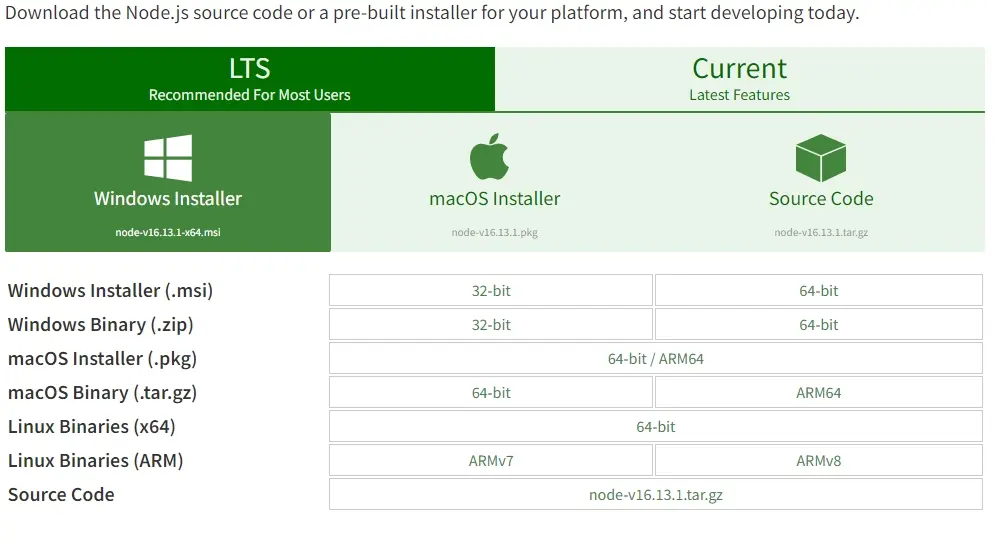
Irrespective of the underlying operating system running the Node.js .msi installer is a straightforward process that involves accepting the terms and conditions and clicking Next a couple of times before clicking Install. Installing Node.js on windows requires that we have administrator privileges.
Using the terminal or command prompt in the respective operating system, we can verify that Node.js has been successfully installed by running the command below.
Sample output:
v16.13.1// Version - v16.13.1 was the most current LTS release at the time of writing this article.
Running the command below will equally return the current version of Node.js installed in your system.
Sample output:
Node.js is bundled with the latest version of npm, and therefore having installed Node.js, we have also installed the Node Package Manager. NPM is the world’s largest software registry that allows developers to publish and share useful packages.
At the time of writing this article, the Node.js download included npm 8.1.2. We can verify the version of npm installed alongside Node.js by running the command below in the terminal or PowerShell.
Sample output:
We can use the Node Package Manager to determine the version of Nodejs that is installed in the system by running the command below in the command prompt.
Sample output:
Alternatively, the command below can be used in the terminal or command line when npm is installed to determine the current version of Node.js installed in the system.
C:\Users\DelftStack>npm --v nodejs
Sample output:
Like Python, Node.js also has a REPL ( read, evaluate, print, loop ) virtual environment to execute and test simple tasks in Node.js and JavaScript. To launch the Node REPL we can simply do so by typing the word node on the command line. By doing so, we enter into this Node.js interactive environment and determine the version of Node.js that we are currently running.
Sample output:
Welcome to Node.js v16.13.1.
Type ".help" for more information.
>
Enjoying our tutorials? Subscribe to DelftStack on YouTube to support us in creating more high-quality video guides. Subscribe