
-
System requirements for installing Windows 10
Keeping Windows 10 up-to-date
More information on hard drive space requirements to install or update Windows 10
Feature-specific requirements for Windows 10
Language versions
Feature deprecations and removals
These are the basic requirements for installing Windows 10 on a PC. If your device does not meet these requirements, you may not have the great experience intended with Windows 10 and might want to consider purchasing a new PC.
There may be additional requirements over time for updates, as well as requirements to turn on specific features within the OS.
Windows 10 is designed to deliver updates for the supported lifetime of the device. Two types of updates may be provided: quality updates and feature updates. Quality updates include both security and non-security updates and are typically targeted to be released once a month. Feature updates also include security and non-security fixes as well as new features to Windows 10 and are typically provided twice a year. Ensuring that your device receives these updates and is kept up-to-date is important for your device security. Windows 10 periodically checks for updates so you don’t have to. When an update is available—and sufficient free disk space is available on your device—it will be automatically installed. So that Windows 10 continues to stay updated, it’s important to ensure your device has sufficient free space. See additional applicable details in the following notes.
Important notes about updates:
- A device might not be able to receive updates if the device hardware is incompatible, if it lacks current drivers or sufficient available hard drive space, or if it’s otherwise outside of the Original Equipment Manufacturer’s (“OEM”) support period. Visit the Windows Lifecycle Fact Sheet or the Lifecycle FAQ for Windows products to learn more about the servicing timeline for each feature update.
- Some of the disk space needed for installing updates is only temporarily required. Typically, ten days after installing an update, a disk cleanup will be automatically performed to delete copies of the older, unneeded Windows files and free up space again.
- Some of the disk space needed for installing updates is only temporarily required. Typically, ten days after installing an update, a disk cleanup will be automatically performed to delete copies of the older, unneeded Windows files and free up space again.
- Not all features in an update will work on all devices.
- An internet connection is required to perform updates and Internet access (ISP) fees might apply.
- If you need assistance installing an update, Windows 10 Update Assistant may be able to help.
The size of the Windows operating system that comes with your device and the amount of space needed to download and install Windows updates, are highly variable as they depend on a variety of factors. Visit here to learn why. The factors that impact the amount of free hard drive space needed to take an update include: the versions of Windows previously installed on the machine, the amount of disk space available to reuse from Windows files, such as the virtual memory pagefile or hibernation file, which applications are installed on your device and how those applications store data. Starting with the May 2019 Update, the system requirements for hard drive size for clean installs of Windows 10 as well as new PCs changed to a minimum of 32GB. The 32GB or larger drive requirement is set to leave space for users to install apps and to keep data on the device. Installing Windows or updating from a previous version of Windows on devices with less than 32GB storage will continue to work if the device has enough free space available. When updating, Windows will attempt to automatically free up enough hard drive space and guide you through freeing up even more if the automatic cleanup is not sufficient. You can also take steps to free up space on your own. For more information, see Free up space to install the latest Windows 10 update or visit the related FAQ.
In addition to the requirements above that are needed to run Windows, some features have additional requirements. In some cases, features included with updated versions of Windows 10 will be best experienced with newer processors. For specific hardware support please refer to your Original Equipment Manufacturer (OEM). Below are some additional details regarding requirements for key features:
- BitLocker Drive Encryption (available with Windows 10 Pro or Windows 10 Enterprise only) requires a Trusted Platform Module (TPM) 1.2 or higher and Trusted Computing Group (TCG)-compliant BIOS or UEFI. BitLocker can be used on devices without TPM, but you will need to save a startup key on a removable device such as a USB flash drive. TPM 2.0 and InstantGo support is required when you want to automatically encrypt the local drive when joining a device to Azure Active Directory (AAD). Check with your PC manufacturer to confirm if your device supports the correct TPM version and InstantGo for the scenario you want to enable.
- BitLocker To Go requires a USB flash drive (available in Windows 10 Pro and Windows 10 Enterprise only).
- Client Hyper-V requires a 64-bit system with second level address translation (SLAT) capabilities and additional 2 GB of RAM (available in Windows 10 Pro and Windows 10 Enterprise only).
- Copilot in Windows 10 requires greater than 4 GB of RAM and a minimum 720p display resolution. Copilot is currently available in preview in select global markets on compatible Windows 10 Home and unmanaged Pro devices running version 22H2 or higher. It is our intention to add additional markets and compatibility over time.
- Cortana is only currently available on Windows 10 for the United States, United Kingdom, China, France, Italy, Germany, Brazil, Mexico, Japan, Canada, Spain, Australia and India.
- Microsoft account is required for some features.
- Miracast requires a display adapter which supports Windows Display Driver Model (WDDM) 1.3, and a Wi-Fi adapter that supports Wi-Fi Direct.
- Movies & TV application is not available in all regions. For the most up-to-date list of regions, please go to the Movies & TV information page.
- Secure boot requires firmware that supports UEFI v2.3.1 Errata B and has the Microsoft Windows Certification Authority in the UEFI signature database.
- Skype is available only in select countries and regions. Calling to select countries and regions only. Excludes special, premium and non-geographic numbers. For details, visit the Office FAQ page.
- Snap: The number of applications that can be snapped will depend upon the minimum resolution for the application with a limit of two applications in Tablet mode and four applications in Desktop mode.
- Speech recognition will vary by device microphone. For a better speech experience, you will need a:
- High fidelity microphone array
- Hardware driver with microphone array geometry exposed
- Tablet mode is available on tablets and 2-in-1s with GPIO indicators or those that have a laptop and slate indicator will be able to be configured to enter «tablet mode» automatically.
- Touch: To use touch, you need a tablet or a monitor that supports multi-touch.
- Two-factor authentication requires the use of a PIN, Biometric (finger print reader or illuminated infrared camera), or a phone with Wi-Fi or Bluetooth capabilities.
- Windows Hello requires a camera configured for near infrared (IR) imaging or fingerprint reader for biometric authentication. Devices without biometric sensors can use Windows Hello with a PIN or a portable Microsoft compatible security key.
- Xbox application requires an Xbox Live account, which is not available in all regions. For the most up-to-date list of regions, please go to Xbox Live Countries and Regions website.
- Wi-Fi Direct Printing requires a Wi-Fi adapter that supports Wi-Fi Direct and a device that supports Wi-Fi Direct Printing.
Windows 10 full localization languages include: Arabic (Saudi Arabia), Bulgarian (Bulgaria), Chinese (PRC), Chinese (Taiwan), Croatian (Croatia), Czech (Czech Republic), Danish (Denmark), Dutch (Netherlands), English (United Kingdom), English (United States), Estonian (Estonia), Finnish (Finland), French (France), French (Canada), German (Germany), Greek (Greece), Hebrew (Israel), Hungarian (Hungary), Italian (Italy), Japanese (Japan), Korean (Korea), Latvian (Latvia), Lithuanian (Lithuania), Norwegian, Bokmål (Norway), Polish (Poland), Portuguese (Brazil), Portuguese (Portugal), Romanian (Romania), Russian (Russia), Serbian (Latin, Serbia), Slovak (Slovakia), Slovenian (Slovenia), Spanish (Spain), Spanish (Mexico), Swedish (Sweden), Thai (Thailand), Turkish (Turkey), Ukrainian (Ukraine).
Additional languages available as Language Interface Packs
When upgrading to Windows 10 from a previous version of Windows such as Windows 7 or Windows 8.1 as well as when installing a newer update to Windows 10, some features may be deprecated or removed. Please see below for information regarding some of the key removed features:
- Desktop Messaging App: The messaging app on Desktop has a sync feature that can be used to sync SMS text messages received from Windows Mobile and keep a copy of them on the Desktop. Starting with the May 2019 Update (Windows 10, version 1903), the sync feature has been removed from all devices. Due to this change, you will only be able to access messages from the device that received the message.
- Wi-Fi WEP and TKIP: Starting with the May 2019 Update (Windows 10, version 1903), a warning message will appear when connecting to Wi-Fi networks secured with WEP or TKIP, which are not as secure as those using WPA2 or WPA3. In a future release, any connection to a Wi-Fi network using these old ciphers will be disallowed. Wi-Fi routers should be updated to use AES ciphers, available with WPA2 or WPA3.
- Cortana: Cortana has been updated and enhanced in the Windows 10 May 2020 Update (Windows 10, version 2004). With these changes, some previously available consumer skills such as music, connected home, and third-party skills will no longer be available. Get detailed information here.
- Phone Companion: As of the October 2018 Update (Windows 10, version 1809), Phone Companion is removed from your PC. Use the Phone page in the Settings app to sync your mobile phone with your PC. It includes all the Phone Companion features.
- HomeGroup: HomeGroup was removed starting with the April 2018 Update (Windows 10, version 1803), but you still have the ability to share printers, files, and folders. When you update from an earlier version of Windows 10, you won’t see HomeGroup in File Explorer, the Control Panel, or Troubleshoot (Settings > Update & Security > Troubleshoot). Any printers, files, and folders you shared using HomeGroup will continue to be shared. Instead of using HomeGroup, you can now share printers, files, and folders by using features that are built into Windows 10:
- Share your network printers
- Share files in File Explorer
- For Xbox 360 and HomeGroup users, please see more information on streaming media
- People app: In Windows 10, the People app shows mail from Microsoft 365 contacts and contacts from your school or work organization under Conversations. Starting with the April 2018 Update (Windows 10, version 1803), in order to see new mail in the People app from these specific contacts, you need to be online, and you need to have signed in with either a Microsoft 365 account or, for work or school organization accounts, through the Mail, People, or Calendar apps. Please be aware that you’ll only see mail for work and school organization accounts and some Microsoft 365 accounts.
- Reader app: The Reader app was removed from Windows 10 starting with the Fall Creators Update (Windows 10, version 1709). For reading PDF files, Microsoft Edge is the recommended replacement app and offers similar functionality as well as additional features including improved accessibility support, improved Inking, and support for AskCortana. Similarly, Windows XPS Viewer is recommended when reading XPS files and Windows Photos app for viewing TIFF files. Note that users of earlier Windows 10 versions can continue using the Reader app.
- Windows Journal: Windows Journal was removed starting with the Windows 10 Anniversary Update (Windows 10, version 1607). After Windows Journal is removed, you will no longer be able to open or edit Journal files (with .JNT or .JTP extensions). In place of Windows Journal, we encourage you to switch to OneNote. If you need to open or edit your journal files, more information is available here.
- Windows Media Digital Rights Management (WMDRM): WMDRM is no longer supported starting with the Windows 10 Anniversary Update (Windows 10, version 1607). You are no longer able to play music or video files that were protected by this rights management technology. Click here to learn more.
The following changes impact devices that are upgrading to Windows 10 from Windows 7, Windows 8 or Windows 8.1:
- Windows Media Center: If you have Windows 7 Home Premium, Windows 7 Professional, Windows 7 Ultimate, Windows 8 Pro with Media Center, or Windows 8.1 Pro with Media Center and you install Windows 10, Windows Media Center will be removed.
- Mobile Device Management (MDM): MDM functionality will not be available in Windows 10 Home edition.
- Windows 7 desktop gadgets: These will be removed as part of installing Windows 10.
- Solitaire, Minesweeper, and Hearts Games: These games that came pre-installed on Windows 7 will be removed as part of installing the Windows 10 upgrade. Microsoft has released our version of Solitaire and Minesweeper called the «Microsoft Solitaire Collection» and «Microsoft Minesweeper».
- Floppy drives: If you have a floppy drive, you will need to download the latest driver from Windows Update or from the manufacturer’s website.
- If you have Windows Live Essentials installed on your system, the OneDrive application is removed and replaced with the inbox version of OneDrive.
- OneDrive place holder files: OneDrive placeholder files are not supported in Windows 10. Windows 8.1 displayed placeholders for files available in OneDrive but not locally on the device. In Windows 10, users can choose which folders to sync from OneDrive settings.
- Snap: Snap is limited to two applications in Tablet mode.
1
dim56
[23.3K]
8 лет назад
Windows 10 можно установить на все компьютеры, на которых идет Windows 7 и на большинство с Windows XP.
Если у вас 1 Гб ОЗУ, 20 Гб места на жестком диске, то можно установить Windows 10. Хотя конечно желательно минимум 2 Гб ОЗУ, а лучше 4. Процессор не имеет значения, но если вам нужна 64-битная Windows 10, то процессор должен поддерживать x64.
автор вопроса выбрал этот ответ лучшим
комментировать
в избранное
ссылка
отблагодарить
If you want to know if your PC will be compatible with Microsoft Windows 10, you can use the Windows 10 compatibility checker. Right-click the «Get Windows 10» icon in your taskbar and click «Check your upgrade status». Then, click the three horizontal lines in the upper-right corner and choose «Check your PC».
When Windows 10 landed, I updated right away. However, some friends of mine had problems installing Windows 10, especially a couple of them that were still using Windows Vista. I was able to get them to run the Windows 10 compatibility checker over the phone, and with that, they could see whether their system was compatible or not.
Wondering how do I check my computer for Windows 10 compatibility? Well, I’ll show you exactly how to do that here. Let’s jump right into it.
Contents
How Do I Know If My Computer Can Upgrade to Windows 10?
There is a useful tool built into the operating system that will give you a Windows 10 compatibility report.
Various hardware manufacturers make computer parts, and some may not have updated drivers for Windows 10 yet. If you have a vital piece of hardware yet to have supported drivers, you may be unable to install this new version of Windows.
There are different ways to access the compatibility checker, but the most popular one involves the «Get Windows 10» icon in your taskbar. Follow the steps below to get this going:
- Look at the system tray at the bottom-right corner of your screen. You should see an icon that looks like the Windows icon. Right-click on it.
- Select «Check your upgrade status» from the options that appear. This will launch the «Get Windows 10» app.
- At the upper right, you’ll see three horizontal lines stacked on top of each other. Click on that. This will open the menu.
- Under the «Getting the upgrade» section, press «Check your PC».
- This next screen will give you all the information you need. If your computer is compatible, it will show here. If not, it will show you the potential compatibility issues that you might face.
You can also use command prompt to check:
- Open the Start menu.
- Type «cmd» and open «Command Prompt».
- Type in the following: schtasks.exe /run /tn «MicrosoftWindowsApplication ExperienceMicrosoft Compatibility Appraiser»
- Press «Enter» to start checking whether you can get Windows 10. This can take up to 15 minutes.
What Are the Minimum System Requirements for the Windows 10 Operating System?
If you want to use Windows 10 on your new PC, it’s necessary that your computer meets the minimum system requirements for the new Windows OS.
Below are the requirements that your PC needs to meet:
- 16 GB (32-bit) or 32 GB (64-bit) of free disk space
- 1 GB (32-bit) or 2 GB (64-bit) of RAM
- A 1 GHz or faster processor
- A graphics card that supports DirectX 9 or later
- A minimum display resolution of 800×600
- If you want to do a direct upgrade, you can only use an original and licensed version of certain operating systems: Windows 7 and Windows 8.1
If you have an older OS, like Windows XP, you will either have to update or do a fresh install if you want the new OS.
How to Use Windows 10 Media Creation Tool to Upgrade?
If you have done a compatibility check and made sure to get Windows 10 on your computer, it is time to install it. You can do this conveniently with the Windows 10 media creation tool.
Follow the steps below to start the upgrade process to Windows 10:
- Go to the Windows 10 page on Microsoft’s website.
- Scroll down and click on «Download tool now». Your download should begin.
- Once you’re done downloading the file, open it.
- Accept the license terms it presents you with.
- Choose the «Upgrade this PC now» option.
- Press «Next» and follow on-screen instructions to finish up.
After upgrading, make sure to install the latest Windows updates to improve security on the system. You can do this by choosing «Windows Update» from «Settings».

Read more resources
Final Words
If you want to do a compatibility check for Windows 10 on your computer, you simply need to right-click on the Windows 10 icon in your tray and choose «Check your upgrade status». Expand the menu, click «Check your PC», and that’s it.
You will need to download the media creation tool from Microsoft’s website to upgrade Windows. Make sure that your computer hardware meets the minimum specs for Windows 10.
Finally, on 14th January 2020, Microsoft ended support for its most popular OS Windows 7 and suggest upgrading to the latest windows 10. And now almost every new laptop or desktop comes with windows 10 preinstalled. But if you are still running an older Windows 7, Windows 8, or Windows 8.1 and planning upgrade to windows 10 for free then Windows 10 compatibility checker will definitely help you whether your hardware can handle it or not.
Contents
- 1 Windows 10 Minimum system requirements
- 2 Check windows 10 compatibility
- 2.1 Upgrade This PC Now
- 2.2 Windows 10 compatibility check command line
If you are using a computer or laptop that was manufactured in the last decade then you might not face any problems, Here are the minimum system requirements to install and run Windows 10 OS on your Device.
- Processor: 1 gigahertz (GHz) or faster processor or SoC
- RAM: 1 gigabyte (GB) for 32-bit or 2 GB for 64-bit
- Hard disk space: 16 GB for 32-bit OS 20 GB for 64-bit OS
- Graphics card: DirectX 9 or later with WDDM 1.0 driver
- Display: 800×600
Pro tip: Run the command dxdiag to check the graphics card details on your device.
Check windows 10 compatibility
Microsoft has an official windows 10 Update Assistant tool that automatically checks the system requirements before install or upgrading the latest version of Windows 10.
- Visit Microsoft’s official windows 10 download page here,
- Click update now to download the official Windows 10 Update Assistant tool
- Right-click on the Windows 10 Update Assistant tool select run as administrator,
- This will open update to the latest version of Windows 10, click update now
On the next screen windows do a compatibility check whether windows install on this device or not (refer to the image below)
Upgrade This PC Now
Whether you using an older version of Windows 10 or running an original and licensed version of Windows 7 or Windows 8.1, you can use the “Upgrade This PC Now” option official media creation tool and follow on-screen instructions to upgrade to the latest Windows 10 version 22H2.
- Visit Microsoft official windows 10 download page here,
- Click the Download tool now under create windows 10 installation media
- Right-click on the media creation tool select run as administrator,
- Accept the using media creation tool terms and conditions
- This tool checks whether windows 10 is install on this device or not
- On the Next prompt select upgrade, this PC now and follow on-screen instructions to install the latest Windows 10 version 2004 on your device.
Windows 10 compatibility check command line
Also, you can use the command prompt to check whether your computer can be upgraded to windows 10 or not.
- Open the command prompt as administrator,
- Type command schtasks.exe /Run /TN “MicrosoftWindowsApplication ExperienceMicrosoft Compatibility Appraiser” and press the enter key,
- The compatibility appraiser takes a few minutes to run a full scan and display whether windows 10 run this device or not.
- If Windows 10 will not run on your device, then you will receive a message “Windows 10 will not run on this PC”
Pro tip: After installing the latest Windows 10 It’s important to download and install updated drivers from the website of various hardware manufacturers.
Also, make sure check for and install the latest windows updates from Settings -> Update & security -> Check for updates. This will not only download windows updates from Microsoft servers that improve security and fix various bugs but also download and install the latest driver version on your device as well.
Updating drivers will ensure that Windows 10 runs flawlessly without any issues.
Also read:
- Solved: Can’t print documents, Printer Driver is unavailable in Windows 10
- Printer not working after the windows 10 update “Printer Driver Is Unavailable”
- Solved: Can’t Adjust Screen Resolution in Windows 10
- Complete Laptop Buying Guide – Specifications of a Good Laptop
- 7 Tips To Maximize Battery Life on Windows 10 Laptops!!!
Операционная система Windows 10 — хоть и не последняя у Microsoft, но актуальная в 2024 году. Чтобы установить ее, не нужно хорошо разбираться в компьютерах: достаточно найти способ скачать проверенный файл с помощью зарубежного IP и действовать по инструкции. Как установить Windows 10 на персональный компьютер или ноутбук, где скачать файл и как активировать систему — в материале «Ленты.ру».
- Актуальные версии Windows
- Подготовка к установке
- Где скачать установочный файл Windows 10
- Как получить ключ активации Windows 10
- Как переустановить Windows 10
- Как установить Windows 10 с помощником без внешнего устройства
- Как установить Windows 10 с внешнего устройства
- Что сделать после установки Windows 10
Актуальные версии Windows
- Windows 10 — вышла в 2015 году, но по-прежнему актуальна. Поддержка продлится до октября 2025 года. За дополнительную плату можно будет получать обновления до октября 2028 года. Уже сейчас пользователи могут бесплатно перейти на 11-ю версию.
- Windows 11 — вышла в 2021 году, сейчас последняя версия операционной системы (ОС). Более требовательна к «железу», чем предшественница. Версии дали более минималистичный дизайн, напоминающий мобильную операционную систему. Среди новых функций — виджеты, поддержка приложений Android, обновления устанавливаются фоново и без перезагрузки. Одна из самых значительных новых функций в Windows 11 — с 26 сентября 2024 года в нее интегрирована нейросеть Copilot.
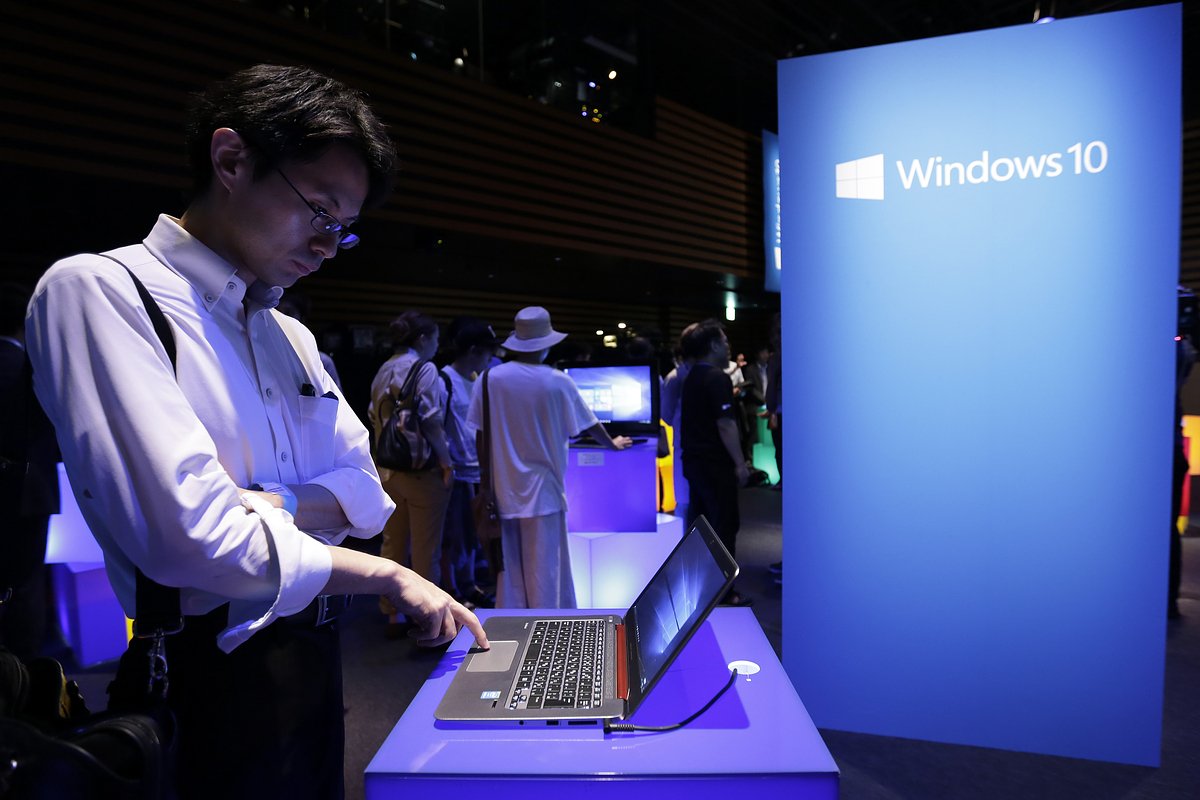
Фото: Kiyoshi Ota / Bloomberg via Getty Images
Многие пользователи по-прежнему предпочитают пользоваться 10-й версией и не переходить на 11-ю. Один из их основных аргументов заключается в том, что в 10-й больше возможностей для кастомизации, тогда как 11-ю нельзя особо настраивать — вы в основном останетесь с пользовательским интерфейсом, выбранным Microsoft.
Поддержка Windows 10 закончится через год, поэтому ей можно продолжать пользоваться. Переходить на Windows 11 имеет смысл тем, кто хочет воспользоваться новыми функциями, особенно ИИ
Версии Windows 10
У Windows 10 есть несколько версий:
- Home — базовый вариант для личного использования. Обычным пользователя нужна именно эта версия.
- Professional — для профессионалов, которым нужны дополнительные инструменты безопасности при переключении с рабочего компьютера на домашний: шифрование дисков, усиленная защита по локальной сети и возможность удаленно подключаться к другому домену.
- Enterprise — корпоративная версия для организаций, чтобы много пользователей удобно работали в общей сети. С ней компании также могут покупать общую подписку.
- Education — та же версия, что и корпоративная, но ее продают со скидкой в образовательные учреждения.
Фото: Nor Gal / Shutterstock / Fotodom
Подготовка к установке
Проверьте системные требования
Прежде всего проверьте, подходят ли характеристики вашего компьютера для Windows 10.
Минимально для работы системы нужно:
- Процессор: от 1 гигагерц
- Оперативная память: 1 гигабайт для 32-разрядной системы или 2 гигабайта для 64-разрядной системы
- Место на жестком диске: 16 гигабайт для 32-разрядной системы или 20 гигабайт для 64-разрядной системы
- Видеоадаптер: DirectX 9 или более поздняя версия с драйвером WDDM 1.0
- Разрешение экрана: 800 x 600
Большинство программ и файлов, совместимых с Windows 7 и 8.1, должны работать и в 10-й версии. Но всегда стоит проверять системные требования.
Выберите способ установки
Фото: Wachiwit / Shutterstock / Fotodom
Один из трех:
- Переустановка. У вас уже есть Windows 10, но работает медленно и нужно ее перезапустить.
- Установка с помощником — официальной программой, которая все сделает за вас.
- Установка с внешнего носителя — более сложный способ. Нужно будет сделать загрузочную флешку или внешний диск. Подойдет для тех, кто не может запустить помощника или хочет самостоятельно настраивать установку.
Сохраните данные
Установка сотрет все данные с системного диска (того, где находится предыдущая система). Вернуть их не выйдет. Перенесите важную информацию на другой диск или флеш-накопитель.
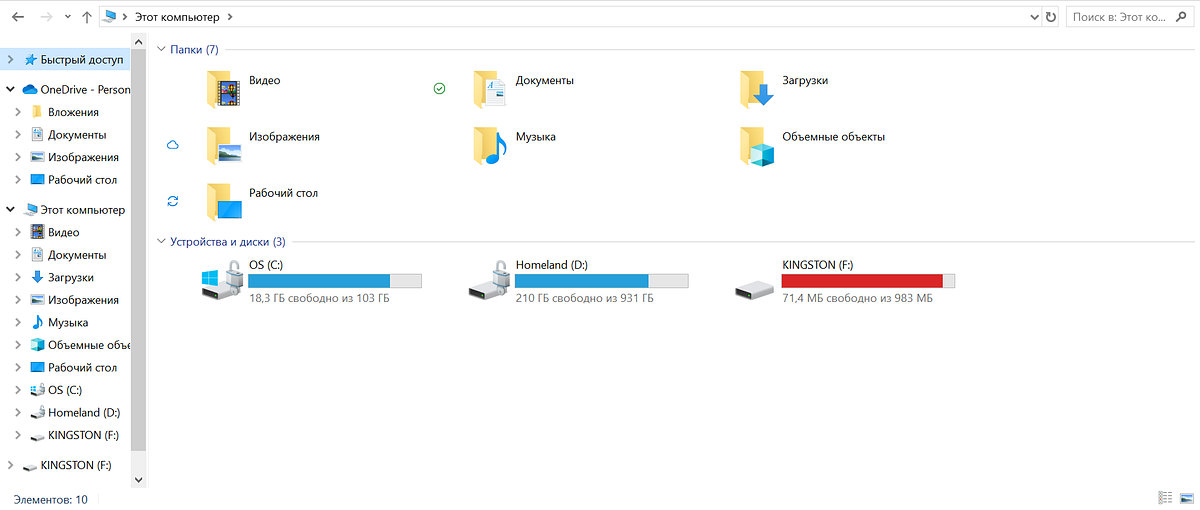
Файлы, которые лежат в системных папках (вроде «Документы», «Изображения») и на рабочем столе, тоже будут удалены. Поэтому не забудьте сохранить все важное, что хранится по адресу c:\Users\*Имя пользователя*, а также данные браузера — например, закладки
Проверьте, чтобы у вас было время
Установка Windows 10 может занять от 15 минут до трех часов. Убедитесь, что у вас достаточно времени.
Где скачать установочный файл Windows 10
Для установки нужен образ системы — его можно скачать с сайта Microsoft или неофициального источника. Также установочную флешку (или диск) с уже загруженным образом можно купить на маркетплейсе или в магазине электроники.
Самый безопасный способ — скачать файл на официальном сайте. В 2024 году в России загрузить образ оттуда напрямую нельзя, для этого придется изменить IP-адрес. Платить за скачивание не нужно, только за ключ активации.
Бесплатно загружать файл с посторонних сайтов и торрентов опаснее всего. Вы не узнаете, какие изменения внесли в файл — там могут быть программы-шпионы и вирусы.
Фото: Friemann / Shutterstock / Fotodom
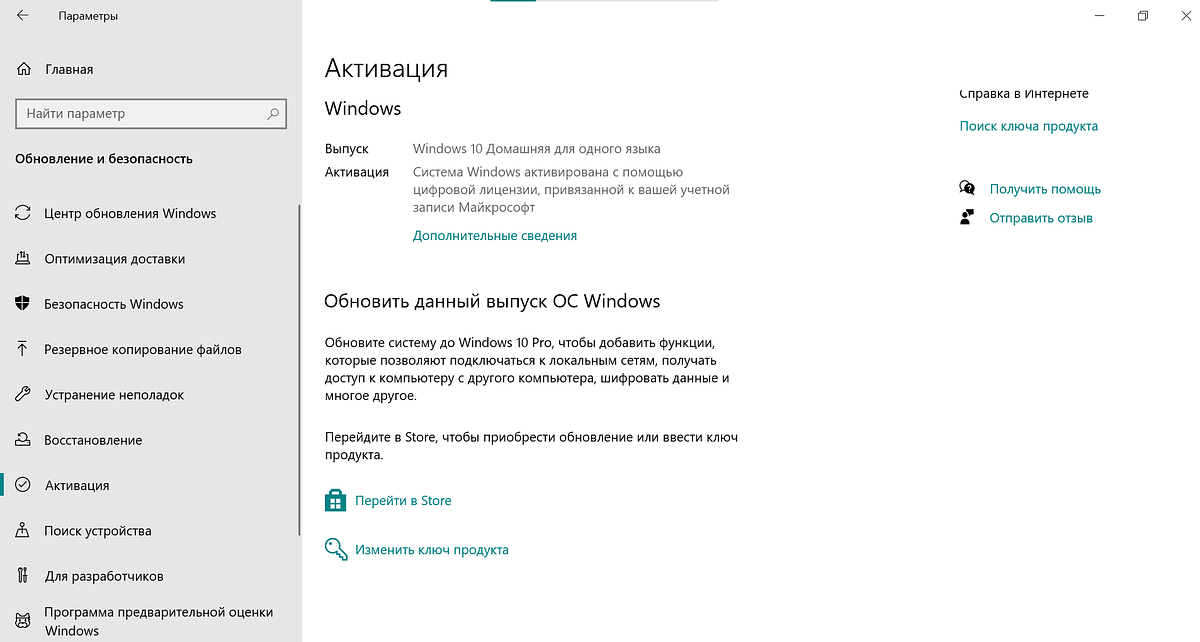
Как получить ключ активации Windows 10
Ключ активации — это код из 25 знаков, сгруппированных по пять. Именно он «открывает» лицензионную версию операционной системы — без него установить Windows 10 не получится.
XXXXX-XXXXX-XXXXX-XXXXX-XXXXX
так выглядит ключ активации Windows
При покупке нового компьютера код можно найти в сертификате подлинности, карточке внутри коробки или на наклейках (например, на нижней крышке ноутбука). Если нигде нет ключа продукта, проверьте его через «Пуск» — «Параметры» — «Обновление и безопасность» — «Активация». Если есть надпись про цифровую лицензию, как на скриншоте ниже, значит, вы купили компьютер с уже вшитым ключом и не потребуется вводить его при переустановке.
Источник: Lenta.ru
Ключ активации можно купить. Как и установочный носитель, в России его продают на всех маркетплейсах и в крупных магазинах электроники. Цена варьируется от нескольких сотен рублей до нескольких тысяч.
Заниженная цена на установочный носитель и ключ активации — сигнал о том, что их происхождение сомнительно, так вы можете наткнуться на мошенников. Поэтому если решите покупать носитель или ключ таким способом, проверьте аккаунт продавца: как давно зарегистрирован, есть ли отзывы и какие продукты предлагает
Одна лицензия может быть установлена только на один компьютер. Если нужно установить ОС на несколько устройств, потребуется отдельная лицензия для каждого.
Как переустановить Windows 10
Стандартный способ
При переустановке произойдет сброс Windows 10 до заводских настроек: система вернется к своему базовому варианту.
Шаг 1. Последовательно нажмите:
- «Пуск»
- «Параметры»
- «Обновление и безопасность»
- «Восстановление»
- «Вернуть компьютер в исходное состояние»
- «Начать»
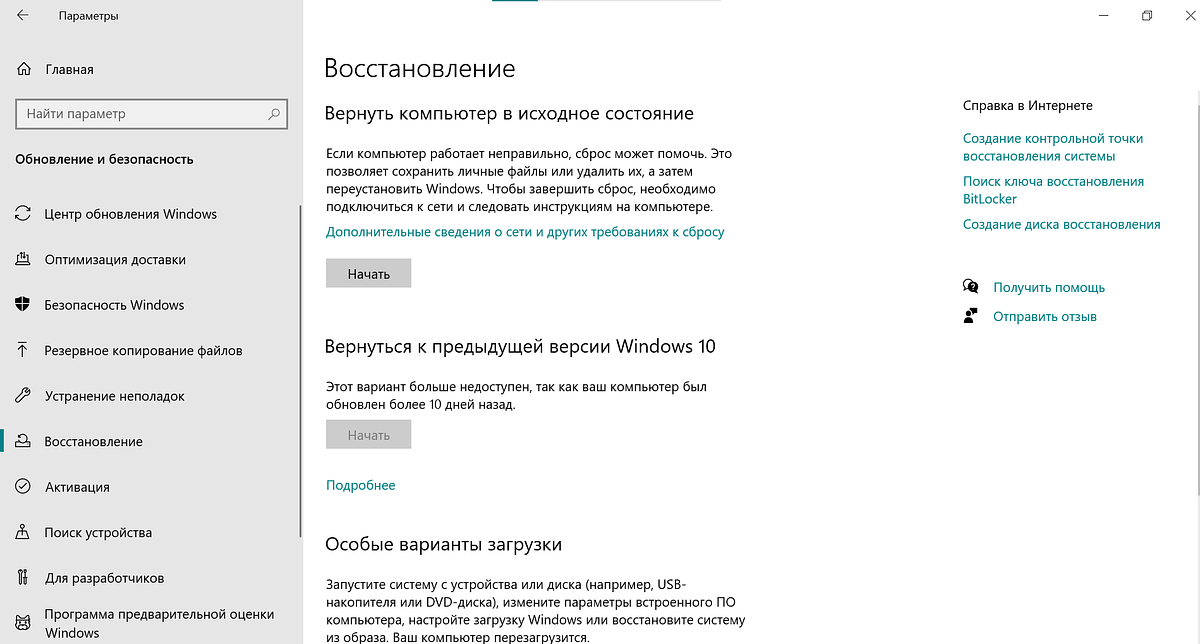
Источник: Lenta.ru
Шаг 2. Система предложит два пути: с сохранением файлов и без. В первом случае вы просто сбросите настройки (но на всякий случай все равно лучше перенести важную информацию), во втором — сотрете систему полностью и начнете с чистого листа. Но именно вариант без сохранения файлов позволит решить проблемы с плохой производительностью компьютера: если в файлах есть вирусы, они исчезнут.
Шаг 3. Выберите источник нового образа. Windows может сам скачать его из сети, на это понадобится примерно 4 гигабайта памяти. Если образ уже загружен, укажите путь к нему.
Шаг 4. Будет предложено выбрать дополнительные параметры для переустановки. Настройте их, как вам нужно, а затем нажмите «Подтвердить».
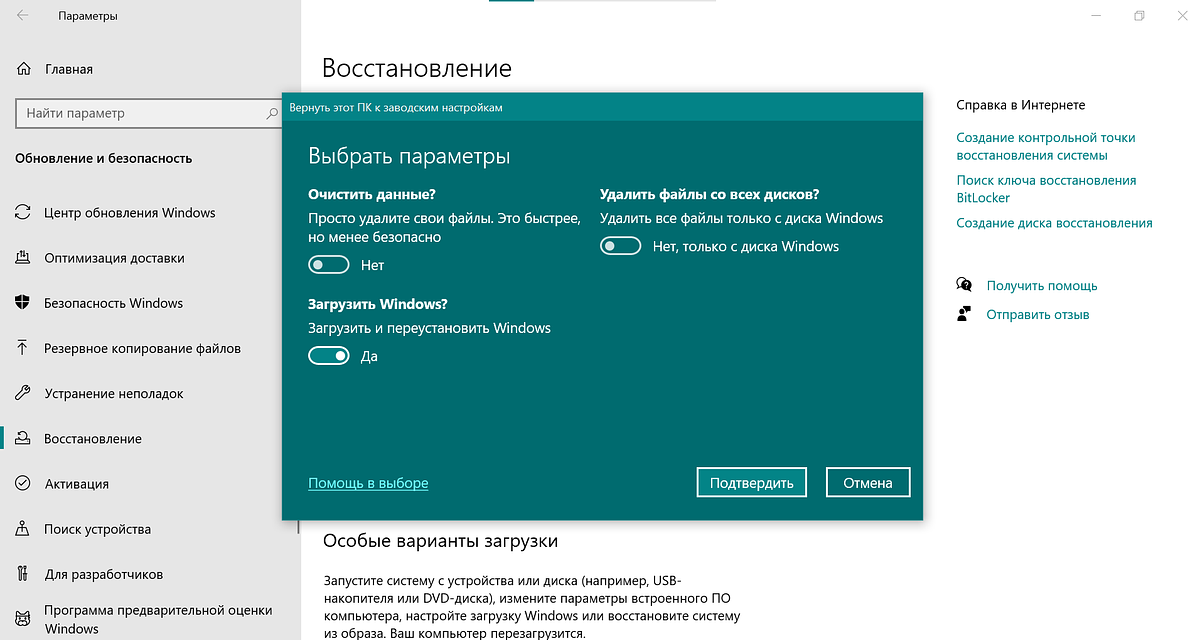
Источник: Lenta.ru
Шаг 5. Нажмите на кнопку «Заводской». После перезагрузки начнется установка ОС.
В Windows 10 есть возможность вернуться к предыдущей версии операционной системы в течение 30 дней после установки. Функция пригодится, если возникнут проблемы или вы передумаете.
Через «Автоматическое восстановление»
Переустановка может потребоваться, если компьютер перестал работать нормально и нельзя запустить процесс способом, описанным выше. Для этого в Windows есть режим восстановления.
- Несколько раз подряд включайте и выключайте компьютер — можно делать это, нажимая кнопку включения. Повторяйте до тех пор, пока на экране не возникнет синий экран «Автоматическое восстановление».
- Выберите «Поиск и устранение неисправностей», а после — «Вернуть компьютер в исходное состояние».
- Система предложит сохранить или стереть данные (тот же принцип, что в шаге 2). Выберите нужный вариант.
- Выберите свою учетную запись и введите пароль.
- Выберите источник, откуда система возьмет новый образ (шаг 3).
- Проверьте все дополнительные параметры и выберите «Вернуть в исходное состояние». Начнется переустановка.
Фото: Beata Zawrzel / NurPhoto via Getty Images
Как установить Windows 10 с помощником без внешнего устройства
Шаг 1. С официального сайта Microsoft скачайте программу-помощника Update Assistant. Он недоступен с российским IP-адресом — в этом случае после того, как нажмете «Скачать», вас просто переведут на неработающую страницу.
Файл займет примерно 64 гигабайта. Нужно сохранить его на один из внутренних дисков компьютера.
Шаг 2. Запустите файл и действуйте по инструкции. Помощник все сделает за вас: скачает нужную версию операционной системы, запустит установку и перезагрузит компьютер.
Фото: eleonimages / Shutterstock / Fotodom
Шаг 3. Когда установка завершится, зайдите в свою учетную запись в Microsoft — программа потребует это, если компьютер подключен к интернету. Без доступа к сети программа предложит сделать локальную «учетку».
Как установить Windows 10 с внешнего устройства
Вам понадобится флешка или внешний диск с памятью не менее 8 гигабайт. Файл можно скачать с сайта Microsoft, если у вас не российский IP. Это самый легкий и проверенный способ.
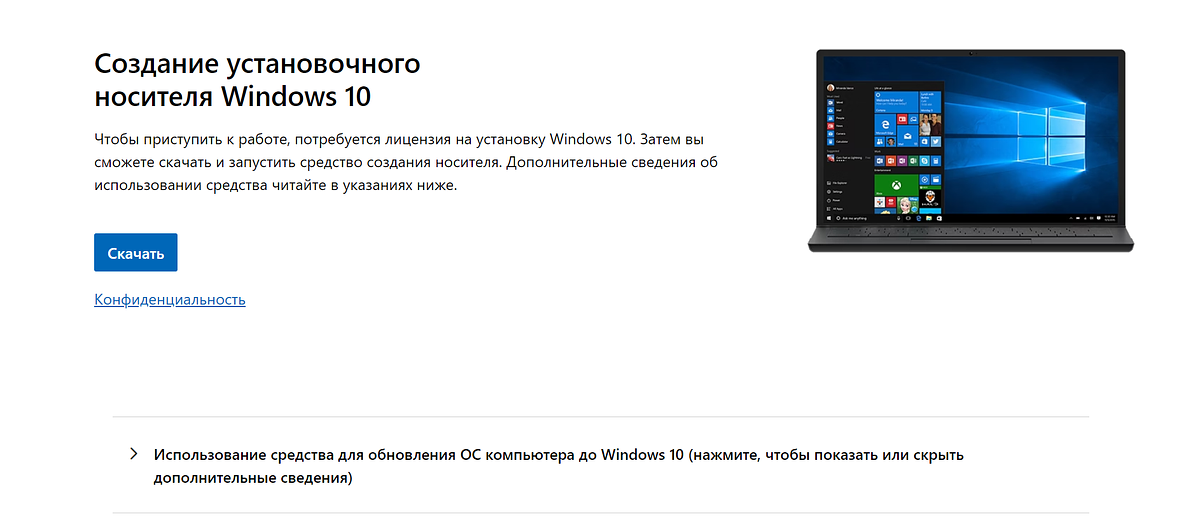
Источник: microsoft.com
Шаг 1. Загрузите установочный файл на компьютер и запустите. Потребуется принять условия использования.
Шаг 2. Выберите «Создать установочный носитель», затем настройте предложенные параметры — русский язык и версию Windows. В следующем окне выберите «USB-устройство флеш-памяти» и укажите устройство, на которое нужно записать образ системы. Для создания загрузочной флешки потребуется время.
Шаг 3. Вставьте устройство с записанным образом в компьютер, на которых хотите установить Windows 10. Перезагрузите его.
Шаг 4. Войдите в BIOS — это программа, встроенная в материнскую плату, которая позволяет загрузить операционную систему. Чтобы открыть ее, надо в первые секунды загрузки много раз подряд нажимать клавишу клавишу DEL, F2 или F11. Выбор клавиши зависит от производителя компьютера, ее обычно указывают в инструкции.
Шаг 5. Теперь нужно поменять приоритет загрузки — по умолчанию BIOS сразу обращается к жесткому диску, а вам нужно, чтобы он поставил на первое место внешнее устройство. Для этого найдите пункт Boot (он может называться Boot Priority). Выберите там источник загрузки — устройство с образом системы. Сохраните изменения — внизу экрана BIOS подскажет, по какой клавише (как правило, это F10).
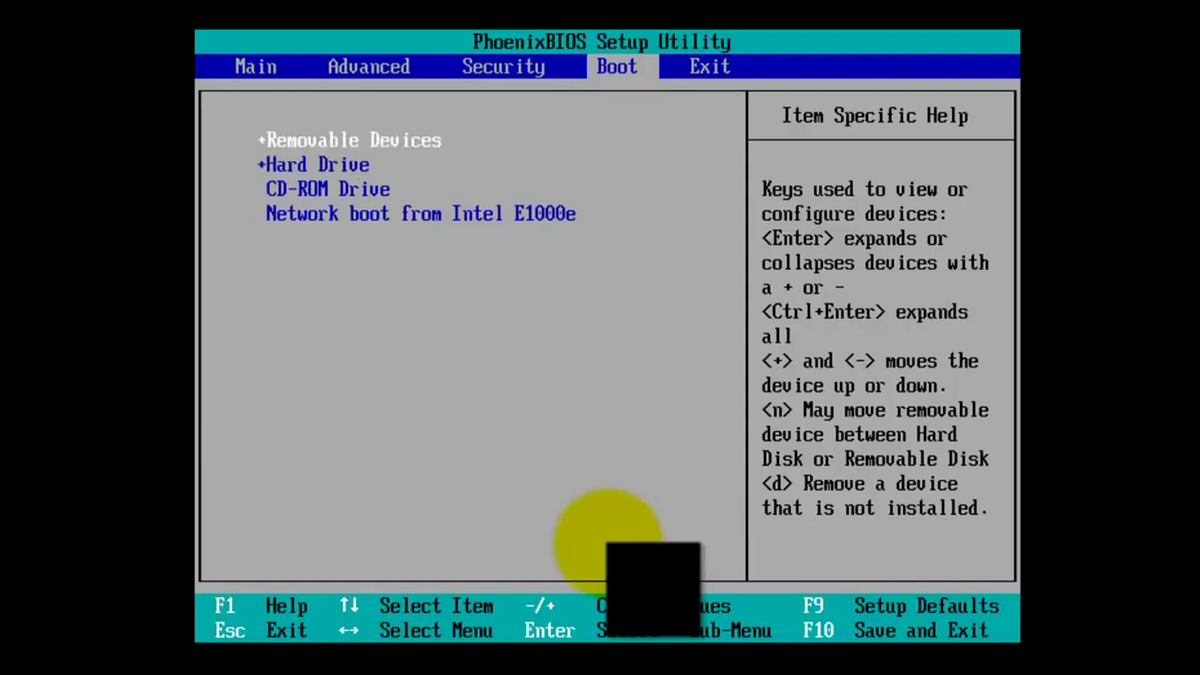
У BIOS разных производителей различается интерфейс. Он может дезориентировать неопытного пользователя
Источник: YouTube/Mell Computer Agency
Шаг 6. Перезагрузите компьютер. Теперь он сразу обратится к внешнему носителю и запустит установку операционной системы.
Шаг 7. Действуйте по инструкции: выберите язык, примите условия лицензионного соглашения, введите ключ активации. На одном из этапов сделайте выбор типа установки — с сохранением или удалением файлов.
Шаг 8. Выберите жесткий диск, куда хотите установить операционную систему. Если у вас несколько дисков, будьте внимательны и не перепутайте — система полностью очистит тот диск, куда вы будете устанавливать операционку. Затем нажмите «Далее».
Диск с операционной системой традиционно называют С
Источник: Lenta.ru
Шаг 9. Дождитесь установки системы. В конце компьютер перезагрузится и включится уже готовым к работе.
Что сделать после установки Windows 10
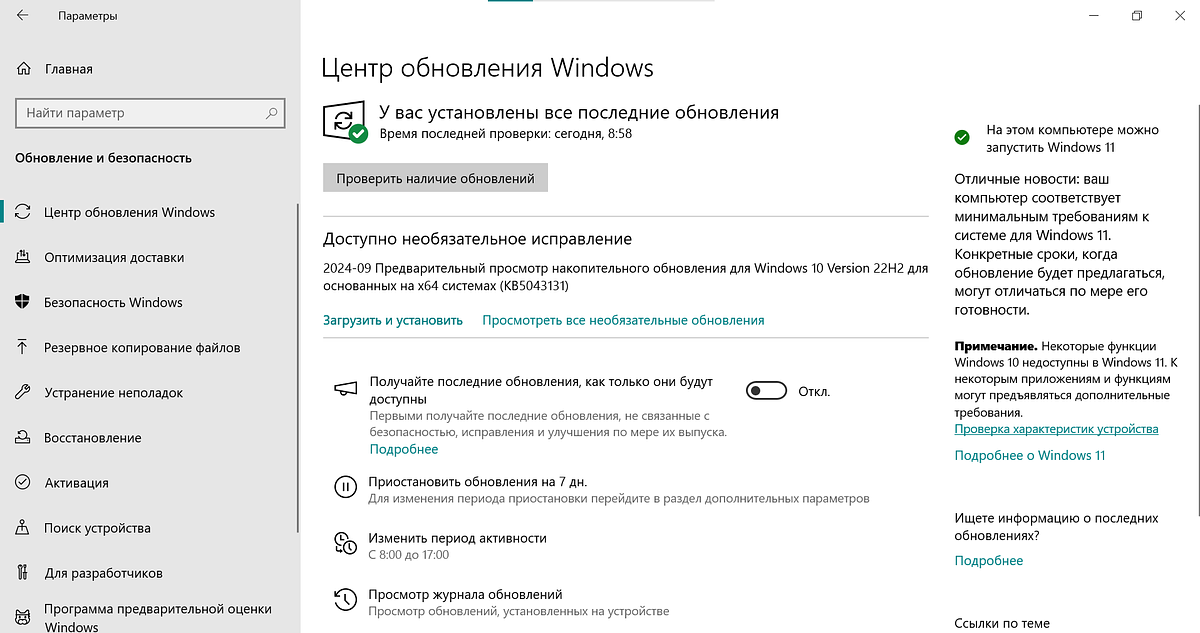
Обновите Windows 10
Последние обновления важны — в них исправляют ошибки системы и улучшают защиту от уязвимостей и вирусов. Лучше обновить систему сразу после установки.
Источник: Lenta.ru
- Перейдите в раздел «Настройки» в меню «Пуск».
- Выберите «Обновление и безопасность», а затем — «Проверить наличие обновлений».
- Когда доступные обновления загружены и подготовлены, нажмите кнопку «Перезагрузить сейчас».
Установите и обновите приложения
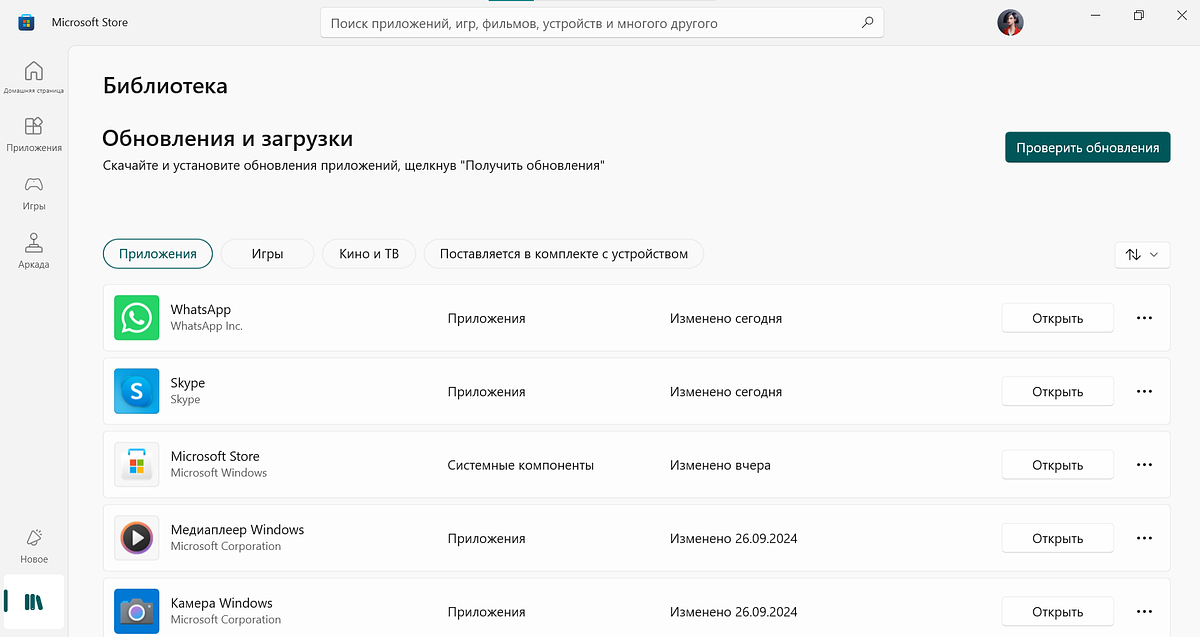
Если на вашем системном диске были установлены приложения, их больше нет. Загрузите их снова, а также обновите сохранившиеся. У них, по аналогии с операционной системой, тоже выходят новые версии. Через «Пуск» и выберите «Microsoft Store», затем нажмите «Проверить обновления».
Источник: Lenta.ru
Настройте компьютер под себя
Очистите панель задач и рабочий стол от ненужных приложений, вынесите на них нужные. Настройте «Пуск» — там тоже могут быть лишние значки.
Можно удалить предустановленные программы, которые вам не потребуются.
Проверьте автозагрузку и уберите из нее программы, которые вам не нужны при запуске. Для этого нужно на панели задач нажать правую клавишу мыши, выбрать «Диспетчер задач» и сверху вкладку — «Автозагрузка». Посмотрите, у каких программ статус «Включено» — щелкните правой клавишей мыши, чтобы отключить.
Настройте уведомления: убрать лишние можно через меню «Пуск» — «Система» — «Уведомления».