The instructions here guide for How to Open DirectX Diagnostic Tool in Windows 11 or 10. The built-in utility of Windows helps to troubleshoot problems related to multimedia applications. Detection of the issues associated with audio, display, and video running an advanced game is the main function of this app. Additionally, dxdiag.exe also lets you find problems that take place while using media players.
By applying the DirectX Diagnostic Tool, you can collect all necessary information about the occurred error. As a result, troubleshooting the issue doesn’t need great effort. Microsoft generally takes help of DirectX to develop Xbox games. So, whenever your video games conflict with stability and performance issues, you need to access this tool to get support. This will help you to know where the problem is coming from.
Open DirectX Diagnostic Tool
Here is How to Open DirectX Diagnostic Tool in Windows 11 or 10 –
1] Use Run Dialog box
Step-1: Invoke Power user menu by pressing Win+X hotkey.
Step-2: When it becomes visible, select Run.
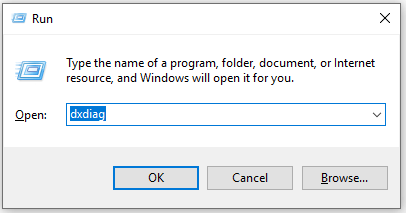
Step-3: Type dxdiag in the text area located next to Open and hit the Enter key.
2] Open DirectX Diagnostic Tool through Windows search
- Press Windows and S keys together to bring forward search box.
- Once appears, type dxdiag in the specific field.
- When the result becomes visible, either click dxdiag from the top or hit Enter.
3] Access Dxdiag with Task Manager
- Right-click on any empty space of Taskbar and select Task Manager.
- Click More details if the wizard is not elongated.
- Next, click File option located in the Menu bar and then select Run new task.
- On the next wizard, write dxdiag and click the OK button to launch it.
4] Open DirectX Diagnostic Tool using Command Prompt
- Press Win+R at once to open Run dialog.
- When it appears, type cmd in the given text field and then hit Enter.
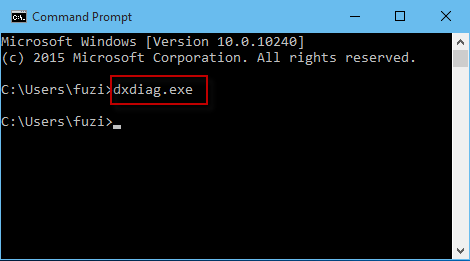
- On the black panel of Command Prompt, type dxdiag followed by pressing Enter.
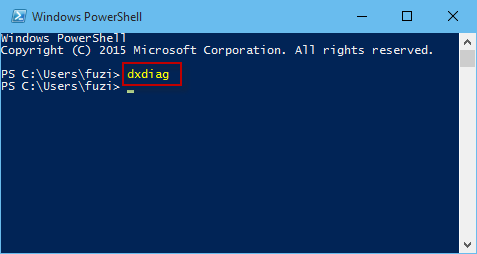
5] By means of Windows PowerShell
- Click the search icon located at the Taskbar and type powerShell.
- When you see the result, hit Enter.
- Wait for a few seconds so that Windows PowerShell becomes ready to execute the command. Thereafter, type dxdiag right after the blinking cursor and press the Enter key.
6] Go through File Explorer to open DirectX Diagnostic Tool
- Press Windows key and E simultaneously to open File Explorer.
- Once appears, move your pointer to its address bar and make a click on it.
- Write down dxdiag there and hit the Enter key to start DirectX Diagnostic Tool.
7] Explore System32 directory
Again launch File Explorer and navigate the following directory first –
C:\Windows\System32
After reaching there, press Ctrl+F and type dxdiag.
When the result shows up, select dxdiag.exe from there to access DirectX Diagnostic Tool.
8] Establish a desktop shortcut to quickly Open DirectX Diagnostic Tool
- Press Win+Q and type dxdiag in the search bar.
- Upon appearing the result, right-click on dxdiag and select Open file location.
- From the subsequent page, right-click on dxdiag.exe and then select Send to>>Desktop (create shortcut).
9] Assign hotkey to run dxdiag tool
To generate a keyboard shortcut, you need to create desktop shortcut first. To do so, follow the previous method.
- Now, head over to desktop screen by using Win+D hotkey.
- Right-click on the shortcut you created and select Properties.
- On the next wizard, take the cursor to the bar assigned for the Shortcut key.
- Type a key you prefer. For example, we pressed D and the system automatically added Ctrl+Alt before that.
In the end, click the Apply button followed by OK.
Methods:
1] Using Run Dialog box
2] Through Windows search
3] By accessing Dxdiag with Task Manager
4] Via Command Prompt
5] By means of Windows PowerShell
6] Through File Explorer
7] From System32 directory
8] Establish a desktop shortcut
9] Assign hotkey
That’s all!!
Do you know what Directx Diagnostic Tool is? How to run the Directx Diagnostic Tool in Windows 10? If you want to learn more information about the Directx Diagnostic Tool, you can check out this post from MiniTool.
Before I introduce you what DirectX Diagnostic Tool is, you should know some information about DirectX. DirectX is a collection of application programming interfaces (APIs) used in Windows for multimedia applications such as 3D games and HD videos. DirectX is very important if you want to play some advanced games on your computer.
Well, what is DirectX Diagnostic Tool? DirectX Diagnostic Tool, also as known as DxDiag, is a diagnostics tool used to test DirectX functionality and troubleshoot problems related to audio, display, video and other multimedia applications.
If you encounter problems when using audio and video players or running 3D applications on your Windows 10 PC, you can run DirectX Diagnostic Tool Windows 10.
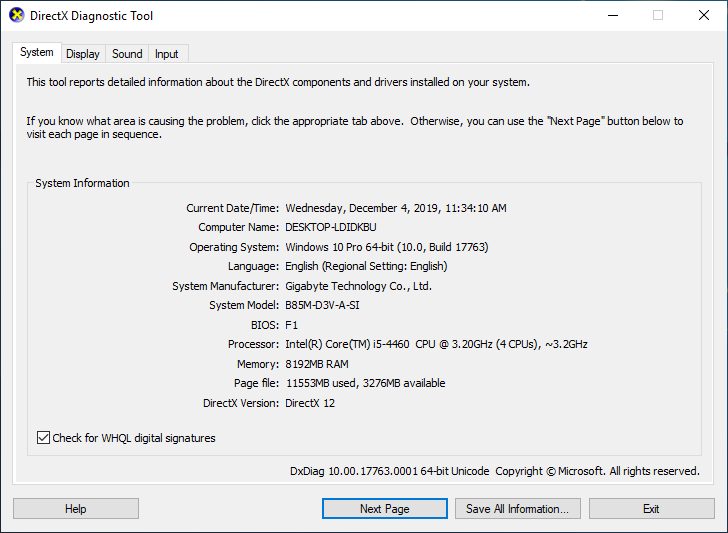
The first version of the DirectX Diagnostic Tool was included in Windows 95. Nowadays the recent version of DirectX Diagnostic Tool in Windows 10 is DirectX 12.
Note: The specific version you are running depends both on the version of Windows you have installed and the DirectX version supported by the graphics adapter on your PC.
DirectX Diagnostic Tool enables you to perform basic diagnostic tests on the DirectX system. If you don’t know how to run the DirectX Diagnostic Tool in Windows 10, you can follow the steps below to run the tool and perform a DirectX test in Windows 10.
Here is the method for you to access the DirectX Diagnostic Tool in Windows.
Step 1. Press Windows + S keys on the keyboard to bring up the Windows search box.
Step 2. Type dxdiag in the search box on desktop and then click the best match to run the DirectX Diagnostic Tool.
Besides the Windows search box, you can access DirectX Diagnostic Tool in Windows 10 via the following three methods:
- Press Windows+R keys to bring up the Run dialog box, then type dxdiag and tap OK.
- Open Windows PowerShell via the Start Menu, then input dxdiag and hit Enter.
- Access Command Prompt Windows 10, then input dxdiag.exe and hit Enter.
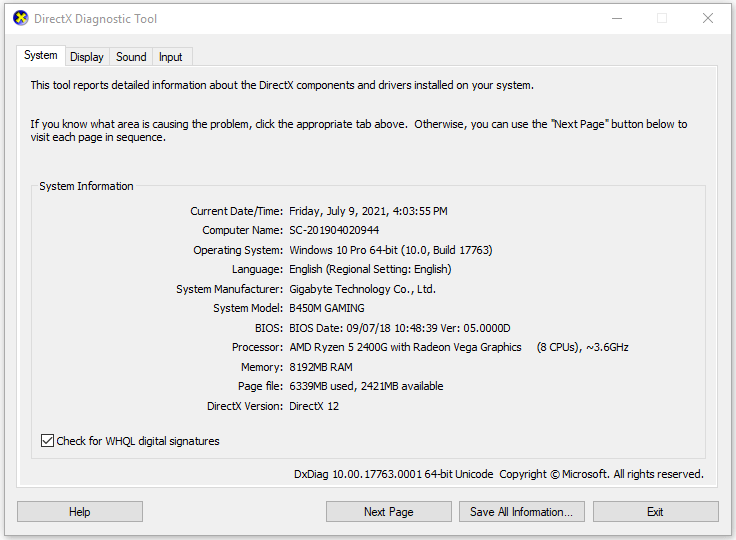
Step 3. After launching the tool, it will scan your system for problems. When it is finished, you can get the following screenshots.
Step 4. You can click System, Display, Sound and Input tabs respectively to check if there is any problem found. You can check the Notes box for detailed information. You can also click the Save All Information… button to save the diagnostic report on your PC so you can share it with others for troubleshooting.
DirectX Diagnostic Tool is designed to help you troubleshoot various hardware problems on your computer. If you have problems with devices and drivers related to the multimedia and video on your PC, you can follow this guide to run DirectX Diagnostic Tool.
Conclusion
After reading this post, you should know what Directx diagnostic tool is and how to run the Directx diagnostic tool in Windows 10. If you have other opinions about the Directx Diagnostic Tool, you can share it with us by leaving a comment in the following comment zone.
Are you a gaming programmer or someone interested in video rendering or other multimedia tasks? Then, you need DxDiag or DirectX, a collection of APIs (Application Program Interfaces), to create stunning games that can run on almost any computer without glitches. This software comes pre-installed in Windows 10 and 11. However, if, for any reason, you require the latest version of this program, here is a comprehensive guide to help you install and run the Windows 10/Windows 11 DirectX Diagnostic tool.
However, please note that a standalone version of DirectX12 is not available for download. You can only update your DirectX Diagnostic tool to the latest version by updating your computer’s operating system.
In the case of versions below DirectX 11.2, you can either download an entirely new version through DirectX End-User Runtime Web Installer or download the missing files via Windows update. Let us discuss all these options.
Methods to Download and Install DxDiag (DirectX) and Run It on Windows 11/10
You can get the latest version of DxDiag downloaded and installed through Windows update and Runtime Web Installer. Let us discuss both methods and then proceed to run the tool on your computer.
DxDiag download and install
Method 1: Update your operating system (OS) to the latest version
As mentioned earlier, the DirectX Diagnostic tool comes downloaded on Windows 10/11 computers. You can only update it to the most recent version by performing an OS update. Here is how to do it step by step.
- First, open settings using the Windows+I keyboard shortcut.
- Next, select Update & Security from the on-screen settings menu.
- Choose Windows Update from the available options.
- Click Check for updates to allow Windows to look for the latest OS updates.
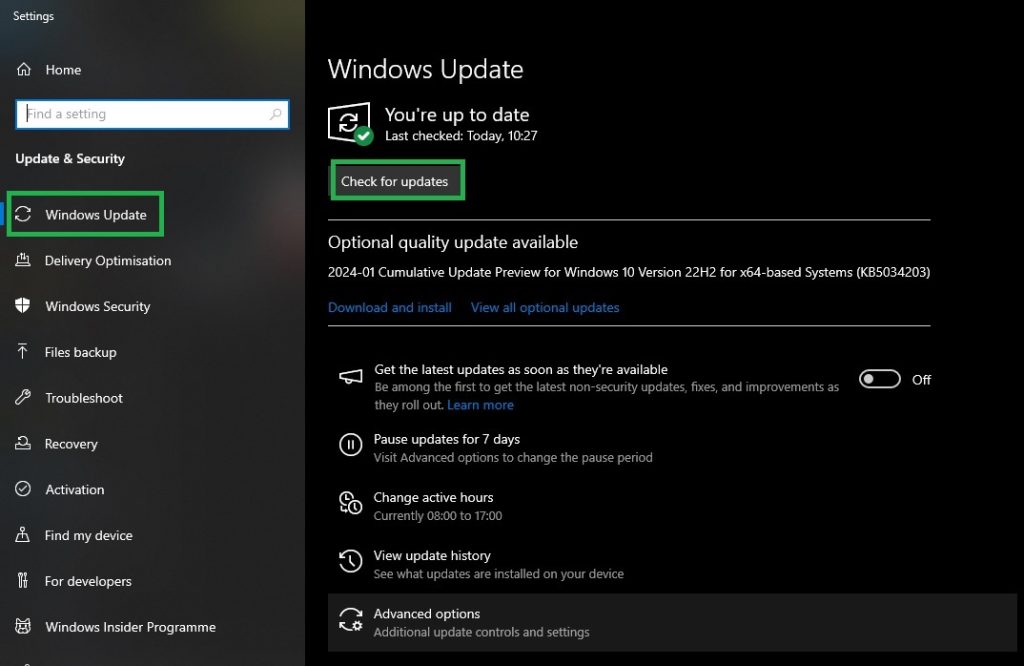
- Next, download and install the suggested updates for your operating system.
- Lastly, restart your computer.
Also know: How to Fix Task Host Window Preventing Shutdown
Method 2: Download and Install DxDiag using the Runtime Web Installer
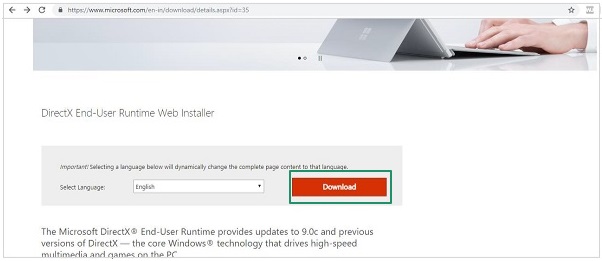
DirectX 10 or any version lower than DirectX 11.2 is available for download via the End-User Runtime Web Installer. You can follow these steps to download and install it from there.
- First, click on this link to navigate to the Microsoft website.
- Next, select your language and click the Download button to download the DirectX End-User Runtime Web Installer setup file.
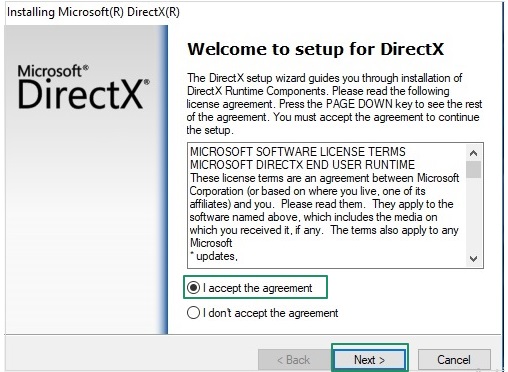
- Click on the setup you downloaded in the previous step.
- Next, click Yes to allow the application to make the required changes to your computer.
- Click I accept the agreement and click Next to proceed further.
- In this step, click Next to install the DirectX Runtime Optional Components.
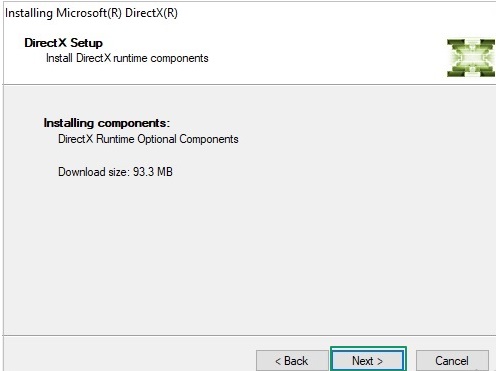
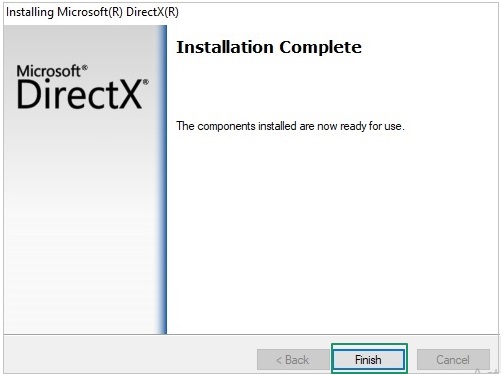
- Wait until the installation is complete.
- After completing the installation, click Finish and restart your computer.
Above is how to download and install DxDiag, i.e., the Windows 10/11 DirectX Diagnostic tool. Let us now answer your question, “How do I run the DxDiag of my PC?”
Run the DxDiag command on Windows 11/10
Method 1: Use the Windows Run command
You can follow these steps to open and run DxDiag using the Run command on Windows.
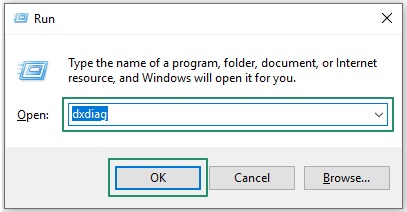
- First, press the Windows and R keys on your keyboard to launch the Run command.
- Next, input DxDiag in the on-screen box and click OK.
Method 2: Use the Start/Search function
Below are the steps to run the DirectX Diagnostic tool on your PC using the Start or Search option.
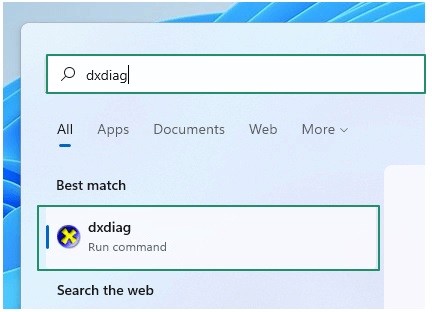
- First, click the Start button or the Search box on your taskbar.
- Next, input DxDiag in the on-screen box.
- Choose DxDiag Run Command from the on-screen search results to open it.
Method 3: Run Windows 10/Windows 11 DirectX Diagnostic tool using Command Prompt (CMD)
You can follow these steps to use the Command Prompt to run the DxDiag command on your computer.
- First, launch the Run function using the Windows+R keyboard shortcut.
- Next, input cmd in the on-screen Run dialog box and press Enter/click OK to open the Command Prompt.
- After opening the Command Prompt, input dxdiag.exe in the command line and press Enter to run the DirectX Diagnostic tool.
Also know: How to Fix High Memory Usage in Windows 11
Method 4: Run DxDiag using Windows PowerShell
Below is how to use Windows PowerShell to open the Windows 10/Windows 11 DirectX tool.
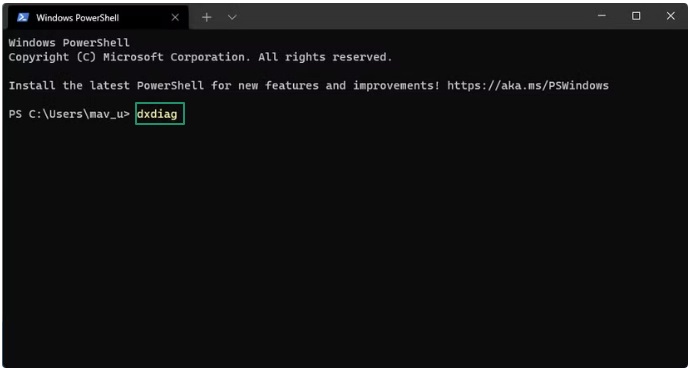
- First, use the Windows+X keyboard shortcut to open the quick access menu.
- Next, choose Windows PowerShell (Admin) from the on-screen menu.
- Lastly, input dxdiag in the on-screen window and press Enter to run the command.
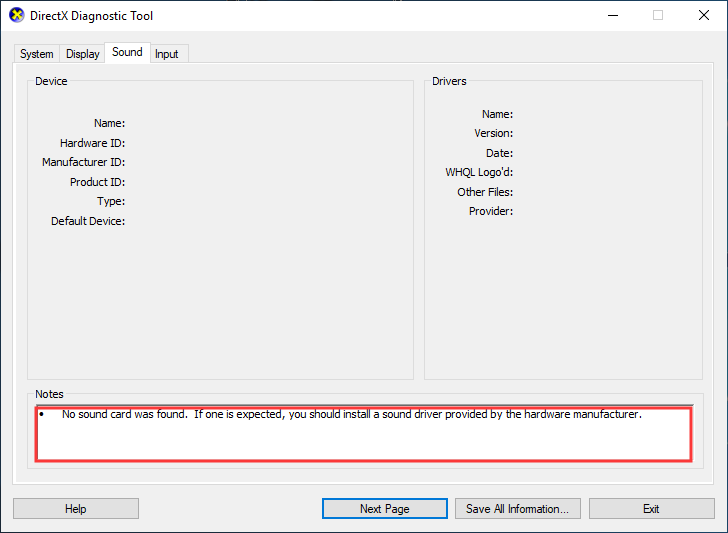
After running the DirectX Diagnostic Tool, you can display your current computer name, OS version, DirectX version, etc., by going to the System tab. Moreover, you can get information about your display driver, monitor, and graphics card via the Display tab. Furthermore, view your audio device and drivers in the Sound tab and get the details about various input devices in the Input tab.
Additionally, you can export all information in the DirectX Diagnostic Tool to a .txt file by clicking the Save All Information button.
Download, Install, and Run DxDiag on Windows 11/10: End Note
This article explains how to download, install, and run the DirectX Diagnostic Tool on Windows 11 and 10. Using DxDiag, you can execute almost all multimedia functions effortlessly and avoid annoying hardware/graphics problems. For more how-to guides like this one, keep visiting this blog.
-
Home
-
News
- How to Open and Run dxdiag.exe on Windows 10/11
By Alisa |
Last Updated
This post includes answers for what is dxdiag, how to run dxdiag in Windows 10/11, DirectX Diagnostic Tool’s main functions, and how to update dxdiag.exe driver. MiniTool Software also provides many other computer tips and solutions for users. You can visit its News library.
What Is Dxdiag?
Dxdiag refers to DirectX Diagnostic Tool. This tool is built into Windows OS. It is used to reports detailed information about the DirectX components and drivers installed on your system. It can also help troubleshoot video or sound-related hardware problems on your Windows 10/11 computer. If your computer has problems, you may extract the information from Dxdiag application to send it to the support person.
How to Run Dxdiag.exe on Windows 10/11 – 4 Ways
You can easily open and run dxdiag.exe (DirectX Diagnostic Tool) on Windows 10/11 using the 4 ways below.
Way 1. Press Windows + R, type dxdiag in Run dialog, and press Enter to quickly launch dxdiag.exe on Windows 10/11.
Way 2. You can click Start or the search box at the taskbar, type dxdiag, and select dxdiag Run command to open it.
Way 3. Press Windows + R, type cmd, and press Enter to open Command Prompt. Type dxdiag.exe in CMD and press Enter to run dxdiag application on Windows 10/11.
Way 4. Press Windows + X and select Windows PowerShell (Admin). Type dxdiag and press Enter to open this tool.
Dxdiag Functions
You can see the dxdiag tool has four tabs: System, Display, Sound, and Input. Dxdiag also displays detected problems with these devices.
System: The System tab displays your current DirectX version, computer name, OS version, system model, BIOS information, process, Memory, etc.
Display: The Display tab display information about your graphics card, monitor, and display driver.
Sound: The Sound tab shows your audio device and drivers.
Input: This tab shows the information about your computer input devices like keyboard, mouse.
If you want, you can click Save All Information button to export all information in DirectX Diagnostic Tool to a .txt file for later sharing.
How to Download and Update Dxdiag.exe Driver
You can do this through Windows Update.
Go to Settings on your Windows 10 or 11 computer. For Windows 10, continue to click Update & Security -> Windows Update -> Check for updates. For Windows 11, click Windows Update -> Check for updates.
This will update DirectX on Windows 10/11 and update its driver.
MiniTool Software is a top software company. It has designed MiniTool Power Data Recovery, MiniTool Partition Wizard, MiniTool ShadowMaker, MiniTool Video Converter, MiniTool MovieMaker, MiniTool uTube Downloader, and some other useful software products. Users can download and try preferred software from its official website.
Among these products, MiniTool Power Data Recovery helps you recover any deleted or lost files from Windows PC or laptop, SD/memory card, USB flash drive, external hard drive, etc.
MiniTool Partition Wizard is also a flag product. It lets you easily create/delete/resize/format/wipe partition, convert disk/partition format, migrate OS, check and fix disk errors, and more.
MiniTool ShadowMaker is a free PC backup tool that lets you choose files, folders, partitions, or the whole disk content to back up to an external hard drive, USB, or network drive. Also support backup and restore Windows OS. Automatic file backup is supported.
About The Author
Position: Columnist
Alisa is a professional English editor with 4-year experience. She loves writing and focuses on sharing detailed solutions and thoughts for computer problems, data recovery & backup, digital gadgets, tech news, etc. Through her articles, users can always easily get related problems solved and find what they want. In spare time, she likes basketball, badminton, tennis, cycling, running, and singing. She is very funny and energetic in life, and always brings friends lots of laughs.
- Blog>
- Windows 10>
- 4 Ways to Run DirectX Diagnostic Tool in Windows 10

The DirectX is a diagnostic tool on the Windows platform. It can help check, diagnose and test the files, devices, and drivers running on the Windows, and help improve the computer’s capabilities to process sound and 3D graphics. Then how do you open or run DirectX Diagnostic Tool in Windows 10? This post will introduce four ways, as shown below.
Either way, you need to use the dxdiag or dxdiag.exe command.
Way 1: from Start menu
Bring up the Start menu and start typing dxdiag (or dxdiag.exe) in the search box. After the dxdiag (or dxdiag.exe) icon appears under the ”Best match”, click it to run the DirectX Diagnostic Tool.
Tips: If it is the first time for you to run the DirectX Diagnostic Tool, a dialog will pop up asking whether you want to check if your drives are digitally signed. Just click Yes to confirm it.
Way 2: by Run box
Open the Run dialog box using Win +R keyboard shortcut, then type dxdiag (or dxdiag.exe) in the Open box, and click OK.
Way 3: with Command Prompt
Open a Command Prompt (or CMD) window, then type dxdiag (or dxdiag.exe), and press the Enter key on your keyboard.
Way 4: with Windows PowerShell
Open a Windows PowerShell window, then type dxdiag (or dxdiag.exe), and hit Enter key.