
На начальных этапах установки операционных систем Windows 10 и Windows 11 может появляться ошибка «Возникла проблема» с кодом OOBELOCAL. С этой же ошибкой встречаются коды OOBEKEYBOARD и OOBEREGION, но они указывают на ту же проблему. Ошибка может возникать и при установке ОС на различные виртуальные машины.
Решение ошибки OOBELOCAL

Полная переустановка Windows – это радикальное решение, которое наверняка поможет. Однако для начала нужно попробовать устранить проблему менее радикальными способами.
Способ №1 Ожидание
Ошибка типа OOBE могла возникнуть из-за того, что перед следующим этапом установки система не успела «разобраться» с драйверами, которые подгрузились с серверов Майкрософт. Когда перед вами появится ошибка… не делайте ничего в течение получаса. Дайте системе завершить установку драйверов и прочего системного ПО, после чего кликните на кнопку «Попробовать еще раз». Некоторым пользователям помогло такое решение.
Способ №2 Отключение Интернета
OOBELOCAL может появляться из-за подключенного к компьютеру Интернета. Звучит контринтуитивно, ведь для полноценной установки ОС требуется наличие стабильного сетевого подключения, но попробуйте на начальном этапе установки отключить Интернет (Ethernet, Wi-Fi – не имеет значения). После отключения выждите где-то минут 10-15 и нажмите кнопку «Попробовать еще раз». Установка Windows продолжилась? Подключите Интернет обратно.
Способ №3 Нажатие кнопки пропуска
В некоторых случаях на экране OOBE-ошибки есть кнопка «Пропустить». Нажмите на кнопку и, возможно, случится чудо: установка Windows продолжится.
Способ №4 Принудительное завершение работы
Некоторые пользователи утверждают, что им удалось избавиться от ошибки OOBELOCAL, принудительно отключив свой компьютер. Зажмите и удерживайте кнопку питания на корпусе ПК до его полного выключения. Выждите минут пять-десять, а затем снова включите ПК. Теперь при установке системы ошибки может и не быть. Минус такого способа – появление других проблем с софтом или даже аппаратной начинкой компьютера. Такой исход крайне маловероятен, но не невозможен.
Способы №5 Учётка администратора + служба Msoobe
Требуется включить учетную запись администратора и произвести запуск службы msoobe (отвечает за настройку завершающего этапа установки ОС).
- На экране с OOBE-ошибкой зажмите комбинацию SHIFT+F10.
- Выполните в окошке консоли следующие команды:
- net user Администратор /active:yes
- net user /add [ПОЛЬЗОВАТЕЛЬ] [ПАРОЛЬ] – прим. это нужно заменить на нужные вам значения.
- net localgroup Администраторы [ПОЛЬЗОВАТЕЛЬ] /add
- cd oobe
- msoobe.exe
- Дождитесь автоматической перезагрузки ПК, если этого не произошло – перезагрузите самостоятельно.
- Повторите установку Windows.
Дополнительные решения OOBELOCAL
В случае, если ошибку OOBELOCAL так и не удалось устранить, можно воспользоваться этими доп. решениями:
- обновление уже имеющейся ОС через исполняемый файл setup на установочном образе Windows;
- запуск установки Windows с предварительным отключением сетевого подключения;
- замена образа Windows.
Делитесь своими успехами в комментариях ниже.
Provide feedback
Saved searches
Use saved searches to filter your results more quickly
Sign up
При установке Windows 11 или Windows 10, особенно в виртуальной машине, например, VirtualBox, на этапе первоначальной настройки вы можете столкнуться с ошибками вида «Возникла проблема, попробуйте ещё раз» с указанием «кода» OOBELOCAL, OOBEKEYBOARD или OOBEREGION.
В этой инструкции подробно о том, как исправить ошибки OOBE при установке Windows 11/10 как в виртуальной машине, так и на обычном ноутбуке или компьютере.
Способы исправить ошибки OOBE при первоначальной настройке системы

Для того, чтобы решить проблемы ошибок OOBE — OOBELOCAL, OOBEKEYBOARD и OOBEREGION возможны различные подходы, начну с простых и не требующих переустановки системы заново:
- Иногда ошибки OOBE появляются, если на этапе настройки системы подключен Интернет, и только что установленная Windows 11 или Windows 10 «занята» установкой драйверов из сети. По некоторым отзывам срабатывает следующих подход: ничего не делаем минут 10-20, оставляя систему включённой, после этого нажимаем кнопку «Попробовать ещё раз».
- Попробуйте отключить Интернет (если ошибка возникла на обычном компьютере, можно извлечь кабель, отключить Wi-Fi роутер), подождать пару минут, а затем нажать «Попробовать ещё раз» на экране с ошибкой.
- При наличии кнопки «Пропустить» на экране с ошибкой, используйте её для пропуска этого шага и продолжения первоначальной настройки.
- Этот способ теоретически может привести к нежелательным результатам, но часто работает: просто перезагрузите компьютер: удерживаем нажатой кнопку питания до полного выключения, снова включаем (в случае виртуальной машины — выключаем кнопкой в интерфейсе управления).
- Следующий метод — включение встроенной учетной записи «Администратор» и запуск msoobe.exe. Порядок действий: на экране с ошибкой нажимаем клавиши Shift+F10 (на некоторых ноутбуках — Shift+Fn+F10), откроется командная строка. В ней по порядку используем следующие команды (имя_пользователя и пароль заменяем на предпочитаемые вами):
net user Администратор /active:yes
net user /add имя_пользователя пароль
net localgroup Администраторы имя_пользователя /add
cd oobe
msoobe.exe
После выполнения приведённых выше команд через некоторое время система должна перезагрузиться (если этого не произошло, перезагрузку можно выполнить вручную), а вы получите возможность входа в созданную учетную запись пользователя. В системную учётную запись без необходимости входить не стоит, её лучше отключить командой net user Администратор /active:no в командной строке, запущенной от имени администратора.
Если по какой-то причине предложенные выше способы не подходят, вы можете:
- Установить новую систему путем обновления текущей: просто запускаем setup.exe с подключённого образа Windows 11 или Windows
- Провести чистую установку системы, не подключаясь к Интернету.
- Попробовать использовать другой образ для установки ОС.
Successfully Tested On: Windows 10 Enterprise versions 1909 – 22H1
Shoutout to Magnus Tokerud for pointing out the below method!
For the past few Windows 10 versions, many administrators have seen portions of OOBE trigger after upgrading Windows machines. Whether the upgrade is initiated from Windows Updates or from an SCCM Operating System Upgrade Package Task Sequence, the OOBE prompts that follow can be confusing for users, especially for domain users since the experience may prompt to sign in with a Microsoft Account (smooth move, Microsoft).

Savvy users may realize they can CTRL + ALT +DEL around the process, but many will end up wondering what they’re supposed to do.
Registry to the Rescue
Implementing the following Registry value has been shown to suppress these prompts when a Windows in-place upgrade occurs:
| Key: | HKEY_LOCAL_MACHINE\SOFTWARE\Microsoft\Windows\CurrentVersion\OOBE |
| Value: | PrivacyConsentStatus |
| Type: | DWORD |
| Data: | 1 |
Single Machine Registry Editor
The Registry value can be manually inputted into a single machine using Registry Editor before upgrading.
Multi Machine Group Policy Preferences
If using Windows Updates or WSUS for upgrades on a large scale, use Group Policy Management to insert the Registry value before upgrading by using GPO preferences under Computer Configuration > Preferences > Windows Settings > Registry.
Multi Machine SCCM Task Sequences
If using SCCM Upgrade Packages with Task Sequences for upgrades, use Configuration Manager Console to add a step in the Task Sequence post upgrade step that runs the following command line to inject the Registry value:
reg add "HKEY_LOCAL_MACHINE\SOFTWARE\Microsoft\Windows\CurrentVersion\OOBE" /v "PrivacyConsentStatus" /t REG_DWORD /d 1 /fMicrosoft keeps throwing curveballs at us Windows administrators, but we’ll keep rolling with the punches!
Readers help support Windows Report. We may get a commission if you buy through our links.
Read our disclosure page to find out how can you help Windows Report sustain the editorial team. Read more
When users turn on their Windows computers for the first time, they are greeted with the Windows Out of Box Experience. It is a series of screens where users must accept the license terms, connect to the internet, login, and sign up for a Microsoft Account.
However, if you are stuck with the OOBE screen every time you start your computer, then it could be frustrating. This guide will discuss the various methods to fix Windows that keeps booting into the OOBE issue.
Why does my Windows keep booting in OOBE?
There could be several reasons why Windows restarts in an OOBE environment; some of the common ones are:
- Corrupted installation files – If the installation files for Windows are corrupted, the setup process could fail, hence the error.
- Incorrect configuration settings – Misconfigured system settings can also be the reason for setup failure. Therefore, you get stuck with the OOBE screen.
- Hardware issues – Failing hard drives or other damaged components could cause the Windows installation process to fail. Hence, you see the screen.
How can I fix the Windows keeps booting into the OOBE issue?
Before moving to the advanced troubleshooting steps, go through these preliminary checks:
- Restart your computer.
- Remove the unwanted external peripherals.
1. Perform an Automatic Repair
- Power on and off your computer three times.
- Then, on the 3rd time it restarts, it will take you to the Preparing Automatic Repair page, then boot in Advanced startup.
- On the Choose an option page, click Troubleshoot.

- Click Reset this PC.

- Now select Keep my files.
- Click Cancel.
- Choose your account, enter your password, and click Continue.
- Now click Reset.


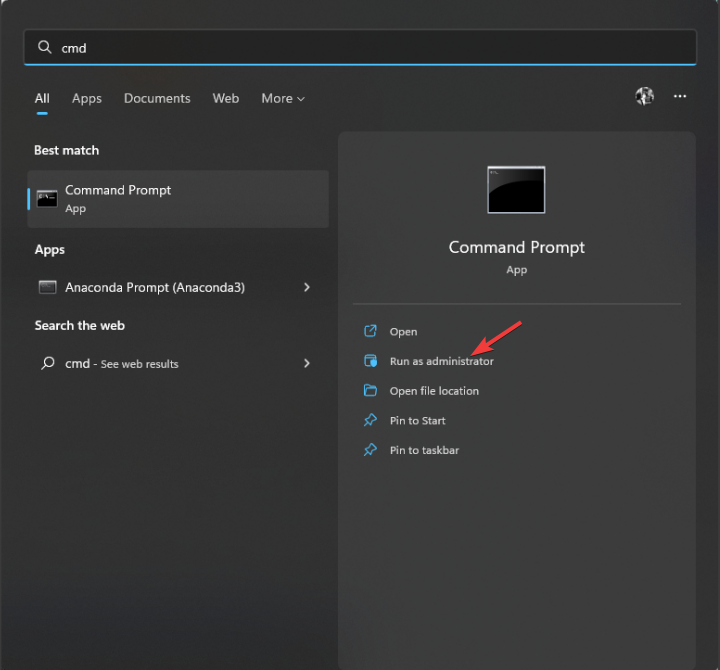
2. Use the Command Prompt
- Press the Windows key, type CMD, and click Run as administrator.

- Copy and paste the following command to come out of audit mode and press Enter:
sysprep /oobe /generalize - Restart your computer. This will reset the Windows licensing state to default. You need to enter your license key again.
3. Use the Run window
- Press Windows + R to open the Run dialog box.
- Type the following command and press Enter:
%WINDIR%\system32\sysprep\sysprep.exe - Now on the next window, place a checkmark next to Generalize and click OK.
- Finally, reboot your computer and check if the issue persists.
The System Preparation tool can help you fix the OOBEEULA error; to learn more about the issue, read this guide.
- Recent Windows 11 update lets you disable profanity filter in voice typing
- Microsoft wants Windows 10 users to upgrade to Windows 11 or Copilot + PCs
- Windows 11 KB5055627 update makes File Explorer more fluid
4. Reinstall Windows
4.1 Create an installation media
- On a different computer, go to Windows 11 download page.
- Under Create Installation Media, click Download now.

- Double-click the downloaded file and click Yes on the UAC prompt.
- Plug in a USB flash drive with 8 GB of free space.
- You will get the Windows Setup wizard; click Accept to agree to the license terms.

- On the Select language and edition page, choose Language & Edition and click Next.
- On the Choose which media to use page, select USB flash drive and click Next.
- Follow the onscreen instruction to create an installation media and click Finish on the last screen.


4.2 Reinstall Windows on your PC
- Plug the USB drive into the affected computer, and restart your computer.
- Press F2, F10, or the designated key when your PC boots up, depending on your device manufacturer.
- Go to the Boot menu and Change the boot order in the BIOS. Select USB flash drive.

- When prompted, press any key to continue booting.
- When the computer restarts, you will get Windows 11 setup wizard.
- Select the Language to install, Time & currency format, and the Keyboard or input method on the next screen. Choose accordingly. Click Next.

- Click Install and follow the onscreen instructions to complete the process.


So, these methods can be used to fix the Windows keeps booting into OOBE. Try them and let us know in the comments section below.
Srishti Sisodia
Windows Software Expert
Srishti Sisodia is an electronics engineer and writer with a passion for technology. She has extensive experience exploring the latest technological advancements and sharing her insights through informative blogs.
Her diverse interests bring a unique perspective to her work, and she approaches everything with commitment, enthusiasm, and a willingness to learn. That’s why she’s part of Windows Report’s Reviewers team, always willing to share the real-life experience with any software or hardware product. She’s also specialized in Azure, cloud computing, and AI.