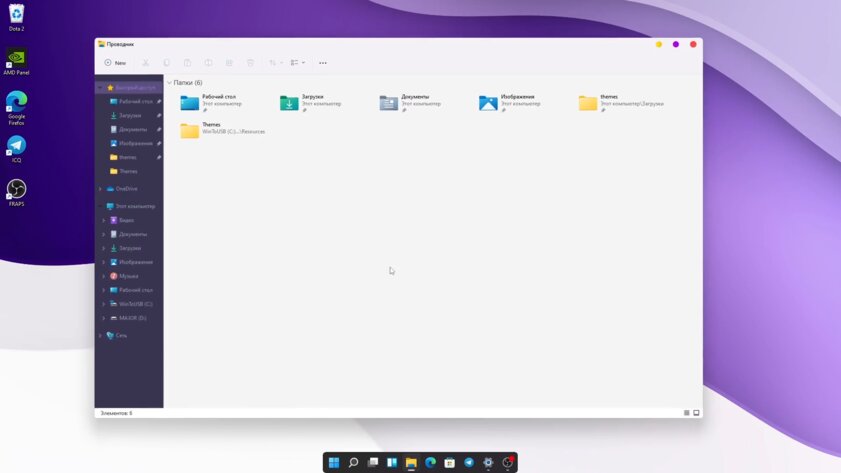
С релизом Windows 11 в 2021 году компания Microsoft сильно освежила дизайн своей системы. Однако кто-то может посчитать этот редизайн недостаточно кардинальным — именно поэтому я нашёл 10 обычных тем от сторонних разработчиков и одну особенную, максимально приближающую интерфейс к таковому в популярных дистрибутивах GNU/Linux. Они полностью преобразят интерфейс Windows 11. Покажу на фишки каждой из них, а затем расскажу, как их установить.
Темы
Все варианты оформления из этого материала устанавливаются с помощью программы UltraUXThemePatcher — о ней в конце статьи. Для начала нужно найти подходящую тему.
Everforest
Одна из самых проработанных тем в подборке. Разработчик не просто сделал серое оформление с зелёными акцентами. Он подобрал к палитре минималистичные обои и сделал темы для сторонних приложений, часто использующихся при моддинге Windows. Например, есть модификации для Stardock Curtains, позволяющей ещё сильнее изменить внешний вид ОС, а также для плееров foobar2000 и PotPlayer и популярной программы StartIsBack для настройки «Пуска».
Macindows
Тема Macindows выделяется использованием толстой обводки в интерфейсе и сочетанием тёплых и пастельных оттенков. Это позволяет частично приблизиться к ранним Mac OS X, где использовались похожие дизайнерские решения. Недаром тема так и называется, отсылая к первым компьютерам Macintosh. В комплекте с темой для Windows идут модификации для сторонних продуктов — плеера foobar2000 и док-баров Nexus или RocketDock. Кроме того, в архиве можно найти тонну стилизованных иконок для популярных программ.
Catppuccin
Catppuccin по цветовой палитре напоминает дизайн свежих macOS — тёмное оформление, граничащее с яркими акцентами и размытием. Фоном для окон служит отдающий фиолетовым серый, выделение и мелкие элементы окрашены в зелёный, оранжевый или пурпурный. В заголовках окон отчётливо видно размытый задний фон. Тема содержит в себе несколько видов иконок управления окнами, кастомизацию для сторонних программ, значки для папок и ярлыков, а также 26 заставок на рабочий стол.
Nord
Эта тема использует популярную цветовую палитру Nord, которая нравится многим своими мягкими и холодными тонами. В честь неё пак оформления и получил своё название. Пользователям доступен как тёмный, так и светлый режим, а также три вида кнопок закрытия — из Linux, macOS и Windows. Nord устанавливает столь же спокойные как и общая цветовая гамма обои, всего доступно три вариации. Тема сделана качественно и подойдёт любителям минимализма.
Dragoon
Ещё одно серое и холодное оформление для Windows. У него невысокая контрастность и несколько видов оформления: тёмный и светлый вариант. Тема заменяет фон на кастомный даже в дополнительных меню, но читабельность надписей ниже, чем у той же Nord. Dragoon содержит в себе набор настроек для утилит StartAllBack и Stardock Curtains.
Dracula
Dracula добавляет красок в интерфейс системы, не превращая его в цирк. Основным тоном является всё же серый, однако акцентными цветами служат розовый и фиолетовый. Иконки закрытия или сворачивания окон тоже заменяются на более яркие, нежели в стандартной Windows. Верхняя часть окон при этом поддерживает размытие. Обои продолжают сочетать в себе нейтрально-тёмные и ярко-насыщенные тона. А вот сторонним приложениям для кастомизации разработчик уделил не очень много внимания — есть тема только для StartAllBack.
Very Peri

Компания Pantone признала Very Peri цветом 2022 года. Microsoft даже выпустила в честь этого коллекцию обоев для Windows 11 в сине-фиолетовых тонах. Энтузиасты пошли дальше и сделали одноимённую тему. Кроме обоев и фиолетовых акцентов оформление Very Peri добавляет чёрный фон в окно Проводника даже туда, где его нет в стандартном тёмном режиме, и меняет иконки управления. Впрочем, есть и светлый вариант. Как и в других темах из статьи, здесь есть моды для других приложений по кастомизации ОС.
BIB3
Оформление BIB3 очень похоже на ранее упомянутый Catppuccin. Главное отличие — в менее красочном основном цвете. Если в Catppuccin он тёмно-фиолетовый, то здесь исключительно серый. Кроме этого, BIB3 даёт выбрать иконки управления из macOS или Linux. Есть еще третий вариант от разработчика. В остальном же это довольно лёгкая тема — здесь нет ни фирменных обоев, ни модов для сторонних утилит.
Kimi
Kimi очень близка к предыдущему оформлению, BIB3. Схожие цвета, минимум изменений и модификаций. Однако у Kimi есть не только ночная, но и дневная тема с фиолетовыми акцентами и яркими значками.
Arctica
Тема Arctica не старается выглядеть сложно — простые и строгие цвета, никакой излишней красочности. Она подойдёт тем, кто устал от стандартного интерфейса, но не хочет превращать систему в зоопарк из разноцветных иконок и плашек. Arctica имеет при себе весь необходимый набор тем для сторонних программ и два цветовых варианта для разного времени суток.
Adwaita — та самая тема, которая превратит Windows в Linux
Это попытка перенести одноимённую тему, установленную по умолчанию для дистрибутивов GNU/Linux с оболочкой GNOME. Создатель этого оформления точно перенёс нейтральную цветовую палитру как для светлого, так и для тёмного режима. При этом остались некоторые фишки дизайна Windows 11 вроде полупрозрачной рамки окон. Adwaita меняет даже некоторые иконки интерфейса — например, кнопки закрытия или сворачивания приложений скопированы прямиком из Linux. Вдобавок идёт и набор из подходящих по стилю обоев, а также целый пак значков для папок и ярлыков.
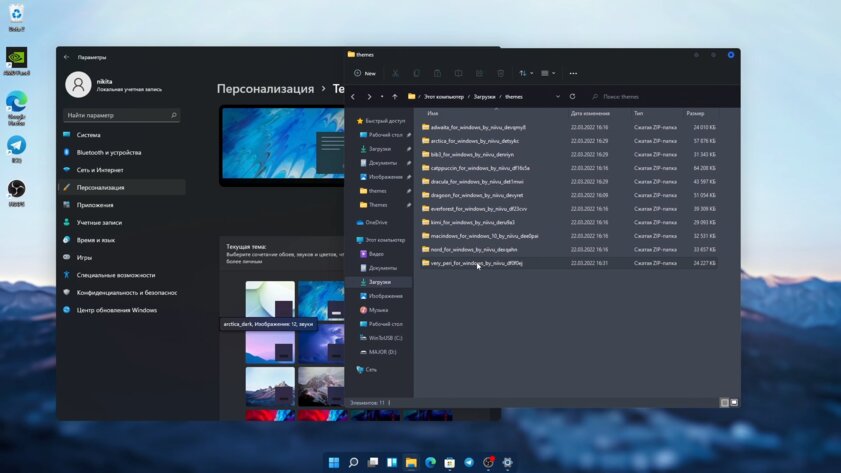
Как установить
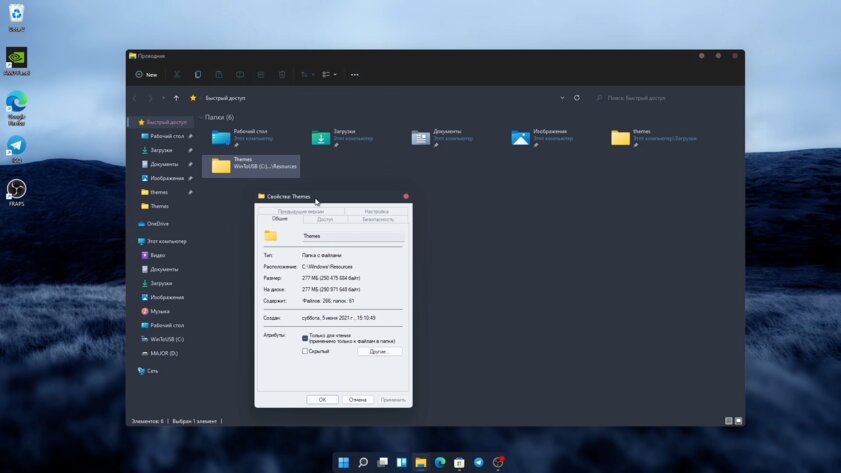
Прежде чем устанавливать темы, нужно поставить программу UltraUXThemePatcher. Запустившись, она создаст бэкап и попросит перезагрузить компьютер. После этого достаточно:
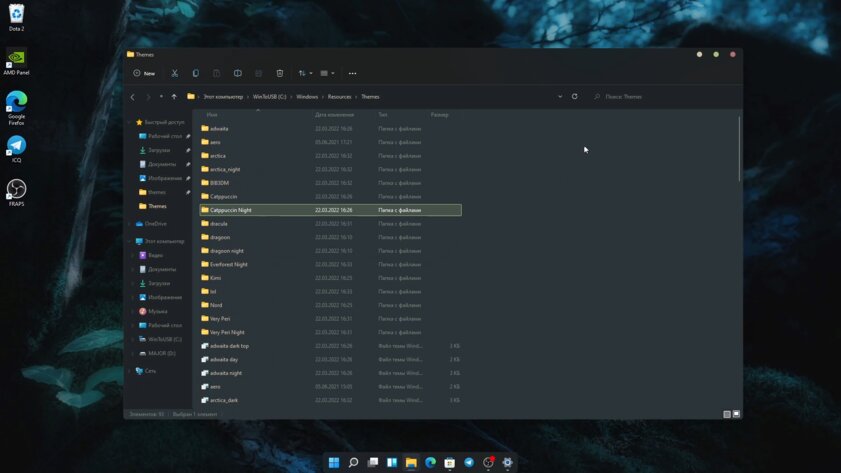
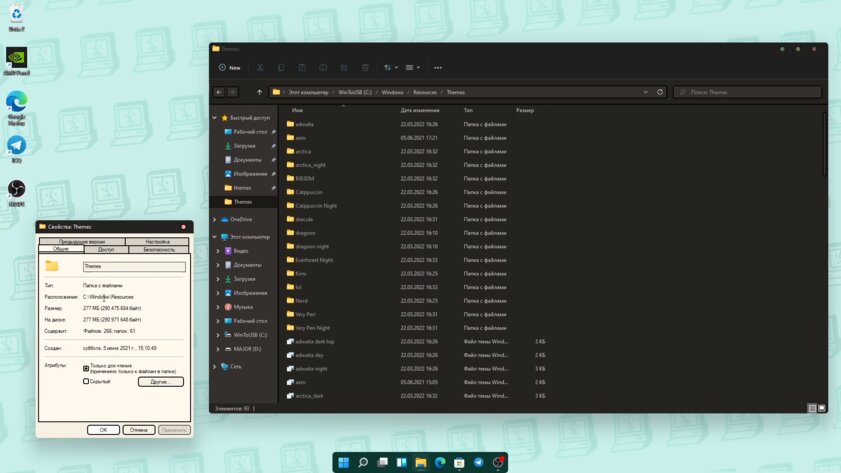
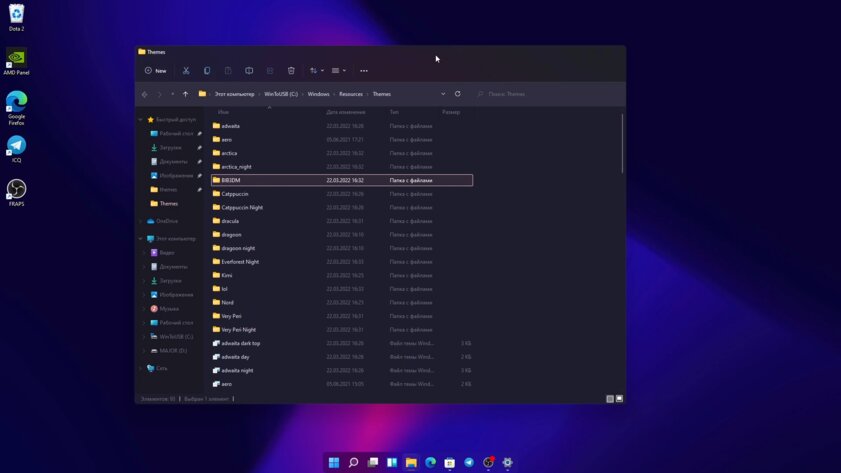
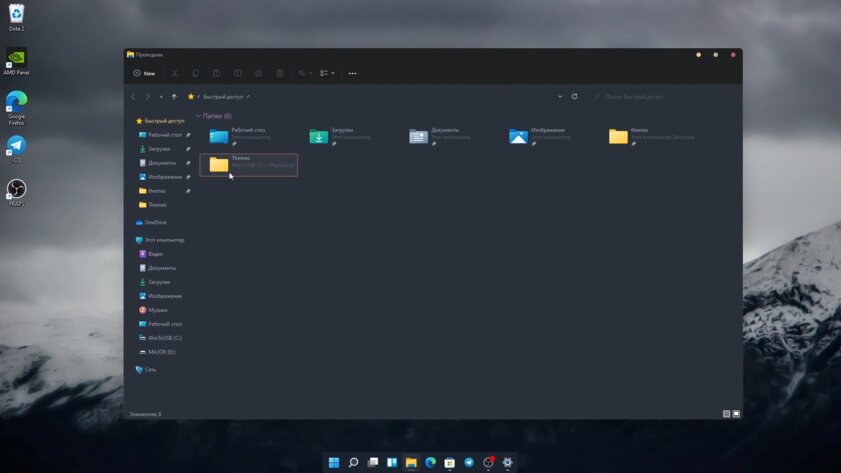
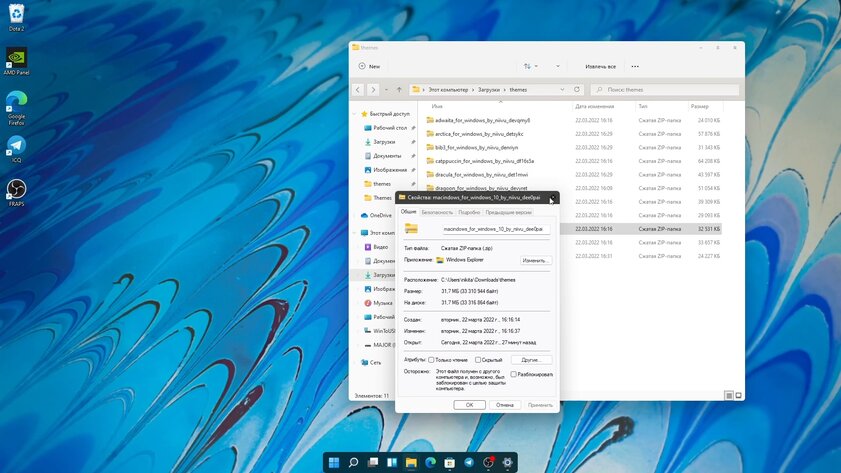
- открыть папку Windows/Resources/Themes/;
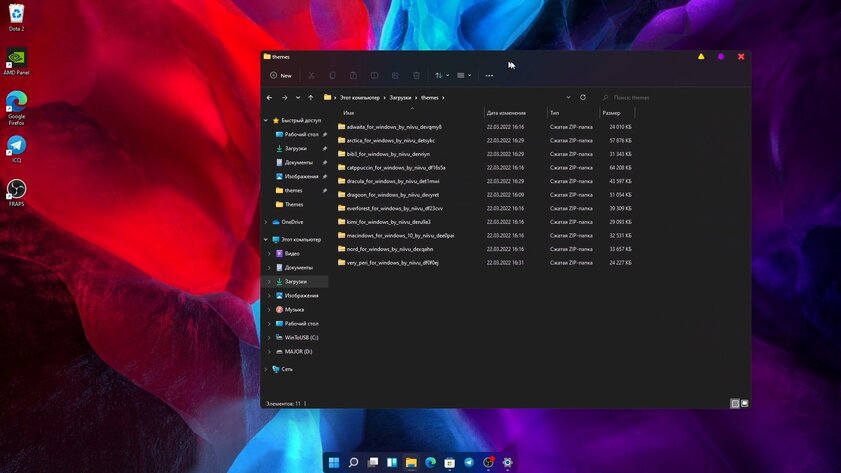
- перетащить туда файлы загруженной темы (обычно они находятся в подпапках Themes или Windows Themes — это зависит от создателей);
- открыть настройки персонализации самой Windows;
- сменить тему на нужную.
Imagine for a moment that you’re stranded on a desert island. You’re a software developer and have been using Linux systems or an Apple Mac ever since you were old enough to type on a keyboard. Yet the only things that you were able to bring with you to your desert island was a Windows machine, and enough tea and biscuits to last a lifetime. Luckily the island already has an internet connection — what do you do?
Okay, you could just download Ubuntu and install it onto a Virtual Machine, but there is another way. Which as it happens, also involves installing Ubuntu…
A Week Without My Macbook
I was in a very similar situation recently, although instead of being stranded on a desert island I was forced to leave my MacBook with the Apple Store while they fixed a weird issue with my touch bar.
I had to find a way to keep working while my development machine was in the shop. I love using a Unix command line and tools such as ZSH and Oh-my-zsh!. In my day job, I have to use Ruby and Node on a regular basis, and I love using iTerm2 as my main terminal emulator. I also primarily use desktop tools like Visual Studio Code, Docker, and Slack.
One option would be to simply install Docker and set up a containerized development environment, but that would be too easy.
Could I continue using my normal development tools and my workflow without my MacBook? I set out to find out!
“Learn how to install Windows Subsystem for Linux, turning your Windows 10 machine into a full-blown Linux powerhouse”
Tweet This
Cross-Platform Applications
Of course, a lot of the applications I just mentioned are available cross-platform, with many of them being HTML, CSS, and JavaScript applications wrapped up using Electron. This covers apps like Visual Studio Code and Slack, which are the two main tools I use day-to-day.
I occasionally dip into using Intellij for Scala development and again this runs cross-platform. So it looks like all the desktop applications I need are available, which is great!
For my main development and blog writing activities, I primarily use Git, Ruby and NodeJS. Fortunately, there are Windows installers for all of these that ultimately work, but they all feel a bit Windows-y. For example, the best way to use Git on Windows is to use Git for Windows, which provides a Git Bash application that drops you into a terminal running Git. Or you can use a desktop application like GitHub Desktop, or the built-in Git interface inside Visual Studio Code.
As for Ruby, I enjoy using RVM, which makes the installation and management of different Ruby versions very easy and relatively painless. Windows is supported using something like Cygwin, but again it’s not really a native solution and I ran into issues getting it to work the way I’m used to.
All of these are good solutions (if you can get them working) but seeing as the goal of this exercise is to figure out a way to work just like I have been doing on my MacBook, I wanted to explore further.
Terminal Velocity
I really enjoy using the terminal for the speed and ability to get things done concisely and quickly. Using a terminal that supports features such as tabs, horizontal and vertical splitting, and Unix command utilities and features like piping and output redirection is very important to me.
Unfortunately, this is where Windows starts to break down. Windows has Command Prompt, which doesn’t support any of those nice UI features that I like, and with me not being familiar with Windows shell script, I find it cumbersome. There is also Powershell and, as the name suggests, is very powerful but it’s something new I’d have to learn. Ultimately, it would take time until I’m as productive as before. Interestingly for the Powershell users, posh-git gives you adornments in the terminal as the Git status of the current folder, which is one of the features I like about Oh-my-zsh.
I’m in love with iTerm2 on the Mac for its ability to use tabs, split windows, profiles, and theming, so is there anything that gets me close?
Hyper is a terminal emulator that supports at least the UI features of being able to use tabs and window splitting. It’s based on Electron and so is cross-platform, and supports more advanced features like themes and plugins. I do like theming my applications so that they look more pleasing to the eye, but I was willing to forget about that for this short-lived exercise.
However, it’s just an emulator and therefore is still just using Windows shell script. Something more fundamental under the hood would have to change.
Enter the Windows Subsystem for Linux
Windows Subsystem for Linux (WSL) is a way to run native Linux commands and tools alongside your existing Windows apps. It doesn’t use a virtual machine and is as easy to access as opening a terminal window. To quote directly from the documentation:
The Windows Subsystem for Linux lets developers run GNU/Linux environment — including most command-line tools, utilities, and applications — directly on Windows, unmodified, without the overhead of a virtual machine.
Sounds good, doesn’t it? In theory, I should be able to use all the command-line tools that I’m used to without leaving my Windows desktop environment.
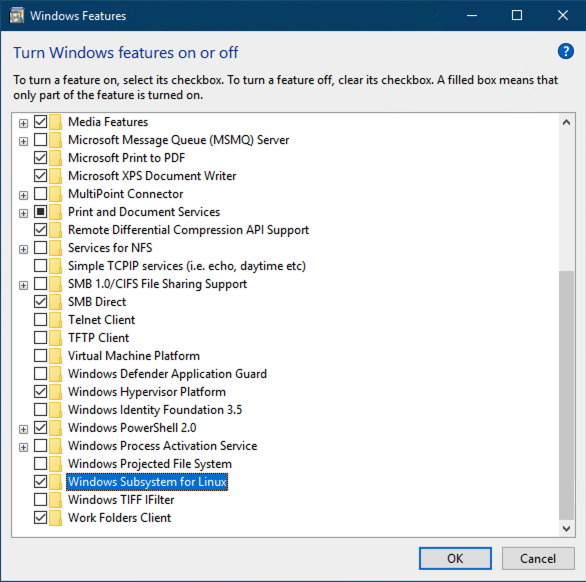
To install WSL, you need to be on the Windows 10 Fall Creator’s Update (build 16215). Then, you can install the feature by using the «Turn Windows features on or off» facility and ticking «Windows Subsystem for Linux»:
It can also be installed by running this Powershell command:
# Run this inside Powershell to enable the WSL feature Enable-WindowsOptionalFeature -Online -FeatureName Microsoft-Windows-Subsystem-LinuxNote: The machine may need to be restarted once WSL is installed
One of the many Linux distributions on the Windows Store can then be installed as a Windows App. I chose Ubuntu as it’s the one I’m most familiar with. An Ubuntu app becomes available once it’s installed, but the normal Windows Command Prompt app can be used in its place if you so wish.
Then, to enter a Linux terminal, open Command Prompt (or your terminal emulator of choice) and type
wslto get started. The next thing you will see is your Linux command prompt.
# My WSL command prompt inside the Command Prompt application /c/Users/steve >So what can be done from here? Supposedly anything that can normally be done from an Ubuntu terminal. Let’s check what release of Ubuntu I’m using:
> lsb_release -a No LSB modules are available. Distributor ID: Ubuntu Description: Ubuntu 18.04.2 LTS Release: 18.04 Codename: bionicUse
curl?
> curl -i google.com HTTP/1.1 301 Moved Permanently Location: http://www.google.com/ Content-Type: text/html; charset=UTF-8 Date: Tue, 26 Feb 2019 10:42:51 GMT Expires: Thu, 28 Mar 2019 10:42:51 GMT Cache-Control: public, max-age=2592000 Server: gws Content-Length: 219 X-XSS-Protection: 1; mode=block X-Frame-Options: SAMEORIGINInstall Vim?
> sudo apt-get install vim Reading package lists... Done Building dependency tree Reading state information... Done The following package was automatically installed and is no longer required: libfreetype6 Use 'sudo apt autoremove' to remove it. 0 upgraded, 0 newly installed, 1 reinstalled, 0 to remove and 3 not upgraded. Need to get 1152 kB of archives. After this operation, 0 B of additional disk space will be used. Get:1 http://archive.ubuntu.com/ubuntu bionic/main amd64 vim amd64 2:8.0.1453-1ubuntu1 [1152 kB] Fetched 1152 kB in 0s (2468 kB/s) (Reading database ... 39405 files and directories currently installed.) Preparing to unpack .../vim_2%3a8.0.1453-1ubuntu1_amd64.deb ... Unpacking vim (2:8.0.1453-1ubuntu1) over (2:8.0.1453-1ubuntu1) ... Setting up vim (2:8.0.1453-1ubuntu1) ...As you can see,
apt-getis available and can be used to install any software that would normally be available on a native instance of Ubuntu.
Can something like NVM be installed the same way as on a native Linux distribution?
For the purposes of this recording and in the interest of time, I had already installed NVM on this machine, but not Node itself. Take a look and see what happens!
Your browser doesn’t support HTML5 video. Here is a link to the working on Windows nvm video instead.
Thankfully, nothing unremarkable happens! I get Node 10 and NPM installed just as happily as I would have done on a native Ubuntu install. I can also confirm that I was able to install RVM perfectly well, by following the installation instructions that I would have normally followed on Linux.
Furthermore, I was able to install ZSH and Oh-my-zsh without any issues, again using the instructions provided for Linux. With this in place, I’m already most of the way towards working the way I’m used to on my Macbook!
Developers, Developers, Developers
Now that I have the tools installed, what is the actual development experience like?
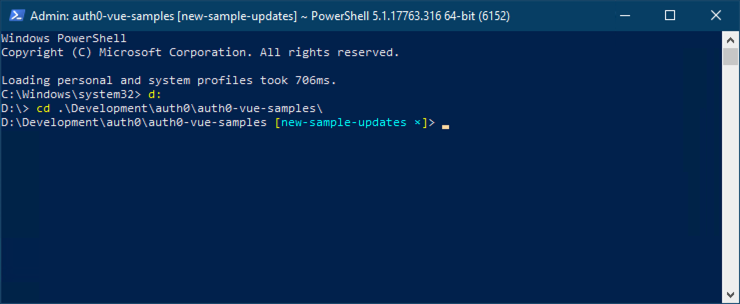
I can happily report that it is fairly unintrusive to the point where I almost forget I’m working on a Windows machine. Thanks to the fact that Windows drives are automatically mounted into your Linux environment, I still get access to my files and folders from within my Ubuntu environment. This means I can use Git and all the other command-line utilities that I’m used to, but still manipulate those files using whatever editor on the host Windows machine I want. By default, your host drives are available in the
/mntfolder. So a Windows path of
D:\Development\auth0would be available in your Linux environment as
/mnt/d/Development/auth0.
At the moment, it’s not possible to get access to the Linux filesystem from the Windows host, but that will change in Windows 10 build 1903. In a nutshell, WSL will start a 9P file server on bootup with Windows as the client, serving Linux files over an internal network protocol.
Windows UI features
For me, the operating system shell is just as part a part of the development experience as the software I use to do my job. For example, I’m a heavy user of OSX’s Spotlight feature, and I regularly navigate through my operating system simply by using text search; it’s very easy to press
Cmd+Spaceand search for what I want.
Windows 10 supports just the same functionality and allows me to move around the operating system very easily, opening programs and manipulating windows simply by using the keyboard. Pressing
Windows Keyopens the Windows Start Menu, where I can just start typing what I want. Admittedly this is not obvious, as there is no focussed text box to indicate to the user that they’re able to type a search term.
Your browser doesn’t support HTML5 video. Here is a link to the working on Windows start video instead.
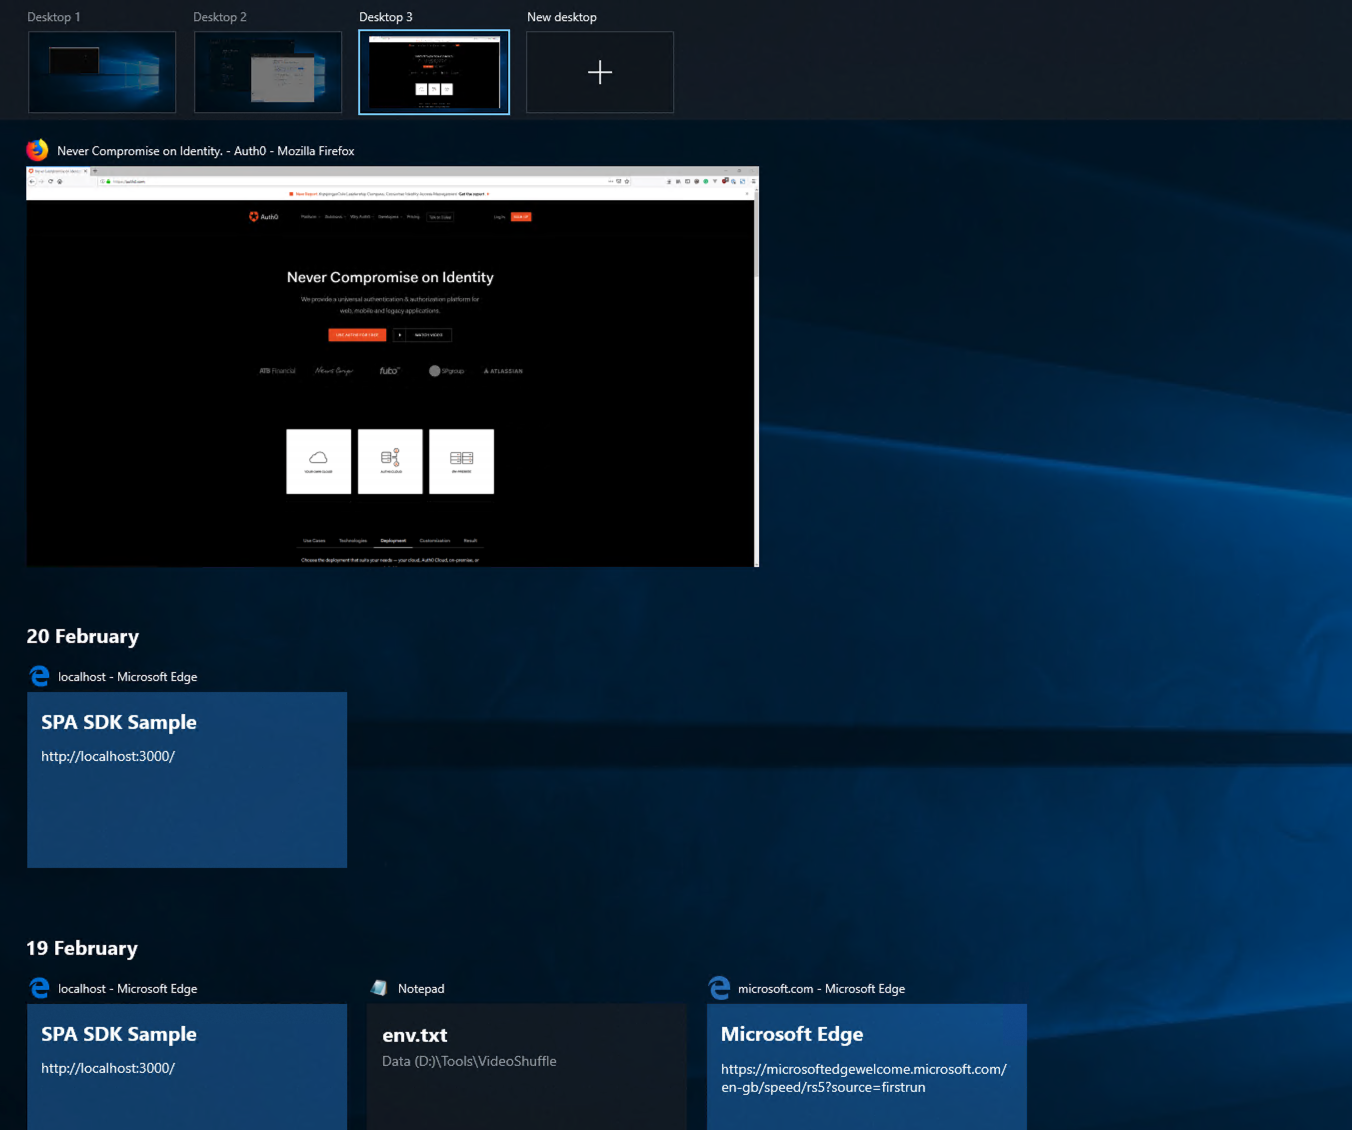
Another feature of OSX that I often use is multiple desktops, or Spaces. This is part of the Mission Control feature that can partition applications into different Spaces, allowing you to easily swipe between them. I use this feature to organize my work better. As an example, with every instance of Visual Studio Code that I have open, I tend to have a corresponding instance of iTerm2 open at my working directory for the project I’m working on. Using multiple desktops, I can group these instances together so that I have different desktops set up for different projects. I can switch between different desktops using a trackpad gesture, or by using
Ctrl+Left/Right Arrowto move between them.
Luckily for me, Windows 10 supports this exact feature! Just like on OSX, different desktops can be created that play host to different instances of running applications, and I can switch between them using simple keyboard commands. Pressing
Win Key+Tabgives me a Mission Control-like overview of my available desktops and applications. I can even specify that an instance of an app is available across all my desktops (it’s handy to have my favorite music player available wherever I need it!).

“With WSL, I love that I have all the command-line tools that I’m used to available to me, as well as the ability to use multiple desktops, search, and use all my favorite desktop applications.”
Tweet This
A word about Docker
I wanted to touch on my experience using Docker with this setup. I already have Docker Desktop installed on my host Windows machine, and I was concerned that I may have had to uninstall that in order to get it working inside WSL. Either that, or I would have to live with having two instances of Docker on my machine taking up valuable hard-drive space; one for the Windows host, and another inside WSL.
Thankfully, I didn’t have to do either of those things and following these instructions on setting Docker up to work on WSL (flawlessly, as the article title puts it) was very easy and painless. The basic principle is that Docker running on the Windows host can also be used by the Docker client running inside WSL, as the two are interfaced by a REST API. The key piece of configuration is to tell the Docker client inside WSL where the host is. By default, it connects to a Docker instance running on the same machine, but in this case, we can point it to the instance running on the Windows host.
After having gone through the setup myself, I can confirm that Docker from inside WSL works as expected!
SSH keys
As you might expect from reading through this post, generating SSH keys works exactly the same way as on any other Linux distro. I followed the SSH key guide on GitHub.com and it just works. The caveat is that the SSH key will be generated for your WSL install, and so the key will need to be added to any services you use that require SSH keys.
This is fine for me, but if you already have an SSH key for your Windows profile then you can symlink your
.sshfolder into your WSL install if you wish to use the same keys.
I’ve Now Sold My Macbook!
I haven’t actually sold my Macbook. However, given everything that I’ve experienced getting my development environment pretty close to what I’m used to, I’m pretty certain that I would be able to live without it for a while longer. I love that I have all the command-line tools that I’m used to available to me, as well as the ability to use multiple desktops, search, and use all my favorite desktop applications.
So far I haven’t found an instance where Windows Subsystem for Linux has provided an obstacle where I can’t get working, although I admit that even the use-case I present here is probably quite simplistic compared to how some other people would like to use it.
Are you a WSL user? Have your experiences been good or bad? Tell us about it in the comments below!
About Auth0
Auth0 by Okta takes a modern approach to customer identity and enables organizations to provide secure access to any application, for any user. Auth0 is a highly customizable platform that is as simple as development teams want, and as flexible as they need. Safeguarding billions of login transactions each month, Auth0 delivers convenience, privacy, and security so customers can focus on innovation. For more information, visit https://auth0.com.
Каждый раз, когда мы заходим на какую-нибудь страницу какого-нибудь сайта, это заходим не мы, а наш браузер. То есть когда мы нажимаем на какую-нибудь ссылку или когда мы вводим в адресную строку браузера какой-нибудь адрес, наш браузер пытается соединиться с удаленным сервером, на котором находится та страница, которую мы хотим открыть. Затем наш браузер и тот сервер начинают обмениваться информацией. Эта информация называется HTTP-заголовки. Браузер посылает серверу HTTP-заголовки, из которых видно, какой у нас браузер, какая у нас операционная система, какая установлена языковая раскладка, с какой страницы мы пришли, и еще очень много всего другого. Так вот, все это можно менять. Для этого существуют специальные программы, которые позволяют менять HTTP-заголовки.
Например, есть удобная и бесплатная программа под названием Proxomitron. (Программа иностранная, поэтому не забудьте поставить к ней русификатор.) С помощью Проксомитрона можно делать много всяких интересных вещей и в том числе можно менять HTTP-заголовки. Еще у программы есть специальное окошко, в котором видно, какие заголовки посылает наш браузер, и что получает в ответ. Чтобы вызвать окошко, нужно нажать кнопку «Журнал».
Вообще пользоваться Проксомитроном очень просто. Предположим, что у нас стоит Windows XP и браузер Internet Explorer. С помощью Проксомитрона мы можем превратить их соответственно в Linux и Netscape. Конечно, на самом деле у нас останутся Windows и Internet Explorer, но когда мы будем заходить на любые сайты, там будут думать, что у нас Linux и Netscape (это будет видно в логах). Вот что нужно сделать.
1. Запускаем Proxomitron.
2. Нажимаем «Заголовки». Тут мы видим много разных заголовков. Нас интересуют заголовки User-Agent. User-Agent — это заголовок, показывающий какой у нас браузер и какая у нас операционная система.
3. Ставим галочку напротив User-Agent: Netscape Linux. Естественно, надо снять галки с любых других браузеров, если они отмечены. То есть должен быть отмечен только User-Agent: Netscape Linux.
4. Нажимаем «ОК». Всё. Теперь Проксомитрон будет посылать заголовок User-Agent, из которого будет видно, что у нас Linux и браузер Netscape.
5. Заходим на специальный сайт для проверки, чтобы узнать, как теперь выглядит наш заголовок. Например, сюда.
Еще можно поменять заголовок Accept-Language, который показывает, какая у нас установлена раскладка. По умолчанию в Проксомитроне этот заголовок не установлен, поэтому нам нужно будет его по-быстрому создать. Это очень просто. Для этого нужно сделать следующее:
1. Запускаем Proxomitron.
2. Нажимаем «Заголовки».
3. Нажимаем «Новый».
4. В окошке «Заголовок HTTP» пишем «Accept-Language:» (без кавычек).
5. В окошке «Значение заголовка» пишем звездочку «*» (без кавычек).
6. В окошке «Текст замены» пишем «zh-cn,en-us;q=0.5» (без кавычек).
7. Нажимаем «ОК»
8. Снова нажимаем «ОК».
9. Всё! Мы превратились в китайцев. Теперь наш браузер будет посылать заголовок Accept-Language, из которого будет следовать, что у нас на компьютере установлена раскладка с двумя языками: китайским (zh-cn) и английским (en-us).
Конечно, для того чтобы превратиться в китайца окончательно, нужно к тому же использовать китайский прокси. Но о проксях — в следующий раз.
Proxomitron вообще позволяет делать еще много всего другого, но об этом — в следующих статьях. А теперь о Гуглботе. Гуглбот — это робот поисковой системы Google, который постоянно лазит по Интернету и ищет новые сайты, а также смотрит, не изменилось ли что-нибудь на старых сайтах. Если Гуглбот находит новый сайт, он его индексирует (то есть заносит в базу данных поисковой системы Гугл). А если он видит какие-то изменения на старых сайтах, то он их тоже заново переиндексирует.
Зайдя на какую-нибудь страницу какого-нибудь сайта, Гуглбот ведет себя как браузер. Он просматривает код страницы и так же как и браузер обменивается с сервером разной информацией, то есть посылает HTTP-заголовки. Например, он посылает заголовок, из которого видно, что он — Гуглбот.
Некоторое время назад у Гугла появился новый Гуглбот. Говорят, что, в отличие от предыдущего, новый гораздо быстрее и умнее. Якобы, понимает CSS, JavaScript и вообще очень умный. Как и положено, у нового Гуглбота новая подпись. Теперь он посылает вот такой заголовок:
Mozilla/5.0 (compatible; Googlebot/2.1; +http://www.google.com/bot.html)
С помощью Проксомитрона мы тоже можем превратиться в Гуглбота. Мы можем поменять наш заголовок User-Agent на тот, который посылает Гуглбот. Конечно, для того, чтобы нас наверняка принимали за Гуглбота, нужно будет поменять и другие заголовки. Но об этом в следующий раз.
Are you a Windows user who’s decided to switch to Linux? But, maybe your work or your favorite game wants you to use Windows.
Compared to Linux, Windows doesn’t provide a lot of customization options. But that doesn’t mean you can’t tweak it to make them look better.
There are a lot of third-party applications that claim they can change how Windows look. But most of them either aren’t stable or can break your Windows. Read further on how you can make windows look like Linux in the safest possible way.
Make Windows Look Like Linux
Turn Windows Into Linux (Paid Version)
Deviantart has lots of themes designed for all versions of Windows that look a lot like Linux. They have a detailed guide on how to install it.

Turn Linux Into Windows (Free Version)
If you are looking for a free alternative, then it becomes a little complicated. You would have to piece together bits from different places. Also, the internet is full of fake applications on this topic. So you never know if you are going to break your Windows trying to force a modification.
Windows doesn’t provide a lot of flexibility in modifying its default settings. So we would need to make do with what is available for us. For example, you cannot change the system font in Windows. And, the taskbar has no customization whatsoever.
A lot of times, there is no choice but to consider third-party applications. They may not integrate well with the system and not quite what you want. I have compiled online resources into different sections. Each section tackles one aspect of customization.
Customizing to look like Linux is a very broad topic. No two Linux distributions look the same. So we will stick to customizing Windows to look like the default Ubuntu.
Change Mouse Cursor
- Down Ubuntu Cursors.

- Once the download completes, go to the Downloads folder.
- Click on the downloaded file and select extract all.

- Click on Start Menu and type Mouse settings to bring up a new window.

- Under Related settings, select Additional mouse options.

- Go to the Pointers tab.

- With Normal Select selected, click on Browse.
- Head to the newly extracted folder from Step 3.
- Select Ubuntu Normal cursor file and click Open.

- Select Apply. The mouse cursor should now change.
- Repeat Steps 7-9 for all cursor types.
- Select OK.
Change Accent Color
- Right-click on Desktop and select Personalize.

- Click on Colors.

- Enable Transparency effects if not already enabled.

- Scroll down to colors and select Custom color.

- Select More.

- Enter #5E2750 as the hex color code and select Done. This is the code for dominant color used in Ubuntu according to their official website.
Hide Desktop Icons
- Right-click on Desktop and Go to View.
- Under Expanded View, click on Show Desktop Icons to uncheck it.
- The desktop icons should disappear. To get them back, repeat steps 1 and 2. You can also hide recycle bin only.
Hide the Taskbar
- Go and grab Taskbar Hider application. Windows 10 doesn’t have a built-in way of hiding the taskbar permanently so we’ll install this instead. Select 32 bit or 64 as needed.

- Once downloaded, extract the application to the Downloads folder.

- Open Powershell or Command Prompt (Press Windows Key + X).
- Go to this location by typing
cd Downloads - Type
TaskBarHider.exe -hide -exit. This will hide the taskbar.

- If you need to get it back, type
TaskBarHider.exe -show -exit.
Change Powershell Font
- Download Ubuntu fonts.

- Extract to Downloads folder.
- Right-click on Desktop and select Personalize.
- Select Fonts from the left navigation pane.

- Open the folder you extracted from Step 2.

- Select all fonts and Drag and Drop them to the Fonts window. Wait until they finish installing.

- Open Powershell.

- Do a Right-click on the window bar and select Properties.
- Select Font tab.
- Scroll and select Ubuntu Mono from the font list.

- Increase Size if needed.
- Click on OK.
Change Powershell Colors
- Open Powershell.
- Do a Right-click on the window bar and select Properties.
- Select Colors.
- Select Screen Text and click on the White palette.

- Select Screen Background.
- Under the Red, Green and Blue values, enter 94, 39, and 80 respectively. This gives you the official color palette of Ubuntu.

- Click on OK.
Install Launcher
- Download Linkbar.
- Once complete, extract to the Downloads folder.

- Open the extracted folder and open LinkBar64.exe or LinkBar.exe(32bit).

- Linkbar now appears on the left side of the screen. Right-click on it and select Settings.
- Make sure the Style is set to Accent to match the Windows color scheme.

- To add a launcher, right-click on Linkbar again and select Shortcut from New.

- Click on Browse.

- Open a Folder location or browse to the application you want.

- Select OK.
- Click Next.

- Type name of new launcher and select Finish.
Download Wallpaper
- Get a Ubuntu wallpaper.
- Go to the Downloads folder and do a right-click on it.
- Select Set As Desktop Background. Dark wallpapers might work well too.

Install WSL
- Open Powershell in Administrator Mode.
- Type
wsl --install. This can take some time to complete. - Go to the Windows App Store.

- Search for Ubuntu and open it.

- Select Install.
- Once completed, you can launch Ubuntu from the Start Menu.

- A terminal window pops up that can be used to enter commands on Windows as if it was an Ubuntu machine.
WSL is one of the ambitious projects by Microsoft. WSL shows its commitment to empowering Linux. Microsoft plans to contribute more to WSL to make it powerful in the future. This means that Windows is going to feel more like Linux in new versions.
Change WSL Terminal Colors and Fonts
- Do a Right-click on the window bar of WSL and select Properties.

- Select Colors.
- Select Screen Text and click on the White palette.
- Select Screen Background.
- Under the Red Green and Blue values, enter 94, 39, and 80 respectively.

- Select Fonts.
- Select Ubuntu Mono.
- Click OK.

And there you go. The end result would be something like the following screenshots.

Frequently Asked Questions
Can I Make Linux Look Like Windows?
Unlike Windows, Linux comes with a lot of customization options. You can choose from a wide variety of themes, color combinations, and desktop apps. You can even find out-of-the-box solutions to Linux systems that look like Windows. A few ready-to-go solutions are available below.
LinuxFx
This is a Ubuntu-based Linux targeted at users who are making a switch from Windows. The interface looks as close to Windows as possible. You can choose to either run it as a virtual machine or a USB bootable drive. Or, you can also choose to install it on your PC.
ZorinOS
Zorin OS is designed for both Windows and macOS users who want to switch to Linux. The interface is very simple and intuitive. It also includes many applications by default.
UkUI
UkUI can be installed on default Ubuntu to give it easier customization options. You can choose from a ton of icons, fonts, and interface options to make Ubuntu look like Windows 10.
Время на прочтение6 мин
Количество просмотров106K
Раньше моей рабочей машиной был ноутбук, созданный Apple. Я мог делать на нём практически всё что угодно: разрабатывать программы, писать тексты, сочинять музыку, да и много чего ещё. Но мне не давали покоя мысли о том, что я привязан к экосистеме Apple, о том, что я зависим от прихотей этой компании. Поэтому я приступил к поискам чего-то нового.
Я начал собирать рабочую станцию под задачи машинного обучения. Поставил в неё, кроме прочего, отличный процессор, много памяти, достойную видеокарту. Практически все мои задачи я решал в Ubuntu. Правда, для работы с текстами мне нужен был Microsoft Office. Онлайновый Office тогда ещё не появился, и, давайте называть вещи своими именами, LibreOffice — это просто ужас какой-то. Для меня решением стала двойная загрузка в конфигурации Ubuntu — Windows 10. Мне невероятно понравилось то ощущение свободы, которое испытываешь, переходя с ОС от Apple на Ubuntu. А возможности, которые открываются перед тем, кто сам собирает свой компьютер, практически бесконечны.

Двойная загрузка в течение долгого времени полностью меня устраивала. А когда я миллион раз ей воспользовался, появилась технология WSL (Windows Subsystem for Linux, подсистема Windows для Linux). Когда это случилось, я начал решать некоторые свои Linux-задачи в Windows. Правда, даже так, многого для полноценной работы мне ещё не хватало. Но теперь, с выходом WSL 2, у меня возникает такое ощущение, что новая версия WSL способна кардинальным образом изменить ситуацию. Сегодня я предлагаю поговорить о том, как, с помощью WSL 2, перенести задачи по разработке программ из Linux в Windows 10. Я расскажу о новых возможностях WSL 2, и о том, что можно ожидать от этой подсистемы в будущем.
Обзор WSL 2
WSL 2 — это новая версия подсистемы Windows для Linux. В этой версии имеются некоторые изменения, определяющие то, как Linux-дистрибутивы взаимодействуют с Windows.

Microsoft любит Linux
В этом релизе WSL в распоряжении пользователя оказывается улучшенная производительность файловой системы и полная совместимость с системными вызовами. Конечно, у нас есть возможность запускать Linux либо на WSL 1, либо на WSL 2, и, более того, переключаться между разными версиями WSL можно в любое время. WSL 2 — это результат серьёзного усовершенствования базовой архитектуры системы, её новые возможности основаны на технологии виртуализации и на функционале ядра Linux. При этом Microsoft берёт на себя заботу о мелких деталях, поэтому пользователь WSL может просто заниматься своими делами, ни на что не отвлекаясь.
Установка
Microsoft обещает, что в ближайшем будущем установка WSL 2 будет выполняться очень просто, и что Linux можно будет обновлять с использованием механизма обновлений Windows. Пока же процесс установки WSL 2 требует некоторых усилий, но, на самом деле, ничего страшного тут нет.
В этом примере мы установим на Windows 10 Ubuntu 20.04. Надо отметить, что процесс установки будет одним и тем же для всех дистрибутивов Linux, доступных в Microsoft Store. Для начала нужно включить компонент Windows Subsystem for Linux. Для этого надо открыть PowerShell от имени администратора и выполнить следующую команду:
dism.exe /online /enable-feature /featurename:Microsoft-Windows-Subsystem-Linux /all /norestart
Далее, нужно обновить WSL до WSL 2. Для этого Windows 10 должна быть обновлена до версии 2004. В BIOS должна быть включена технология виртуализации Intel. Снова воспользуемся PowerShell с административными привилегиями и выполним такую команду:
dism.exe /online /enable-feature /featurename:VirtualMachinePlatform /all /norestart
Для завершения установки WSL и обновления до WSL 2 перезагрузите компьютер. Затем нужно установить WSL 2 в качестве версии WSL, используемой по умолчанию при установке новых дистрибутивов Linux. Для этого, всё так же, пользуясь PowerShell с правами администратора, выполним эту команду:
wsl --set-default-version 2
После того, как вы выполните эту команду, может появиться такое сообщение:
WSL 2 requires an update to its kernel component. For information please visit https://aka.ms/wsl2kernel

Сообщение, выдаваемое при попытке установки WSL 2 как подсистемы Windows для Linux, используемой по умолчанию
Перейдите по указанной ссылке и установите соответствующий MSI-файл, благодаря которому на вашу машину будет установлено ядро Linux для WSL 2. После того, как ядро будет установлено, выполните вышеприведённую команду снова. Теперь она должна завершиться успешно, не выдавая подобного сообщения.
Теперь осталось лишь установить нужный дистрибутив Linux. Для этого надо открыть Microsoft Store и поискать там Ubuntu 20.04 LTS. После установки дистрибутива в меню Пуск должен появиться ярлык для запуска Ubuntu. Запустите систему и следуйте инструкциям для завершения установки (в целом, завершение установки заключается в создании нового пользователя).
Для того чтобы проверить, действительно ли дистрибутив установлен на WSL 2, выполните такую команду:
wsl --list --verbose
Если оказалось, что используется WSL 1, то переключиться на WSL 2 можно, воспользовавшись командой такого вида:
wsl --set-version <distribution name> <versionNumber>
Вот и всё. Теперь в вашем распоряжении имеется полноценный дистрибутив Ubuntu, работающий в Windows 10.
Настройка рабочей среды для программиста
Теперь, когда в вашем распоряжении оказалась рабочая Ubuntu, вы можете устанавливать всё, что вам может понадобиться. Например, если вы — дата-сайентист, вы можете установить самый свежий дистрибутив Anaconda. Если вы — фронтенд-разработчик, то вас, например, могут заинтересовать Angular, npm и многое другое. Здесь же мне хотелось бы сосредоточиться на двух инструментах. Это — Visual Studio Code и связка Docker + Kubernetes.
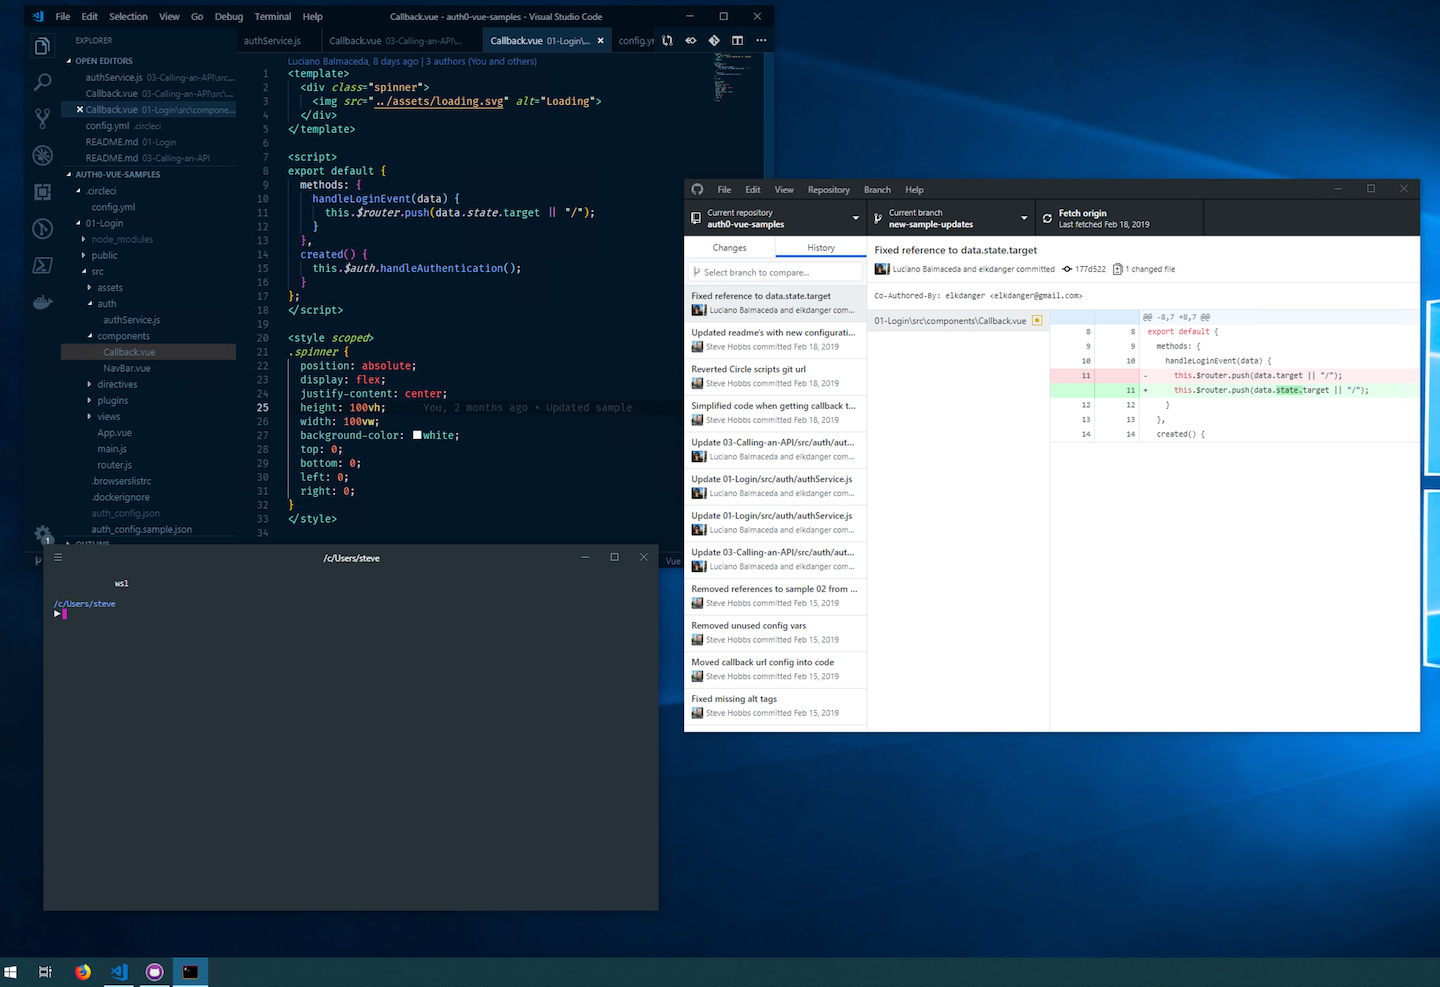
▍Visual Studio Code
VS Code — это редактор кода, которому отдаёт предпочтение множество разработчиков. Одна из сильных сторон этого редактора заключается в поддержке бесконечного множества расширений. А теперь, когда мы включили WSL 2, совершенно необходимым расширением для VS Code можно назвать Remote Development.
Это расширение позволяет удалённо работать над кодом, который имеется в среде, создаваемой средствами WSL 2, в контейнере, или даже на удалённой виртуальной машине, доступ к которой осуществляется по SSH. Данное расширение позволяет, например, создать проект в ОС Linux, работающей в WSL 2, и использовать для работы над этим проектом редактор VS Code, установленный в Windows 10.
Собственно говоря, VS Code отличается огромными возможностями. Это и интеллектуальная система IntelliSense, и интеграция с git, и отладчик, и терминал, и очень много чего ещё. Полагаю, с настройкой VS Code вы справитесь и очень скоро сможете сделать из этого редактора именно то, что нужно вам.
▍Docker + Kubernetes
Docker для Windows сделан на «хорошо», но не на «отлично». На самом деле, именно Docker заставлял меня постоянно «прыгать» между Windows и Ubuntu. Например, мне приходилось делать это тогда, когда нужно было создать новый образ Docker. А вот WSL 2 отличается полной поддержкой Docker. Это, полагаю, такая возможность новой подсистемы, которая делает работу с Docker даже удобнее, чем в Linux.
Для того чтобы включить эту возможность, нужно перейти в настройки Docker Desktop и включить опцию Use the WSL 2 based engine.

Включение поддержки Docker для WSL 2
Более того, перейдя в раздел настроек Kubernetes, можно включить возможность запуска локального кластера Kubernetes, просто установив соответствующий флажок.

Включение Kubernetes
Теперь можно перезапустить Ubuntu в WSL 2 и выполнить следующие команды:
docker version
kubectl version
Результаты выполнения подобных команд покажут, что в вашем распоряжении теперь есть Docker и Kubernetes.
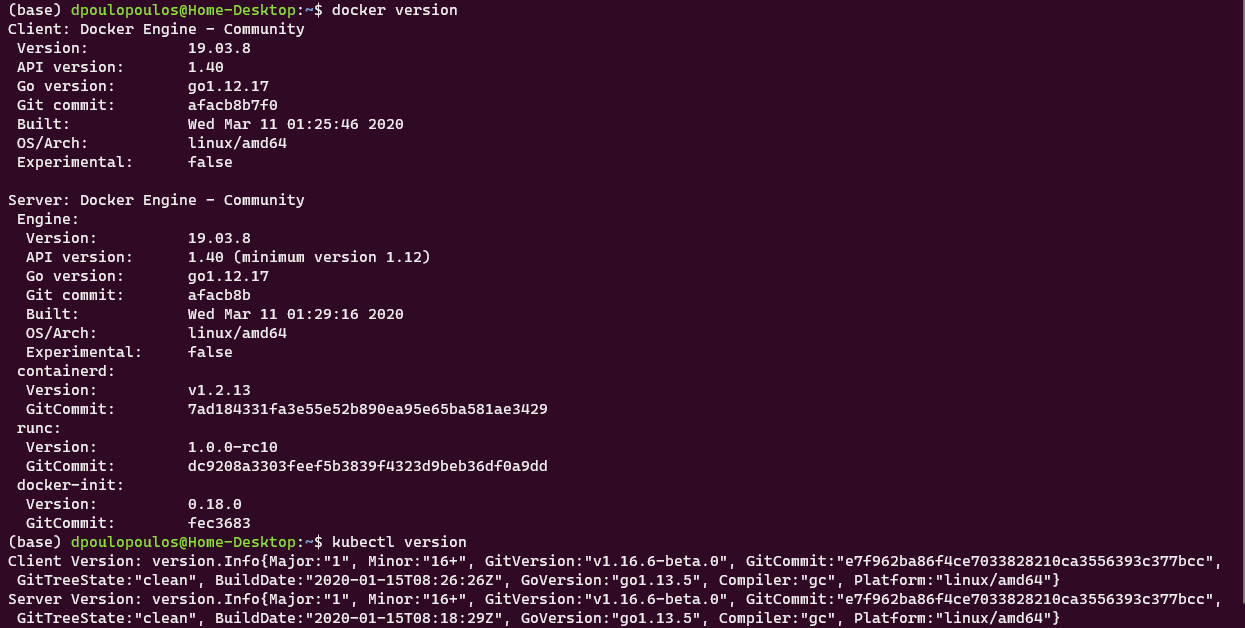
Docker и Kubernetes работают в среде WSL 2
Бонус: новый терминал Windows
В качестве дополнительной полезной программы вы можете установить из Microsoft Store новый терминал Windows. В описании к нему сказано, что перед нами новое современное приложение — быстрое, эффективное и мощное. Оно предназначено для пользователей, работающих с инструментами командной строки и с соответствующими средами, наподобие PowerShell. Среди его главных возможностей можно отметить следующие: поддержка вкладок и панелей, поддержка Unicode и UTF-8, ускорение вывода текста средствами GPU, поддержка пользовательских тем, стилей и настроек.
Вот видео про новый терминал Windows.
Более того, новый терминал очень хорошо выглядит, а его внешний вид поддаётся настройке. Настройки можно выполнять, пользуясь особым JSON-файлом. Здесь можно найти темы для терминала. Вот материал, в котором можно почитать подробности о терминале.
Планы развития WSL
В WSL 2 ещё недостаёт некоторых возможностей, но подсистема Windows для Linux развивается в правильном направлении. В ближайшее время установить WSL можно будет с помощью одной команды. Для этого достаточно будет открыть терминал Windows и выполнить в нём следующее:
wsl.exe --install
Кроме того, WSL 2 будет той версией подсистемы, которая, при первой установке WSL, устанавливается по умолчанию.
Надо отметить, что разработчики очень ждут от WSL следующих возможностей: поддержка видеокарт и поддержка приложений с графическим интерфейсом.
С момента выхода WSL 1 команду разработчиков этой подсистемы чаще всего просили о внедрении в WSL поддержки CUDA или GPU Compute. В последний код команды разработчиков WSL, систем виртуализации, DirectX, Windows Driver работают над этой возможностью. Поэтому — следите за новостями.
Обучение модели, использующей технологии глубокого обучения, в WSL 2 (с использованием CUDA)
Более того, на подходе и поддержка графических приложений для Linux. Например, в Linux-системах, установленных на WSL, можно будет пользоваться текстовыми редакторами или IDE. На Windows-машине можно будет даже разрабатывать GUI-приложения для Linux!
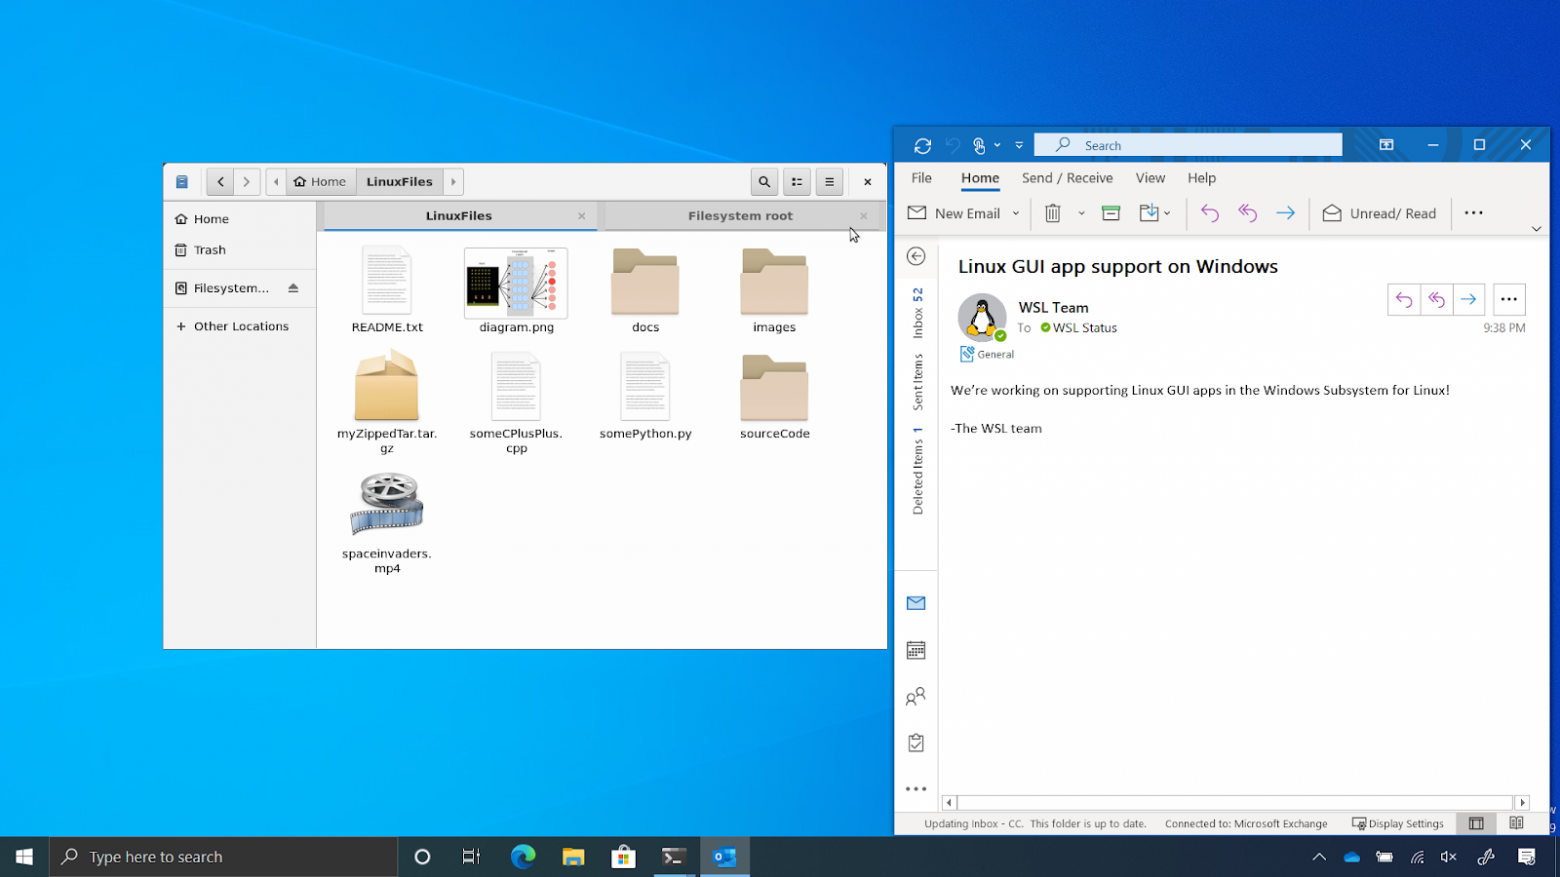
Поддержка графического интерфейса Linux в WSL 2
Итоги
Сегодня мы поговорили о том, как, пользуясь WSL 2 можно превратить Windows-компьютер в рабочую станцию программиста, пользующегося Linux. В распоряжении такого программиста оказывается высокая производительность и множество полезных возможностей, набор которых, со временем, пополнится. Поэтому я и могу говорить о том, что двойная загрузка умерла.
А вы пользуетесь WSL 2?