
Enable or Disable Windows Boot Manager on Windows 11/10
Windows Boot Manager (Bootmgfw.efi) is a critical component of the Windows operating system that plays a vital role in system booting. It manages the boot process and provides options for booting various operating systems installed on the computer. The default configuration usually works seamlessly for most users, but there may be scenarios where you might want to enable or disable Windows Boot Manager.
This article will delve into the intricacies of Windows Boot Manager in Windows 10 and Windows 11, discussing its function, why you might want to enable or disable it, and providing a step-by-step guide on how to perform this operation safely.
Understanding Windows Boot Manager
What is Windows Boot Manager?
Windows Boot Manager is the software that ensures the correct operating system is loaded when you boot your PC. It is responsible for initializing the operating system and loading the necessary drivers and services for the hardware. For users with multiple operating systems, Boot Manager allows selection among these systems at startup.
How Does Windows Boot Manager Work?
When you turn on your computer, the BIOS or UEFI firmware kicks in and looks for a boot medium, usually a hard drive or SSD. Once a boot device is found, the firmware looks for the Boot Manager program. Upon finding it, the Boot Manager loads and presents you with the options of which operating system to boot (if multiple OS installations exist).
Why Enable or Disable Windows Boot Manager?
It might seem unnecessary to touch Windows Boot Manager unless you are facing specific issues, but there are various reasons people might look to change its status.
-
Multiple Operating Systems: If you have multiple operating systems installed, you may want to disable Boot Manager from displaying the boot options screen for faster booting. Conversely, if you have trouble booting into a specific OS, ensuring Boot Manager is correctly configured may solve the issue.
-
Speeding Up Boot Time: For users that work primarily on one OS and do not require the Boot Manager, disabling it can streamline the startup process.
-
Customization: Enthusiasts who customize their boot settings and options may choose to enable or disable Boot Manager to facilitate their setup.
-
Solving Boot Issues: In some cases, boot problems can occur due to the presence of Boot Manager or its configurations. Managing Boot Manager may help rectify such issues.
Enabling or Disabling Windows Boot Manager
Enabling or disabling Windows Boot Manager can seem intimidating, but it can be done relatively easily with the right instructions. Below are step-by-step guides on how to manage your Windows Boot Manager settings effectively.
Step 1: Accessing the Command Prompt
The Command Prompt is a powerful tool in Windows that allows you to execute a variety of commands, including those that influence Boot Manager behavior.
- Open Command Prompt as Administrator:
- Press
Windows + Xto open the Quick Access menu. - Select Windows Terminal (Admin) or Command Prompt (Admin).
- If prompted by User Account Control (UAC), click Yes.
- Press
Step 2: View Existing Boot Entries
Before making changes, it’s good to understand the current state of your boot configurations.
- In the Command Prompt, type the following:
bcdedit - Press
Enter. - You will see a list of boot entries, including details such as the identifier, device, and type (whether it’s a Windows Boot entry or another OS).
Step 3: Enable or Disable Windows Boot Manager
To make Windows Boot Manager visible or hidden during system startup, you can use the bcdedit command.
-
Disabling Windows Boot Manager:
Disabling the Boot Manager means that it won’t be displayed during startup.bcdedit /set {bootmgr} displaybootmenu no- In this command,
{bootmgr}refers to the boot manager, anddisplaybootmenu notells Windows not to show the Boot Manager menu.
- In this command,
-
Enabling Windows Boot Manager:
If at any point you want to enable the Boot Manager back, you can reverse the command:bcdedit /set {bootmgr} displaybootmenu yesThis command tells Windows to display the Boot Manager at startup.
Step 4: Configure Timeout (Optional)
It’s also possible to configure the timeout settings for Windows Boot Manager. If you want to adjust how long the Boot Manager displays at startup:
-
Set Boot Menu Timeout: To set a timeout:
bcdedit /timeout- For example, if you want to set a timeout of 5 seconds:
bcdedit /timeout 5
- For example, if you want to set a timeout of 5 seconds:
-
Set the Timeout to Zero:
If you want to skip the display entirely and always boot straight into the default OS, use:bcdedit /timeout 0
Important Considerations
Back Up Your Data
Before proceeding with any changes to your computer’s boot configuration, ensure that important data is backed up. Corrupted settings or failed updates can lead to startup issues.
Understand Your Changes
Make sure you clearly understand the implications of enabling or disabling the Windows Boot Manager. Modifying boot settings can result in the inability to access certain operating systems or functions.
Recovery Options
It is wise to have recovery options ready should you encounter a problem following these changes. Being able to access Windows Recovery Environment (WinRE) can help undo changes or troubleshoot boot issues.
Troubleshooting Boot Manager Issues
After enabling or disabling Windows Boot Manager, issues may arise. Here are some common problems and solutions:
-
Can’t Boot into Windows:
- If you disabled Boot Manager but still want to recover your system, boot from a Windows installation media and select «Repair your computer.»
- Access advanced options, and you will find choices like “Startup Repair,” “System Restore,” or the Command Prompt to use
bcdeditagain.
-
Boot Menu Not Showing:
- If your Boot Manager doesn’t show up as expected, ensure that the settings were entered correctly in the Command Prompt.
- Check BIOS/UEFI settings to ensure that Secure Boot or Fast Boot options are configured if necessary.
-
Performance Issues:
- If your PC experiences startup slowdowns after enabling Boot Manager, recheck your configurations or consider changing your timeout settings.
Conclusion
Managing Windows Boot Manager settings on Windows 10 and Windows 11 is an essential skill for users who deal with multi-boot environments or simply want to speed up their boot process. Through the Windows Command Prompt, you can easily enable or disable Boot Manager as well as customize its display settings.
Remember, taking precautions, backing up important data, and carefully following these steps will help ensure a smooth experience when working with Windows Boot Manager. Whether you’re enhancing your boot experience or troubleshooting boot issues, understanding Boot Manager fundamentally helps in navigating Windows effectively.
As with any system-level changes, ensure that you’re comfortable with the steps before proceeding, and don’t hesitate to consult additional resources or forums for help should you need it. In the ever-evolving world of technology, being informed is your best tool!
The other day, I wrote about setting up a sleek dual-boot system. Everything was humming along just fine. That is, until the first reboot. Eager to select my operating system of choice, I rebooted, entered the BIOS, and… nothing. The Windows Boot Manager was nowhere in sight. A myriad of questions followed, including the simplest yet most perplexing: Why?
The Windows Boot Manager might not appear in BIOS due to several reasons, such as an outdated BIOS version, drive connection issues, corrupted Boot Configuration Data, or an incorrect boot mode. But, here’s the silver lining; each of these challenges has a corresponding solution.
Let’s unpack each of these causes, explore their intricacies, and more importantly, their fixes. Ready to navigate the booting Issue? Let’s set sail.

Why does the Windows Boot Manager isn’t Appear in BIOS?
- BIOS Version Mismatch: Some older BIOS versions might not be compatible with newer Windows installations or boot configurations, leading to the Boot Manager not being listed.
- Drive Connection Issues: If the hard drive or SSD with your Windows installation isn’t properly connected, the Boot Manager might not appear in BIOS.
- Corrupted Boot Configuration Data (BCD): The BCD can become corrupted due to software conflicts, power outages, or disk write errors, causing the Boot Manager to vanish from the BIOS.
- Incorrect Boot Mode: There are two primary boot modes – UEFI and Legacy. An inconsistency between your system and drive setup can make the Boot Manager disappear.
Resurrecting the Boot Manager in BIOS
Navigating the often cryptic BIOS settings can feel like traversing a digital maze. But with the right guide, bringing the Boot Manager back from its slumber is doable. Let’s explore a set of detailed methods to address this challenge:
Solution 1: Check Your Hardware Connections
Step 1: Power down your system and unplug it from the wall.
Step 2: Open the system case (Check your PC’s manual if unsure about how to do this).
Step 3: Inspect the cables connected to your hard drive or SSD. Make sure they are securely plugged into both the drive and the motherboard.
Step 4: If a cable seems worn out or damaged, consider replacing it.
Step 5: After checking and adjusting, close the system case, plug the system back in, and power it up. Then check BIOS again for the Boot Manager.
Solution 2: Update BIOS
Step 1: Start by checking your current BIOS version. This is typically displayed on the BIOS splash screen or within the BIOS settings.
Step 2: Go to your motherboard manufacturer’s website and navigate to the support or downloads section.
Step 3: Enter your motherboard model to find the latest BIOS update.
Step 4: Download the update and follow the manufacturer’s instructions closely. Some systems allow updating directly within Windows, while others might require creating a bootable USB drive.
Step 5: After the update, reboot and access the BIOS to see if the Boot Manager is visible.
Solution 3: Repair Boot Configuration Data (BCD)
Step 1: Insert your Windows installation disk or USB and restart your PC.
Step 2: Boot from the disk or USB, and on the Windows Setup screen, click ‘Next’.

Step 3: Click on ‘Repair your computer’.
Step 4: Choose ‘Troubleshoot’ and then ‘Advanced options’.

Step 5: Select ‘Command Prompt’.

Step 6: Type the following commands in sequence:
- bootrec /fixmbr
- bootrec /fixboot
- bootrec /scanos
- bootrec /rebuildbcd
Step 7: After executing the commands, restart your system and check the BIOS.
Solution 4: Switch Boot Modes
Step 1: Access your BIOS/UEFI settings during the boot-up process. This usually involves pressing a specific key (like F2, F10, or Del) repeatedly.
Step 2: Navigate to the ‘Boot’ tab or similar.
Step 3: Locate the boot mode setting, which should offer options like ‘UEFI’ and ‘Legacy’.
Step 4: Change the mode. If you’re in UEFI, switch to Legacy and vice-versa.

Step 5: Save and exit the BIOS settings.
Step 6: As your system reboots, check if the Boot Manager has reappeared in BIOS.
Conclusion: Navigating the Booting Labyrinth
Encountering unexpected issues, like the vanishing act of the Windows Boot Manager in BIOS, can be both baffling and frustrating. However, armed with the right knowledge and a touch of patience, these technological quirks become solvable puzzles.
FAQs – Booting Up the Answers:
Is It Safe To Update My Bios?
While updating BIOS is generally safe, it’s crucial to follow the manufacturer’s instructions. A failed or interrupted update can cause system instability.
How Do I Switch Between Uefi And Legacy Modes?
This option is available in the BIOS or UEFI settings, usually under the “Boot” tab. Ensure to save changes when exiting.
If I Repair The Bcd, Will I Lose Any Data?
Repairing BCD shouldn’t result in data loss. However, always backup important files before making significant system changes.
Table Of Contents
- Why does the Windows Boot Manager isn’t Appear in BIOS?
- Resurrecting the Boot Manager in BIOS
- Conclusion: Navigating the Booting Labyrinth
- FAQs — Booting Up the Answers:
A tech wordsmith with an unquenchable thirst for knowledge. Has a knack for breaking down complex topics into digestible insights ensures that our readers are always in the know.
Решил поставить в свой старенький ноутбук Asus U45J диск SSD Samsung 860 EVO и перенести на него систему.
В ноутбуке стоит диск Western Digital WD750BPKX с двумя разделами — на первом система(установлена в режиме UEFI), на втором рабочие файлы, дистрибутивы, загрузки и т.д. Чтобы не тратить время на переустановку Windows и всего софта, решил клонировать раздел с системой с помощью утилиты Macrium Reflect (как обычно и делаю у клиентов, когда переношу систему на SSD), а вторым разделом пользоваться со старого диска, переустановив его вместо DVD-дисковода, с помощью адаптера Espada SS90.
Однако после клонирования в BIOS почему-то не появилась еще одна опция Windows Boot Manager для нового диска. Соответственно загрузиться с него нельзя.
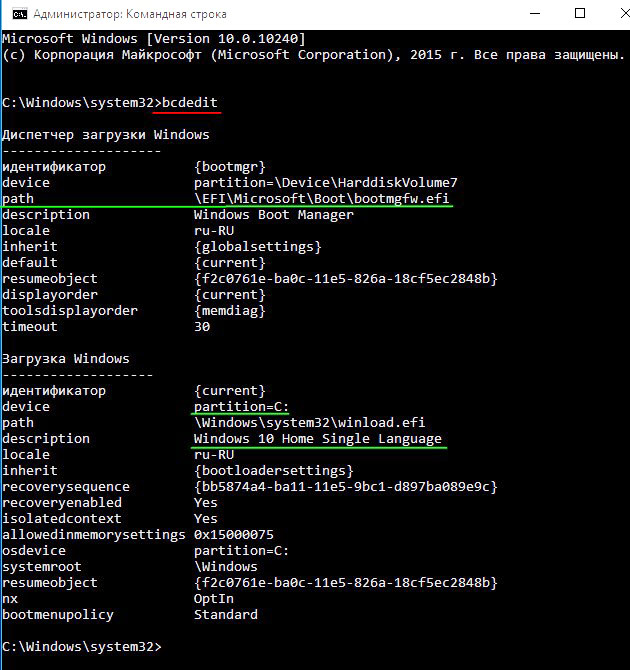
Решил добавить опцию вручную — Add New Boot Option, на следующем шаге нужно задать имя опции(оно может быть любым, главное чтобы вы понимали, что это такое), затем выбрать раздел, с которого будем грузиться — Select Filesystem (выбираем раздел на новом диске) и путь загрузки — Path for boot option. Этот путь можно посмотреть в рабочей системе, запустив в командной строке от имени администратора команду bcdedit:

Итак, в поле Path for boot option пишем \EFI\Microsoft\Boot\bootmgfw.efi, сохраняем и выбираем грузиться по умолчанию с этого пункта. Загрузка произошла успешно уже с раздела с системой на SSD.
Таким образом удалось вручную добавить опцию Windows Boot Manager.
Здравствуйте админ! Мне нужно установить на ноутбук с Windows 8.1 (БИОС UEFI) вторую операционную систему Windows 10, но загрузчик для Win 10 хочу создать отдельный, то есть, как это бывает, когда системы установлены на двух разных жёстких дисках, только в моём случае жёсткий диск на ноутбуке один. Задавал этот вопрос на многих интернет-форумах, но никто мне внятно не ответил, а на последнем ресурсе, где я был, меня переадресовали на ваш сайт.
Как установить вторую Windows со своим загрузчиком, но на одном жёстком диске
Автор: Владимир
Привет друзья! На первый взгляд просьба нашего читателя покажется странной, но тем не менее, многие профессионалы и опытные пользователи используют несколько загрузчиков на одном жёстком диске и вот для чего.
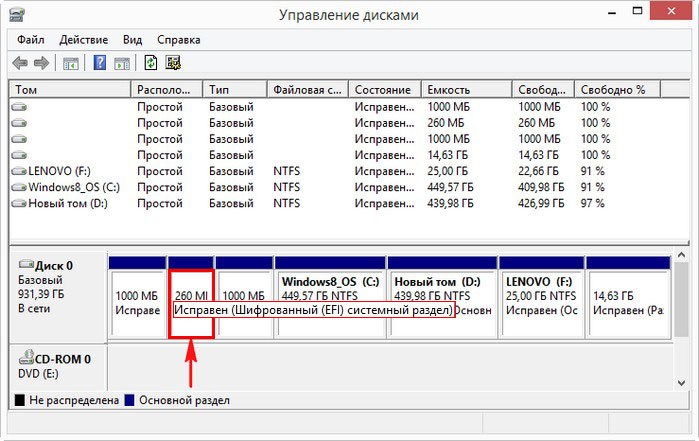
Все мы знаем, что при установке Windows 8.1, 10, на ноутбук с БИОСом UEFI на жёстком диске ноутбука создаётся загрузчик, представляющий из себя скрытый (EFI) системный раздел, отформатированный в файловую систему FAT32, размер 100-300 Мб, на данном разделе располагаются файлы загрузки Windows 8.1, 10, в том числе и файл данных конфигурации загрузки (BCD).
Если на этот же ноутбук установить вторую операционную систему Windows 8.1, 10, то вторая винда просто пропишет себя в уже имеющийся загрузчик и при включении ноута будет выходить специальное меню выбора операционных систем, в котором вы можете выбирать OS для загрузки и последующей работы.
Но вы сами прекрасно понимаете, что если при каких-либо обстоятельствах файлы загрузки будут повреждены (вирусы, неосторожные действия самого пользователя), то тогда не загрузятся обе операционные системы.
В сегодняшней статье я покажу вам, как очень просто установить на ноутбук с Windows 8.1 вторую операционную систему Windows 10 и создать для неё отдельный независимый загрузчик.
Итак, имеем установленную на ноутбуке с магазина Windows 8.1.

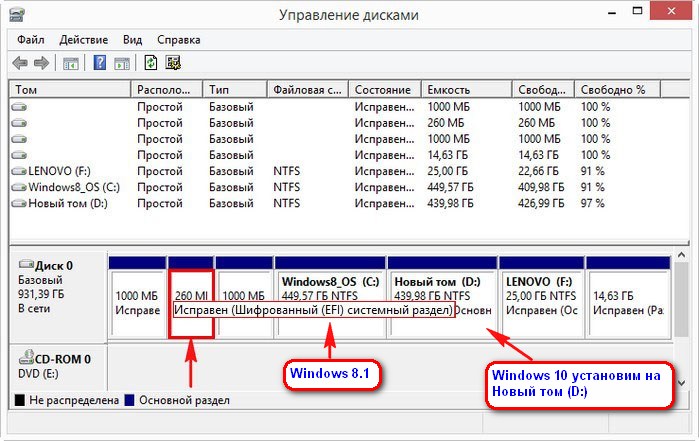
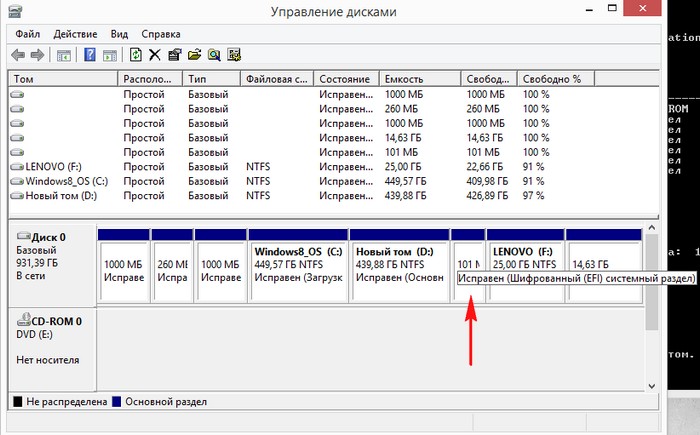
Управление дисками.
Windows 8.1 установлена на диске (C:), также имеется диск (D:), именно на него установим вторую операционную систему Windows 10, но сначала создадим для неё загрузочный раздел.
Запускаем командную строку от имени администратора.
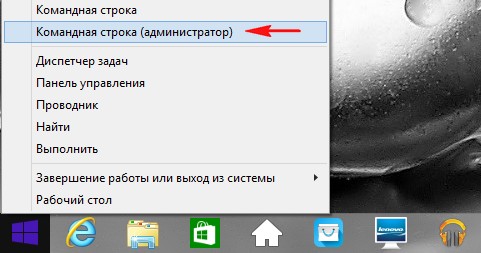
Вводим команды:
diskpart
lis vol (выводим список разделов жёсткого диска)
sel vol 2 (выбираем Том 2 (раздел D:)).
shrink desired=100 (сжимаем Том 2 (раздел D:) на 100 Мб, в конце раздела появляется нераспределённое пространство объёмом 100 Мб)
creat par efi (создаём скрытый (EFI) системный раздел)
format fs=FAT32 (форматируем скрытый (EFI) системный раздел в файловую систему FAT32)
Закрываем командную строку.
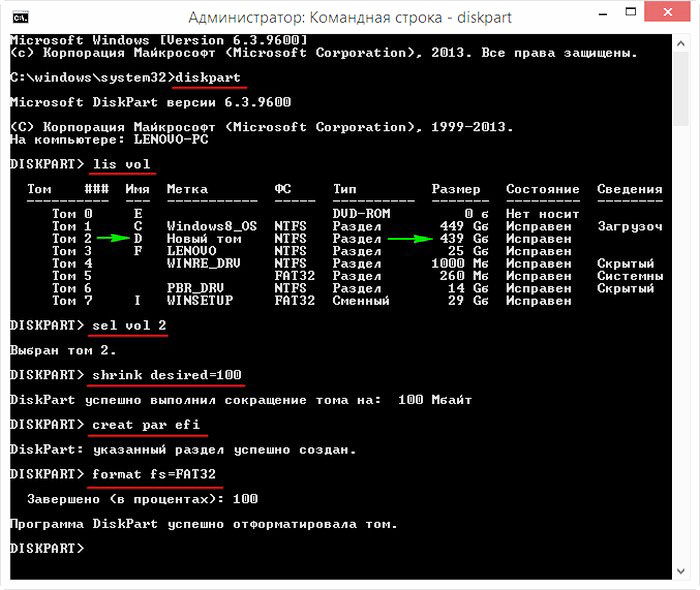
В результате наших действий на жёстком диске ноутбука, сразу за разделом (D:) создался второй скрытый (EFI) системный раздел, отформатированный в файловую систему FAT32, именно на этом разделе мы создадим позднее файлы загрузки Windows 10.
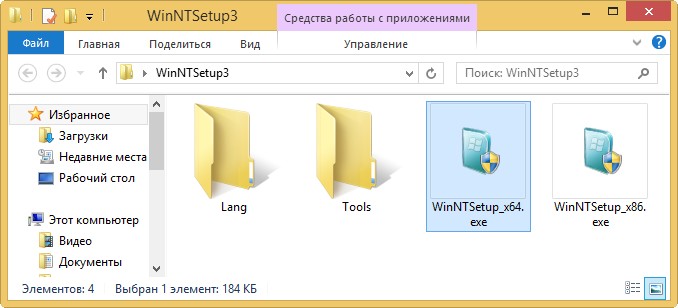
WinNTSetup
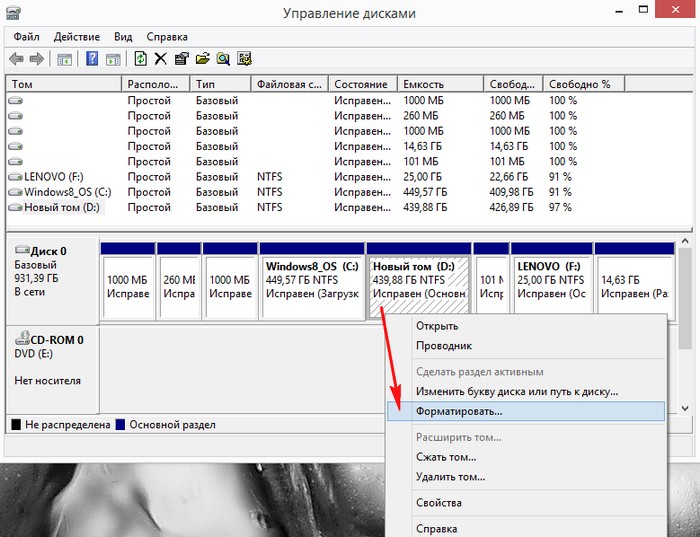
Для установки Windows 10 предлагаю воспользоваться программой WinNTSetup, это очень простая программа и она установит нам Win 10 на Новый том (D:) прямо в работающей Windows 8.1.
Перед работой нужно форматировать Новый том (D:), щёлкаем на нём правой мышью и выбираем «Форматировать»
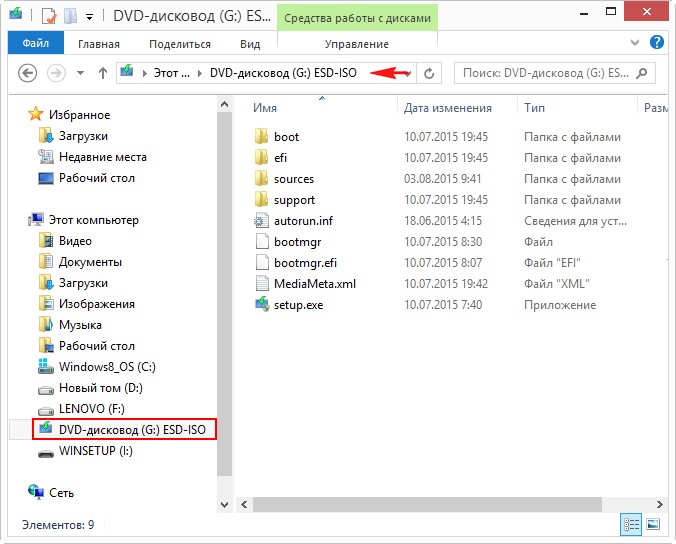
После форматирования Нового тома (D:), скачиваем на сайте Майкрософт ISO-образ Windows 10.
Щёлкаем на нём двойным щелчком левой мыши и образ подсоединяется к виртуальному дисководу (G:).
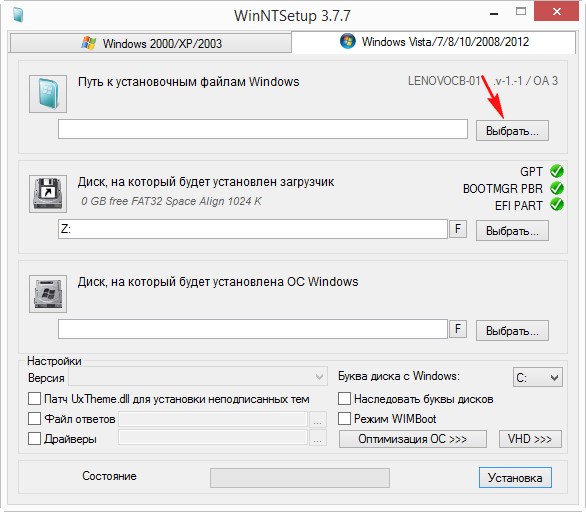
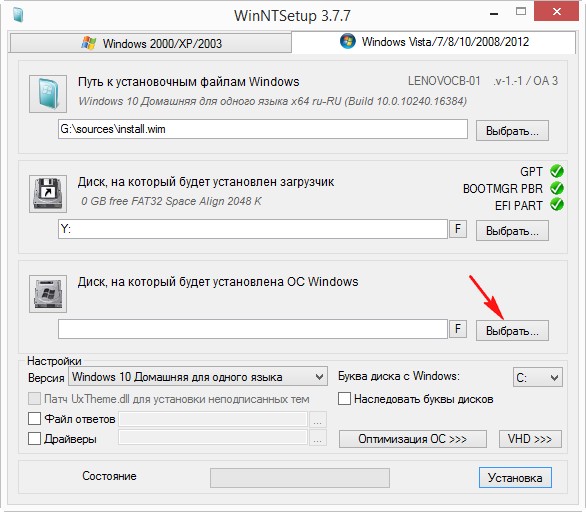
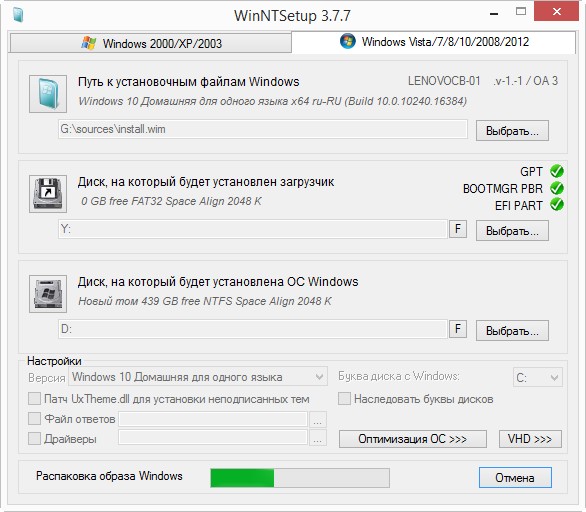
Запускаем программу WinNTSetup.
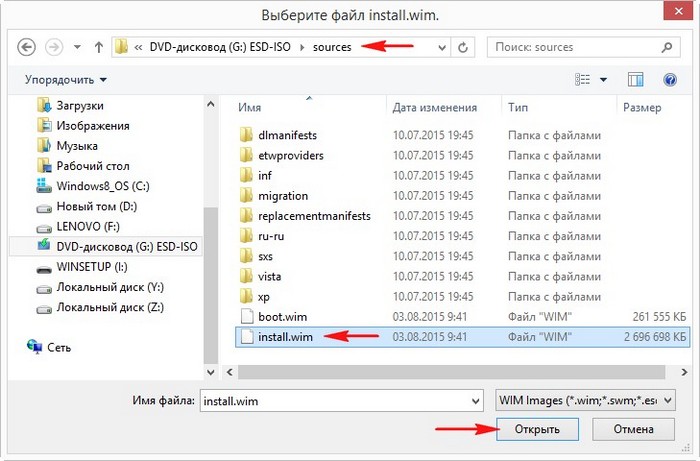
В главном окне программы нам нужно указать файлы Windows 10, а точнее файл install.wim находящийся в папке G:\sources.
Жмём «Выбрать»
Находим в проводнике файл G:\sources\install.wim и жмём «Открыть».
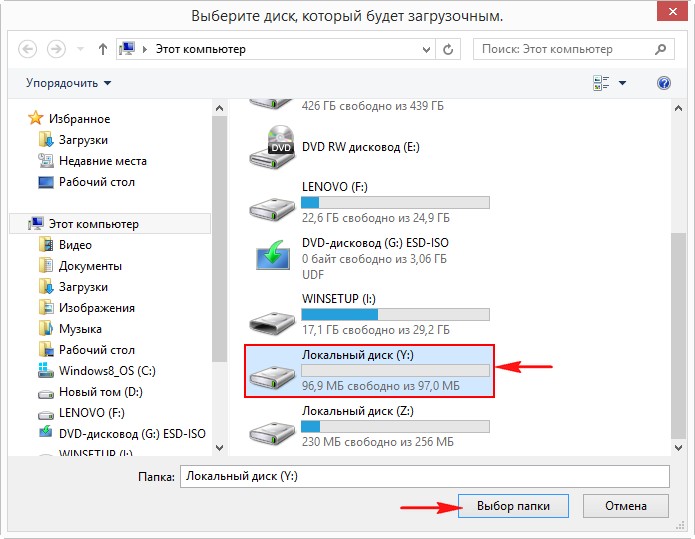
Теперь нужно выбрать раздел жёсткого диска, на который будет установлен загрузчик.
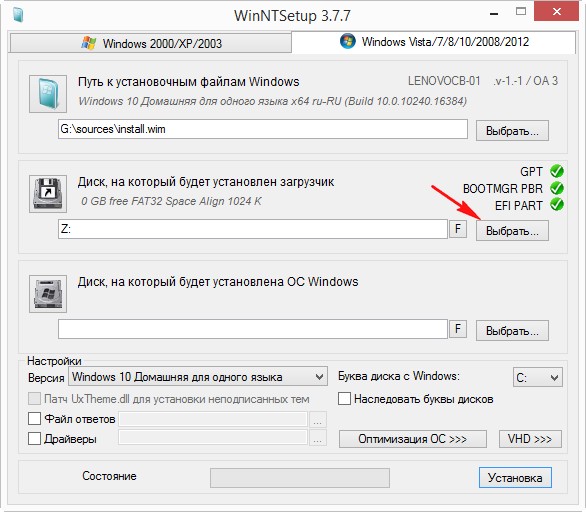
Программа WinNTSetup смонтировала в проводнике созданный нами скрытый (EFI) системный раздел (100 Мб) и присвоила ему букву диска (Y:). Выделяем левой мышью Локальный диск (Y:) и жмём на кнопку «Выбор папки».
Примечание: Также программа WinNTSetup смонтировала в проводнике первый скрытый (EFI) системный раздел (260 Мб) (загрузчик Windows 8.1) и присвоила ему букву диска (Z:), если выбрать его, то Windows 10 пропишется в загрузчик Windows 8.1.
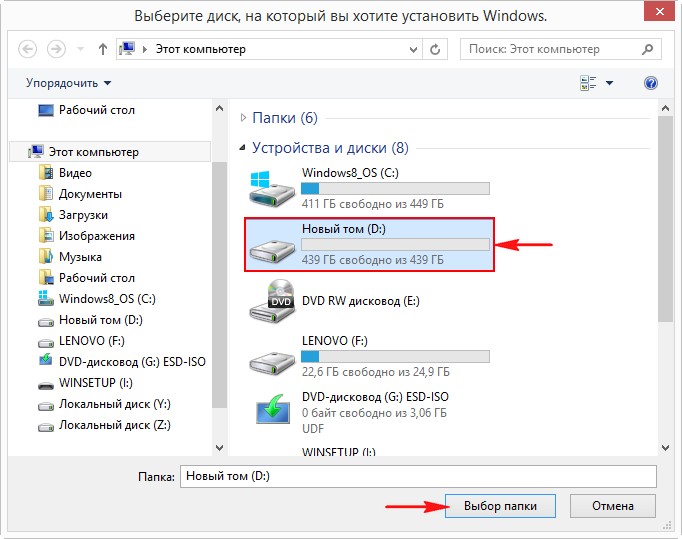
Теперь выбираем раздел, на который будет установлена Windows 10.
Жмём «Выбрать»
Выбираем Новый том (D:) и жмём «Выбор папки»
Жмём на кнопку «Установка»
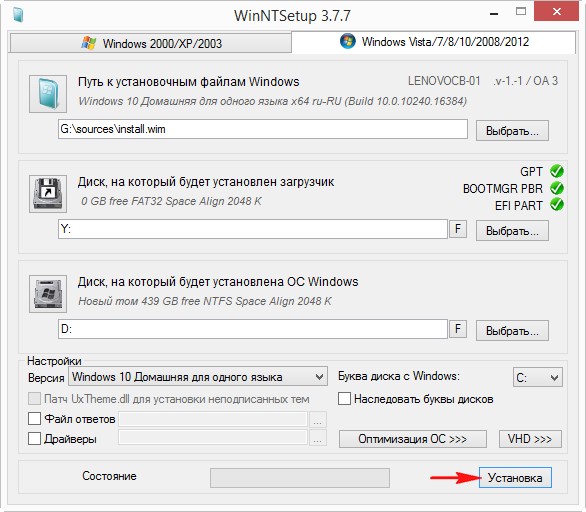
Загрузчик выбираем UEFI.
«ОК»
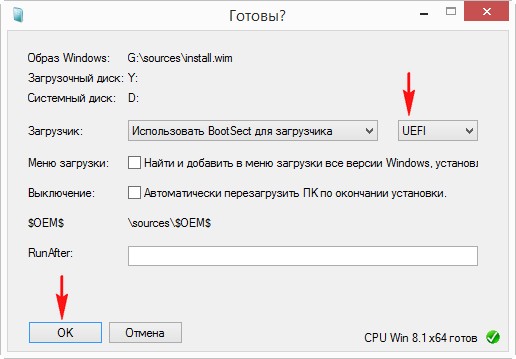
Образ Windows 10 разворачивается на Новый том (D:).
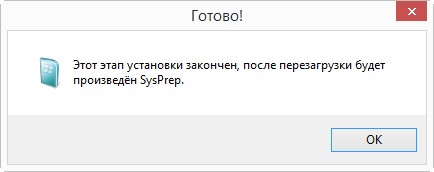
Первый этап установки Windows 10 второй системой на ноутбук с Win 8.1 закончен. Жмём «ОК».
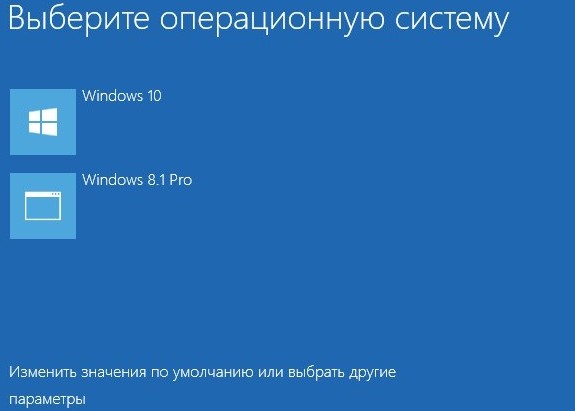
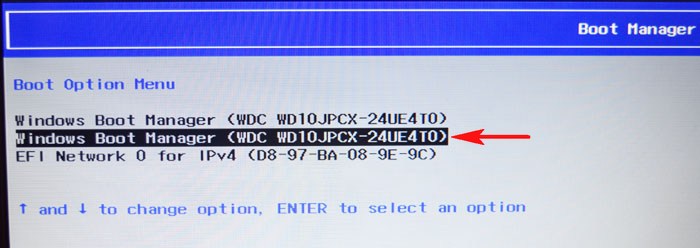
Перезагружаем ноутбук и входим в его загрузочное меню.
В загрузочном меню отобразились 2 устройства
Windows Boot Manager название диска и
Windows Boot Manager название того же диска.
Если выбрать первое, то загрузится Windows 8.1, а если выбрать второе, то загрузится Windows 10, выбираем второе.
Начинается заключительный этап установки Windows 10.
Идёт подготовка устройств.

Затем следует перезагрузка и нам ещё раз нужно выбрать в загрузочном меню ноутбука второй Windows Boot Manager.
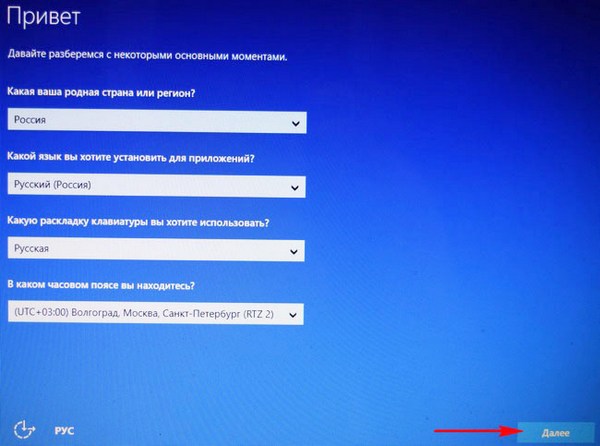
«Далее»
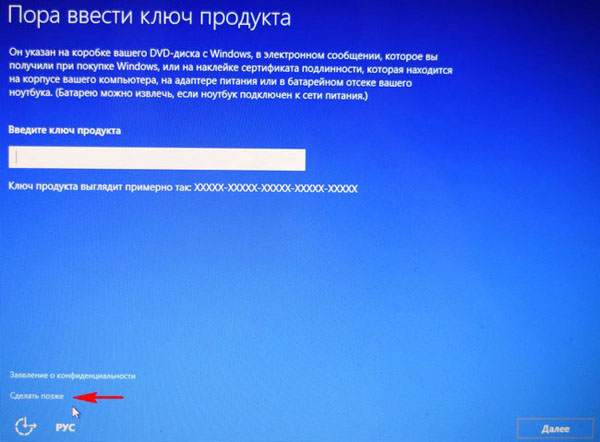
Если у вас нет ключа, жмите «Сделать позже»
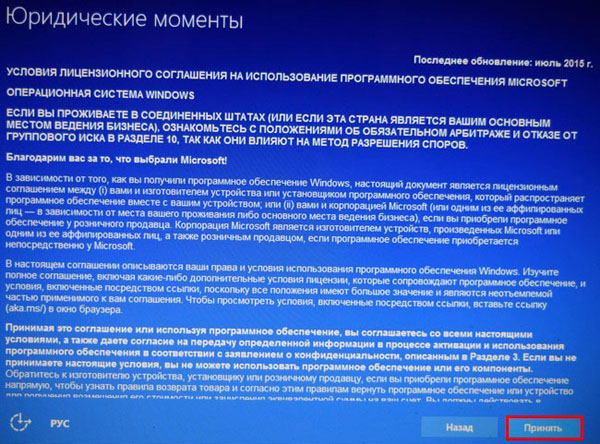
«Принять»
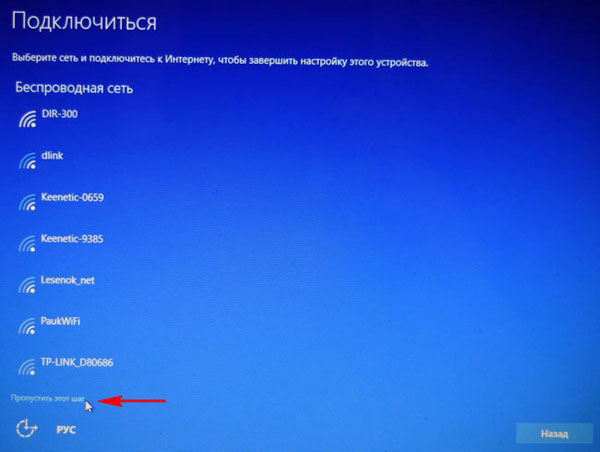
«Пропустить этот шаг»
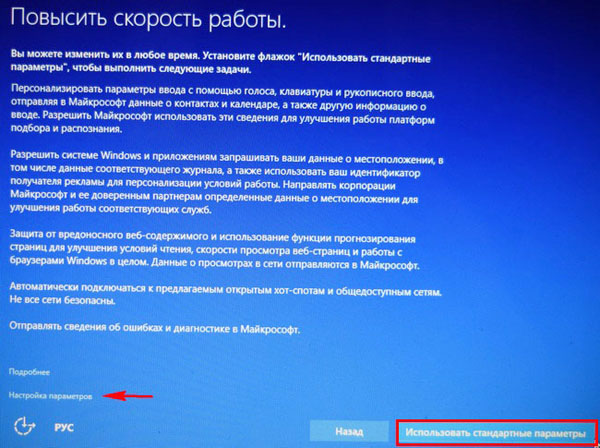
Можете «Использовать стандартные параметры», а можете настроить их вручную по этой статье: Отключение «шпионских» функций в Windows 10.
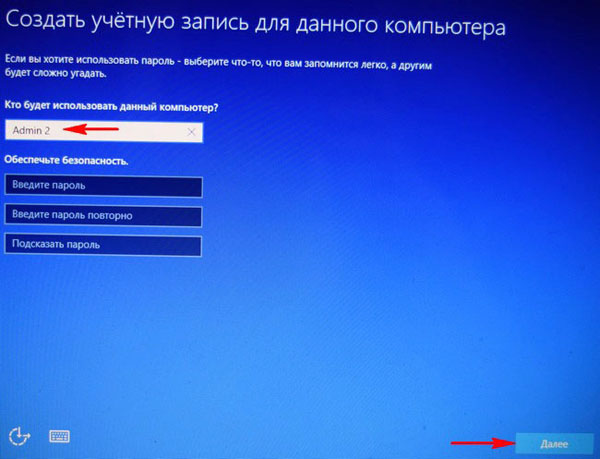
Придумываем имя локальной учётной записи.
«Далее»
Загружается Windows 10.
Управление дисками.
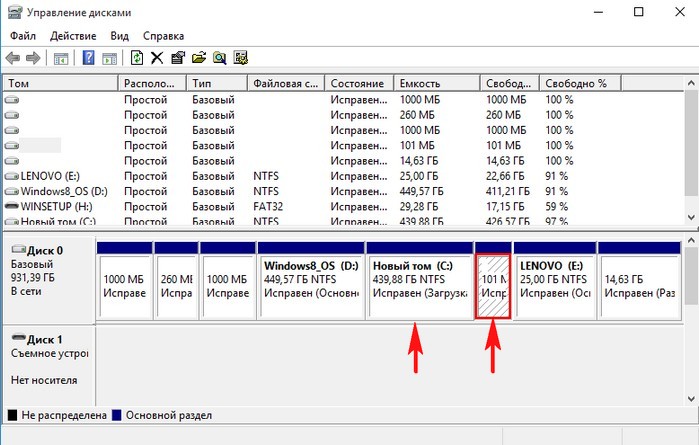
Windows 10 имеет свой отдельный и независящий от Windows 8.1 загрузчик.
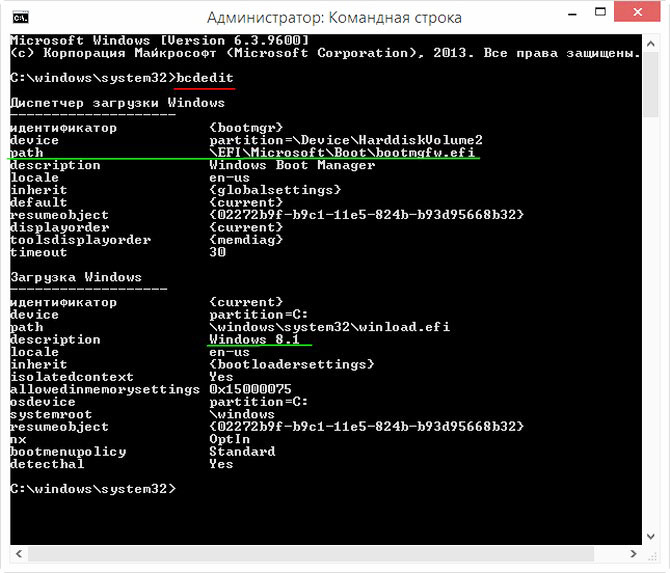
В Windows 8.1 ничего не изменилось и её загрузчик выглядит так
Вот и всё!
Статьи по этой теме:
- Как создать два независимых друг от друга загрузчика на жёстком диске MBR (обычный БИОС). Или как установить на компьютер с Windows 10 вторую операционную систему Windows 10 и сделать ей отдельный загрузчик
- Как создать два независимых загрузчика, если на разных томах одного жёсткого диска, с главной загрузочной записью MBR, установлены две операционные системы: Windows XP (32-bit) и Windows 7 (64-bit)
- Как установить на разные жёсткие диски несколько операционных систем с независимыми друг от друга загрузчиками
- Как установить на ноутбук две взаимоисключающие операционные системы
Multi-booting, and particularly dual-booting Windows and Linux, is becoming more and more mainstream with each passing year. On a PC with multiple operating systems (OS), the Windows Boot Manager is what lets the user pick which OS to boot to.
Of course, in single-OS systems, it’s usually better to disable Windows Boot Manager. Unless you’ve made multiple boot entries from a single OS, all it does is make the boot process longer for no reason.
In any case, we’ve listed all the necessary steps to enable or disable Windows Boot Manager via both GUI and Command-Line in the guide below.
Enable or Disable Boot Manager via GUI
As usual, the GUI method is very convenient but doesn’t allow for much flexibility. It’s very easy to enable or disable the Windows Boot Manager, but there’s not much room for further modification. Regardless, here are the necessary steps:
- Press Windows + R, type
systempropertiesadvanced, and press Enter. - In the Startup and Recovery section, click on Settings.

- To enable BOOTMGR, turn on the checkmark for the Time to display list of operating systems options.
- Set the time in seconds. The default value is 30, but you can replace it with however many seconds (3 – 999) you want the Boot Manager screen to display before the timeout expires and loads the default Boot Entry.
- Press OK to apply the changes.
- To disable BOOTMGR, uncheck the Time to display the list of operating systems box.

- Press OK to apply the changes.


Enable or Disable Boot Manager via Command Line
The CLI method is somewhat technical but allows for lots more ways to modify the Windows Boot Manager.
You’ll use the bcdedit command to enable/disable Bootmgr. Keep in mind that you may need to turn off Secure Boot or BitLocker for bcdedit to function properly. With that said, here are the necessary steps:
- Press Windows + R to launch Run.
- Type cmd and press CTRL + Shift + Enter to launch Elevated Command Prompt.
- To enable BOOTMGR, type the following commands and press Enter after each:
bcdedit /set {bootmgr} displaybootmenu yes
bcdedit /set {bootmgr} timeout 30
Note: You can replace 30 with however many seconds (3 – 999) you want the Boot Manager screen to display for before the timeout expires and loads the default Boot Entry.
- To disable BOOTMGR, type the following command and press Enter:
bcdedit /set {bootmgr} displaybootmenu no

How to Modify Boot Manager
Modifying bootmgr not only includes enabling and disabling it, but also adding or removing an entry, editing the display order, changing the default entry, and much more.
Add New Boot Entry to Bootmgr
You can create multiple new boot entries for an operating system and customize each to have a different set of configurations. The easiest way to do so is to copy an existing boot entry and then modify it. Here’s how you can do that:
- Type the following command in the elevated command prompt:
bcdedit /copy {current} /d "TestEntry"
- Current is the last used boot entry. If you want to use another boot entry, replace current with any other identifier value as appropriate.
- Change TestEntry to whatever you wish to name the new entry.
- Finally, press Enter to execute the command.
- You’ll receive a message similar to:
The entry was successfully copied to {1f126914-2e93-11e5-a85b-be1ae2100b04}.

Here, the value inside the curly brackets is the new entry’s GUID. You can use this ID to modify this boot entry however you wish.
Remove or Delete Boot Entry
Removing a boot loader entry removes it from the boot menu, but it will still be present in the BCD store. You’ll need to delete it instead to remove it entirely. Here are the steps to do so via GUI:
- Press Windows + R, type msconfig, and press Enter.
- Switch to the boot tab.
- Select the boot entry you wish to delete and press the Delete button.


With the command line, you can choose to remove it or delete it as you prefer. You can do either using the steps listed below:
- Press Windows + R, type cmd and press CTRL + Shift + Enter.
- Type
bcdeditand press Enter. - Under each Windows Boot Loader section, check the value of the device element. Once you’ve identified the appropriate partition, note the value of identifier above it.
- To remove the boot entry, replace identifier with its value from Step 3 and use the following command:
bcdedit /displayorder {identifier} /remove
- To delete the boot entry, replace identifier once again and use the following command:
bcdedit /delete {identifier}

Edit Display Order on a Multi-Boot Menu
You can set the display order of boot entries on a multi-boot menu using the /displayorder switch.
- In an elevated command prompt, execute the
bcdeditcommand and note the value of identifier for each entry. - Replace the IDs with the boot entry’s GUID or a reserved identifier like {current} and use the following command:
bcdedit /displayorder {ID1} {ID2} - Add as many more {IDs} as appropriate depending on how many entries you have. Don’t forget the curly brackets and space between the identifiers.
E.g. if you use the following command: bcdedit /displayorder {current} {9f25ee7a-e7b7-11db-94b5-f7e662935912} {e16cd9d6-379f-11e5-99d4-de034410edac}

This sets the display order as:
- current
- 9f25ee7a-e7b7-11db-94b5-f7e662935912
- e16cd9d6-379f-11e5-99d4-de034410edac
Alternatively, you can also use the /addfirst and /addlast modifiers to directly add an entry as the first or last items respectively on the Boot Manager menu. E.g.bcdedit /displayorder {5370b175-2e93-11e5-a85b-be1ae2100b04 } /addfirst
Change Default OS in Windows Boot Manager
You can easily change the default OS in Windows Boot Manager via System Configuration. Here are the steps to do so:
- Launch System Configuration using the run command msconfig.
- In the boot tab, select the OS you want to set as the default one.
- Click on Set as Default and press OK to apply the changes.


You can also specify the default boot entry by using the bcdedit /default {ID} command in Elevated Command Prompt. Don’t forget to replace ID with the appropriate value of the boot entry though.
How to Get Windows 7 or Windows 10 Style Dual Boot Screen?
Here are the steps to get the dual boot screen you want using the bootmenupolicy parameter:
- Open Elevated Command Prompt and use the commands listed below as appropriate.
- For the Windows 10 style Metro Boot Loader:
bcdedit /set {default} bootmenupolicy standard
- For the Windows 7 style Classic Boot Loader:
bcdedit /set {default} bootmenupolicy legacy
