
If you are into such a business where you will need to access different countries’ time, such desktop click widgets will help. Looking at the perfect time, you can send emails to your buyers or send messages. If you are using Windows 10, you can add a clock on Windows 10 desktop.
Depending on your requirements, you can select a desktop clock or digital clock or floating clock on your Windows 10 desktop. It is very easy to install such desktop click widgets on Windows 10.
Windows 10 has one of the best GUI as compared to Windows 7 and 8. You can check the time right from the taskbar. But it is limited to one country only. There are many available widgets for Windows 10 that you should be aware of. You should always keep in mind that when you are downloading, be sure to download from reliable sources.
There are two types of downloads you should know about. One type will let you create a copy of your current clock and put it onto your desktop; the other will let you have it downloaded in a zip file. There are no hassles with this application, so why waste your time trying to download the one you are not familiar with and make yourself frustrated.
Here is a complete guide to installing a clock widget on the Windows 10 desktop. There are so many click widgets that you can use on your Windows 10.
Method 1: Add a Clock to Windows 10 Clock Menu
Step 1: Open settings using Win + I.
Step 2: Select Time and Language. Go to Date & Time and then select add clocks for different timezones.
Step 3: In the Additional clock settings, select Show this clock option and then select a time zone from the drop-down menu.
Enter the display name for your clock.
Step 4: If you want to add the second clock, then enable the clock below the first clock and select the different timezone.
Method 2: Display a Digital Clock on Windows 10 Desktop
You can also use a digital clock on your Windows 10 desktop. Follow these steps:
Step 1: First, you have to download 3rd party apps like win10gadget, Cool Timer, KuKu Clock, and Alarm Clock HD on your Windows 10.
Step 2: Install it, and you can choose a digital clock to show on the desktop easily.
Method 3: Put a Floating Clock on Windows Desktop
There is another option that you can use, which is a floating clock. It is a fully customized clock and floating around your Windows desktop for your convenience.
Conclusion
That’s it for this article. We hope this article will help you to add a Desktop clock to Windows 10.
Comment below or contact us if you need more help.
Содержание статьи:
- Инструменты для добавления часиков на раб. стол
- Вариант 1
- Вариант 2
- Вариант 3
- Вопросы и ответы: 4
Народный гнев в комментариях
Зачем вообще добавлять еще одни часы на рабочий стол?! Ведь в правом нижнем углу и так есть время! Пустая заметка, захламляете систему пользователей…
Всех приветствую!
Специально привел в самом начале заметки (☝️) часть одного комментария (из моей старой статьи по похожей теме / правда, там речь о др. ОС шла). И я с этим утверждением, разумеется, не согласен:
- во-первых, ряд пользователей скрывает панель задач для увел. пространства на раб. столе (особенно при работе за ноутбуком с небольшим экраном). И отдельные часы очень выручают в этом плане!
- во-вторых, не у всех хорошее зрение и мелкие цифры в углу не всегда легко воспринимаются. То ли дело крупный циферблат по центру экрана!
- в-третьих, есть пользователи с тонкой душевной организацией (😉) и желанием изменить как-нибудь классический серо-голубой дизайн во что-то более красивое, приятное, удивляющее. К тому же психологи отмечают, что добавление даже незначительных «улучшений» на раб. месте — положительно может сказываться на настроении!
*
✏️ В общем, кому ненужно — просто проигнорируют материал, а кому нужно — ниже приведу неск. способов, как можно добавить часики к себе на раб. стол (ссылки + примеры настроек в комплекте). Заранее отмечу, что материал актуален для современных ОС Windows 11 (10).
*
Инструменты для добавления часиков на раб. стол
Вариант 1
В магазине приложений Microsoft Store (встроен в Windows 11) есть несколько весьма неплохих приложений-часов. Мне импонируют очень простенькие «.Clocks», ссылка на них ниже (рекомендую к тестированию).
✏️ Clocks
Ссылка на Store: https://www.microsoft.com/store/productId/9NQ1TSHFWJG4
Как открыть Microsoft Store: https://ocomp.info/kak-ustanovit-magazin-prilozheniy-v-windows-10-microsoft-store.html
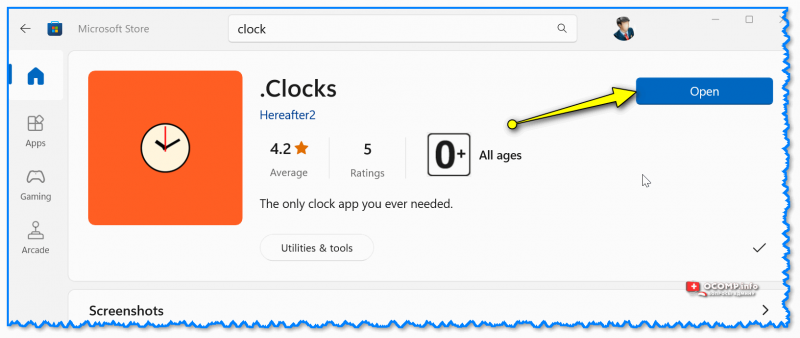
Для установки этих часов нужно нажать по синей кнопке «Get» (установка), а затем «Open» (открыть/запустить).

Установка Clock
👉 После запуска приложения — перед вами появится окно с предложением выбрать вариант циферблата. Есть прямоугольный, круглый, цифровой и т.п. (возле понравившегося есть кнопка «Play ▶« — для начала работы необходимо ее нажать).
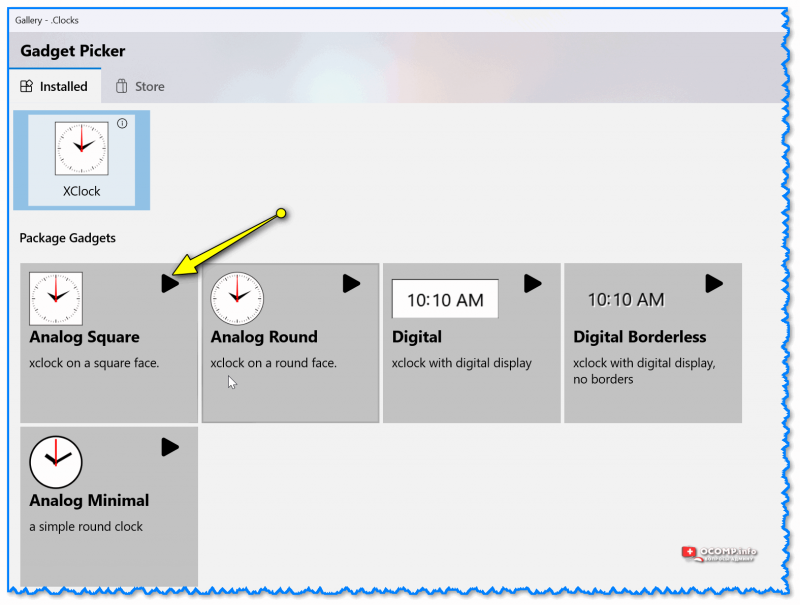
Запуск часиков
Сразу после этого у вас на рабочем столе появится заветный циферблат со временем. В принципе, на этом задача решена?! 😉
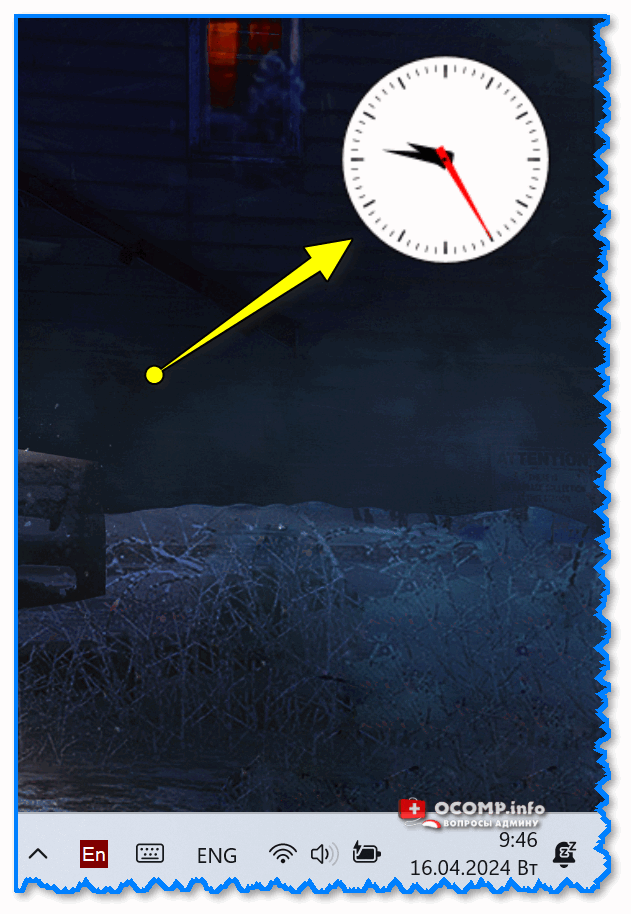
На рабочем столе появился будильник!
Кстати, если навестись мышкой на часы (и подождать 2-3 сек.) — то появиться спец. меню, с помощью которого можно переместить циферблат на др. место, изменить ряд настроек, да и просто закрыть их…

Если навестись мышкой на часы — появится меню опций
В общем, всё в лучшем стиле минимализма: задача решена, и в то же время нет ничего лишнего… 👌
*
Вариант 2
Store — это, конечно, хорошо, но есть магазин не во всех версиях Windows (да и в самом магазине не так, чтобы уж очень большой выбор бесплатного ПО по этой теме).
И для этих случаев весьма неплохим выбором будут сторонние наборы гаджетов. Одним из лучших (на мой субъективный взгляд) явл. набор 8gadgetpack.net (ссылка на офиц. сайт: ✏️https://8gadgetpack.net/).
Для его установки: необходимо открыть офиц. сайт, загрузить пакет (кнопка Download), и запустить его (установка проходит в обычном режиме, т.е. неск. раз, нажать «Далее»…). Пакет актуален для ОС Windows 7, 8, 10, 11). 👇👇
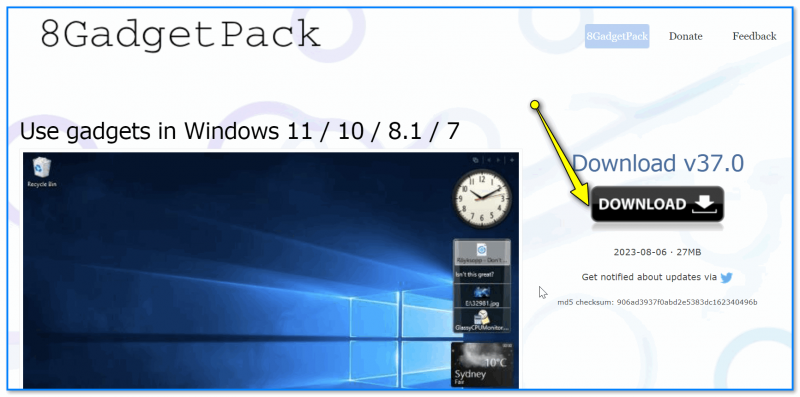
Загрузка и установка 8gadgetpack.net (скрин с офиц. сайта)
После у вас в меню ПУСК появится кнопка для настройки гаджетов (после установки рекомендуется сразу же открыть их).
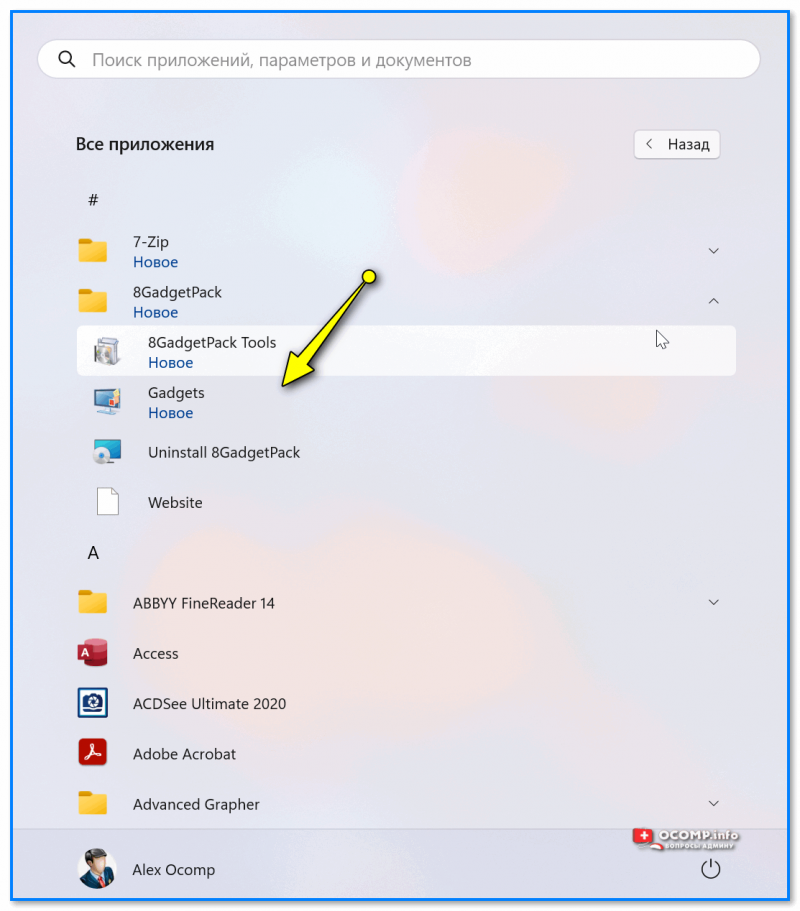
Запускаем новый пакет гаджетов
Пред вами появится целая страница с гаджетами: тут и часы, и погода, и нагрузки на диск, ЦП и т.п. Сделайте двойной клик ЛКМ для тех гаджетов, которые вам нужны!
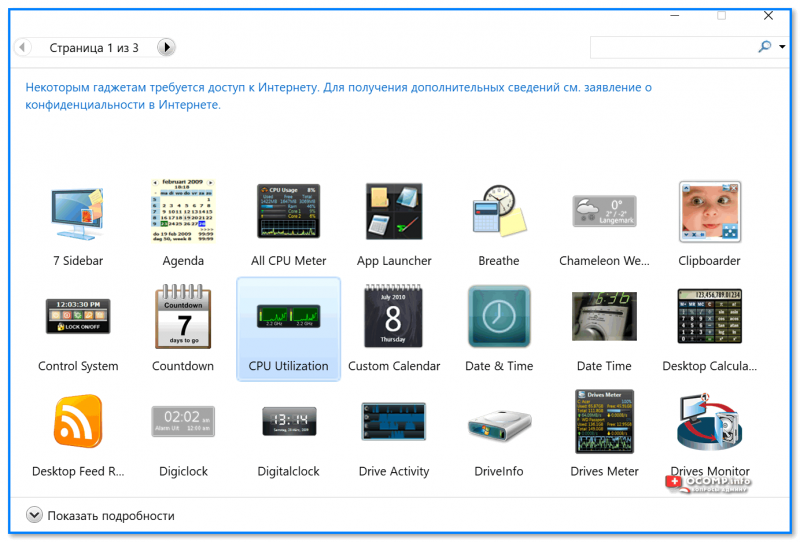
Выбираем нужные гаджеты — их тут 3 страницы
Все добавленные гаджеты появятся на рабочем столе. Например, я добавил календарик и часы (получилось удобно и наглядно! 😉).
Пример — календарь, часы, погода
Кстати, если сделать клик ПКМ (прав. кнопка мыши) по тому или иному элементу гаджетов — то можно открыть меню настроек и изменить их отображение (например, сделать их отобр. поверх остальных окон). Также при помощи ЛКМ можно переместить их в нужное место. В общем, удобно! 👌
Серую полоску можно откл., если войти в настройки через ПКМ
*
Вариант 3
Если с гаджетами возиться нет желания — можно попробовать одну небольшую утилиту TheAeroClock (от немецких разработчиков, в установке не нуждается!).
TheAeroClock
Офиц. сайт: https://www.softwareok.com/?seite=Freeware/TheAeroClock
После ее загрузки и извлечения из архива — нужно только запустить EXE-файл часиков и они тут же появятся на рабочем столе!
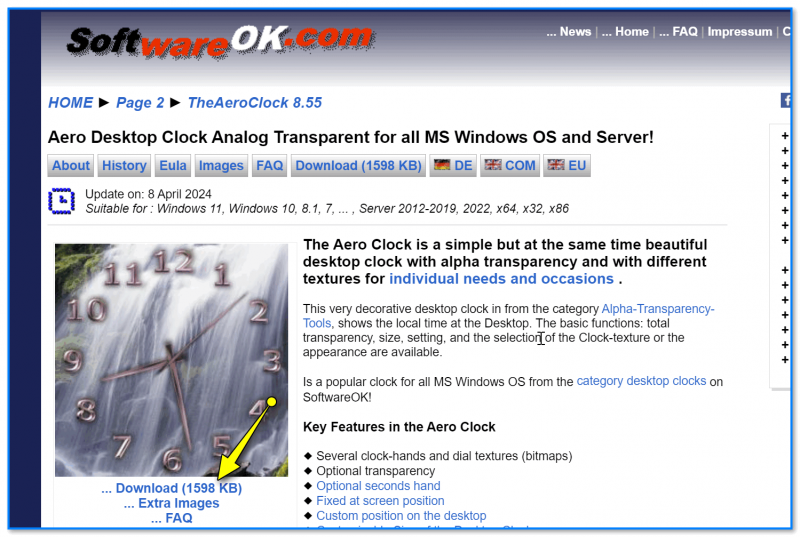
Загрузка TheAeroClock
Чтобы открыть настройки часов — откройте трей и нажмите ПКМ по значку TheAeroClock, а затем откройте настройки этого ПО. См. скрин ниже. 👇
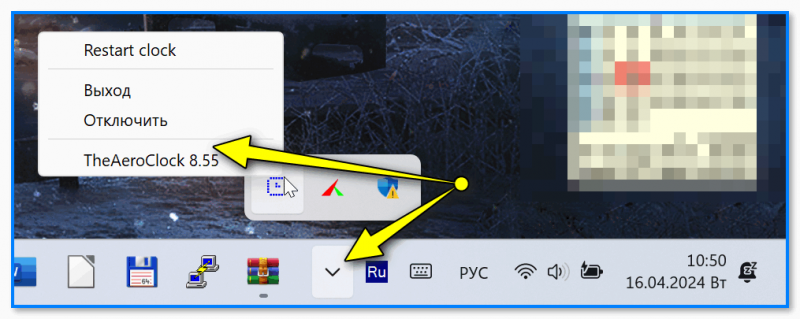
TheAeroClock — в трее будет значок для запуска настроек
Далее можно выбрать тему часов (см. вкладка «Изображения\текстура»), выбрать вариант отображения (поверх всех окон или только на раб. столе // «Only on the desktop»), вкл. секундную стрелку, вкл. запуск вместе с Windows и т.д.
В общем, часики очень удобные и простые (да и работают шустро, без нареканий). Рекомендую к знакомству! 👌😉
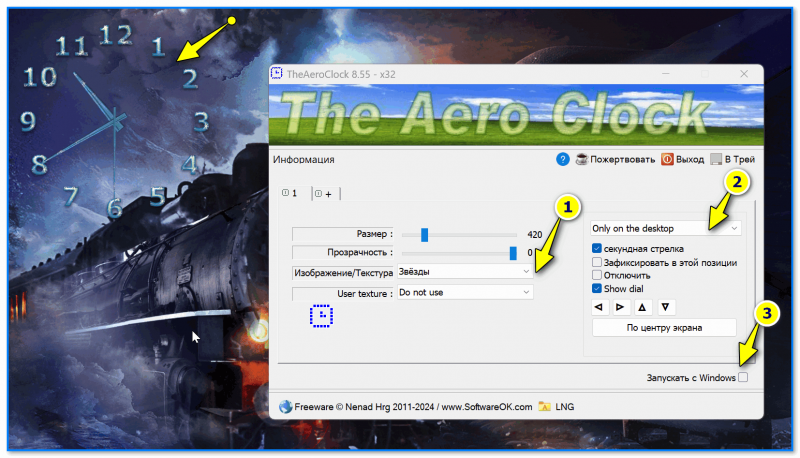
TheAeroClock — скрин часиков и их настроек
*
Если есть какое-нибудь другое интересное ПО для решения текущей задачи — поделитесь пожалуйста им в комментариях (форма ниже).
За сим откланяюсь, удачи!
👋
Adding a clock widget to Windows 10 is a great way to keep track of time right from your desktop. This article will walk you through the steps to add a clock widget and customize it to your liking. By the end of this guide, you’ll have a fully functional, personalized clock right on your Windows 10 desktop.
Adding a clock widget in Windows 10 can enhance your productivity and give your desktop a personal touch. Here are the steps to do just that.
Step 1: Open Microsoft Store
Start by opening the Microsoft Store on your computer.
The Microsoft Store is where you’ll find lots of apps, including the clock widget. You can find the Store by searching for it in the Start menu.
Step 2: Search for a Clock Widget
Once you’re in the Microsoft Store, use the search bar to look for a clock widget.
There are multiple options available. Look for one that has good reviews and fits your needs.
Step 3: Download and Install the Widget
Select the clock widget app you want and click on the “Get” or “Install” button.
The app will download and install automatically. This process should only take a few minutes depending on your internet speed.
Step 4: Open the Clock Widget App
After the installation is complete, open the clock widget app from the Start menu or by clicking “Launch” in the Microsoft Store.
Opening the app will give you access to its settings and customization options.
Step 5: Customize Your Clock Widget
Use the app’s interface to set the time zone, style, and other preferences for your clock widget.
You can typically change the color, format, and size of the clock. Make it look exactly how you want it to.
Step 6: Pin the Clock Widget to Your Desktop
Follow the app’s instructions to pin the clock widget to your desktop.
Different apps may have different methods, but it’s usually straightforward. This will make your clock widget visible on your desktop at all times.
Once you’ve completed these steps, your new clock widget will be up and running on your Windows 10 desktop. You can now keep track of time more easily without having to open additional applications.
Tips for Adding Clock Widget in Windows 10
- Choose a clock widget with high ratings and positive reviews for reliability.
- Some clock widgets offer additional features like multiple time zones or alarms; consider these if you need them.
- Regularly check for updates in the Microsoft Store to ensure your widget runs smoothly.
- If you experience any issues with the widget, try reinstalling it or look for a different app.
- Customize the widget to match your desktop theme for a cohesive look.
Frequently Asked Questions
Why can’t I find a clock widget in the Microsoft Store?
Make sure your Microsoft Store is up to date. Sometimes, available apps can vary by region.
Is there a way to add multiple clock widgets?
Yes, many apps allow you to add more than one clock widget, each set to different time zones.
Do I need internet access to use a clock widget?
Most clock widgets will work offline but may need internet access for initial setup and updates.
Can I move the clock widget around on my desktop?
Yes, most clock widgets are draggable. You can place them wherever you prefer on your desktop.
Are there any free clock widgets?
Absolutely! There are several free options available in the Microsoft Store. Just make sure to read the reviews before downloading.
Summary
- Open Microsoft Store.
- Search for a clock widget.
- Download and install the widget.
- Open the clock widget app.
- Customize your clock widget.
- Pin the clock widget to your desktop.
Conclusion
Adding a clock widget in Windows 10 is a great way to personalize your desktop and stay on top of your schedule. With just a few simple steps, you can download, install, and customize a clock widget that suits your needs. Whether you’re managing multiple time zones or just want a stylish clock to complement your desktop theme, there’s a widget out there for you. Explore the Microsoft Store, try out different widgets, and find the one that fits your lifestyle best. Once you’ve got it set up, you’ll wonder how you ever managed without that handy little addition. So go ahead, give it a try, and make your Windows 10 experience even better!
Matthew Burleigh has been writing tech tutorials since 2008. His writing has appeared on dozens of different websites and been read over 50 million times.
After receiving his Bachelor’s and Master’s degrees in Computer Science he spent several years working in IT management for small businesses. However, he now works full time writing content online and creating websites.
His main writing topics include iPhones, Microsoft Office, Google Apps, Android, and Photoshop, but he has also written about many other tech topics as well.
Read his full bio here.
A lot of people miss the cool gadgets like the clock and sticky notes on your Desktop from Windows 7. Sadly they are no longer included in Windows 10 as Microsoft deemed them to be a security risk.
However, many of the functions used in the old Windows Gadgets are still available throughout Windows 10.
There are a few ways you can get a clock on your desktop, one being the Live Tiles function built-in to Windows or you can download separate apps to show one or even use a desktop designer software called Rainmeter.
The implementation of Live Tiles allows you to view their time and data information in the notification area.
You can access this by clicking the time and date in your task bar at the bottom right of your screen. Obviously this is slightly redundant as it will show the same timer, just larger.
The good part about the view is that it also shows the date and the calendar to provide mode usefulness.
If your goal is to have a visual clock shown on your desktop at all times, we’ll show a few simple ways to accomplish that for free.
Alarms & Clock App on Windows 10 Desktop
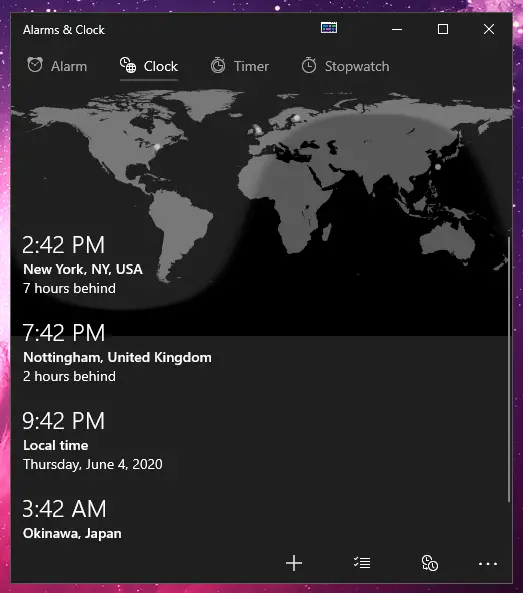
Windows 10 has its own built-in clock app named ‘Alarms & Clock‘ that provides features like an alarm, clock, timer and a stopwatch.
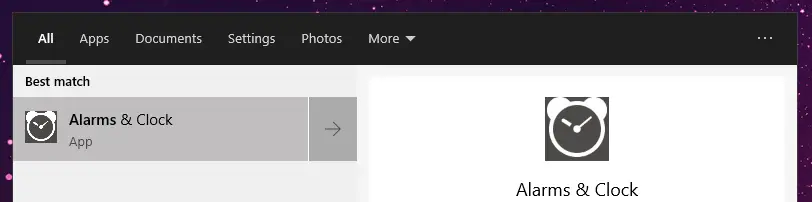
In order to launch the app, open up your Windows Start Menu and type in ‘alarms‘. You should then be able to open up the ‘Alarms & Clock’ app in the list.
The interface contains four different tabs, one for each of the features mentioned above.
We will solely be focusing on the Clock feature and how to personalize it according to your needs.
If you need to change your time zone settings for the Local time clock, navigate to Settings > Time & language > Data & time.
Alternatively, you can right-click on the time and date box in the bottom-right corner of the screen and from that menu, select ‘Adjust date/time’ at the top.
In the Date & Time window you are able to use the drop-down menu to choose an appropriate time zone as well as modify other related settings.
You can also synchronize your clock online in case you notice it lagging a few minutes behind.
In order for you to get a visual digital clock, as seen below, all you need to do is reduce the size of the app by dragging from the top right corner to the middle.
This will make allow you to place the clock anywhere on their desktop and it will be visible when you are viewing the desktop.
In order to automatically launch the app at start-up, you can check out how to do that in our guide on how to speed up your Windows 10.
If you wish to open up the app quickly, you can simply right-click on its icon in the taskbar while the app is open, then select ‘Pin to taskbar’, so you can always open it up with a single click.
Gadgets and Desktop Widgets for Windows 10
Even though Microsoft has removed their integrated sidebar gadgets that were a controversial feature in prior versions of Windows, it is still possible to get access to similar gadgets on Windows 10.
This can be done easily using free third-party applications and software.
8GadgetPack
Arguably the most popular gadget software currently available for a Windows 10 desktop clock is 8GadgetPack. This is a freeware software that allows users to run original desktop gadgets on newer versions of Windows, including Windows 10.
Getting 8GadgetPack up and running is very simple. Just head on over to the 8GadgetPack Official Website and follow the installation instructions on their website.
Once you’re done installing the app, exit the installer and you should be greeted with three classic gadgets on the right side of your screen, the clock, clipboard and weather.
If you have multiple monitors, your gadgets may appear on one of your secondary monitors at first. Thankfully this is not an issue as you can simply drag and drop any of the gadgets anywhere across all of your monitors.
Next to the clock you are able to press the ‘Options’ button in order to customize the clock to your liking and also set the preferred time zone. There are up to 8 designs to choose from.
Once you have customized the clock to your liking, simply drag the gadget from the menu anywhere on your desktop and now you have an awesome clock displayed on your desktop at all times.
You can also find digital cocks and calendars from the widget list so you can show the clock on your desktop in any fashion you wish.
The 8GadgetPack comes packed with over 60 different widgets to use, so make sure to take advantage of them. You can easily add new gadgets to the side-panel by clicking the little plus icon at the top-right corner.
Yahoo Widgets for Windows
Yahoo Widgets is another alternative to the above-mentioned desktop gadgets. The only issue is that the Yahoo Widgets software was discontinued, so you can’t download alternative widgets online anymore.
The good thing is the included widgets still work perfectly and they include things like a clock, a digital timer, a battery level indicator for laptops and a few others.
In the end it really depends on which designs you prefer, but due to the more limited options, we prefer the 8GadgetPack instead.
Although both gadget packs work perfectly on Windows 10, we highly recommend you take the extra effort and try out Rainmeter instead.
Using Rainmeter for Desktop Widgets
Rainmeter allows you to display customizable skins on your desktop, the scope of this being vast and the only limiting factor, your imagination and creativity.
A simple example use-case of Rainmeter would be the implementation of an animated clock on your desktop.
The sheer number of customizable clocks that are available on Rainmeter ensure anyone wishing to display time on their desktop will do so in the coolest way possible.
In order to use Rainmeter, head over to the official Rainmeter website and download the newest ‘Final Release’ installer. After downloading the file, run the .exe and install it to the desired location.
We recommend installing it to same drive as your operating system, since the drive will stay active/turned on 100% of the time Rainmeter is running.
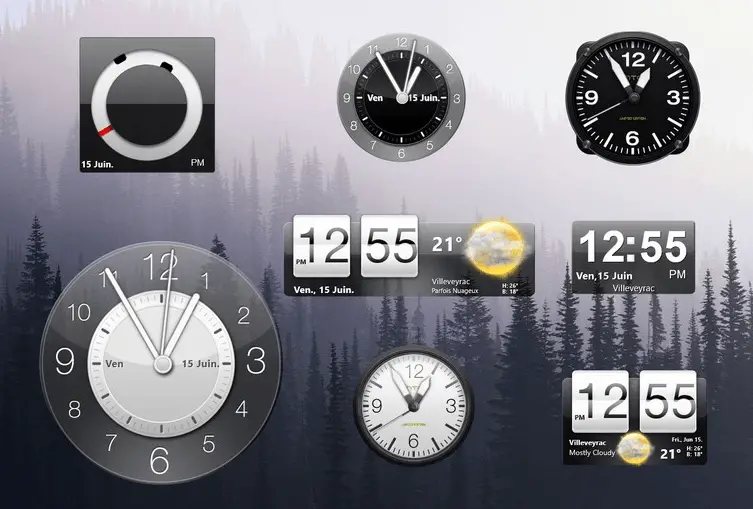
Next up, head on over to a website called Visual Skins and you will be greeted with a massive plethora of amazing gadgets and widgets that can be directly added to Rainmeter.
Download any one widgets you like and move on to the next step. (We used the HTC Sense Clocks collection below.)
Adding a Skin to Your Desktop
Once you found out a cool skin to use, make sure to download it and locate your downloads folder.
After downloading the installer (.rmskin file), if it is compressed in a zip file, simply extract the file anywhere first and then double click on it.
You will be greeted with an installation screen where you can see the widget you are about to install. All you need to do next is make sure the widget is selected and click the Install button.
The new widget should now pop-up on your desktop and is ready for any modifications.
In order to find all the Rainmeter settings and installed skins, navigate to the bottom-right of your taskbar and left-click on the Rainmeter icon.
A management window will open up showing your current active skins.
You should see the skin you just installed on the folder hierarchy on the left. Click on it to open up the folder and look for an .ini file.
Each Rainmeter widget consist of an .ini file which basically contains all the needed options and design settings for the widget to operate.
If you wish to edit more complex options for a widget, click on the ‘Edit’ button at the top right to modify everything further.
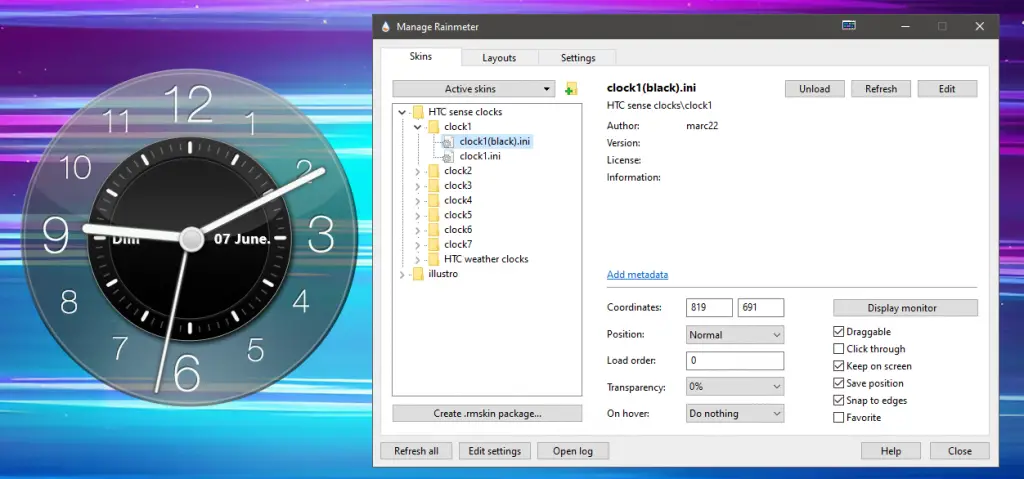
In order to use this clock on your Windows 10 desktop, simply double-click the .ini file and you should immediately see the clock appear on your desktop.
You have now successfully added a clock to your desktop that is fully customizable.
В этой статье о том, где скачать гаджеты для Windows 10 и как установить их в системе — оба эти вопроса задаются пользователями, которые обновились до новой версии ОС с «семерки», где уже успели привыкнуть к гаджетам рабочего стола (таким как часы, погода, индикатор ЦП и другие). Покажу три способа сделать это. Также в конце инструкции есть видео, где показаны все эти способы бесплатно получить гаджеты рабочего стола для Windows 10.
По умолчанию, в Windows 10 нет официального способа установить гаджеты, эта функция была убрана из системы и предполагается, что вместо них вы будете использовать новые плитки приложений, которые так же могут отображать требуемую информацию. Тем не менее, вы можете скачать стороннюю бесплатную программу, которая вернет привычный функционал гаджетов, располагаемых на рабочем столе — две таких программы и будут рассмотрены ниже.
Windows Desktop Gadgets (Gadgets Revived)
Бесплатная программа Gadgets Revived возвращает гаджеты в Windows 10 именно в таком виде, в котором они были в Windows 7 — тот же набор, на русском языке, в том же интерфейсе, что был ранее.
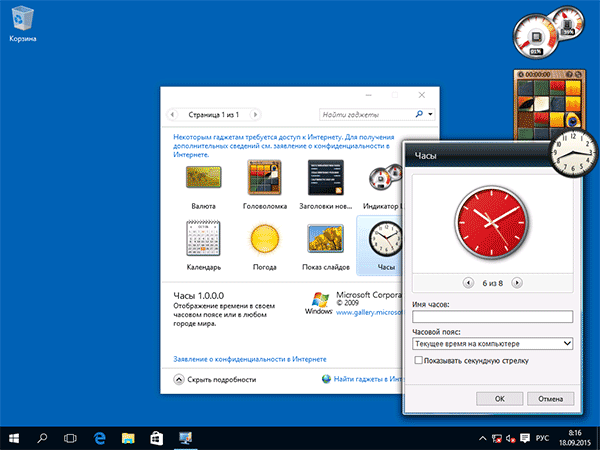
После установки программы, вы можете нажать в контекстном меню рабочего стола (через правый клик мышью) пункт «Гаджеты», после чего выбрать, какие именно требуется разместить на рабочий стол.
Доступны все стандартные гаджеты: погода, часы, календарь и остальные оригинальные гаджеты от Microsoft, со всеми скинами (темами оформления) и функциями настройки.
Помимо этого, программа вернет функции управления гаджетами в раздел персонализации панели управления и пункт контекстного меню рабочего стола «Вид».
Скачать бесплатно программу Gadgets Revived вы можете на официальной странице http://gadgetsrevived.com/download-sidebar/
8GadgetPack
8GadgetPack — еще одна бесплатная программа для установки гаджетов на рабочий стол Windows 10, при этом несколько более функциональная, чем предыдущая (но не полностью на русском языке). После ее установки вы точно также, как и в предыдущем случае можете перейти к выбору и добавлению гаджетов через контекстное меню рабочего стола.
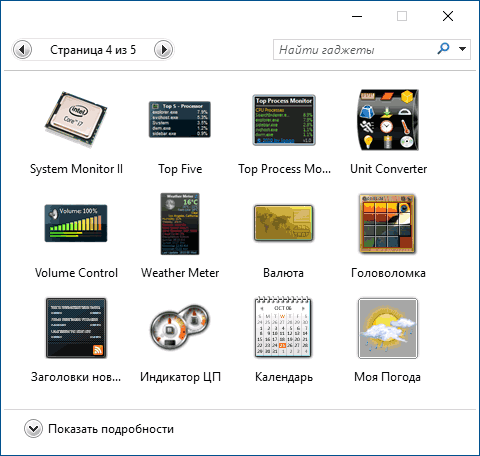
Первое отличие — куда более широкий выбор гаджетов: помимо стандартных, здесь представлены дополнительные на все случаи жизни — списки запущенных процессов, продвинутые системные мониторы, конвертер единиц, одних только гаджетов погоды несколько штук.
Второе — наличие полезных настроек, вызывать которые можно, запустив 8GadgetPack из меню «Все приложения». Несмотря на то, что настройки на английском языке, все довольно понятно:
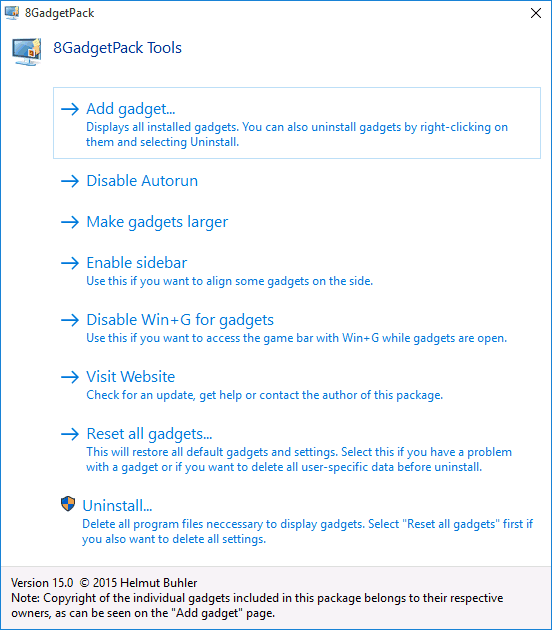
- Add gadget — добавление и удаление установленных гаджетов.
- Disable Autorun — отключение автозагрузки гаджетов при старте Windows
- Make gadgets larger — делает гаджеты больше по размеру (для мониторов с высоким разрешением, где они могут казаться мелкими).
- Disable Win+G for gadgets — так как в Windows 10 комбинация клавиш Win+G по умолчанию открывает панель записи экрана, данная программа перехватывает данную комбинацию и включает отображение гаджетов по ней. Данный пункт меню служит для того, чтобы вернуть настройки по умолчанию.
Скачать гаджеты Windows 10 в данном варианте вы можете с официального сайта http://8gadgetpack.net/
Как скачать гаджеты Windows 10 в составе пакета MFI10
Missed Features Installer 10 (MFI10) — пакет компонентов для Windows 10, присутствовавших в предыдущих версиях системы, но исчезнувших в 10-ке, среди которых есть и гаджеты рабочего стола, при этом, как и требуется нашему пользователю, на русском языке (несмотря на англоязычный интерфейс установщика).
MFI10 представляет собой образ диска ISO, размером более гигабайта, скачать который можно бесплатно с официального сайта (обновление: MFI исчез с этих сайтов, не знаю, где сейчас искать) mfi.webs.com или mfi-project.weebly.com (там же присутствуют версии для предыдущих версий Windows). Отмечу, что фильтр SmartScreen в браузере Edge блокирует загрузку этого файла, но мне ничего подозрительного в его работе обнаружить не удалось (все равно будьте осторожны, в данном случае гарантировать чистоту я не могу).
После загрузки образа, смонтируйте его в системе (в Windows 10 это делается просто двойным кликом по файлу ISO) и запустите MFI10 находящийся в корневой папке диска. Сначала запустится лицензионное соглашение, а после нажатия кнопки «Ок» — меню с выбором компонентов для установки. На первом же экране которого вы увидите пункт «Gadgets», который и потребуется для того, чтобы установить гаджеты рабочего стола Windows 10.
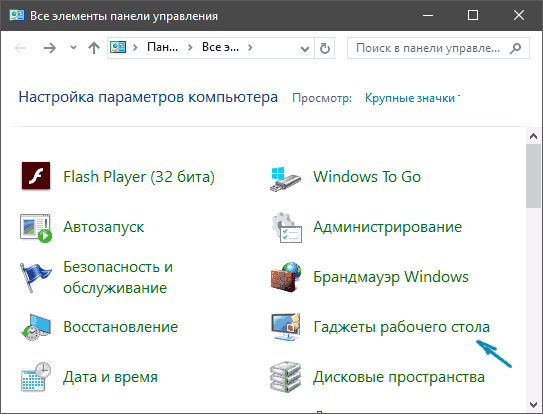
Установка по умолчанию проходит на русском языке, а после ее окончания в панели управления вы найдете пункт «Гаджеты рабочего стола» (у меня данный пункт появился только после ввода «Гаджеты» в окно поиска панели управления, т.е. не сразу), работа которого, как и набор доступных гаджетов не отличается от того, что был раньше.
Гаджеты для Windows 10 — видео
В видео ниже показано, где именно взять гаджеты и как установить их в Windows 10 для трех описанных выше вариантов.
Все три рассмотренные программы позволяют также загружать и устанавливать сторонние гаджеты на рабочий стол Windows 10, однако разработчики отмечают, что небольшое количество из них по каким-то причинам не работают. Тем не менее, для большинства пользователей, думаю, окажется достаточно уже имеющегося набора.
Дополнительная информация
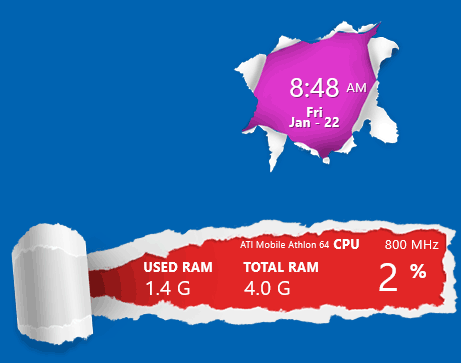
Если вы хотите попробовать что-то поинтереснее с возможностью скачать тысячи виджетов для рабочего стола в разном оформлении (пример выше) и полностью преобразить интерфейс системы, попробуйте Rainmeter.