
Wallpaper Engine is a great app for any PC enthusiast. Its vibrant community and intuitive editing features make it an accessible app for anyone looking to customize their desktop. Along with its base features, you can also set your lock screen using Wallpaper Engine. Down below are the steps need to set your Lock Screen.
Keep in mind that you can only use your current home screen wallpaper as your lock screen image.
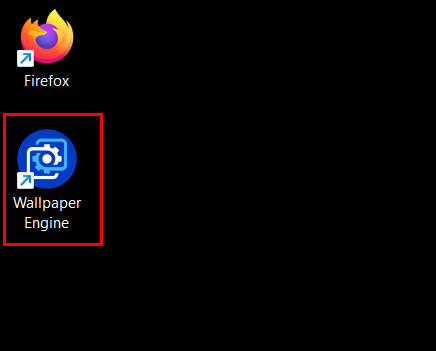
- Go to the bottom right on your screen to Hidden icons, right-click on Wallpaper engine, and go to settings.
- Go to the general tab in settings and scroll down till you see an option called “Override lock screen image“
- Enable this option, you should get a warning if you do this the first time but don’t worry it’s just a precautionary message.
Thats it! Now every time you start your PC you will see the non-animated version of your preferred desktop wallpaper. This can also be done on your Android smartphone with the help of the free companion Wallpaper Engine App that you get on purchasing Wallpaper Engine on Steam.
How to set the Lock Screen on your phone
- Go to settings and click on wallpaper and style
- Select the “My wallpaper” option
- Click on the three dots on the top right of the screen and Click on Live wallpaper
- If you have the Wallpaper Engine app installed, it should show up in this window, Now simply click on it and it should show you the wallpaper you currently have live on your PC.
- Now just press Set Wallpaper and choose between Home screen or home and lock screen as per your preference.
That’s all there is to Setting your lock screen using Wallpaper Engine. Check out our guides on Making Wallpaper Engine start automatically and other gaming-related guides on Gamer Tweak.
Даю вам повод почистить рабочий стол от всякого хлама типа 10-ти папок под названием «Новая папка 123» в разных вариациях. Внутри материал в текстовом формате.
Специально вернул все настройки в исходное состояние, здесь все выглядит не особо презентабельно и пользоваться таким рабочим столом не особо приятно.
Начнем с панели задач. Жмем правой кнопкой по панели задач. Если она закреплена — открепляем.
Меняем отображение значка поиска, чтобы его поле не отнимало так много места. Можно поставить «Показать значок поиска», но я ставлю «Скрыто», все равно если открыть пуск и начать что-то писать, откроется все тот же поиск.
Убираем лишние кнопки вроде кортаны, просмотра задач и панели люди. Кортана и панель люди в принципе бесполезны, а просмотр задач, нужен только если вы используете временную шкалу для управления несколькими рабочими столами или ваш телефон связан с компьютером. Если вам будет интересно, расскажу об этом подробнее как-нибудь в другой раз.
Открываем параметры панели задач.
Если у вас ноутбук с маленьким экраном, возможно, вам будет удобно включить тумблер «Использовать маленькие кнопки панели задач«. Тогда в области даты и времени будет отображаться только время.
Мне подходят большие кнопки, поэтому оставляю как есть. «Положение панели задач на экране» я оставляю «Внизу».
Если выставить «Группирование кнопок» в позиции «Всегда, скрывать метки», не будет отображаться заголовок открытой программы. При этом запущенные две одинаковые программы (например, два окна Google Chrome) сольются в одну кнопку.
На мой взгляд это неудобно, поэтому я ставлю «Никогда». Опять же, если у вас маленький экран ноутбука, можете поставить «При переполнении панели задач». Тогда окна будут группироваться только в том случае, если на панели задач заканчивается место.
Ниже открываем пункт «Выберите значки, отображаемые в панели задач». Включаем тумблер, чтобы значки открытых программ не прятались под стрелочку на панели задач. Так всегда наглядно видно, что у вас открыто и не получается ситуации, когда под стрелочкой прячется 5 непонятно для кого открытых программ.
Возвращаемся и открываем «Включение и выключение системных значков». Здесь я обычно убираю «Центр уведомлений». Потому что у меня они полностью отключены. Как это сделать можно посмотреть в моем предыдущем посте про оптимизацию системы Windows 10. Если вам нужны — оставляйте.
Возвращаемся в настройки параметров и переходим во вкладку «Цвета». Ставим темную тему, чтобы белый свет не бил по глазам и включаем «Эффекты прозрачности», чтобы привести все к одному стилю.
Оставляем галочку«Автоматический выбор главного цвета фона», чтобы винда сама выбрала подходящую цветовую палитру под обои. Ниже есть галочки для отображения цветовых элементов в меню пуск, панели задач и окнах. Их ставить не нужно, потому что тогда цвет панели задач и пуска будет выглядеть не в тему, а нам это не нужно.
С одной ст��роны, рабочий стол вроде как предназначен для того чтобы именно на нем были ярлыки. С другой стороны, выглядит это как-то слишком перегружено. Да еще эти щитки и стрелочки на ярлыках бросаются в глаза. Конечно, есть способы их убрать, но перемещение всего это добра в пуск и на панель задач видится мне более элегантным вариантом.
Заходим во вкладку «Пуск». Включаем тумблер «Показывать больше плиток в меню Пуск», так удобнее сортировать ярлыки в пуске. Отключаем «Список приложений в меню Пуск», все нужные программы будут в плитках.
Теперь закрепляем все нужные ярлыки плитками и оформляем как нам удобно. ПКМ по ярлыку и выбираем «Закрепить на начальном экране«. Большинство плиток делаю мелкого размера, какие-то из них широкими и крупными. Подбираю так, чтобы все это хорошо выглядело вместе. Плитки собираются в группы, им можно давать названия, но я предпочитаю этого не делать. Вы можете здесь все делать под себя как вашей душе угодно.
Кроме этого, в пуск прикрепляю плитку погоды из стандартного приложения майкрософт. Если тоже хотите иметь прогноз погоды под рукой — открываем пуск и пишем «Погода», если у вас ничего не вырезано, приложение должно быть у вас установлено. Если его нет, скачайте в официальном магазине Microsoft Store. Здесь указываем свой населенный пункт, выбираем его из выпадающего списка. Тыркаем закрепить и соглашаемся.
Далее закрепляем приложения, которыми пользуемся каждый день, на панели задач. Можно просто закрепить ярлыки на панели задач, но тогда при открытии программы, у вас будет открываться заголовок на ней. Это не очень удобно, да и выглядит кривовато.
Поэтому создаем папку на любом диске, закидываем туда ярлыки. Дальше жмем правой кнопкой на панели задач > «Панели» > «Создать панель инструментов» > выбираем путь к созданной папке. Зажимаем созданную на панели задач панель ЛКМ и перетягиваем куда вам нужно. Теперь жмем по ней ПКМ. Здесь уже под себя убираем или оставляем галочки «Показывать подписи» и «Показывать заголовок». Я убираю и ставлю вид «Крупные значки».
Лайфхак: в основную панель я специально закидываю папку, которую использую как рабочую, чтобы не засорять рабочий стол.
Лайфхак2: если хотите сделать панель с ярлыками по центру, то создайте пустую панель инструментов, перенесите ее влево к пуску. После этого создайте уже панель с нужными ярлыками и разместите ее по центру.
Это хороший альтернативный способ для быстрого доступа к программам, если вы не хотите что-то выносить в пуск. Например, сюда можно вынести программы Adobe: Photoshop, Premiere Pro, After Effects, Audition и закрепить их справа или по центру.
Для этого создаем ярлыки и переносим их в другую папку, точно также создаем еще дополнительные панели инструментов на панели задач. Я ставлю крупные значки Adobe и создаю третью панель с маленькими значками, куда помещаю Anydesk, OBS и Paint.
И наконец-то ставим обои. Для этого заходим в параметры фона и загружаем со своего ПК любые с просторов гугла, которые вам больше нравятся.
Лично я использую программу Wallpaper Engine и ставлю анимированные обои. Так, конечно, рабочий стол выглядит поинтереснее, но делать это не обязательно. Особенно в этом нет смысла если у вас объективно слабый компьютер. Программа платная, купить можно в стиме. При большом желании есть бесплатные альтернативы, если вы понимаете о чем я, но не думаю что это стоит таких заморочек. При включении ПК, программа будет запускаться автоматически. Стим при этом запускаться не будет.
Если вы тоже установили Wallpaper Engine, в настройках рекомендую поставить следующие настройки. «Другое приложение выбрано» — продолжать работу. «Другое приложение развернутся» — приостановить все. «Другое приложение в полный экран» – приостановить все. С такими настройками обои будут останавливаться, когда у вас приложение в полный экран, чтобы не нагружать дополнительно систему.
Качество ставим высокое, иначе зачем вообще ставить анимированные обои. Во вкладках «Рекомендации» и «Workshop» можно искать новые обои. Оставляю ссылки на некоторые из тех, что добавил себе:
Чтобы добавить их к себе в Wallpaper engine достаточно будет просто нажать подписаться, они автоматически загрузятся и появятся в программе во вкладке «Установлено».
Также вы можете изменить цвет и размер курсора в параметрах «Специальные возможности«. Здесь есть на выбор черный курсор, но он немного другой формы. Поэтому если вам нужен черный курсор стандартной формы, просто кликните на цветной курсор и добавьте черный. Сам я пользуюсь обычным белым курсором.
Еще я добавляю часы для другого часового пояса. Жмем правой кнопкой по дате и время, открываем настройки. Здесь выбираем «Часы для различных поясов» вкладка «Дополнительные часы«, ставим галочку, выбираем часовой пояс и пишем название. Теперь можно нажать на часы и увидеть актуальное время в другом часовом поясе.
Переходим во вкладку «Регион», открываем «Дополнительные параметры даты, времени, региона» > «Региональный стандарты» > «Дополнительные параметры», вкладка «Дата». Тут вписываем три буквы « ddd » в графу «Краткая дата» с любой стороны, какая вам больше нравится, жмем применить. Теперь возле даты будет написан день недели.
Остался маленький штрих, можно еще улучшить вид панели задач. Для этого качаем программу TranslucentTB (exe файл), устанавливаем. Жмем правой кнопкой по значку программы, во вкладке «Regular» выбираем «Blur» или «Fluent» на свой вкус в зависимости от обоев.
Во вкладках «Maximised window» и «Start Menu opened» ставим «Enabled» и выбираем «Opaque». По умолчанию здесь стоит черный цвет, я под себя ставлю RGBA 32 32 32 1. Вы можете сделать также либо подобрать свой цвет.
Это нужно, чтобы при открытии пуска и окон на полный экран к панели задач не применялся эффект вкладки «Regular», без этой настройки они будут сильно выделяться. Не забудьте поставить галочку «Open at Boot«, чтобы программа включалась при запуске системы.
Результат на лицо, тобишь на экран, как говорится.
Конечно, вам не обязательно следовать моим настройкам точь-в-точь, в конце концов это вы будете пользоваться своим компьютером. Главное, чтобы именно вам было приятно это делать.
Буду рад, если материал оказался вам полезен. В этом случае, будет не лишним поставить лайк, подписаться на ютуб канал и вот это вот все.
Wallpaper Engine lets users customize their desktops and also helps to setup lock screen on your PC. If you’ve been looking for a way to use Wallpaper Engine to set up this feature, you’ve come to the right place.
In this article, you’ll learn everything you need to know about setting up lock screen using your Wallpaper Engine.
How to Use Wallpaper Engine to Set the Lock Screen on Your PC
The process of setting up a lock screen on your PC using the Wallpaper Engine is simple and quick. Follow these steps to complete this process:
- Locate the app using hidden icon menu on your taskbar.

- Right-click on Wallpaper Engine and then open “Settings.”

- Click on the “General” tab under Settings.

- Scroll down the window till you locate the “Override lock screen image.”
- Turn on toggle to enable this option.


It’s important to remember that the only image that you can set up as your lock screen display is your current home screen wallpaper.
How to Use Wallpaper Engine to Set the Lock Screen on Your Phone
Steam offers you a free companion Wallpaper Engine for your smart phone once you purchase the Wallpaper Engine. Here’s how you can use it on your phone to setup lock screen:
- Open “Settings” and select “Wallpaper and Style.”
- Choose the “My wallpaper” option.
- Navigate to the top of your screen and tap on the three dots on the top right.
- Select “Live Wallpaper.”
- Tap the Wallpaper Engine appearing in this window and select “Set Wallpaper.”
- Choose “Lock Screen.”
It’s important to note that depending on your phone manufacturer, the wallpapers you set using the Wallpaper Engine can either be static or live.
How to Set Up Wallpaper Engine as Screen Saver
This is an alternative method to setting up the lock screen recommended by Wallpaper Engine developers. However, the process is quite complex. First, you’ll have to initiate screensaver setup.
Here’s how you can set up Wallpaper Engine as screensaver in combination the On resume display logon screen:
- Move your cursor over the installed tab in the Wallpaper Engine window.

- Click “Configure screensaver.”

- Screensaver will automatically be saved if it’s already installed.

- If not, a prompt will appear asking you to install screensaver.
- Window screensaver will open automatically after installation.


Configuring Screensaver Settings
You’ll have to first configure Windows. Here’s how you can do it:
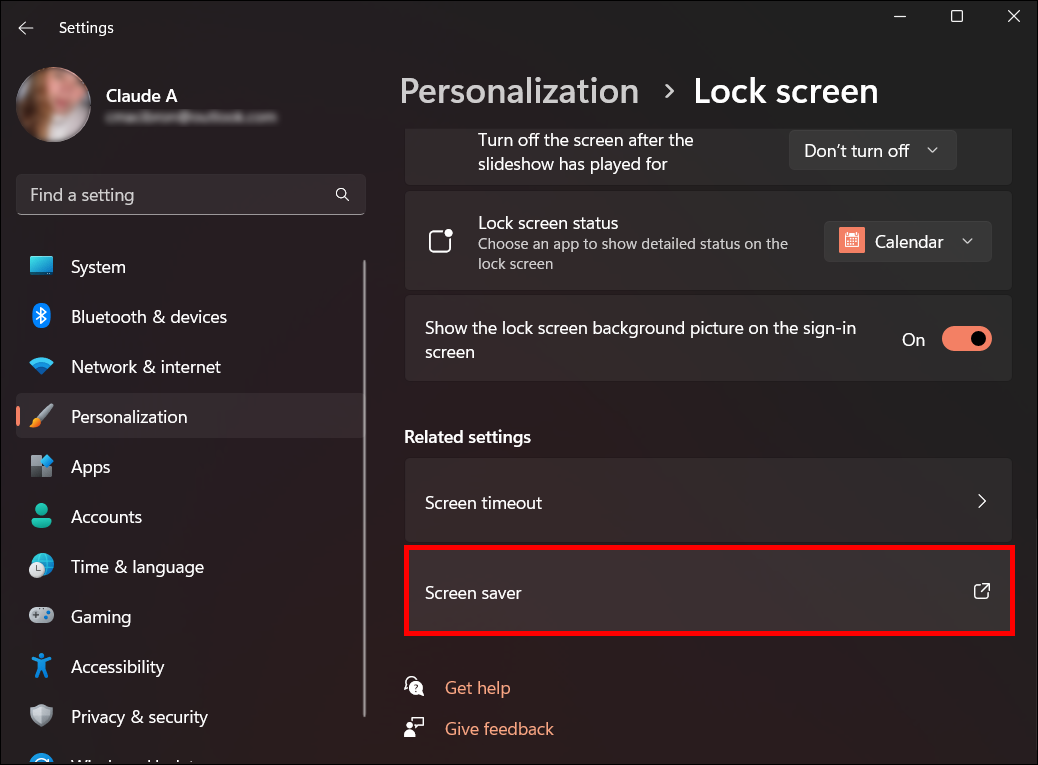
- Open “Settings” on your computer and click “Personalization.”

- Click on “Screen Saver.”
- Select Wallpaper Engine as your screensaver.

- Set wait time then check the box next to “On resume, display logon screen.”
- Click “Apply.”

- Select “OK.”


Wallpaper Engine Configuration
You can begin to set up the Wallpaper Engine screensaver after you’ve finished setting up your screensaver settings. Here’s how it’s done:
- Launch Wallpaper Engine.

- Move your cursor over the installed tab in the top left corner of your Wallpaper Engine.

- Select “Configure screensaver.”
- Wallpaper Engine will now preview your screensavers.
- You can go back to your wallpaper configuration by exiting screensaver mode.


The Wallpaper Engine typically operates the same way as the wallpapers that are actively running. But you can alter these settings by changing the screensaver settings to be configured separately. With the option to configure separately enabled, you can set up different wallpapers for different functions and profiles. Click on the red quit button in the upper left corner of the Wallpaper Engine window to restore your Wallpaper Engine to default settings.
How to Troubleshoot Screensaver
The screensaver function on the Wallpaper Engine is authorized by Windows. There are a few methods you can use if your screensaver refuses to run appropriately:
- Check Windows default screensaver to see if it’s working properly. If it is, you can restart your PC to see whether issue is resolved.
- Double-check your Windows screensaver settings to ensure that the wait time is correct. Also check your Windows energy settings. If battery power is low, ensure you connect your device to a power supply.
- You can also exempt the screensaver file from the PCs antivirus scan.
If you don’t want the wallpapers to fill your screen when your device is in sleep mode, you can disable Wallpaper Engine screensaver. You can do this by opening Windows screensaver settings and changing the screensaver option to “None.”
FAQs
What is the best method you can use to set up lock screen with Wallpaper Engine?
The best method to use is to override lock screen using the Wallpaper Engine setting.
Why is Wallpaper engine refusing to set up lock screen on your phone?
It’s likely that your phone manufacturers haven’t enabled these settings to ensure that your phone security isn’t undermined. Windows also treats the lock screen area as a protected area and blocks you from enabling this setup.
Is it worth it to invest in Wallpaper Engine?
Yes, this is an amazing tool especially for gamers. But, you can also use it to improve the overall look of your desktop.
Is Wallpaper Engine free?
It depends. The Wallpaper Engine from Steam for your PC is a paid for platform. But once you purchase it, Steam gifts you a free Wallpaper Engine companion designed for your Android phone.
There are limited options on how you can enable lock screen using Wallpaper Engine. The reason being, the manufacturers in the field believe that allowing these settings will compromise device security. There will hopefully be more positive updates on this as technology evolves.
Does your phone allow live wallpaper lock screen? If so, have you ever used it before? Let us know in the comments section below.
Wallpaper Engine has entrenched itself as a staple of PC gaming, with easy support for multiple monitors, ultra-wide aspect ratios and a broad assortment of workshop content developed by the userbase on Steam. Its estimated tens of millions of total users blow competitors, like the open source Lively Wallpaper, out of the water.

Related
16 Best Free FPS Games On Steam
Here are the best FPS Video Games on Steam!
For people who don’t want to manage both their Windows desktop settings and the wallpapers in the app, getting it to start automatically is a nice quality-of-life feature. Here’s how to configure it to start when you boot up your machine, alongside a few other timesavers.
Configuring Wallpaper Engine To Start On Launch
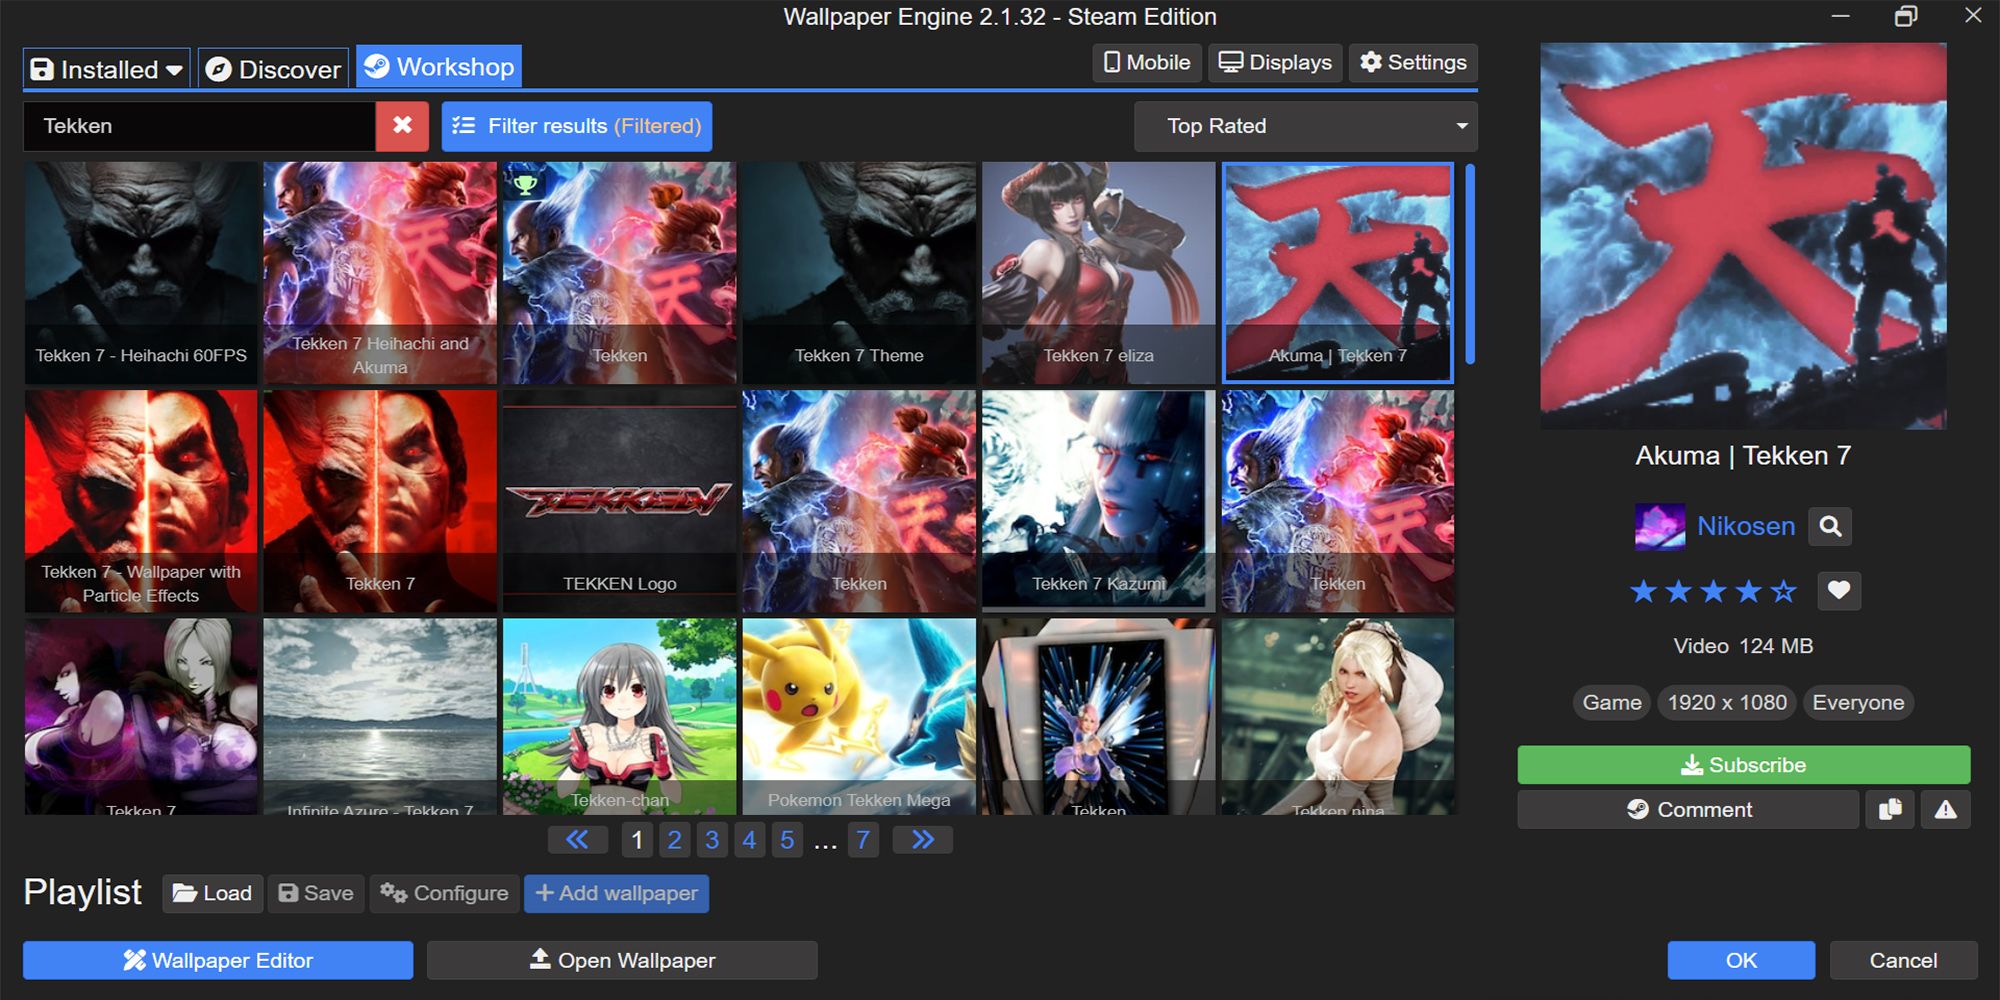
When opening Wallpaper Engine, you’ll be met with a rather cluttered User Interface until you take a few moments to filter through it and sort out the sections you need.
For startup settings, you’ll find them under the settings wheel in the top right. It’ll pop open a sub-window, and you’re looking for the general settings tab within that.
As long as you’re in this area of the settings, it may be worth configuring the performance settings for a first-time user: If audio playback is enabled, it’s very easy to accidentally scare yourself with a loud wallpaper. After that, the top section of the general settings tab is focused on startup options.
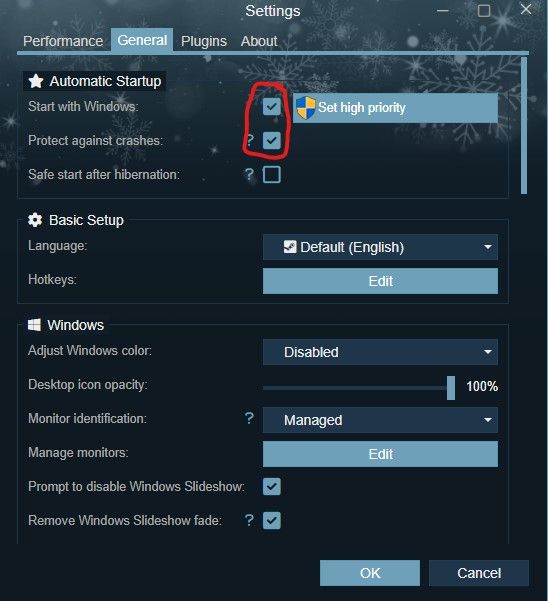
It’s important to also check the option below Start With Windows, labelled ‘protect against crashes’. This ensures that if either your system or the program encounters any severe errors, the wallpaper engine will disable automatic startup temporarily. If you’re using an especially intensive wallpaper that melts a graphics card or eats an entire RAM stick, this will let you safely open the app up and disable the culprit.
The crash protection setting is especially important if you use Web or Application wallpapers. Since these run their own code, they can contain defective or malicious scripts.
You don’t need administrative permissions to enable it on startup but if you use the optional high-priority mode this does require admin rights. It’ll also activate the app regardless of who is logging into the computer so be careful about what wallpapers you have enabled on a shared machine.
Further down on the same general settings menu, you’ll find other useful options that can also be activated on startup. The override lock screen tool allows you to replace the Windows login screen with your new wallpapers but has a significant chance of clashing with Windows and antiviral software.
The Windows Lock Screen is, for good reasons, a protected piece of the operating system and does not play nicely with software that tries to interfere with it.
Screensavers have fewer security concerns compared to the lock screen. Setting up Wallpaper Engine to control your screensavers is a safer alternative to modifying your lock screen.
Testing Your Startup Apps Without Rebooting Your Computer
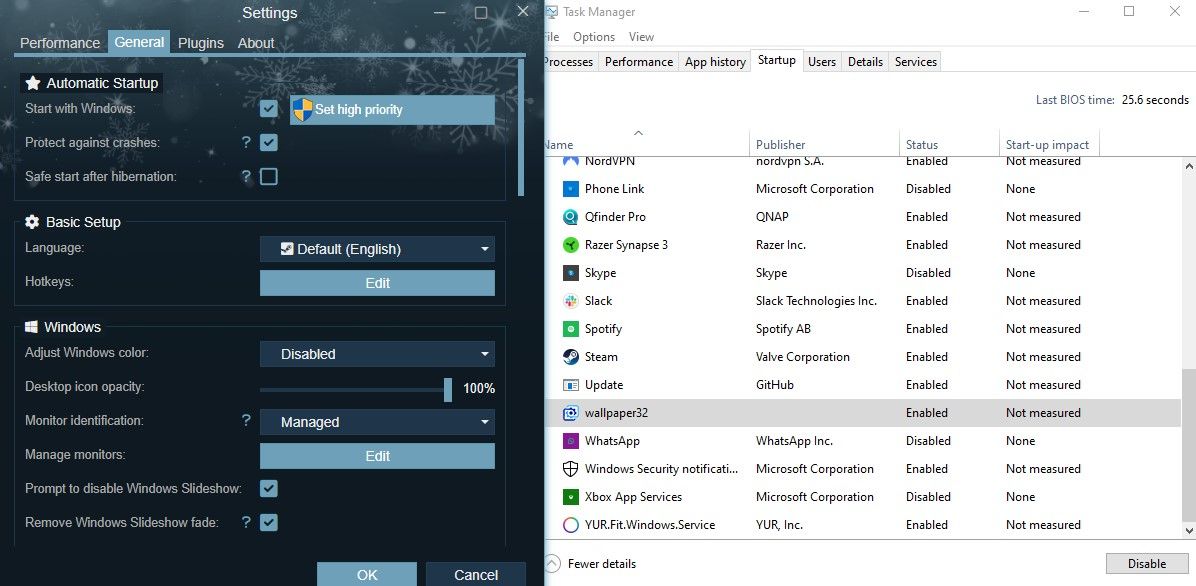
Opening Windows Task Manager with ctrl-shift-esc and clicking more details should reveal a tab labelled Startup. Wallpaper Engine should now be listed as one of these startup applications. It might be listed under a different application name, such as «wallpaper32».
As long as you’re here, it may also be worth examining what other startup apps you have enabled and, if any, can be safely disabled. Some especially pesky apps either don’t have or will hide their toggle to disable them on startup, making it easier to handle them through this menu.
If you have enabled it in high-priority mode, Wallpaper Engine will not appear on this list of startup applications. This is because the high-priority mode uses an alternative route and will activate before other programs on the startup list. The best way to check that it’s working in high-priority mode is to simply reboot your machine and confirm that it opens automatically. If there are any startup issues along the way, disable high-priority mode.

Next
The Best Free Video Games You Can Play On Steam
Spent too much of your budget on your gaming rig and don’t have the money to fill your Steam account with games? Well, we have you covered!
-
Tech