
Все способы:
- Способ 1: Приложение «Параметры»
- Способ 2: «Редактор реестра»
- Способ 3: Консоль «PowerShell»
- Вопросы и ответы: 0
Способ 1: Приложение «Параметры»
Включить или отключить монофонический звук проще всего в отдельном разделе приложения «Параметры».
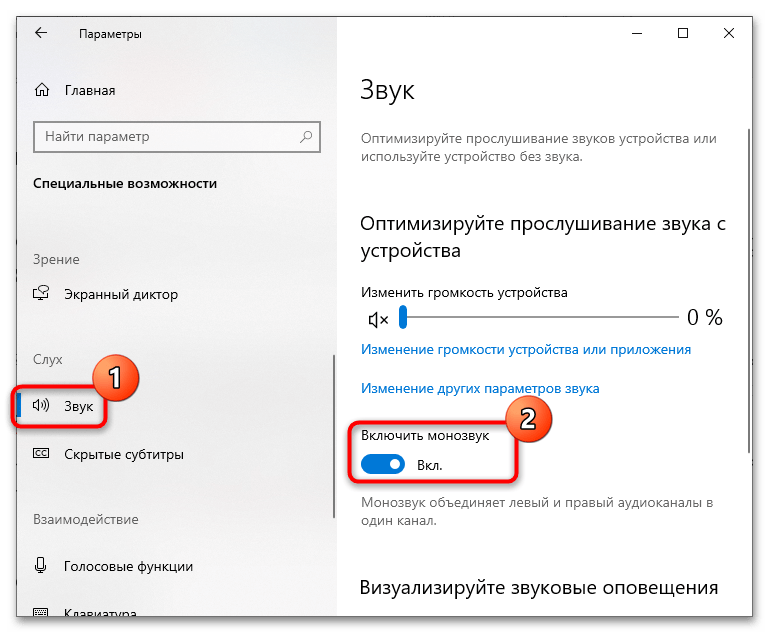
- Откройте приложение «Параметры» и перейдите в раздел «Специальные возможности» → «Звук. Также для быстрого перехода в этот раздел можно использовать команду
ms-settings:easeofaccess-audio, выполненную в диалоговом окошке, которое вызвано клавишами Win + R. - В правой части окна настроек найдите опцию «Включить монозвук» и установите переключатель в положение «Выкл.».
Способ 2: «Редактор реестра»
К этому способу обычно прибегают, когда настройка в приложении «Параметры» по какой-то причине оказывается недоступной.
- Запустите «Редактор реестра», выполнив в вызванном нажатием клавиш Win + R окошке команду
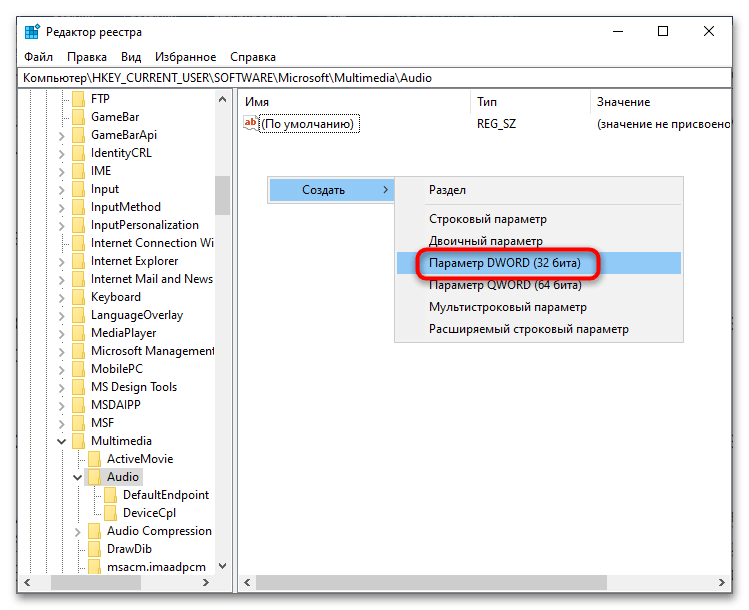
regedit. - Разверните в левой колонке ветку
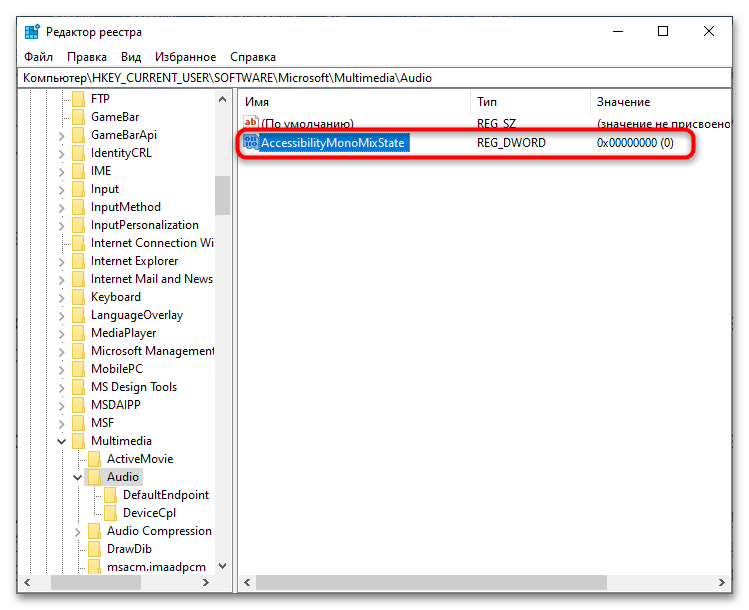
HKEY_CURRENT_USER\Software\Microsoft\Multimedia\Audio, кликните правой кнопкой мыши по пустой области правой колонки и выберите из меню опцию «Создать» → «Параметр DWORD (32 бита)». - Назовите новый параметр «AccessibilityMonoMixState». Если параметр уже присутствует, пропустите этот шаг.
- Откройте окошко редактирования созданного параметра двойным по нему кликом и задайте в качестве его значения «1».
Если новые настройки не вступят в силу сразу, перезайдите в учетную запись либо перезагрузите компьютер.
Способ 3: Консоль «PowerShell»
По большому счету этот способ дублирует предыдущее решение, разница лишь в том, что ключ реестра создается средствами консоли.
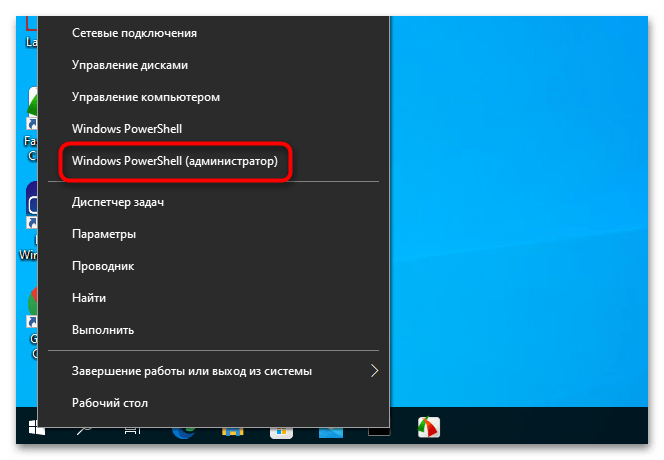
- Запустите консоль «PowerShell» от имени администратора из контекстного меню кнопки «Пуск».
- Скопируйте команду
powershell -windowstyle hidden -command "Start-Process cmd -ArgumentList ‘/s,/c,REG ADD "HKCU\Software\Microsoft\Multimedia\Audio" /V AccessibilityMonoMixState /T REG_DWORD /D 1 /F & net stop "Audiosrv" & net start "Audiosrv"‘ -Verb runAs", вставьте ее в консоль и нажмите клавишу ввода.
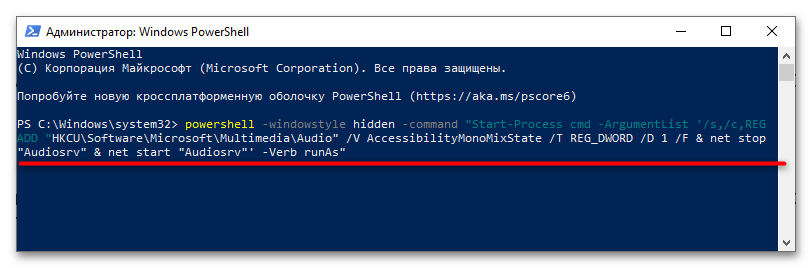
Монофонический звук будет включен. Приведенная выше команда состоит из трех частей. Первая создает параметр с именем «AccessibilityMonoMixState» и устанавливает в качестве его значения «1», вторая команда останавливает службу аудио, а третья команда запускает ее.
Наша группа в TelegramПолезные советы и помощь
- О сайте
- Условия пользования
- Реклама
- Контакты
-
18+
Информационно-аналитический портал «Xabar.uz» зарегистрирован в качестве электронного СМИ 27 декабря 2017 года. Номер свидетельства: 156697. Учредитель: редакция газеты «Xabar». Адрес редакции: 100000, г. Ташкент, ул. Амир Темур пр.1, дом 2 (Ориентир: Алайский рынок). Ответственный редактор: Абдуғани Абдураҳмонов. Электронный адрес: info@xabar.uz
При полном или частичном тиражировании материалов обязательно выполнение «Условий использования». Все права защищены законами Республики Узбекистан о средствах массовой информации и об авторском праве и смежных правах.
-
Home
-
News
- How to Turn On or Off Mono Audio in Windows 10/11
By Alisa |
Last Updated
Learn how to turn on or turn off mono audio on Windows 10 or 11 in this post. For more computer tips and solutions, you can visit MiniTool News Center. You can also find some useful programs from MiniTool Software website.
Mono audio combines left and right audio channels into one channel. If you want to turn on mono audio on Windows 10/11 or force Windows 10/11 to make all audio mono, you can check the detailed steps below.
How to Turn On or Off Mono Audio on Windows 10
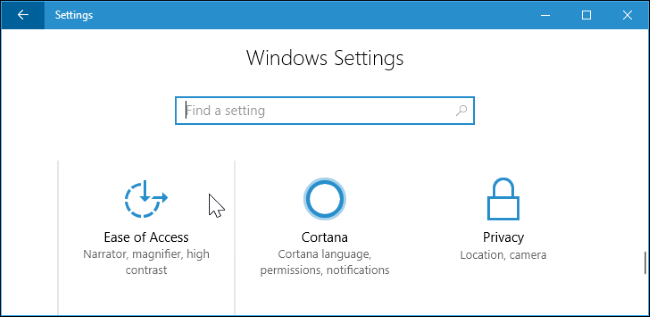
Step 1. Press Windows + I to open Windows Settings app. Click Ease of Access. In newer Windows 10 versions, you can click Accessibility.
Step 2. Next, click Audio under Hearing in the left panel.
Step 3. In the right window, toggle the switch on of the Turn on mono audio option to turn on mono audio in Windows 10. If you want to turn off mono audio in Windows 10, toggle the switch off.

On this Windows audio settings page, you can also change device or app volume, change other sound settings, fix sound problems in Windows 10, etc.
How to Enable or Disable Mono Audio on Windows 11
Step 1. Click Start -> Settings to open the Settings app on Windows 11. Click the System tab.
Step 2. Click Sound on the right side.
Step 3. Under the Output section, you can turn on the switch of Mono audio option to turn on mono audio on Windows 11. After this, your system will combine the left and right audio channels to deliver mono sound. To turn off mono audio in Windows 11, turn off the switch.
How to Fix Sound Problems in Windows 10/11
To help users fix audio or sound problems, Microsoft provides an audio troubleshooter that is embedded in the Windows system. It helps fix audio problems automatically in Windows.
For Windows 10, click Start -> Settings -> Update & Security -> Troubleshoot. Find and click Playing Audio in the right window and click the Run the troubleshooter button to run the audio troubleshooter to detect and fix possible problems with audio.
For Windows 11, click Start -> Settings -> System -> Troubleshoot -> Other troubleshooters. Click the Run button next to the Playing Audio option to run the audio troubleshooter in Windows 11 immediately.
Free Audio Converter and Recorder for PC
MiniTool Video Converter is a 100% clean and free program that combines video/audio convert, video download, and screen record functions into one suite.
You can use MiniTool Video Converter to convert any audio to MP3 or other formats, convert any video to MP4 or other popular formats, free download YouTube video for offline playback, record Windows computer screen and audio, etc.
Download and install MiniTool Video Converter on your Windows PC or laptop and check the simple guide below.
MiniTool Video Converter FreeClick to Download100%Clean & Safe
- Launch MiniTool Video Converter. Choose a module on the main UI.
- After you click the Video Convert module, you can add the source video or audio file, click the Edit icon under the Target section, click Video or Audio tab to choose output audio or video format. Click the Convert button to convert the video/audio to the target format at a fast speed.
- You can click Screen Record mode to open the MiniTool Screen Recorder window. Choose a recording module and choose to record system audio or microphone audio or not. Click the Record button to instantly start the recording.
This post teaches you how to turn on or turn off mono audio on Windows 10/11 and offers an all-in-one tool MiniTool Video Converter for your reference. Hope it helps.
About The Author
Position: Columnist
Alisa is a professional English editor with 4-year experience. She loves writing and focuses on sharing detailed solutions and thoughts for computer problems, data recovery & backup, digital gadgets, tech news, etc. Through her articles, users can always easily get related problems solved and find what they want. In spare time, she likes basketball, badminton, tennis, cycling, running, and singing. She is very funny and energetic in life, and always brings friends lots of laughs.
Sign in to your How-To Geek account
Quick Links
Most audio you listen to is in «stereo», which means that different things are played in through both the left and right speakers. However, you can have your PC mix the sound to mono, playing everything combined through both speakers.
This would allow you to use just one earbud with your PC, but still hear both the left and right audio tracks. It’s also very helpful if you have trouble hearing through one ear.
Windows 10
The mono audio option was introduced in Windows 10’s Creators Update, so it’s built right into the settings, just like on the iPhone and Android.
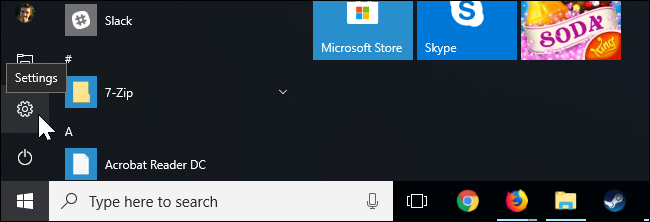
To find this option, click the Start button and select the gear-shaped «Settings» icon.
Click the «Ease of Access» icon in the Settings window.
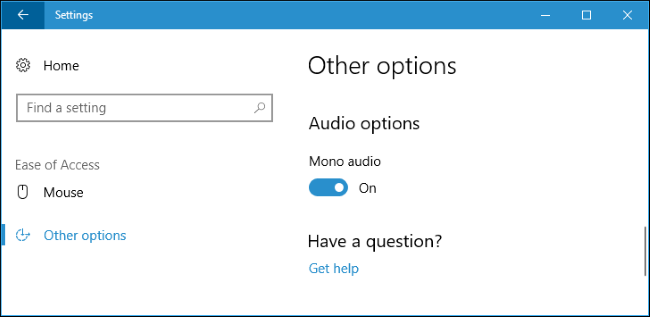
Click «Other options» in the sidebar.
On modern versions of Windows 10, select «Audio» under Hearing in the sidebar instead.
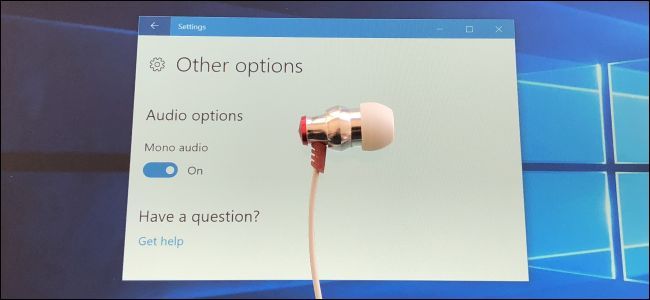
Scroll down to the bottom of the window you’ll find «Mono audio» under Audio options. Set it to «On.»
That’s it! If you ever want to disable this option and re-enable standard stereo audio, just return here and set Mono audio to «Off».
Windows 7 and 8
Older versions of Windows, including Windows 7, offer no way to actually «mix» both stereo tracks to mono without third-party software.
To achieve mono audio for all sound on your PC, the third-party software has to install a virtual audio device. Applications on your PC output sound to the virtual audio device, the virtual audio device software mixes the stereo sound to mono, and mono audio comes out of your PC.
You can do this with the free VoiceMeeter software on any version of Windows. First, install the software and restart your PC.
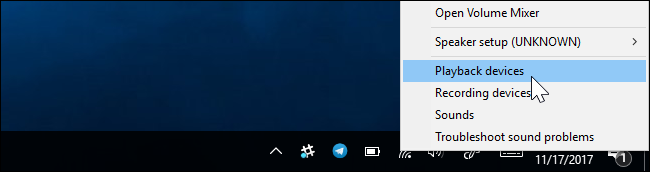
After rebooting your PC, right-click the volume icon in your notification area and select «Playback Devices».
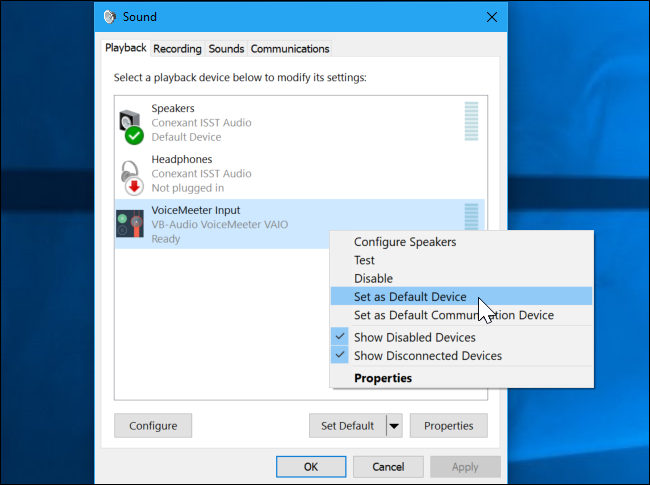
Right-click the «VoiceMeeter» device here and select «Set as Default». This will make all programs on your PC play their sound through VoiceMeeter.
Then, launch the VoiceMeeter application from your Start menu.

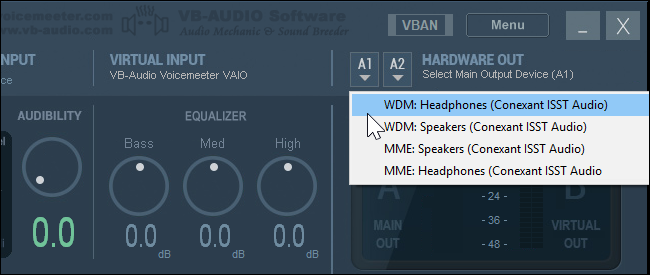
On the Hardware Out tab in VoiceMeeter, click the A1 or A2 button and select the headphones or speakers you want to play audio from.
Be sure to select one of the «WDM» options instead of the «MME» options. These are different sound driver interfaces in Windows, and WDM is faster.
Click the «Mono» button on the Hardware Out tab in VoiceMeeter.
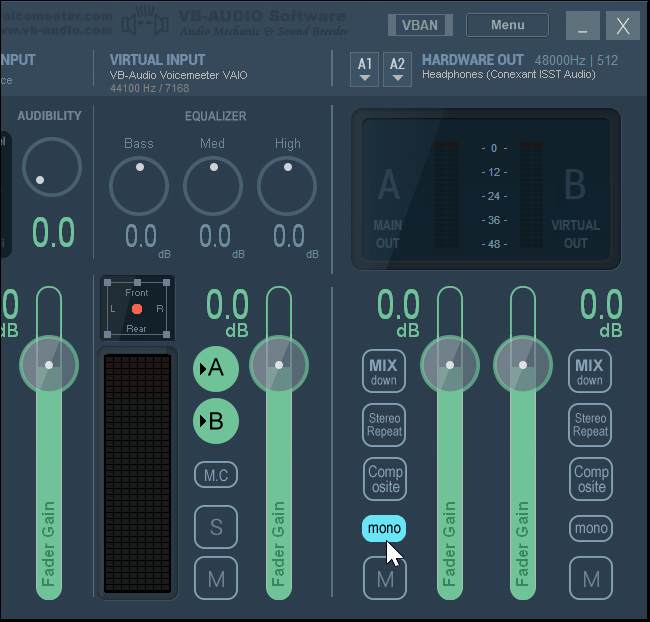
You’re now done. Applications on your computer will play their audio through the virtual VoiceMeeter audio device, and it will mix that audio to mono before outputting it to your headphones. To stop using VoiceMeeter, return to the Playback Devices window and set your standard headphones or speakers as your default audio output device.
You can check that your tweak worked by visiting the Left / Right (Stereo) Sound Test page. The buttons here play sound through the left and right channels separately if you’re using stereo audio, so you can run this test before and after making the change to ensure mono audio is coming out of your PC.
Монофонический звук — это одна из функций специальных возможностей Windows 10, которая гарантирует, что даже если у пользователя возникнет проблема с одним аудиоканалом, он или она никогда не пропустит ни слова, ни звука при воспроизведении через стереогарнитуру или многоканальные динамики. В течение многих лет аудио, которое мы слушаем, имеет два разных канала — левым и правым. В этом случае пользователь при прослушивании получает разные аудиопотоки из обоих каналов. В отличие от стерео, монофонический звук воспроизводит один и тот же поток через оба канала. Windows 10 включает встроенную опцию для включения монофонического вывода звука. Вы можете получить к нему доступ быстрее, добавив специальную команду контекстного меню рабочего стола.
Хотя эта возможность стала доступной в программном обеспечении медиаплеера в течение достаточно долгого времени благодаря понижающему микшированию стереофонического или многоканального звука в монофонический, она не была доступна в Windows 10 на системном уровне. Включение монофонического аудиовыхода полезно, когда вы слушаете звук, который имеет только один канал, или кодируется неправильно, или если закодированные каналы несовместимы с настройками вашего оборудования, в результате чего звук воспроизводят только один наушник или динамик.
В Windows 10 возможность включения монофонического звука является частью функций «Специальные возможности». И его можно включить в настройках соответствующей категории.

Если вы часто включаете функцию Монозвук, для вас может быть полезно иметь специальную команду контекстного меню, чтобы быстрее включить / отключить эту функцию.
Windows 10 Переключение моно – стерео в контекстном меню.
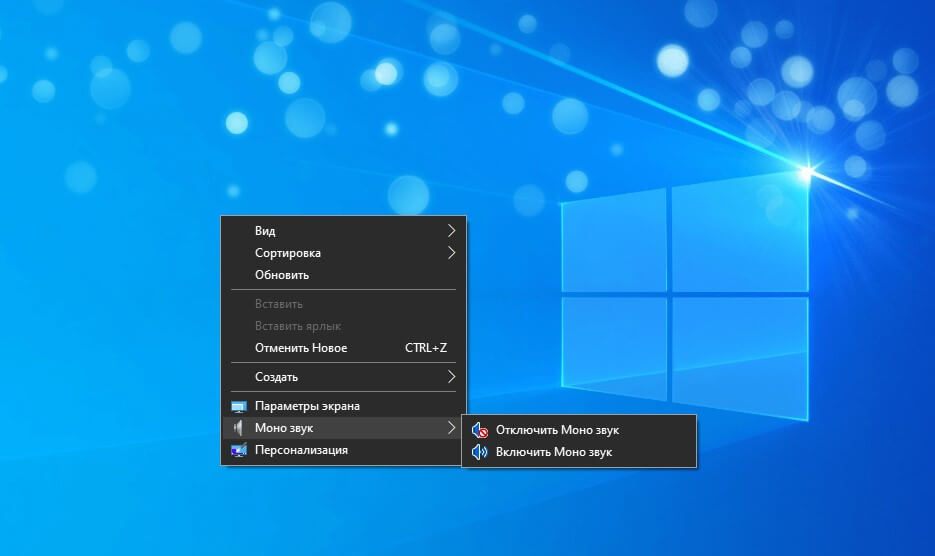
Чтобы добавить Монозвук в контекстное меню в Windows 10,
Шаг 1: Загрузите следующий ZIP-архив: Скачать ZIP-архив.
Шаг 2: Распакуйте его содержимое в любую папку. Вы можете разместить файлы прямо на рабочем столе.
Шаг 3: Дважды кликните файл «Add Mono Zvuk Desktop Context Menu.reg», чтобы автоматически добавить значения в реестр системы.
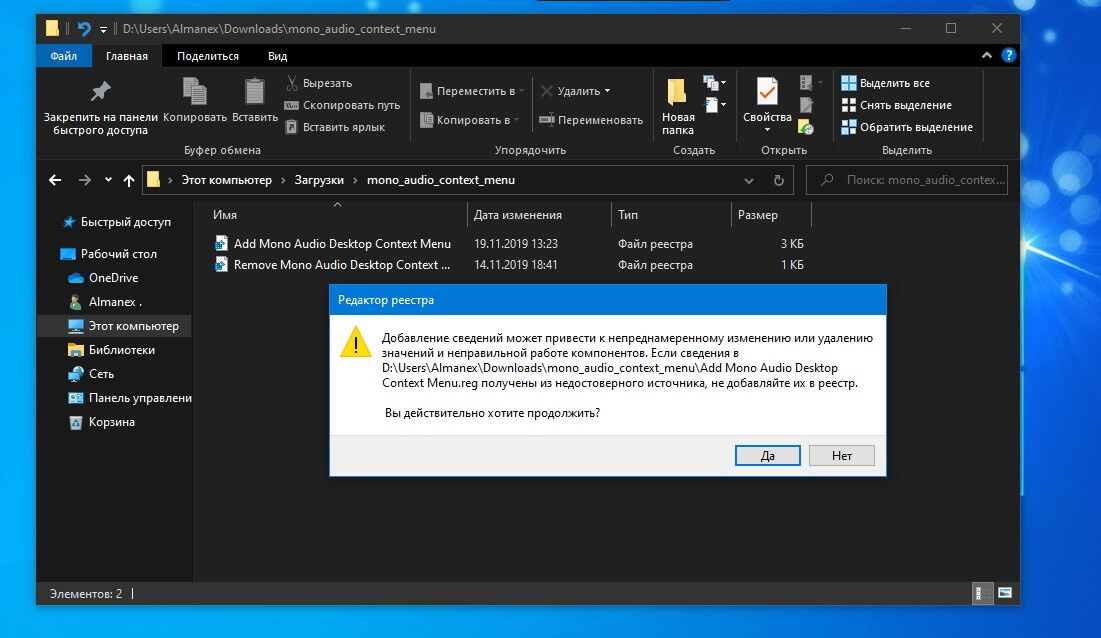
Шаг 4: Чтобы удалить запись из контекстного меню, используйте предоставленный файл Remove Mono Zvuk Desktop Context Menu.reg.
Все!
Как это работает или ручная правка реестра.
Указанные выше файлы реестра изменяют ветку реестра.
Шаг 1: Откройте редактор реестра и перейдите по следующему пути:
HKEY_CURRENT_USER\Software\Microsoft\Multimedia\Audio
Шаг 2: Чтобы включить эту функцию, создайте новый параметр DWORD (32 бита) с именем «AccessibilityMonoMixState» и установите для его значение равным «1».

Примечание: Даже если вы используете 64-разрядную версию Windows, вы все равно должны создать параметр DWORD (32 бита).
Шаг 3: Значение «0» отключит функцию моно и вернет стерео режим.
Шаг 4: Чтобы применить изменения, перезагрузите ПК или перезапустите службу Windows Audio.
Вот и все.