Все способы:
- Меняем иконки в Windows 10
- Вариант 1: 7tsp GUI
- Вариант 2: IconPackager
- Вариант 3: iPack
- Вариант 4: Файлы ICO и PNG
- Заключение
- Вопросы и ответы: 2
Многие пользователи после установки операционной системы остаются недовольными внешним видом интерфейса. Специально для таких целей в Windows предусмотрена возможность изменения тем оформления. Но как быть, если требуется не только сменить стиль окон, но и установить новые элементы, в частности, иконки. В этой статье мы расскажем, как это сделать.
Меняем иконки в Windows 10
В контексте сегодняшней статьи иконки – это значки, которыми визуально обозначаются различные элементы интерфейса Виндовс. К ним относятся папки, файлы разных форматов, жесткие диски и так далее. Иконки, подходящие для решения нашей задачи, распространяются в нескольких видах.
- Пакеты для 7tsp GUI;
- Файлы для использования в программе IconPackager;
- Автономные пакеты iPack;
- Отдельные файлы формата ICO и (или) PNG.
Для каждого приведенного выше вида есть отдельные инструкции по установке. Далее мы подробно разберем четыре варианта действий. Обратите внимание, что все операции необходимо выполнять в учетной записи с администраторскими правами. Программы также нужно запускать от имени администратора, так как мы планируем редактировать системные файлы.
Вариант 1: 7tsp GUI
Для установки данных пакетов иконок необходимо скачать и инсталлировать на свой ПК программу 7tsp GUI.
Первым делом необходимо подстраховаться и создать точку восстановления системы.
Подробнее: Как создать точку восстановления в Windows 10
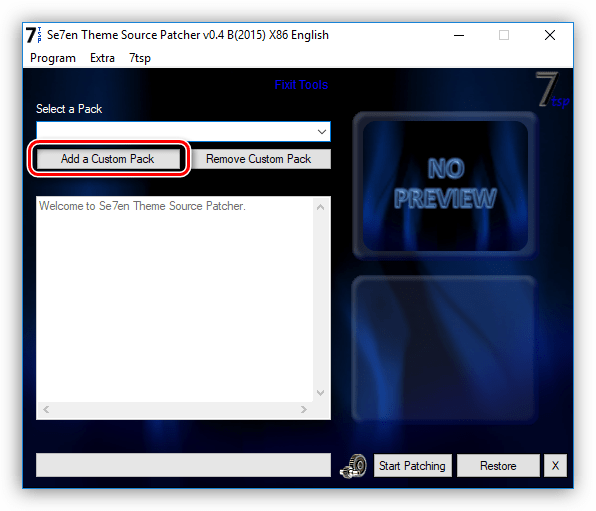
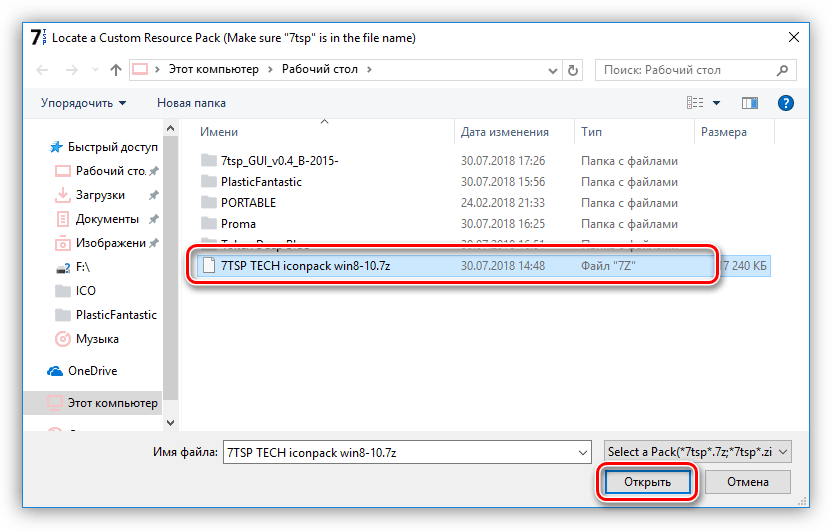
- Запускаем программу и нажимаем кнопку «Add a Custom Pack».

- Ищем на диске пакет иконок 7tsp, скачанный из интернета, и жмем «Открыть». Имейте в виду, что необходимые для работы файлы могут быть упакованы в архив ZIP или 7z. В данном случае ничего распаковывать не нужно – просто указываем архив в качестве пакета.

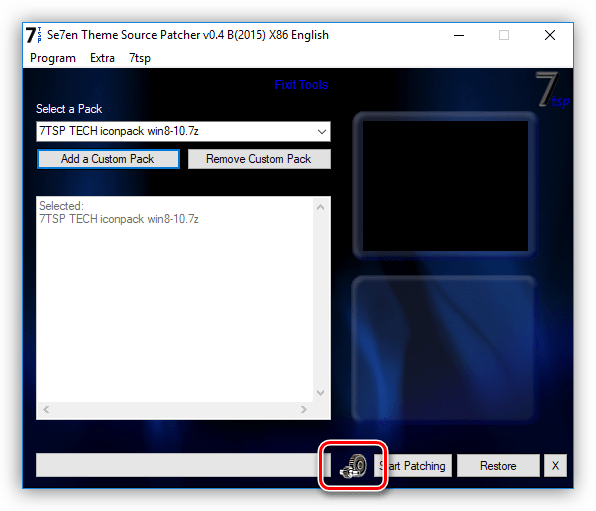
- Переходим к опциям.
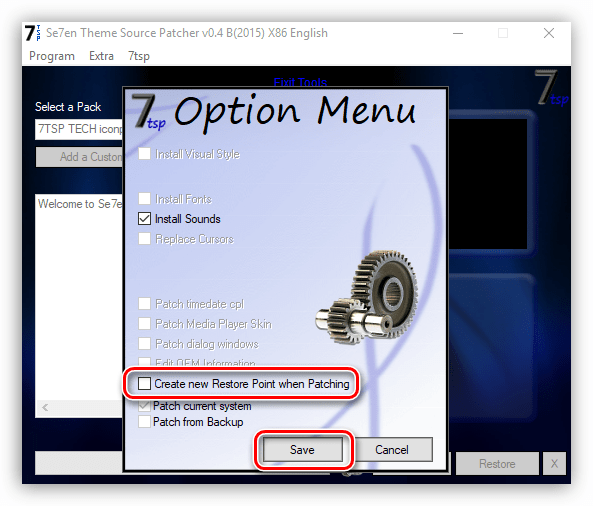
Здесь ставим флажок в чекбоксе, указанном на скриншоте. Это заставит софт создать дополнительную точку восстановления. Не стоит пренебрегать этой настройкой: в процессе могут возникнуть различные ошибки, в том числе и системные.

- Нажимаем «Start Patching» и ждем завершения операции установки.
- На завершающем этапе программа потребует выполнить перезагрузку. Нажимаем «Да».

- После перезагрузки мы увидим новые иконки.


Для того чтобы вернуть систему в исходное состояние, достаточно выполнить восстановление из созданной ранее точки. В программе имеется свой инструмент для отката изменений, но он не всегда работает корректно.
Подробнее: Как восстановить систему Windows 10
Вариант 2: IconPackager
Этот вариант также подразумевает использование специальной программы – IconPackager, которая способна устанавливать иконки из пакетов с расширением IP. Программа является платной с 30-дневным пробным периодом.
Скачать IconPackager
Перед тем как начать, не забудьте cоздать точку восстановления.
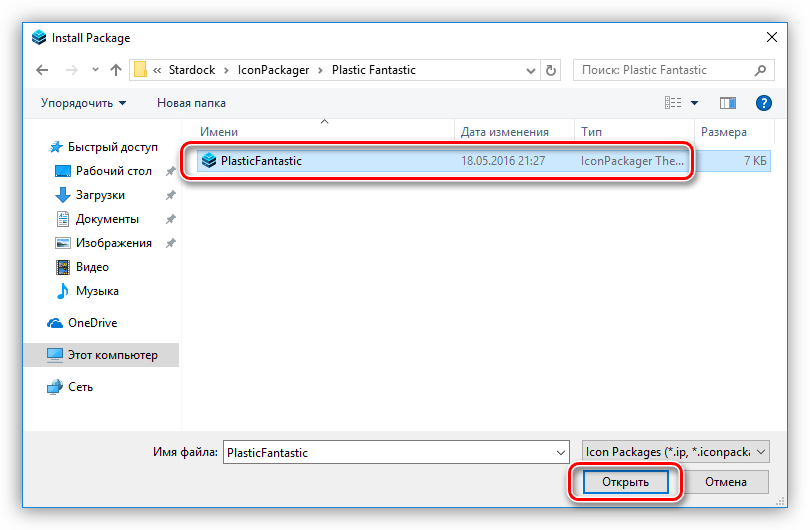
- Запускаем IconPackager и нажимаем на ссылку «Icon Package Options». Далее наводим курсор на пункт «Add Icon Package» и кликаем по «Install From Disk».

- Находим заранее распакованный файл с пакетом иконок и жмем «Открыть».

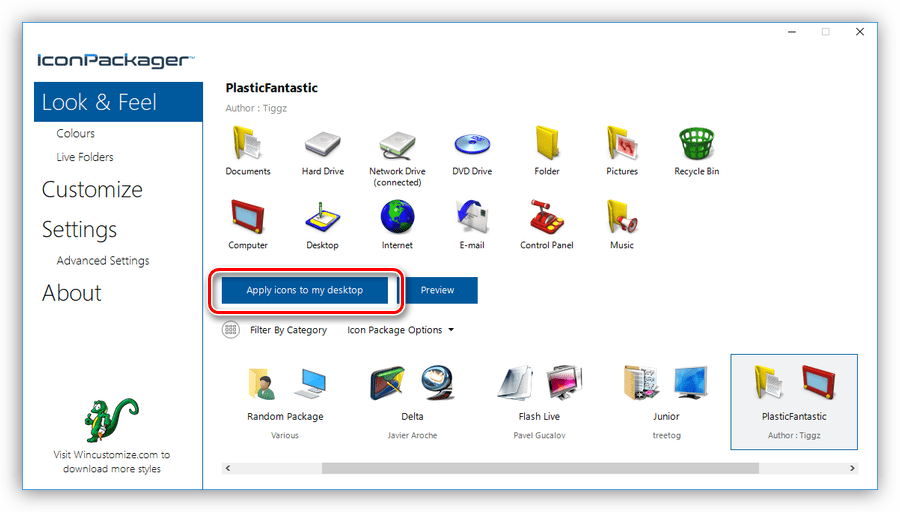
- Нажимаем кнопку «Apply icons to my desktop».
- Программа на время заблокирует рабочий стол, после чего иконки будут изменены. Перезагрузка не требуется.

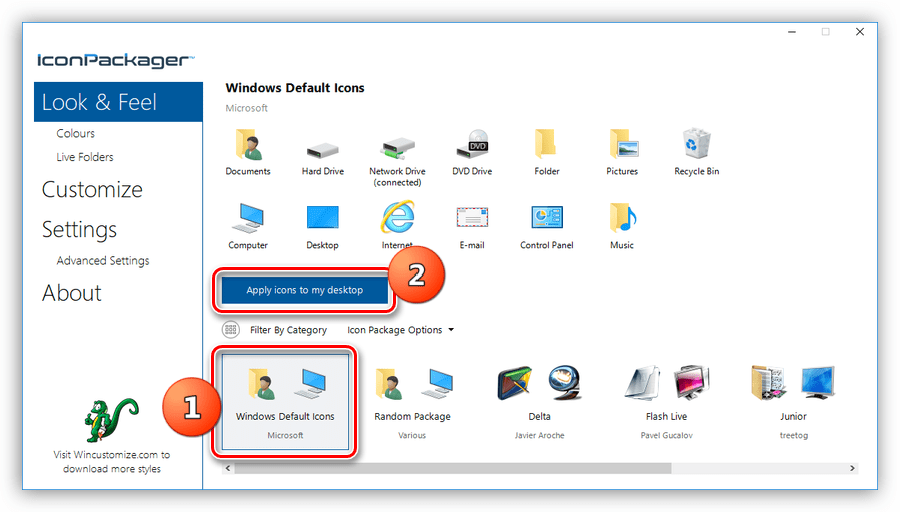
Для отката к старым значкам нужно выбрать «Windows Default Icons» и снова нажать кнопку «Apply icons to my desktop».
Вариант 3: iPack
Такие пакеты представляют собой упакованный установщик со всеми необходимыми файлами. Для их использования дополнительный программы не требуются, кроме того, инсталлятор автоматически создает точку восстановления и резервирует системные файлы, подлежащие изменению.
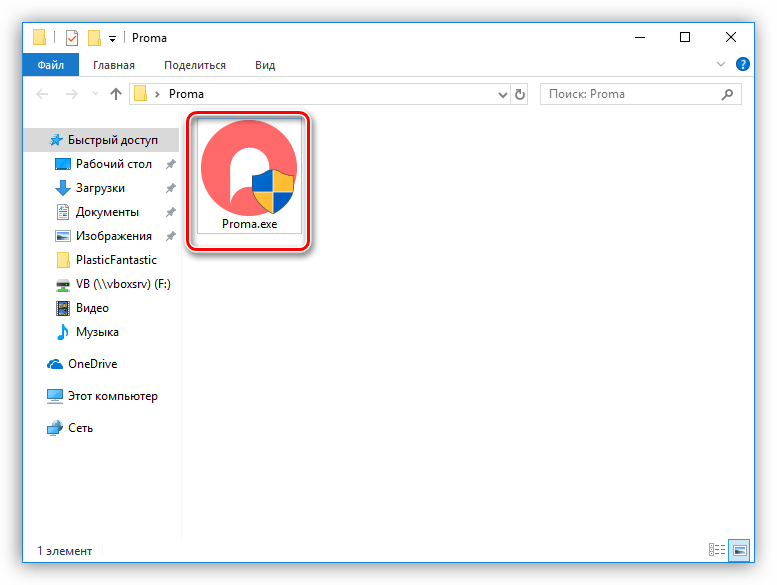
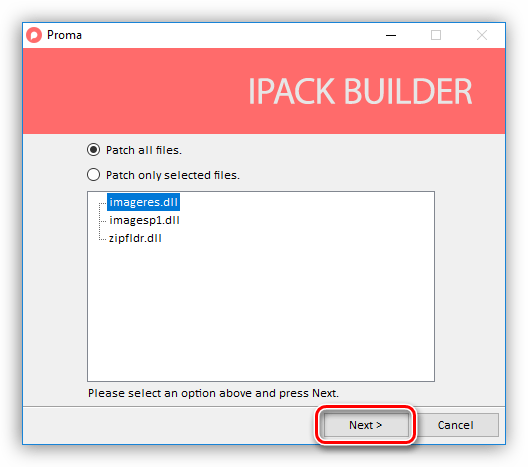
- Для установки необходимо просто запустить файл с расширением EXE. Если вы скачали архив, то его нужно будет предварительно распаковать.

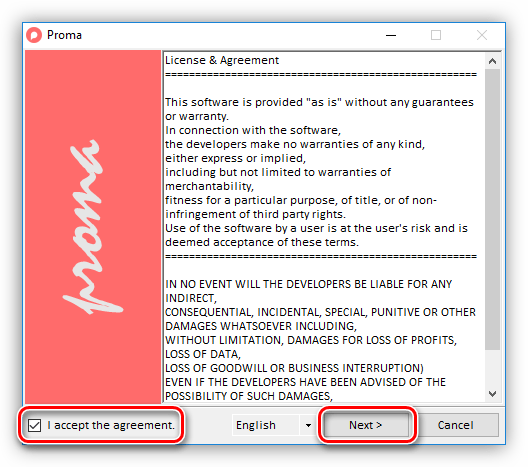
- Ставим галку, показанную на скриншоте, и жмем «Next».

- В следующем окне оставляем все как есть и снова нажимаем «Next».
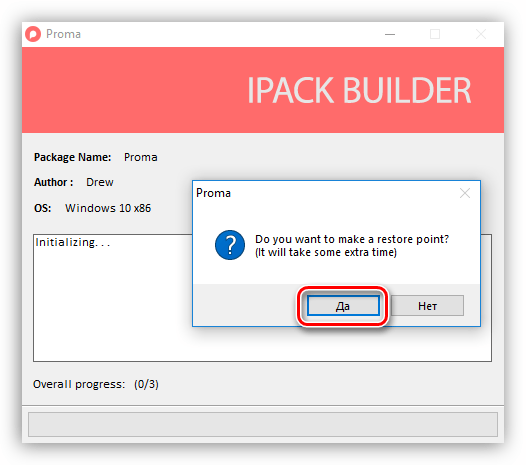
- Установщик предложит создать точку восстановления. Согласимся, нажав «Да».

- Ждем завершения процесса.
Откат выполняется с помощью точки восстановления.
Вариант 4: Файлы ICO и PNG
Если у нас имеются только отдельные файлы в формате ICO или PNG, то придется немного повозиться с их установкой в систему. Для работы нам понадобится программа IconPhile, а если наши картинки имеют формат PNG, то их еще будет необходимо конвертировать.
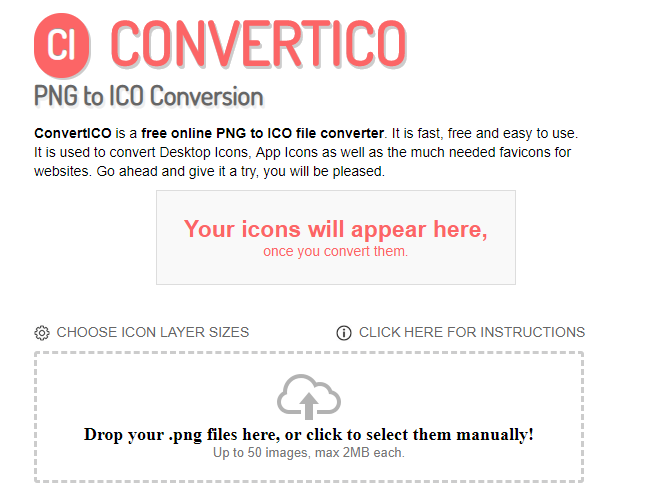
Подробнее: Как конвертировать PNG в ICO
Перед началом установки иконок создайте точку восстановления.
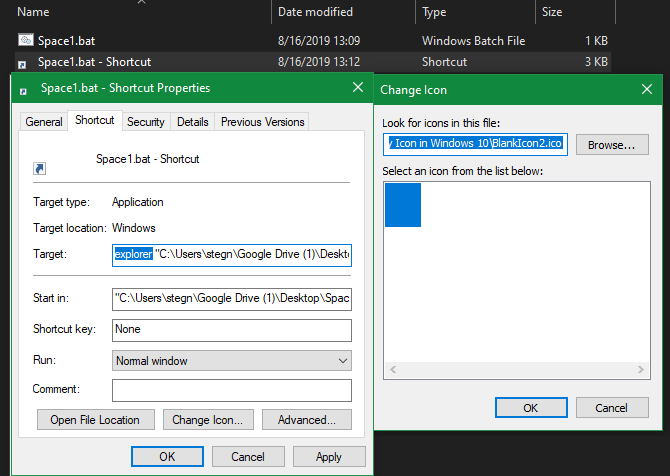
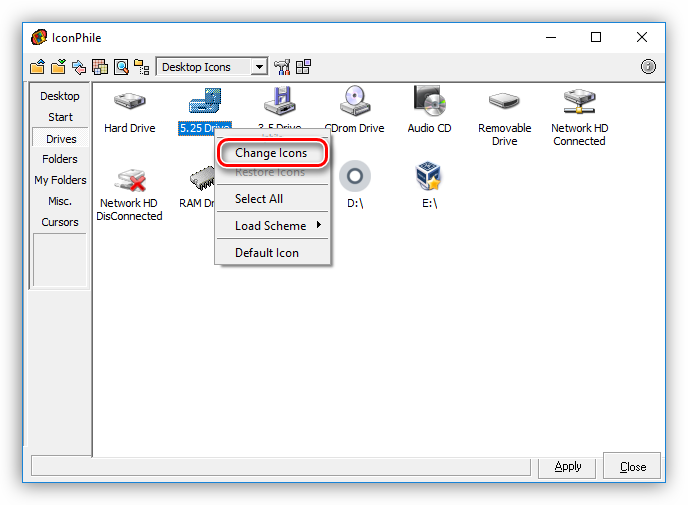
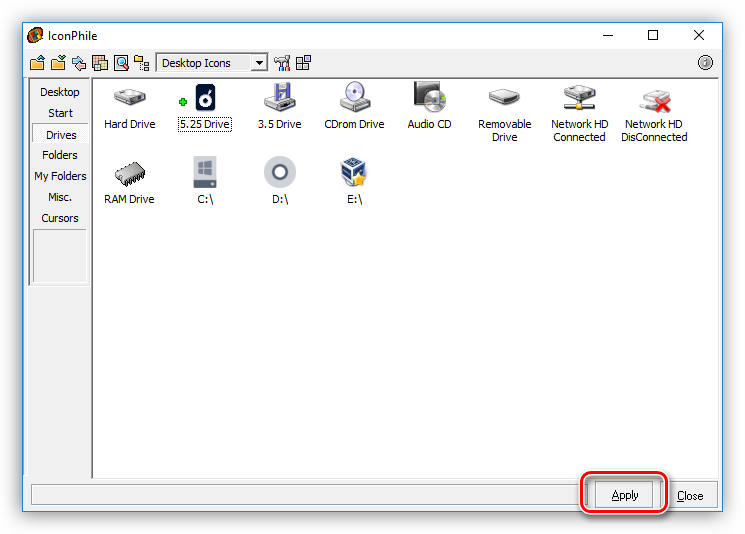
- Запускаем IconPhile, выбираем группу в выпадающем списке и кликаем по одному из пунктов в правой части интерфейса. Пусть это будет группа «Desktop Icons», а пункт выберем «Drives» — диски и приводы.

- Далее жмем ПКМ по одному из элементов и активируем пункт «Change Icons».
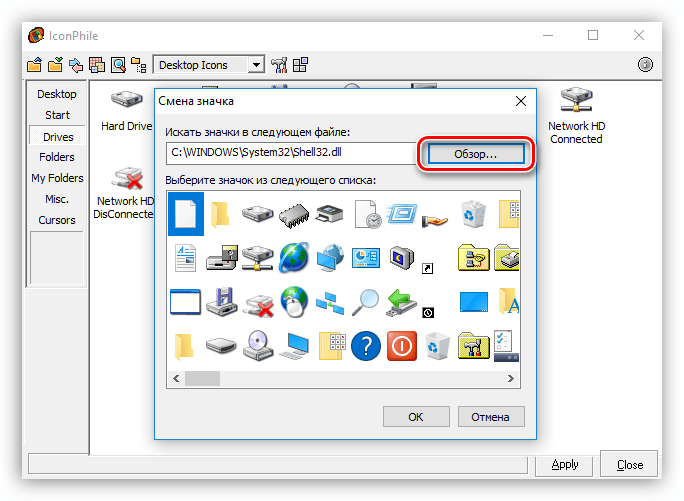
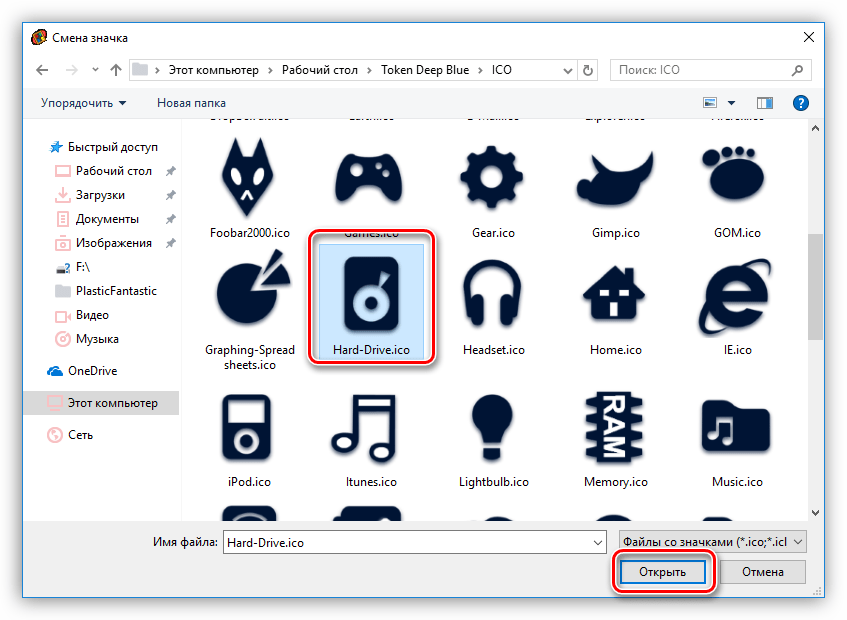
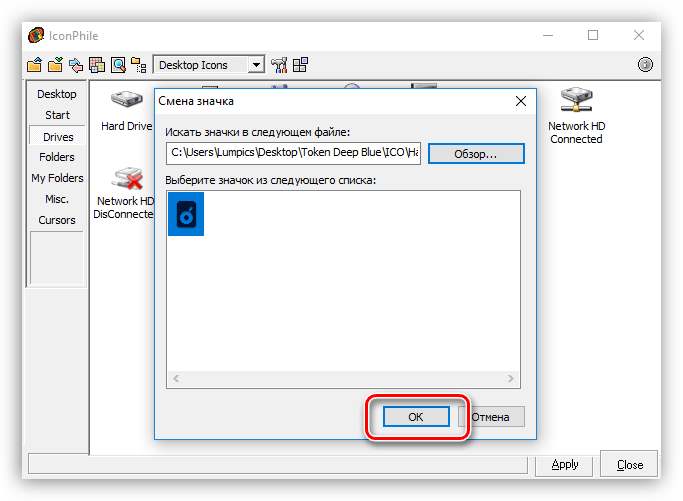
- В окне «Смена значка» нажимаем «Обзор».

- Находим нашу папку с иконками, выбираем нужную и нажимаем «Открыть».

Нажимаем ОК.

- Применяем изменения кнопкой «Apply».

Возврат исходных значков осуществляется при помощи восстановления системы из точки.

Данный вариант хоть и подразумевает ручную замену значков, но имеет один неоспоримый плюс: используя эту программу, можно установить любые самостоятельно созданные иконки.
Заключение
Изменение внешнего вида Windows – процесс увлекательный, но не стоит забывать, что при этом происходит замена или редактирование системных файлов. После подобных действий могут начаться проблемы с нормальным функционированием ОС. Если решились на эту процедуру, то не забывайте создавать точки восстановления для того, чтобы можно было откатить систему в случае неприятностей.
Наша группа в TelegramПолезные советы и помощь
Applies ToWindows 11 Windows 10
Support for Windows 10 will end in October 2025
After October 14, 2025, Microsoft will no longer provide free software updates from Windows Update, technical assistance, or security fixes for Windows 10. Your PC will still work, but we recommend moving to Windows 11.
Learn more
Your desktop is the first thing you encounter when you sign in to Windows, and having it organized to your liking can significantly enhance your productivity and overall experience. This article describes how to customize the default desktop icons, add new shortcuts, adjust their size to suit your preferences, and show or hide all icons as needed.
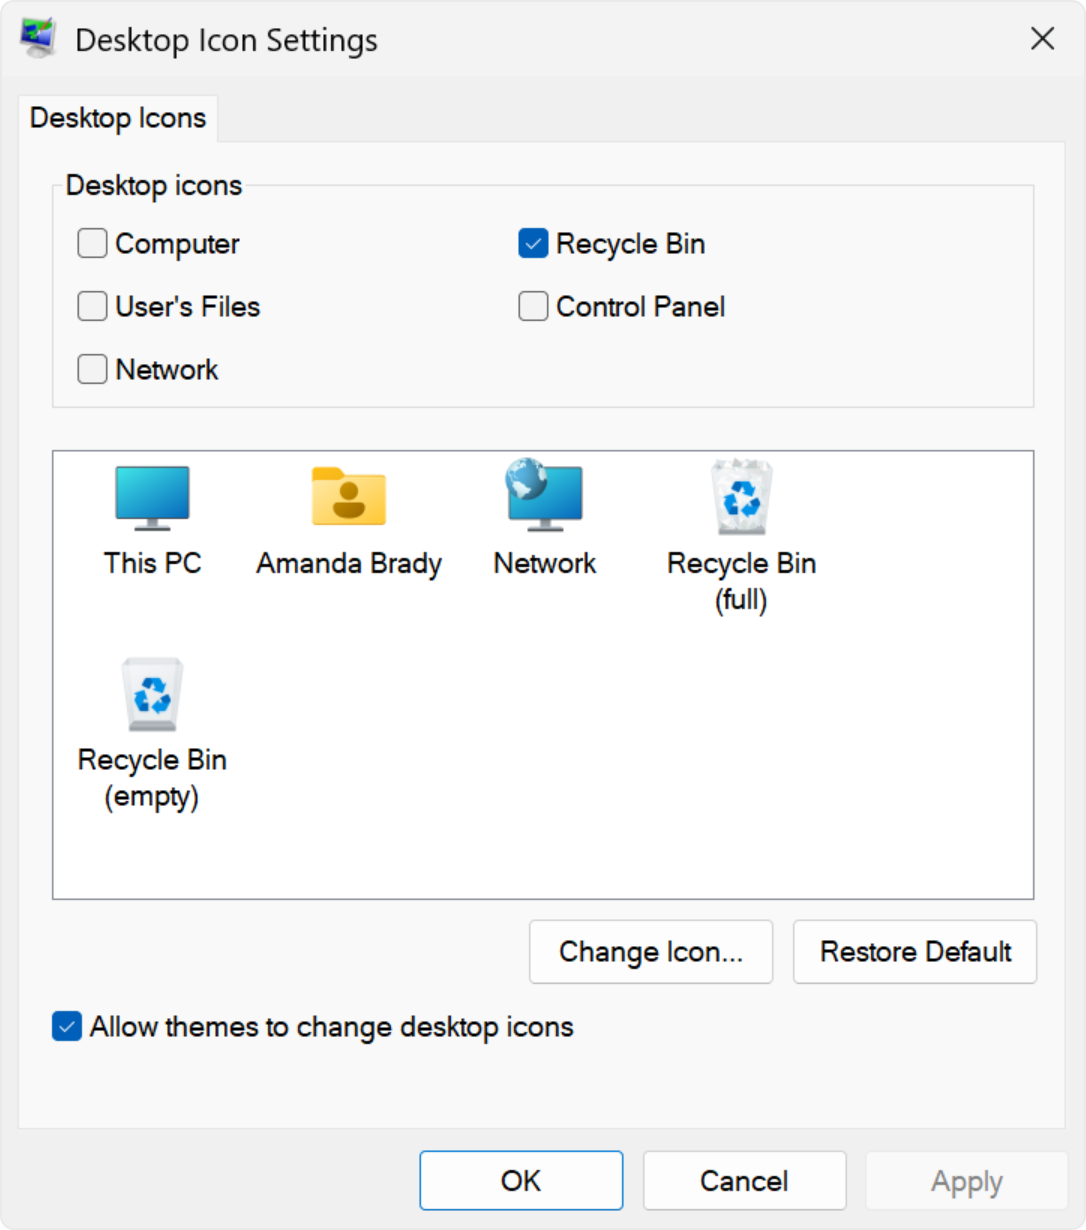
Customize the default desktop icons
By default, Windows includes the Recycle Bin icon on the desktop. Essential icons that you can customize include:
-
This PC: Provides access to the computer’s drives and connected devices
-
Recycle Bin: Where deleted files are temporarily stored
-
Network: Allows you to view and connect to network resources
-
User’s Files: A shortcut to your personal folders
Additional shortcuts can be added to suit individual preferences and enhance productivity.
To customize the default desktop icons:
-
In the Settings app on your Windows device, select Personalization > Themes or use the following shortcut:
Themes
-
Select Desktop icon settings
-
Select the icons you would like to have on your desktop, then select OK
Note: The option Allow themes to change desktop icons allows or prevents themes from changing the icons used for common desktop shortcuts such as This PC, User’s Files, Network, and Recycle Bin. By default, themes are allowed to change these icons. However, if you have customized these icons to your preference, you might not want them to be altered whenever you change your theme.
Add shortcuts to your desktop
By placing frequently used applications, files, and folders directly on your desktop, you can access them quickly without navigating through multiple menus or folders. This can save time and reduce the effort needed to perform routine tasks.
To add shortcuts to your desktop, you can use one of these options:
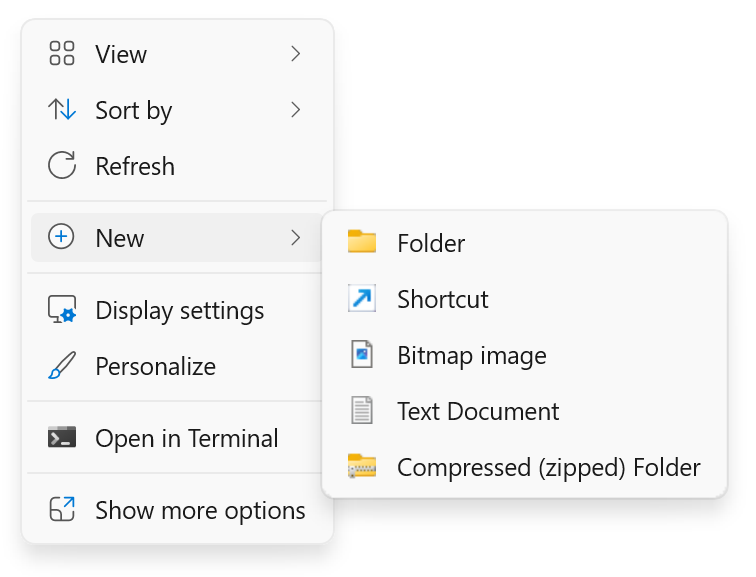
-
Right-click on an empty area of the desktop
-
Select New > Shortcut
-
Follow the prompts to create a shortcut to a specific file, folder, or web page
-
Select Start and select All to display a list of all installed applications
-
Scroll through the list to find the app for which you want to create a shortcut
-
Drag and drop the app you want to create a shortcut for to the desktop
-
Navigate to the file or folder you want to add
-
Right-click on the file or folder and select Show more options > Send to > Desktop (create shortcut)
-
Open your web browser and navigate to the web page you want to add
-
Click and drag the padlock icon (next to the URL) to your desktop
Resize the desktop icons
Resizing desktop icons can be useful for improving accessibility and organization. For example, if you have a high-resolution monitor, the default icon size might appear too small, making it difficult to identify and click on the icons. By increasing the icon size, you can make them more visible and easier to interact with. Conversely, if you have many icons on your desktop and want to fit more on the screen without scrolling, reducing the icon size can help you manage your workspace more efficiently.
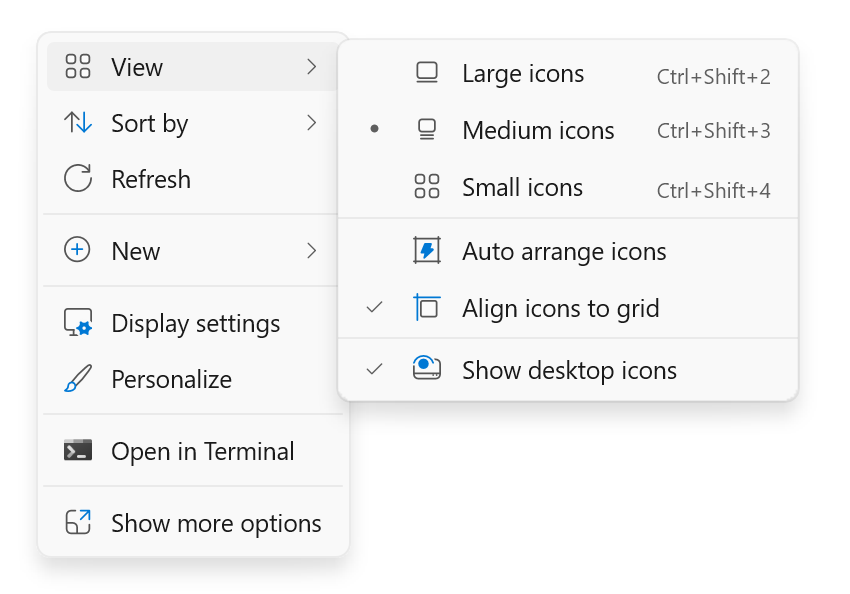
-
Right-click on an empty area of the desktop
-
Select View and then choose between Large icons, Medium icons, or Small icons to adjust their size.
Tip: You can also use the scroll wheel on your mouse to resize desktop icons. On the desktop, press and hold Ctrl while you scroll the wheel to make icons larger or smaller.
Show or hide all desktop icons
Hiding desktop icons can be useful in various scenarios. For instance, if you’re giving a presentation or sharing your screen during a meeting, hiding desktop icons can help create a cleaner and more professional appearance. It can also be beneficial if you want to focus on a specific task without the distraction of numerous icons cluttering your desktop.
-
Right-click on an empty area of the desktop
-
Select View, and then uncheck Show desktop icons. This will temporarily hide all icons, and you can easily show them again by rechecking the same option.
Tip: If you hide your desktop icons and need to access the desktop, you can do so through File Explorer. Simply open File Explorer , and select Desktop in the navigation pane.
Need more help?
Want more options?
Explore subscription benefits, browse training courses, learn how to secure your device, and more.