
You are here:
Home » Windows 10 » How To Set Animated GIF As Wallpaper In Windows 10/11
Windows 10 and 11 let you customize the desktop in various ways. For example, you can change the default desktop background, create and use themes to automatically change wallpaper at specified time intervals, and automatically set Bing picture (Windows Spotlight) as the desktop background.
Most PC users are happy with the available options to customize the desktop. However, some users, like me, would like to make the desktop more interesting by setting an animated GIF picture as the desktop background.

As you might already know, Windows 10 and 11 do not support setting GIF (Graphics Interchange Format) or live wallpaper as desktop background. You need to use third-party tools for this job.
While many apps are available to help you set animated GIF as your Windows 10/11 desktop wallpaper, Lively Wallpaper is one of the best free software available for this job.
Lively Wallpaper helps you set a GIF photo as your desktop background in no time. In fact, setting a GIF as wallpaper is as easy as changing the desktop wallpaper via the Settings app in Windows 10/11. In addition to the GIF, it can also set a webpage as your desktop background!
This guide will show you how to use the Lively Wallpaper to set GIF as wallpaper in Windows 10/11. Once again, it’s a free app.
Set GIF as desktop background in Windows 10/11
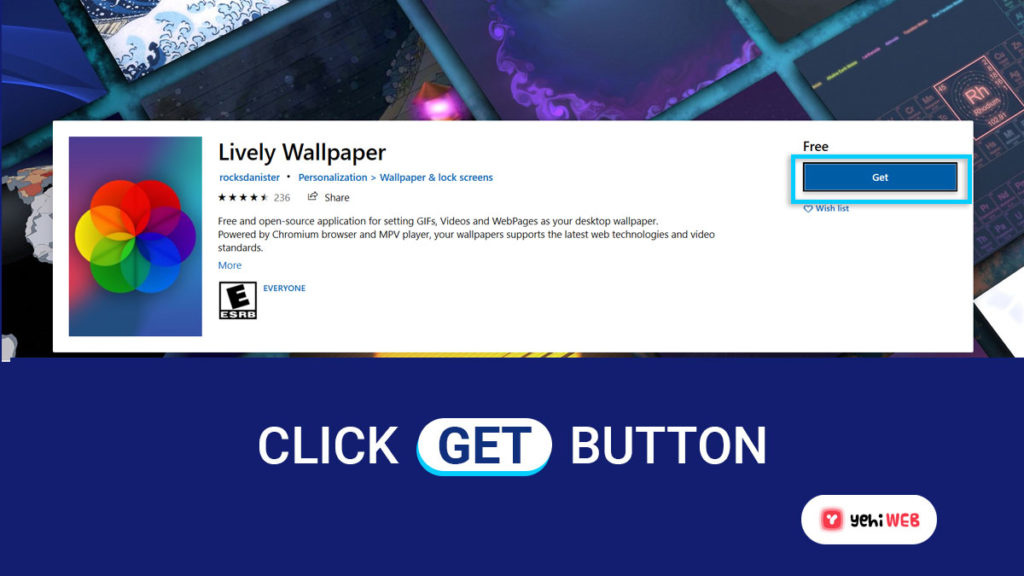
Step 1: Open the Microsoft Store app and search for Lively Wallpaper. Click on the Install button to download and install it.
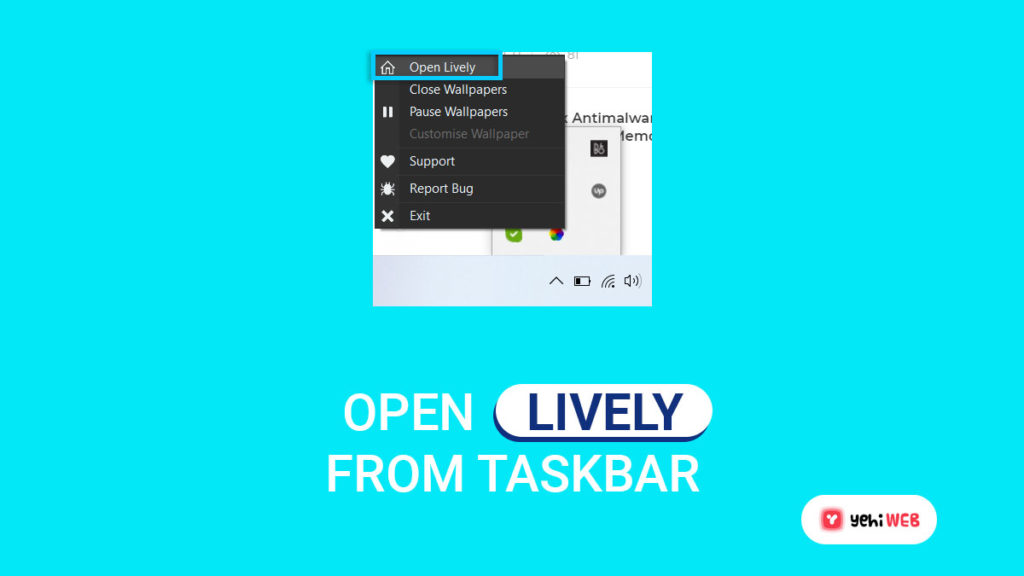
Step 2: Launch the Lively Wallpaper app. If the Lively Wallpaper app does not show its window, right-click on its icon in the system tray and click Open Lively.
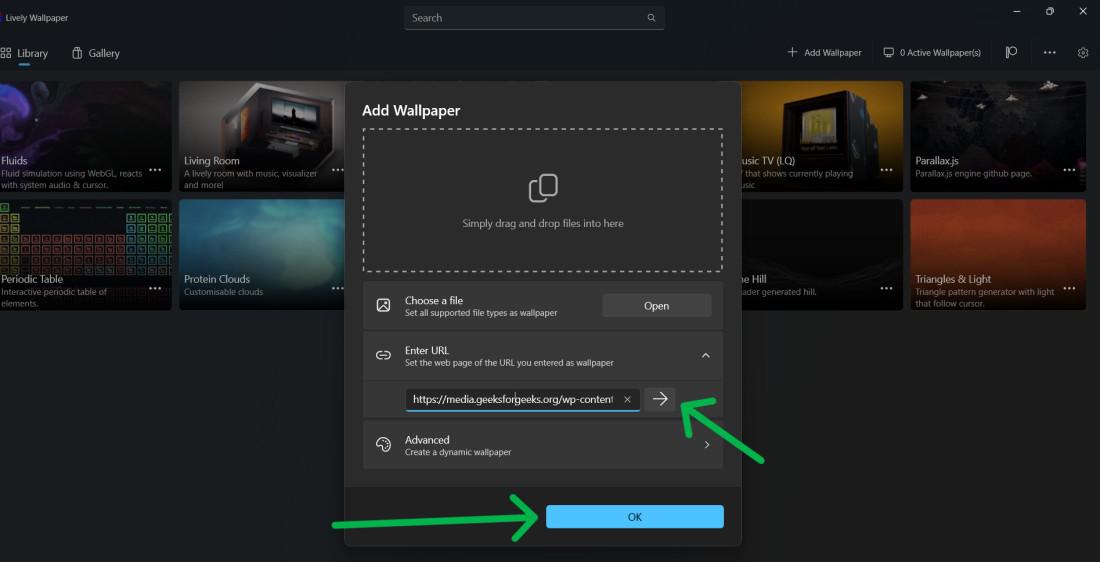
Step 3: Click on the Add Wallpaper option.

Step 4: In the resulting dialog, click the Open button next to the Choose a file option, select your GIF file and then click the Open button.

Step 5: Now, you will see the following dialog where you need to click the OK button.

Step 6: That’s it! Your GIF picture should now appear as your desktop background. If you prefer to return to the default wallpaper, right-click on the Lively Wallpaper app and click the Exit option.
Tip: Lively Wallpaper includes options to change the opacity of the taskbar. Go to Lively Wallpaper Settings > System tab and select a taskbar theme to change the taskbar transparency.
Are you tired of looking at the same static wallpaper on your Windows 11 desktop? Well, here’s a surprising fact: Did you know that you can actually set a GIF as your wallpaper on Windows 11? Imagine the dynamic and captivating visuals that can liven up your screen, adding a touch of excitement to your daily digital experience.
Setting a GIF as wallpaper on Windows 11 is a simple yet powerful way to personalize your desktop. With just a few steps, you can transform your screen into a vibrant display of moving images. Not only does this feature allow you to express your unique style, but it also adds a sense of energy and creativity to your workspace. Whether you choose to use a mesmerizing nature scene, a funny animation, or a mesmerizing art piece, the possibilities are endless when it comes to selecting the perfect GIF to adorn your desktop.
Setting a GIF as your wallpaper in Windows 11 is a straightforward process. Begin by downloading the GIF you want to use as your wallpaper. Next, right-click on your desktop and select «Personalize» from the drop-down menu. In the Personalization settings, choose «Background» and click on «Browse» to locate the GIF file you downloaded. Finally, select the GIF and set it as your wallpaper. Now, your Windows 11 desktop will display the animated GIF as your wallpaper.
Customizing Your Windows 11 Desktop with Animated GIF Wallpapers
If you’re looking to add some visual flair to your Windows 11 desktop, setting a GIF as your wallpaper is a great way to do it. Unlike static images, animated GIFs can bring life and movement to your desktop background, making it more engaging and dynamic. In this article, we’ll guide you through the steps to set a GIF as wallpaper on Windows 11, allowing you to personalize your desktop and express your creativity. So let’s get started!
Method 1: Using a Third-Party App
If you’re comfortable using third-party apps, there are several software options available that allow you to set a GIF as wallpaper on Windows 11. These apps provide a user-friendly interface and additional features to enhance your desktop customization experience. Here’s how you can use one of these apps to set a GIF as your wallpaper:
Step 1: Download and install a trusted third-party app that enables GIFs as wallpaper. Some popular options include Wallpaper Engine, BioniX Wallpaper, and DesktopHut.
Step 2: Launch the app and navigate to the «Settings» or «Preferences» section.
Step 3: Look for the option to set a GIF as wallpaper. This setting might be referred to as «Animated wallpaper,» «Live wallpaper,» or «GIF wallpaper.»
Step 4: Select the GIF file you want to use as your wallpaper. You can either browse your computer for the GIF file or choose from a pre-installed collection within the app.
Step 5: Adjust any additional settings provided by the app, such as animation speed, screen size, or background effects.
Pros of Using a Third-Party App:
Using a third-party app to set a GIF as wallpaper offers several advantages:
- Easy installation and user-friendly interface.
- Advanced customization options.
- Access to a wide range of pre-installed GIFs and community creations.
- Opportunity to explore additional features like screen savers and interactive wallpapers.
Cons of Using a Third-Party App:
However, using a third-party app may have some downsides:
- Additional system resource usage.
- Potential compatibility issues with future Windows updates.
- Premium features may require a paid version of the app.
- Dependence on third-party developers for updates and support.
Method 2: Using an Online Wallpaper Platform
If you prefer not to install additional software on your system, you can still set a GIF as wallpaper on Windows 11 using online wallpaper platforms. These platforms offer a collection of animated wallpapers that can be accessed directly from your browser without the need for installations. Here’s how you can set a GIF as your wallpaper using an online platform:
Step 1: Open your preferred web browser and visit an online wallpaper platform like Wallpaper Abyss, Wallpaper Cave, or Desktop Nexus.
Step 2: Search for the GIF you want to set as your wallpaper using the platform’s search bar or browse through the available categories.
Step 3: Click on the GIF you want to use, and you’ll usually find a «Download» or «Set as wallpaper» option.
Step 4: Choose the option to set the GIF as your wallpaper, and the online platform will apply it as your desktop background.
Note: Some online platforms may require you to create an account or sign in before downloading or setting the GIF as your wallpaper.
Pros of Using an Online Wallpaper Platform:
Using an online wallpaper platform to set a GIF as wallpaper has its advantages:
- No installation of additional software required.
- Wide variety of GIFs to choose from.
- Access to user-uploaded and community-curated wallpapers.
- Ability to browse and discover new wallpapers conveniently.
Cons of Using an Online Wallpaper Platform:
However, there are a few limitations to consider when using online wallpaper platforms:
- Dependence on internet connectivity to access and set wallpapers.
- Possible restrictions on wallpaper resolution or quality.
- Limited customization options compared to desktop apps.
- Potential presence of ads or sponsored content on the platform.
Method 3: Using a GIF Converter and Windows Settings
If you prefer a more hands-on approach and want to use a locally stored file as your GIF wallpaper, you can convert the GIF into a video format and utilize Windows settings to set it as your wallpaper. Here’s how:
Step 1: Convert the GIF file into a video format like MP4 using an online GIF converter or desktop software. This process typically involves uploading the GIF and selecting the desired video format.
Step 2: Save the converted video file to your computer.
Step 3: Right-click on the Windows desktop and select «Personalize» from the context menu.
Step 4: In the Personalization settings, click on «Background» in the left sidebar.
Step 5: Under the «Choose your picture» section, click on the «Browse» button and navigate to the folder where you saved the converted video file.
Step 6: Select the video file and click on «Choose picture.»
Step 7: Adjust any additional settings provided by Windows, such as picture position, fill, or fit.
Pros of Using a GIF Converter and Windows Settings:
Opting for a GIF converter and utilizing Windows settings offers the following benefits:
- Control over the selection and creation of your GIF wallpapers.
- No need for third-party apps or online platforms.
- Compatibility with future Windows updates.
- Direct control over Windows settings for further customization.
Cons of Using a GIF Converter and Windows Settings:
However, this method also has a few drawbacks:
- Requires the conversion of GIFs into video formats.
- May be challenging for users less familiar with file conversion and Windows settings.
- Limited visual effects compared to specialized wallpaper apps.
- No access to pre-installed GIF collections or online communities.
Enjoy a Dynamic Desktop with GIF Wallpapers
Setting a GIF as your wallpaper on Windows 11 can transform your desktop into a visually captivating and interactive space. Whether you use a third-party app, an online wallpaper platform, or convert GIFs using a GIF converter and Windows settings, you have the freedom to personalize your desktop with animated images that reflect your style and preferences. Give it a try and enjoy a dynamic desktop experience!
Setting a GIF as Wallpaper on Windows 11
Windows 11 allows you to personalize your desktop by setting a GIF as your wallpaper. This dynamic feature can add a touch of creativity and animation to your computer screen. Here’s a step-by-step guide on how to set a GIF as your wallpaper on Windows 11.
Method 1: Using Windows Settings
To set a GIF as your wallpaper using Windows Settings:
- Right-click on an empty area of your desktop and select «Personalize».
- In the Personalization settings, click on «Background» in the left sidebar.
- Under the «Choose your background» section, click on the drop-down menu and select «Browse».
- Navigate to the location of the GIF file on your computer and select it.
- The GIF will now be set as your desktop wallpaper.
Method 2: Using Third-Party Software
If you prefer using third-party software for more advanced wallpaper customization:
- Download and install a reliable GIF wallpaper software such as «BioniX Wallpaper Changer» or «Wallpaper Engine».
- Open the software and add the desired GIF to your wallpaper collection.
- Customize additional settings like wallpaper position, opacity, and transition effects.
- Windows 11 allows you to set a GIF as your wallpaper.
- You can use third-party software like Wallpaper Engine to set GIF as wallpaper on Windows 11.
- Another way to set a GIF as wallpaper on Windows 11 is by converting it to a video file format.
- Once you have the GIF converted to a video file, you can use the «Set as desktop background» option in Windows 11 to set it as your wallpaper.
- Remember to choose a lightweight GIF or video file to ensure smooth performance on your Windows 11 desktop.
- Right-click on your desktop and select «Personalize» from the context menu.
- In the Personalization settings window, click on «Background» in the left sidebar.
- Under the «Background» section, click on «Browse» and navigate to the location of your GIF file.
- Select the GIF file and click «Choose picture» to set it as your wallpaper. You can also adjust the picture position and fit to your preference.
- Close the Personalization settings window, and your GIF will be set as the wallpaper for your Windows 11 desktop.
- JPG (JPEG)
- PNG (Portable Network Graphics)
- BMP (Bitmap)
- GIF (Graphics Interchange Format)
Key Takeaways: How to Set GIF as Wallpaper Windows 11
Frequently Asked Questions
In this section, we will address some common questions related to setting GIFs as wallpaper in Windows 11.
1. Can I set a GIF as wallpaper in Windows 11?
Yes, you can set a GIF as wallpaper in Windows 11. Windows 11 provides native support for animated GIFs as wallpaper, allowing you to add some dynamic visual appeal to your desktop.
To set a GIF as your wallpaper in Windows 11, follow these steps:
2. Can I set a GIF as a lock screen wallpaper in Windows 11?
No, at the moment, Windows 11 does not provide native support for setting GIFs as lock screen wallpapers. You can only set a static image as your lock screen wallpaper in Windows 11.
If you’d like to have a GIF as your lock screen wallpaper, you can use third-party software or apps specifically designed for this purpose. These tools offer additional customization options and allow you to set GIFs as lock screen wallpapers in Windows 11.
3. What file formats are supported for setting wallpapers in Windows 11?
Windows 11 supports a variety of image file formats for setting wallpapers, including:
You can use any of these file formats to set images or animated GIFs as your wallpaper in Windows 11.
4. Can I set a GIF as a wallpaper on multiple monitors in Windows 11?
Yes, you can set a GIF as wallpaper on multiple monitors in Windows 11. Windows 11 supports extended desktop mode, allowing you to have different wallpapers on each monitor or span a single wallpaper across multiple monitors.
To set a GIF as wallpaper on multiple monitors in Windows 11, follow the same steps as mentioned earlier to set the GIF as wallpaper. The GIF will be applied to all monitors by default.
5. Can I change the speed or animation settings of a GIF wallpaper in Windows 11?
No, Windows 11 does not provide built-in settings to change the speed or animation settings of a GIF wallpaper. The GIF will play at its original speed without any customization options.
However, if you want to adjust the animation speed or other settings of a GIF wallpaper, you can use third-party GIF editing software to modify the GIF before setting it as your wallpaper in Windows 11.
Setting a GIF as your wallpaper on Windows 11 can add a touch of excitement to your desktop. By following a few simple steps, you can bring your screen to life with animated images. First, you need to make sure that you have the right version of Windows 11 which supports GIFs as wallpapers. Then, you can download an application like BioniX Wallpaper Changer, which allows you to set GIFs as your wallpaper easily. Once the application is installed, you can choose the GIF file you want to set as your wallpaper and customize its display settings to your preference. It’s a fun and creative way to personalize your desktop.
By setting a GIF as your wallpaper on Windows 11, you can make your desktop more dynamic and expressive. Whether it’s a favorite movie clip, cute animal animation, or mesmerizing nature scene, a GIF can provide visual interest and entertainment while you work or browse your computer. Just remember to choose a GIF that is suitable for your workspace or environment, as excessive movement or distractions can be counterproductive. So go ahead and explore the world of animated wallpapers to give your Windows 11 desktop a unique and vibrant look.
Windows Operating system offers its users to have a background of their own choice. But it limits the feature by not letting them having an animated image or a GIF file.
With few clicks, you can set any image of your choice as your desktop background. But using a GIF for background in Windows 10/ Windows 11 is a different story altogether.
Windows Operating Systems has never allowed users to use GIF for background. And even after the release of Windows 11, users still can’t use GIFs for backgrounds. In short, like its predecessors, Windows 11 does not allow its users to use GIFs for background.
And when you try to set your GIF file as a background, it sets a single frame from your animated GIF as a background. Windows 11 and its predecessor Windows 10, can’t set a GIF for background on its own.
Luckily, you can use a few programs to play and set GIFs for your desktop’s background. Following are the best applications to use a GIF for your desktop’s background image:
- Lively Wallpaper
- BioniX Wallpaper
So, if you’ve downloaded a cool animated GIF image and want to use it as your desktop background, you can do that with the apps mentioned above.
What is a GIF?
A GIF (pronounced “gif” or “jiff“) is an image file in its simplest form. A GIF file is a lossless image file format that can hold both animated and static images. Before PNG became a viable alternative, it was the standard for 8-bit color images. You may have seen them in a lot of email signatures.
Use GIF for Background Via Lively Wallpaper
Lively wallpaper is a free and open-source application. It allows you to set GIF, Video, and webpages as your desktop wallpaper. For Windows 11 and Windows 10 users to set GIF for background.
Follow the instructions outlined below to use a GIF for background:
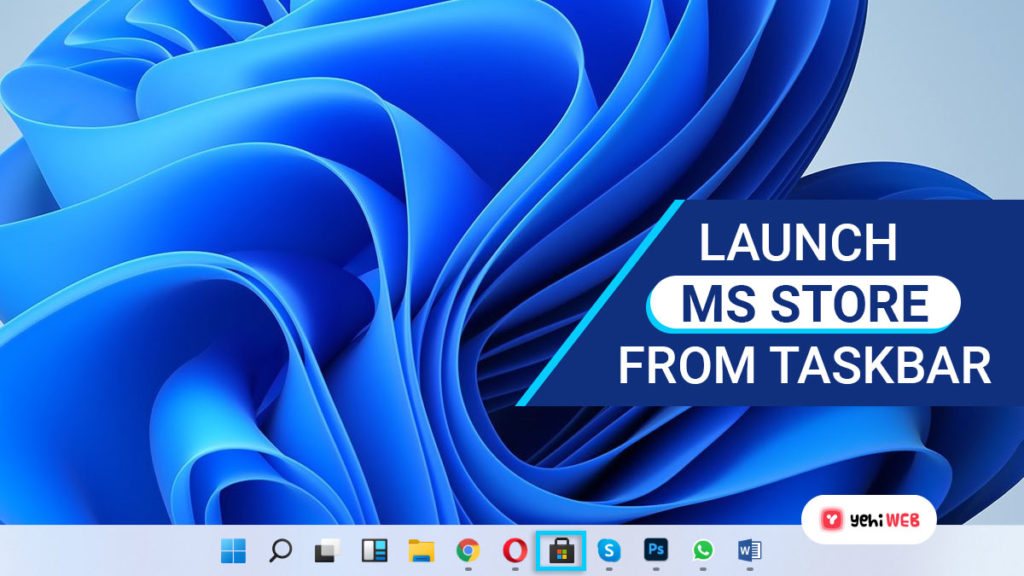
- Launch Microsoft Store from the taskbar.
- From the top-right corner, click on the search icon. And in the search field, type “Lively Wallpaper.”
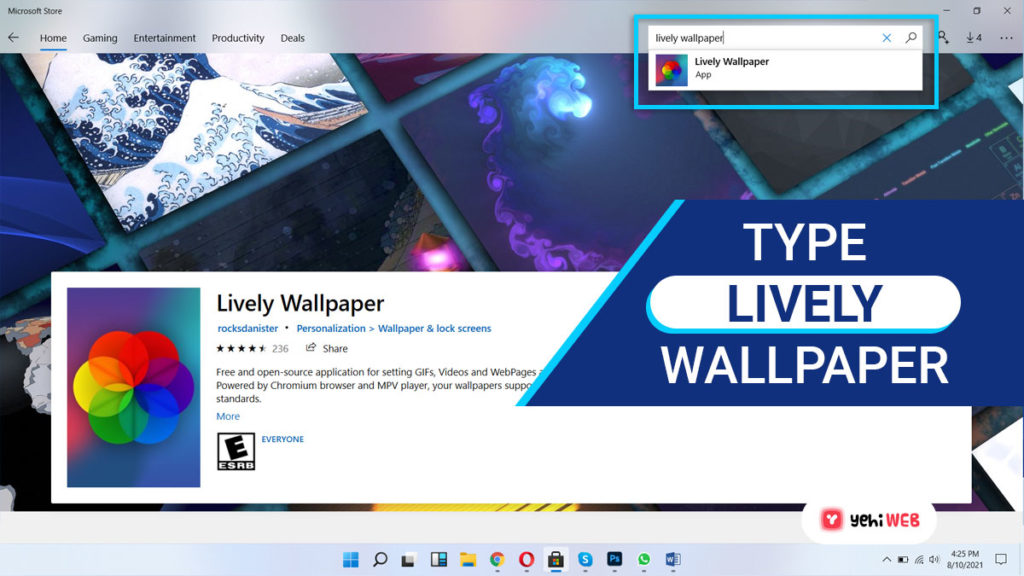
- Select Lively Wallpaper from the search results in the Apps section.
- On the next page, click on the “Get” button to download and install the application.
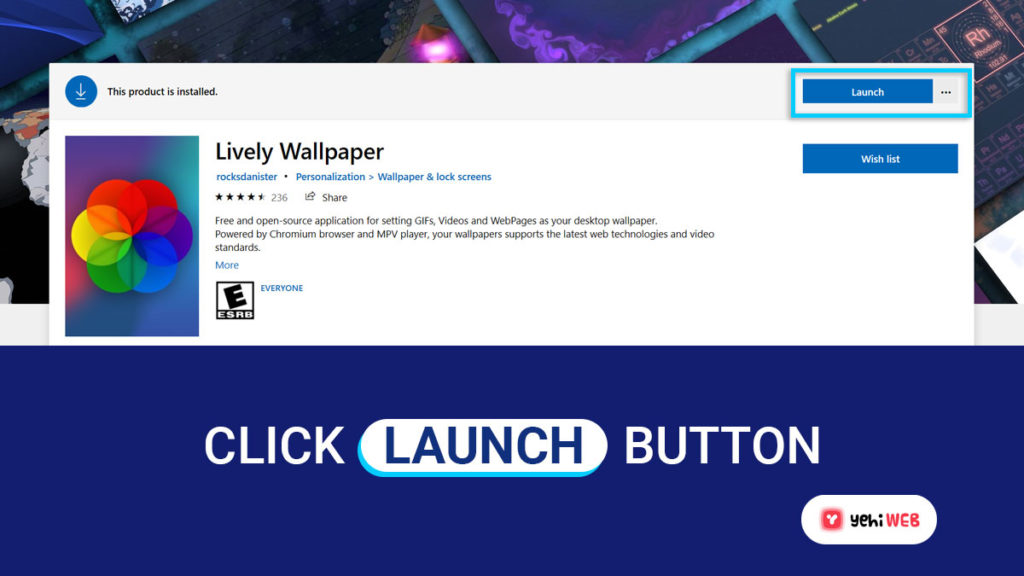
- To open the application setup window, click the launch button after the application is installed.
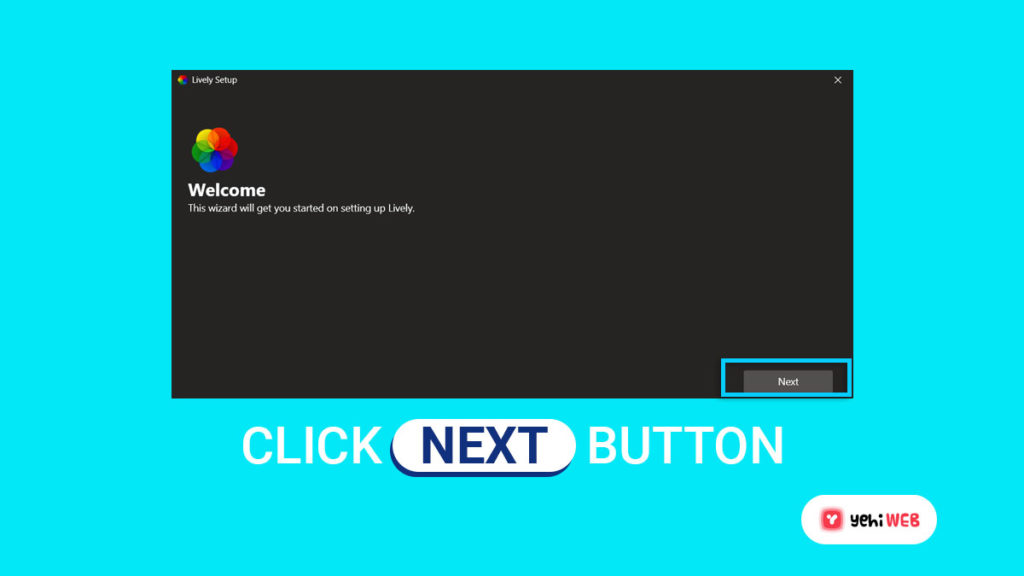
- On the Setup Wizard window, click on the “Next” button.
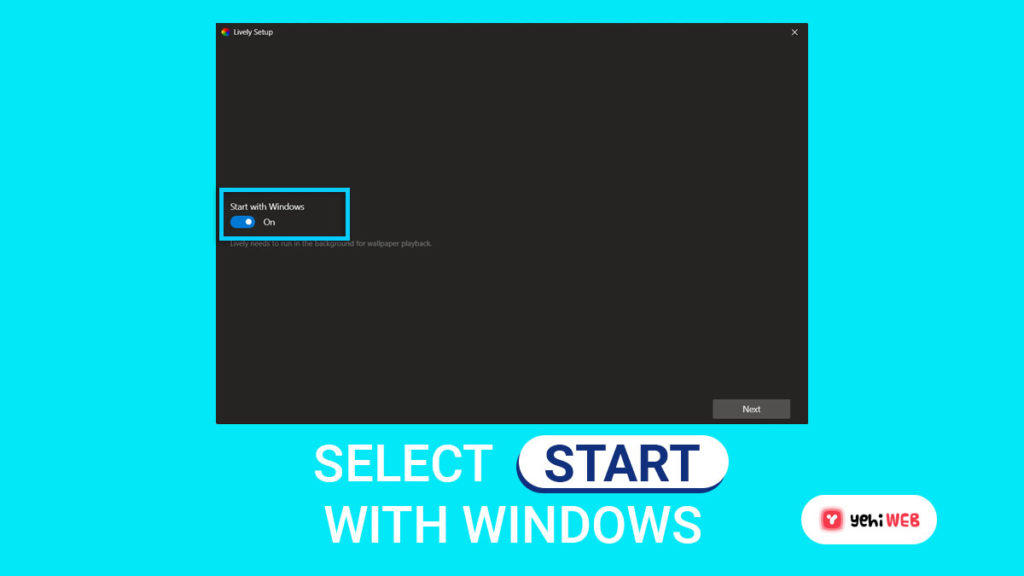
- Ensure that the switch associated with “Start with Windows” is turned on on the next window. After that, click on the Next button.
Note
Start with windows switch allows the app to GIF, videos, or Webpages for your computer’s background.
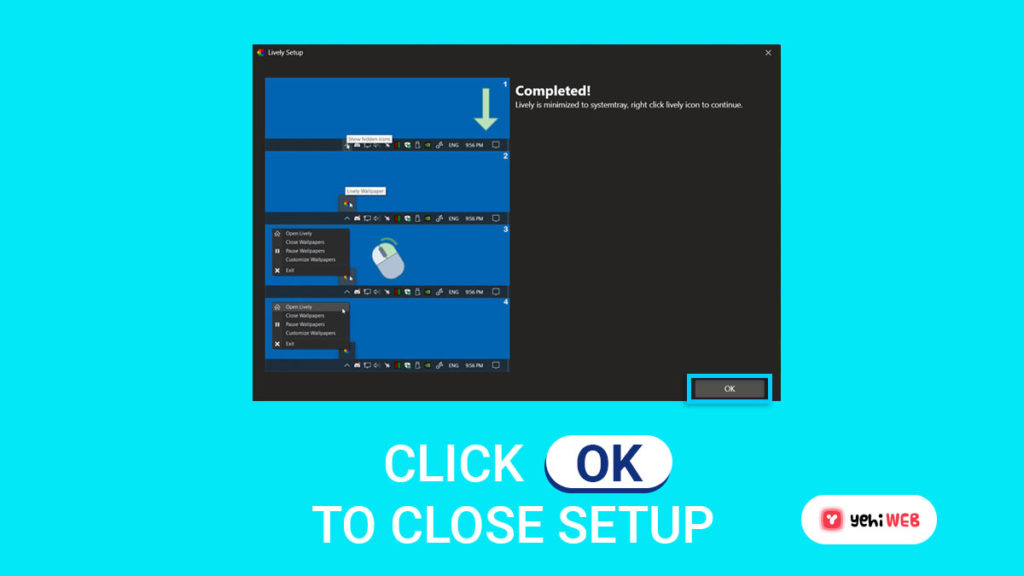
- To finish the setup, click the “OK” button.
- Lively is now running in the background. Now to use a GIF for background, right-click on the Lively app icon and select open Lively.
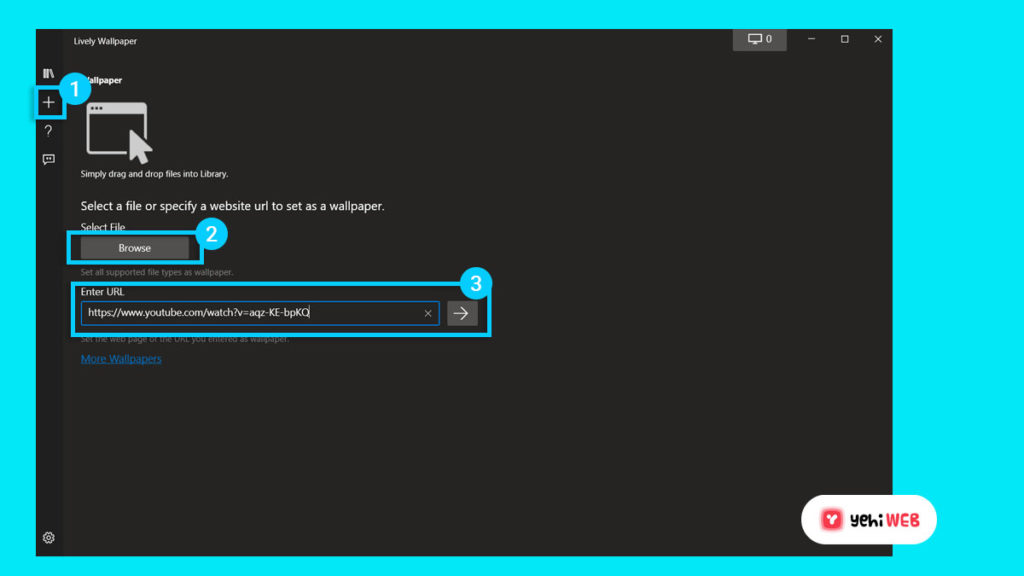
- Use the available GIF in Lively or click on the + icon from the left menu and select your downloaded GIF to use as background.
Use GIF for Background Via BioniX Wallpaper
Follow the instructions outlined below to use a GIF for background via BioniX:
- First, Download the BioniX Wallpaper application from here and install it.
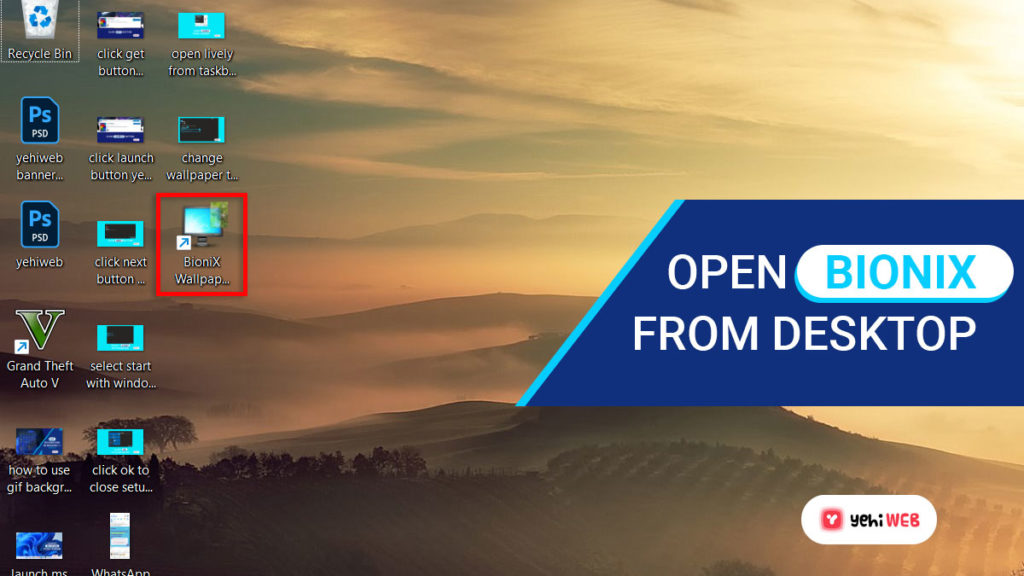
- After installation of the application, launch it from the shortcut created on Desktop.
- After launching the program, from the top menu bar, click on Tools > Wallapaper animator.
- From the next window, navigate to the directory housing your downloaded GIFs.
- BioniX will list all your GIFs from the directory.
- Select any GIF you wish to use as your background wallpaper from the list on the left.
- BioniX will assign that as your computer background as soon as you select it. From here, you can also customize the following features:
- Playback Speed
- Quality
- Zoom
Note
Note: You can also configure BioniX to animate your GIF in a specific location of your desktop.
After using BioniX to set a GIF for wallpaper, minimize the animator and main application. Both windows will disappear to the notification area of your taskbar.
To make changes in the future or select a new GIF, access and open the animator from the system tray. To bring up the settings, click on the red dragon icon in your taskbar.
Do you find working on your Windows 11 computer boring? It may be because you left the customizations in their default settings, or perhaps configured the theme and color preferences ages ago to the same old wavy background that Microsoft offers for Windows.
It is about time you made your work computer fun as well! No, we are not saying that you install games. But simply add more color and life to it.
Table of Contents
By default, Windows 11 only offers 5 static desktop backgrounds, the same ones used in the 6 themes that are offered. So it does not leave you with many options to choose from.
Themes and Desktop Backgrounds can be set from the Settings app >> Personalization in Windows.

But we are going to show you how you can set live, interactive wallpapers, also known as “animated wallpapers” on your PC. Not only that, but you can also have a GIF, or even a YouTube video running as your desktop wallpaper.
Lively Wallpaper is a free application that the Microsoft Store offers that can be used to customize your desktop background. You can perform the following using this app:
- Set up interactive wallpapers
- Configure wallpaper on one or multiple display devices, as per preference
- Set up a video from YouTube as a desktop background
- Set GIF animation as desktop background
- Play audio on live wallpaper when the desktop is in focus
- Customize the Taskbar theme
- Manage live wallpaper in different conditions (Battery-saving mode, Remote Desktop, etc.)
Continue reading to download and install the app, and then move on to customizing your desktop background. But before you do, there are a few downsides to setting up a live wallpaper on any device.
Why Not Set Live Wallpaper as Your Background
Live animated wallpapers indeed bring some color and magic to your PC. However, it also has a few cons you must consider.
Since the live wallpapers are continuously running in the background, they consume a huge amount of processor and memory that affects system performance. This consequently also affects the amount of power consumption, which is not ideal if you are using a laptop on battery.
Another thing to consider is the continuous shifts of the pixels on your device. This not only consumes the battery but could be dangerous for the screen if too many color changes occur.
That said, if you are still willing to take the risk, the sections below illustrate how to configure live wallpaper on your Windows 11 computer.
Download and Install Lively Wallpaper App
Let us begin by installing the free application.
- Open the Lively Wallpaper Microsoft Store page and click Get.

- Now click Open Microsoft Store from the popup at the top of the browser.
- The Microsoft Store application will now launch with Lively Wallpaper displayed. Click Get again.

- The application will now begin downloading and then installing. When it does, launch the application.
- On the first welcome screen, click Next.

- On the next screen, choose whether you want to run the app (and the live wallpaper) as soon as the computer starts, or run it later manually. Then click Next.
- Now choose how you would like to customize the Taskbar from the dropdown menu under Taskbar Theme. Click Next when selected.
- On the next screen, you will have a little pictorial of how to manage your wallpaper directly from the Taskbar. Click OK.


The Lively Wallpaper application is now ready for you to begin your personalization. You will be presented with the Home screen/Library where you can find the live wallpaper to choose from. Click on the background that you wish to set.

Note that this will only set the live background on the primary screen if you have more than one connected. Continue to the next section to learn how to manage the wallpaper across multiple screens.
How to Set Live Animated Wallpapers on Multiple Monitors
As we said, the application only sets the live wallpaper to the primary display device if more than one is connected. However, you can configure it to either duplicate across all screens, or expand it. Here is how:
- Click on the monitor icon at the top of the Lively Wallpaper app to open the Display Control Panel.

- From the Control Panel, under the Placement method section, select whether you would like the wallpaper to span across screens or Duplicate the same wallpaper.
- Now close the Control Panel to save the settings.


You can choose which live wallpaper to set on these multiple display devices before or after performing the steps above.
Set YouTube Video/GIF as Desktop Wallpaper in Windows 11
If you find that the default animated wallpaper offered by the Lively Wallpaper application is insufficient, you can add your GIF or a video from YouTube to the wallpaper library and have it running as your desktop background.
- Click on the “+” (plus) sign on the menu to the left of the app.
- On the next screen, click Browse and then navigate to the downloaded GIF to set it as live wallpaper. Or, paste a YouTube video link in the text field under “Enter URL” to set a video as your background, and then click the arrow button in front of it.
- If you enter a YouTube video URL in the last step, then you will be presented with a popup such as the one below. Click OK.


The GIF/Video will now commence playing in the background and repeat itself when it finishes.
How to Turn Off Live Wallpaper in Windows 11
If you are running live wallpaper in the background and think that they are consuming too much of your system resources, you can simply close the Lively Wallpaper application to revert your preferences to the way they were configured through the Windows Settings app.
Simply right-click on the Lively Wallpaper icon in the Taskbar and click Exit on the context menu to remove the close the app, and consequently remove the live wallpaper.

More Live Wallpaper Applications for Windows 11
There are other applications online that you can use to set up live animated wallpapers on your computer. However, some of them are either paid apps or offer only a limited trial period.
DeskScapes
DeskScapes is a paid application that you can use to set and adjust live wallpapers on your computer. However, you can try it out for 30 days before purchasing it as it offers a trial period with all the same options as the fully-paid version. It is compatible with Windows 11 as well as Windows 10 and 8.
After choosing a live wallpaper, you can then add special customized effects to it and also adjust the color saturation according to your preferences.
Wallpaper Engine
Wallpaper Engine is another paid application that you can use to set live wallpapers on your Windows PC. This application costs USD 2.79 at the time of writing. However, it doesn’t offer a trial period.
It provides one of the best live animated wallpapers that you can then customize as well. Another great feature this application offers is that it pauses the live wallpaper whilst you’re playing a game, freeing up system resources.
WinDynamicDesktop
WinDynamicDesktop is a free application that is also available through the Microsoft Store. It does not provide any interactive wallpaper. The only reason this app made it top the list is that it brings the wallpaper from the MacOS to Windows with the day and night effects.
The app synchronizes itself with your sunrise and sunset timing and changes the theme of the wallpaper accordingly.
Final Thoughts
Having a good desktop background wallpaper is not only important aesthetically, but also keeps your mind fresh in case you are working long hours on a screen.
Not too long ago, Microsoft released 2 special backgrounds for the Insiders which you can also try out if you do not wish to put any extra load on your processor or your RAM.
Все способы:
- Способ 1: Lively Wallpaper
- Способ 2: HD 4K Живые обои
- Способ 3: DeskScapes
- Способ 4: Push Video Wallpaper
- Вопросы и ответы: 0
Способ 1: Lively Wallpaper
По умолчанию в Windows 11 отсутствует инструмент, с помощью которого можно было бы установить живые обои. Для выполнения этой задачи пользователям понадобится скачивать дополнительные программы. Одна из подходящих называется Lively Wallpaper и распространяется через Microsoft Store. Давайте рассмотрим процесс ее установки и использования в операционной системе.
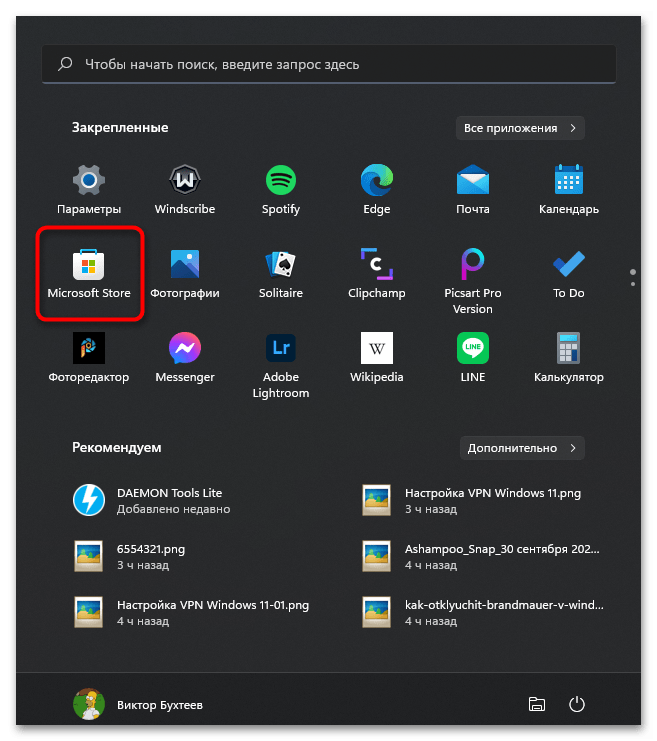
- Откройте меню «Пуск» и в списке закрепленных значков найдите «Microsoft Store». Запустите магазин для поиска приложения внутри него.
- Активируйте строку поиска, найдите «Lively Wallpaper» и перейдите на страницу приложения.
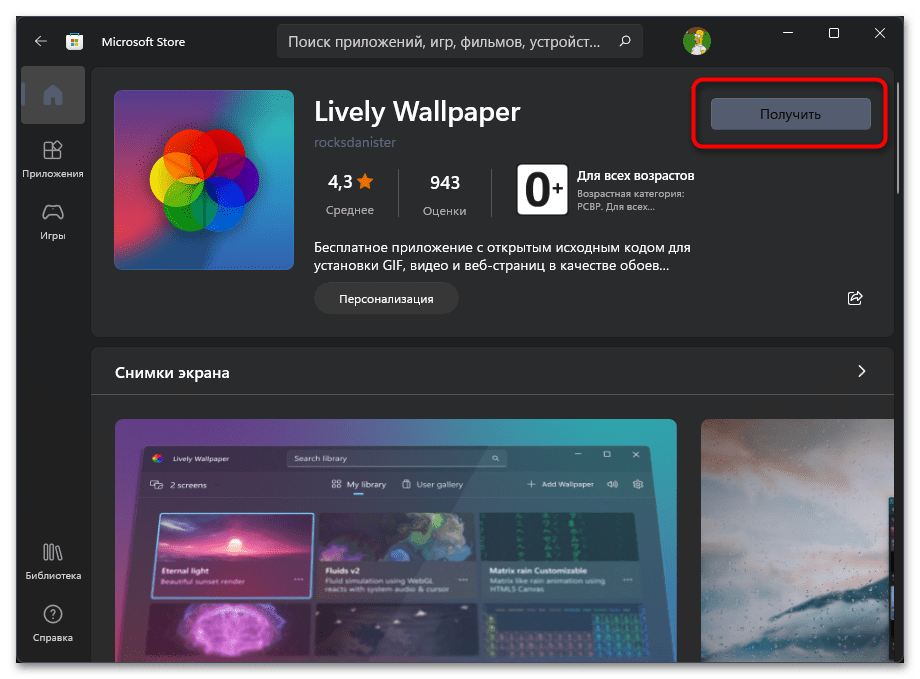
- Нажмите «Получить», чтобы запустить установку.
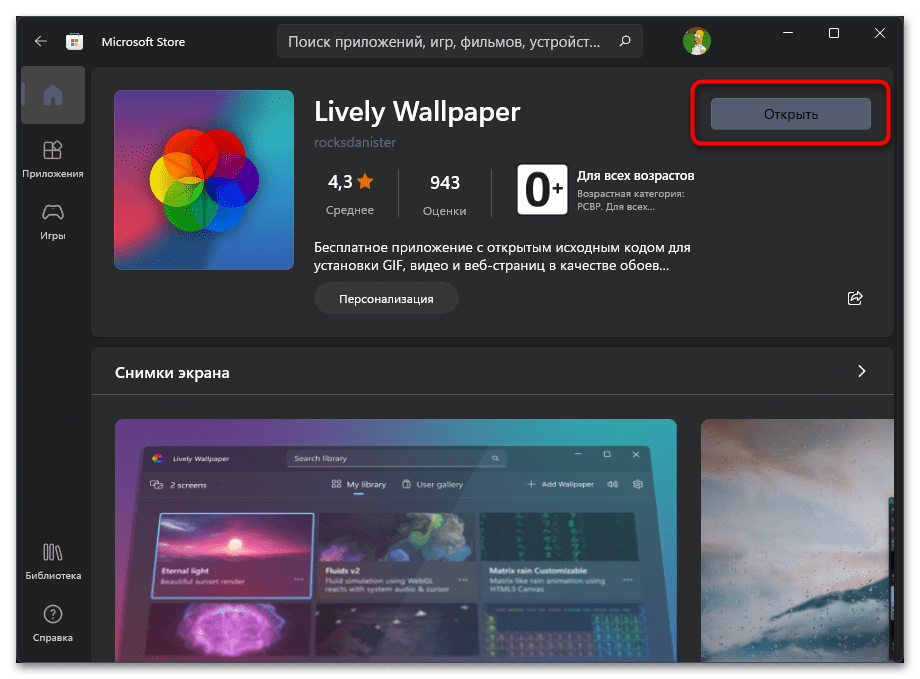
- Вы можете следить за процессом инсталляции, а по завершении нажать «Открыть», чтобы сразу запустить программу и перейти к ее настройке.
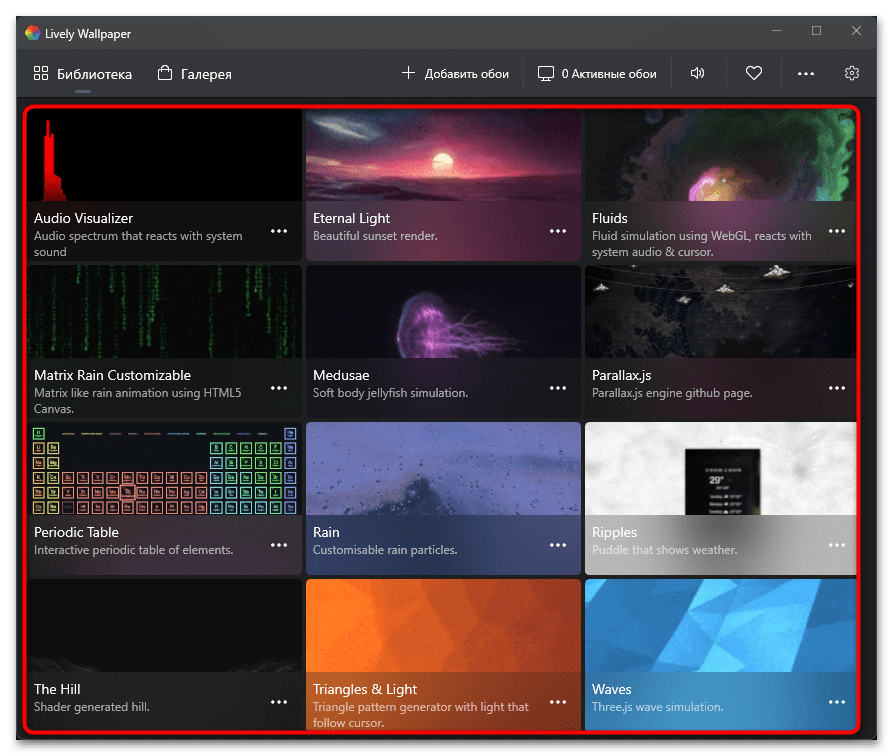
- Разработчики сразу же предлагают на выбор большое количество разных живых обоев из встроенной библиотеки. Ознакомьтесь с этим списком и отыщите среди них подходящий вариант.
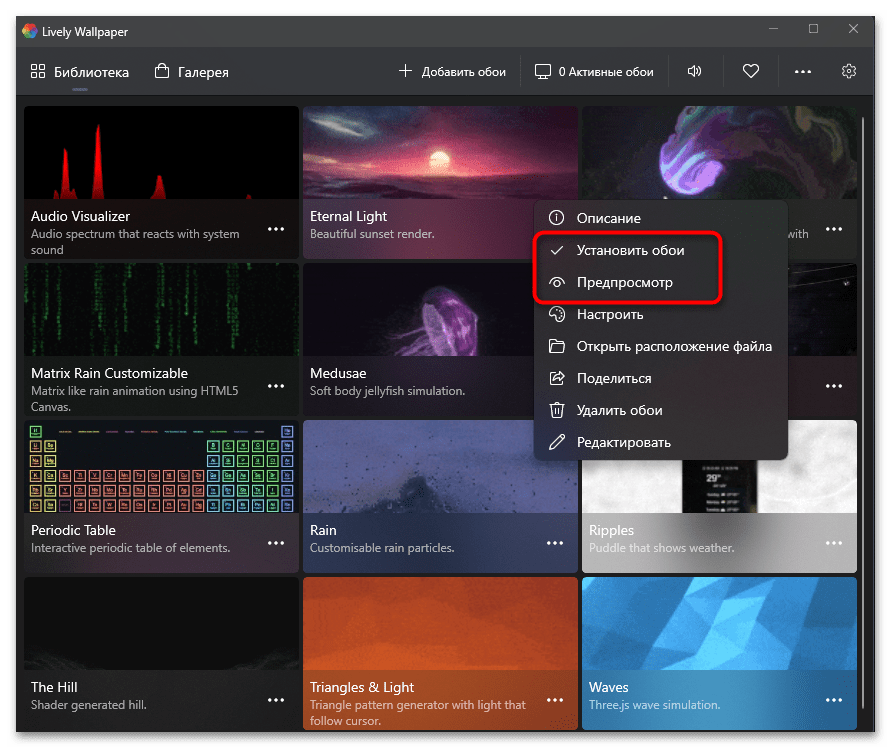
- Нажмите по кнопке с тремя точками справа от подходящих обоев, чтобы сразу установить их на рабочий стол или перейти к предпросмотру.
- Заметим, что все обои, присутствующие в Lively Wallpaper, обладают персональными настройками, напрямую влияющими на внешний вид анимации.
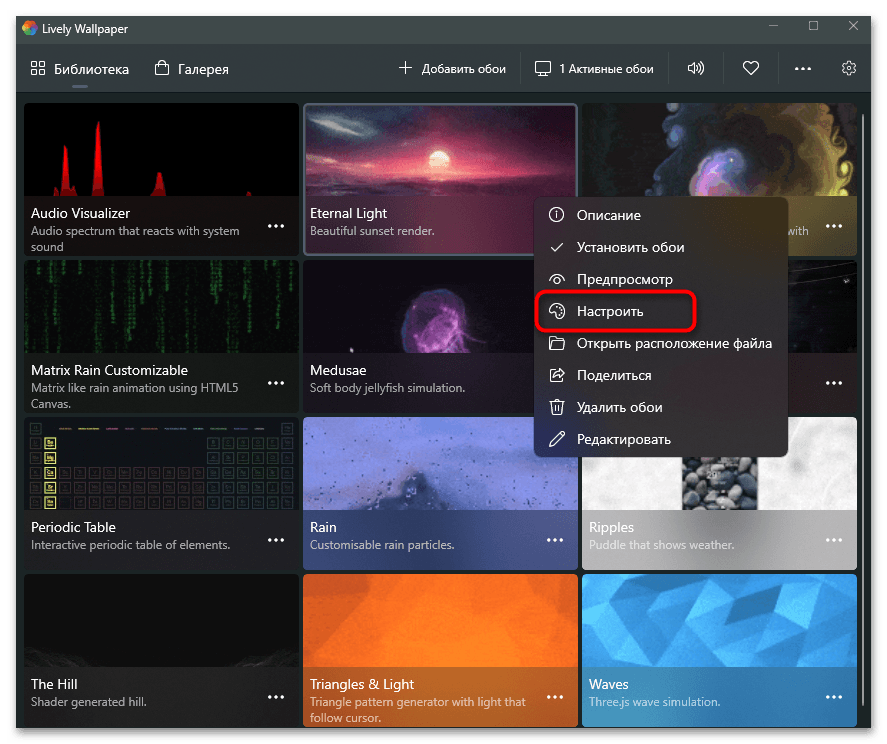
- Вы можете изменять яркость, контраст, гамму, сатурацию и скорость воспроизведения. Если выбранные обои имеют звуковое сопровождение, а вам оно не нужно, активируйте галочку возле пункта «Mute».
- Сверните окно с параметрами и обратите внимание на рабочий стол. Изменения вступают в силу сразу же, поэтому вы будете видеть, как теперь выглядят живые обои.
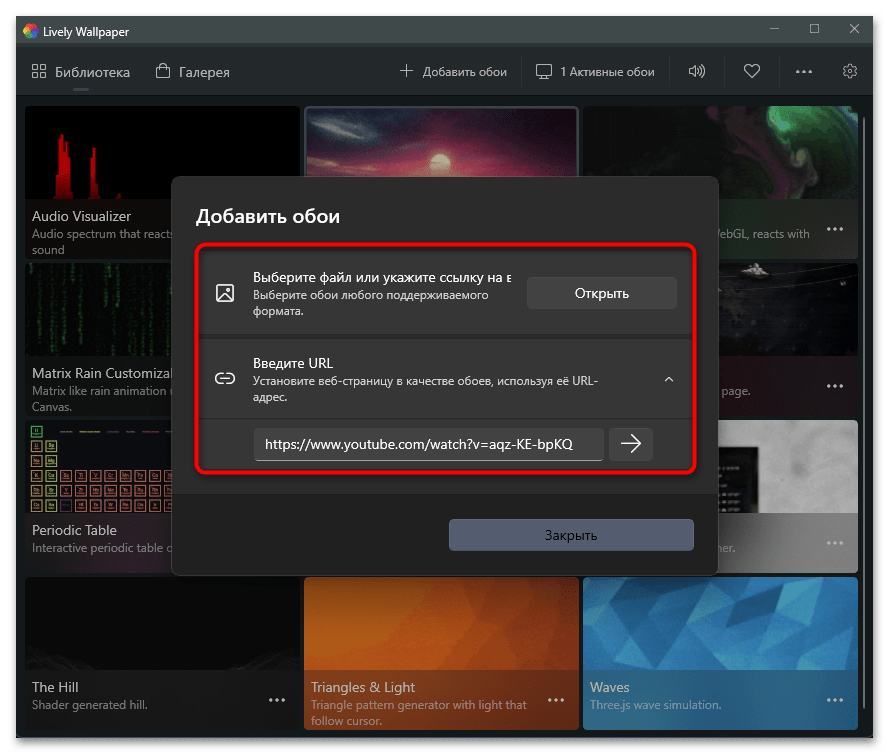
- Если ничего подходящего из библиотеки найти не удалось, можно нажать кнопку «Добавить обои», чтобы выбрать локальный файл или вставить ссылку на видео с YouTube.
- В новом окне выберите подходящий тип импорта и завершите добавление своих собственных живых обоев, которые хранятся в формате GIF или любом современном типе видео.
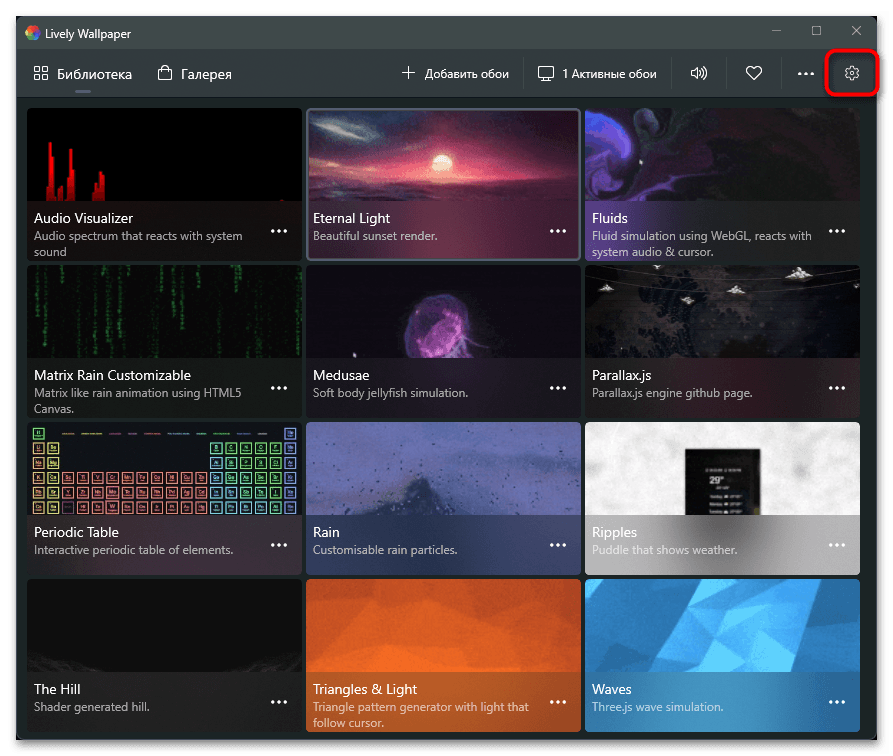
- В завершение обзора данного приложения разберем его общие настройки, для перехода к которым нужно нажать по значку с изображением шестеренки справа вверху.
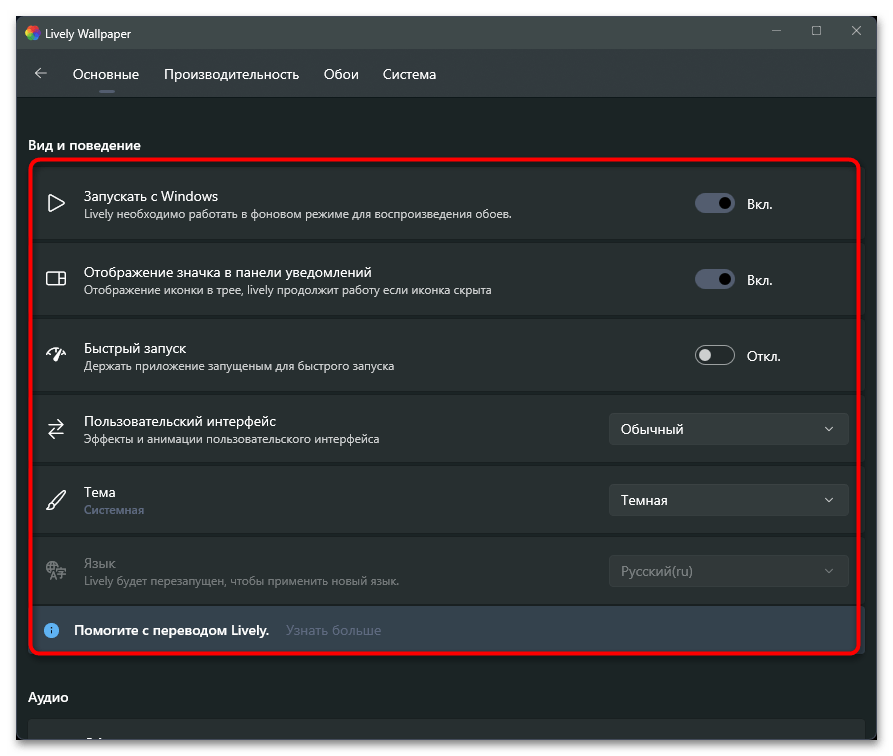
- Среди основных параметров вы найдете переключатель для автоматического запуска с Windows, что обязательно нужно для воспроизведения живых обоев. Сможете настроить отображение значка на панели уведомлений и активировать быстрый запуск, чтобы получать оперативный доступ к библиотеке с живыми обоями.
- Перейдите на вкладку «Производительность» для просмотра параметров воспроизведения и отдельных функций для ноутбуков. Останавливаться на всех них не будем, поскольку каждый из них имеет свое описание на русском языке, с помощью которого вы и сможете понять, стоит ли активировать ту или иную функцию.


Способ 2: HD 4K Живые обои
Разберем еще одно приложение для установки живых обоев, которое можно скачать бесплатно через Microsoft Store. Его функциональность не такая широкая, как у предыдущей программы, а также отсутствует встроенная библиотека с эффектами. Мы бы рекомендовали использовать HD 4K Живые обои тем юзерам, кто уже скачал видео, которое будет установлено в качестве живых обоев, или нашел на него ссылку на YouTube.
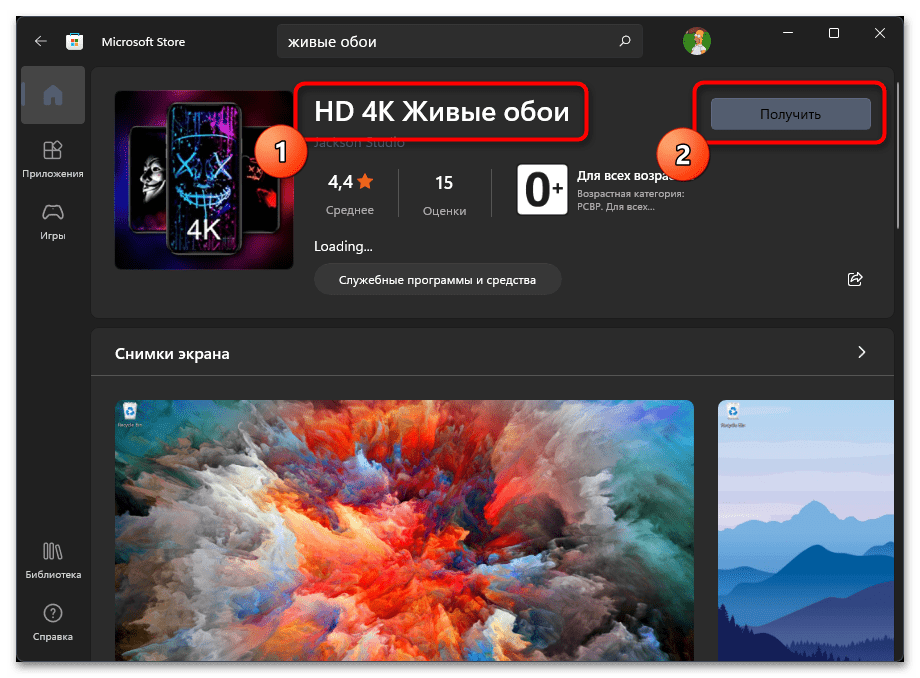
- Отыщите страницу приложения HD 4K Живые обои по названию в магазине и нажмите кнопку «Получить».
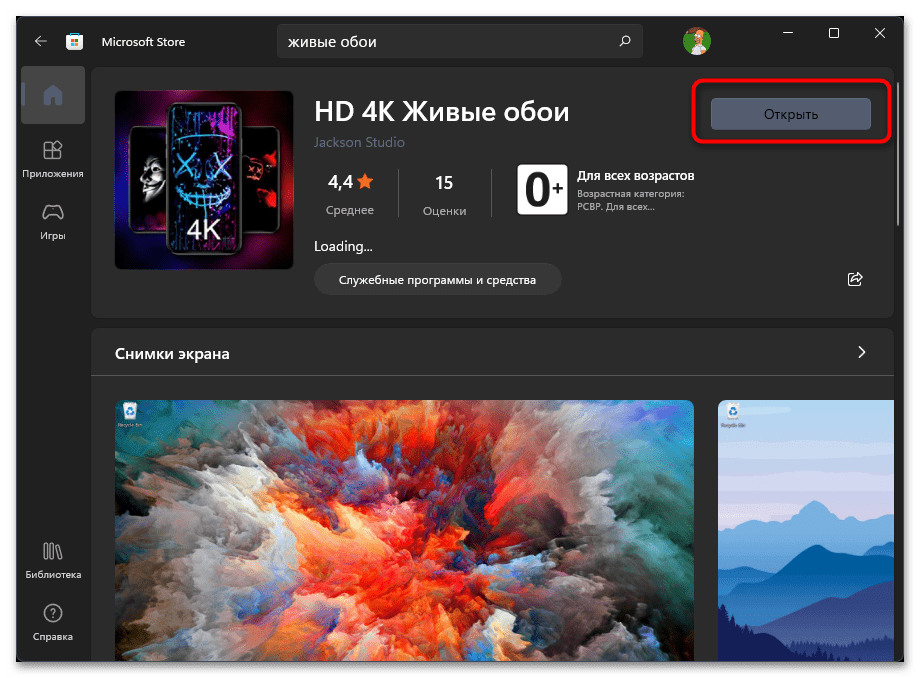
- После установки щелкните по «Открыть» или используйте для запуска значок, который должен автоматически добавиться в меню «Пуск».
- Окно у HD 4K Живые обои минималистичное. На выбор предлагается два варианта работы и список для переключения экранов, если таких используется несколько. По умолчанию будет выбран режим воспроизведения локального файла, а для выбора конкретного видео понадобится нажать кнопку «Browse».
- Если вам больше подходит использование ролика с YouTube без предварительного скачивания файла на компьютер, поставьте галочку возле пункта «YouTube/Niconico Video» и вставьте ссылку в поле ниже.
- Остается только нажать «play», чтобы запустить воспроизведение.
- Больше в HD 4K Живые обои никаких настроек нет, поэтому вы можете просто просматривать воспроизведение живых обоев на рабочем столе, время от времени менять их или останавливать проигрывание через меню программы.
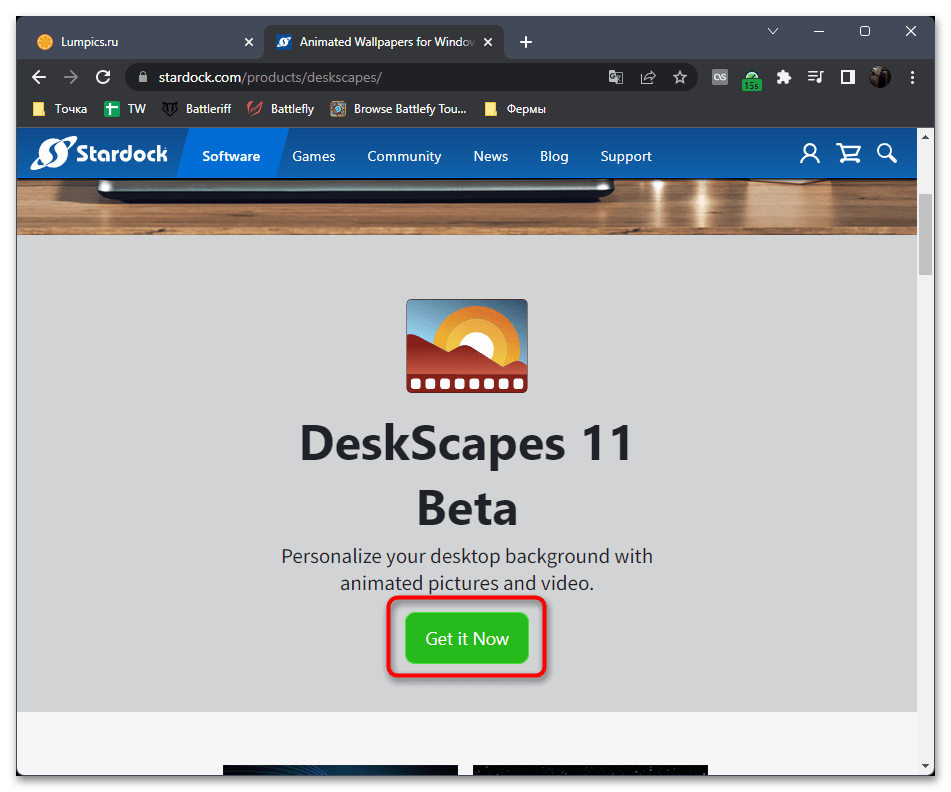
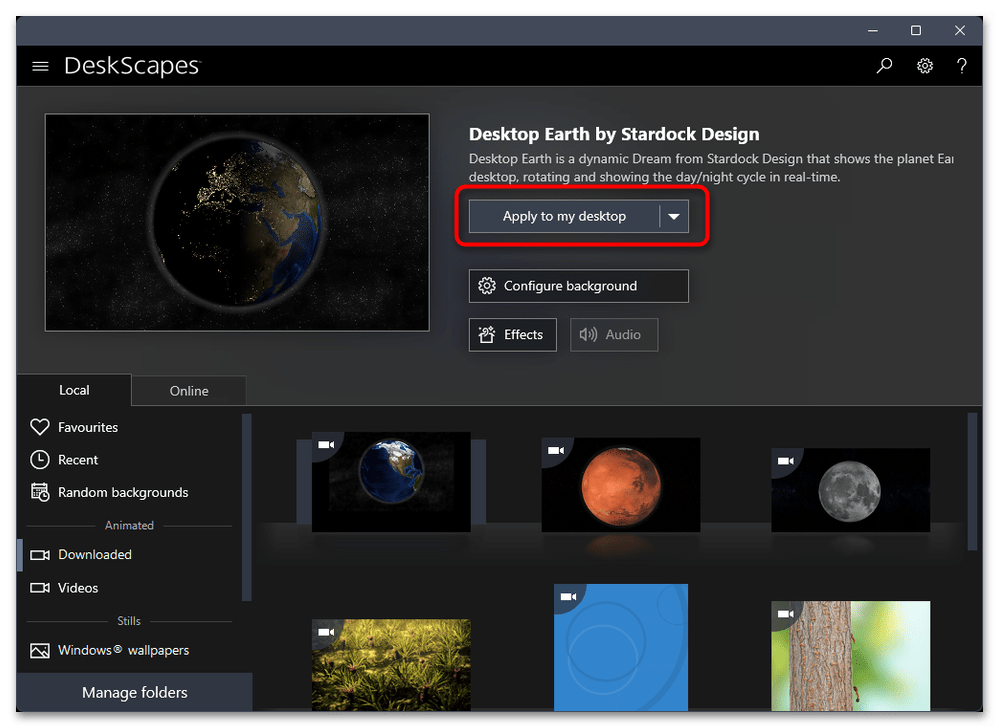
Способ 3: DeskScapes
Далее остановимся на программном обеспечении под названием DeskScapes. Для его использования понадобится загрузить пробную версию на 30 дней или оформить покупку на официальном сайте, что обязательно нужно учитывать еще до перехода к ознакомлению со следующей инструкцией. Данный софт имеет много разных настроек и большую встроенную библиотеку с живыми обоями.
Скачать DeskScapes с официального сайта
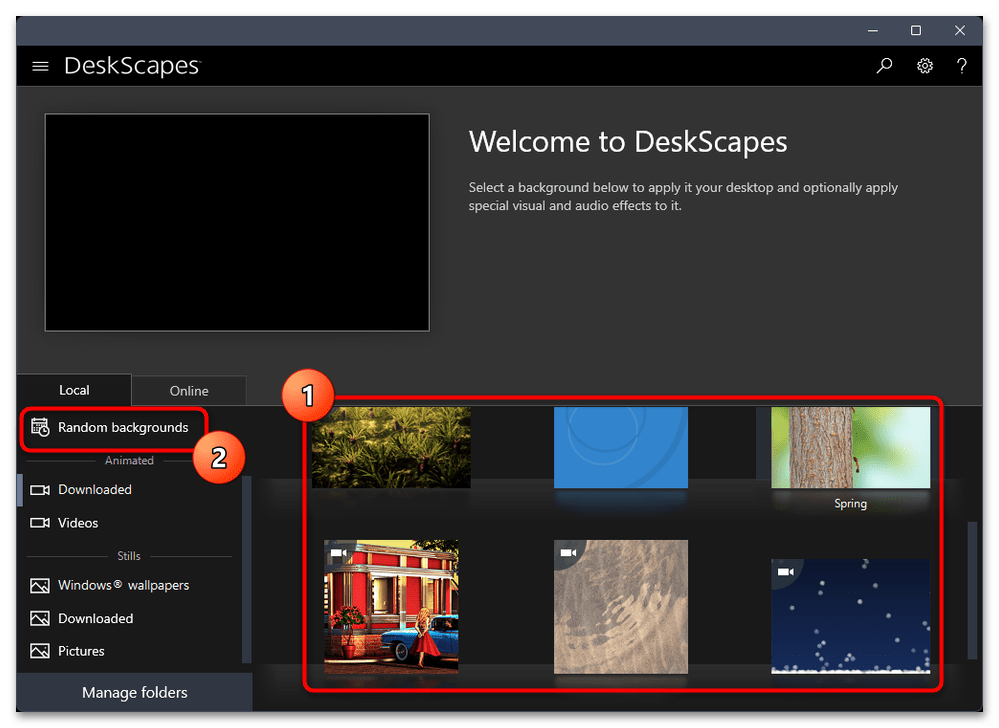
- Начните с выбора сборки или скачивания пробной версии программы с официального сайта. Затем пройдите установку и запустите софт.
- Справа вы увидите список живых обоев, которые уже скачаны и доступны к использованию. Дополнительно можно нажать по кнопке «Random backgrounds», чтобы настроить случайное воспроизведение.
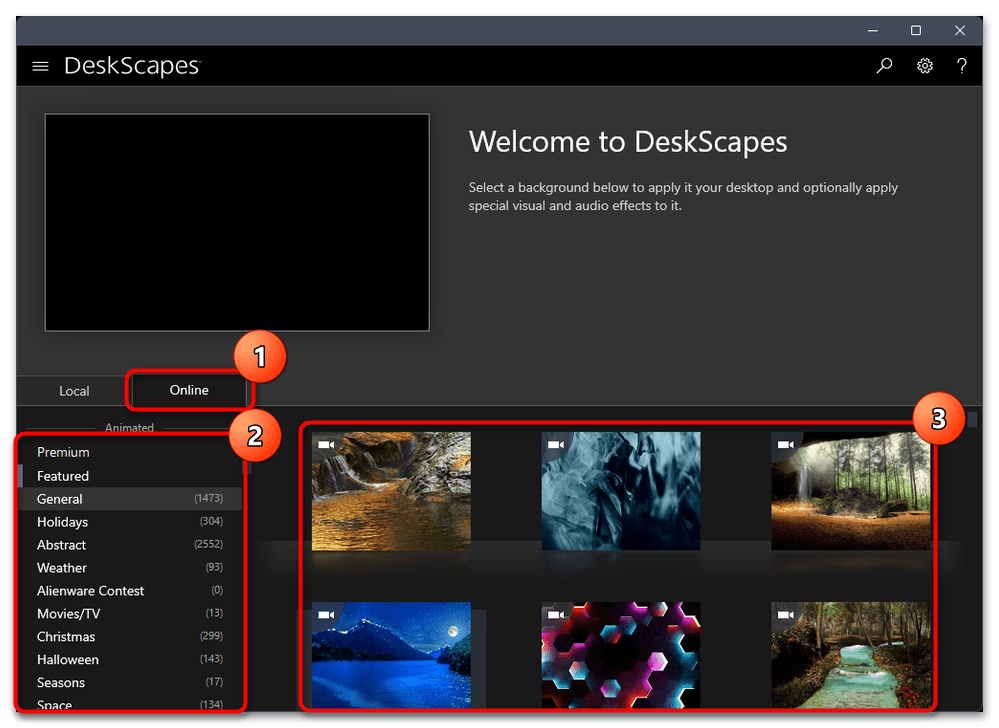
- Переключитесь на вкладку «Online» для поиска живых обоев, которые можно скачать на компьютер и использовать через DeskScapes. В списке слева вы найдете перечень доступных категорий, а справа увидите все варианты живых обоев.
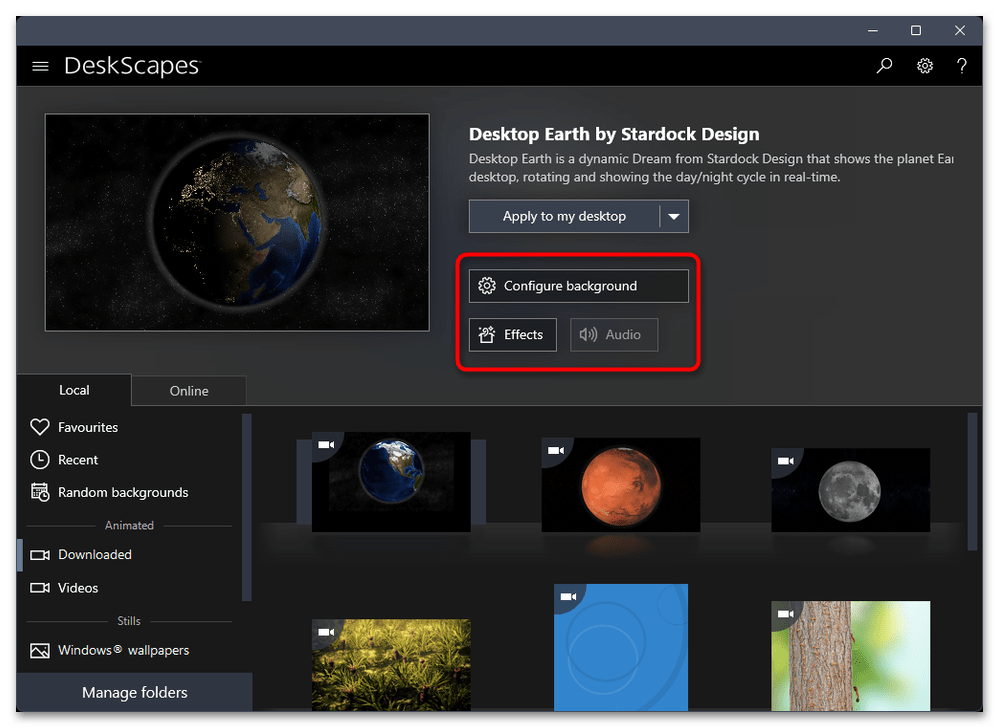
- Выберите подходящее видео и нажмите «Download this background», чтобы скачать его на ПК и применить в качестве фона рабочего стола.
- Каждые обои имеют свои особенные настройки и расширенные эффекты, за переход к выбору которых отвечают две кнопки на панели с презентацией самого фона рабочего стола.
- В отдельном окне вы сможете настроить скорость анимации и движение находящихся на ней объектов. Количество настроек зависит исключительно от того, какой фон был выбран.
- Для применения живых обоев и установки их на рабочий стол в Windows 11 нажмите кнопку «Apply to my desktop».
- Дополнительно отметим, что на панели слева есть категории с разными обоями и видео. В них вы можете выбирать одну из загрузок или переходить к библиотеке установленных файлов для их переключения.


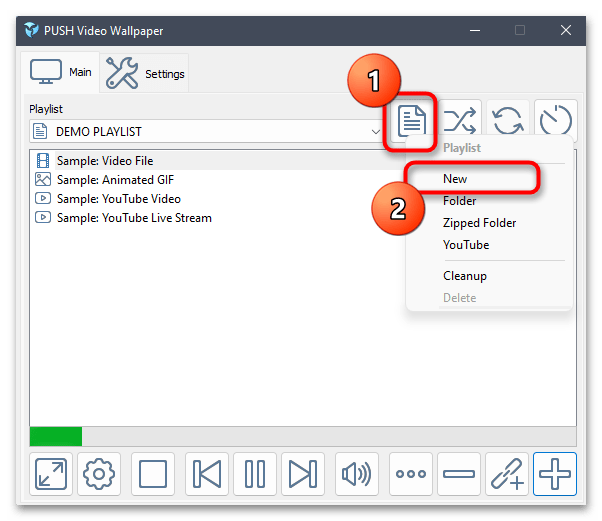
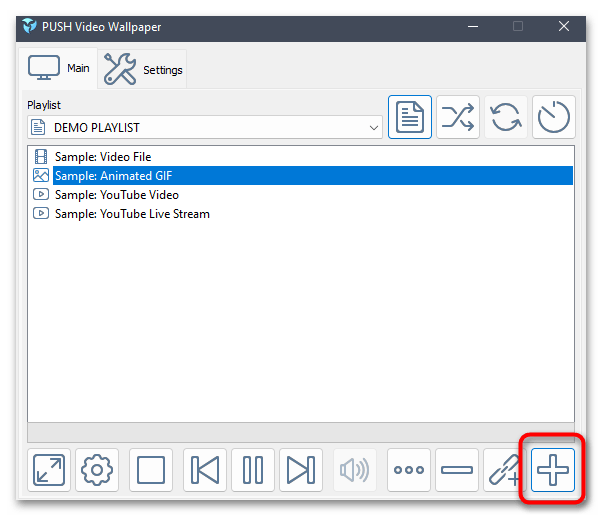
Способ 4: Push Video Wallpaper
Push Video Wallpaper — более простое программное обеспечение, но и распространяется оно бесплатно. В нем есть несколько разных заготовок для установки живых обоев, но больше всего акцент сделан на возможности выбора видео с YouTube для установки его как фона рабочего стола или добавления видео, которое предварительно было скачано на компьютер. Кстати, загрузка разных живых обоев доступна с официального сайта, где присутствует довольно обширная библиотека.
Скачать Push Video Wallpaper с официального сайта
- Сначала скачайте Push Video Wallpaper по ссылке выше и установите программу в Windows 11.
- После запуска можете выбрать один из любых шаблонов, чтобы проверить воспроизведение живых обоев.
- Если нужно создать собственный профиль для дальнейшего добавления видео или ссылок с YouTube, нажмите по значку с изображением файла и выберите вариант «New».
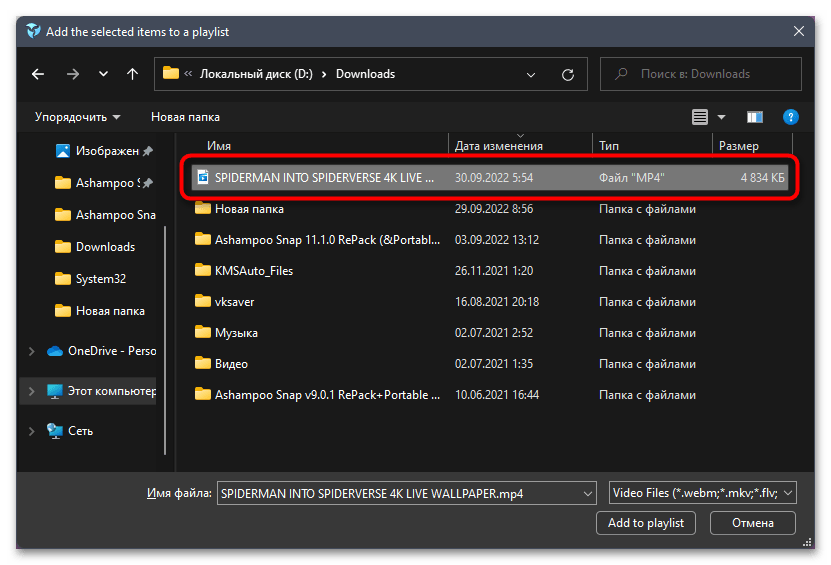
- Далее щелкните по кнопке с плюсом, чтобы перейти к выбору файла или вставке ссылки.
- Ссылка вставляется в отобразившееся на экране поле, а файл выбирается через открывшееся окно «Проводника». После этого изменения сразу же вступят в силу и вы увидите, что фон рабочего стола был изменен на выбранную анимацию.
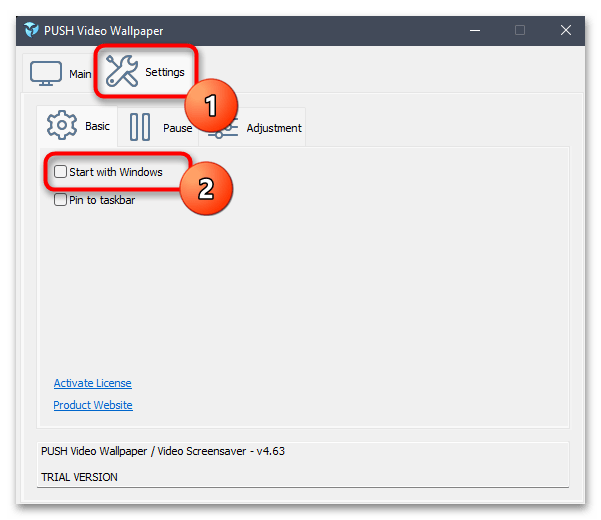
- Дополнительно рекомендуем переключиться на вкладку «Settings» и установить галочку «Start with Windows», чтобы Push Video Wallpaper запускалась вместе с операционной системой и сразу применяла анимированный фон рабочего стола.


Наша группа в TelegramПолезные советы и помощь