
Все способы:
- Определяем версию драйвера графического адаптера в Windows
- Способ 1: Сторонние программы
- Способ 2: Фирменное ПО видеокарты
- Способ 3: Диспетчер устройств
- Способ 4: Средство dxdiag
- Способ 5: Утилита msinfo32
- Вопросы и ответы: 0
Абсолютно каждый компьютер или ноутбук оснащен встроенной либо дискретной видеокартой. Для таких устройств разработчики время от времени выпускают программное обеспечение, называющееся драйверами. Иногда юзеру требуется определить, какая именно версия драйвера установлена в операционной системе сейчас, например, чтобы далее скачать сборку новее. Существуют разные методы получения интересующей информации. Именно о них и пойдет речь далее.
Определяем версию драйвера графического адаптера в Windows
В ПО графического адаптера встроены общие сведения, которые используются программами и могут быть просмотрены юзерами. Сюда входит и версия актуального драйвера. Доступно несколько вариантов вывода этих данных на экран монитора. Пользователю следует подобрать оптимальный для себя, присмотревшись к описанным далее инструкциям.
Способ 1: Сторонние программы
Сейчас в интернете находится множество программ, позволяющих всячески упростить взаимодействие с компьютером. Среди них имеются решения, предназначенные для просмотра характеристик комплектующих. Они отображают всю найденную информацию, что относится и к версии драйвера видеокарты. В качестве примера мы взяли популярный инструмент AIDA64 и предлагаем узнать, как на его примере осуществляется реализация поставленной задачи.
Скачать AIDA64
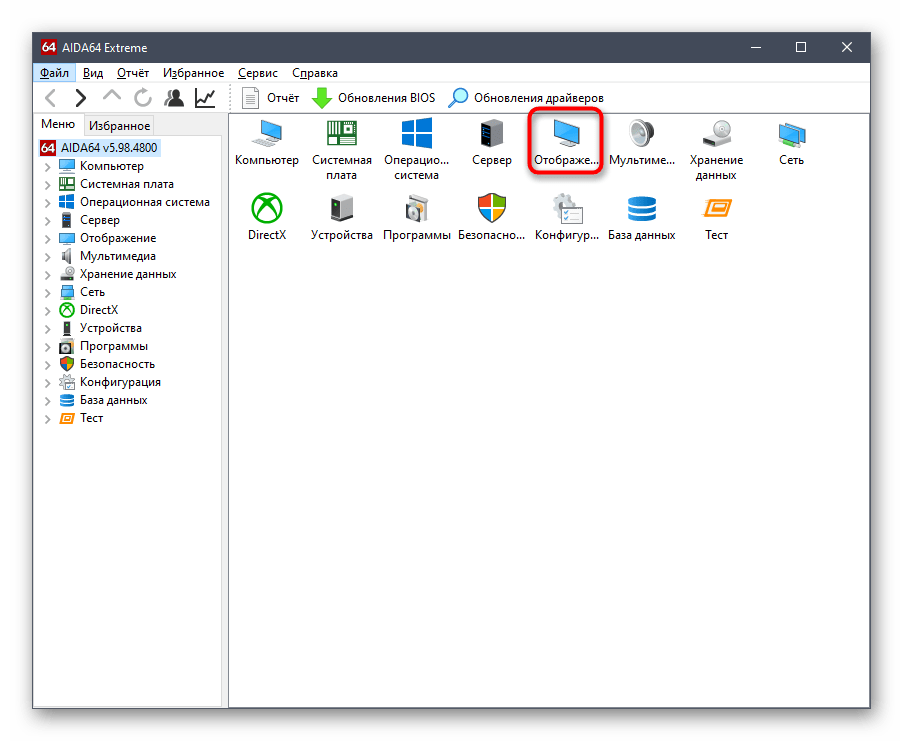
- Воспользуйтесь приведенной выше ссылкой, чтобы скачать и установить AIDA64 на свой компьютер. После запуска в главном меню нажмите на кнопку «Отображение».
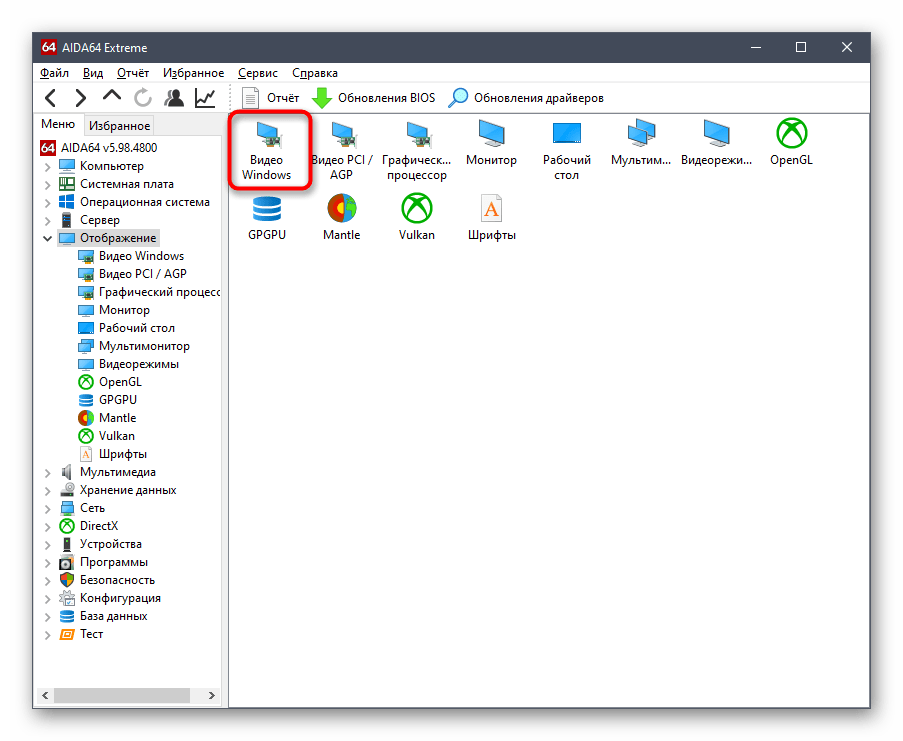
- В появившемся разделе выберите первый пункт «Видео Windows».
- В поле «Описание устройства» убедитесь, что отображается правильный графический адаптер, а затем просмотрите пункты «Версия драйвера» и «Дата драйвера», чтобы получить необходимые сведения.

Если AIDA64 вам по каким-либо причинам не подходит, советуем изучить другие программы, воспользовавшись представленной далее ссылкой. В том обзоре автор детально расписал каждое средство, способное предоставить информацию о характеристиках компьютера, поэтому благодаря ему можно подобрать оптимальное для себя ПО.
Подробнее: Программы для определения характеристик компьютера
Способ 2: Фирменное ПО видеокарты
Все производители видеокарт выпускают фирменное программное обеспечение, устанавливаемое на компьютер вместе с драйвером. В нем можно не только производить основную конфигурацию устройства, но и получать основную информацию. Давайте остановимся на каждом решении подробнее.
Настройки Radeon
Для начала затронем обладателей графических адаптеров от компании AMD. У них на ПК должно быть установлено средство «Настройки Radeon». Интересующие сведения в нем получаются буквально в несколько кликов, что выглядит так:
- Щелкните по пустому месту на рабочем столе ПКМ и выберите пункт «Настройки Radeon».
- В открывшемся окне обратите внимание на нижнюю панель. Здесь следует кликнуть по кнопке «Обновления».
- В отдельной плитке будет отображена надпись «Установлено». Под ней и находится текущая версия драйвера.


При необходимости в этом же окне можно сразу же запустить проверку на наличие обновлений, чтобы инсталлировать их и начать использование последней версии драйвера.
Панель управления NVIDIA
Примерно такие же действия, которые были описаны только что, предстоит выполнить и обладателям устройств от NVIDIA. Вся разница заключается лишь в самом графическом интерфейсе.
- Переход на «Панель управления NVIDIA» тоже происходит через контекстное меню, вызываемое нажатием правой кнопкой мыши по пустому месту на рабочем столе.
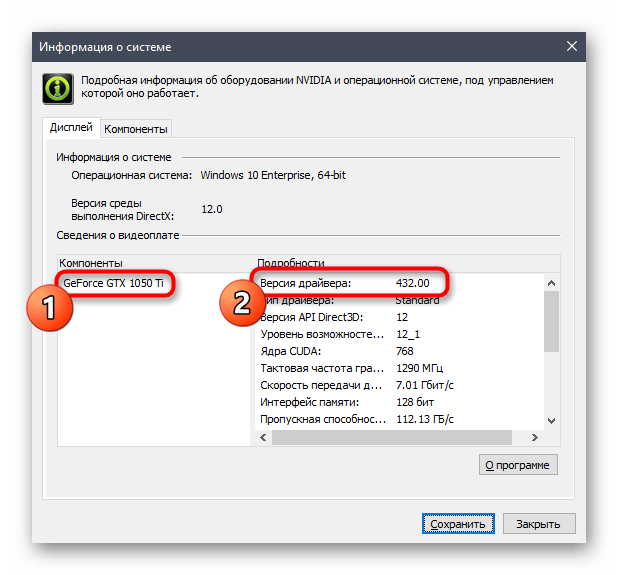
- Здесь на верхней панели кликните по кнопке «Справка» и в появившемся меню выберите «Информация о системе».
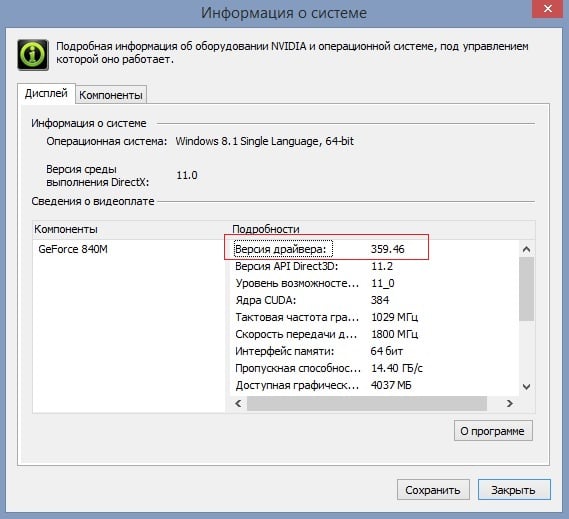
- Изучите представленную информацию, сначала выбрав компонент, а затем обратив внимание на надпись «Версия драйвера».

Способ 3: Диспетчер устройств
Перейдем ко встроенным в операционную систему средствам, через которые тоже можно узнать версию программного обеспечения видеокарты. В первую очередь обратим внимание на меню «Диспетчер устройств», знакомое даже начинающим пользователям.
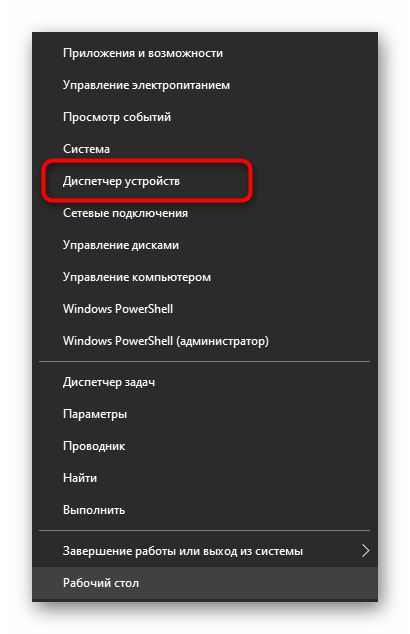
- Запустите это меню любым удобным образом, например, вызвав контекстное меню нажатием ПКМ по кнопке «Пуск».
- В нем вас интересует раздел «Видеоадаптеры». Разверните его, кликнув ЛКМ.
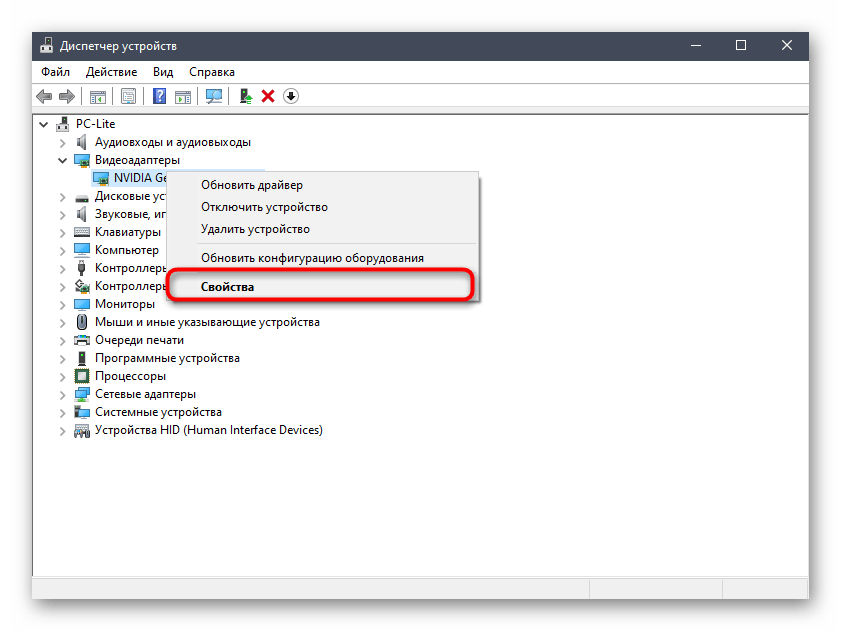
- Щелкните ПКМ по строке с названием видеокарты и в контекстном меню выберите «Свойства».
- Переместитесь на вкладку «Драйверы», чтобы определить версию в соответствующей строке.


Способ 4: Средство dxdiag
На каждом компьютере под управлением Windows имеется установленная версия DirectX — компонента, который добавляет в систему ряд файлов, отвечающих за расширение функциональности графического адаптера. Вместе с ними инсталлируется и средство dxdiag, позволяющее узнать интересующие нас сегодня сведения.
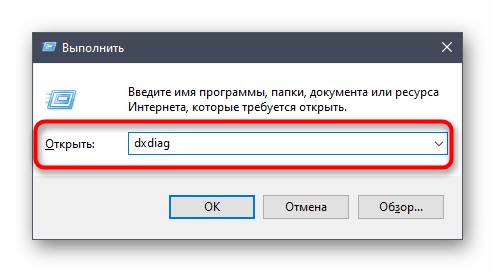
- Для этого запустите «Выполнить» и введите там
dxdiag, после чего нажмите на Enter. - Перейдите на вкладку «Экран».
- Справа будет находиться блок «Драйверы». В соответствующих строках отыщите версию программного обеспечения и дату его выпуска.


Способ 5: Утилита msinfo32
В Windows встроена еще одна встроенная утилита, позволяющая получать сведения о системе. Называется она msinfo32 и подходит для выполнения поставленной сегодня задачи.
- Запустите «Выполнить» (Win + R). Введите там
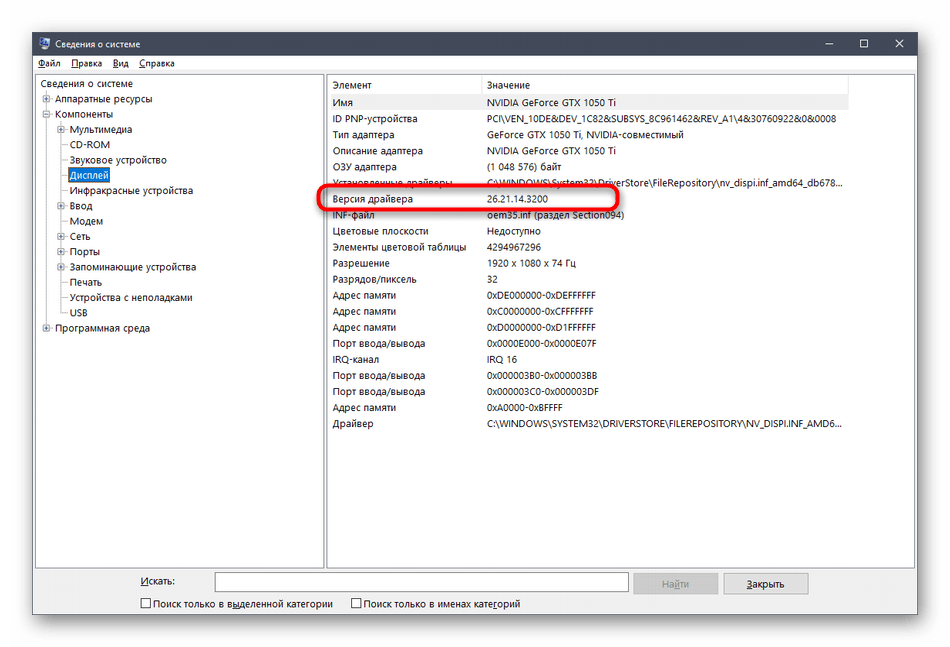
msinfo32и нажмите на клавишу Enter. - В открывшемся окне воспользуйтесь панелью слева, развернув раздел «Компоненты» и выбрав «Дисплей».
- Изучите представленные в таблице строки.


Теперь вы знакомы с пятью разными методами определения версии драйвера любой видеокарты в Windows. Как видно, справиться с этой задачей можно как при помощи сторонних средств, так и через стандартные инструменты операционной системы. Каждый пользователь сам вправе сделать выбор и следовать приведенным к варианту инструкциям.
Наша группа в TelegramПолезные советы и помощь
Главная страница решений
LCD Monitor
General Questions
Изменено: Ср, 27 Янв, 2021 на 10:54 PM
1. На «Панели управления» откройте «Диспетчер устройств».

2. Найдите видеоадаптеры и дважды нажмите на него, затем дважды нажмите на показанное устройство:
3. Выберите вкладку Драйвер, здесь будет указана версия драйвера.
Была ли эта статья полезной?
Да
Нет
Отправить отзыв
Извините, что не удалось помочь. У вас есть идеи, что можно улучшить в этой статье?
Статьи по теме
Drivers are the next most essential thing a computer needs after its Operating System. Without the drivers, all the individual components inside of your computer, or the peripherals outside of it would become useless.
A driver is a piece of code, or a file, that acts as a communication medium between the operating system and the hardware. Or as Microsoft puts it:
A driver is a software component that lets the operating system and a device communicate with each other.
Any piece of hardware, may it be the RAM or hard drive inside your PC, or an attached keyboard or printer, requires a driver to help it communicate with the OS. Without the driver, the hardware would not understand what the operating system is demanding from, and vice versa. Therefore, an up-to-date and error-free driver is essential for the smooth functioning of each hardware.
Drivers are consistently being updated with new improvements through patches, which consequently change a driver’s associated version. This article discusses how you can check the versions of all the different drivers that are installed on your computer and why it is important to keep tabs on them.
Table of Contents
What is Driver Version and Why is it Important
The driver version is a combination of numbers that signifies the release of the driver itself. A version can have decimals in it to separate major version changes from the minor ones.
For example, if we were to release a new driver for the first time, we would proudly name it Itechtics 1.0.0. After making some minor improvements to the driver, we would then republish the driver and change its version number to Itechtics 1.0.1 (or Itechtics 1.0.3, depending upon the number of iterations made to the release).
If we were to make a major update to the driver, we may as well name it Itechtics 2.0.0. As you may notice, the version number(s) started from the smaller ones and then made incremental changes depending upon how big the update is.
Now that that’s understood, it is important to keep tabs on what version of the driver you are running on your computer. This will help differentiate between your driver and the latest one available. If your system has not updated the driver in some time, then there ought to be a significant version difference between the one being offered by the vendor and the one you have on your device.
Therefore, cross-checking the driver versions for all your hardware is important, since the latest drivers include security patches that fix vulnerabilities that can be exploited through attacks and other performance improvements for you to benefit from.
Let us now move on to show you how you can check the driver version for the different components on your PC.
Check Installed Driver Version using Device Manager Console
One way to check the version of the installed drivers on your computer is through the Device Manager – a Microsoft Management Console (MMC) to manage your system’s hardware. Note that using this method, you can only get the version of one component driver at a time. If you want to know the versions of all the installed drivers, continue to the next section of this post.
- Launch the Device Manager by typing in devmgmt.msc in Run.
- You will see the name of your computer at the very top, and then the different branches of hardware under it. Expand the associated branch of the hardware whose driver version you want to know by clicking on it.

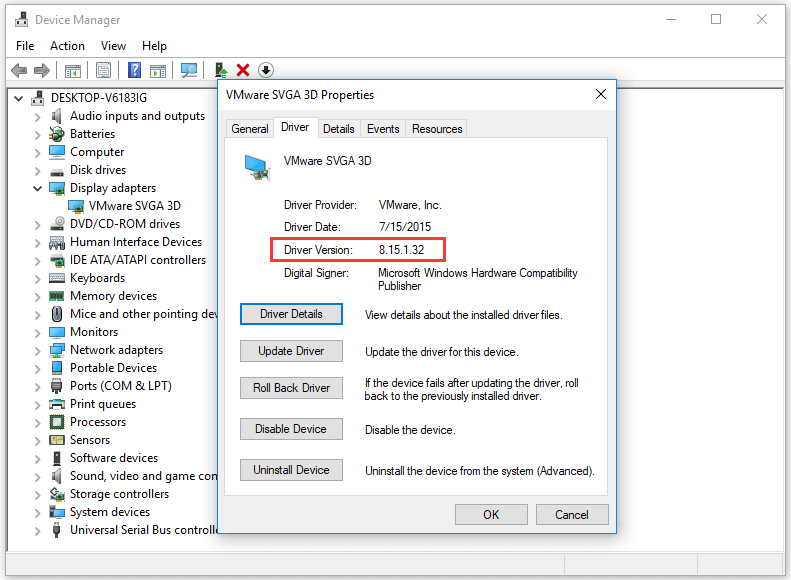
- Now right-click on the item and then click Properties from the context menu.
- From the Properties window, switch to the Driver tab. There, you will find the version of the driver written, as highlighted in the image below.


You can now cross-check the manufacturer’s website for the latest available drivers. If a newer one is available, you can update it using the guide given further down this post.
From the Properties window in step 3 above, you can also find other useful information, such as the name of the manufacturer, the date the driver was installed on, etc.
Check Installed Driver Version using PowerShell
Another method to check the version of the installed drivers is through Windows PowerShell. You can get the versions of all the drivers installed on your PC for all the hardware with just one command.
To obtain the driver version, launch Windows PowerShell with administrative privileges and then paste the following command:
Get-WmiObject Win32_PnPSignedDriver| select DeviceName, Manufacturer, DriverVersion
This command will display all of the drivers installed on your computer, as in the picture below:

This is a quick way to get information on the current drivers installed all at once!
Now that you have the information needed regarding the current drivers installed, how would you know when an update is required?
When Does a Driver Need to be Updated
It is not always necessary to update a driver. Your drivers are typically updated automatically by Windows Update. Nevertheless, there is no benchmark that will determine whether a driver needs to be updated or not.
In most cases, a driver needs to be updated if the associated hardware becomes glitchy. For example, the network driver may need to be updated if you are experiencing weak signals while the other devices around you are not.
Another indicator for the driver update requirement is the date it was installed. Again, there is no time frame during which a driver should be updated, as all manufacturers release drivers for different components after different durations. However, we suggest that you update the driver manually (guide given below) if it is older than 1 year.
You can check the date of installation of the driver from the Properties window of the hardware, as discussed above in the section for “Checking installed driver version using Device Manager console.”

How to Reinstall a Driver
It may be possible that you are already running the latest version of the driver, yet the hardware could be glitchy. In such scenarios, it may be possible that the driver did not install correctly, or has been corrupted. You can then try reinstalling the driver using the following steps:
- Open the Device Manager console by typing in devmgmt.msc in Run.
- Now expand the associated branch of the hardware whose driver you think is faulty.
- Right-click on the item and click Uninstall device from the context menu.
- In the confirmation dialog box, check the box next to “Attempt to remove the driver for this device” and then click Uninstall.
- Now click on the Scan for hardware changes button at the top.
- Now restart your computer. This step is optional and would only reassure the driver reinstallation.


Your associated driver will now be reinstalled. Check to see if the issue you were facing has been resolved (if any).
How to Update Driver Automatically
You can try to update your driver automatically in Windows. The process uses Windows Update to automatically search for any updates for the associated driver and then install them if found.
Here’s how to automatically update a driver in Windows:
- Open the Device Manager console by typing in devmgmt.msc in Run.
- Now expand the associated branch of the hardware whose driver you want to update.
- Right-click on the item and click Update driver from the context menu.
- From the pop-up window, click Search automatically for drivers.
- The wizard will now start searching for an update for the driver on the internet. Once found, it will automatically install the update. If not, you will be prompted with “The best drivers for your device are already installed.” Either way, close the wizard.


How to Update Driver Manually
You can also manually update the driver if a newer version is available than your already-installed one. However, this method requires that you download the correct driver for the hardware before performing the steps given below. We suggest that you visit the manufacturer’s website and download the driver. Once done, follow the steps below to install it:
- Open the Device Manager console by typing in devmgmt.msc in Run.
- Now expand the associated branch of the hardware whose driver you want to update.
- Right-click on the item and click Update driver from the context menu.
- From the popup window, click Browse My Computer for drivers.
- On the next screen, click the Browse button and navigate to the downloaded driver and select it. Click Next when done.
- The driver will then begin installing. When it finishes, close the wizard.


How to Roll Back Driver
If a driver has been updated, Windows still keeps the previous version of the driver just in case. This will be made available in case you decide to roll back to it at a later time.
You may require to go back to the previous version of the driver if you find that the newer one is having issues, or is just not compatible with your setup.
That said, Windows only keeps the last installed version of the driver and discards the rest. You can roll back to the latest version through the following steps:
- Launch the Device Manager by typing in devmgmt.msc in Run.
- You will see the name of your computer at the very top, and then the different branches of hardware under it. Expand the associated branch of the hardware whose driver version you want to know by clicking on it.
- Now right-click on the item and then click Properties from the context menu.
- From the Properties window, switch to the Driver tab and click Roll Back Driver.
- From the pop-up window, select the reason for rolling back and then click Yes.


The window will now close. Give your system a few seconds for the driver to successfully rollback. Note that you will not be prompted whether the driver has rolled back or not. You can confirm this by checking that the Roll Back Driver button has been greyed out in the Properties window. Proceed to close the Properties window and the Device Manager console.

Final Thoughts
As you may have already understood, healthy drivers are very important for a device to run smoothly. Thus, keeping an eye out for a new driver version is equally significant.
Although Windows updates most drivers automatically, we recommend that you occasionally check for updated drivers manually as well, just to make sure.
Usually, the latest drivers are pre-checked by the vendor and are mostly error-free. If there are any anomalies discovered, they are usually fixed in a later update.
-
Home
-
News
- How to Check Nvidia Driver Version Windows 10 – 2 Ways
By Alisa |
Last Updated
This post introduces 2 ways to allow you easily check Nvidia driver version on Windows 10. You can check driver version through Device Manager or Nvidia Control Panel. Check the step-by-step guide below. MiniTool software also provides free data recovery software, hard drive partition manager, system backup and restore software if you need.
If you want to check if your Nvidia driver is in up-to-date and find out the current Nvidia driver version of your Windows computer, you can check the 2 ways below. Each way is attached with a step-by-step guide.
#1. How to Check Nvidia Driver Version Windows 10 in Device Manager
You can access Windows Device Manager that allows you to manage computer hardware devices and drivers, and check driver version on Windows 10. Below is the guide for how to check drivers Windows 10.
Step 1. Press Windows + R, type devmgmt.msc in Run dialog, and click OK to open Device Manager in Windows 10.
Step 2. In Device Manager window, you can see all computer hardware devices are listed. You can expand the device category which you want to check the driver version. Here we click Display adapters since we want to check Nvidia driver version.
Next you can right-click the Nvidia graphics card, and choose Properties.
Step 3. Then you can click Driver tab in Properties window, and you can see the current version of the Nvidia driver.
In the driver properties window, you can also check the driver details, update driver, roll back Nvidia drivers, disable the device, uninstall the driver, etc.
#2. Check Nvidia Driver Version in Windows 10 from Nvidia Control Panel
If your computer uses Nvidia graphic cards, then an Nvidia Control Panel application is installed on your computer. You can check Nvidia driver version through Nvidia Control Panel.
Step 1. Right-click the empty area on computer desktop screen, and choose Nvidia Control Panel to open it.
Step 2. Next click System Information link at the bottom-left. And you can check the Nvidia driver version under Details.
How to Recover Lost Data on Windows 10 Computer
Data loss frequently occurs when your computer has problems like system crash, blue/black screen error. You can easily restore lost data from Windows 10 computer only if you have the professional data recovery software at hand.
MiniTool Power Data Recovery, best data recovery software for Windows, helps you easily recover any deleted/lost files from Windows 10 computer, external hard drive, SSD, USB flash drive, SD card, etc. Novice users can use this data recovery software with ease due to its extremely intuitive interface and simple operation. The easy user guide is attached below.
- You can download and install MiniTool Power Data Recovery on your Windows computer. Then launch it.
- Next choose the device you’d like to recover data from in the left pane. If you want to recover data from external storage device like external hard drive or USB, you should connect it to your computer beforehand.
- In the right window, you can select the target partition or storage device, and click Scan MiniTool Power Data Recovery will start scanning the chosen device.
- After it finishes the scan, you can check the scan result to find wanted files, and click Save button to choose a new destination to store the recovered files.
About The Author
Position: Columnist
Alisa is a professional English editor with 4-year experience. She loves writing and focuses on sharing detailed solutions and thoughts for computer problems, data recovery & backup, digital gadgets, tech news, etc. Through her articles, users can always easily get related problems solved and find what they want. In spare time, she likes basketball, badminton, tennis, cycling, running, and singing. She is very funny and energetic in life, and always brings friends lots of laughs.
Версия драйвера NVIDIA может оказаться полезной информацией при диагностике и попытке исправить проблемы с видеокартой. Часто эти данные необходимы, чтобы проверить, нет ли проблем у используемого в данный момент устройства, с которыми уже сталкивались другие геймеры. Также это может быть полезно для поиска решений, применимых именно к этой версии.
В любом случае, какой бы ни была причина, стоит знать, как быстро выяснить версию драйвера NVIDIA, установленную в настоящее время на нашем компьютере. На самом деле это достаточно просто. Более того, информацию о видеокарте можно посмотреть сразу в нескольких местах.
Как проверить версию драйвера в Панели управления NVIDIA?
Панель управления NVIDIA устанавливается на каждый компьютер с видеокартой NVIDIA и встроенными драйверами для неё. Помимо настроек, эта часть интерфейса может отображать много информации о системе и компьютерном обеспечении.
Инструкция:
- Щелкните правой кнопкой мыши на рабочем столе и выберите в контекстном меню «Панель управления NVIDIA». Подождите, пока она загрузится и отобразится в виде окна.
- В окне «Панели управления» нужно перейти в раздел, в котором отображается системная информация. Для этого разверните вкладку «Справка» в верхнем меню и выберите «Информация о системе». Также в нижнем левом углу есть ссылка для быстрого доступа к разделу.
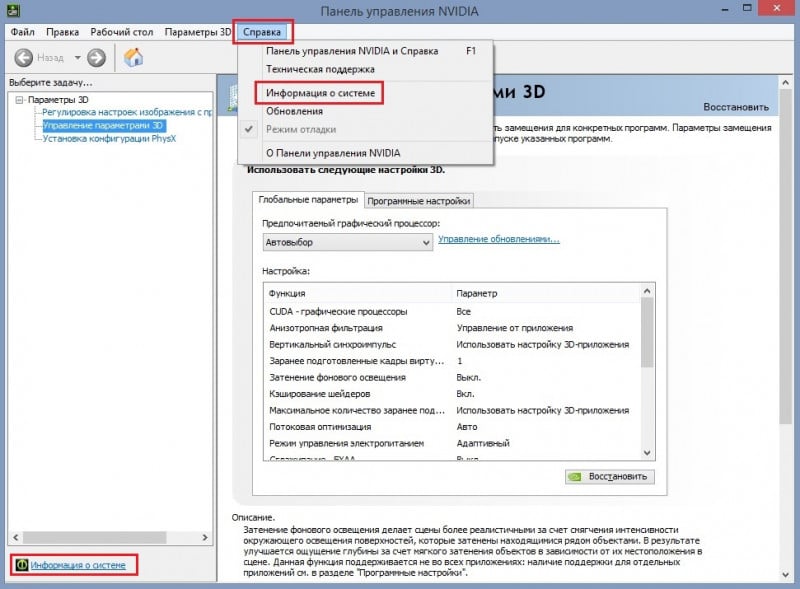
- Далее откроется новое окно с подробной информацией. В самом начале списка можно посмотреть версию установленного драйвера.
Как узнать версию драйвера в GeForce Experience?
GeForce Experience — это приложение, которое позволяет автоматически устанавливать новые драйверы для вашей видеокарты, а также упрощает настройку графики в играх до нужного уровня. Здесь мы также можем проверить версию программного обеспечения NVIDIA.
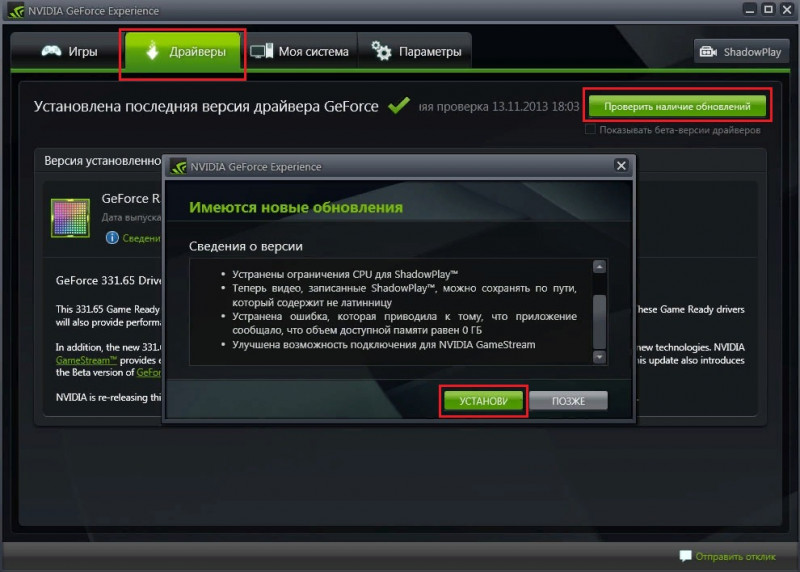
Для этого запустите GeForce Experience и перейдите на вкладку «Драйвер» на верхней панели. Оттуда можно быстро проверить наличие обновлений обеспечения, а также прочитать любые изменения, внесенные драйвером. И, собственно, узнать его версию.