
Все способы:
- Способ 1: «Командная строка»
- Способ 2: «Windows PowerShell»
- Способ 3: Фирменное программное обеспечение
- Вопросы и ответы: 3
Важно! В этой статье речь будет идти о просмотре серийного номера компьютера средствами операционной системы Windows 10, что не предполагает такие методы, как просмотр надписи на наклейке устройства и поиск информации в BIOS. Поэтому, в случае необходимости, рекомендуем обратиться за помощью к другой статье на нашем сайте. Несмотря на то, что в ней речь идет о ноутбуке, перечисленные способы в большинстве своем будут полезны и для владельцев стационарных компьютеров.
Подробнее: Как узнать серийный номер ноутбука
Способ 1: «Командная строка»
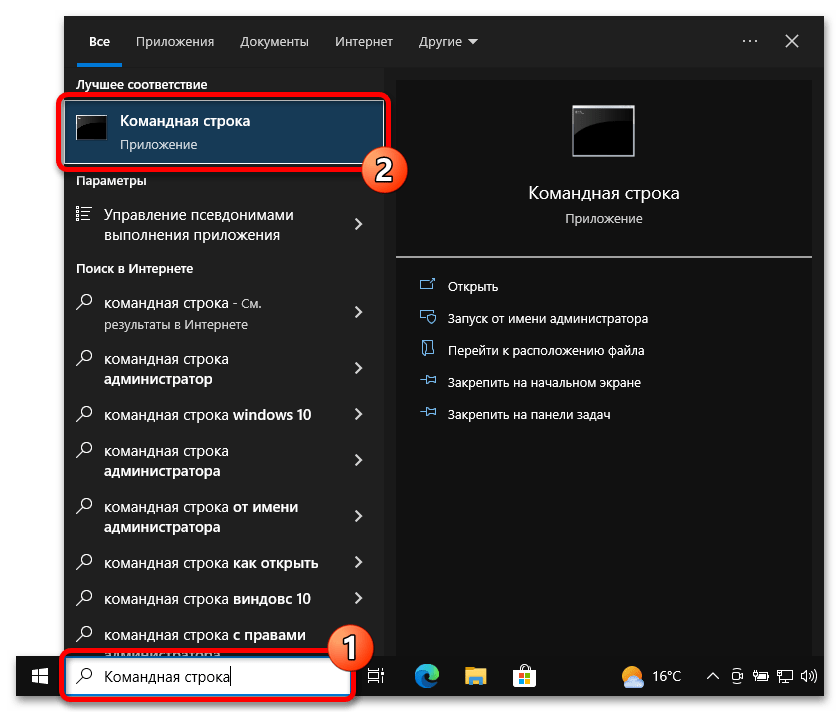
Наиболее распространенный способ просмотра серийного номера устройства — выполнение специального запроса в «Командной строке» операционной системы. Первостепенно необходимо будет запустить саму консоль. Сделать это можно многими способами, например, выполнив поиск по системе. Для этого установите курсор в поисковую строку на панели задач и введите запрос «Командная строка». Затем в результатах выдачи кликните по одноименному приложению.
Читайте также: Все способы запуска «Командной строки» в Windows 10
После того как на экране появится черное окно консоли, необходимо ввести вручную или скопировать приведенную ниже команду и нажать по клавише Enter:
wmic bios get serialnumber
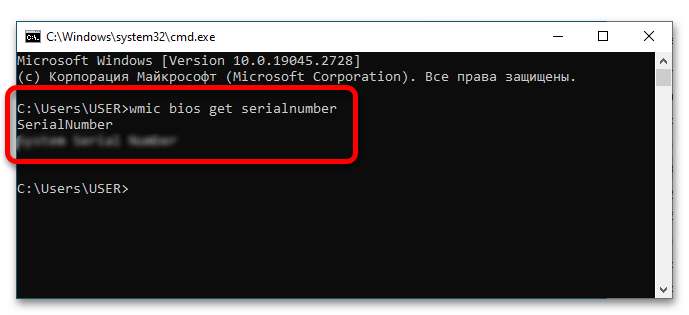
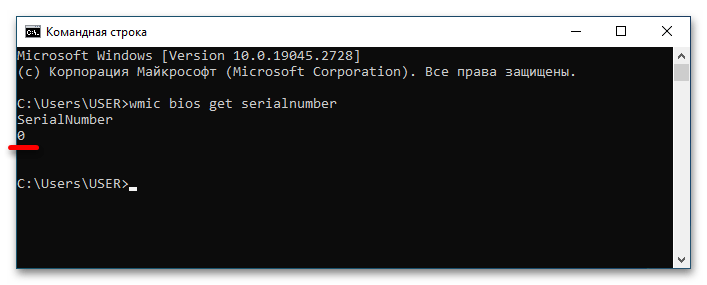
Обратите внимание! Этот способ подразумевает обращение системы к утилите ввода и вывода (BIOS), в которой серийный номер должен быть прописан поставщиком оборудования. Если в консоли после выполнения команды указан «0» (ноль), это означает, что нужных данных нет, тогда этот способ становится попросту бесполезным.
Способ 2: «Windows PowerShell»
«Windows PowerShell» тоже позволяет просмотреть серийный номер компьютера путем ввода специальной команды, более того, в отличие от «Командной строки», доступны две версии запроса.
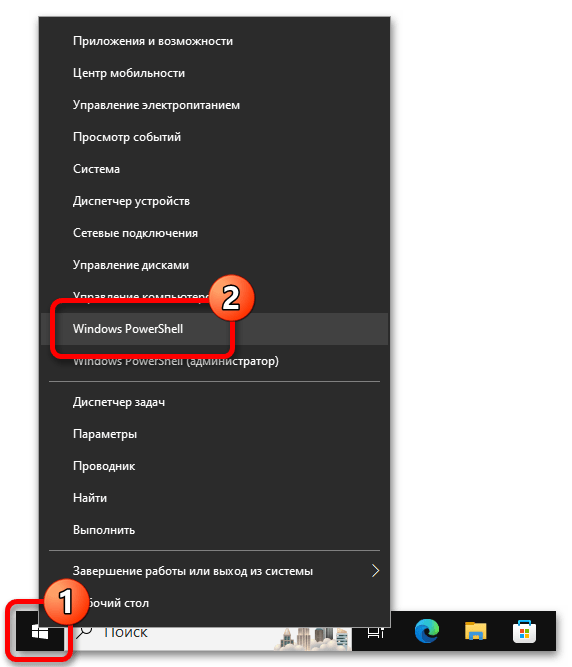
Для начала следует открыть непосредственно «PowerShell» любым доступным способом. В последних версиях Windows 10 проще всего это сделать через контекстное меню кнопки «Пуск». Для этого сначала нажмите по ней правой кнопкой мыши, а затем щелкните по строке «Windows PowerShell».
Читайте также: Все способы запуска «PowerShell» в Windows 10
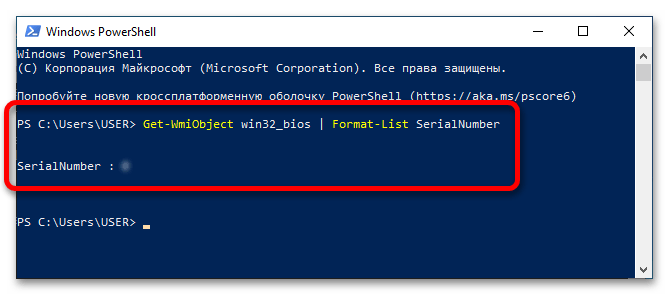
После появления окна вызываемого приложения дождитесь, пока отобразится строка запроса, в данном случае это «PS C:\Users\USER>», но у вас она может отличаться. Затем скопируйте и вставьте приведенную ниже команду и нажмите Enter:
Get-WmiObject win32_bios | Format-List SerialNumber
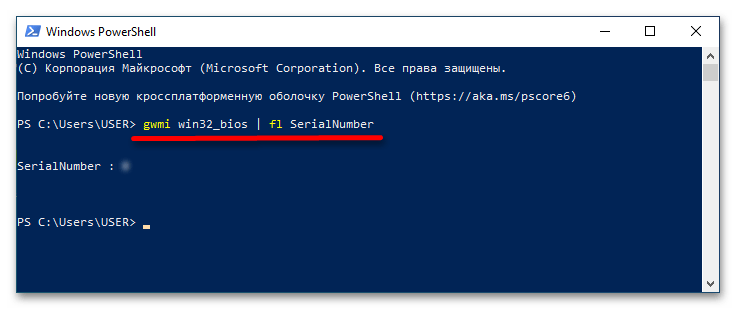
Если после выполнения команды по каким-то причинам серийный номер компьютера не выведется на экран, рекомендуется повторить попытку, только на этот раз отправить другой запрос, приведенный ниже:
gwmi win32_bios | fl SerialNumber
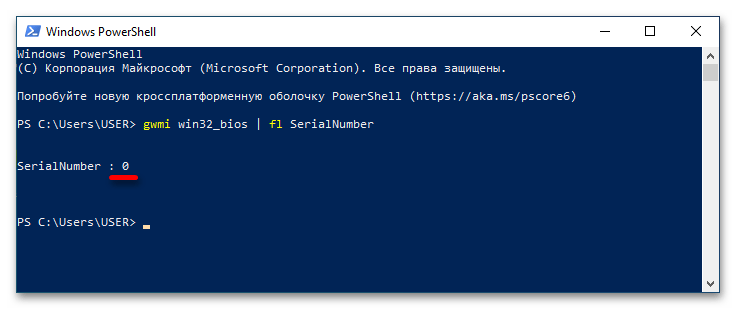
Важно! Как и в случае с «Командной строкой», после выполнения команды в Windows PowerShell следует обращение в BIOS для получения нужной информации. Если ее там не оказалось, в результатах будет отображаться «0» (ноль). В таком случае этот способ выполнения поставленной задачи неэффективен.
Способ 3: Фирменное программное обеспечение
Современные компьютеры зачастую имеют фирменное программное обеспечение для настройки отдельных компонентов устройства и просмотра дополнительной информации о нем. С помощью таких приложений можно узнать в частности и серийный номер. Например, компьютеры от HP поставляются с предустановленной утилитой «HP System Event Utility», которая подходит для выполнения поставленной задачи.
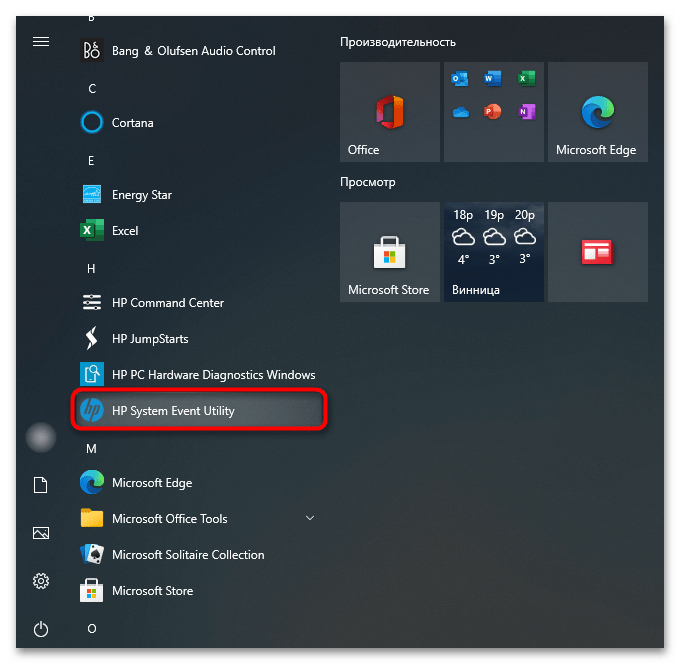
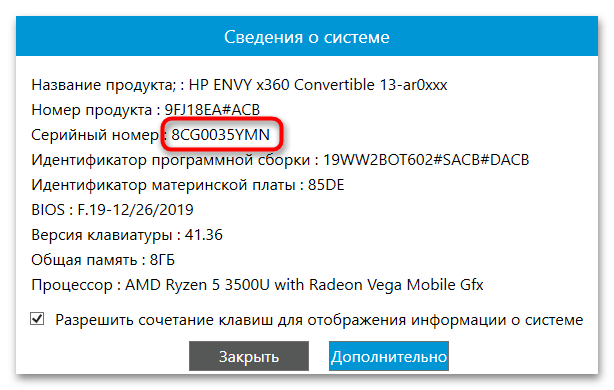
Достаточно просто найти ее в списке приложений меню «Пуск» и запустить. На экране сразу откроется информационное окно, в котором будет находиться серийный номер компьютера.
Примечание! В случае отсутствия фирменной программы на компьютере, загружать ее рекомендуется только с официальных ресурсов производителя компьютера, иначе имеется риск проникновения вредоносного ПО в операционную систему.
Читайте также: Методы удаления вируса с компьютера под управлением Windows 10
Наша группа в TelegramПолезные советы и помощь
(Image credit: Windows Central)
On Windows 10, the ability to check the computer serial number can come in handy in many scenarios. For instance, when you need to create an inventory of the devices connected to your home network or organization, or need to contact technical support to troubleshoot a problem, order a replacement part, or check the warranty information.
Usually, you can find the required information on the sticker affixed on the back or bottom of your laptop or desktop, or checking the Basic Input/Output System (BIOS) or Unified Extensible Firmware Interface (UEFI) on your motherboard. However, if the sticker isn’t available or you don’t want to go through extra steps to access firmware, you can also use PowerShell and Command Prompt to retrieve this information quickly on Windows 10.
In addition, using commands can be useful to automate the process using a script when you need to retrieve the serial information from multiple devices.
In this Windows 10 guide, we’ll walk you through the steps to quickly find your device serial number using command lines.
- How to determine PC serial number using PowerShell
- How to determine PC serial number using Command Prompt
How to determine PC serial number using PowerShell
To retrieve the serial number of your computer with a PowerShell command, use these steps:
- Open Start.
- Search for PowerShell, right-click the top result, and select the Run as administrator option.
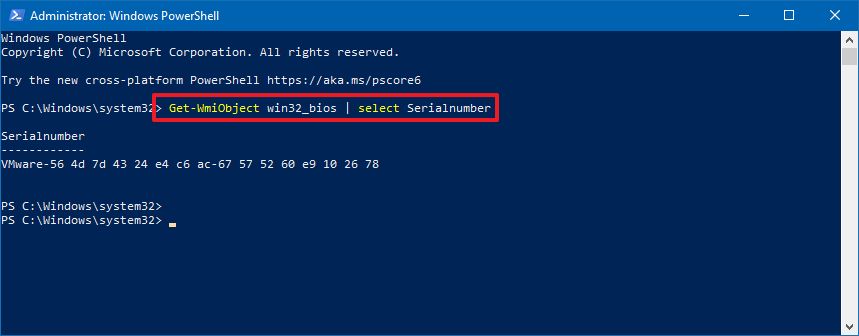
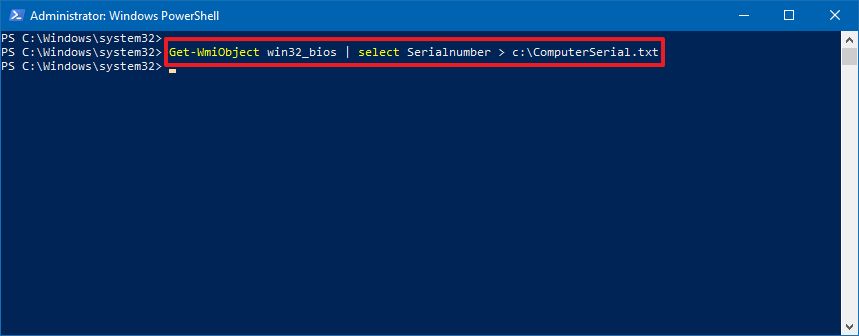
- Type the following command to find out the computer serial number and press Enter:
Get-WmiObject win32_bios | select Serialnumber
- Confirm the SerialNumber information.
- (Optional) Type the following command to determine device serial number and press Enter:
Get-CIMInstance win32_bios | format-list SerialNumber - Confirm the SerialNumber information.
- (Optional) Type the following command to export the serial information to a text file and press Enter:
Get-WmiObject win32_bios | select Serialnumber > PATH\TO\EXPORTIn the command, make sure to replace «PATH\TO\EXPORT» with the path to the text file you want to export the serial number information.For example, this command exports the output to the ComputerSerial.txt file in the C drive:Get-WmiObject win32_bios | select Serialnumber > C:\ComputerSerial.txt
Once you complete the steps, you’ll know the serial number of your desktop or laptop computer.
If you are using the command to export the output, you’ll find the file in folder location you specified. Also, since you exported it as a text format, you can open it with Notepad or any other text editor.
All the latest news, reviews, and guides for Windows and Xbox diehards.
How to determine PC serial number using Command Prompt
To check the device serial number using a Command Prompt command, use these steps:
- Open Start.
- Search for PowerShell, right-click the top result, and select the Run as administrator option.
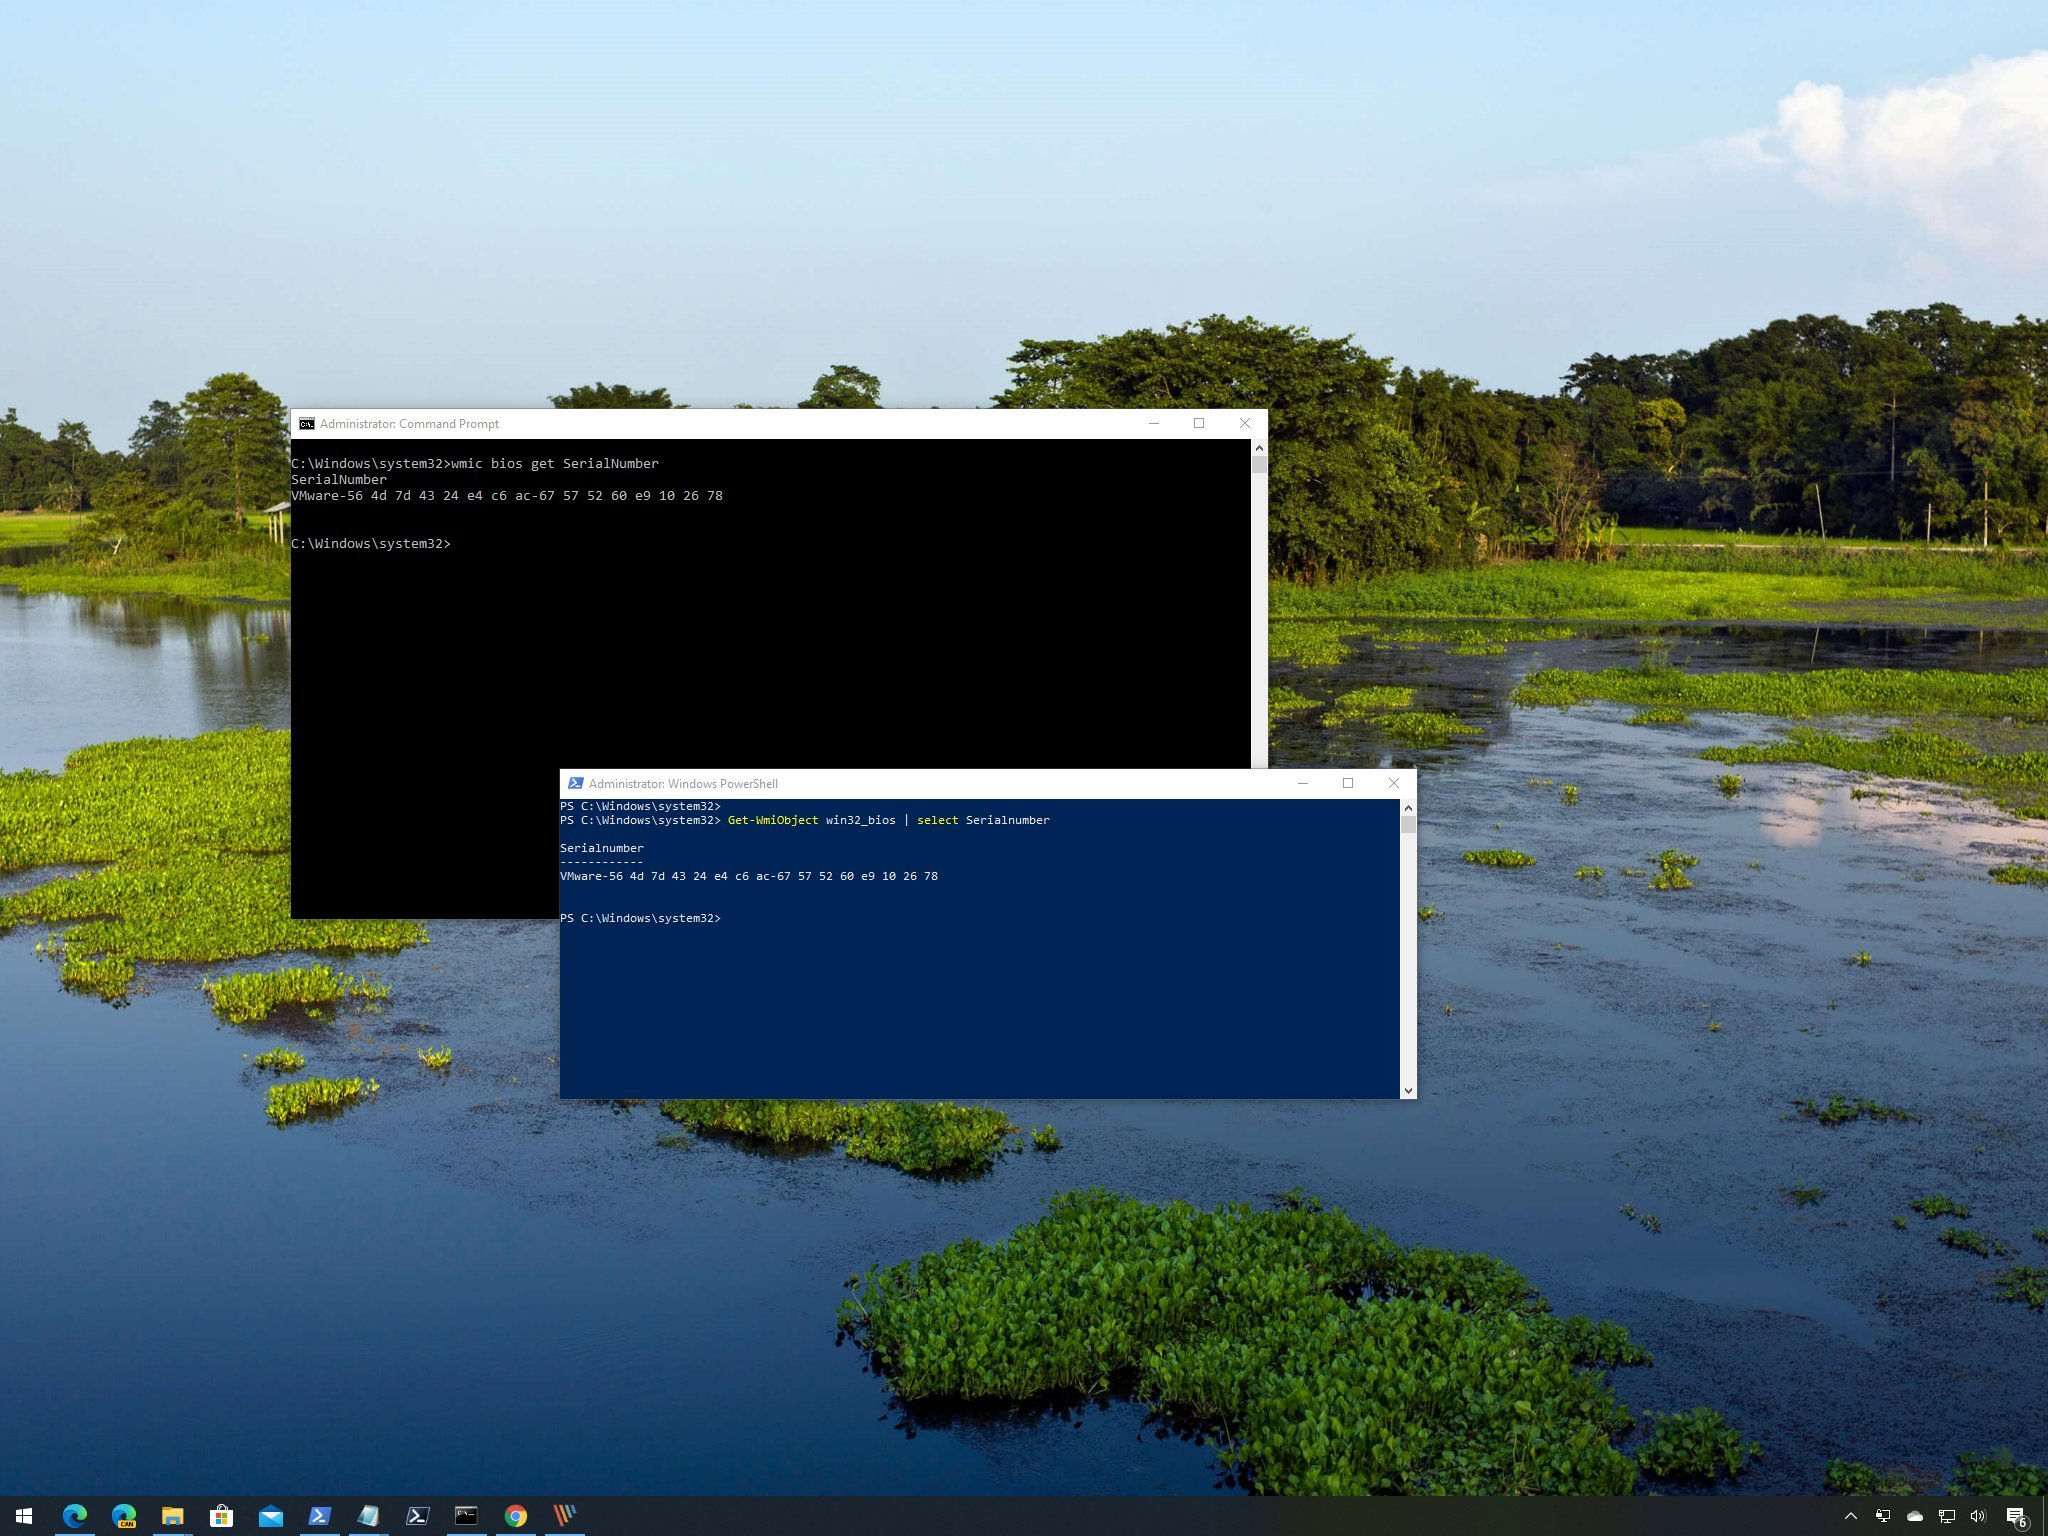
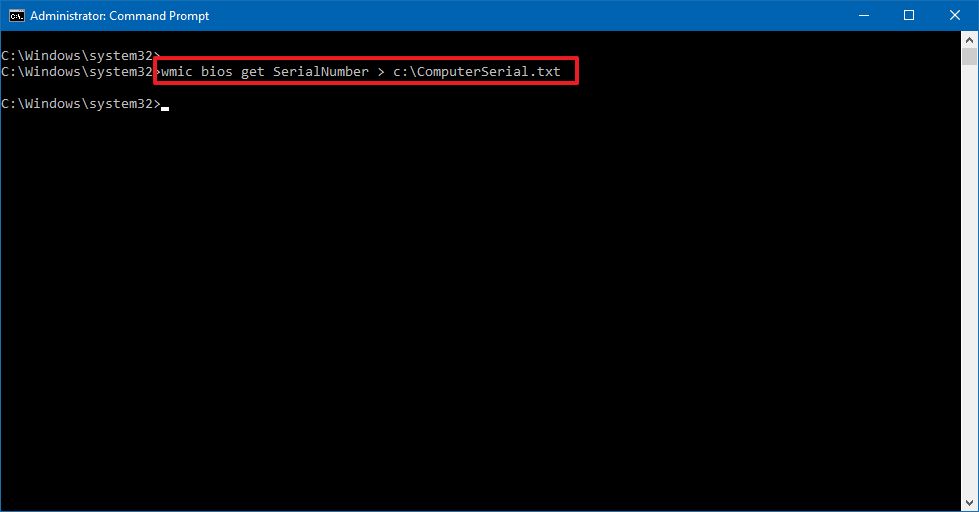
- Type the following command to find out the computer serial number and press Enter:
wmic bios get SerialNumber

- Confirm the computer serial number.
- (Optional) Type the following command to export the serial information to a text file and press Enter:
wmic bios get SerialNumber > PATH\TO\EXPORTIn the command, make sure to replace «PATH\TO\EXPORT» with the path to the text file you want to export the serial number information.For example, this command exports the output to the ComputerSerial.txt file in the C drive:wmic bios get SerialNumber > C:\ComputerSerial.txt
After you complete the steps, the command will return the serial number without needing to access the BIOS or going behind the device to look for the sticker.
Although these commands will work on any computer, custom-build devices don’t have a serial number. This means that the command output may read «To Be Filled By O.E.M.»
If you’re looking to retrieve the device model number, you can use these instructions.
Mauro Huculak has been a Windows How-To Expert contributor for WindowsCentral.com for nearly a decade and has over 15 years of experience writing comprehensive guides. He also has an IT background and has achieved different professional certifications from Microsoft, Cisco, VMware, and CompTIA. He has been recognized as a Microsoft MVP for many years.
Download Article
Find your Windows product key using the Command Prompt, PowerShell, or the Windows Registry
Download Article
- Finding your Windows Product Key
- Using Command Prompt
- Using PowerShell
- Using the Registry
- Video
- Expert Q&A
- Tips
- Warnings
|
|
|
|
|
|
|
Do you need to find your Windows product key? The Windows product key is necessary if you want to install Windows on a different computer or reinstall it on your the same computer. You can find the Windows product key using your computer’s Command Prompt, PowerShell program, or within the Windows Registry. This wikiHow article teaches you how to find your Windows product key so that you can activate Windows.[1]
Things You Should Know
- You can find your Windows product key using the Command Prompt, Powershell, or the Windows Registry.
- If you purchased Windows from a licensed retailer, you can find your Windows key in the box that it came in.
- If you bought a digital version of Windows or an upgrade online or from the Microsoft Store, you should receive your product key in a confirmation email.
-

If your PC comes with Windows pre-installed, you do not need to use your product key to activate Windows. It’s already running. If you want to save a backup copy, you can do so, using the Command Prompt, PowerShell, or your Windows Registry. You can also find your Windows product key within the packaging your PC came with or within the Certificate of Authenticity.
- Most newer computers do not have the Windows product key printed on a sticker on the bottom of the computer like they used to. However, you should be able to find the Windows product key within the package your computer came in.
-
If you bought a physical copy of Windows 10 or 11 from an authorized retailer, you can find your Windows product key within the box that Windows came in.
Advertisement
-
If you bought a digital copy of Windows online or through the Microsoft Store, either as a new copy or an upgrade, you should have received a confirmation email. Your Windows product key should be in the confirmation email.
-
If you have a volume licensing agreement or MSDN subscription, you can find your Windows product key in the web portal for your program.[2]


Advertisement
-
Click the Windows Start menu

. It’s the icon with the Windows logo in the taskbar at the bottom of the screen. You can do this in Windows 10 or 11.
-
This displays the Command Prompt in the Windows Start menu.
-
Open the Command Prompt as an administrator

. To open the Command Prompt as an administrator, right-click the Command Prompt and click Run as Administrator.
- You must be signed in to Windows with an administrative account in order to open the Command Prompt as an administrator.
-
To display your product key, type the following command and press Enter.[3]
- wmic path softwareLicensingService get OA3xOriginalProductKey
-
Your product key is the 25-letter key displayed under the text that says «OA3xOriginalProductKey.»
-
You can either take a screenshot of the results or write down the key to ensure you have access to it if needed.


Advertisement
-
It’s the icon that resembles the Windows logo in the taskbar at the bottom of the screen. Right-clicking the Windows Start menu displays a context menu. This will work on both Windows 10 and 11.
-
This will open PowerShell as an administrator.
- You must be logged into Windows with an administrative account in order run PowerShell as an administrator.
-
The command is as follows:[4]
- powershell "(Get-WmiObject -query 'select * from SoftwareLicensingService').OA3xOriginalProductKey"
-
You should see the product key appear directly below the command that you entered; this is your product key.
- The product key will be 25 characters long. If you don’t see the product key appear immediately, enter the code a second time and press Enter.[5]
- The product key will be 25 characters long. If you don’t see the product key appear immediately, enter the code a second time and press Enter.[5]
-
You can either take a screenshot of the results or write down the key to ensure you have access to it if needed.


Advertisement
-
Pressing the Windows key and R at the same time will open the Run program. This will work on both Windows 10 and 11.
-
This will open the Registry Editor, where you can find the Windows Product Key.
- Warning: Editing files within the Registry Editor can cause permanent damage to your Windows operating system. Do not edit or move any files unless you know what you are doing.
-
You will see a series of folders listed in the panel to the left. Open the following folders to navigate to the «SoftwareProtectionPlatform» folder.
- Open the HKEY_LOCAL_MACHINE folder.
- Open the SOFTWARE folder.
- Open the Microsof folder.
- Open the Windows NT folder
- Open the CurrentVersion folder.
- Open the SoftwareProtectionPlatform folder.
-
This displays all the files within this folder in the large panel on the right.
-
This displays your 25-digit product key in the field that says «Value Data.» You can also read the product key under «Data» next to the BackupProductKeyDefault file.[6]
-
You can either take a screenshot of the results or write down the key to ensure you have access to it if needed.


Advertisement
Add New Question
-
Question
How do you check your Windows Product Key?
Luigi Oppido is the Owner and Operator of Pleasure Point Computers in Santa Cruz, California. Luigi has over 25 years of experience in general computer repair, data recovery, virus removal, and upgrades. He is also the host of the Computer Man Show! broadcasted on KSQD covering central California for over two years.
Computer & Tech Specialist
Expert Answer
The Product Key is encoded in your computer, in BIOS. To access it, you will have to use a third-party software, like Produkey or Show Key Plus.
-
Question
What is a Windows product key and how do I find it?
Yaffet Meshesha is a Computer Specialist and the Founder of Techy, a full-service computer pickup, repair, and delivery service. With over eight years of experience, Yaffet specializes in computer repairs and technical support. Techy has been featured on TechCrunch and Time.
Computer Specialist
Expert Answer
A Windows product key is a 25-character key that tells Microsoft that your Windows operating system is authentic. The way you find it will depend on how you received the product key initially, but if you can’t find it, I recommend Magical Jelly Bean, which is a product key finder.
-
Question
What is a Windows Product Key? How do I get one?
Windows Product Key is a unique key for each customer. This key is used to activate your Windows operating system. You receive the Product Key when you purchase a Windows OS, or you can buy it separately from Microsoft.
See more answers
Ask a Question
200 characters left
Include your email address to get a message when this question is answered.
Submit
Advertisement
Video
-
You can also use the free program Magical Jelly Bean to help you retrieve your Windows product key.[7]
Thanks for submitting a tip for review!
Advertisement
-
Using someone else’s product key to activate your own Windows software is against Microsoft’s terms of use.
Advertisement
About This Article
Article SummaryX
1. Open PowerShell.
2. Type «(Get-WmiObject -query ‘select * from SoftwareLicensingService’).OA3xOriginalProductKey» and press Enter.
3. Note your product key.
Did this summary help you?
Thanks to all authors for creating a page that has been read 1,298,715 times.
Is this article up to date?
77
77 people found this article helpful
Use these simple methods to get the serial number in seconds
Updated on April 15, 2025
The Download
- Enter this into Command Prompt: wmic bios get serialnumber. The serial number shows up instantly.
- Another way to find the serial number is to look on the underside of the laptop.
- Other methods include checking the purchase receipt or warranty details.
This article explains how to find the serial number of a Windows 10 or Windows 11 laptop and why you might need to.
How to Get the Laptop Serial Number in Command Prompt
One of the simplest ways to find your serial number is by entering a command into the Command Prompt. This will display the serial number in a fraction of a second, and it’s easy to copy it if you need to.
-
Open Command Prompt. One easy way to do this is to search for cmd from the taskbar.
-
Type this into Command Prompt, and then press Enter:
wmic bios get serialnumber -
Your serial number should be displayed. Highlight it and then right-click if you need to copy it.
Physically Find the Serial Number
If your laptop won’t boot up or you don’t feel comfortable using the command line, turn your laptop over and look for S/N or Serial Number followed by a string of letters and numbers on the label. You might also find it on the box your laptop came in.
Other Places to Look
If you registered your laptop with the manufacturer, your serial number should be included in the registration documentation, warranty service receipt, or email confirmation. You might also find it on the purchase receipt.
What Is a Laptop Serial Number?
The serial number is a unique string of numbers and letters assigned to your laptop. No two laptops have the same serial number.
Why You Might Need Your Laptop Serial Number
As mentioned previously, a laptop’s serial number is useful for warranty claims and insurance issues. It also helps technical support identify when your laptop was manufactured and explain what specific hardware it’s running.
So, it’s useful in many situations—for example, when:
- You must prove your laptop’s authenticity to a buyer.
- The manufacturer’s technical or customer support person must identify the specific model, specifications, and/or warranty details.
- The laptop has been stolen, and an insurance claim has been submitted.
- A technician must specify compatible parts for upgrades or repairs.
FAQ
-
First, check the underside or back edges of the laptop. Next, if you have a laptop with a removable battery, look inside the battery compartment. Finally, for a detachable laptop, remove the tablet from the dock to reveal the serial number.
-
Although you can use Windows commands to find the serial number, you can also find it on the Service Tag of a Dell laptop. The Service Tag is located on the bottom panel.
-
The serial number can be found as a printed sticker or laser etching on the bottom case of a Toshiba laptop.
-
On a Lenovo laptop, the serial number is on the bottom of the system. Alternatively, you can go to the Lenovo Support website, select Detect Product, and install Lenovo Service Bridge. After installation, Lenovo Service Bridge will open a product page with your laptop’s information, including the serial number.
Thanks for letting us know!
Get the Latest Tech News Delivered Every Day
Subscribe
Quick Tips
- Use Command Prompt: Open Command Prompt and type wmic path softwarelicensingservice get OA3xOriginalProductKey to retrieve your Windows product key.
- Registry Method: Navigate to HKEY_LOCAL_MACHINE\SOFTWARE\Microsoft\Windows NT\CurrentVersion\SoftwareProtectionPlatform in the Registry Editor to find your product key.
- Third-Party Tools: Use reliable third-party software like ProduKey or ShowKeyPlus to quickly find and back up your product key.
1. Using Command Prompt
Step 1: Press the Windows key, type Command Prompt, and click on Run as administrator.
Select Yes in the prompt.
Step 2: Type the following command and press Enter.
wmic path softwareLicensingService get OA3xOriginalProductKey

There you go. You will be shown your Windows product key when you press Enter. Pretty straightforward, right? There’s one more command line way to find the product key, but with Windows PowerShell.
2. Using Windows PowerShell
Step 1: Press the Windows key, type Windows PowerShell, and select Run as Administrator.
Select Yes in the prompt.
Step 2: Enter the following command and press Enter.
powershell "(Get-WmiObject -query 'select * from SoftwareLicensingService').OA3xOriginalProductKey"

There you go. This method is as easy as pie. We recommend you copy the above command, but if you are typing it, ensure you leave spaces and add dots, as shown above.
If Windows PowerShell begins behaving strangely, check out different ways to fix PowerShell popping up on Windows.
3. Using Registry Files
Step 1: Press the Windows key, type Registry Editor, and click on Run as administrator.
Select Yes in the prompt.
Step 2: Enter the below address into the Registry’s address bar.
Computer\HKEY_LOCAL_MACHINE\SOFTWARE\Microsoft\Windows NT\CurrentVersion\SoftwareProtectionPlatform
Step 3: In the right side panel, under Name, you will find BackupProductKeyDefault; right beside it, you will see your Windows product key.

Note: You may find the product key coming from the Command Prompt or PowerShell different from the product key coming from the Registry Editor. It might happen because you have upgraded or changed your Windows version.
1. What is a product key finder?
The product key finder is a tool for displaying Microsoft Windows product keys and other important information.
2. Are Windows keys stored in BIOS?
The Windows key is stored in the BIOS and invoked when there is an event that restores your operating system. The BIOS key is used to activate Windows automatically if you use the same edition of Windows.
3. Is the product ID the same as the product key?
They are not. The product ID is used to determine the level of service you are entitled to, whereas the product key is used to pair your license with your PC and validate its authenticity.
4. Is Windows 10 illegal without activation?
The installation of Windows without a license is acceptable. Activating it through unsolicited means without purchasing the key is, however, unlawful.
Although there are third-party tools that let you find your Windows product key, they pose the risk of a privacy breach. Besides, it is also worth considering that you can do it on your own without the need for a third-party tool.
Was this helpful?
Thanks for your feedback!
The article above may contain affiliate links which help support Guiding Tech. The content remains unbiased and authentic and will never affect our editorial integrity.