
Applies ToPrivacy Windows 11 Windows 10 Панель мониторинга учетной записи Майкрософт
Журнал действий помогает отслеживать ваши действия на устройстве, например приложения и службы, которые вы используете, а также просматриваемые веб-сайты. Журнал действий хранится локально на вашем устройстве.
Вы можете управлять параметрами журнала действий, чтобы выбрать, что хранить.
Функции, использующие журнал действий
Журнал действий используется в следующих функциях Windows. Вернитесь на эту страницу после выпусков и обновлений Windows, чтобы узнать о новых службах и функциях, использующих журнал действий.
-
Временная шкала. Просмотрите временная шкала действий и укажите, следует ли возобновлять эти действия с устройства. Например, предположим, что вы редактируете документ Word на устройстве, но не можете завершить работу до того, как придется прекратить работу в течение дня. Если вы включите параметр Сохранить журнал действий на этом устройстве на странице параметров журнала действий, вы увидите, что Word действия в временная шкала на следующий день( и в течение следующих нескольких дней) и после этого вы сможете возобновить работу с ним.
-
Microsoft Edge. При использовании устаревшая версия Microsoft Edge журнал браузера будет включен в журнал действий. Журнал действий не будет сохранен при просмотре в окнах InPrivate.
Параметры учетной записи Майкрософт не позволяют отправлять журнал действий в корпорацию Майкрософт, но журнал действий будет храниться на вашем устройстве, чтобы отслеживать действия, которые вы делаете.
Журнал действий для нескольких учетных записей
Для нескольких учетных записей журнал действий собирается и сохраняется локально для каждой локальной учетной записи, учетной записи Майкрософт или рабочей или учебной учетной записи, связанной с устройством, в разделе Параметры > учетные записи > Email & учетных записей. Эти учетные записи также можно просмотреть в Windows 10 в разделе Параметры > журнал действий > конфиденциальности, а в Windows 11 разделе Параметры > конфиденциальность & журнал действий> безопасности, где можно отфильтровать действия из определенных учетных записей, отображаемых в временная шкала. При скрытии учетной записи данные на устройстве не удаляются.
Управление параметрами журнала действий
Журнал действий можно настроить. В любой момент можно остановить сохранение журнала действий.
Остановите локальное сохранение журнала действий на устройстве
-
Нажмите кнопку Пуск , а затем выберите Параметры > Конфиденциальность & безопасность > журнал действий.
-
Переключите параметр Сохранить журнал действий на этом устройстве в положение Выкл.
Открытие параметров журнала действий
Примечание: Возможность отправки журнала действий в Корпорацию Майкрософт устарела с Windows 11 23H2 и 22H2, 23 января 2024 г. KB5034204 обновление. Предыдущие версии Windows 11 до этого обновления по-прежнему будут иметь параметр, доступный на странице журнала действий. Если этот параметр включен, данные журнала действий по-прежнему будут отправляться в корпорацию Майкрософт. Этот параметр можно отключить или обновить до последней версии Windows, чтобы получить последние обновления.
Вы можете очистить и удалить журнал действий, хранящийся на устройстве.
Очистка журнала действий
-
Нажмите кнопку Пуск , а затем выберите Параметры > Конфиденциальность & безопасность > журнал действий.
-
Рядом с пунктом Очистить журнал действий для этой учетной записи выберите Очистить журнал.
Примечание: Если у вас есть предыдущий журнал действий, хранящийся в облаке до Windows 11 23H2 и 22H2, 23 января 2024 г. KB5034204 обновления, вы можете удалить ранее сохраненные данные в облаке с помощью кнопки Очистить журнал действий. В противном случае журнал действий будет автоматически удален в течение 30 дней с момента последней синхронизации данных с облаком.
Нужна дополнительная помощь?
Нужны дополнительные параметры?
Изучите преимущества подписки, просмотрите учебные курсы, узнайте, как защитить свое устройство и т. д.
The Task Manager has been around since the release of Windows NT and Windows 2000. It is a useful tool for many. Apart from killing off “Not Responding” tasks, it can also be used to view resource consumption, hardware performance, manager startup apps, user and process details, services, and view app history and statistics.
Today, we are going to talk about the “App History” tab inside the Task Manager and how it can be used to view the history of all processes that are running and had run in the past, and gain some insight into its resource utilization, such as CPU time, network bandwidth consumption, etc.
Table of Contents
What is App History in Task Manager

The “App History” tab inside the Task manager shows you the resource utilization statistics of the different applications that had run on your computer in the past. It shows the accumulative CPU time and other network bandwidth consumption over time.
By default, the App History tab shows details for only the Microsoft Store applications, and other applications and programs are not included in the list. However, you can change this and view the history for all processes that had run on your computer. Note that the statistics for each app/process are only displayed since the last time the counter was reset.
The methods to view the history of all processes and reset the counter are discussed below in this post.
How to See History of All Processes in Task Manager
Using the steps below, you should be able to view the history of all processes that are currently running and have run in the past, on your Windows computer.
Note: Microsoft has recently updated the UI of the Task Manager with Windows 11 22H2. If you are on this OS version, then use the given method below to view the history of all processes. If you are using an older version of Windows 11 or are on Windows 10, then skip to the next section down below.
View History of All Processes on Windows 11 22H2
-
Open the Task Manager by pressing the CTRL + Shift + Esc shortcut keys and then open its settings by clicking on the gear icon in the bottom-left corner.

Open Task Manager settings -
Here, under Other options, check the box next to “Show history for all processes.”
Enable show history for all processes -
Now switch to the App History tab and you should now see all of the processes and their respective details.
App History tab in new Task Manager You should now be able to see the usage history of all the apps and processes.
-
(Optional) Here, right-click on any column’s header and select or unselect which information you wish to view about the processes from the context menu.
Select details to view or hide You can also arrange the processes by a specific column in a descending or ascending manner by clicking on the respective header.


As you can see in the image above, the App History tab now includes the history of all the processes and apps, as opposed to the default Microsoft Store apps only.
You can also uncheck the same option in the Task Manager settings to disable show details for all processes in the Task Manager.
View History of All Processes on Windows 11/10
Use the guide below to view the usage history of all the processes in the Task Manager if you are using Windows 11 21H2, or Windows 10.
-
Open the Task Manager by pressing the CTRL + Shift + Esc shortcut keys and then switch to the App History tab.

Switch to the App History tab -
Now click Options from the top menu and then click “Show history for all processes.”
Enable show history for all processes


You should now be able to see all of the processes in the App History tab along with their past statistical data.

If you wish to view only the history of the Microsoft Store apps again, simply click on Show history for all processes inside the Options menu to disable it.
Open App & Process Details
Regardless of which Windows version you are using, you can open an app directly from the App History tab and view the details of the individual processes.
Note that you can only open the Microsoft apps and view the details of the processes from the App History tab.
To open an app, right-click on the app and then click Switch To.

If you wish to view the details of a process, right-click it and then click Properties from the context menu.

This opens the Properties window where you can find all sorts of information about the process, including the file responsible for the process, its copyright holder, etc.

If you still need more information, then you can also perform a quick online search by clicking Search online from the context menu.

Windows then uses the default search engine and opens the results for the process name in the default web browser.
Reset Usage History
As we mentioned earlier, the App History tab only contains the information till the time it was last reset. You can see the last reset date near the top of the Task manager window.

You can also reset the entire data by clicking Delete usage history.

This will reset all the statistical data and begin recording the app and process usage history from that time onwards.
Closing Words
The Task Manager can do much more than what we have discussed today. It has integrated performance monitoring tools for the different hardware components, and you can also manage the Windows services too.
As far as the App History tab is concerned, it is all the tab is capable of at the moment. We found that the information per app/process is currently very limited. For example, we cannot see the disk or RAM utilization for each item, when was the last time it was run, etc.
We certainly hope that Microsoft will eventually add these features for us to be able to get more insight into our system usage habits.
The Windows Timeline feature tracks everything you do on your PC i.e., apps you open, files you had accessed, etc. All the data is stored on your Windows 11 and Windows 10 PC, with Microsoft under your account. This makes it easy to access them back and start working from your left. This is known as Activity History.
Keeping Windows Privacy in mind, Microsoft offers you to manage your activity history, and restrict Windows to keep track. Just before we start, there are a few things you should know about Timeline and Activity History:
- It collects activities from the PC you are using.
- It can sync your activities from this PC to the cloud.
- You can access this history when you switch PC
All these are linked with the Microsoft Account you sign in to the PCs.
To manage everything, go to Settings > Privacy > Activity History.
How to remove your account from Activity History
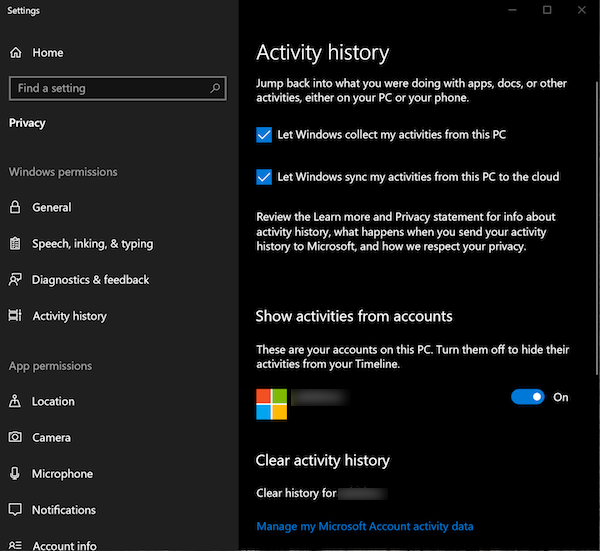
Under Activity History, look for the section listing all the accounts on that PC. There is a toggle button; choose to turn it off. Windows 10 will not track any activity and create a timeline for that account.
Prevent Windows 11 from sharing Activity History data
Press Win+I in combination to open Windows Settings. From the side panel on the left, select Privacy & security heading.
Move to the right side and locate the Activity History tile. When found, click it to expand its menu of options.
In the new page that opens, scroll down to the Clear Activity History section and hit the clear button below the desired account.
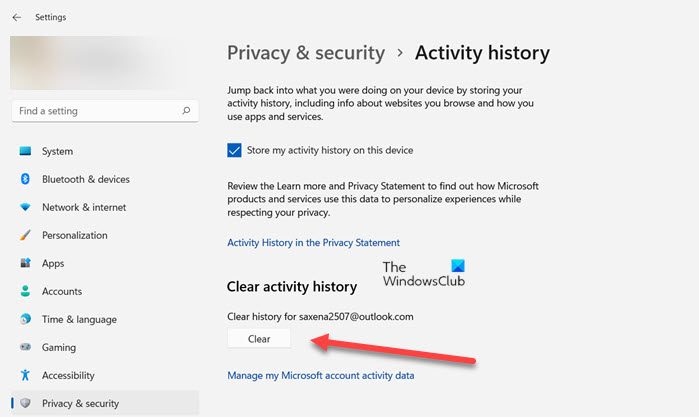
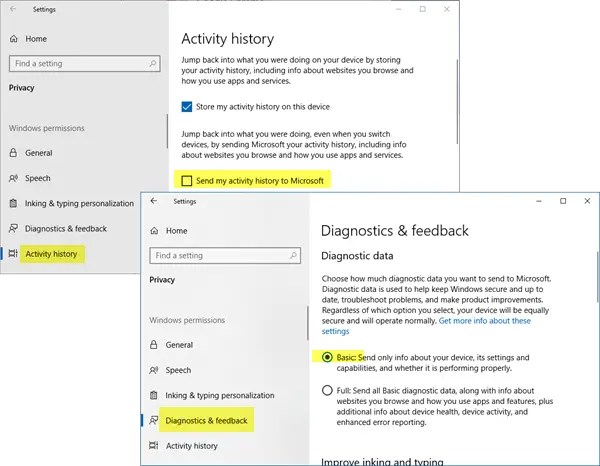
Next, uncheck the Store my activity history on this devices box under the Activity History privacy page.
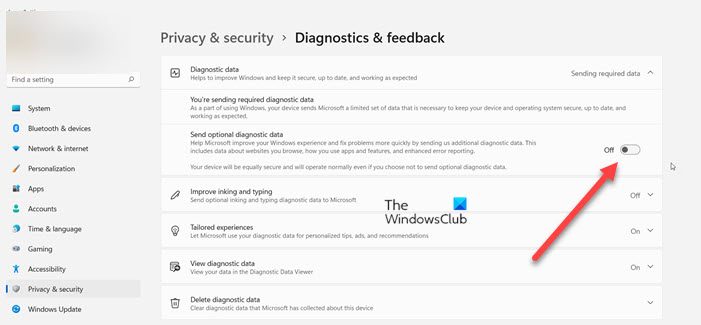
Similarly, go back to Privacy & security page, choose Diagnostics & feedback tile and under the page settings, slide the toggle next to the Send optional diagnostic data heading to the off position.
How to clear Activity History from Windows 11 PC
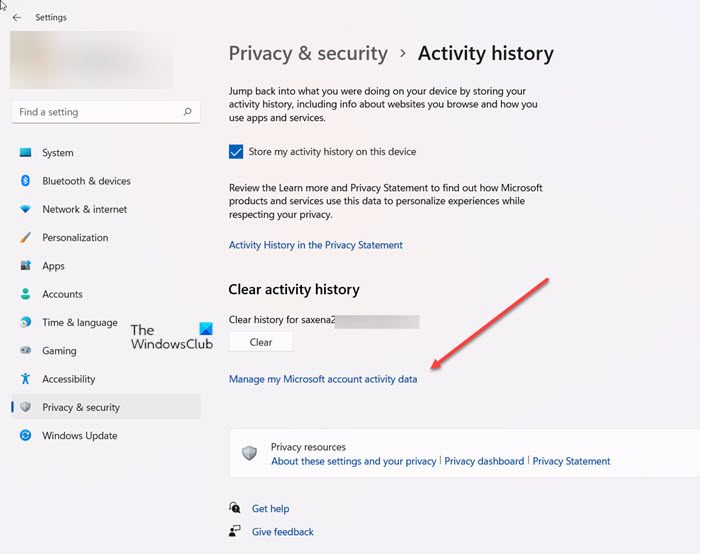
Under section Clear Activity History, you can choose to clear the history for your account. To manage & clear all your history, click on the link that says Manage my Microsoft Account activity data.
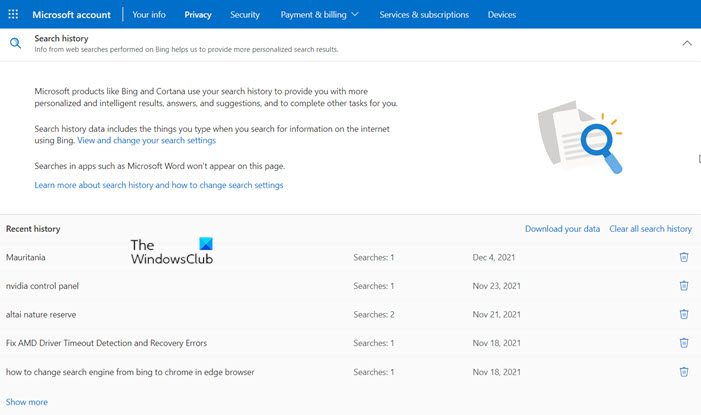
This will take you to the Microsoft Privacy website, which may ask you to sign in. Once you are into your account, switch to the activity history page. Clear your history.
Read: How to Delete Usage History of Apps in Windows
Prevent Windows 10 from sharing Activity History data
To prevent Windows 10 from sharing Activity History data, you need to do the following:
- Open Settings > Privacy > Activity history > Uncheck ‘Send my activity history’.
- Open Settings > Privacy > Diagnostics & feedback > Set ‘Diagnostic data’ to Basic.
Read: How to disable Windows Active History permanently using REGEDIT or GPEDIT.
How to clear Activity History from Windows 10 PC
Under section Clear Activity History, you can choose to clear history for your account. To manage & clear all your history, click on the link which says “Manage my Microsoft Account activity data”. This will take you to the Microsoft Privacy website which may ask you to sign-in. Once you are into your account, switch to activity history page.
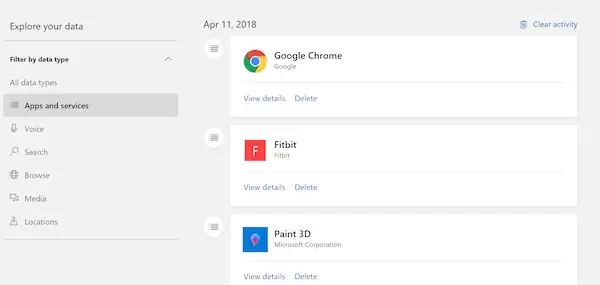
Here you can see the collected data based on Apps, and Services, Voice, Search, Browse, Media, and locations. That said, you can always go to Microsoft’s Privacy Settings for your account, and directly do it from there even when you are not on your PC. The Privacy Section of your Microsoft Account can be accessed by following this link.
Microsoft has clearly said here that the information that appears on that page represents the most relevant personal data that they save with your MS account to help improve your experience with products and services. So, if you use Timeline and have multiple PCs, it actually delivers a great experience.
Since this page is related to you, the data is visible only to you, and you can clear it anytime you want by selecting a data type from the filters available on the page. The Privacy Dashboard also offers you to download your data, access Cortana’s notebook, change ad settings, and so on.
Where is Activity History?
Activity History in Windows 11 can be found under the Privacy & Security Settings section. It tracks your device’s activities, such as the apps and services you use, the files you open, and the websites you browse, and stores the information locally on your device.
How do I open Optional diagnostic data?
To open optional diagnostic data in Windows 11, go to Settings > Privacy & security > Diagnostics and feedback. Here, you can delete diagnostic data for your device. Note that selecting this option does not delete the diagnostic data that is associated with your Microsoft account, nor does it stop your diagnostic data from being sent to Microsoft.
Как можно узнать историю действий на компьютере
Немногие знают, что разработчики ОС Windows внедрили в программный код своего продукта специальную функцию, позволяющую отслеживать любые изменения состояния системы. Таким образом, даже без установки стороннего ПО, любой пользователь в подробностях может узнать обо всех процессах, запущенных на его компьютере.
Подобное бывает полезно в самых разнообразных случаях, начиная от необходимости восстановить последовательность рабочей процедуры и заканчивая подозрениями о незаконном использовании машины третьим лицом.

Вся регистрируемая информация, классифицируется операционной системой и собирается в удобном и упорядоченном виде в соответствующих журналах Windows.
Для того чтобы найти эти журналы необходимо из меню «Пуск» нажать на иконку «Панель управления» и далее «Администрирование». В следующем окне среди ярлыков служб нужно выбрать «Просмотр событий», который в конечном итоге и содержит всю необходимую информацию.
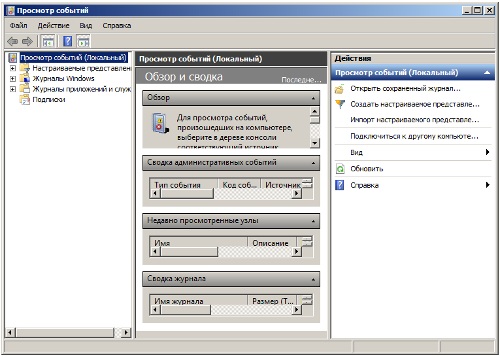
Открывшееся окно разделено на три функциональные части: слева дерево категорий, по центру перечень событий, а справа действия.
Среди последних можно выделить возможность сохранения и поиска, при этом для конкретизации запроса также предусмотрен фильтр, позволяющий отсечь все несущественные и ненужные данные.
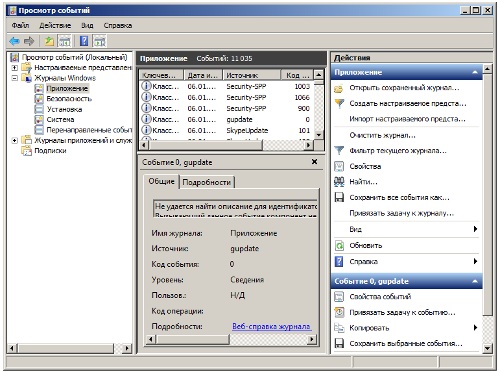
Ещё одной полезной функцией является очистка журнала, помогающая сократить общий объём баз, тем самым облегчив поиск в будущем, и, помимо всего прочего, скрыть следы своего вмешательства в работу компьютера.
Download Article
Learn to find your history and recent searches on your computer
Download Article
- Checking Your Browser History
- Seeing Recent Files
- Checking Windows Activity History
- Video
- Q&A
- Tips
|
|
|
|
|
If you want to see which websites you’ve visited on your Windows 10 PC, checking your web browsing history is as easy as pressing the Control and H keys together on your keyboard.[1]
But your browsing history isn’t the only activity that’s logged in Windows—you can also see a list of recently-opened files by typing «Recent» into the Run dialog box, or go to Settings > Privacy > Activity History > Manage my Microsoft account activity data to see all activity connected to your account. We’ll show you how to see which websites, files, and account options have been accessed on your Windows PC.
Tips to Check Your Computer History
- Open your web browser and click the menu icon.
- Select the “History” button to check your browser history.
- If you’re using Windows 10, click “Start,” “Settings,” “Privacy,” and then “History.”
-

Open a web browser. This might not be the default web browser on your computer, so look for Microsoft Edge, Google Chrome, Mozilla, or other web browsers.
-
The appearance of this menu icon is different between browsers. For example, Chrome has ⋮, Firefox has ☰, and Microsoft Edge has an icon that looks like a star with three lines coming out of it.[2]
Advertisement
-
In Firefox, you’ll need to hover your mouse over Library to see this option.[3]
-
If you’re using Firefox, click Show All History. The pages visited and the searches initiated should be separated by date.


Advertisement
-

Press the Windows key and type «Run» to search for the program.
- Click the app from the search results to open it.
-
A File Explorer window will open to show you a list of recent files that have been edited.[4]
-
You’ll see categories like the file’s name, date modified, type, and size.


Advertisement
-
Pressed together, the Windows and uppercase «i» keys open the Settings menu.
-
It’s next to an icon of a padlock.
-
You’ll find this in the panel on the left side of the window.[5]
-
You may need to scroll down to find this at the very bottom of the window.
- Your Microsoft account activity history will open in a new browser window or tab. Enter your password to continue.
-
There are menus for location, speech, browsing, and search histories.
- You can click Clear all history in each menu, but to quickly clear everything, go to Settings > Privacy > Activity History > Clear Activity History > Clear.[6]
- You can click Clear all history in each menu, but to quickly clear everything, go to Settings > Privacy > Activity History > Clear Activity History > Clear.[6]


Advertisement
Add New Question
-
Question
How do I reinstate the History button on my computer?
Real Estate Jot
Community Answer
In most browsers like Chrome, Firefox or Edge, the history button can be easily restored through settings. For Google Chrome, click the three-dot menu in the top-right corner, go to «History,» and ensure the History section is enabled. In Firefox, you can add the History button by customizing the toolbar via the settings menu. For Windows, check your system settings to ensure history-related features like File Explorer History are active. Restoring this button will help you quickly access your browsing or file history, enhancing productivity.
-
Question
Why did my school disable incognito mode?
Real Estate Jot
Community Answer
Many schools restrict the use of private-browsing features. This is done to maintain online safety, monitor student activity, and ensure appropriate internet usage. By disabling Incognito mode, schools aim to promote responsible browsing and protect students from inappropriate content.
Ask a Question
200 characters left
Include your email address to get a message when this question is answered.
Submit
Advertisement
Video
-
If the account on your computer that you want to check is in your family group, open Settings > Accounts > Family & other users > Manage family settings online. The Microsoft family page will open in a web browser and you can navigate around the page to see the different aspects of your child’s activity on your computer like screen time and apps used. You won’t see this information if they aren’t part of your family group.
Thanks for submitting a tip for review!
Advertisement
References
About This Article
Article SummaryX
1. Open the Run app.
2. Type «Recent» and press Enter.
3. Review the list.
Did this summary help you?
Thanks to all authors for creating a page that has been read 159,437 times.