
Все способы:
- Способ 1: Lock Screen Customizer
- Способ 2: Win 10 BG Changer
- Способ 3: Параметры персонализации в Windows 10
- Вопросы и ответы: 8
Приветственное окно в Windows 10 появляется каждый раз при загрузке операционной системы, даже если настроен автоматический вход. Сейчас фоном для этого окна по умолчанию устанавливаются фото от Майкрософт, где присутствуют описания видов или местности, где были сделаны такие кадры. Однако не всем пользователям это нравится, из-за чего возникает надобность изменения фона. Сегодня мы детально разберем три разных метода осуществления поставленной задачи.
Способ 1: Lock Screen Customizer
Сначала хотим рассказать о сторонних приложениях, позволяющих настроить экран блокировки, поскольку они предлагают пользователю значительно больше функций, нежели стандартное меню персонализации. Первой на очереди выступает программа под названием Lock Screen Customizer, которая была создана известным разработчиком, основавшим сайт Winaero. Распространяется этот инструмент бесплатно, а взаимодействие с ним происходит следующим образом:
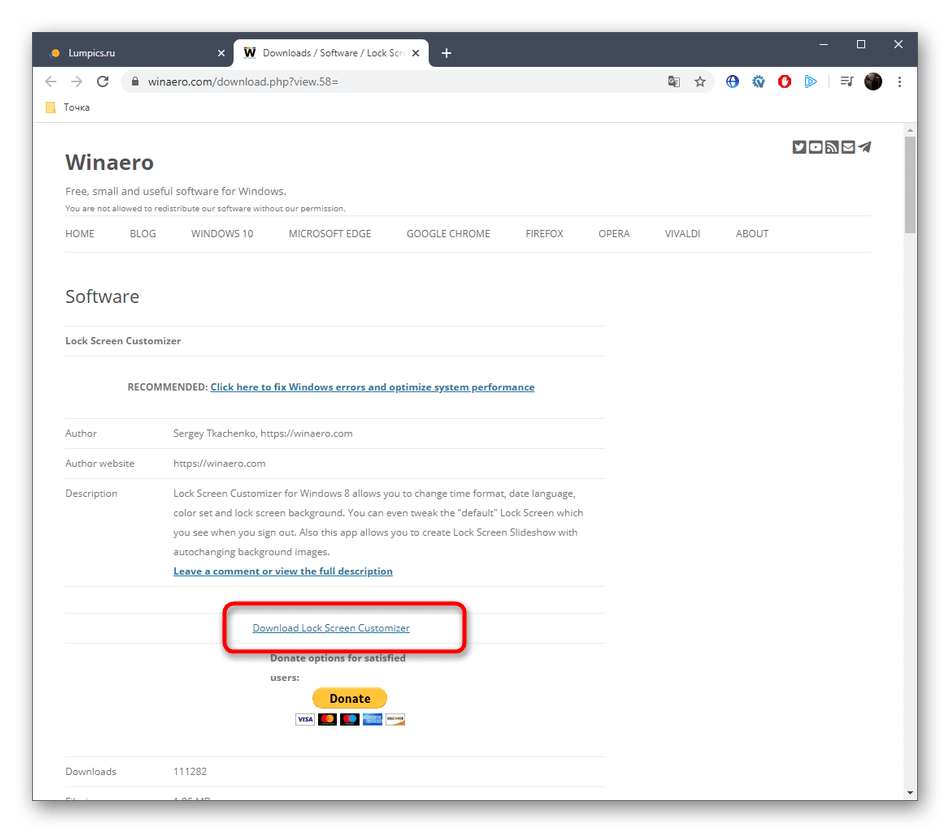
Перейти на официальный сайт Lock Screen Customizer
- Перейдите на официальную страницу программного обеспечения, кликнув по ссылке выше, и найдите там строку «Download Lock Screen Customizer». Нажмите по ней, чтобы начать загрузку.
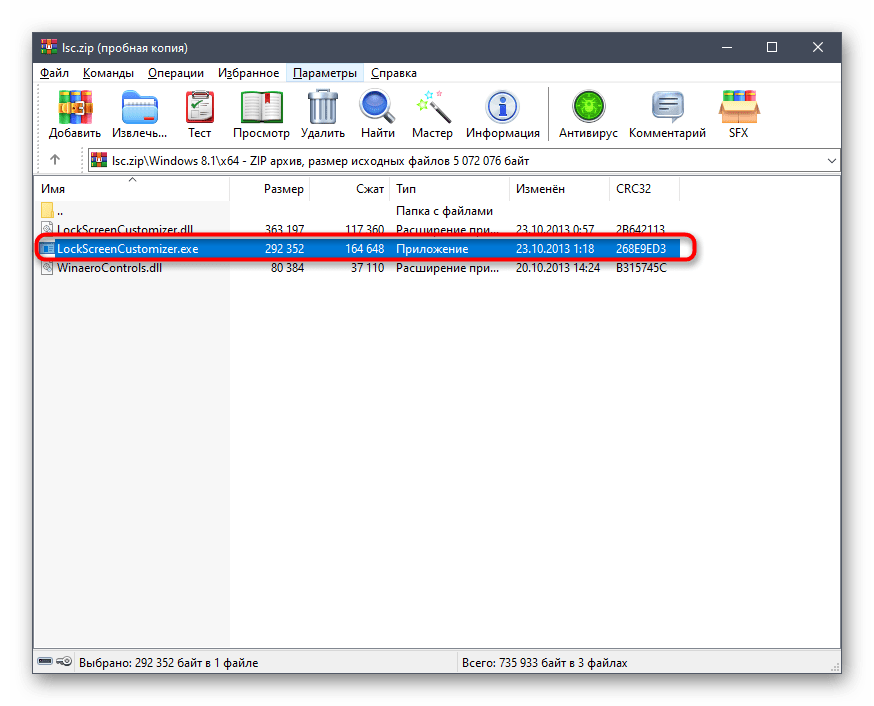
- По завершении скачивания откройте полученную директорию через любой архиватор и запустите Lock Screen Customizer через находящийся там исполняемый файл.
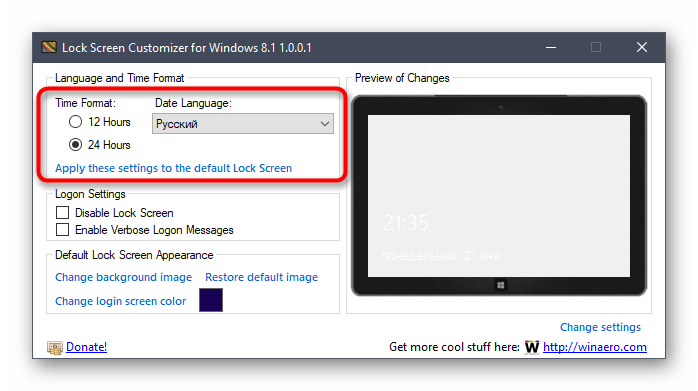
- Инсталляцию софта производить не придется, поскольку он функционирует в портативном режиме. Сразу же откроется его главное окно, где вы можете настроить стандартные параметры экрана блокировки: язык отображения даты и формат времени.
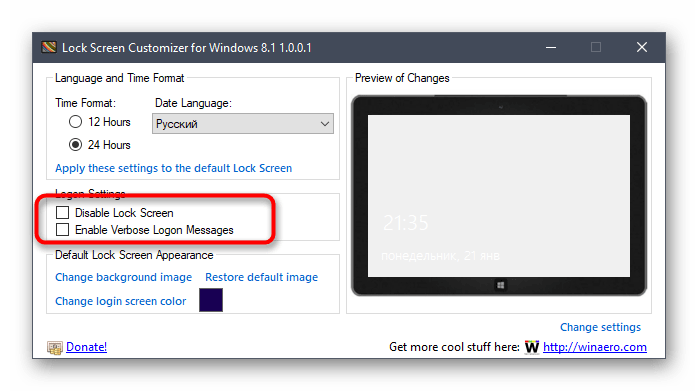
- После этого просмотрите на дополнительные опции входа в систему. Их можно включить, отметив галочкой специально отведенные пункты.
- Теперь приступим к выбору фонового изображения. Если вы хотите поместить в качестве него свою картинку, нажмите по строке «Change background image».
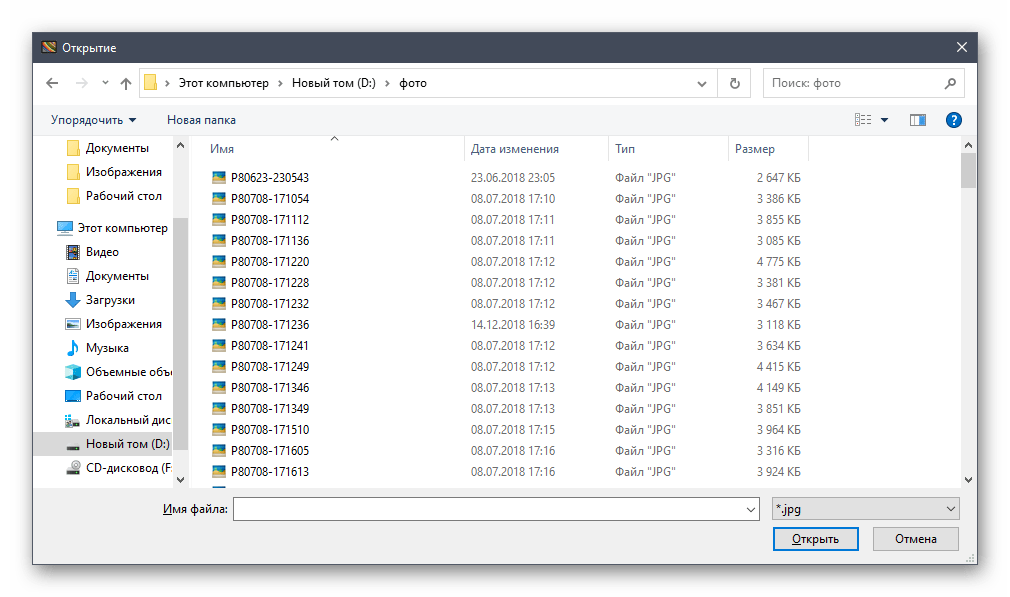
- В открывшемся окне Проводника выберите изображение и нажмите на «Открыть». При надобности позволяется отказаться от кастомного изображения и просто задать статичный цвет или вернуть настройки по умолчанию.
- По окончании конфигурации нажмите на «Change settings», чтобы применить новую настройку, но перед этим обязательно обратите внимание на окно предпросмотра, дабы убедиться в корректном отображении установленного изображения.


При следующем же входе в систему вы заметите, что новые настройки были применены. Если они вас не устраивают и появилось желание вернуть все к стандартному виду, повторно запустите Lock Screen Customizer и нажмите там по строке «Restore default image».
Способ 2: Win 10 BG Changer
Как альтернативу рассмотренной выше программе хотим порекомендовать Win 10 BG Changer. Это решение функционирует примерно по такому же принципу, а вся разница заключается лишь в оформлении интерфейса. Однако по определенным причинам Win 10 BG Changer может оказаться для некоторых пользователей лучше Lock Screen Customizer.
Перейти на официальный сайт Win 10 BG Changer
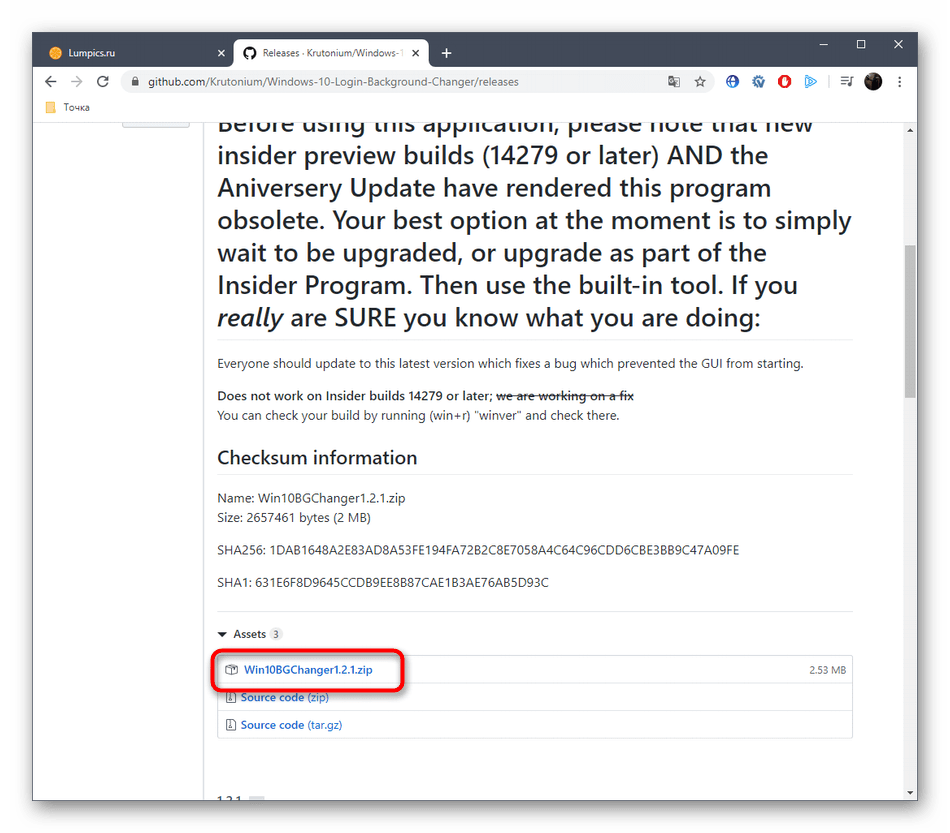
- У Win 10 BG Changer нет официального сайта, а сама программа обладает открытым исходным кодом, поэтому у нее имеется отдельная страница на GitHub, откуда и производится скачивание архива.
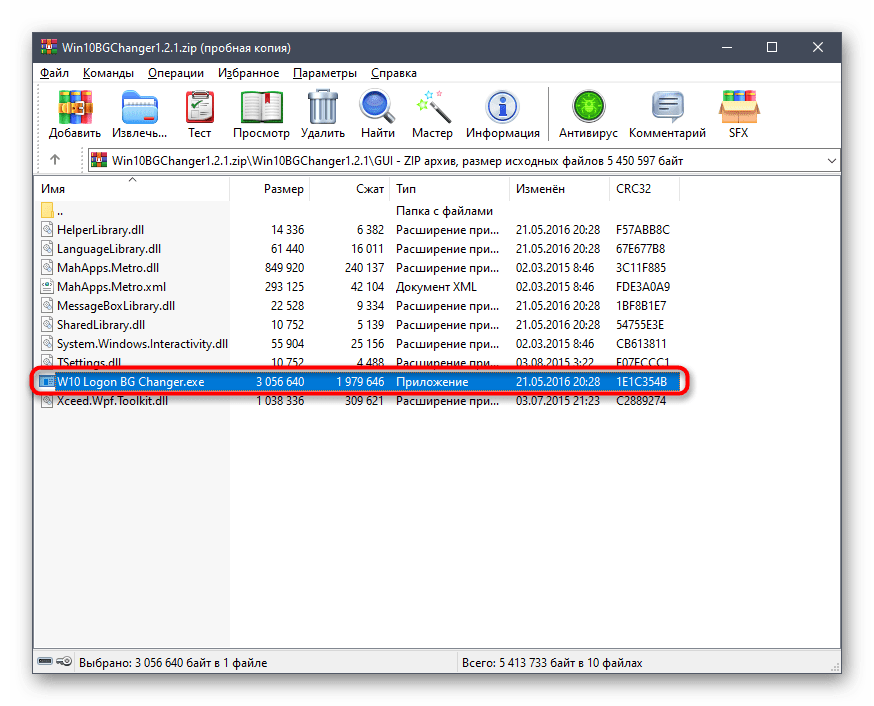
- После скачивания запустите исполняемый файл прямо из архива. Устанавливать Win 10 BG Changer не придется, поскольку он представляет собой portable-версию.
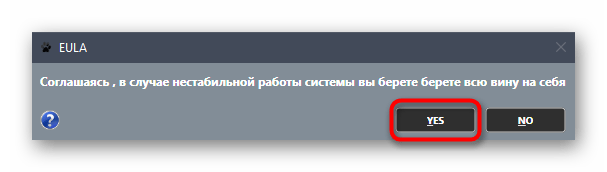
- При запуске появится уведомление о том, что вся ответственность за проблемы с нестабильностью системы, связанные с изменением параметров, лежит только на вас. Подтвердите его, выбрав вариант «Yes», чтобы перейти к работе с Win 10 BG Changer.
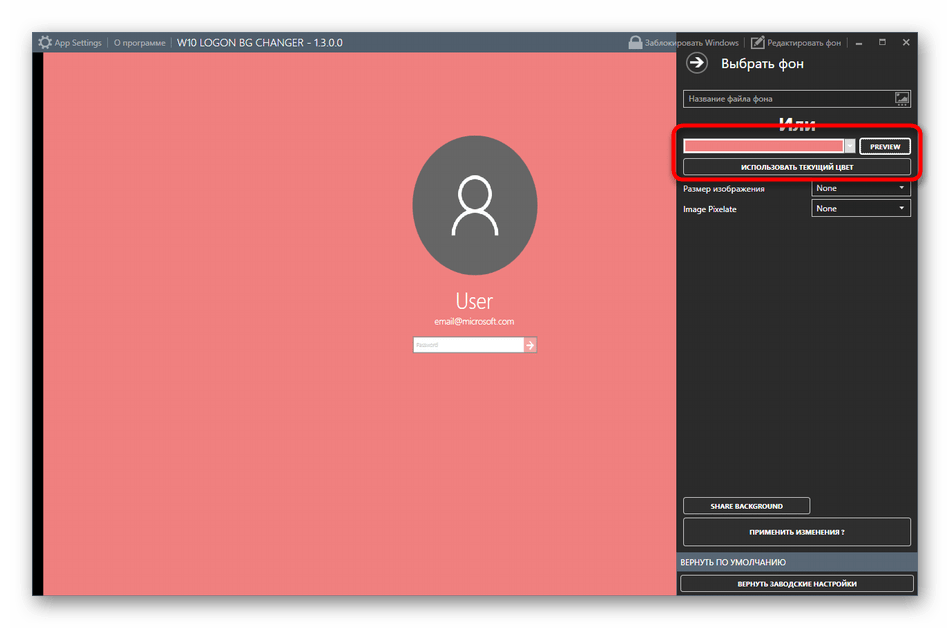
- Здесь вы можете сразу же выбрать собственное изображение для фона, если это требуется.
- Дополнительно обратите внимание на статичный цвет. Все изменения отображаются сразу же в окне предпросмотра, благодаря чему становится удобнее оценить качество передачи цветов.
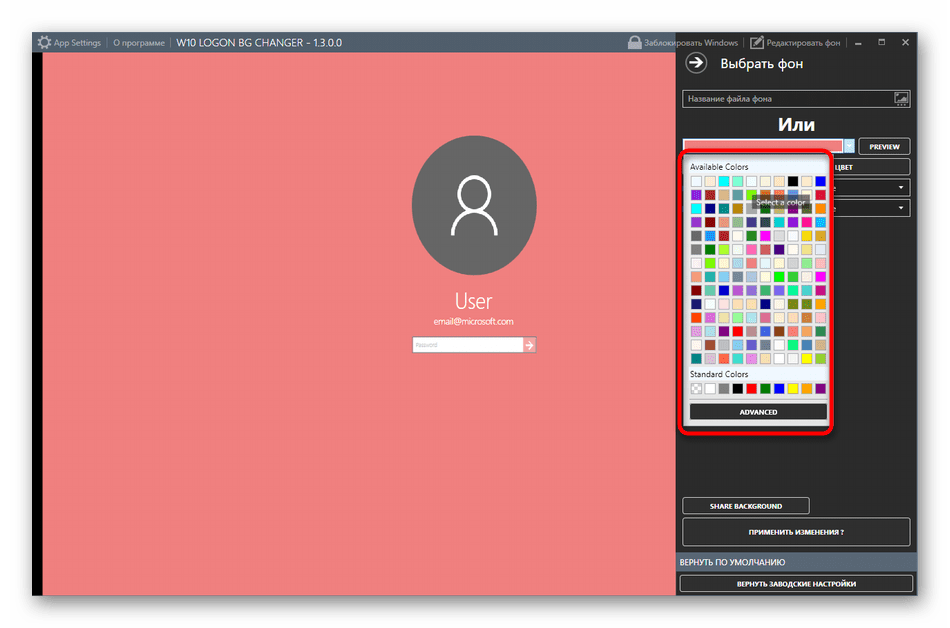
- Палитра оттенков в Win 10 BG Changer огромная, поэтому абсолютно каждый пользователь найдет подходящий для себя вариант.
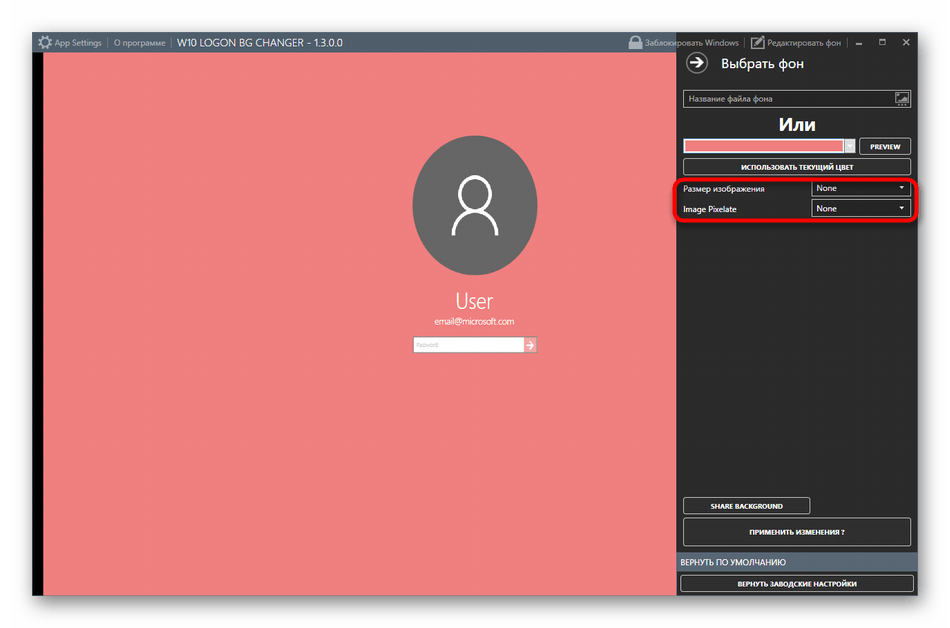
- После этого доступно изменение параметров отображения картинки. Не забудьте настроить размер, чтобы оптимизировать разрешение в соответствии с используемым дисплеем.
- Осталось только применить все изменения, кликнув по специально отведенной кнопке.

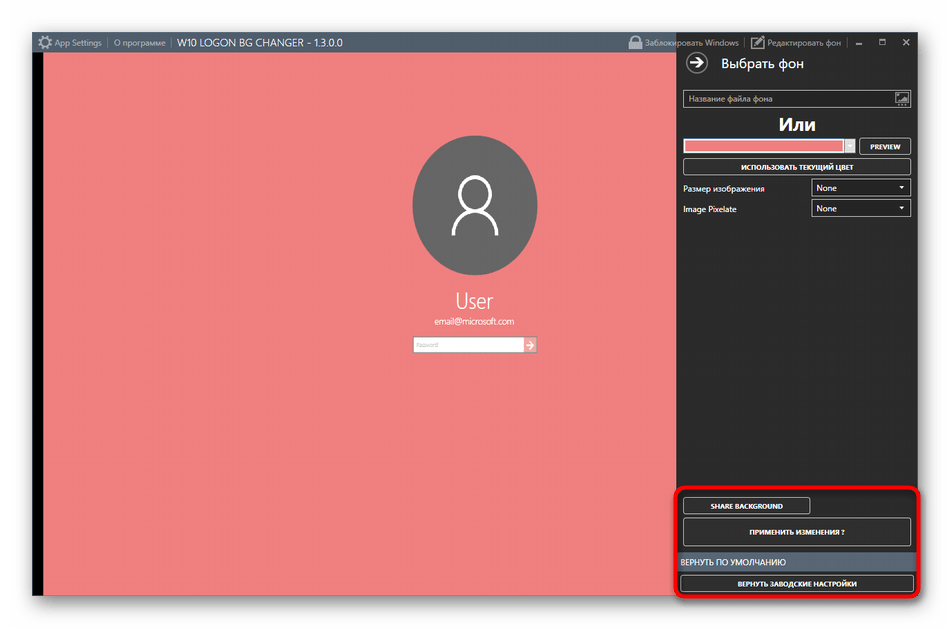
При необходимости вы в любой момент можете вернуть стандартные настройки. Для этого нужно запустить Win 10 BG Changer и выбрать там пункт «Вернуть заводские настройки». Как видно, ничего сложного в управлении приложением нет, поэтому разберется с поставленной задачей даже начинающий юзер.
Способ 3: Параметры персонализации в Windows 10
Теперь хотим поговорить о встроенном в операционную систему средстве, которое позволяет вручную задать настройки экрана блокировки без предварительного скачивания дополнительных программ. Для этого потребуется выполнить следующие действия:
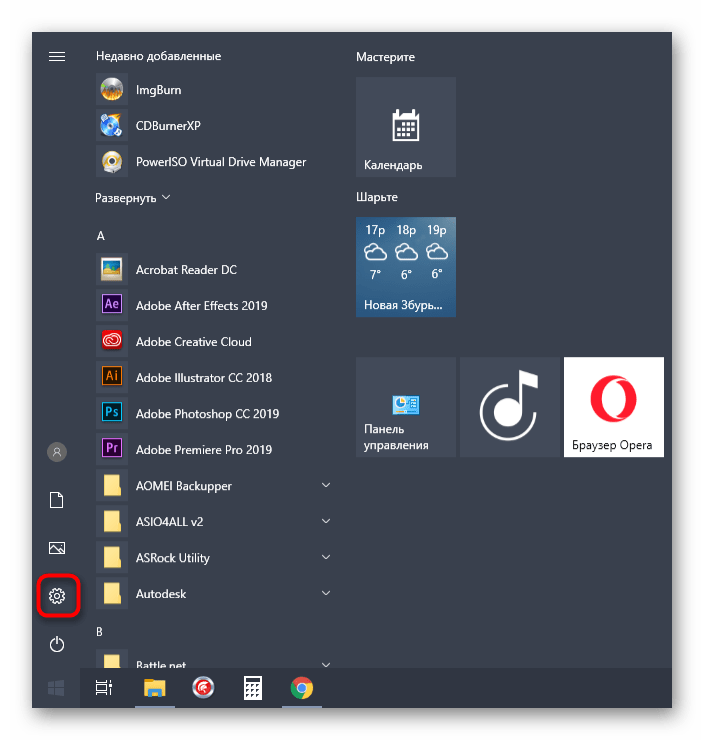
- Откройте «Пуск» и перейдите в меню «Параметры».
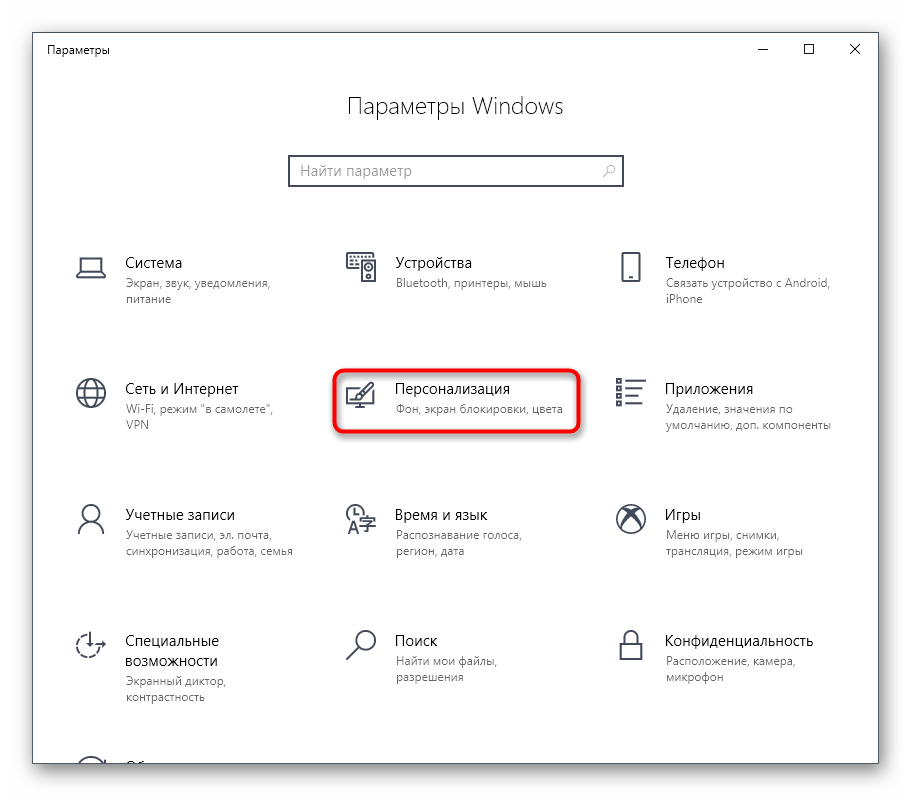
- Здесь откройте раздел «Персонализация», выбрав соответствующую плитку.
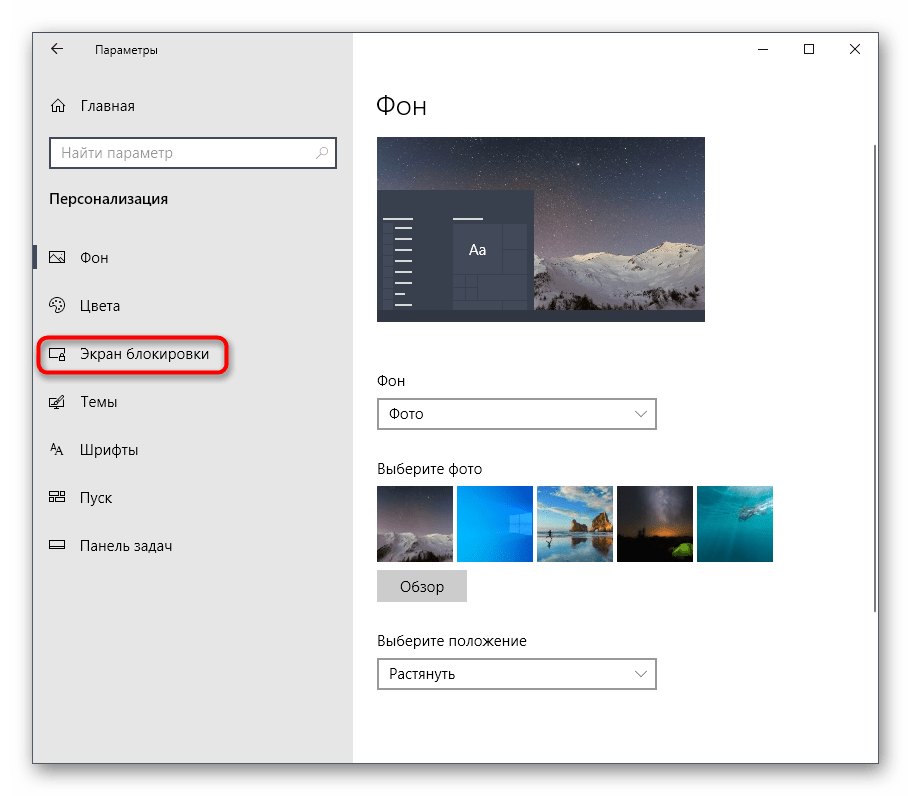
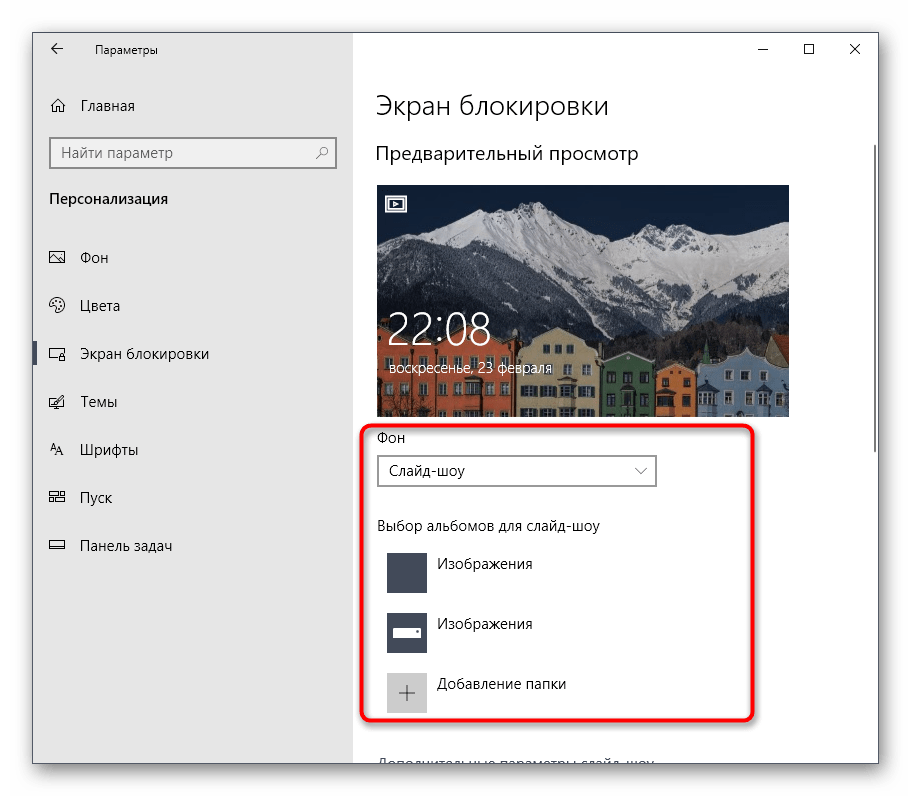
- Через левую панель переместитесь в «Экран блокировки».
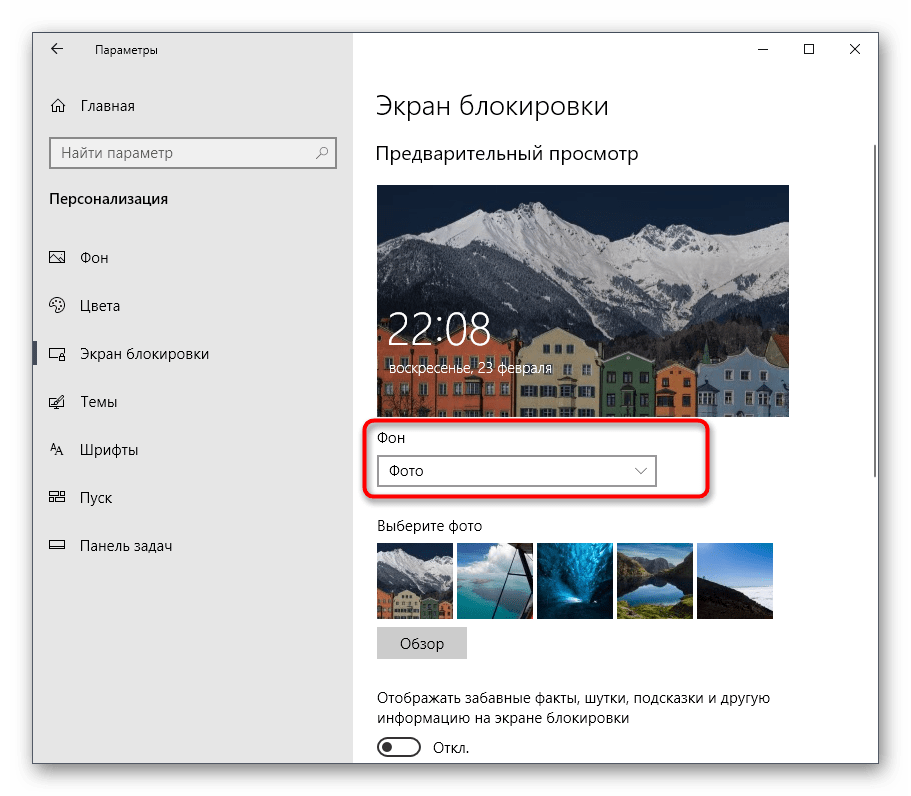
- Фоном вы можете выбрать изображения от Microsoft, фото или слайд-шоу.
- При выборе слайд-шоу предлагается самостоятельно добавить несколько изображений или даже целую папку.
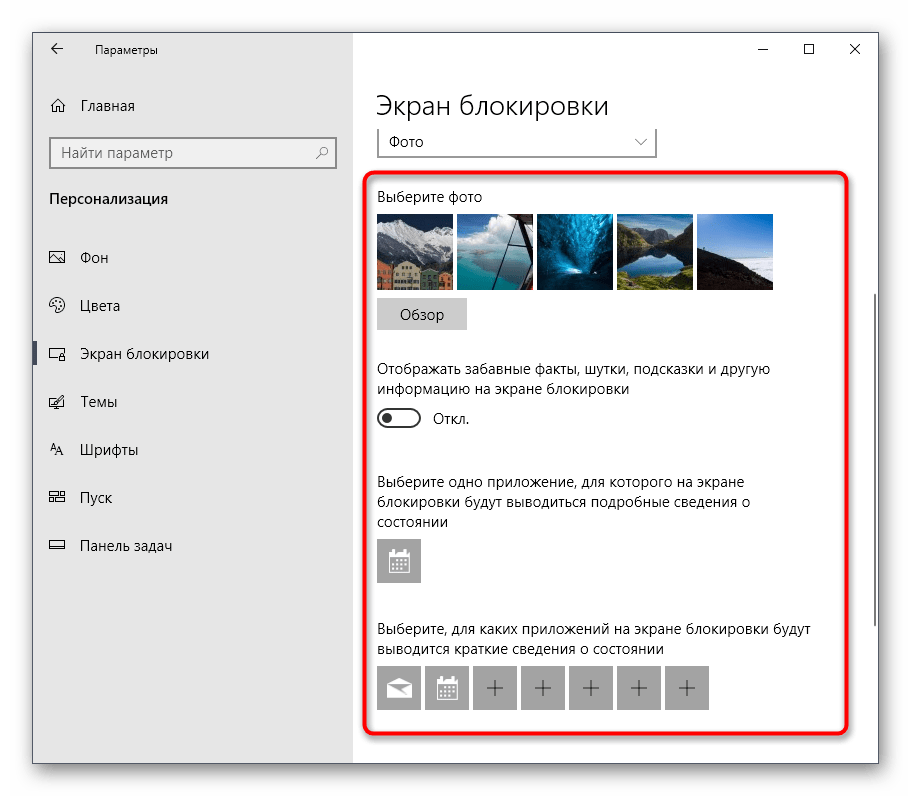
- После этого просмотрите дополнительные параметры, где, например, доступен выбор одного приложения, о котором будут выводиться подробные сведения, а также другие инструменты с краткими сведениями.
При взаимодействии с рассмотренным только что окном вы могли заметить, что там присутствует еще множество параметров, связанных с персонализацией. Они не входят в тематику нашей сегодняшней статьи, однако если возникло желание более детально изучить их, ознакомьтесь с другим руководством на нашем сайте по этой теме, кликнув по расположенной далее ссылке.
Подробнее: Параметры «Персонализации» в ОС Windows 10
Теперь вы знакомы с тремя различными методами изменения приветственного окна в Windows 10. Осталось только подобрать понравившийся метод и реализовать его, следуя нашим инструкциям.
Наша группа в TelegramПолезные советы и помощь
Applies ToWindows 11 Windows 10
Поддержка Windows 10 прекратится в октябре 2025 г.
После 14 октября 2025 г. корпорация Майкрософт больше не будет предоставлять бесплатные обновления программного обеспечения из Центра обновления Windows, техническую помощь и исправления безопасности для Windows 10. Ваш компьютер по-прежнему будет работать, но мы рекомендуем перейти на Windows 11.
Подробнее
Заставки были основной функцией в Windows на протяжении десятилетий. Изначально предназначенные для предотвращения записи на CRT-мониторах, они превратились в настраиваемую функцию, которая добавляет личный контакт на ваше устройство с Windows. Тем не менее, с современными достижениями, теперь рекомендуется положить ваш дисплей в спящий режим, чтобы сэкономить энергию.
Что такое заставка?
Заставка — это анимированное изображение или шаблон, которое появляется на экране, когда компьютер простаивает в течение указанного периода. Хотя современные ЖК-мониторы и светодиодные мониторы менее подвержены прогоранию, заставки остаются популярным способом персонализации устройства и добавления дополнительного уровня безопасности.
Зачем использовать заставку?
Хотя заставки больше не требуются для предотвращения записи, они предлагают несколько преимуществ:
-
Персонализация. Настройка экрана с анимацией или фотографиями, отражающими ваш стиль
-
Безопасность: автоматическая блокировка компьютера, когда вы отсутствуете, защита данных
-
Эстетика: добавление визуально приятного элемента на экран бездействия
-
Предотвращение Burn-In на OLED-дисплеях: заставки могут помочь предотвратить запись на OLED-дисплеях, гарантируя, что статические изображения не отображаются в течение длительного времени
Совет: Чтобы сэкономить энергию и уменьшить износ дисплея, рекомендуется переводить компьютер в спящий режим, когда он простаивает. Спящий режим потребляет значительно меньше энергии, чем запуск заставки, и позволяет компьютеру быстро возобновить работу, где вы оставили. Дополнительные сведения см . в статье Настройка параметров питания и спящего режима в Windows.
Настройка заставки
-
В приложении «Настройки» на устройстве с Windows, откройте экран персонализации > блокировки или используйте следующий ярлык:
Экран блокировки
-
Выбор заставки
-
В окне Параметры заставки выберите заставку из раскрывающегося списка. Параметры включают трехмерный текст, пустое, пузырьки, mystify, фотографии и ленты
-
Настройка заставки: если она доступна, выберите Параметры… , чтобы настроить выбранную заставку. Например, можно создать пользовательское сообщение в заставке трехмерного текста или выбрать папку с изображениями для заставки «Фотографии».
-
Задание времени ожидания: используйте параметр Wait (Ожидание), чтобы указать количество минут бездействия перед активацией заставки
-
Включить безопасность: (необязательно) Установите флажок При возобновлении, отображение экрана входа , чтобы требовать пароль при возобновлении из заставки
Нужна дополнительная помощь?
Нужны дополнительные параметры?
Изучите преимущества подписки, просмотрите учебные курсы, узнайте, как защитить свое устройство и т. д.
Nothing is quite as impersonal and boring as the generic background already loaded on your computer. Whether it’s a drop of water or a landscape view of a place you’ve never been, it’s time to change it to something more reflective of you.
This guide shows you how to change the wallpaper of your Windows 10 desktop using a few simple steps. We’ll also show you how to change the background for the lock and sign-in screens. Want to use a third-party app instead? We have a favorite to recommend.
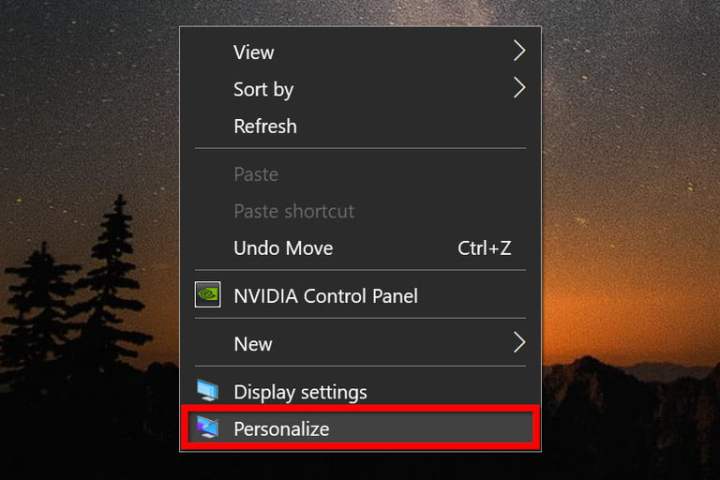
Image used with permission by copyright holder
Change your wallpaper
Step 1: Right-click anywhere on the desktop, and select Personalize on the pop-up menu. The Settings app should open to the Personalization section by default and display your background options. This screen will look different in Windows 11 but the same options will be available.
Alternatively, you can click on the Start button followed by the gear icon displayed on the Start menu to open the Settings app. There you can select Personalization.

Image used with permission by copyright holder
Step 2: Click the drop-down menu underneath Background and select one of three options: Picture, Solid Color, or Slideshow. In this example, we selected Picture. If you chose Slideshow or Solid Color, move on to the next sections. In Windows 11, you’ll start by clicking the Background section.
Step 3: Select a thumbnail displayed under Choose Your Picture, and it automatically replaces your background. If the desired image isn’t displayed, move on to step 4.
Step 4: Click the Browse button.
Step 5: When File Explorer appears on the screen, locate the image you want to use and click the Choose Picture button. It’s now set as your background.
Step 6: Click the drop-down menu underneath Choose a Fit and select one of six options: Fill, Fit, Stretch, Tile, Center, or Span.
If you have more than one connected monitor, you can set a different background for each one. Let’s continue on and change the second display.
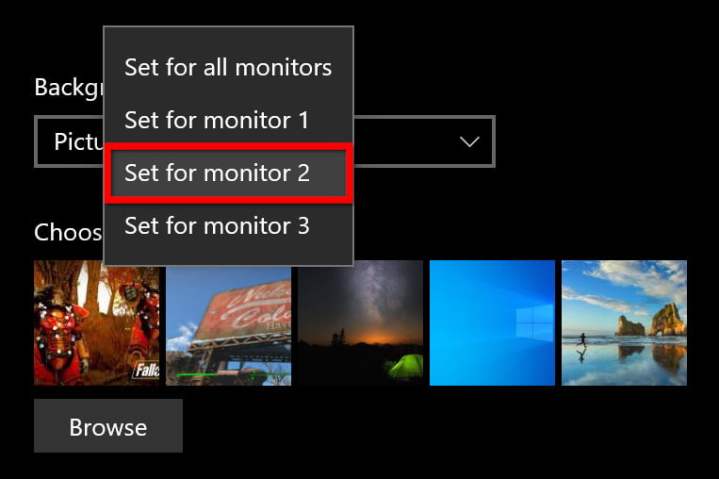
Image used with permission by copyright holder
Step 7: With Settings still open, right-click on a thumbnail displayed under Choose Your Picture.
Step 8: Select the Set for Monitor 2 option on the pop-up menu.
Step 9: Rinse and repeat for any additional screen.
Note: To use multiple wallpapers, you’ll need to add each picture to the thumbnail ribbon by clicking the Browse button and selecting an image. This image fills display 1, so you’ll need to reset that screen’s wallpaper each time you add an image to the thumbnail ribbon.

Image used with permission by copyright holder
Slideshow options
If you chose Slideshow, you have a different set of options. Keep in mind that if you have more than one display, a different wallpaper will appear on each one. Again, the Windows 11 interface will look a bit different but the general process is the same.
Step 1: Click the Browse button and locate the folder containing the images you want to use as wallpapers. You do not need to select the images individually.
Step 2: Click the drop-down menu underneath Change Picture Every and select one of six options spanning one minute to one day.
Step 3: Toggle the Shuffle feature on or off.
Step 4: Enable or disable the slideshow when running on battery power.
Step 5: Click the drop-down menu underneath Choose a Fit and select one of six options: Fill, Fit, Stretch, Tile, Center, or Span.
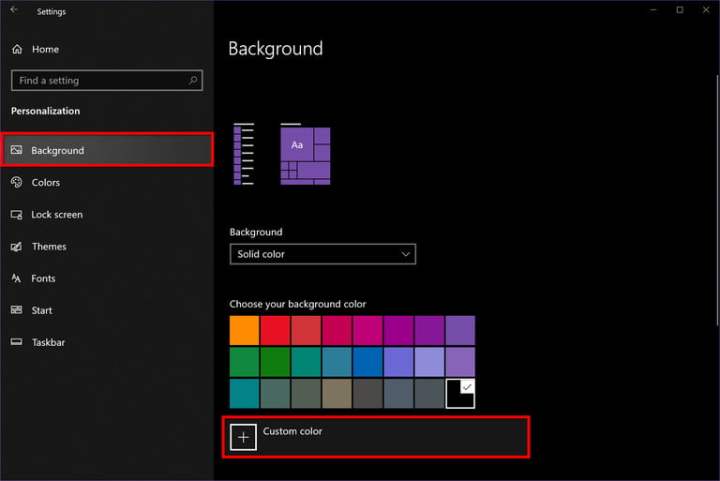
Image used with permission by copyright holder
Solid color options
If you chose a solid color, your only options are to select one of 25 color swatches or click the Plus button next to Custom Color and create a background color.
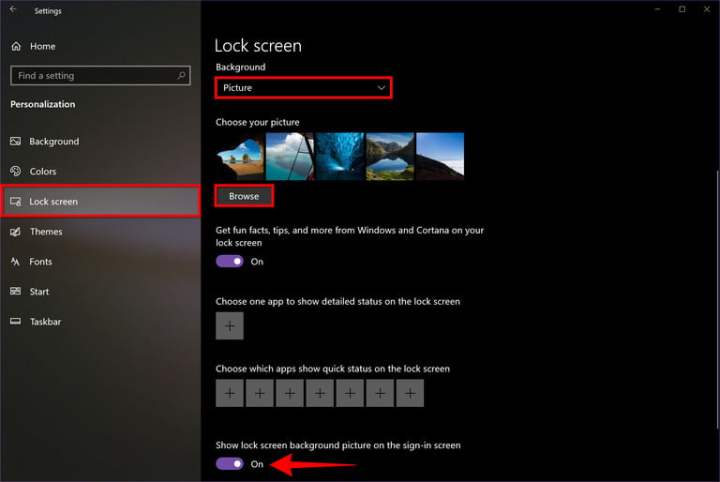
Image used with permission by copyright holder
Change your lock screen/sign-in screen
While you can change the wallpaper for both the lock and sign-in screens, you can also choose what appears on each one. As you adjust the wallpaper, you’ll see options to select an app that can show its detailed status and select seven additional apps to show their quick status. Leave these blank if you don’t want anything appearing on your lock and sign-in screens.
Step 1: Right-click on the desktop and select Personalize on the pop-up menu. The Settings app should open to the Personalization section by default and display your background options.
Alternatively, you can click on the Start button followed by the gear icon displayed on the Start menu to open the Settings app. There you can select Personalization.
Step 2: Select the Lock Screen tab listed on the left. In Windows 11, you’ll want to start by clicking on the Lock Screen section.
Step 3: On the right, click the drop-down menu under Background and select one of three options: Windows Spotlight, Picture, or Slideshow. In this example, we chose Picture.
Step 4: You can either choose one of the preset images by selecting one of the thumbnails provided under Choose Your Picture. Or you can click the Browse button.
Step 5: If you choose the Browse button, File Explorer appears on the screen. Locate the image you want to use and click the Choose Picture button. It’s now set as your background.
Note: If you chose Slideshow, click the Plus symbol next to Add a Folder to select the folder holding your images. You do not need to choose a picture when you select Windows Spotlight.
Step 6: You can access an optional feature by selecting the toggle that appears next to Show Lock Screen Background Picture on the Sign-In Screen. This is a great thing to do if you want to replicate the lock screen’s background on the sign-in screen.
Use Backiee — Wallpaper Studio 10
If you’re the type of person who loves switching up your background pictures, a third-party app may be the best option for you (especially if you’d like to do this with minimal effort).
One of the most popular is Backiee — Wallpaper Studio 10. This impressive app gives you the chance to explore a medley of creative and modern wallpapers starring fantastic resolutions maxing out at 8K. You can do whatever you please with one of these sweet designs; feature one of them on your lock screen or add one to your desktop. And that’s not even half of it — this app also integrates directly with Bing, giving you the opportunity to peruse through photos without even popping your browser window open.
Unfortunately, you’ll have to deal with some annoying ads if you opt for the free version. However, you can remove them by spending a small fee that starts at $1.49 per month.
Windows has become synonymous with its modern blue-tiled logo. It can be seen in the black backdrop whenever PC is powered on. Windows gives tons of customization abilities to its users which include changing the default boot logo to any other picture. In this article, we bring to you a helpful guide that will teach you how to change Windows 10 boot logo, edit Windows startup and also look into Windows 10 boot screen changer.
Here are some necessary pre-requisites to change Windows 10 boot logo.
- Windows should be running on UEFI boot mode.
- Secure boot must be disabled.
- Administrative privileges are required.
Most modern Windows PC come with UEFI while older systems use Legacy BIOS. You can follow our guide below to check which one your system is running. Follow our guide to Check if your PC is using UEFI or Legacy BIOS.
Windows 10 doesn’t allow changing boot logo but there is a safe way to do it. HackBGRT is an open-source and free command-line tool used to change boot logo. Follow these steps to do so.
Note: Using HackBGRT, GIFs or transparent images cannot be used as the boot logo and the required image resolution is 300px x 300px.
1. Go to download page of HackBGRT and download zip file for the latest version (1.5.1).

2. Once downloaded, unzip HackBGRT – 1.5.1.zip using appropriate tool like 7-zip.

3. In the extracted folder, right–click on setup.exe file and select Run as administrator from context menu.

4. HackBGRT will open Command Prompt window. HackBGRT will detect location of UEFI System Partition and check if Secure Boot has been disabled. Information regarding the same will be displayed.

5. Install HackBGRT by pressing the I key.
6. After executing the install command HackBGRT config file will open up in Notepad. Close it by changing it.
7. HackBGRT will automatically launch the Paint application now with its logo on it.
8. To replace the boot logo with your preferred image, expand the Paste drop-down list and select Paste from the option.

9. Locate image file you wish to set as new boot logo, select it and click on Open.

10. Edit it as you wish and once satisfied, click on File > Save. Close the Paint application window.

11. Look for confirmation message HackBGRT is now installed and then close Command Prompt.

12. Finally, reboot the PC and you will see the new boot logo.
Also Read: What is Windows 10 Boot Manager?
How to Revert back to default Windows Boot Logo
If you wish to revert back to the original Windows 10 boot logo, you will need to remove the HackBGRT application. Follow these steps to do so.
1. Follow Step 3 from the previous method to open the HackBGRT setup file as administrator.
2. You will see additional options to remove and disable HackBGRT.
Note: If you want to keep the application, press the D key to disable it and it will restore the default boot logo.
3. Press the R key to execute the remove command. It will remove HackBGRT completely from your System.

4. Once you receive HackBGRT has been removed confirmation message, press any key to quit the Command Prompt window.
The Default Windows logo will now be restored.
Also Read: How to Boot Windows 10 into Recovery Mode
How to Disable Secure Boot
If your Windows PC is running UEFI then you will need to disable Secure boot to change Windows 10 boot logo. Secure boot ensures that the device boots using only system-manufactured trusted software. If enabled, it will prevent the third-party applications from running and changing the boot logo. Follow these steps to check whether it is enabled.
1. Press the Windows key and type System Information, and click on Open.

2. Check whether Secure Boot State is On or Off.

If it is On, follow the steps below to disable it.
1. Launch Settings application by pressing Windows + I keys and clicking on Update & Security tile.

2. Move to Recovery tab and click on Restart now button under Advanced Startup.

3. On the Choose an Option screen, click on Troubleshoot.

4. Click on Advanced Options.

5. Select UEFI Firmware Settings and click on Restart on the next screen.

6. Your system will now boot into the BIOS menu.
Note: The placement of Secure Boot settings varies for each manufacturer. Read our article to access BIOS settings in Windows 10.
7. Using Arrow Keys go to the Boot tab and find the Secure Boot option.
8. Press Enter key or use + or – to change its status to Disabled, Press F10 to confirm changes.
Restart your PC and now you are ready to change the Windows 10 boot logo.
Recommended:
- Fix WaasMedicSVC.exe High Disk Usage in Windows 10
- How to Convert M4B to MP3 in Windows 10
- Fix Windows 10 Bluetooth Mouse Lag
- What is Test Mode in Windows 10?
We hope that this guide was helpful and you were able to change Windows 10 boot logo. We showed how to edit Windows startup using Windows 10 boot screen changer application, HackBGRT. If you have any queries or suggestions then feel free to drop them in the comments section.
Readers help support Windows Report. We may get a commission if you buy through our links.
Read our disclosure page to find out how can you help Windows Report sustain the editorial team. Read more
Windows is often said to be a highly customizable OS, but most users remain unaware of the wide range of changes they can make. For instance, many wonder if they can change the boot logo in Windows 10.
By default, every time you boot the OS, a Windows logo appears on the screen with a few dots spinning in a circle which denotes the boot progress. Let’s find out all there’s to now.
Can you change the Windows startup logo?
Yes, you can easily change the Windows startup or boot logo without making any significant modifications to the BIOS or the OS. And the best part, you can do it with a simple open-source tool.
While there are a few other ways, the complex ones run the risk of bricking the PC if you are not careful during the process. So, let’s stick to the simpler option to change the boot logo in Windows 10.
How do I change the boot logo in Windows 10?
Before we start the actual process, here are a few quick checks and changes to ensure that things work:
- Make sure your PC employs UEFI as the firmware interface. Though most newer generation PCs do, a quick way to verify this is to check System Information and look at the BIOS Mode.
- Disable Secure Boot on the PC through the BIOS. The method here differs for every OEM, so you must check the official website for the exact steps.
Once done with these two, let’s start the actual process.
NOTE
Given that changing the boot logo in Windows 10 is a slightly complex process, we have divided the steps into three sections for higher clarity and enhanced ease. The last section details how you can revert to the default settings.
1. Get the image ready
- Right-click on the image you want to set as the boot logo, hover over Open with, and choose Paint from the list.

- Under the Image section, select Resize.

- Now, choose Pixels as the unit, enter 250 under both Horizontal and Vertical, and then click OK. Alternatively, you could use a third-party tool or website to resize the image.
- Once done, click on the File menu, hover the cursor over Save as, and select BMP picture.
- Navigate to the desired folder, enter splash as the file name, under Save as type, choose 24-bit Bitmap, and click on Save.


After the file is ready, let’s head to the next step, which is to get HackBGRT running to change the boot logo. It’s an open-source tool and easy to use.
2. Get the tool ready
- Go to HackBGRT’s GitHub page and download the ZIP file.

- Head to the Downloads folder, right-click on the HackBGRT.zip file, and select Extract All.

- Choose the desired path for extracted files, and click on Extract.

- Once done, head to the extracted files, and run setup.exe.
- Click Yes in the UAC prompt.


3. Change the boot logo
- The tool will now open in a Command Prompt window, press I to proceed with the installation.

- A notepad window will launch, listing the various details. Simply close it.
- In the Paint window that opens next, click on the File menu, and choose Open.
- Now, open the partition created by the tool, select the EFI folder, and then the HackBGRT folder. In our case, the path was:
A:\EFI\HackBGRT - You will now find a splash.bmp image here. Copy the one you created earlier, head back to this window, and press Ctrl + V to paste it.
- Click on Replace the file in the destination option in the prompt that appears.

- Once done, click on Open, and then close the Paint window.
- The Command Prompt will read HackBGRT is now installed. Press any key to quit. Close it.


That’s it! You have successfully changed the boot logo in Windows 10. Every time you restart the computer, the new logo will appear instead of the old Windows icon.
- Microsoft wants Windows 10 users to upgrade to Windows 11 or Copilot + PCs
- Deleting ‘inetpub’ folder lets hackers permanently stop Windows updates, Microsoft warns
4. Revert to default settings
Reverting to the default settings is easier than ever using HackBGRT. Open the tool and press either D to restore the default settings or R to remove the HackBGRT files completely.

Now, when you boot Windows, it will display the default logo instead of the customized one.
That’s it! This was the easiest method to change to boot logo in Windows 10 using a simple and user-friendly open-source tool. Make sure to check the conditions (listed earlier) beforehand and make the relevant changes to avoid any issues later.
Also, if you are planning on making more changes, check the best desktop customization software for Windows 10. For Windows 11 users, we have a separate guide on how to change the boot logo on Windows 11, so don’t miss it.
If you have any queries or want to share your experience of changing the boot logo, drop a comment below.
Kazim Ali Alvi
Windows Hardware Expert
Kazim has always been fond of technology, be it scrolling through the settings on his iPhone, Android device, or Windows PC. He’s specialized in hardware devices, always ready to remove a screw or two to find out the real cause of a problem.
Long-time Windows user, Kazim is ready to provide a solution for your every software & hardware error on Windows 11, Windows 10 and any previous iteration. He’s also one of our experts in Networking & Security.