

This tutorial will show you how to move or restore the default location of the Documents folder for your account in Windows 10 and Windows 11.
The Documents folder (shell:personal) is a component of the user profile that is used as a unified location for storing personal data. By default, the Documents folder is a shell folder in the user’s profile (%UserProfile%) that is used as a default storage location for saved documents.
If you like, you can move the Documents folder and its content to a location you want it at instead.
If the current Documents folder path is incorrect or is no longer available, you can use the Restore Default option to restore the default path.
Reference:
Contents
- Option One: Move Location of Documents Folder in Properties
- Option Two: Restore Default Location of Documents Folder in Properties
- Option Three: Restore Default Location of Documents Folder using BAT file
Option One
Move Location of Documents Folder in Properties
1 If you turned on back up Documents folder to OneDrive, then you will need to temporarily turn off back up Documents folder to OneDrive until after you moved the Documents folder.
2 Open File Explorer (Win+E).
3 Navigate to the location (ex: «D») you want to move your Documents folder to, and create a new folder named Documents at this location. (see screenshot below)

4 Right click on the Documents folder in the navigation pane of File Explorer, and click/tap on Properties. (see screenshot below)
If you don’t see the Documents folder in the navigation pane, then type shell:Personal into the address bar of File Explorer, and press Enter to open the Documents folder no matter where it may be located.
You can then right click or press and hold on an empty area in the opened Documents folder, and click/tap on Properties.

5 Click/tap on the Location tab, and click/tap on the Move button. (see screenshot below)

6 Navigate to and select the new Documents folder from step 3, and click/tap on Select Folder. (see screenshot below)

7 Click/tap on OK. (see screenshot below)
8 Click/tap on Yes to move all the files from the old location to the new location. (see screenshot below)

Option Two
Restore Default Location of Documents Folder in Properties
1 If you turned on back up Documents folder to OneDrive, then you will need to temporarily turn off back up Documents folder to OneDrive until after you restored the default location of the Documents folder.
2 Open File Explorer (Win+E).
3 Right click on the Documents folder in the navigation pane of File Explorer, and click/tap on Properties. (see screenshot below)
If you don’t see the Documents folder in the navigation pane, then type shell:Personal into the address bar of File Explorer, and press Enter to open the Documents folder no matter where it may be located.
You can then right click or press and hold on an empty area in the opened Documents folder, and click/tap on Properties.
4 Click/tap on the Location tab, and click/tap on the Restore Default button. (see screenshot below)
5 Click/tap on OK. (see screenshot below)
6 If prompted to create a Documents folder at the default location, click/tap on Yes. (see screenshot below)

7 Click/tap on Yes to move all the files from the old location to the default location. (see screenshot below)
Option Three
Restore Default Location of Documents Folder using BAT file
This option can be very useful if Option Two is not available.
This option will not move the contents of the Documents folder from the old location to the default location. You will need to manually move the contents after restoring the default location if wanted.
1 If you turned on back up Documents folder to OneDrive, then you will need to temporarily turn off back up Documents folder to OneDrive until after you restored the default location of the Documents folder.
2 Click/tap on the download button below to download the Restore_default_location_of_Documents_folder.zip file.
(Contents of BAT file for reference)
Code:
@echo off

taskkill /f /im explorer.exe

timeout /t 2 /nobreak >nul

if not exist "%UserProfile%\Documents" mkdir "%UserProfile%\Documents"

reg add "HKCU\SOFTWARE\Microsoft\Windows\CurrentVersion\Explorer\Shell Folders" /v "Personal" /t REG_SZ /d "C:\Users\%USERNAME%\Documents" /f

reg add "HKCU\SOFTWARE\Microsoft\Windows\CurrentVersion\Explorer\User Shell Folders" /v "{f42ee2d3-909f-4907-8871-4c22fc0bf756}" /t REG_EXPAND_SZ /d %%USERPROFILE%%"\Documents" /f

reg add "HKCU\SOFTWARE\Microsoft\Windows\CurrentVersion\Explorer\User Shell Folders" /v "Personal" /t REG_EXPAND_SZ /d %%USERPROFILE%%"\Documents" /f

attrib +r -s -h "%USERPROFILE%\Documents" /S /D

timeout /t 1 /nobreak >nul

start explorer.exe
3 Save the ZIP file to your desktop.
4 Unblock the ZIP file.
5 Extract the BAT file from the ZIP file.
6 Run the BAT file.
7 You will now see a command prompt open and close to kill the explorer process, run the commands to restore the default location and attributes of the Documents folder, and restart the explorer process.
8 You can now delete the BAT file if you like.
That’s it,
Shawn Brink
Related Tutorials
- Add or Remove Location tab in Folder Properties in Windows 11
- Move or Restore Default Location of Desktop Folder in Windows 11
- Move or Restore Default Location of Downloads Folder in Windows 11
- Move or Restore Default Location of Music Folder in Windows 11
- Move or Restore Default Location of OneDrive Folder in Windows 11
- Move or Restore Default Location of Pictures Folder in Windows 11
- Move or Restore Default Location of Saved Games Folder in Windows 11
- Move or Restore Default Location of Searches Folder in Windows 11
- Move or Restore Default Location of Videos Folder in Windows 11
-
Restore_default_location_of_Documents_folder.zip
Restore_default_location_of_Documents_folder.zip
712 bytes
· Views: 4,049
Get Everything About Change Location of Desktop Folder:
| Workable Solutions | Step-by-step Troubleshooting |
|---|---|
| Where Is the Desktop Location in Windows 11/10 | Default path: C:\Users\Public\Desktop or C:\Users\admin\Desktop…Full steps |
| Change Location of Desktop folders Windows 11/10 |
Option 1: Using PC Data Migration Software to Move Desktop Folder…Full steps Option 2: Manually Change Desktop Folder…Full steps Can’t Change Desktop Folder…Full steps |
| More Useful Tips: Change User Folder Location Mac | Open Finder > Go to the Users folder…Full steps |
In this article, we post two solutions to change Desktop folders on Windows 11/10: PC data migration software and file explorer. If you also keep a Mac device, you are lucky to get tips for moving user folders on Mac.
Where Is the Desktop Location in Windows 11/10
When you use windows11 or windows10, the Desktop displays default software, downloaded applications, files, folders, shortcuts, images, and more. You are free to manage what is said on the Desktop. The initial location of desktop files is usually on drive C.
Default path: C:\Users\Public\Desktop or C:\Users\admin\Desktop
It is easy to move your desktop folder to a new folder. Let’s see the how-to guide below.
Option 1. Using PC Data Migration Software to Move Desktop Folder
EaseUS Todo PCTrans allows you to change Desktop folders location with simple clicks. Unlike the manual ways, it comes with a «large file cleanup» feature and allows you to batch-change the location of desktop folders. This tool works well on Windows 10 and Windows 11. Moreover, it is designed for beginners with a clear interface, making it easy to use. Download software to enjoy the quick change of Desktop Folders Location:
How to Move Desktop Folder:
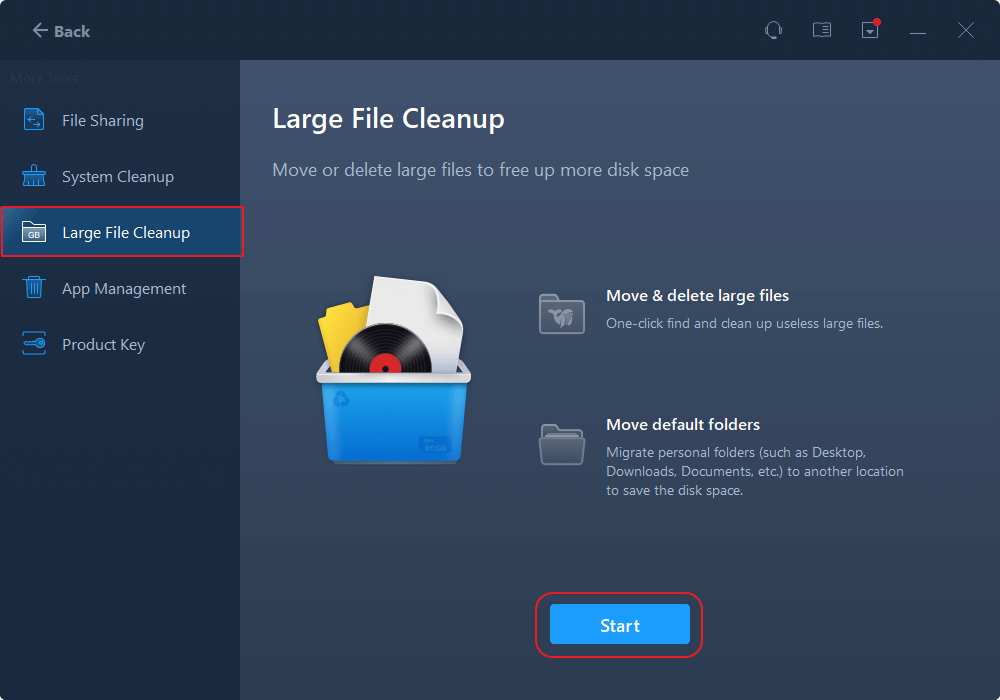
Step 1. Run EaseUS Todo PCTrans, click «More Tools» on the left pane. Then, click «Large File Cleanup» and click «Start» button.
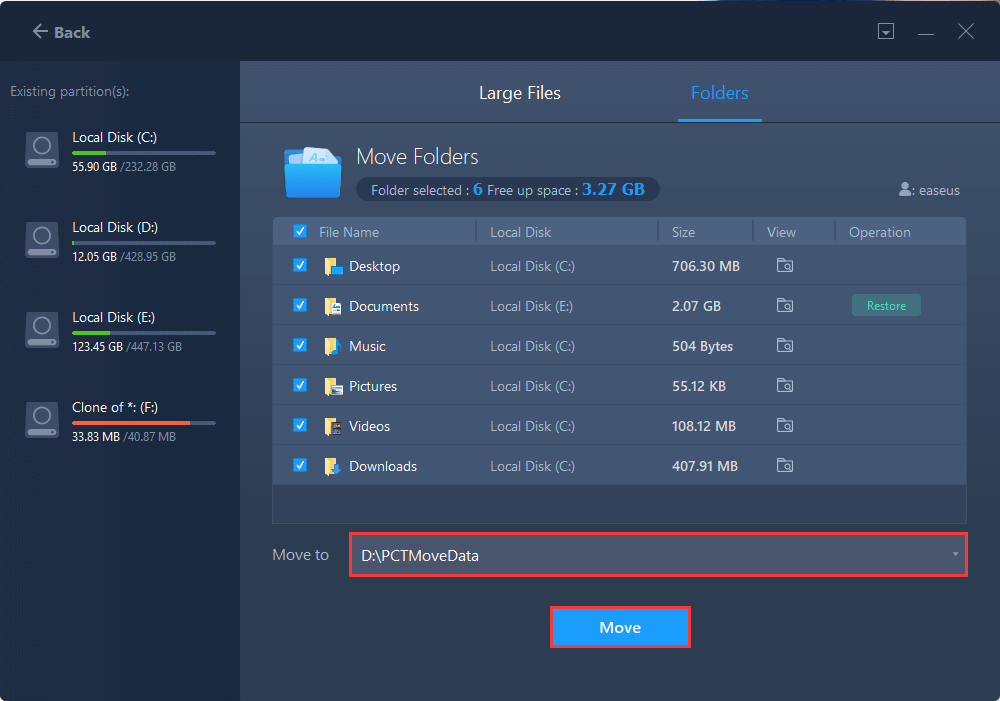
Step 2. Select «Folder» tab, check the folders you want to move. Choose target drive and click «Move» button.
Step 3. Wait for moving process completes. Click «Finish».
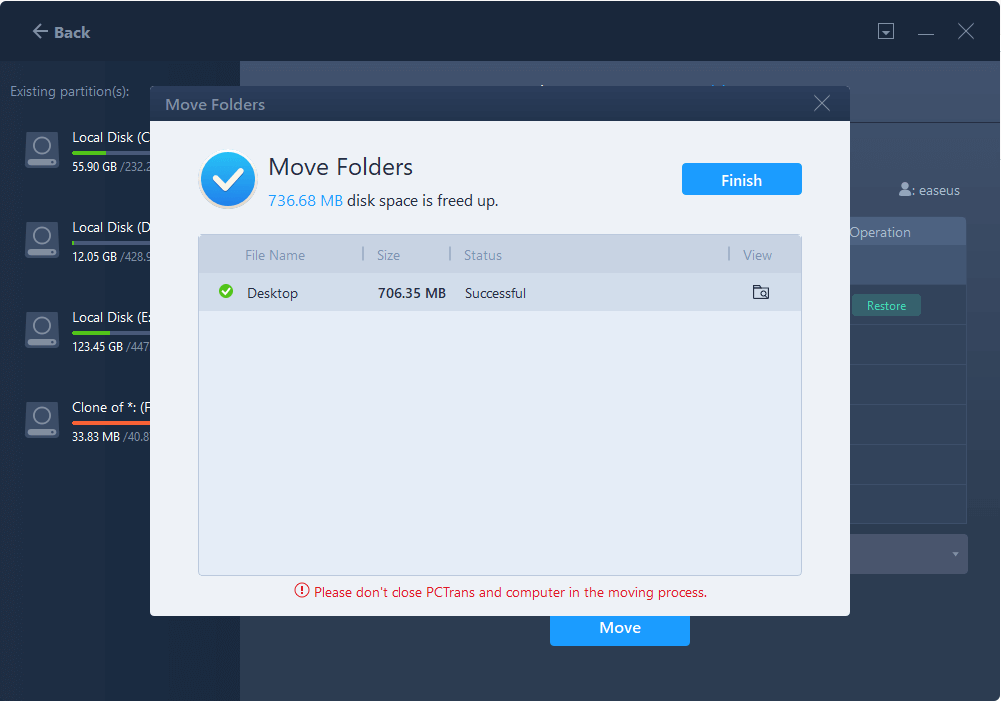
Note: You can click the «Restore» button to restore the current folder to the default location.
Following this guide, you can quickly change the desktop folder locations. EaseUS Todo PCTrans provides other advanced features to help transfer, such as:
- PC to PC Transfer: One click transfer desktop folders(Music, files, folders, downloads, user folders) to another desktop.
- App Migration: Transfer programs/software to another drive or another PC.
- Large File Cleanup: Locate the large files and transfer them to another drive to get more free space.
Option 2. Manually Change Desktop Folder on Windows 11/10
Windows 11 and Windows OS have several unique features that let you customize the device as you like. Of course, you can move the desktop folder to another location via a built-in tool — File Explorer.
With File Explorer, your Desktop folder gets a new place quickly. But it can be troublesome to
In this part, we will show you how to click on the «Move» button and explain the solution to fix «Not able to change the location of desktop folder.»
Step 1. Locate your Desktop folder’s location in these two ways below:
1. Open File Explorer from the taskbar > Navigate to This PC part > Click C drive (Common path: This PC/Local Disk (C:) > Users > Admin) > Locate folder named «Desktop».
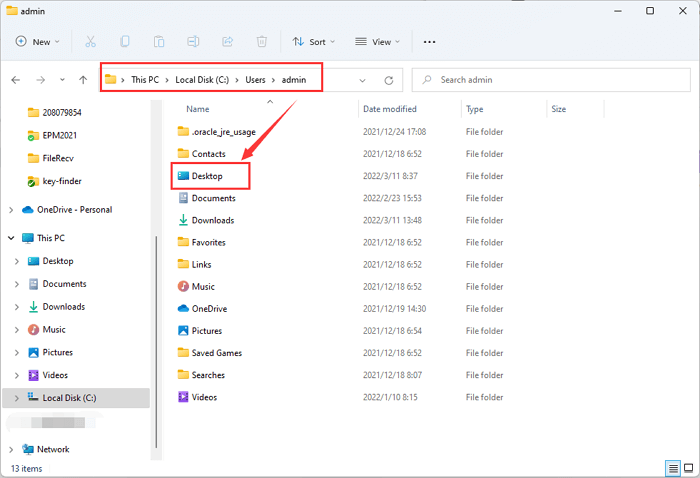
2. Press Windows + R to evoke the Run box > Type «.» and then click OK.
Step 2. Right-click the Desktop folder and choose «Properties» from the menu.
Step 3. Select the Location tab of the Desktop window. Under the current location, click the «Move…» button.
Step 4. It wakes up the window to select a destination where you choose to keep the Desktop folder. If there are fewer idle options, you can create a new folder and move the targeted folder to it.
Related articles:
Can’t Change Desktop Folder Windows 11/10? What Can We Do?
When the «Location tab doesn’t show up» happens, the reason may refer to you changing the default location of the personal folder. So you can follow the steps to restore the default location by using Registry.
Step 1. Open Registry Editor (2 options).
1. Click on the Search icon and type «registry editor.»
2. Press Windows + R to open the Run box. Then type «Regedit» and hit Enter.
Step 2. Navigate this path: HKEY_CURRENT_USER\SOFTWARE\Microsoft\Windows\CurrentVersion\Explorer\User Shell Folders
Step 3. On the right side, locate the Desktop. And double-click it. Or right-click it and select «Modify.»
Step 4. Change value as %USERPROFILE%\Desktop (In the wrong word, it is good to copy and paste.) Save the change and close the Registry Editor.

Step 5. Restart Windows 11 or Windows 10 PC.
Now, go to C drive and click on the Desktop folder. The location tab from Properties shows up again. If this advice is not helpful, you can go back to using the PC data migration software.
More Useful Tips: Change User Folder Location Mac
Note: Do a backup first and start to move your Home folder on Mac.
Step 1. Open Finder.
1. Press Option + Command + Space to open a «Searching This Mac» window.
2. Press Command + N to open a Finder window.
Step 2. Go to the Users folder.
Follow the path like: /Macintosh HD/Users.
Step 3. Choose the home folder and directly drag it to the new drive.
Step 4. Click the Apple icon and select System Preferences from the menu.
Step 5. Click the Users & Groups.
Step 6. Click the yellow lock icon and enter the administrator password.
Step 7. Right-click on the account you just moved Home folder, and then choose Advanced Options.
Step 8. Click the «Choose» button from the menu. Then go to the target location your folder located > Select the new folder and click the «Open» button on the bottom right side.
Step 9. Click OK to turn off the sheet on the Advanced Options panel, then close the System Preferences.
Step 10. Time to restart your Mac device, and then you’ll see the folder in the new destination.
Conclusion
There are two options to set up your folder on Windows PC:
- Quick migration — EaseUS Todo PCTrans (Recommend)
- Manual — File Explorer
Related Articles
-
How to Transfer Files to Windows 11 New Computer [2025🏅]
Tracy King/2025/01/23
-
How to Uninstall Roblox on PC & Mac
Cici/2025/04/01
-
[Full Guide] How to Back Up Programs for Windows 11
Tracy King/2025/01/23
-
Get Rid of Windows Server C Drive Full Issue | 5 Methods🎖️
Tracy King/2025/01/23
With more and more computers coming with two (2) drives, managing the free space can be daunting. And the biggest space hog on your computer is your personal folders. So here is how to change the default location of your personal folders in Windows 11.
Most computers that have two (2) drives will have one Solid State Drive (SSD) for the operating system and program files and one Hard Disk Drive (HDD) for data. And by default, Windows 11 saves everything to the same drive as the operating system.
But after a while, your personal folders can get quite large, with all of the music, pictures, and videos you save to your computer. And with Windows 11 saving all of these files on the same drive as the OS and program files, the possibility of running out of free space is quite real.
And if that drive is an SSD, your personal folders are taking up valuable real estate that could be used for other uses, like more programs. So why not move your personal folders to another drive?
Now relocating your personal folders is relatively easy, but there are a few guidelines you want to be aware of. When it comes down to it, the location of your personal folders is set inside of the registry. I include the instructions on restoring the locations of your personal folders via the registry later in this article.
Note: You can remap your personal folders to any drive or folder that has a drive letter assigned to it in File Explorer. It is recommended only to use drives that are built into your computer, not external and network drives. Remember that if you lose connection with an external or network drive, you will also lose connection to your personal folders.
How to change the personal folder location in Windows 11
- Open File Explorer using one of the following:
- In the left-side column, left-click on This PC.
- In the right-side column, double left-click on the drive you want to use for your personal folders. The contents of that drive will appear in the right-hand column.
- Right-click on any blank space in the right-hand column, and a context menu will appear..
- From that context menu, select New > Folder. Give the new folder a unique name, like User files. If there are multiple users on this computer, you will want to create sub-folders for each user.
- Double left-click on the new user folder you just created. You now need to make six (6) sub-folders inside this folder. Named them: Desktop, Documents, Downloads, Music, Pictures, and Videos.
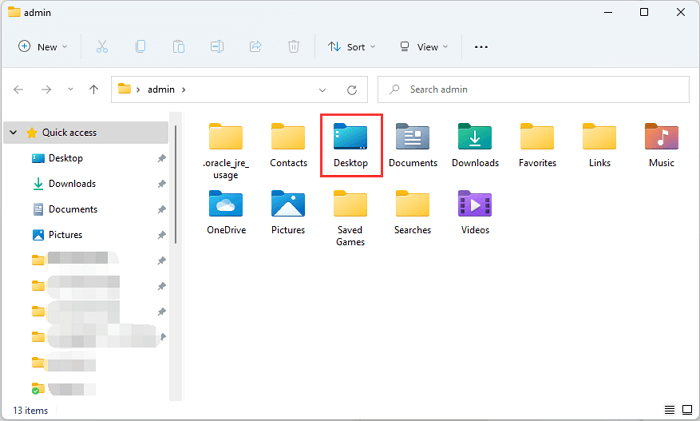
- Now navigate to C:\Users\your user name. There you will find all of your personal folders.
- Right-click on the Desktop folder and select Properties from the context menu that appears.
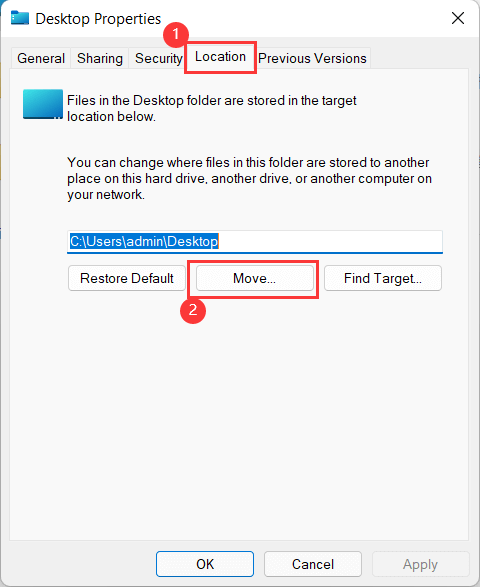
- Left-click on the Location tab and left-click on the Move… button.
- From the Select a Destination dialog box that appears, navigate to the new location for the Desktop folder you just created in Step 6. Once selected, left-click on Select Folder.
- On the Desktop Properties dialog box, left-click on Apply. You will be prompted to move the contents of this folder from the old location to the new one. Left-click on Yes and let Windows proceed to move this folder.
- Repeat steps 7- 10 for the remaining personal folders (Documents, Downloads, Music, Pictures, and Videos).
To restore the default location of your personal folders, just navigate to the personal folder you want to restore and right-click on it. From the context menu that appears, select Properties and then Location. Left-click on the Restore Default button and follow the prompts. If you receive an error when trying to restore the default location of any personal folder, you can manually change the location by editing the registry.
Note: Editing the registry incorrectly can render your computer unusable! If you do not feel comfortable editing your computer’s registry, please contact a local computer repair technician for assistance.
How to open the Registry Editor in Windows 11
- Left-click on the Start button to bring up the Start menu.
- In the upper right-hand corner of the Start menu, left-click on All apps.
- Scroll down the list of programs and left-click on Windows Tools.
- Double left-click on Registry Editor. If prompted for an administrator password or confirmation, type the password or provide confirmation.
or
- Left-click on the magnifying glass to the right of the Start button to bring up the Search dialog box.
- Type Registry Editor into the Search box and left-click on the app Registry Editor. If prompted for an administrator password or confirmation, type the password or provide confirmation.
or
- Press the Windows logo key + R to bring up a Run dialog box.
- In the Open field, type regedit and left-click on OK. If prompted for an administrator password or confirmation, type the password or provide confirmation.
When you have the Registry Editor open, navigate to the following key:
HKEY_CURRENT_USER\Software\Microsoft\Windows\CurrentVersion\Explorer\User Shell Folders
Here is a list of the six (6) personal folders, the registry key, and the default value. Change only the keys for the folders you are having problems with. Once you are done editing the registry, log out or restart your computer for the changes to take effect. For a complete list of user folder keys, check out how to manually change the user files location in the registry.
| Folder | Registry key | Default value |
|---|---|---|
| Desktop | Desktop | %USERPROFILE%\Desktop |
| Documents | Personal | %USERPROFILE%\Documents |
| Downloads | {374DE290-123F-4565-9164-39C4925E467B} | %USERPROFILE%\Downloads |
| Music | My Music | %USERPROFILE%\Music |
| Pictures | My Pictures | %USERPROFILE%\Pictures |
| Videos | My Video | %USERPROFILE%\Videos |
99559d28-2c02-4aba-94c9-809d81d6f3d7|10|3.6|96d5b379-7e1d-4dac-a6ba-1e50db561b04
Для профиля каждого пользователя в операционной системе Windows по умолчанию создается несколько папок для самых востребованных у пользователей файлов вроде музыки, видео и документов. Чтоб файлы хранились не все в одной куче, а хоть как-то были упорядочены. Они создаются на системном диске, на котором установлена операционной система.
Иногда требуется перенести пользовательские папки на другой диск, чтоб освободить место на системном диске или хранить ванные файлы на отдельном диске, на случай проблем с системным разделом или сбоя системы. Для переноса пользовательских папок Загрузки, Видео, Изображения, Документы и Рабочий стол Windows 11, необходимо:
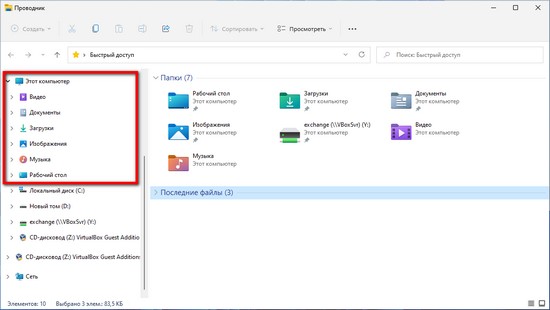
1. Запустите проводник нажмите «Мой компьютер» в правой колонке, чтоб увидите список из стандартных пользовательских папок доступных для переноса, которые операционная система создает для каждого пользователя.
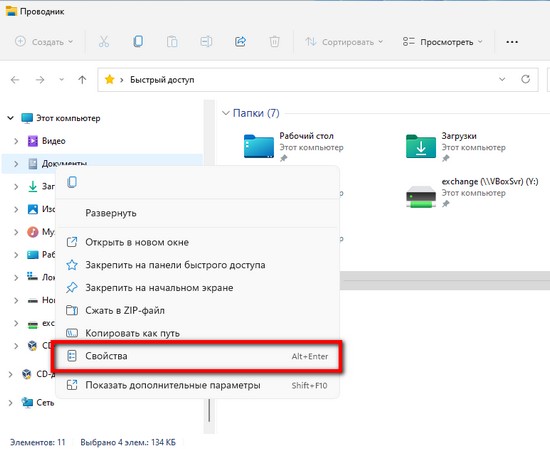
2. Кликаем по нужно папке правой кнопкой мышки, из контекстного меню выбираем пункт «Свойства».
3. В окне свойств переходим на вкладку «Расположение».
4. Жмем на кнопку «Переместить…». В окне «Выберите конечную папку», выбираете папку куда вы хотите перенести и сохранять данные. По окончанию нажав «ОК». Учтите для хранения файлов будет использована именно выбранная вами папки.
5. В окне «Свойства» нажать кнопку «Применить».
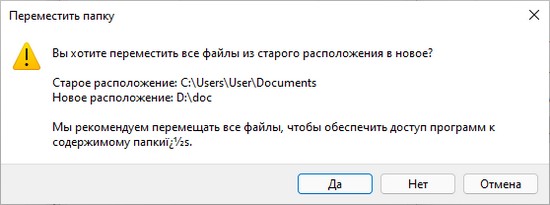
6. В появившемся окне с предупреждением о переносе папки в новое место, нажать «Да», чтоб папка была перемещена и внесены нужные изменения.
Для всех папок, которые нужно перенести повторяем действия с пункта 2 по 6. Если вам нужно вернуть пользовательскую папку в место по умолчанию в окне «Свойств» на вкладке «Расположение» необходимо нажать кнопку «По умолчанию».
Если вам необходимо перенести все профили пользователей со всеми вложенными папками (в том числе AppData) и файлами на другой диск, а не только Видео, Документы, Загрузки, Изображения, Музыка и Рабочий стол, то стоит воспользоваться способом, предложенным в статье «Как перенести папку пользователя на другой диск в Windows 11 и Windows 10».
Как изменить папку документов в Windows 11. Мастерство настройки Windows 11: Полное руководство по изменению папок и файлов 🛠️
🤷♀️Подробности🤘🏼Windows 11 — мощная и гибкая операционная система. Она предоставляет пользователям широкие возможности для персонализации. Одной из ключевых функций является возможность настройки расположения папок, имени пользователя и даже формата файлов. В этой статье мы подробно рассмотрим, как изменить папку документов, имя пользователя, расширение файлов и многое другое в Windows 11. Мы также обсудим, что делать, если вы случайно удалили папку, и как архивировать файлы для экономии места.
Откройте желаемый раздел, нажав на соответствующую ссылку:
🎁 Как изменить папку «Документы» в Windows 11 📁➡️📂
🎁 Как изменить имя папки C:\Users (имя пользователя) 👤➡️🆕
🎁 Как поменять расширение файла 📄➡️📊
🎁 Что делать, если удалил папку «Документы» 🗑️➡️⎗
🎁 Как архивировать папку Windows 11 🗂️➡️📦
🎁 Выводы и заключение 📝
🎁 FAQ ❓
😾 Раскрыть
Как изменить папку «Документы» в Windows 11 📁➡️📂
Перемещение папки «Документы» в другое место может быть полезно, если вы хотите, например, хранить свои документы на другом диске или в облачном хранилище. Это достаточно простой процесс, который включает несколько шагов.
- Откройте свойства папки: Щелкните правой кнопкой мыши по папке «Документы». Обычно она находится в «Быстром доступе» в проводнике файлов или в вашем профиле пользователя. В появившемся контекстном меню выберите пункт «Свойства».
- Перейдите на вкладку «Расположение»: В открывшемся окне свойств перейдите на вкладку с названием «Расположение». Здесь вы увидите текущий путь к вашей папке «Документы».
- Выберите новый путь: Нажмите кнопку «Переместить». Откроется окно выбора папки. Здесь вы можете выбрать новое место для хранения ваших документов. Вы можете выбрать существующую папку или создать новую.
- Подтвердите изменения: После выбора нового пути нажмите кнопку «OK». Windows 11 предложит вам переместить все файлы из старой папки в новую. Рекомендуется согласиться с этим, чтобы не потерять ваши документы. Нажмите «Да».
- Дождитесь завершения процесса: Windows 11 переместит ваши файлы в новую папку. Этот процесс может занять некоторое время в зависимости от количества файлов.
Важно! Перед началом процесса убедитесь, что у вас есть достаточно места на диске, куда вы перемещаете папку «Документы». Также убедитесь, что у вас есть права доступа к новой папке.
Как изменить имя папки C:\Users (имя пользователя) 👤➡️🆕
Изменение имени папки пользователя — более сложная задача. Это связано с тем, что имя пользователя тесно связано с системными настройками. Неправильные действия могут привести к проблемам с учетной записью. Поэтому важно следовать инструкциям очень внимательно.
- Создайте резервную копию: Перед началом любых изменений создайте резервную копию вашей системы или хотя бы важных данных. Это позволит вам восстановить систему в случае возникновения проблем.
- Создайте нового пользователя с правами администратора: Войдите в систему под учетной записью с правами администратора. Если у вас нет такой учетной записи, создайте ее. Это необходимо для выполнения следующих шагов.
- Переименуйте папку пользователя: Откройте проводник файлов и перейдите в папку `C:\Users`. Найдите папку с именем вашей текущей учетной записи. Щелкните правой кнопкой мыши по папке и выберите «Переименовать». Введите новое имя папки.
- Измените запись в реестре: Откройте редактор реестра. Для этого нажмите Win+R, введите `regedit` и нажмите Enter. Перейдите к следующему ключу реестра: `HKEY_LOCAL_MACHINE\SOFTWARE\Microsoft\Windows NT\CurrentVersion\ProfileList`.
- В разделе `ProfileList` вы увидите несколько подразделов с длинными именами, представляющими собой GUID (Globally Unique Identifier) профилей пользователей.
- В каждом из этих подразделов найдите параметр `ProfileImagePath`. Дважды щелкните по нему и измените значение на новый путь к вашей папке пользователя. Убедитесь, что новый путь соответствует имени папки, которую вы переименовали на шаге 3.
- Перезагрузите компьютер: После внесения изменений в реестр перезагрузите компьютер.
Предупреждение! Редактирование реестра — это сложная задача. Неправильные изменения могут привести к серьезным проблемам с системой. Будьте очень внимательны и следуйте инструкциям точно.
Как поменять расширение файла 📄➡️📊
Изменение расширения файла — простой процесс, но важно понимать, что это может повлиять на то, как файл открывается и работает.
- Включите отображение расширений файлов: По умолчанию Windows 11 скрывает расширения файлов. Чтобы их увидеть, откройте проводник файлов, перейдите на вкладку «Вид» и установите флажок «Расширения имен файлов».
- Переименуйте файл: Выберите файл, расширение которого вы хотите изменить. Щелкните правой кнопкой мыши по файлу и выберите «Переименовать».
- Измените расширение: В имени файла удалите старое расширение и введите новое. Например, если вы хотите изменить файл `document.txt` на `document.docx`, удалите `.txt` и введите `.docx`.
- Подтвердите изменение: Windows 11 покажет предупреждение о том, что изменение расширения может сделать файл неработоспособным. Если вы уверены в своих действиях, нажмите «Да».
Важно! Убедитесь, что новое расширение соответствует типу файла. Например, не пытайтесь изменить расширение текстового файла на расширение изображения.
Что делать, если удалил папку «Документы» 🗑️➡️⎗
Удаление папки «Документы» может быть неприятным сюрпризом. К счастью, есть несколько способов восстановить удаленные файлы.
- Проверьте корзину: Первым делом проверьте корзину. Возможно, вы случайно удалили папку, и она все еще находится там. Если это так, щелкните правой кнопкой мыши по папке и выберите «Восстановить».
- Восстановление предыдущих версий: Windows 11 автоматически создает резервные копии файлов и папок. Чтобы восстановить предыдущую версию папки «Документы», щелкните правой кнопкой мыши по папке, где раньше находилась папка «Документы», и выберите «Восстановить предыдущие версии». Выберите нужную версию и нажмите «Восстановить».
- Используйте программы для восстановления данных: Если вы не нашли папку в корзине и не можете восстановить предыдущую версию, можно использовать специальные программы для восстановления данных. Эти программы сканируют ваш диск и пытаются найти удаленные файлы.
Как архивировать папку Windows 11 🗂️➡️📦
Архивирование папок — отличный способ сэкономить место на диске и упростить передачу файлов.
- Выберите папку для архивирования: Найдите папку, которую вы хотите архивировать.
- Сжатие (zipping): Щелкните правой кнопкой мыши по папке и выберите «Отправить» -> «Сжатая ZIP-папка».
- Назовите архив: Windows 11 создаст ZIP-архив с тем же именем, что и папка. Вы можете переименовать архив, если хотите.
Выводы и заключение 📝
Настройка Windows 11 — это ключ к комфортной и продуктивной работе. Знание того, как изменять расположение папок, имена пользователей, расширения файлов и восстанавливать удаленные данные, дает вам полный контроль над вашей системой. Помните о важности создания резервных копий и осторожности при редактировании реестра.
FAQ ❓
- Можно ли изменить имя папки пользователя без создания нового пользователя? — Нет, это не рекомендуется. Изменение имени папки пользователя без создания нового пользователя может привести к проблемам с учетной записью.
- Как часто нужно создавать резервные копии? — Рекомендуется создавать резервные копии регулярно, особенно перед внесением каких-либо изменений в систему.
- Какие программы для восстановления данных лучше использовать? — Существует множество программ для восстановления данных, таких как Recuva, EaseUS Data Recovery Wizard и Disk Drill.
- Как узнать, включено ли отображение расширений файлов? — Откройте проводник файлов, перейдите на вкладку «Вид» и проверьте, установлен ли флажок «Расширения имен файлов».
- Что делать, если я не могу восстановить удаленную папку? — Обратитесь к специалисту по восстановлению данных.
Вопросы и ответы
👉 Как сменить владельца ПК 👈
1. Откройте «Свойства» папки из её контекстного меню.
2. Перейдите на вкладку «Безопасность» и нажмите кнопку «Дополнительно».
3. Напротив параметра «Владелец» нажмите кнопку «Изменить», если владелец отсутствует или им является другой пользователь.
👉 Как удалить папку Windows old 👈
Windows 10:
1. Откройте Параметры.
2. Выберите Система.
3. Выберите Память.
4. В разделе Контроль памяти выберите Изменить способ автоматического освобождения места.
5. В разделе Освободить место установите флажок Удалить предыдущую версию Windows.
6. Затем нажмите кнопку Очистить сейчас.
👉 Где находится папка Документы Windows 11 👈
В windows 11 папка «Документы» написана на кириллице и идет по пути C:\Users\akizi\OneDrive\Документы, из-за этого есть некоторые проблемы.
👉 Где папка документов 👈
По пути (C:\Users\User\AppData\Roaming\Microsoft\Windows\Recent) находится папка »Недавние документы». В ней отображается список, недавно открытых файлов и папок на компьютере.
👉 Как стать владельцем папки Windows 7 👈
Чтобы стать владельцем файла или папки:
1. Щелкните правой кнопкой мыши значок папки, владельцем которой вы хотите стать, и выберите пункт Свойства.
2. Откройте вкладку Безопасность, нажмите кнопку Дополнительно и выберите вкладку Владелец.
3. Нажмите кнопку Изменить.
👉 Как получить права на папку в Windows 10 👈
В области папок щелкните правой кнопкой мыши общедоступную папку, для которой необходимо назначить разрешения, и выберите пункт Свойства. Примечание: Если общие папки не отображаются в области папок, нажмите клавиши CONTROL+6. На вкладке Разрешения в разделе Разрешения выберите уровень разрешений из списка.
👉 Как менять тип файла 👈
Как изменить расширение файла:
1. Откройте Проводник файлов (Win+E) и перейдите к файлу, расширение которого необходимо изменить.
2. Выделите файл, который требуется изменить, а затем щелкните имя файла, чтобы переименовать его.
3. Удалите старое расширение, а затем добавьте новое расширение.
👉 Как быстро создать папку в Windows 11 👈
Нажмите клавишу с логотипом Windows+E.
👉 Как перенести Документы на диск D 👈
Откройте Параметры — Система — Память, нажмите Изменить место хранения нового содержимого и для каждой папки выберите диск, на котором отныне будут сохраняться файлы.
⚪ Как восстановить папку «Мои документы» в Windows 10
⚪ Как закрепить расположение папок на рабочем столе
⚪ Как сохранить ярлыки на рабочем столе
⚪ Как спрятать провода от компьютера под столом
….