
What you need to know
- Microsoft is changing the default behavior of the «Print Screen» key
- In an upcoming update, the Print Screen key will be changed to launch the Snipping Tool instead.
- Luckily, Microsoft will allow users to switch back to the old behavior if they want to.
Microsoft is planning to change the default behavior of the print screen button on Windows 11, which will open Microsoft’s new Snipping Tool experience instead of taking an instant screengrab of your desktop. It’s a behavior change that may take some getting used to, and luckily, it’s something you can switch back.
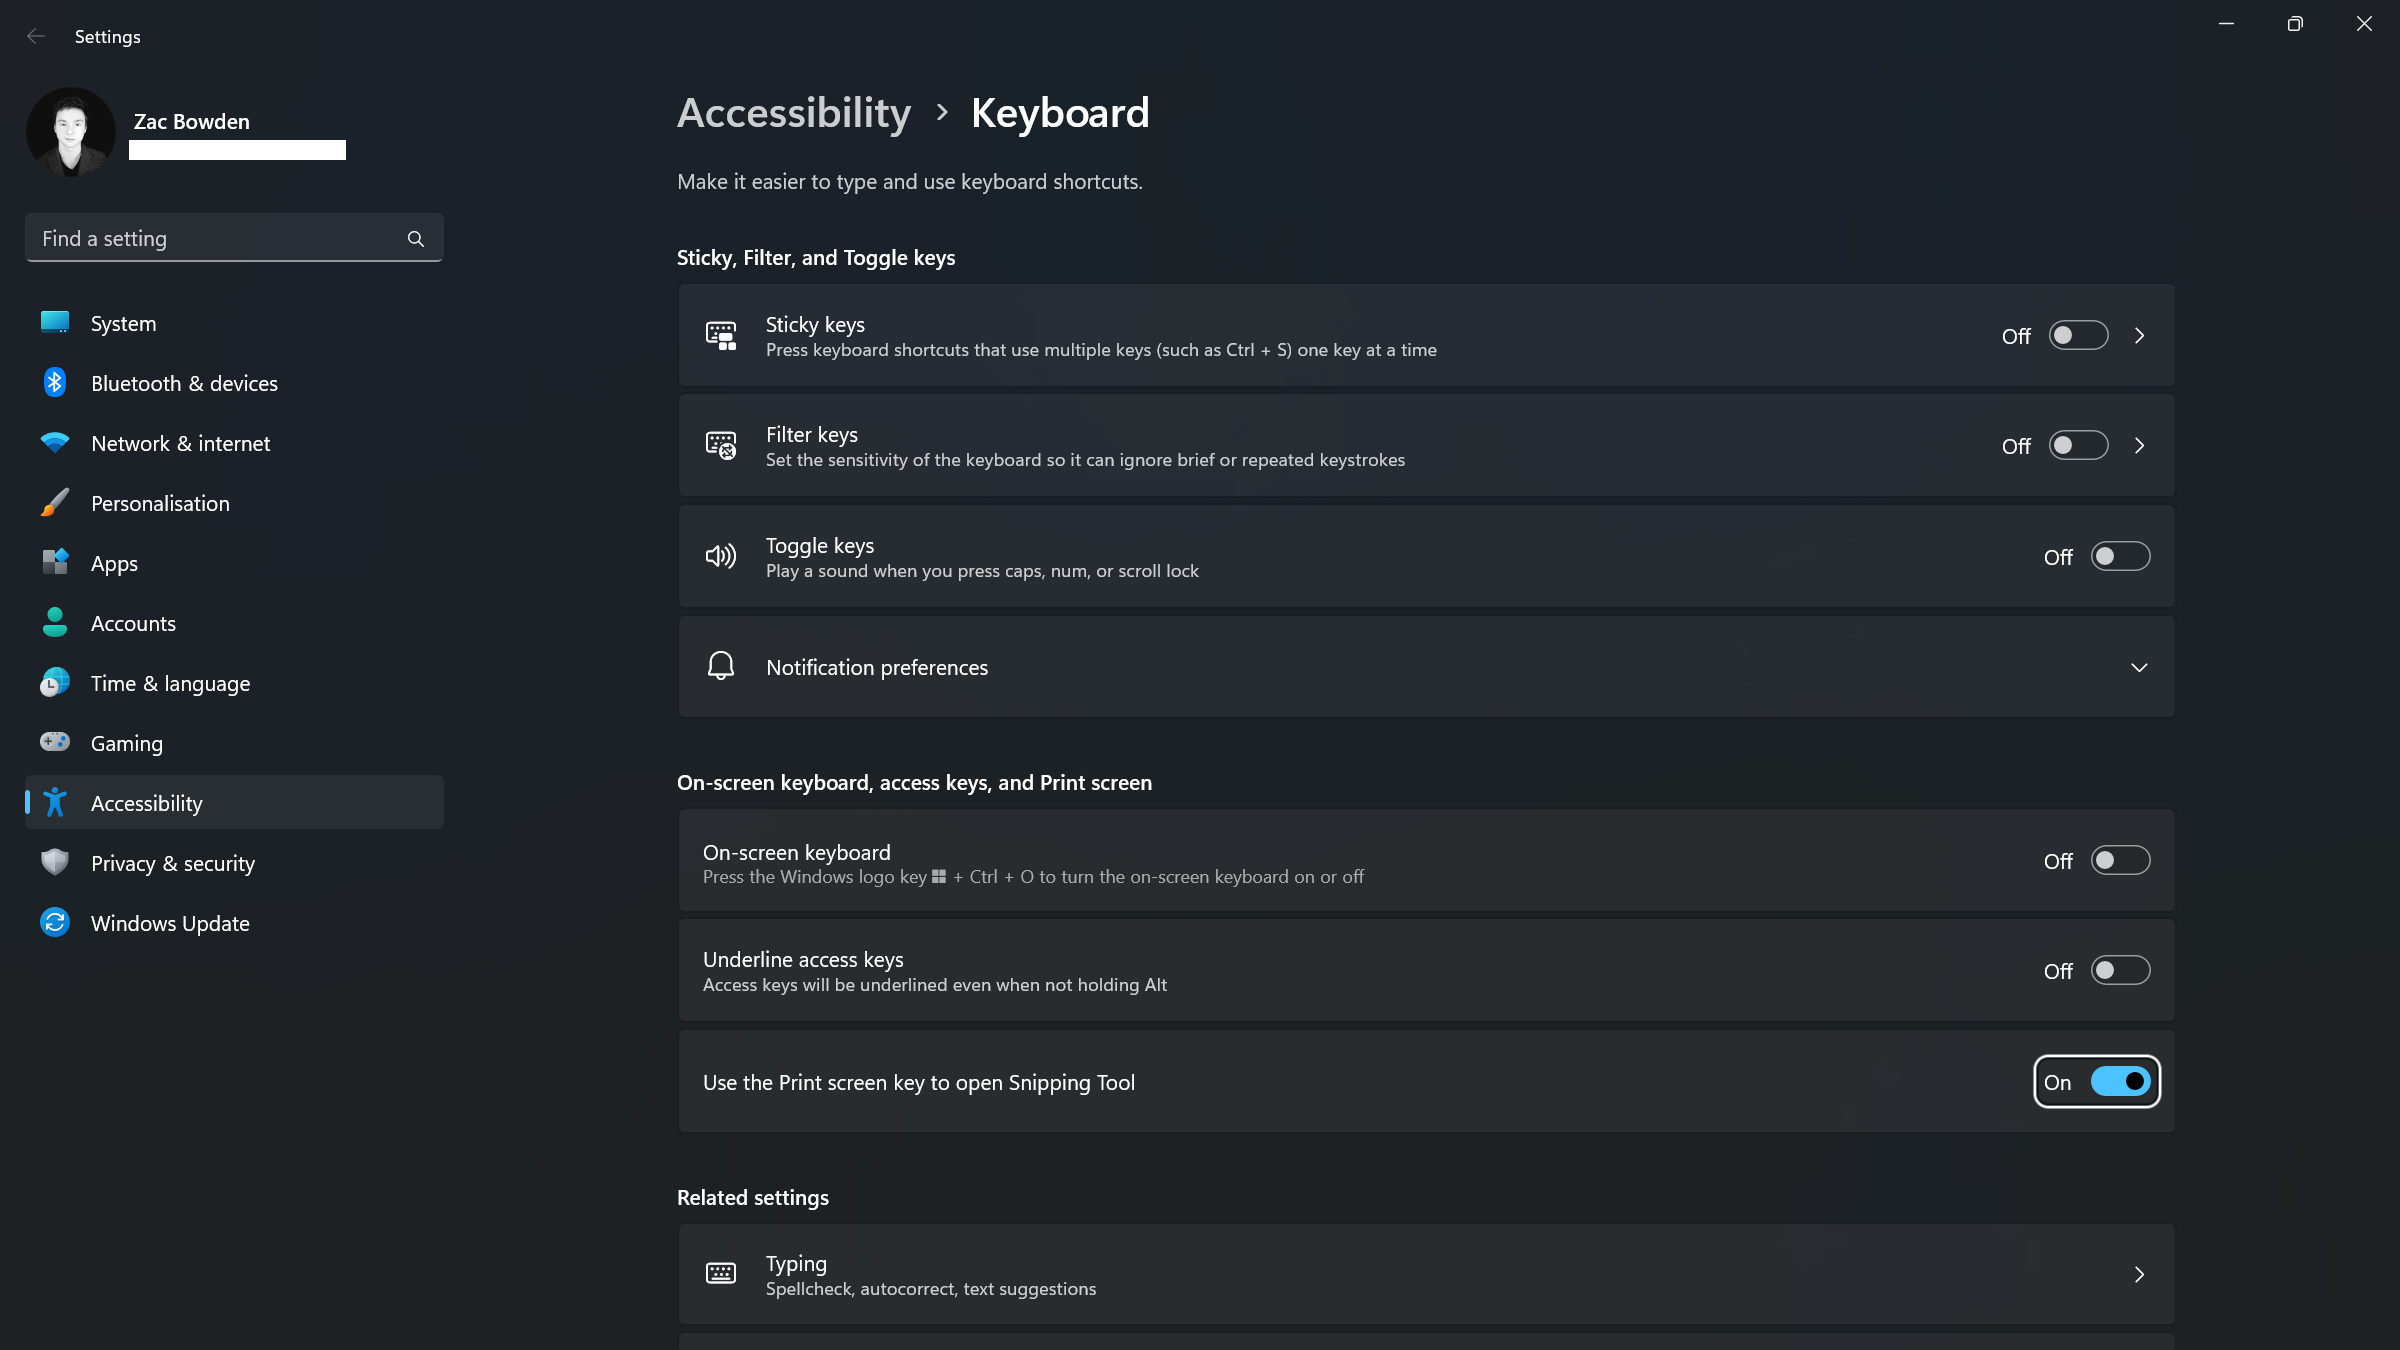
In fact, this is a setting that Microsoft has had available on Windows 11 for a long while. It’s an optional accessibility feature, which can be accessed by heading to Settings > Accessibility > Keyboard and toggling «Use the Print screen key to open Snipping Tool.»
Currently, this setting is off by default, but an upcoming Windows 11 update will enable this toggle for everyone, changing the default behavior of the print screen key to launch Snipping Tool instead. We think this is an improvement, as the Snipping Tool offers a wider variety of screenshot types, including window-only, full-screen, and freeform mode.
However, if you’re not a fan of this change, the good news is this option is remaining in the Settings app. All you have to do is head to the aforementioned Settings area and toggle it back off, which will restore the classic functionality of the Print screen button.
How to change what the Print Screen key does on Windows 11
- Open Windows Settings
- Select the «Accessibility» category in the left-hand sidebar
- Select the «Keyboard» setting
- Scroll down until you find the «Use the Print screen key to open Snipping Tool» setting
- Toggle the setting on or off
Microsoft has slowly but surely been updating legacy experiences with modern equivalents on Windows 11, and the behavior of the Print Screen button is the latest to get an update. Snipping Tool on Windows 11 was recently updated to include a screen recording mode for the first time too, bringing it in-line with other operating systems.
All the latest news, reviews, and guides for Windows and Xbox diehards.
Zac Bowden is a Senior Editor at Windows Central. Bringing you exclusive coverage into the world of Windows on PCs, tablets, phones, and more. Also an avid collector of rare Microsoft prototype devices! Keep in touch on Twitter and Threads
It’s true, the latest update to Windows 11 changes the default behavior of the PrtScr [Print Screen] button in the OS. Now the default will be to utilize Snipping Tool, which is an improvement. But want to change it back? Here’s how…
Microsoft Windows has been evolving since the first day it was released, all those years ago. Some changes are huge (Windows 95 -> Windows XP, for example, or Windows 10 to Windows 11) but most are subtle tweaks and improvements designed to make the system safer, smarter, more secure, and easier to use. About 90% of them do just that, but sometimes there are changes that prove a bit much to accept, most infamously the Start Menu -> Start Screen change, also known as the-interface-change-that-shall-not-be-mentioned in some PC circles.
The latest update that’s coming with the spring update to Windows 11 is that after many years, Microsoft is changing the default behavior of the Print Screen [PrtScr] button on your keyboard. By default it has always allowed you to grab a screen capture and have it in the copy-paste buffer, allowing you to add it to an email, share it with a colleague, etc. What it never did, however, was also save that screenshot as a file on your system, meaning it was impossible to go back and reference earlier images.
The new keybinding for PrtScr is that it’s going to launch the handy Snippet Tool, a utility included in Win11 that’s actually quite a bit more powerful and functional. I’ll show you some of its cool features, then show you how you can change things back to the earlier default if you really want to. Let’s check it out…
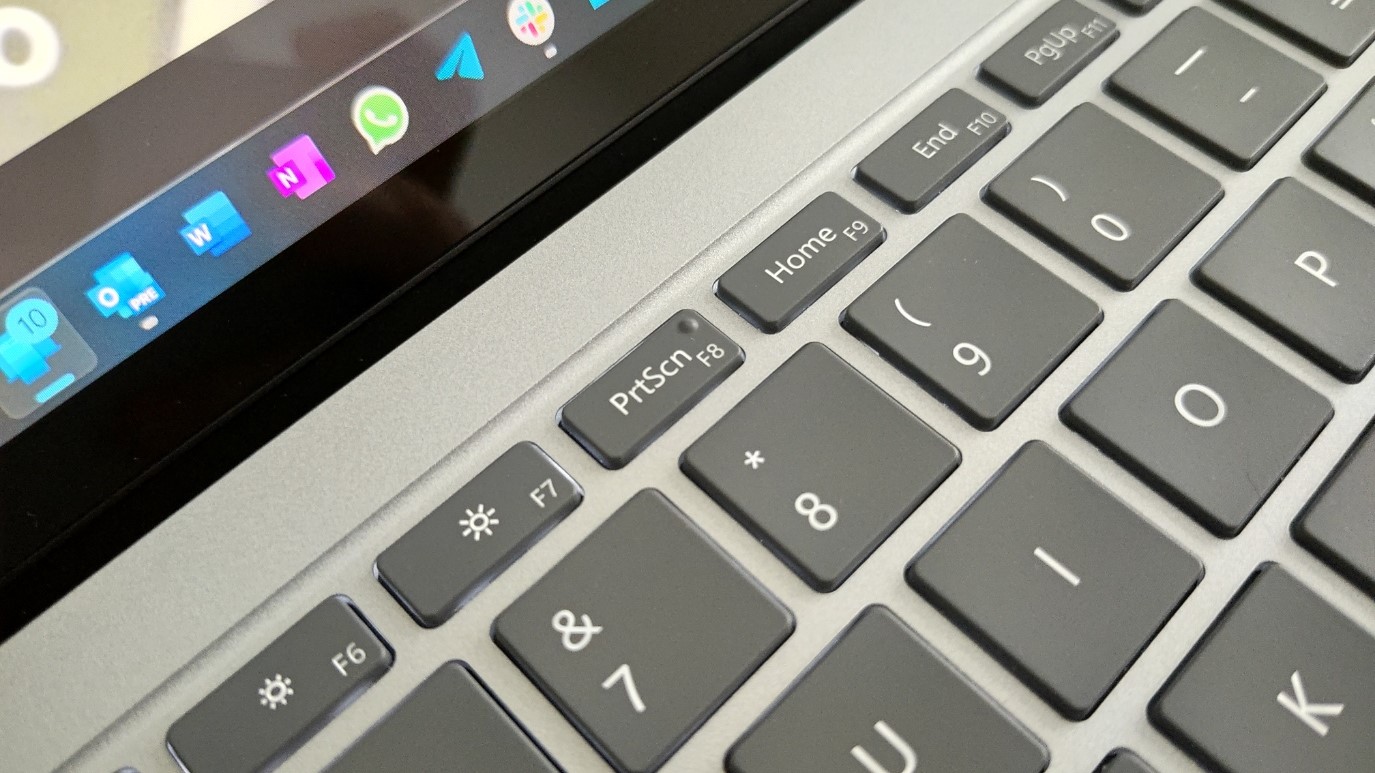
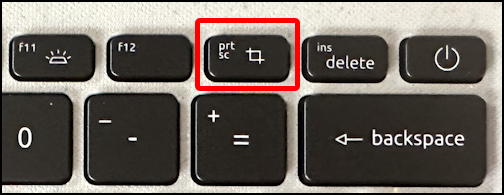
THE PRINTSCREEN KEY ON YOUR PC KEYBOARD
First things first, here’s the key we’re talking about. On many PCs it’s the f12 key, but on the below, it’s an additional key:
If you’ve never pressed it, well, then you won’t notice that it’s remapped in the latest Win11 update, right? But while many people like the default action of it taking a screen capture and putting it into the copy/paste buffer, others have figured out that you can remap the key to launch Snipping Tool.
THE SNIPPING TOOL SHORTCUT WINDOW
If you have, or you have the latest update, pressing this key won’t just generate audio feedback, it’ll display this tiny window at the top of your screen:
What’s handy is that if you move your cursor over any of these, you’ll get a tooltip reminder of its functionality:
Left-to-right they are defined-rectangular-region, freeform-region, the top window, or the entire screen. But there’s much more that Snipping Tool can do, so let’s launch the app directly…
THE FULL SNIPPING TOOL IN WIN11
Easiest way to launch any app is to just search for it on the Taskbar:
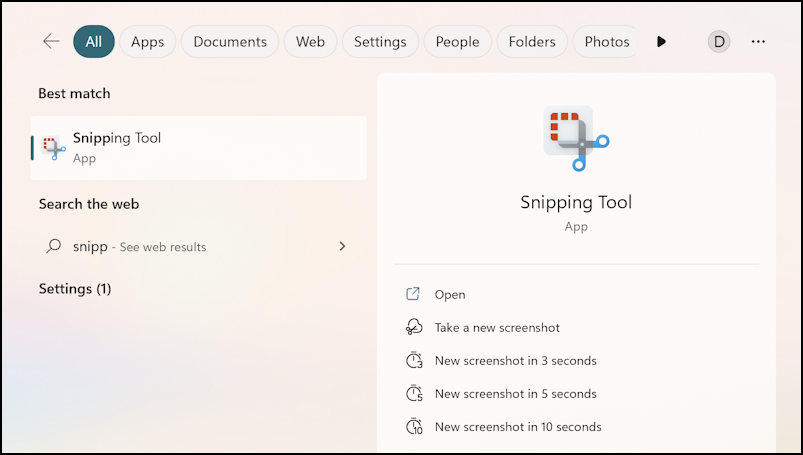
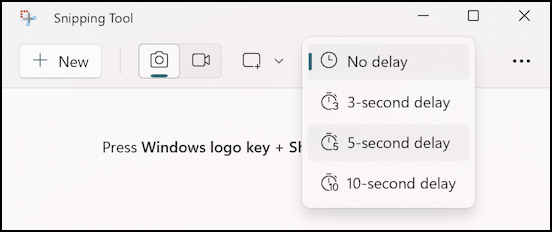
What’s particularly of note is that the shortcuts are actually useful, allowing you to easily take screenshots after a 3, 5, or 10 second delay. Just enough time to set up a window or reveal a menu or similar. Quite helpful!
To launch the app, however, just click on the app icon or “Open”. When it launches, Snipping Tool has a slightly expanded window versus the sleek minimalist window from the PrtScrn key:
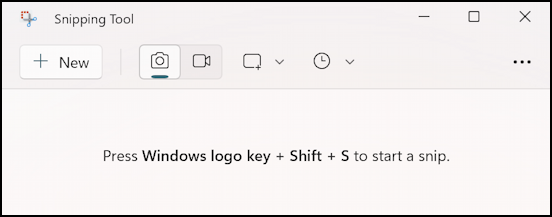
In fact, here’s a useful shortcut if you want to leave the default action of Print Screen to be “Screenshot to Clipboard” but still occasionally utilize Snipping Tool: Windows + Shift + S launches the program, ready to capture what’s on your screen!
Also note that as of very recently, Snipping Tool supports screen recording as a movie, accessed by clicking on the tiny movie camera icon (the box with the triangle on its right, adjacent to the camera icon). You can also access those delayed screenshots too:
Where it gets particularly interesting is when you go into Settings.
SNIPPING TOOL SETTINGS FEATURES AND OPTIONS
Click on the “•••” link on the right and a menu appears. Choose “Settings” and you’ll see lots of useful options:
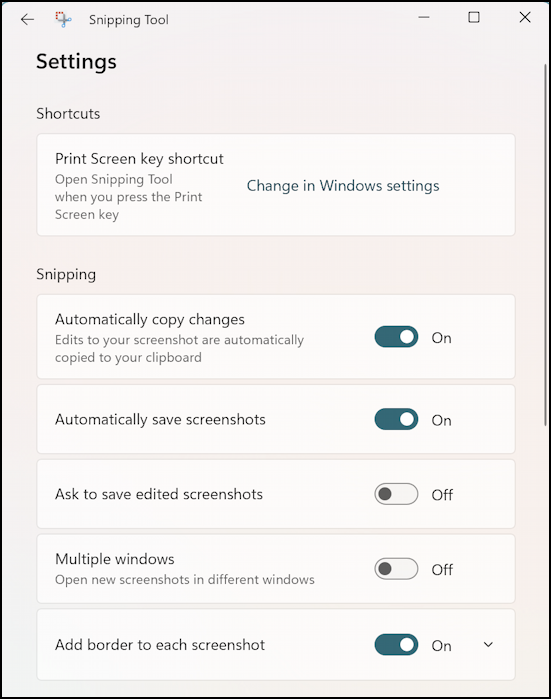
We’ll come back to the very first one, so just jump down to the Snipping block of settings. I’ve written in the past about how to add borders to your snipping tool screenshots (the last option) but notice the other options too, including the ability to turn off the automatic screenshot saving feature.
Scroll down even further and you’ll see another very useful setting:
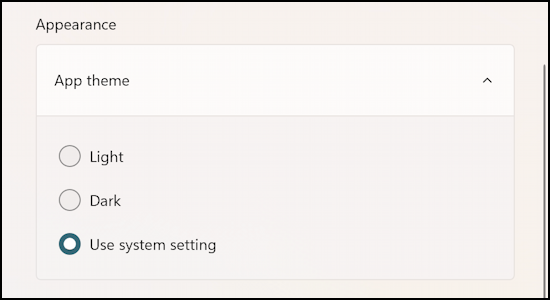
Honestly, I suggest you just mimic the settings I display here, they’ll likely work just great for you. So there’s only one more thing to consider: how to change the default PrtScrn behavior.
CHANGE DEFAULT PRINT SCREEN KEY ACTION
You can use the link in Snipping Tool settings as a shortcut or just go into your PC’s Settings and find Keyboard in the Accessibility area:
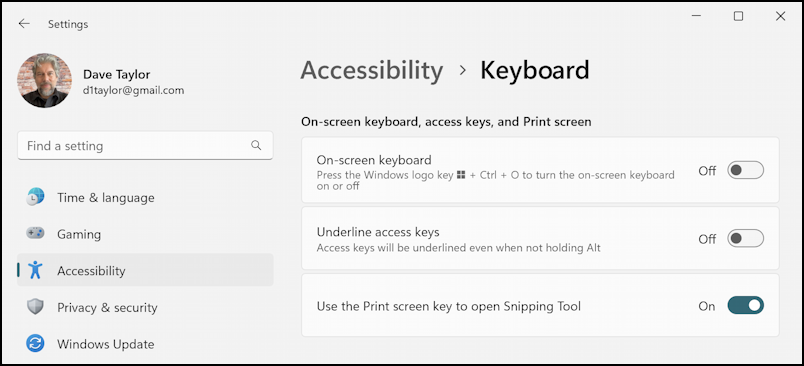
You’ll likely have to scroll down to find the entry I have shown, but it’s “Use the Print screen key to open Snipping Tool” that you can enable or disable, as you prefer. The long-time default behavior on Windows is to disable this feature, but the new default and more featureful alternative is to enable it. Your choice.
That’s it, now you can take screen captures and screenshots on your PC to your heart’s content!
Power User Tip: I’ve been writing about Windows for many years and have an extensive Windows 11 help library here. Please check it out while you’re visiting. Thanks!
print screen, prtscrn default, snipping tool
In newer versions of Windows 11, pressing the “Print Screen” (PrtScn) key on the keyboard launches new Snipping Tool app to capture the screenshot. If you want to restore the old classic Print Screen key functionality to direct copy the full screenshot to clipboard without using Snipping Tool app, this article will help you.
In recently released Moment 3 update for Windows 11, Microsoft has changed the default behavior of “Print Screen” (PrtScn) key. Now whenever the user presses Print Screen key, Windows 11 opens the built-in Snipping Tool app to take the screenshot.
Following screenshot shows the Snipping Tool app’s toolbar appearing at the top of the screen:

The user can select any option such as Rectangular mode, Freeform mode, Window mode or Fullscreen mode from the toolbar. As soon as the user selects screen area to take the screenshot, a notification is shown to notify the user about the captured screenshot. If the user clicks on the notification, Snipping Tool app opens the screenshot to allow the user view or edit the captured screenshot.

The screenshot is also automatically saved in default Screenshots folder where other screenshots taken using WIN+PrtScn key are stored. The screenshots taken using Snipping Tool are saved with the name using “Screenshot YYYY-MM-DD HHMMSS.png” format where YYYY is the year number, MM is month number, DD is date, HH is the hour, MM is minute and SS is second.
Although Snipping Tool is an improved version of taking screenshots but some Windows 11 users may not like this change. In older versions of Windows 11, the Print Screen key used to capture the screenshot to clipboard and the user could paste the screenshot in any image editing app.
Fortunately, Microsoft has provided an option to disable the new Snipping Tool functionality and restore classic Print Screen behavior in Windows 11.
If you also want to bring back good old behavior of Print Screen key in your Windows 11 device, following steps will help you:
1. Open Settings app from Start Menu. Alternatively, you can press WIN+I keys together to directly launch Settings app.
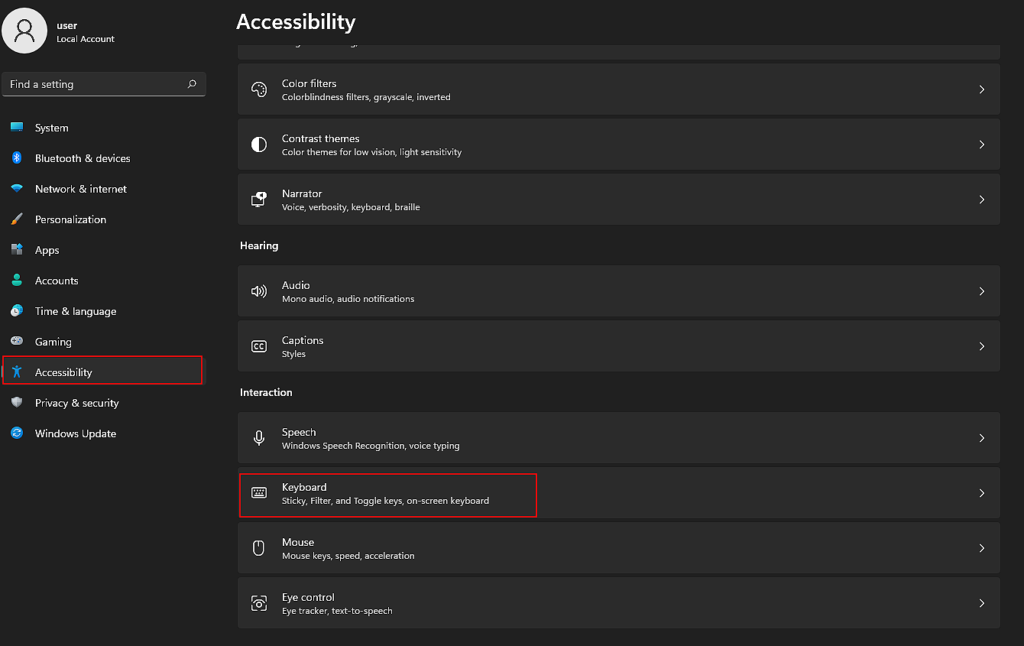
2. Now click on Accessibility tab or section present in left-side pane.
3. In right-side pane, scroll down to bottom and click on “Keyboard” option.
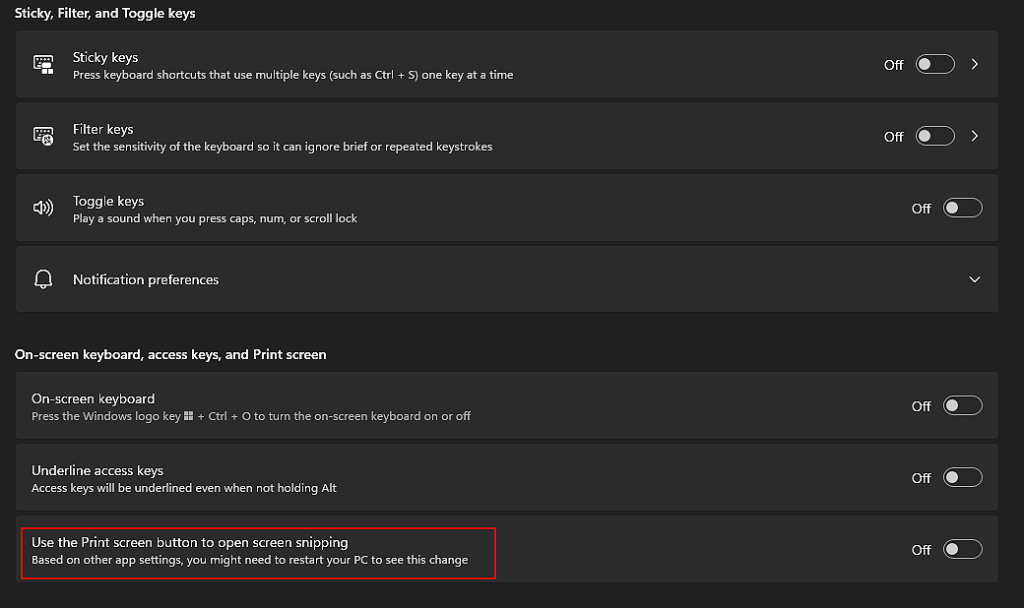
4. On the Keyboard settings page, you’ll see a new toggle option “Use the Print screen key to open Snipping Tool“.
To restore classic Print Screen key behavior, set the toggle option to OFF.

That’s it. It’ll immediately restore the old classic behavior of Print Screen key in your Windows 11 device and now the screenshots will be saved to clipboard directly without launching Snipping Tool app.
PS: If you want to enable new Snipping Tool functionality, set the above mentioned toggle option to ON.
NOTE: You can still access Snipping Tool app to capture screenshots by pressing WIN+Shift+S hotkey.
BONUS TIP: Windows 10 also contains similar feature which is disabled by default. Interested Windows 10 users can enable Snipping Tool (Snip & Sketch) app upon pressing Print Screen key using following article:
[Tip] Use “Print Screen” Key to Take Screenshots Using “Snip & Sketch” App in Windows 10
Also Check:
[Tip] Use “Win+Alt+PrtScn” Hotkey to Take Program Screenshots in Windows 10
[Tip] Use “Win+Shift+S” Hotkey to Take Selected Area Screenshot in Windows 10
[FIX] Screen Won’t Dim When You Press Win+PrtScn keys to Save Screenshots in Windows
You are here: Home » Troubleshooting Guides » [Tip] Restore Classic Print Screen (PrtScn) Key Behavior in Windows 11
Wondering how to enable or disable Print Screen key to open screen snipping in Windows 11?
As a guides writer, snapping screenshots is something I need to do multiple times a day. It’s mostly to attach them in guides like this one and sometimes just to prove a point (you know how it goes) but the one thing that has immensely helped me through the process is the Print Screen key.
Often abbreviated as Prscr, PrtScrn, Prt Scrn, or PrntScrn, the Print Screen key is a keyboard key found on most keyboards. When pressed, the key can launch screen snipping in Windows 11. It can be used to quickly take screenshots, photos, and other images. You can then annotate them with a touch/click, and save, paste, or share them with other apps.
The screen snipping feature is customizable, which means that you can enable and disable the functions of the Print Screen key according to your preferences.
In this guide, we will walk you through several easy methods of doing so in detail.
Let’s get started!
1. Modify Windows Settings.
If you want to enable or disable the Print Screen key in Windows 11, then one of the easiest ways of doing so is by modifying Windows settings.
Windows allows users to personalize their user experience by providing a wide range of customizable features. You can easily access these features using Windows Settings, so even if this is your first time modifying the Settings app, you should do just fine.
The important thing to note is that this method can also be utilized by standard users, along with administrators. If you are looking to make changes at the administrative level for all users of Windows 11, jump to the next method.
Here is what you need to do:
- Press Windows + I keys simultaneously on your keyboard to open Windows Settings.
- Select Accessibility from the left panel and click on Keyboard in the right pane.
- Now switch the toggle on or off against Use the Print screen button to open screen snipping as shown below.
- Finally, close the Settings window.
This should make the desired changes in no time.
2. Try Using CleanMyPC.
If you are unable to execute the methods in this guide, then there is a possibility that bugs or corrupt files in the operating system are preventing it from doing its job properly. Before you begin troubleshooting, it would be best if you removed all junk files.
A professional PC cleaner can help you with deep cleaning your computer. If you want a recommendation, we like CleanMyPC.

CleanMyPC offers a variety of system-maintenance utilities to address PC problems that are beyond removing junk files. After installing the tool, it will scan your computer and automatically identify any problems and fix them without extensive user input.
It is also quite easy to use, so even if you have never used a PC cleaner before, you will have no problem using CleanMyPC!
Try CleanMyPC Now!
3. Modify Registry Editor.
The Windows Registry is a database of low-level information about programs and processes on a computer. Information in the Registry Editor is stored in the form of Registry keys and by modifying the relevant keys, you can make desired changes in your operating system.
If you are an administrator who wants to enable/disable the Print Screen key for all standard users, this method is for you. However, note that the standard users will not be able to modify this setting on their own after this.
You can always revert the changes by following the steps mentioned here.
Here is how you can use Windows Registry to make the desired changes:
- Press Windows + R keys simultaneously on your keyboard to open a Run dialogue box.
- Inside the text field of the dialogue box, type ‘regedit‘ and hit Enter to open Registry Editor.

- Once you are inside the Registry Editor, navigate to the location mentioned below.
HKEY_CURRENT_USER\Control Panel\Keyboard
- Now right-click anywhere in the right pane and select the New > DWORD (32-bit) Value option.
- Rename this value as PrintScreenKeyForSnippingEnabled and double-click on it.
- If you want to enable the feature, type 1 under Value data and hit Enter. If you want to disable the feature, type 0 under Value data and hit Enter.
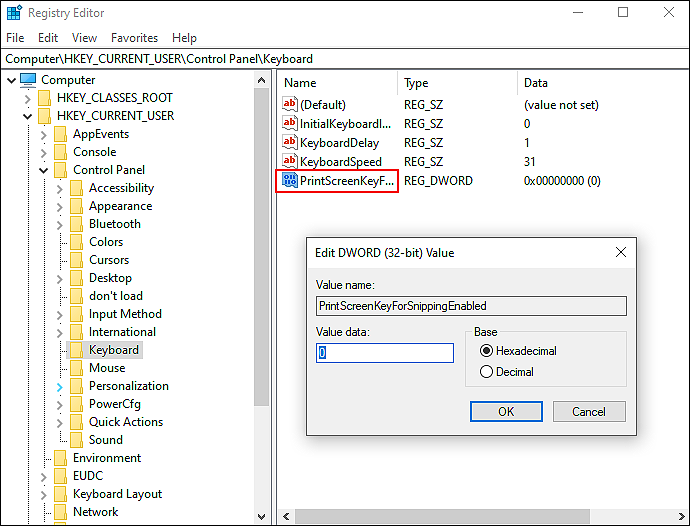
- Finally, restart your PC to save the changes.
Hopefully, this will enable/disable Print Screen key to open screen snipping in Windows 11.
This brings us to the end of our guide on enabling/disabling Print Screen key to open screen snipping in Windows 11. We tried walking you through all the steps in detail and hope that one of the methods mentioned above did the trick for you. In case you still have any confusion about the methods, please let us know in the comment section below!
If this guide helped you, please share it. 🙂
-
Zainab Falak is a staff writer for Saint and an expert in Microsoft Windows, having authored more than 200 posts. She has a Bachelors in Actuarial Sciences and her passion for computers extends to exploring various aspects, from UI customization to the Windows registry and exploring error codes. Twitter
LinkedIn
View all posts
Windows 11 makes capturing your screen easier than ever. Get to know these screenshot taking methods and save important information to your PC in a moment’s notice.
How to screen snip on Windows 11
Using the Snipping Tool is one of the easiest ways to take a screenshot. If you’ve taken screenshots using Windows before, you’re probably familiar with the Snipping Tool. This version of the tool combines the original Snipping Tool with the Snip & Sketch Tool. Follow these instructions to open the Snipping Tool and get started:
- Press Windows logo key+Shift+S to open the Snipping Tool directly.
- After entering the keyboard shortcut, you’ll see a box at the top of your computer.
- Choose between the following screenshot options: (from left to right) rectangular selection, freehand selection, window, or full-screen capture.
- Pick the rectangular selection or use freehand selection to highlight a designated screenshot area for an active window or your full screen.
- Look for a thumbnail image of your selection at the lower-right-hand corner of your screen after capturing your screenshot.
- The Snipping Tool copies your screenshot directly to your clipboard, so you can paste (CTRL+V) your image into another app if needed.
How do I edit with the Snipping Tool?
Personalize your screenshot with the Snipping Tool’s user-friendly interface. Simply open the thumbnail at the bottom of your screen and select from the variety of tools available. Highlight, crop, color, and write on your screenshot using various shapes and fonts. If you’re working with a touchscreen, draw on your screenshot directly using your finger or a stylus. When you’re done, you can:
- Save your screenshot and any edits by selecting the floppy disk icon.
- Send your image to friends, family, or colleagues using the share option.
- Print your image.
- Open your image in another app via the menu options.
How to take a screenshot using the Print Screen key
Take a screenshot the old-fashioned way with the Print Screen key. The Print Screen key is at the top-right corner of most keyboards, and usually says Print Screen, PrtSc, PrtScn, or PrntScrn.
How to capture your working screen
Capture a screenshot from an active window, or the window you’re currently working in, by following these steps:
- Select the window you want to screenshot.
- Press ALT+Print Screen.
- Paste (CTRL+V) into an Office program or app of your choice.

How to capture your entire screen
Follow these steps to copy the entire image on your screen:
- Position everything you want to copy to your liking.
- Press Print Screen.
- Paste (CTRL+V) into an Office program or app of your choice.
How to save your screenshot as an image file
Take these steps to save your screenshot directly to your desktop as an image file in Windows 11:
- Press Windows+Print Screen.
- Find your screenshot in a PNG format by navigating to Pictures > Screenshots in your directory.
Looking for the perfect Windows 11 device? Explore all our Windows computers to find the best option for you.