
Changing the background image of the Windows Terminal is an easy way to customize your command line experience. This adds a personal touch and makes your experience visually appealing.
This tutorial will explain three methods to change the Terminal background image in Windows 11.
How to Change Windows Terminal Background Image
You can change the background image of Windows Terminal in three ways: using the Default option within the Terminal app or manually editing the settings.json file using File Explorer and Run dialog box. All three methods achieve the same result and are easy to use.
Using the default option is the simplest way to change your background image while editing the settings.json file provides more control and customization options. Below, we will guide you through each option.
1. Change Windows Terminal Background Image via Its Options
The easiest way to change the background image of Windows Terminal is by using its option. This can be done by opening Windows Terminal and changing settings within the app. Here’s how to do it:
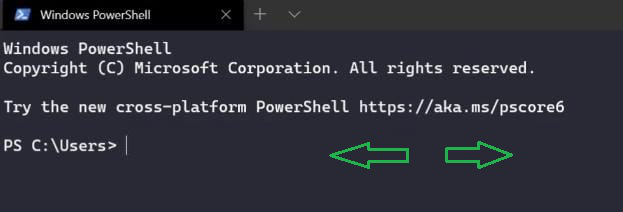
To get started, open the Windows Terminal application first. For this, click on the Windows icon to open the Start menu. Then type Terminal into the search box, and select it from the list.
Once you open the Terminal application, click on the dropdown menu icon in the top left corner, and select the Settings option.
In the settings window’s left column, go to Defaults. Now move to the right side of the page and tap Appearance to expand it.
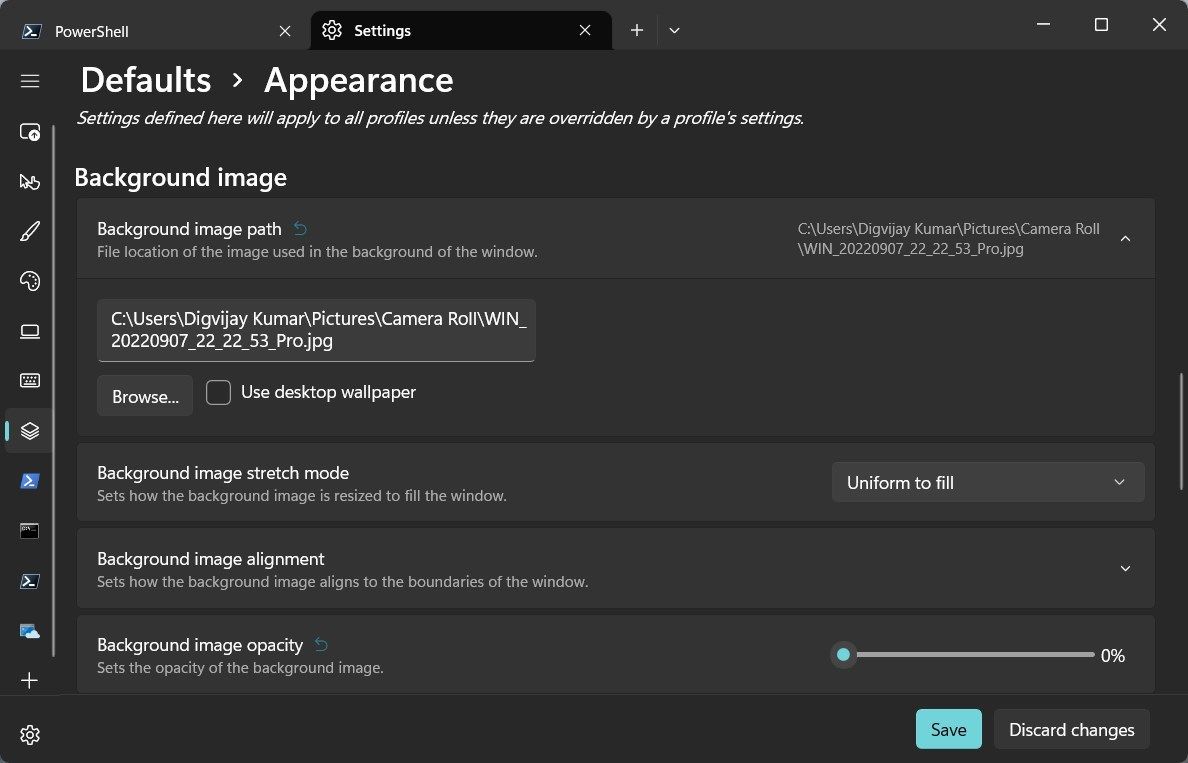
Scroll down to the Background image section, then click the Background image path option. Next, click the Browse option and select an image you want to use as a background.
Click Open to confirm your selection. Now you should be able to see the selected image as the background of the terminal.
You can also copy and paste the file path of an image directly into the Background image path option. Finally, click the Save button and the background image will be set.
To improve the appearance of your image in the Windows Terminal, you can customize it using several options. You can use Background image stretch mode to change how the image is resized to fill the window. Further, you can change the Background image alignment to adjust the image position, and Background image opacity to make it more or less transparent.
Once you are satisfied with the changes, click the Save button in order to apply them. Your custom background image should now be visible in the Windows Terminal.
If you want to switch to the default image, reset the Windows Terminal to its default settings. This will automatically restore your background to the default image.
2. Change the Windows Terminal Background Image via Windows File Explorer
Manually editing settings.json is another great way to customize your Windows Terminal background image. For this, you need to open the settings.json file in any text editor, such as Notepad. Here’s how to do it:
- Open Windows File Explorer (see our guide on how to open File Explorer on a Windows PC).
- Once you’re in File Explorer, navigate to your C: drive and select the Users folder.
- Locate your username in this folder, then open the AppData folder and the Local folder.
- In the Local folder, find and open the Packages folder.
- Look for the Microsoft.WindowsTerminal_8wekyb3d8bbwe folder and open it.
- Finally, in this folder, double-click on Settings to open settings.json in any text editor.
In the settings.json file, you will find a section called backgroundImage. You can use Ctrl + F to find it quickly.
This is where you can enter the path of your own image to set as the Windows Terminal background. To do this, first copy the full file path for the image you want to use, including the file name.

Then paste this path into the backgroundImage section of settings.json. Remember to include a comma (,) after the path, as shown in the image above.
Once you have pasted the path of your image, save the settings file and close the text editor. To apply this new background image, simply restart your Windows Terminal. The new background image should be displayed on the terminal window.
You can adjust the image transparency using the same method. Simply input values for the backgroundImageOpacity parameters to modify the settings. These additional settings allow you to personalize your Windows Terminal background image even further.
Restart Windows Terminal for the changes to take effect. In this way, you can easily customize your Windows Terminal background image using the settings.json file.
3. Change the Windows Terminal Background Image Using the Run Command
The Run Command can also help you change your Windows Terminal background image. Instead of searching for the settings.json file in Windows File Explorer, you can directly access and modify it using this tool.
Follow these instructions to customize your Windows Terminal background image using the Run Command tool:
- Right-click on Start and select Run from the menu list. If you prefer using shortcut keys, press Win + R on your keyboard to open the tool directly.
-
In the text box, type the following command and press Enter:
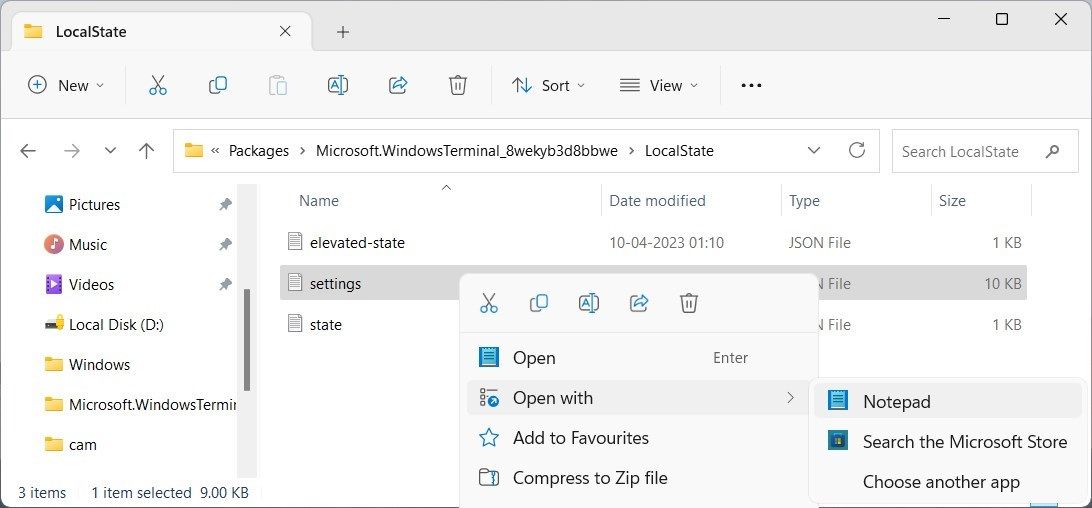
%localappdata%\Packages\Microsoft.WindowsTerminal_8wekyb3d8bbwe\LocalState -
This will open the Local State folder containing the settings.json file. Right-click on Settings and select Open with > Notepad.

- Scroll down to the backgroundImage section and replace the image path with your own.
- Then press Ctrl + S on your keyboard to save the changes.
- Close Notepad, then open Windows Terminal to see your new background image.
You’re done! Now you know how to customize your Windows Terminal background image using the Run Command tool. You can further explore the settings.json file or use other tools to customize and personalize your Windows Terminal.
Set a New Background Image for Windows Terminal
It’s easy to customize your Windows Terminal by adding or changing the background image. All you need to do is access the settings.json file, where you can also adjust your image’s transparency. Just remember to restart Windows Terminal after making changes. Read this guide to learn how to customize your Windows Terminal background image easily.
Last Updated :
09 Dec, 2022
Every operating system should have some sort of place where users can execute some commands. Commands are a very important element while using any operating system. Every technique of the operating system can’t be known by all users. There might be some processes that need to be executed by the commands. For all these reasons, all operating systems have some sort of software where users can run commands. Linux has its default software known as the Terminal. macOS has a place known as the Terminal. But in the case of the Windows operating system, there are Command Prompt, Power Cell, etc. So for Windows, there are a lot of operating systems present.
But after Windows 11, the process changed. Like other operating systems, Windows also has only one terminal. It is known as the Windows Terminal. This is the common terminal where Command Prompt, Powercells, etc. all get in the same place. For Windows operating system, users need to install the Windows Terminal from the Microsoft Store. But in Windows 11, there is only Windows Terminal present. So, users find it boring as it is a simple black background with no beautification. Users often need to use a custom theme in the Windows Terminal to provide it with a special look.
Creating Custom Themes For Windows Terminal:
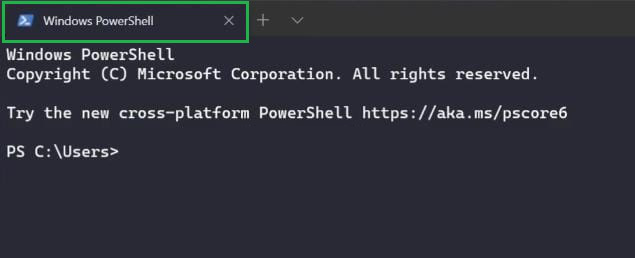
Step 1: First, users need to open the Windows Terminal. After opening, they will find a Dropdown symbol. Users need to click on the symbol to find more options. There will be some options present. Among them, users need to click on the Settings option.
Step 2: There is no typical settings window present. It is a JSON file. As per the default editor of the device, the JSON file will open. If the default editor is Notepad, then the JSON file will open in Notepad. Users need to search for the default braces in the file. All settings-related changes should be made there.
Disclaimer: Users are advised not to change any other part of the JSON file. It is advisable to only change the default. Changes to any other parts in the Settings file can create issues at the Windows Terminal. If users are confident enough about the changes that they want to make there, then only they proceed. Making changes without having any proper knowledge can create issues.

Step 3: Now, inside the default braces, users can make changes. As users can add Color Schemes there. There are a lot of Color Schemes on the internet. The Windows Terminal has the ability to gather details from the name. Users will just need to provide their names there. The changes will be done automatically. Users can use the sample text provided below. This will make changes to the Terminal.
«defaults»:
{
«colorScheme»: «Dracula»,
},
Step 4: Now after making the above changes, if the user wants, they can add more changes to it. For example, if users want, they can also add the Tab Color also. This means the tab color will be changed from that onwards. To change the tab color, users also need to add that part to the default settings. Users can use any type of color. The same color code can be used which they use in the CSS color scheme.
«defaults»:
{
«colorScheme»: «Dracula»,
«tabColor»: #282A36′
},
Step 5: Now, along with that, users can make changes to the thickness of the background color. Using the acrylic settings, users can change the coloring thickness of the background. Users just need to add the acrylic settings option to the default. Users can use the below-mentioned text. It will increase the transparency of the background color.
«defaults»:
{
«colorScheme»: «Dracula»,
«tabColor»: #282A36′
«useAcrylic»: true’
},
Step 6: Now, if users want, they can change the front of the Terminal also. Users just need to provide the front name to the default settings. Users just need to write the face name in the settings. Then the face will be changed. Along with that, if users want, they can change the font size Just, they need to add the Front Size part to the default settings. Along with that, they need to mention the front side also. Then the front side will get changed. Users can use the below-written text.
«defaults»:
{
«colorScheme»: «Dracula»,
«tabColor»: #282A36′
«useAcrylic»: true’
«frontFace»: «Agency FB»,
«frontSize»: 12,
},

Hence, we have successfully created a custom theme for Windows Terminal.
(Image credit: Windows Central)
Windows Terminal is the best terminal app for Windows 10 for a number of reasons. The open-source tool built out by Microsoft can seamlessly operate a number of different shells at the same time. It can also operate a different visual theme for each of those shells and there’s room to go wild with your designs.
White text on a black background is fine, but you’re really missing out. After all, why not make your environment as pleasing as possible to look at?!
If this sounds interesting, here’s how to get started customizing your Windows Terminal.
How to change your Windows Terminal theme
To get you started there are a number of built-in themes that you can switch to. Right now, any changes to themes involve making amendments to the settings.json file, though in a future release there will also be a settings UI to do this.
To get a feel for things, changing to one of the stock themes is easy.
- Open Windows Terminal
- From the dropdown, select settings.
- The settings.json file will open up in your default text editor.
From here on out you need to add the theme information to whichever shell you want to change. It will follow this template:
"colorScheme": "Your Chosen Color Scheme"In Windows Terminal as standard you can choose any of the following themes:
All the latest news, reviews, and guides for Windows and Xbox diehards.
- Campbell
- Campbell Powershell
- Vintage
- One Half Dark
- One Half Light
- Tango Dark
- Tango Light
So, for example, to amend PowerShell 7 to have a One Half Dark theme, your settings would look something like this:
"hidden": false,"colorScheme": "One Half Dark","name": "PowerShell","source": "Windows.Terminal.PowershellCore"Note, too, that if your theme is not the final line you must remember to add a comma at the end of its line. Once you’ve added the theme, simply save the file and Windows Terminal will update before your eyes.
How to add custom themes to Windows Terminal
The built-in themes aren’t the only ones you can use in Windows Terminal. If you’re feeling particularly creative you can build your own. Microsoft has a great resource with some examples to help you get started.
Essentially, you add your own scheme with the hex string for the colors you want into the schemes section, then use this as you would in the first section to add the theme to your shells.
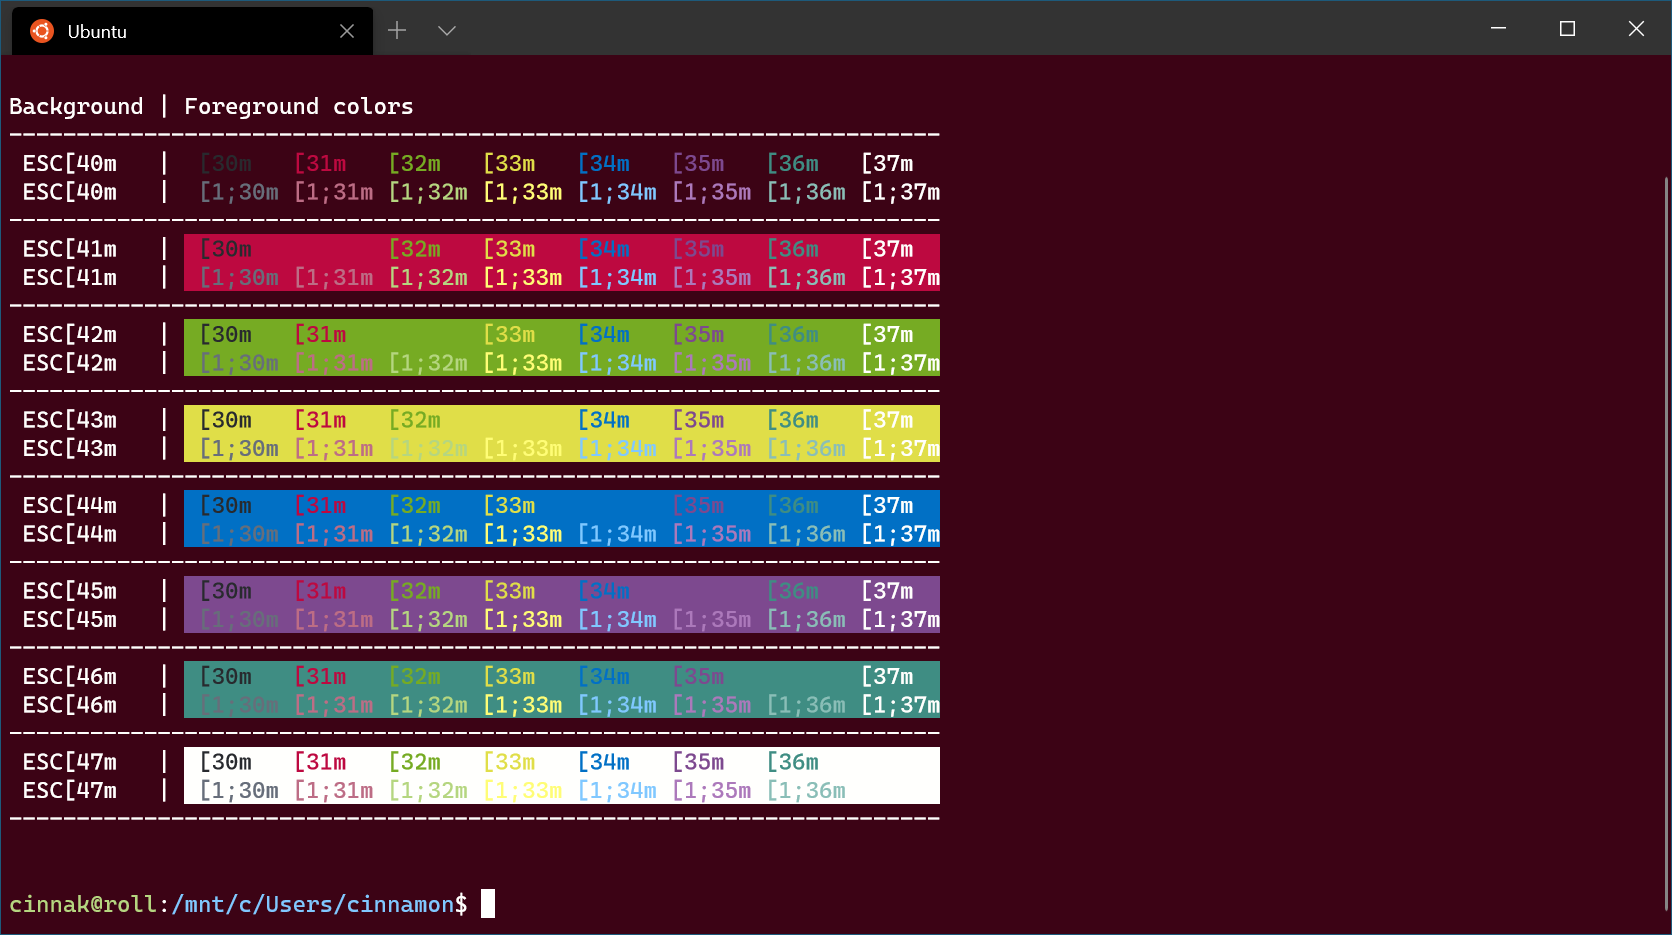
This example from Microsoft shows you the template to follow to create the theme in the image above:
{"theme": "dark","profiles": [{"name" : "Ubuntu","source" : "Windows.Terminal.Wsl","colorScheme" : "Raspberry","cursorColor" : "#FFFFFF","fontFace" : "Cascadia Code","padding" : "5, 5, 5, 5","suppressApplicationTitle": true,"tabTitle": "Ubuntu"}],"schemes": [{"name" : "Raspberry","background" : "#3C0315","black" : "#282A2E","blue" : "#0170C5","brightBlack" : "#676E7A","brightBlue" : "#80c8ff","brightCyan" : "#8ABEB7","brightGreen" : "#B5D680","brightPurple" : "#AC79BB","brightRed" : "#BD6D85","brightWhite" : "#FFFFFD","brightYellow" : "#FFFD76","cyan" : "#3F8D83","foreground" : "#FFFFFD","green" : "#76AB23","purple" : "#7D498F","red" : "#BD0940","white" : "#FFFFFD","yellow" : "#E0DE48"}]}I also recommend following the Microsoft Program Manager for Windows Terminal, Kayla Cinnamon, on social media, not only to keep up with the latest news, but also for regular amazing theme ideas.
How to change the background image in Windows Terminal

You can also add a background image to your Windows Terminal shells, either as part of or instead of, a full theme. It’s very easy and all you need is your picture and its file location.
To then add this to Windows Terminal, follow these steps.
- Open Windows Terminal
- From the dropdown, select settings.
- The settings.json file will open up in your default text editor.
Locate the shell you wish to change and then add the image with this template:
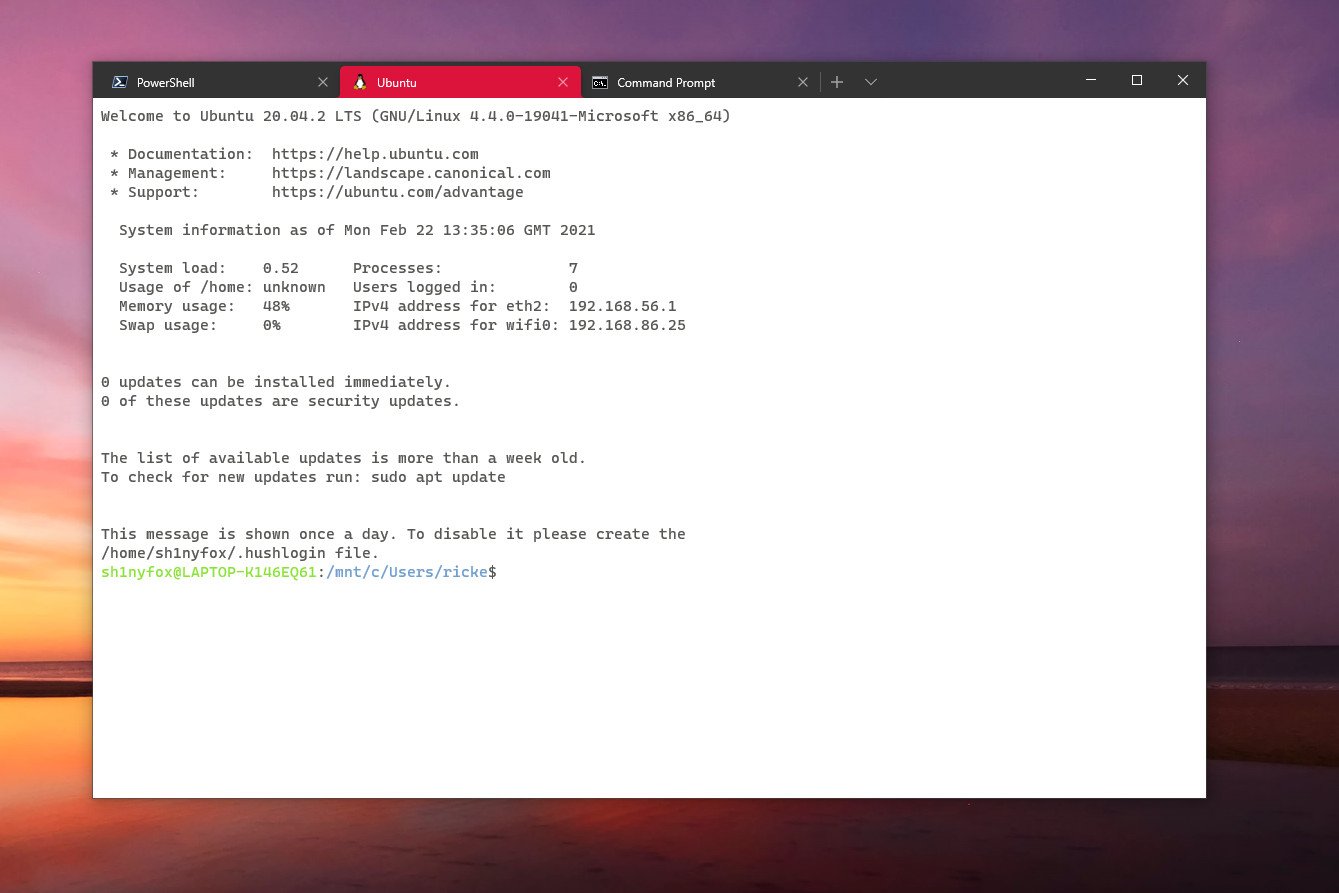
"backgroundImage": "C:/Your/Image/Location/imagefilename.png",You should then end up with something that looks like this:
{"name": "Command Prompt","commandline": "cmd.exe","backgroundImage": "C:/Users/ricke/Pictures/surface-duo-screenshottool.webp","hidden": false},Save the file and your background image should now be attached to your shell.
The fun doesn’t stop there, though, and if you’re using a full background image you probably want to tone it down a little. We can do that by adding an opacity value such as this:
"backgroundImageOpacity" : 0.2,This then tones down the background image and you’re left with something less distracting that doesn’t overpower the text.
Windows Terminal also supports Acrylic effects, and you can use this either on its own or in conjunction with your background image like this:
"useAcrylic" : true,"acrylicOpacity" : 0.5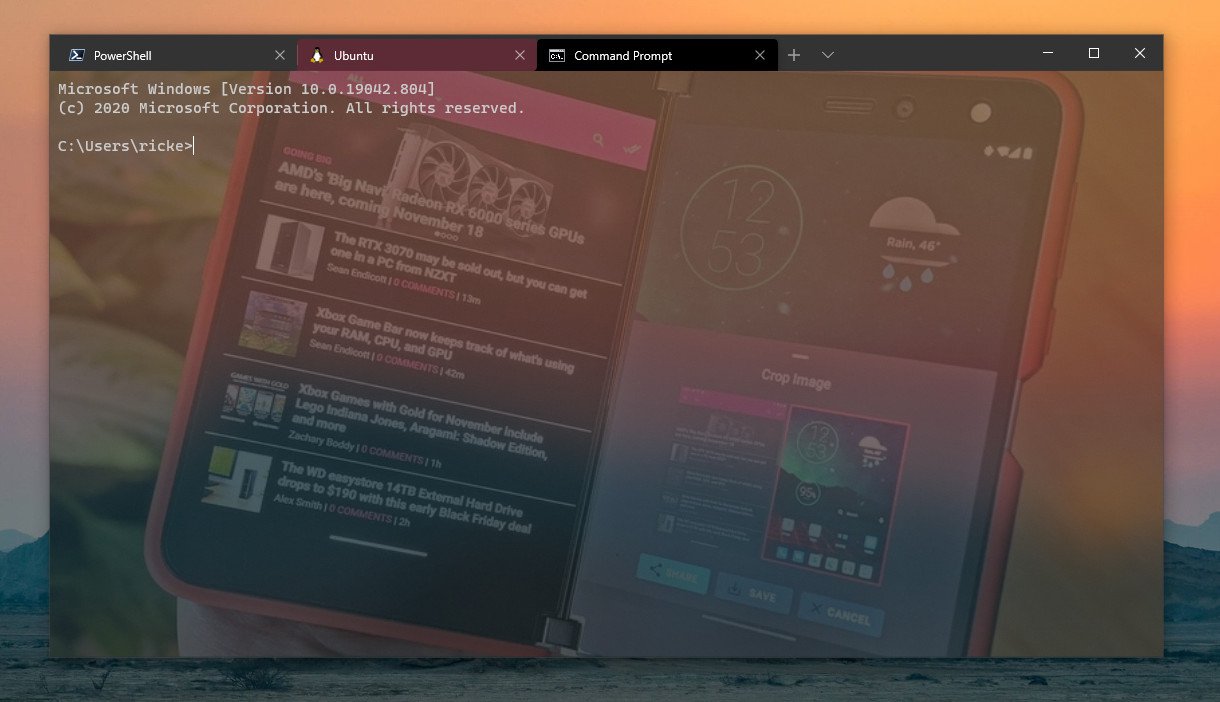
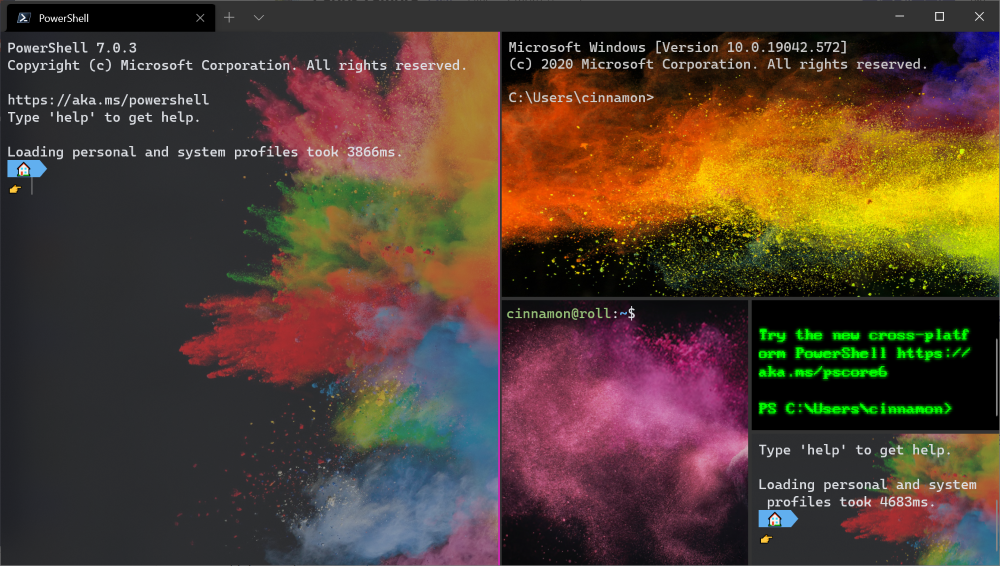
The image above is a result of adding a background image, opacity, and enabling the Acrylic effect. All of the settings combined will look something like this:
{ "name": "Command Prompt","commandline": "cmd.exe","backgroundImage": "C:/Users/ricke/Pictures/surface-duo-screenshottool.webp","backgroundImageOpacity" : 0.2,"useAcrylic" : true,"acrylicOpacity" : 0.5,"hidden": false},Even when the settings UI is integrated, users of Windows Terminal will be able to make manual changes to the JSON like this, and it’s on the roadmap for an import/export feature to allow even easier sharing of themes among the community.
This tool can be used for command-line tools, Command Prompt, PowerShell, and the Windows Subsystem for Linux. It has multiple tabs for easy navigation and several other handy features.
Richard Devine is a Managing Editor at Windows Central with over a decade of experience. A former Project Manager and long-term tech addict, he joined Mobile Nations in 2011 and has been found on Android Central and iMore as well as Windows Central. Currently, you’ll find him steering the site’s coverage of all manner of PC hardware and reviews. Find him on Mastodon at mstdn.social/@richdevine
Время на прочтение6 мин
Количество просмотров36K
Терминал Windows поставляется с множеством функций, которые позволяют настраивать его и взаимодействовать с ним наиболее удобным для вас способом. Давайте рассмотрим несколько советов и приемов, которые помогут вам настроить свой терминал так, чтобы он идеально вам подходил. На момент публикации этого сообщения в блоге Windows Terminal имел версию 1.3, а Windows Terminal Preview — версию 1.4.
При первом запуске
При первой установке Windows Terminal вы будете поприветствованы строкой Windows PowerShell. Терминал Windows по умолчанию поставляется с профилями Windows PowerShell, командной строки и Azure Cloud Shell.
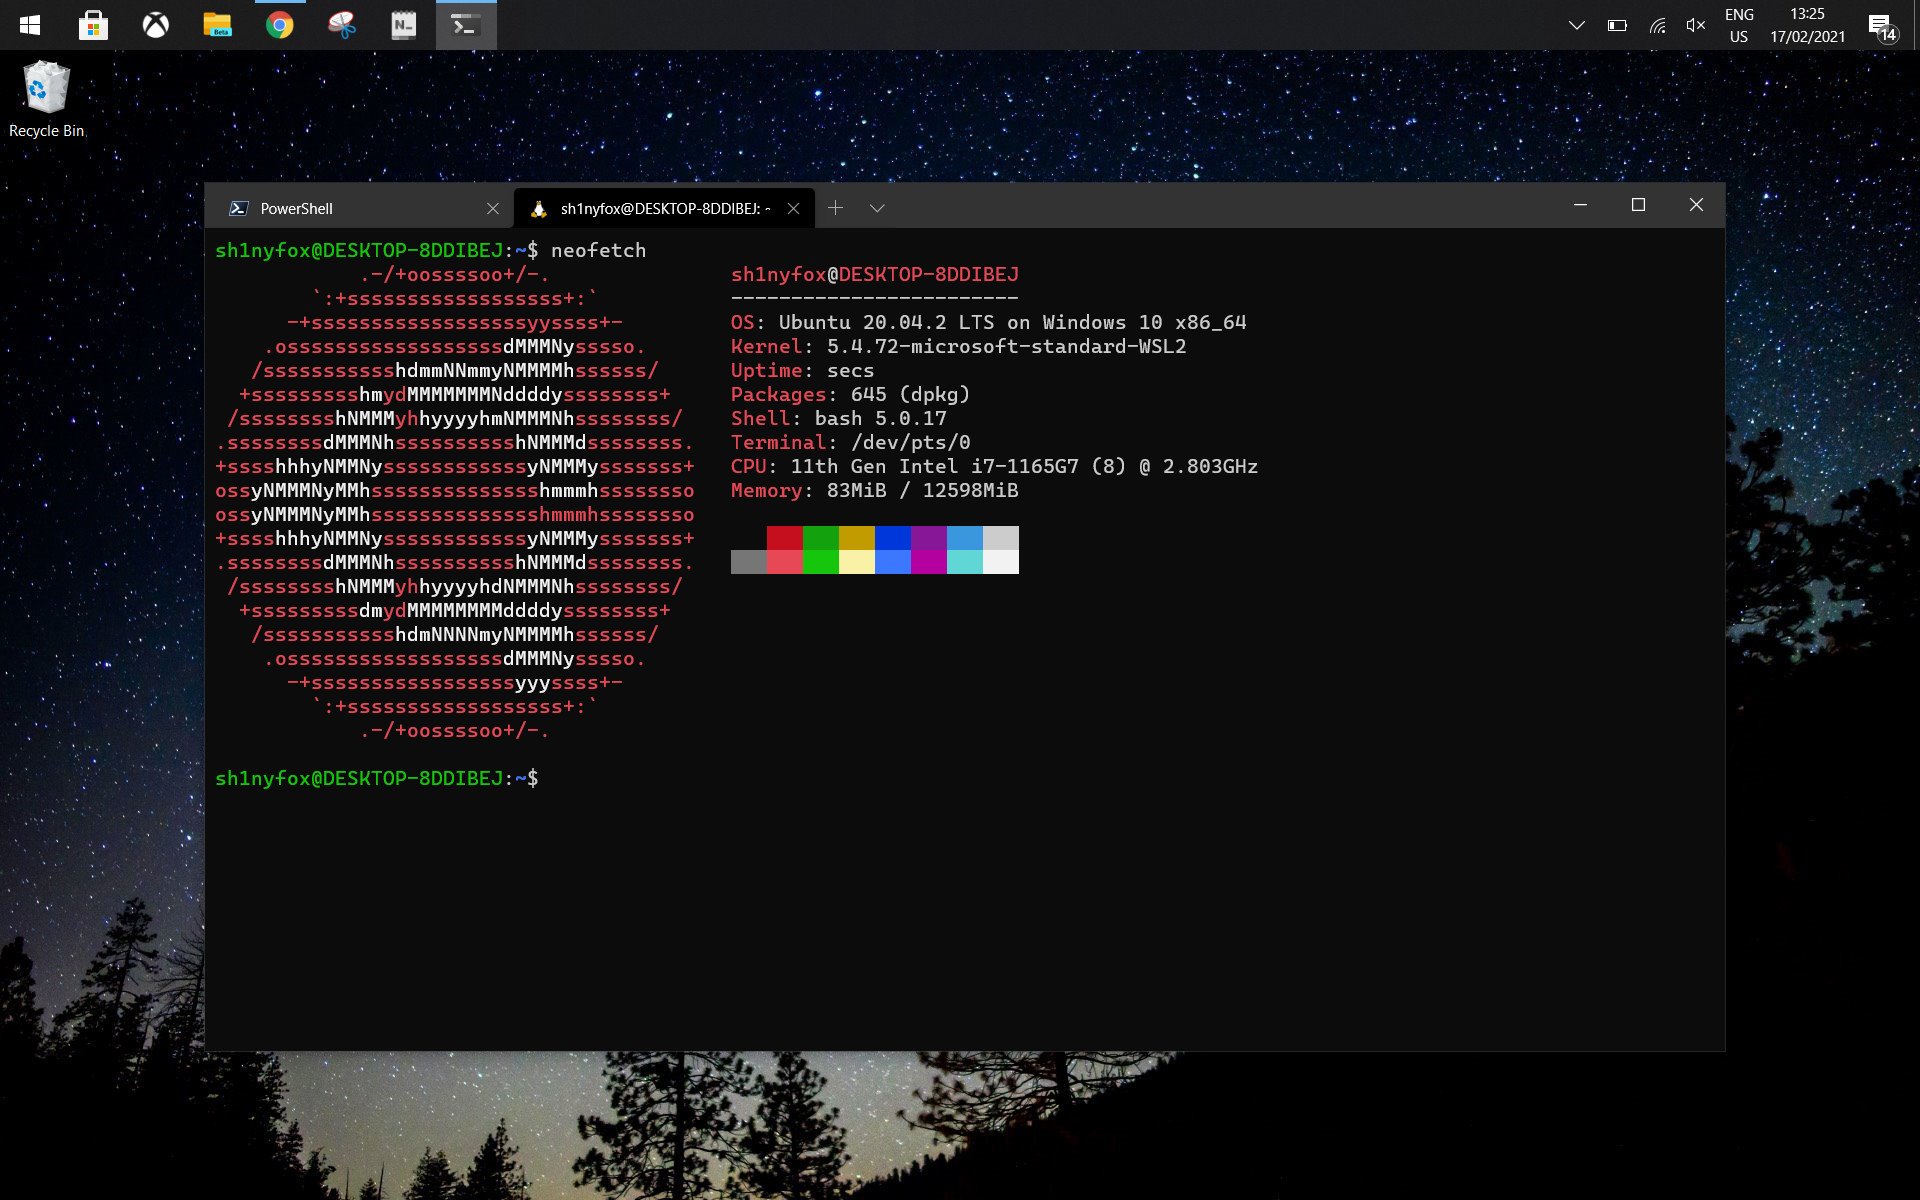
В дополнение к этим профилям, если у вас установлены какие-либо дистрибутивы Подсистемы Windows для Linux (WSL), терминал также автоматически создаст профили для этих дистрибутивов. Если вы хотите установить дополнительные дистрибутивы WSL на свой компьютер, вы можете сделать это после установки терминала и при следующем запуске терминала профили для этих дистрибутивов должны появиться автоматически. Эти профили будут иметь значок Tux, однако вы можете изменить значок дистрибутива в своих настройках, чтобы он соответствовал любому дистрибутиву, который у вас есть. Вы можете найти дополнительную информацию о WSL на сайте с документацией WSL.
Примечание. Вам нужно будет загрузить значки дистрибутивов, поскольку они не поставляются внутри терминала.
Кастомизация
Терминал Windows поставляется с большим набором настроек по умолчанию, включая цветовые схемы и сочетания клавиш. Если вы хотите просмотреть файл настроек по умолчанию, удерживайте Alt и нажмите кнопку «Настройки» в раскрывающемся меню.
Глобальные настройки профиля
Терминал Windows предоставляет вам возможность применить настройку к каждому профилю без необходимости дублировать настройку для каждой записи профиля. Это можно сделать, добавив параметр в массив "defaults" внутри объекта "profiles". Список всех возможных настроек профиля можно найти на странице настроек профиля в нашей документации.
"profiles":
    {
        "defaults":
        {
            // Поместите здесь настройки, которые вы хотите применить ко всем профилям.
            "fontFace": "Cascadia Code"
        },
        "list":
        []
    }
Кастомные цветовые схемы
Терминал Windows по умолчанию поставляется с набором цветовых схем. Однако, когда дело касается цветовых схем, есть неограниченные возможности. Отличное место для поиска дополнительных схем терминалов — terminalplash.com.
Если вы хотите создать свою собственную цветовую схему, terminal.sexy — отличный инструмент для создания и визуализации ваших собственных цветовых схем.
Совет. Вы можете сопоставить свою цветовую схему с фоновым изображением, используя палитру цветов PowerToys, чтобы получить коды цветов для использования в вашей схеме. PowerToys можно установить с помощью winget с winget install powertoys.
Настраиваемая командная строка
Вы можете придать стиль своей командной строке с помощью Oh my Posh и Terminal-Icons. Эти инструменты позволяют настроить внешний вид вашей командной строки с помощью цветов, глифов и смайликов. Чтобы запустить Oh my Posh с Posh-Git и PSReadline, следуйте этому руководству.
Oh my Posh недавно выпустили Oh my Posh 3, который имеет гораздо больше возможностей настройки и не является эксклюзивным только для PowerShell. Пройдя руководство, указанное выше, вы можете перейти на V3 с помощью следующей команды:
Update-Module -Name oh-my-posh -AllowPrerelease -Scope CurrentUser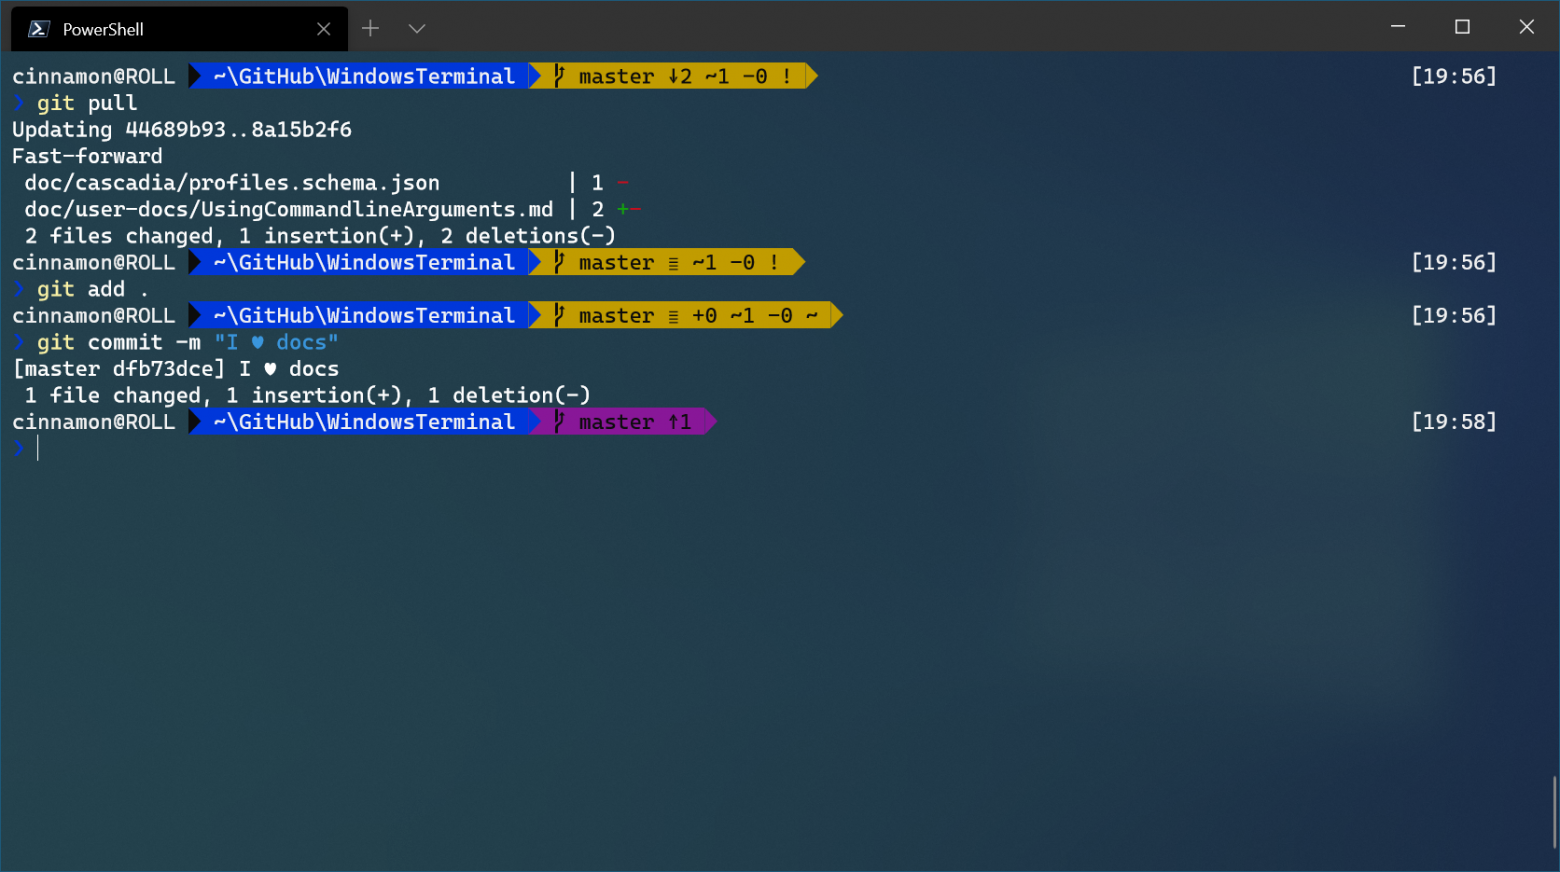
Вы можете добавить немного изюминки своей оболочке, добавив пользовательские значки с помощью значков терминала. На изображении ниже также используется настраиваемая тема Posh для добавления смайлов в строку.
Примечание. Для отображения значков терминала вам необходимо установить шрифт Nerd Font.
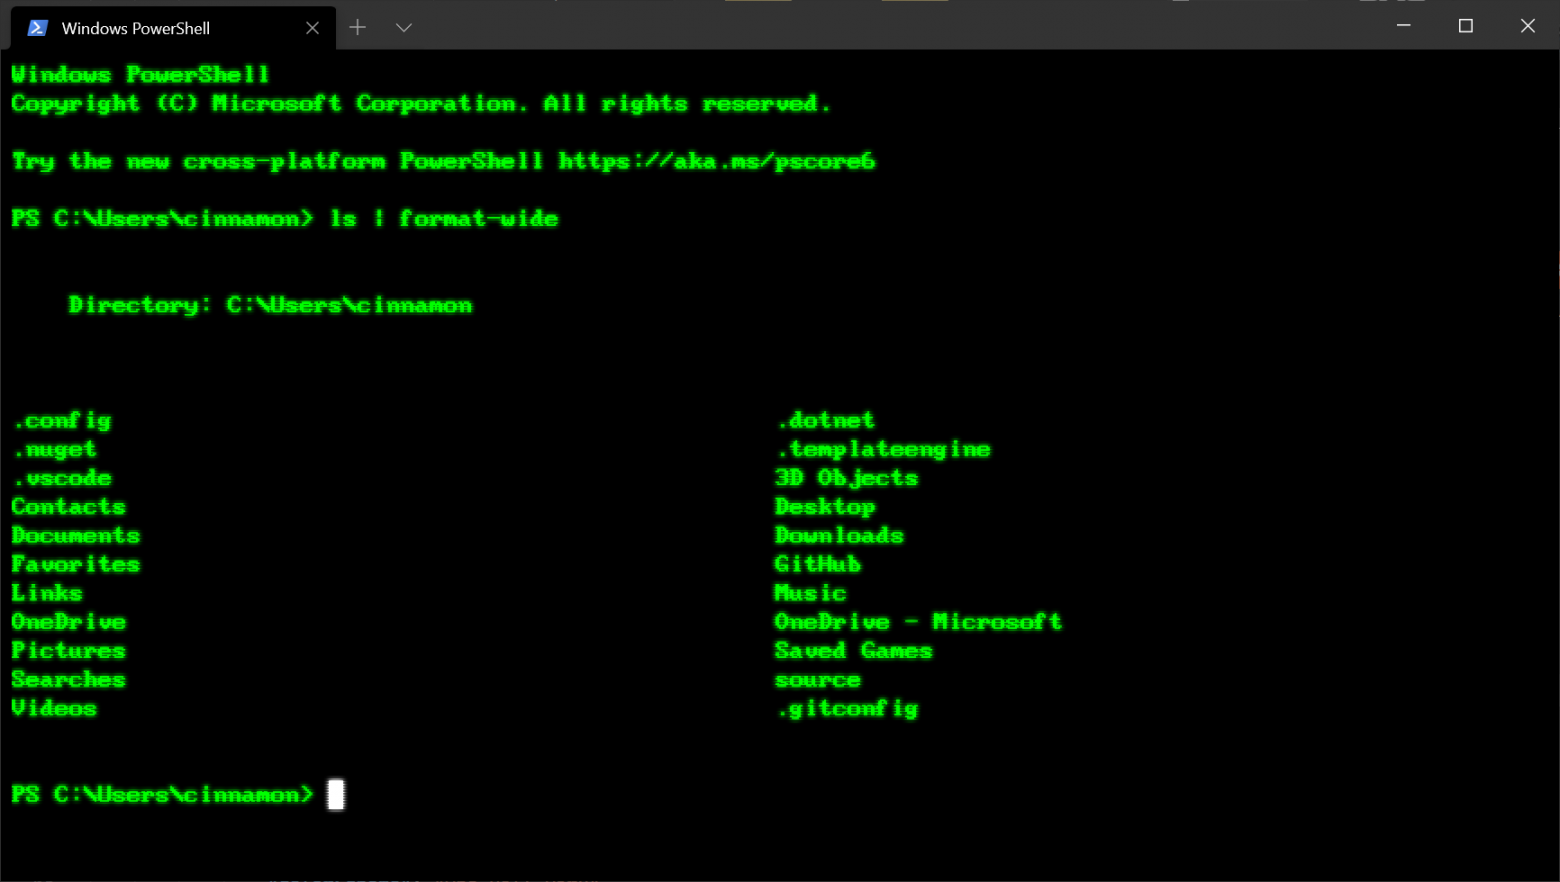
Олдскульный шрифт
Для тех из вас, кто является поклонником эффекта ретро-терминала, отличное место для поиска шрифтов старой школы находится на странице https://int10h.org/oldschool-pc-fonts/.

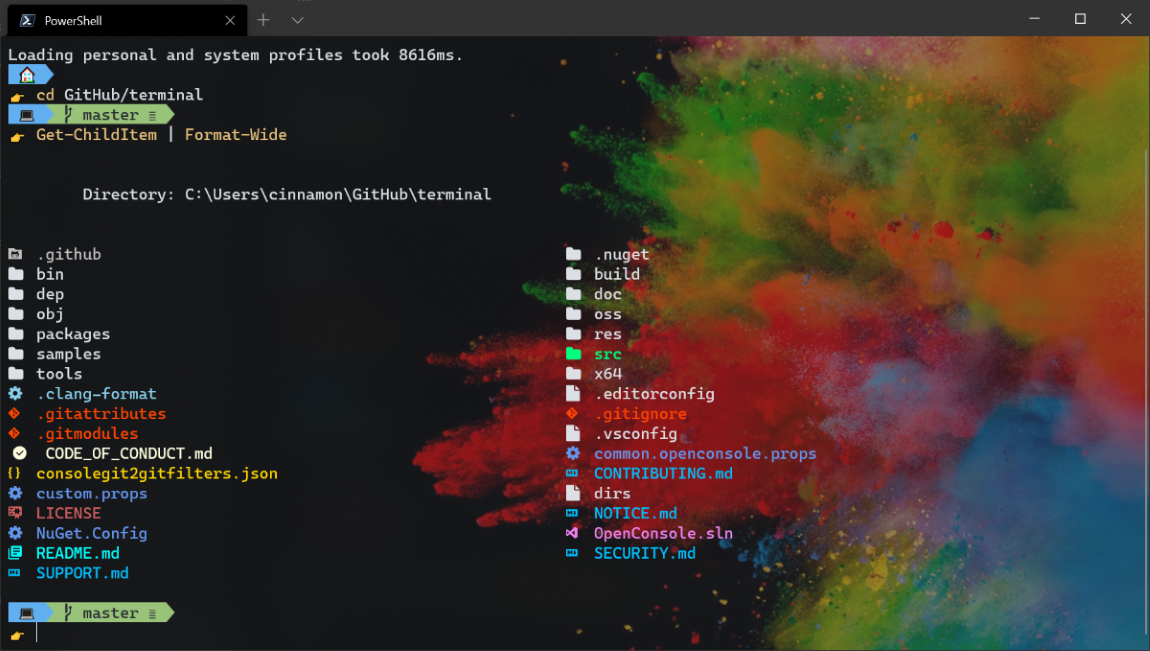
Места для фоновых изображений
Обои для рабочего стола часто отлично смотрятся в Windows Terminal в качестве фоновых изображений. Отличные места для поиска фоновых изображений — это темы Windows, а также WallpaperHub. Терминал Windows поддерживает как изображения, так и гифки для фоновых изображений.
Другой популярный вариант — размещение логотипа оболочки, которую вы используете в качестве фонового изображения, чтобы помочь определить, в какой оболочке вы находитесь. Вы можете указать, где будет размещаться фоновое изображение, с помощью "backgroundImageAlignment" в настройках. Дополнительную информацию о настройках фонового изображения можно найти в нашей документации.
Функции
аргументы командной строки wt.exe
Вы можете запустить свой терминал в определенной конфигурации с помощью команды wt.exe. Некоторые параметры, которые вы можете установить, — это расположение вкладок и панелей, а также их начальные каталоги и профили. Вы можете сохранить настраиваемую команду как ярлык и закрепить ее на панели задач, чтобы открыть желаемую конфигурацию.
Если вы используете команду wt.exe внутри палитры команд, она вступит в силу в вашем текущем окне терминала, вместо того, чтобы запускать новый экземпляр терминала.
В этом примере профиль PowerShell откроется в текущем рабочем каталоге на новой вкладке с вертикальной панелью, на которой будет запущен ваш профиль по умолчанию.
wt -p "PowerShell" -d . ; split-pane -VFull documentation about wt command line arguments can be found on our docs site.
Панели
Терминал Windows поддерживает панель для профилей. Вы можете открыть новую панель профиля, удерживая Alt и щелкнув профиль в раскрывающемся списке, или используя следующие сочетания клавиш:
- Автоматическое разделение панели текущего профиля:
Alt+Shift+D - Горизонтальное разделение панели профиля по умолчанию:
Alt+Shift+Minus - Вертикальное разделение панели профиля по умолчанию:
Alt+Shift+Plus
Вы также можете перемещать фокус по панелям, удерживая Alt и используя клавиши со стрелками. Наконец, вы можете изменить размер панелей, удерживая Alt + Shift и используя клавиши со стрелками. Дополнительную информацию о панелях можно найти на нашем сайте документации.
Копи-паст
В Терминале Windows по умолчанию используются сочетания клавиш для копирования и вставки Ctrl+C и Ctrl+V, соответственно. Если у вас нет выделения, Ctrl + C будет действовать как обычно, как команда break.
Вы можете настроить, какие клавиши вы хотите использовать для "копировать" и "вставить", редактируя привязки клавиш. Если вы удалите эти привязки клавиш из файла settings.json, терминал по умолчанию будет использовать Ctrl + Shift + C и Ctrl + Shift + V. Это может быть особенно полезно для пользователей WSL, которым нужны свободные Ctrl + C и Ctrl + V для своих оболочек.
Вы также можете выбрать, какое форматирование копируется в буфер обмена вместе с символами новой строки с помощью действий "copyFormatting" и "singleLine", связанных с командой копирования. Полную документацию по командам интеграции с буфером обмена можно найти на нашем сайте документации.
Определение привязок клавиш и действий
Большая часть настраиваемых свойств внутри Windows Terminal зависит от привязок клавиш и действий. Команды внутри массива "actions" будут автоматически добавлены в вашу палитру команд. Если вы хотите также использовать их с привязками клавиш, вы можете добавить к ним «ключи», чтобы вызывать их с клавиатуры. Полный список всех возможных команд можно найти на странице действий нашего сайта документации.
Отправка команд input
Терминал Windows дает вам возможность отправлять input в вашу оболочку с привязкой клавиш. Это можно сделать с помощью следующей структуры внутри массива "actions" .
{ "command": {"action": "sendInput", "input": ""}, "keys": "" }Отправка ввода в оболочку с помощью сочетания клавиш может быть полезна для часто выполняемых команд. Одним из примеров может быть очистка экрана:
{ "command": {"action": "sendInput", "input": "clear\r"}, "keys": "alt+k" }Также может быть полезен переход к родительскому каталогу с привязкой клавиш.
{ "command": {"action": "sendInput", "input": "cd ..\r"}, "keys": "ctrl+up" }Вы также можете использовать эту функцию для запуска сборок или тестовых сценариев.
Начальный каталог WSL
На данный момент Терминал Windows по умолчанию устанавливает начальный каталог профилей WSL в качестве папки профиля пользователя Windows. Чтобы настроить запуск вашего профиля WSL в папке ~, вы можете добавить следующую строку в настройки своего профиля, заменив DISTRONAME и USERNAME соответствующими полями.
"startingDirectory": "//wsl$/DISTRONAME/home/USERNAME"In this post, we will show you how to set a custom theme in Windows Terminal app on a Windows 11/10 computer. This is a new feature of Windows Terminal that helps to create multiple custom themes and then you can apply any of those themes with a few mouse clicks. In the custom theme, you can set the tab background color or color for the focused tab, color for the tab row of the active window, unfocused tabs (or background tabs), and color for the tab row for the background window. You can see the same in the screenshot added below.

Earlier, there were only three options present to use as a theme (Dark, Light, and Windows theme) in Windows Terminal. Now you can create and set a custom theme with any of your favorite colors. The best part is you can use a custom theme with the color scheme feature of Windows Terminal.
Before you proceed, do note that this custom theme feature has come with version 1.16 of Windows Terminal. Currently, it can be accessed in the Preview release, but it will be a part of the stable version of Windows Terminal soon.

In order to set a custom theme in Windows Terminal on your Windows 11/10 computer, you need to edit the JSON settings file of Windows Terminal. There you can add theme content and then save the JSON file. After that, the custom theme can be set. Editing that file is quite easy. Even if something goes wrong, you can always reset Windows Terminal settings to default very easily. Now let’s check the steps:
- Open the Windows Terminal app
- Access the Settings tab
- Open the JSON settings file
- Add the theme contents in the required place
- Save the JSON file
- Access the Appearance section
- Select your custom theme
- Save the changes.
Let’s have a look at all these steps in detail.
First, you need to open the Windows Terminal app which can be done using the Start menu, Search box, etc., on your Windows 11/10 computer.
Use the Ctrl+, hotkey to open the Settings tab. In that tab, click on the Open JSON file option (present in the bottom left corner) and open that settings file in Notepad.

Scroll down the settings content to look for the “themes”: [] line. This is where you need to add the content for your custom theme. You must enter the content under the square brackets or closed brackets only. Here is a sample theme content that will give you a good idea:
"themes":
[
  {
    "name": "The Windows Club",
    "tab":
    {
        "background": "#FFA500FF",
        "showCloseButton": "always",
        "unfocusedBackground": "#FFFF00FF"
    },
    "tabRow":
    {
        "background": "#00FFFFFF",
        "unfocusedBackground": "#FF0000FF"
    },
    "window":
    {
        "applicationTheme": "light"
    }
  }
]

The theme content has the following important items:
- Theme Name: You can give any name to your theme and it will appear in settings. As in the above example, you can change The Windows Club with any other name
- Tab background color: You can enter the Hex color code of your choice to show that color for the focused or active tab
- Set a background color for the unfocused tabs. Again, you need to enter a Hex color code
- Background color for tab row
- Background color for tab row for the unfocused window
- Application theme: It can be set to dark, light, or system only. It doesn’t let you select a custom color.
Once the theme content is added, use the File menu of Notepad to save the JSON file.
Related: How to enable Transparent Background in Windows Terminal
In the same way, you can add content for other themes. Just remember to close the content of one theme with a comma(,), and enter the content of another theme in a separate line. Keep the theme contents in the square brackets.
Now come back to the Settings tab of Windows Terminal. After that, access the Appearance section available on the left part of Settings. Open the drop-down menu available for the Theme option and there you will see the name of your custom theme.

Select that theme and press the Save button.
That’s it! It will immediately change the theme and the custom theme will be applied in all the opened instances of Windows Terminal.
Hope it is helpful.
How do I customize Windows Terminal?
If you want to customize Windows Terminal, then you can do that either using the JSON file or the Settings page of Windows Terminal. In the JSON file, you need to add the content for customization and on the Settings page, there are preset options present to change cursor shape for a profile in Windows Terminal, change font size and font weight for a profile, and lots more.
How do I add a custom color scheme to Windows Terminal?
If want to add a custom color scheme for a Windows Terminal profile, then you need to access the Color schemes section present in Windows Terminal Settings. There you can use the Add new button and then Edit the new scheme to set cursor color, selection background, profile background color, etc. After that, you can change the color scheme for a Windows Terminal profile.
Read next: Windows Terminal Tips and Tricks to work like a Pro.