
Как перейти от Waterfall к Agile
EggHead 06.05.2025
Каскадная модель разработки Waterfall — классический пример того, как благие намерения превращаются в организационный кошмар. Изначально созданная для упорядочивания хаоса и внесения предсказуемости. . .
Оптимизация SQL запросов — Продвинутые техники
Codd 06.05.2025
Интересно наблюдать эволюцию подходов к оптимизации. Двадцать лет назад всё сводилось к нескольким простым правилам: «Избегайте SELECT *», «Используйте индексы», «Не джойните слишком много таблиц». . . .
Создание микросервисов с gRPC и Protobuf в C++
bytestream 06.05.2025
Монолитные приложения, которые ещё недавно считались стандартом индустрии, уступают место микросервисной архитектуре — подходу, при котором система разбивается на небольшие автономные сервисы, каждый. . .
Многопоточность и параллелизм в Python: потоки, процессы и гринлеты
py-thonny 06.05.2025
Параллелизм и конкурентность — две стороны многопоточной медали, которые постоянно путают даже бывалые разработчики.
Конкурентность (concurrency) — это когда ваша программа умеет жонглировать. . .
Распределенное обучение с TensorFlow и Python
AI_Generated 05.05.2025
В машинном обучении размер имеет значение. С ростом сложности моделей и объема данных одиночный процессор или даже мощная видеокарта уже не справляются с задачей обучения за разумное время. Когда. . .
CRUD API на C# и GraphQL
stackOverflow 05.05.2025
В бэкенд-разработке постоянно возникают новые технологии, призванные решить актуальные проблемы и упростить жизнь программистам. Одной из таких технологий стал GraphQL — язык запросов для API,. . .
Распознавание голоса и речи на C#
UnmanagedCoder 05.05.2025
Интеграция голосового управления в приложения на C# стала намного доступнее благодаря развитию специализированных библиотек и API. При этом многие разработчики до сих пор считают голосовое управление. . .
Реализация своих итераторов в C++
NullReferenced 05.05.2025
Итераторы в C++ — это абстракция, которая связывает весь экосистему Стандартной Библиотеки Шаблонов (STL) в единое целое, позволяя алгоритмам работать с разнородными структурами данных без знания их. . .
Разработка собственного фреймворка для тестирования в C#
UnmanagedCoder 04.05.2025
C# довольно богат готовыми решениями – NUnit, xUnit, MSTest уже давно стали своеобразными динозаврами индустрии. Однако, как и любой динозавр, они не всегда могут протиснуться в узкие коридоры. . .
Распределенная трассировка в Java с помощью OpenTelemetry
Javaican 04.05.2025
Микросервисная архитектура стала краеугольным камнем современной разработки, но вместе с ней пришла и головная боль, знакомая многим — отслеживание прохождения запросов через лабиринт взаимосвязанных. . .
Позвоните нам: +7 (916) 956-87-79
Вернуться к списку статей

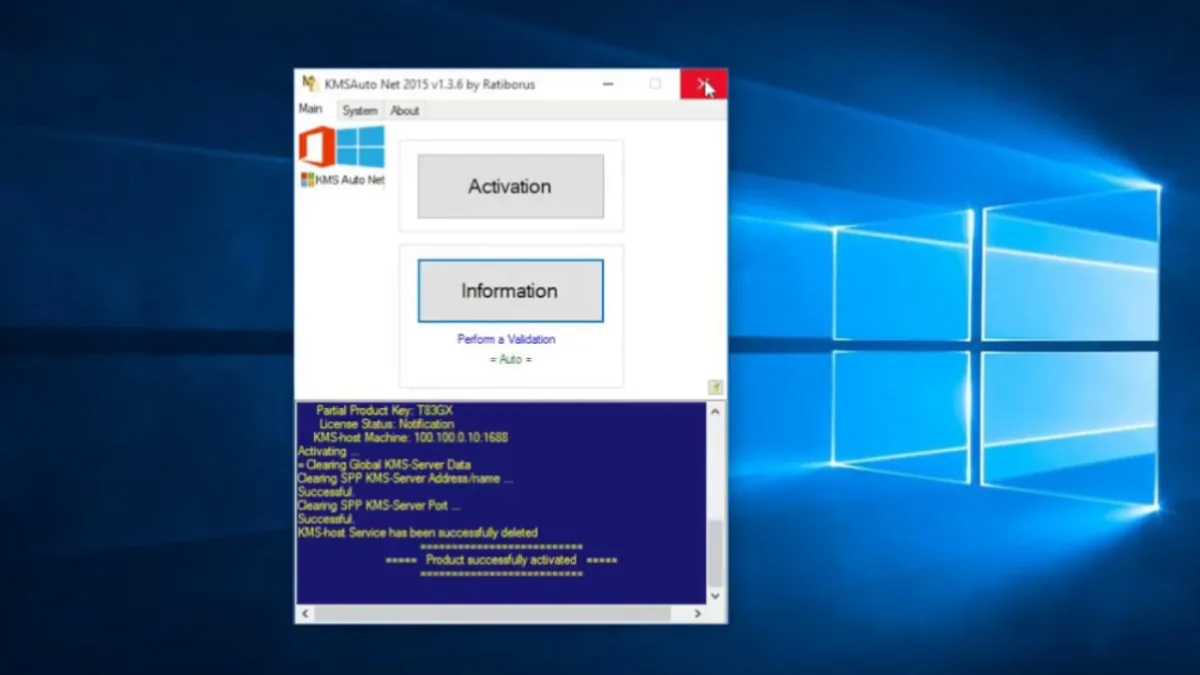
Зачастую к нам обращаются покупатели у которых активирован Windows различными активаторами. Мы провели анализ информации и как правило этой программой является KMS активатор. Перед тем как активировать Windows через стандартную службу активации лицензионным ключом необходимо удалить KMS активатор. В данной статье рассмотрим как бесследно удалить KMS активатор.
Небольшая утилита KMS Service Cleaner, которая удалит все следы и саму активацию операционной системы Windows.
Причин «подтереть» следы использования kms активаторов может быть несколько. Например, не срабатывает переактивация или вы решили перейти на лицензионное использование Windows.
Если вы решили использовать более свежую версию kms активатора, то скорее всего могут возникнуть проблемы совместимости. Даже если вы удалите предыдущую версию — следы от нее могут остаться в системе (служба, записи реестра и прочее). Программа KMS Cleaner в один клик мышки полностью удалит все упоминания и файлы от кмс.
Краткая инструкция по активации:
- Скачиваем утилиту;
- Запускаем (можно от администратора);
- Нажмите «Delete KMS-Service and clearing system«;
- После успешного удаления активатора обязательно перезагрузите ПК
- Поздравляем ваш Windows готов к стандартной активации.
Купить ключ активации для:
Windows 7 Professional
Windows 8.1 Professional
Windows 10 Professional
Windows 10 Home
Windows 10 Enterprise 2019 LTSC
Windows 11 Professional
Windows 11 Home
store-keys.ru
Вам могут быть интересны эти товары
Хит продаж
Хит продаж
Хит продаж
Хит продаж
Все способы:
- Вариант 1: Приложение-«активатор»
- Способ 1: Средства самого решения
- Способ 2: KMSCleaner
- Вариант 2: Троянское вредоносное ПО
- Способ 1: Антивирусные утилиты
- Способ 2: Антивирусный LiveCD
- Способ 3: Ручное удаление
- Вопросы и ответы: 1
Вариант 1: Приложение-«активатор»
Под рассматриваемым названием чаще всего подразумевается специальное ПО для пиратской активации Windows или MS Office. Методы его удаления достаточно просты.
Способ 1: Средства самого решения
В рассматриваемом приложении присутствуют встроенные средства для удаления изменённых данных. Чтобы воспользоваться ими, проделайте следующее:
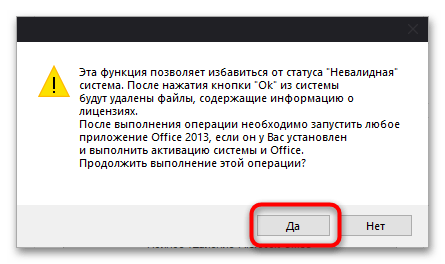
- Запустите исполняемый файл программы, затем перейдите к вкладке «Утилиты» и нажмите на кнопку «Сброс состояния невалидная система».
- Появится окно предупреждения о том, что все файлы лицензий будут удалены. Ознакомьтесь с этим сообщением и щёлкните «Да».

Об удачном завершении процедуры уведомит надпись «Completed» в области журнала.
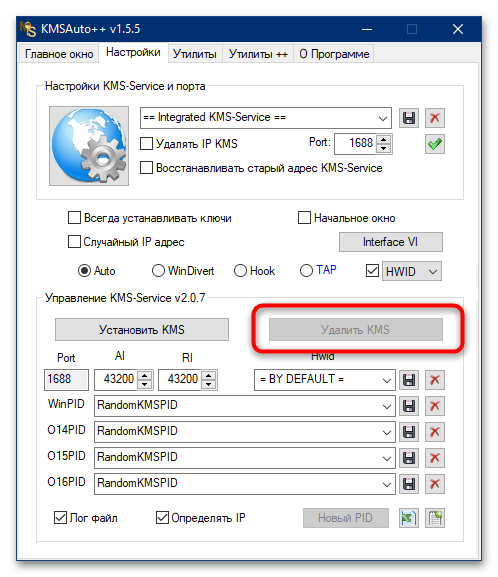
- Также необходимо зайти в раздел «Настройки» и проверить, активна ли кнопка «Удалить KMS» – если да, нажмите на неё.
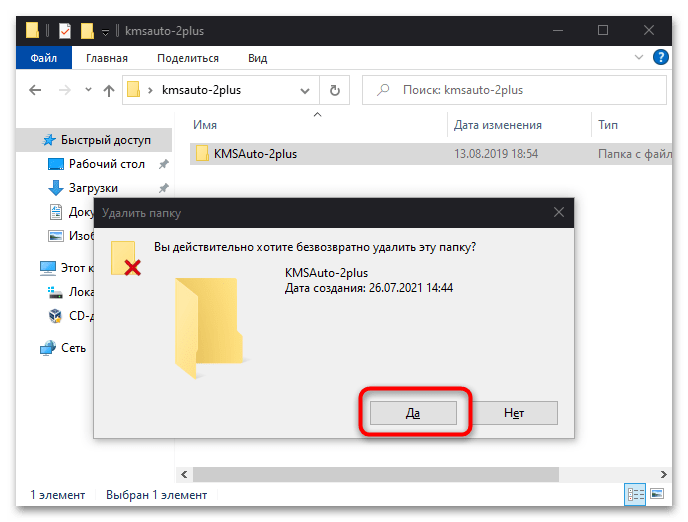
- После выполнения всех шагов выше закройте приложение, затем удалите его данные из файловой системы – проще всего бесповоротно, сочетанием клавиш Shift+Del.


Этот вариант является предпочтительным для решения рассматриваемой задачи.
Способ 2: KMSCleaner
Для быстрого и эффективного удаления АутоКМС была создана специальная утилита – КМСКлинер.
Внимание! Утилита для работы использует те же алгоритмы, что и сам активатор, вызывая ложные срабатывания антивируса, поэтому понадобится его отключить!
Подробнее: Как отключить антивирус
Скачать KMS Cleaner
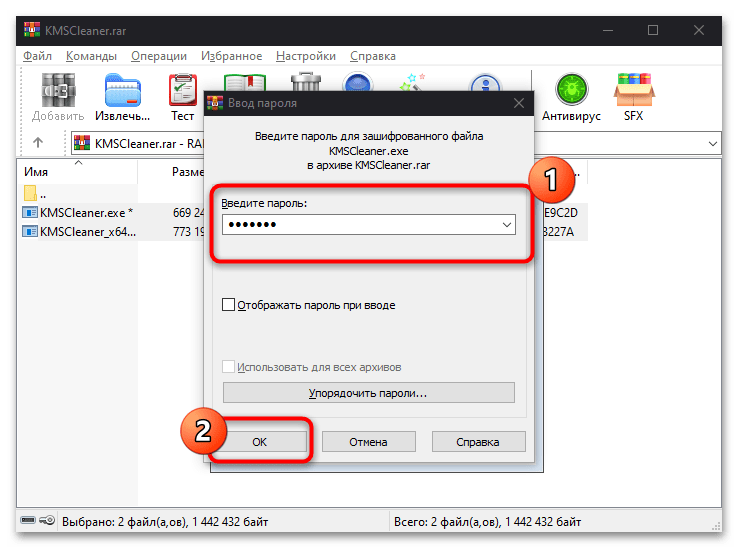
- Загрузите архив и распакуйте его в любое подходящее место, пароль –
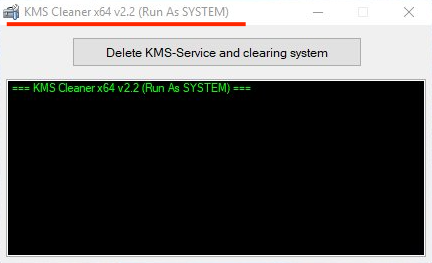
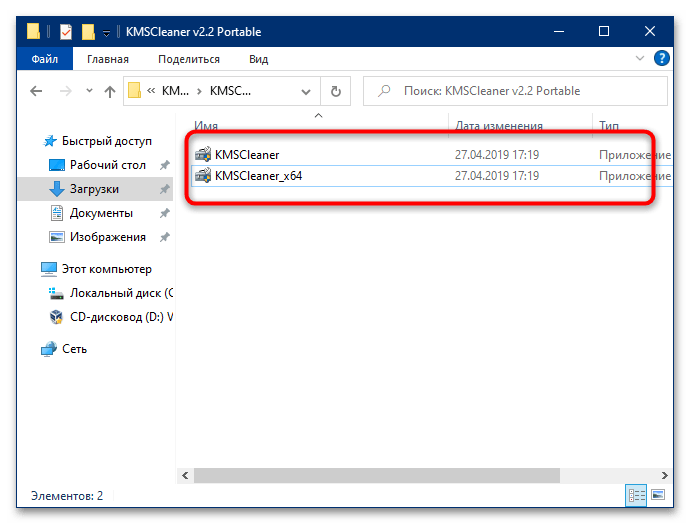
lumpics. - Программа портативная, поэтому ничего устанавливать не нужно – сразу запустите исполняемый файл KMSCleaner (32-битная версия ОС) или KMSCleaner_x64 (64-битная версия).
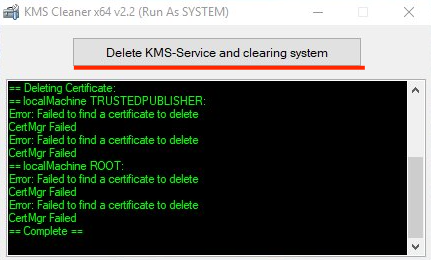
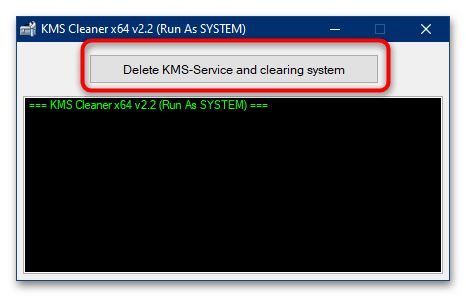
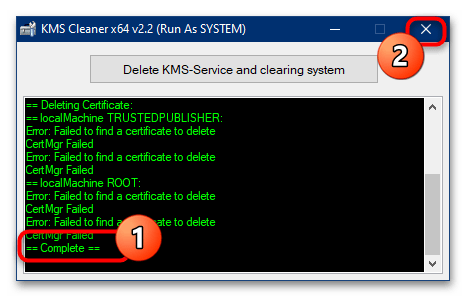
- После появления окна утилиты нажмите на кнопку «Delete KMS-Service and cleaning system».
- Подождите, пока ПО проделает свою работу, а когда в логе появится слово «Complete», закройте окно и перезагрузите компьютер.
Данный метод стоит применять в ситуациях, когда первый описанный не помог.
Вариант 2: Троянское вредоносное ПО
Нередко под нелегальный активатор маскируется шпионский софт-троян. Избавиться от него сложнее, чем от предыдущего, однако всё-таки возможно, приложив определённые усилия.
Способ 1: Антивирусные утилиты
Самым простым и достаточно эффективным методом удаления рассматриваемого трояна является использование утилит-очистителей, например, программы AdwCleaner.
Скачать AdwCleaner
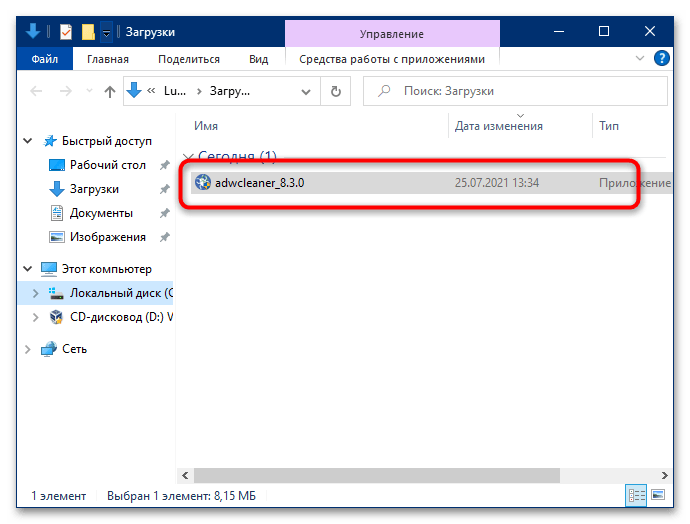
- Приложение не требует установки, так что запускайте исполняемый файл сразу после загрузки.
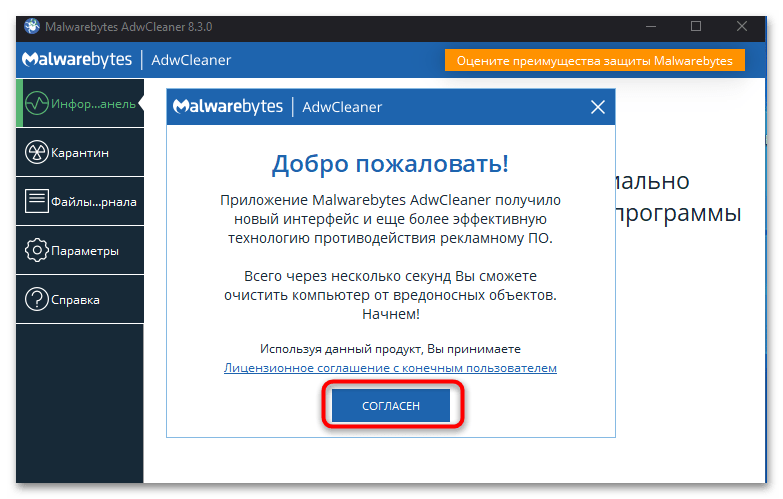
- При первом запуске ПО отображает информационное окно – нажмите в нём «Согласен» для продолжения.
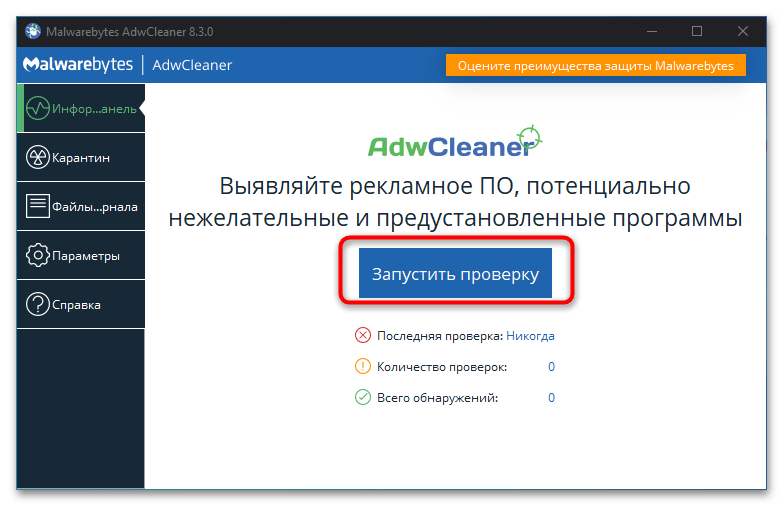
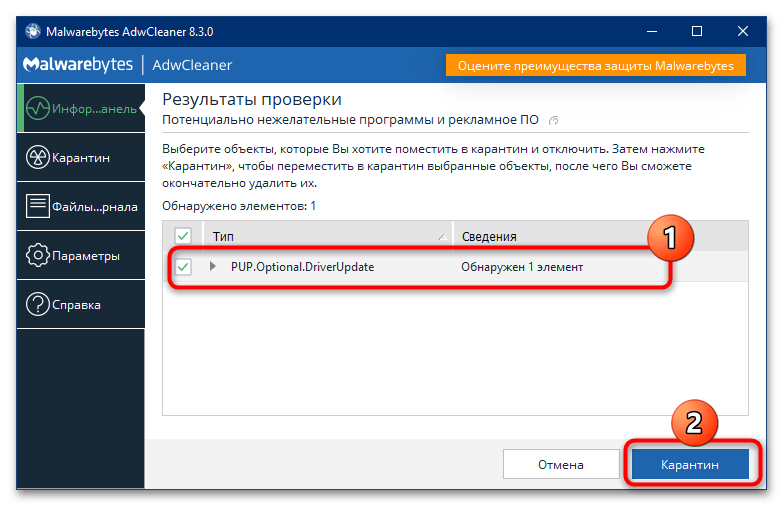
- В основном интерфейсе кликните «Запустить проверку».
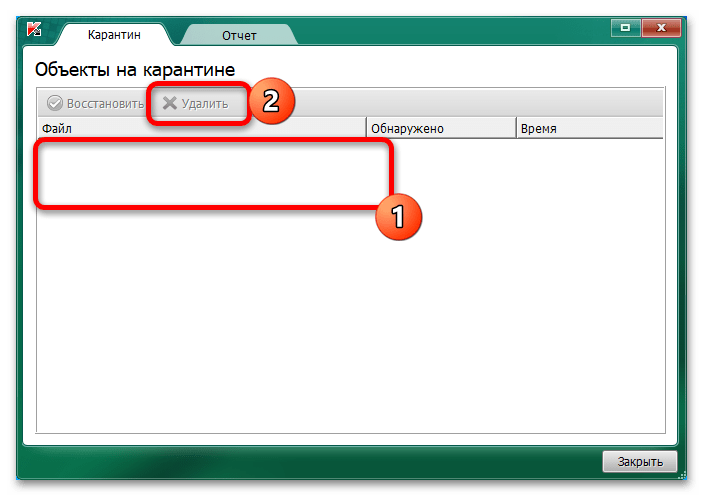
- Подождите, пока софт проделает свою работу – когда угроза будет обнаружена, то соответствующая запись появится в области проверки. Убедитесь, что нужная позиция отмечена, затем нажмите «Карантин».

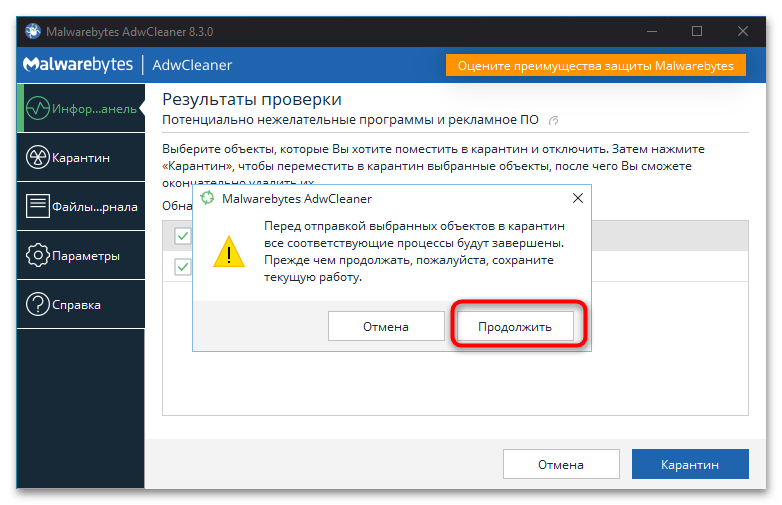
Прочитайте текст предупреждения и щёлкните «Продолжить».
- Для окончательного устранения угрозы желательно также очистить карантин – для этого перейдите на соответствующую вкладку посредством меню слева.
Здесь отметьте позиции, которые хотите стереть, и воспользуйтесь кнопкой «Удалить».


После выполнения этих действий закройте утилиту и перезагрузите компьютер – вирус должен быть окончательно удалён.
Способ 2: Антивирусный LiveCD
Порой ситуация становится запущенной: зловред успел проникнуть в систему глубоко, и метод с задействованием антивирусов или средств очистки уже не помогает. В таком случае стоит воспользоваться LiveCD: специальной портативной версией ОС, в которой предустановлены средства борьбы с заражением.
- Первым делом подберите подходящий инструмент для решения рассматриваемой задачи. Таковых существует достаточно много, и каждый из них обладает своими преимуществами. Для нашей же цели подойдёт универсальный набор под названием Hiren’s BootCD PE, доступный бесплатно на официальном сайте.
Скачать Hiren’s BootCD PE с официального сайта
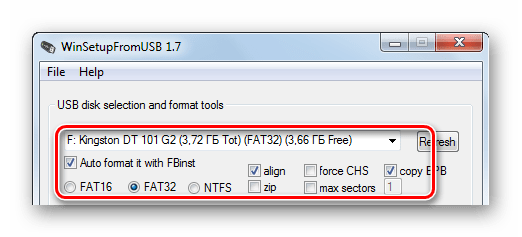
- Полученный образ нужно записать на флеш-накопитель. Чтобы правильно создать LiveCD, воспользуйтесь инструкцией по ссылке.
Подробнее: Как правильно записать LiveCD на флешку
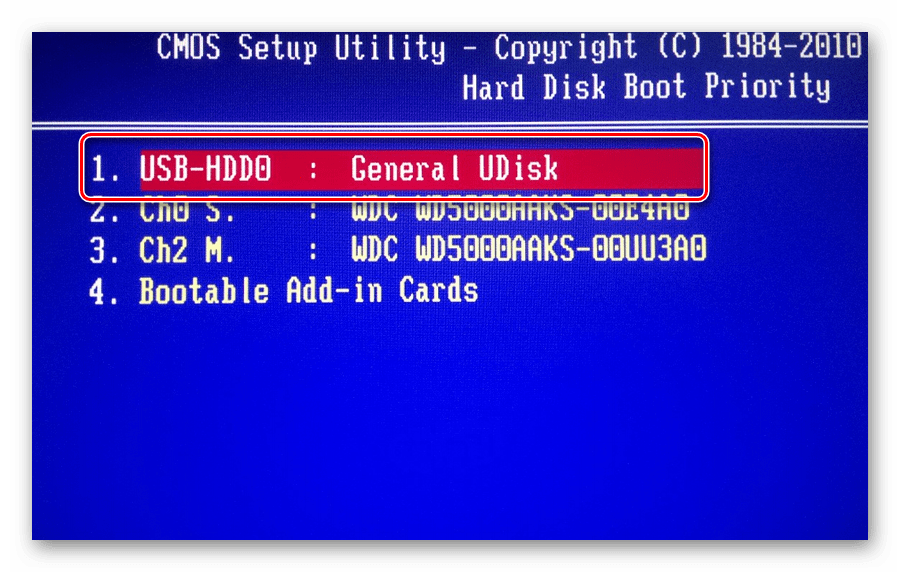
- После подготовки носителя необходимо настроить BIOS целевого компьютера для загрузки с флешки. Чтобы не повторяться, приводим ссылку на соответствующее руководство.
Подробнее: Как настроить BIOS для загрузки с флешки
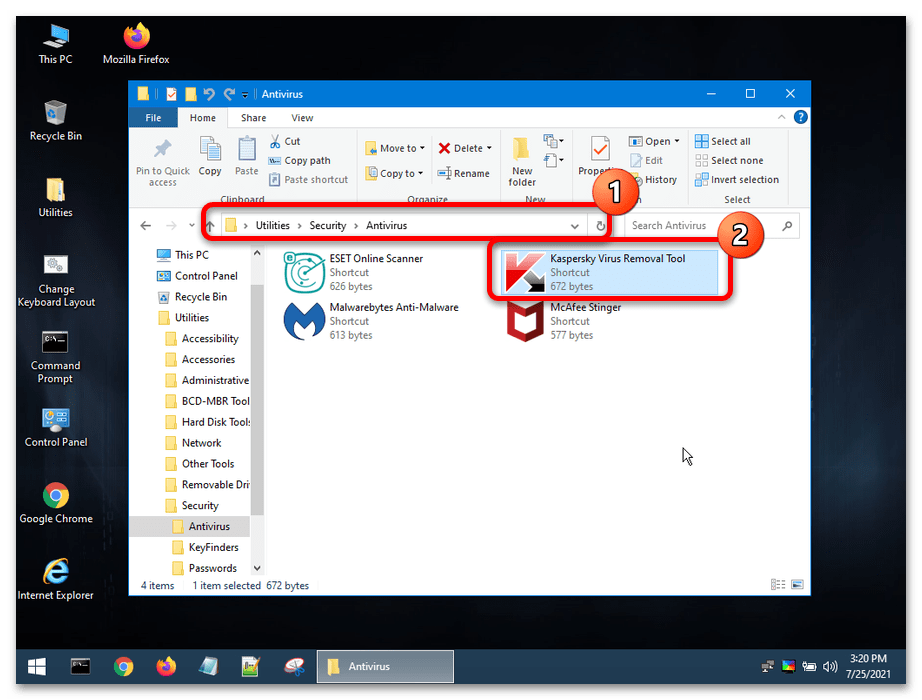
- Если вы всё сделали правильно, то вместо вашей заражённой ОС должна загрузиться записанная на флешку система со всем софтом. В наборе Hiren’s BootCD PE имеются несколько утилит, но для нашей цели наиболее эффективно использовать средство Kaspersky Virus Removal Tool – запустите его из папок «Utilities» – «Security» – «Antivirus».
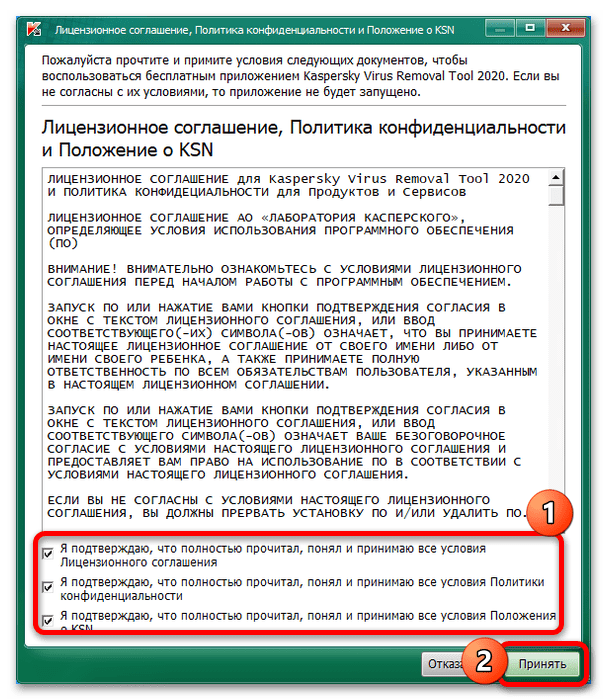
- Перед началом работы понадобится прочитать пользовательское соглашение и принять его условия, отметив все пункты.
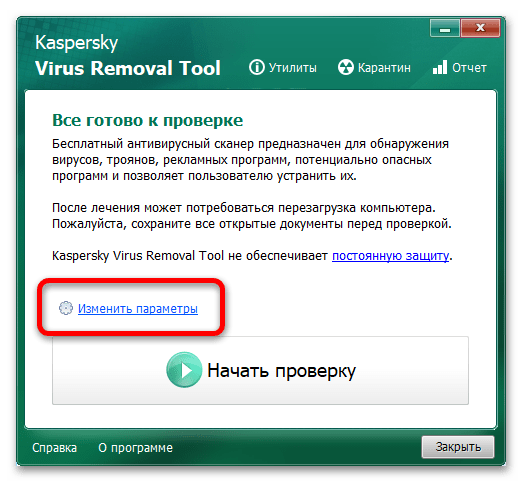
- После периода инициализации появится рабочее окно приложения. Стандартных настроек для решения нашей задачи недостаточно, поэтому кликните по ссылке «Изменить параметры».

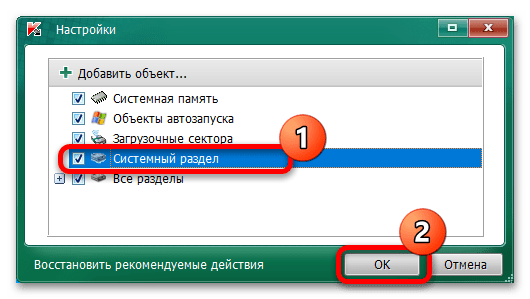
Здесь отметьте позицию «Системный раздел» и нажмите «OK».
- По возвращении в главное окно утилиты воспользуйтесь кнопкой «Начать проверку» и дождитесь окончания процедуры.
- Как правило, данное средство автоматически помещает найденные угрозы в карантин – для доступа к нему кликните по соответствующей ссылке вверху.
Выделите проблемный файл и нажмите «Удалить».
- Закройте программу, выключите компьютер и изымите из порта флешку с LiveCD. Загрузитесь в основную систему для проверки – вирус должен быть удалён.


Данный метод хоть и трудоёмкий, но один из самых эффективных.
Способ 3: Ручное удаление
Если по каким-то причинами ни первый, ни второй варианты решения проблемы вам не подходят, можно попробовать избавиться от зловреда вручную.
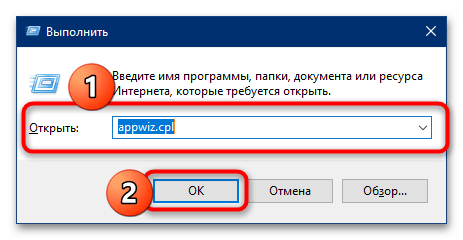
- Для начала стоит попытаться удалить его файлы «стандартным» методом, пустив в ход деинсталлятор. Откройте окно «Выполнить», впишите в него запрос appwiz.cpl и нажмите «ОК».

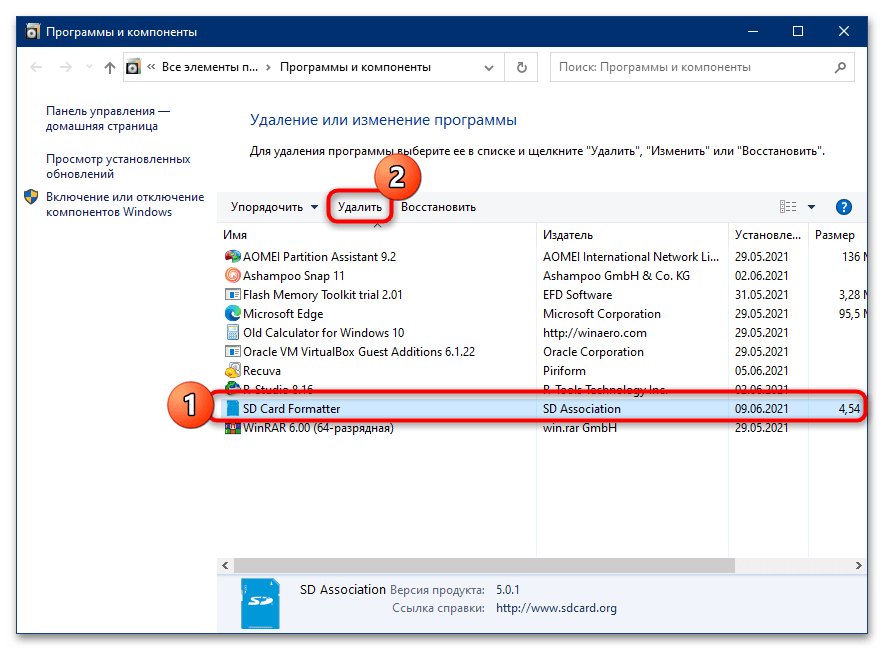
После запуска оснастки «Приложения и компоненты» поищите в перечне установленных следующие позиции:
- Search Protect;
- FLV Player (remove only);
- PassShow;
- Coupon Server;
- TidyNetwork;
- MyPC Backup.
Если обнаружите одну из таких записей, выделите её и воспользуйтесь кнопкой «Удалить» на панели инструментов.

При благоприятном раскладе запустится деинсталлятор и вы сможете стереть файлы, которые использует вирус. Поступите точно так же с другими подозрительными программами.
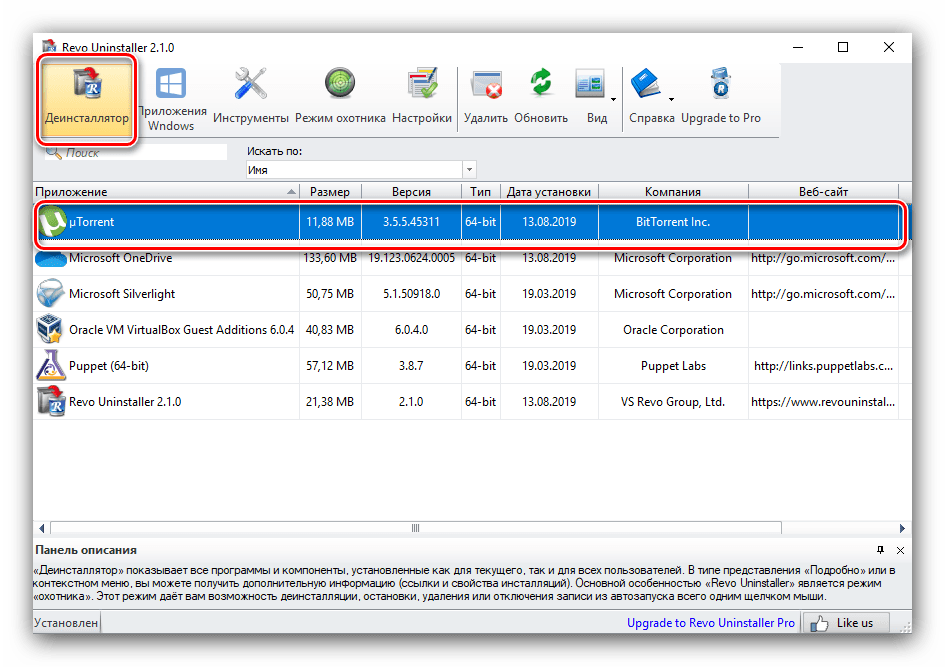
- Если предыдущий шаг не помог и при попытке деинсталляции появляется ошибка, воспользуйтесь сторонними решениями для удаления программ, например, Revo Uninstaller.
Скачать Revo Uninstaller
Подробнее: Как пользоваться Revo Uninstaller
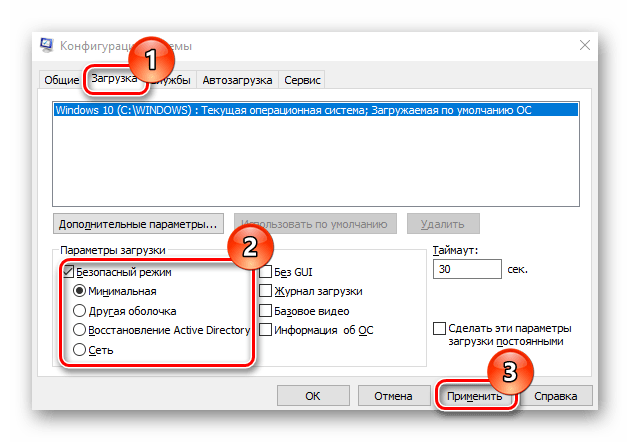
- Деинсталляция программы-маскировки – только половина дела, дальше надо стереть её остатки, скрытые в глубине файловой системы. Делать это рекомендуется в «Безопасном режиме» загрузки Виндовс. Если вы не знаете, что это такое, прочитайте материал далее.
Подробнее: «Безопасный режим» в Windows 10

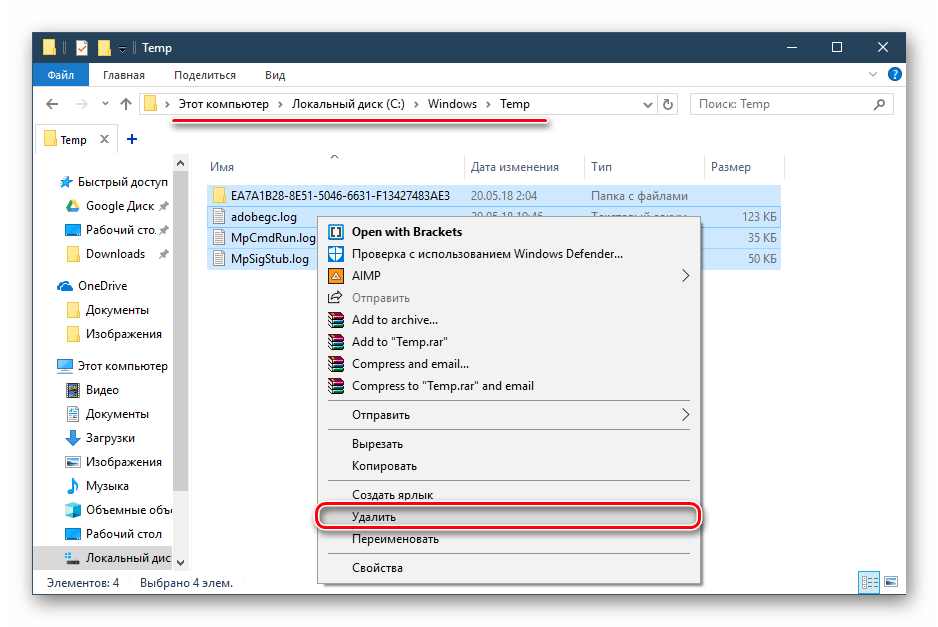
Наиболее часто рассматриваемый вирус размещает свои файлы в папке «Temp» системы, поэтому первым делом очистите её содержимое.
Подробнее: Как очистить папку Temp в Windows 10

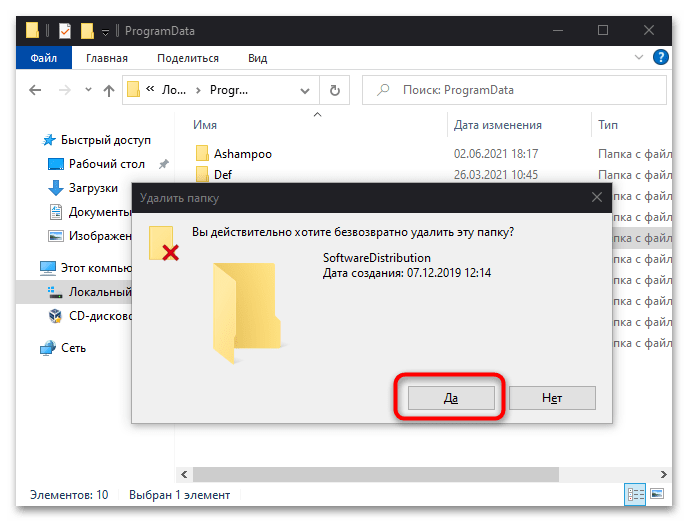
Далее откройте директорию C:\ProgramData и проверьте, нет ли там подозрительных файлов или подкаталогов. Если обнаружите таковые, удалите посредством сочетания Shift+Del.

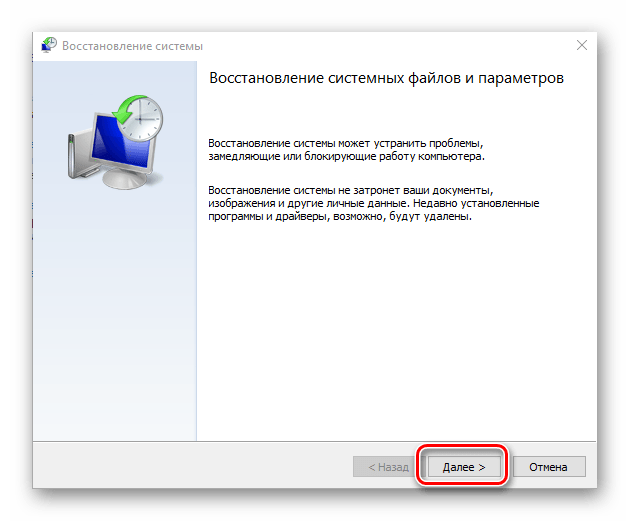
Также можно воспользоваться точкой восстановления, если соответствующая функция активна на вашем компьютере.
Важно! Нужно выбирать бэкап с даты, которая предшествовала появлению проблемы!
Подробнее: Как пользоваться точкой восстановления Windows
Удаление вирусов вручную – занятие не самое простое, однако в некоторых ситуациях представляет собой единственный выход.
Наша группа в TelegramПолезные советы и помощь
In this article, we’ll show you how to remove KMS activation from Windows 10. This process involves using a few simple commands in the Command Prompt, and it should only take a few minutes to complete. By the end of this guide, you will know exactly what steps to follow to deactivate KMS on your Windows 10 machine.
In this section, we’ll walk you through the exact steps to remove KMS activation from your Windows 10 computer. We’ll use some specific commands in the Command Prompt to achieve this.
Step 1: Open Command Prompt as Administrator
First, you’ll need to open Command Prompt with administrative privileges.
To do this, click on the Start menu, type “cmd,” and then right-click on Command Prompt. Select «Run as administrator» to open it.
Step 2: Input the First Command
Next, input the command slmgr /upk to uninstall the current product key.
This command will remove the current product key from your system. You should see a message confirming the action.
Step 3: Input the Second Command
Now, type slmgr /cpky and press Enter.
This command will clear the product key from the registry to ensure it’s thoroughly removed from your system.
Step 4: Input the Third Command
Then, execute slmgr /rearm by typing it into Command Prompt and pressing Enter.
This command resets the licensing status of your machine. A message will confirm that the command was successful.
Step 5: Restart Your Computer
Finally, restart your computer to apply all changes.
Once your computer restarts, KMS activation will be removed, and you can proceed with a new method of activation if needed.
After following these steps, your computer will no longer be activated through KMS. You might see a message asking you to activate Windows again, which is normal and expected.
Tips for Removing KMS Activation from Windows 10
Here are some extra tips to help you through this process:
- Always back up important data before making changes to your system.
- Ensure you have administrator rights before starting.
- Use a genuine product key if you plan to reactivate your Windows.
- If you encounter errors, double-check the commands for typos.
- Consider creating a restore point before starting, just to be safe.
Frequently Asked Questions
What is KMS Activation?
KMS (Key Management Service) Activation is a method used by organizations to activate software on multiple computers within their network.
Why would I want to remove KMS activation?
You might want to remove KMS activation if you’re planning to switch to a different activation method or if you no longer have access to the KMS server.
Is it legal to remove KMS activation?
Yes, it is legal to remove KMS activation from your own computer, especially if you plan to replace it with a legitimate activation method.
Can I use these steps on other versions of Windows?
These steps are specifically for Windows 10, though similar commands might work on other versions.
What should I do if the commands don’t work?
If the commands don’t work, restart your computer and try again, or check for administrative permissions.
Summary
- Open Command Prompt as Administrator.
- Input the command
slmgr /upk. - Input the command
slmgr /cpky. - Input the command
slmgr /rearm. - Restart your computer.
Conclusion
Removing KMS activation from Windows 10 can be a straightforward process if you follow the steps outlined in this guide. We’ve walked you through each command and explained what they do, ensuring that you can accomplish this task with ease.
Once you remove KMS activation, your system might prompt you to activate Windows again. This is a normal part of the process and can be resolved by entering a new, valid product key.
Remember, always back up important data before making significant changes to your system. If you’re unsure or run into trouble, don’t hesitate to seek professional help. There is a wealth of resources and forums online where experts and enthusiasts can offer additional assistance.
If you found this guide helpful, consider sharing it with others who might benefit from it. Good luck!
Kermit Matthews is a freelance writer based in Philadelphia, Pennsylvania with more than a decade of experience writing technology guides. He has a Bachelor’s and Master’s degree in Computer Science and has spent much of his professional career in IT management.
He specializes in writing content about iPhones, Android devices, Microsoft Office, and many other popular applications and devices.
Read his full bio here.
Downloading KMSAuto from untrustworthy sources and potentially bundling it can inflict backdoors into your system and cause significant system instability. If necessary, remove KMSAuto from your Windows computer for security and stability.
Understanding the proper methods to eliminate KMSAuto from your system is crucial. Also, knowing the best approach can make a significant difference in maintaining a clean and secure operating environment.
But what methods should you take to ensure a thorough removal process while avoiding any potential complications that may arise? Discover the most effective strategies and tools to remove KMSAuto from your Windows system successfully.
How to Remove KMSAuto
If you accidentally download KMSAuto from any untrusted source and want to remove KMSAuto, you can try any of the following methods:
- Using the Control Panel
- Using CCleaner to Delete KMSAuto
- Using IObit Uninstaller to Uninstall KMSAuto
1. Using the Control Panel
You can uninstall KMSAuto by accessing the Control Panel on your PC. To begin, click on the Start menu and select the Control Panel. Within the Control Panel, locate the Programs and Features or Adding or Removing Programs option based on your Windows version.
Once there, you’ll see a list of installed programs. Scroll through the list to find KMSAuto and select it. Click on the Uninstall button at the top of the list, or right-click on KMSAuto and choose Uninstall.
Follow the on-screen directions to complete the removal process. After the uninstallation is finished, it’s advisable to restart your computer to ensure that all changes take effect.
2. Using CCleaner to Delete KMSAuto
You can also consider using CCleaner to effectively remove KMSAuto from your Windows Defender and system. CCleaner is a popular utility tool that can help clean up unwanted files and programs from your computer.
To start, download and install CCleaner from the official website. Once installed, open CCleaner and navigate to the ‘Tools’ section. Under the ‘Uninstall’ tab, you’ll find a list of all installed programs on your computer.
Look for KMSAuto in the list and select it. Click on the ‘Uninstall’ button to initiate the removal process. CCleaner will guide you through the uninstallation wizard, ensuring that all associated files and registry entries related to KMSAuto are deleted from your system.
Once the process is complete, restart your computer to finalize the removal of KMSAuto. Using a CCleaner is a straightforward and efficient way to ensure that KMSAuto is completely removed from your computer, freeing up space and improving system performance.
3. Using IObit Uninstaller to Uninstall KMSAuto
For a streamlined approach to removing KMSAuto, consider utilizing IObit Uninstaller. IObit Uninstaller is powerful software that removes stubborn programs like KMSAuto. To uninstall KMSAuto using IObit Uninstaller, start by downloading and installing the software on your computer.
Once installed, open IObit Uninstaller and locate KMSAuto in the list of installed programs. Select KMSAuto and click on the Uninstall button. Follow the on-screen instructions to complete the uninstallation process.
IObit Uninstaller offers additional features such as batch uninstallation, leftover file cleanup, and software health checks to ensure your system stays optimized. It also provides a safe and clean uninstallation process, preventing any leftover files or registry entries from cluttering your system.
Why Is Removing KMSAuto Necessary from Your Windows?
When you remove KMSAuto from your Windows system, you significantly reduce security risks associated with using unauthorized software.
Security Risks
KMSAuto and similar tools can sometimes pose significant security dangers to your system. They’re often distributed from untrustworthy sources and can come bundled with malware, viruses, or malicious software. These unwanted additions can compromise the integrity of your system and put your data at risk.
Furthermore, certain versions of KMSAuto for Windows can create backdoors and install Trojans, providing cyber attackers with unauthorized access to your computer. This unauthorized access can lead to severe consequences, such as data theft and further exploitation of your system.
System Stability and Performance
Removing KMSAuto from your Windows system ensures system stability and optimal performance. Unauthorized activation tools like KMSAuto can modify critical system files and settings, leading to system instability, crashes, and other performance issues.
These modifications can create conflicts with legitimate software updates and installations, causing errors that degrade system performance over time. By removing KMSAuto, you eliminate the risk of software conflicts and ensure your system functions smoothly and efficiently.
Reliability
Unauthorized tools lack official support or documentation, making it challenging to address any problems that may arise. Without the backing of proper support channels, you risk encountering unresolved issues that could compromise your system’s stability.
Moreover, using unauthorized activation software like KMSAuto can lead to update problems. Microsoft’s official updates may detect and counteract unauthorized activations, potentially losing functionality or reverting your system to an unlicensed state.
Best Practices After Removing KMSAuto from Your Windows
After uninstalling KMSAuto from the Windows system, run a full system scan to eradicate all remnants:
Run a Full System Scan
Consider running a full system scan using a reputable antivirus program to ensure the complete removal of any potential threats left from KMSAuto.
A thorough scan will help detect and eliminate any malware or malicious files that might still be present on your system. Using trusted antivirus software is essential to ensure the best protection for your device.
Change Passwords
For enhanced security post-KMSAuto removal, promptly update your Windows account password and any other stored passwords, ensuring they’re strong and unique.
Changing your passwords is crucial to prevent unauthorized access to your accounts and sensitive information. Creating complex passwords using numbers, letters, and special characters is recommended. Avoid using simple guessable information such as names, birthdays, or common words.
Enhance Security Practices
After removing KMSAuto from the Windows system, implement these best practices to enhance security measures. To prevent loss, regularly backup your important data using external drives or cloud services.
Ensure your firewall is enabled and running, and utilize a reputable antivirus program while keeping it updated to protect against malware and other threats. Additionally, keep User Account Control (UAC) enabled to prevent unauthorized changes to your system.
How do I remove all KMS files?
Removing all KMS files requires performing a clean install to ensure the activator’s complete eradication from your system. KMSAuto alters numerous registry keys and adds files that may go undetected by antivirus software due to its non-malicious nature.
Back up all essential data, as a clean install will erase all existing files on your system. Obtain a legitimate copy of the operating system you want to install. Boot from the installation media and follow the prompts to begin the installation process.
During the installation, choose the option to format the hard drive, which will remove all existing data, including the KMS files. Once the installation is complete, reinstall your programs and restore your backed-up data.
Prioritizing System Integrity through Complete KMSAuto Removal
Removing KMSAuto from your Windows system is essential to maintain security and ensure proper software licensing. You can effectively eliminate any potential risks associated with unauthorized software by using uninstaller tools or manually uninstalling the program.
After removal, running a full system scan is recommended, such as changing all your passwords and enhancing your security practices. This includes enabling your firewall, maintaining updated antivirus software, and enabling User Account Control.
If you still doubt the complete removal of all KMS files, a clean install can ensure all traces of the KMS activator are entirely deleted. After all, the health and security of your system should always be a priority, and taking these actions can ensure it remains at its best.