
Вы можете удалить браузер Chrome с компьютера (Windows, macOS или Linux) или устройства iOS.
Windows 11
- Закройте все окна Chrome на компьютере.
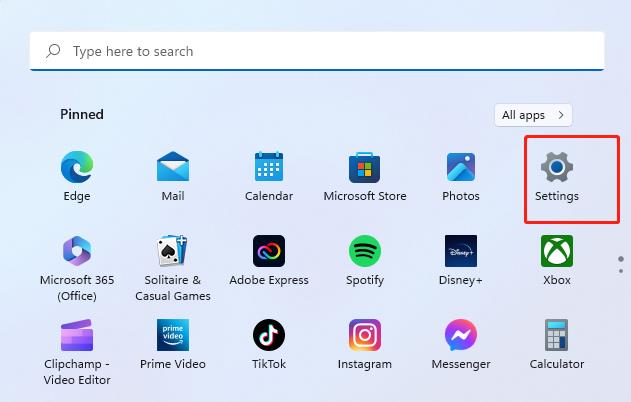
- Нажмите «Пуск» Параметры.
- Выберите Приложения Установленные приложения.
- Напротив Google Chrome нажмите на значок Удалить.
- Выберите Удалить.
- Чтобы разрешить этому приложению вносить изменения на устройстве, нажмите Да.
Windows 10
- Закройте все окна и вкладки Chrome.
- Нажмите кнопку «Пуск» Параметры.
- Выберите Приложения.
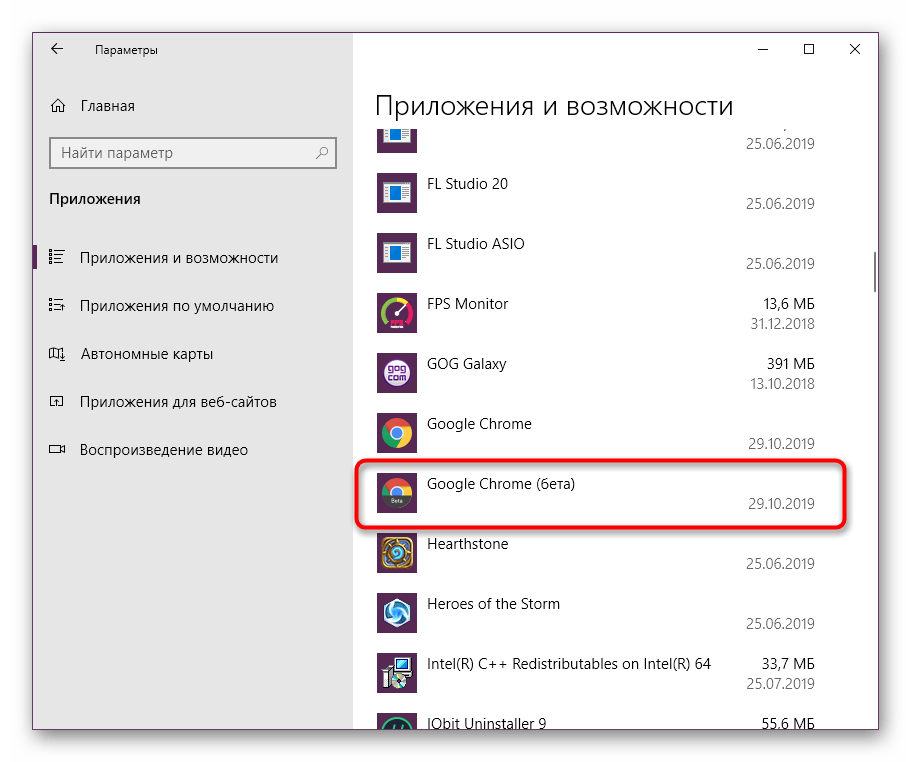
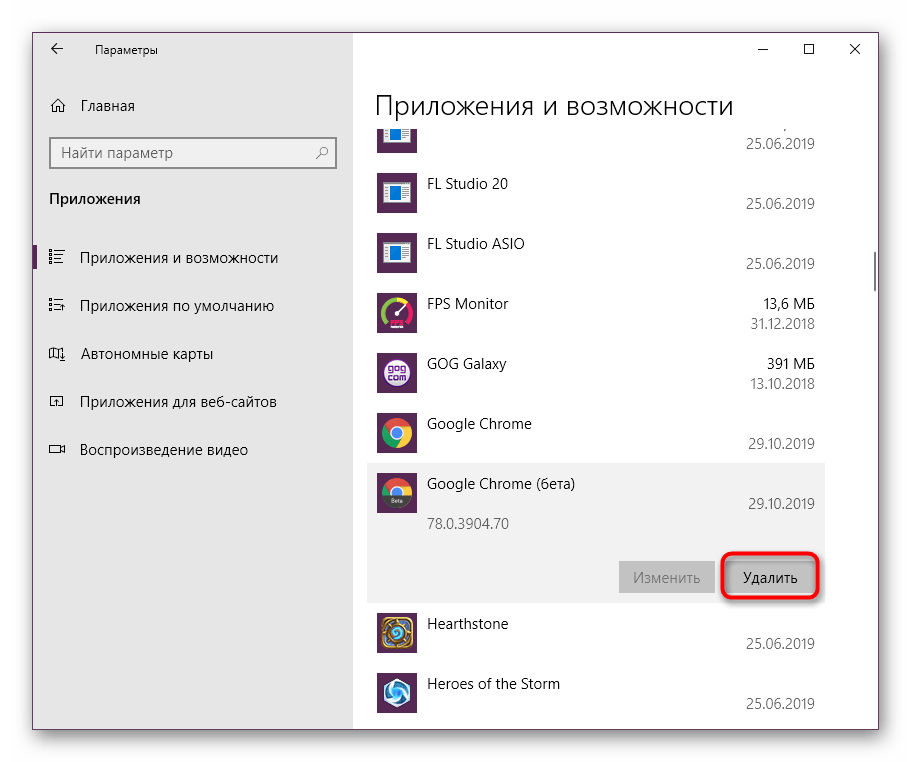
- В разделе «Приложения и возможности» найдите и выберите Google Chrome.
- Выберите Удалить.
- Подтвердите действие, нажав Удалить.
- Чтобы стереть данные профиля, например закладки и историю, установите флажок «Также удалить данные о работе в браузере».
- Выберите Удалить.
macOS
- На панели Dock в нижней части экрана нажмите значок Chrome правой кнопкой мыши.
- Выберите Выйти.
- Откройте Finder.
- Откройте папку, в которую установлен браузер Google Chrome.
- Совет. Он может находиться в папке «Программы». Если его там нет, нажмите Файл Найти и выполните поиск по названию Google Chrome.
- Перетащите значок Google Chrome в корзину.
- Вы также можете удалить данные профиля, например закладки и историю:
- В верхней части экрана нажмите Переход Переход к папке.
- Введите
~/Library/Application Support/Google/Chrome. - Нажмите Перейти.
- Выберите все папки и перетащите их в корзину.
Linux
- Откройте окно терминала.
- В версиях GNOME, Unity и Cinnamon нажмите Ctrl + Alt + T.
- В версии KDE нажмите Меню приложений Система Консоль.
- Воспользуйтесь командой для удаления.
- Системы на базе Debian. Введите
sudo dpkg -r google-chrome-stable. - Прочие системы. Введите
sudo rpm -e google-chrome-stable.
- Системы на базе Debian. Введите
- Когда появится запрос, укажите пароль компьютера.
Удаленные данные профиля больше не будут доступны на вашем компьютере. Если вы после входа в Chrome синхронизировали данные в аккаунте Google, часть информации по-прежнему может находиться на серверах Google. Чтобы ее стереть, удалите данные о работе в браузере.
Как устранить проблемы с Chrome
Большинство проблем с поисковыми системами по умолчанию, всплывающими окнами и обновлениями браузера можно устранить, если удалить и повторно установить Chrome.
Информация по теме
- Как скачать и установить Google Chrome
- Вход в Chrome и синхронизация данных
- Как обновить Google Chrome
Эта информация оказалась полезной?
Как можно улучшить эту статью?
Требуется помощь?
Попробуйте следующее:
Опубликовать на справочном форуме Получите ответы от участников сообщества
Все способы:
- Удаляем браузер Google Chrome полностью в Windows
- Способ 1: IObit Uninstaller
- Способ 2: Revo Uninstaller
- Способ 3: Стандартное средство Windows
- Вопросы и ответы: 3
Хоть Google Chrome и считается самым популярным браузером, иногда пользователи удаляют его из-за ненадобности. Случается это и по причине необходимости переустановки, но бывает такое гораздо реже первой ситуации. Существует несколько методов выполнения поставленной задачи — при помощи сторонних средств или через стандартные инструменты операционной системы. Сегодня мы хотим продемонстрировать все эти варианты, детально разобрав каждый. Вам останется лишь выбрать оптимальный способ.
Удаляем браузер Google Chrome полностью в Windows
Полное удаление веб-обозревателя заключается не только в использовании стандартного деинсталлятора, сюда входит и очистка остаточных файлов, которые часто сохраняются на ПК и мешают корректному взаимодействию с ним, а также просто занимают лишнее место. Специальные средства для удаления хороши тем, что они автоматически очищают временные объекты и записи реестра, а при использовании стандартного средства все придется выполнять вручную. Подробнее об этом мы и расскажем в следующих трех способах.
Способ 1: IObit Uninstaller
Начнем с инструментов от стандартных разработчиков, взяв только самые популярные и удобные решения. Первая такая программа имеет название IObit Uninstaller и распространяется бесплатно. Взаимодействие с ней максимально простое и интуитивно понятное, поэтому даже новичок сможет без проблем деинсталлировать Хром.
Скачать IObit Uninstaller
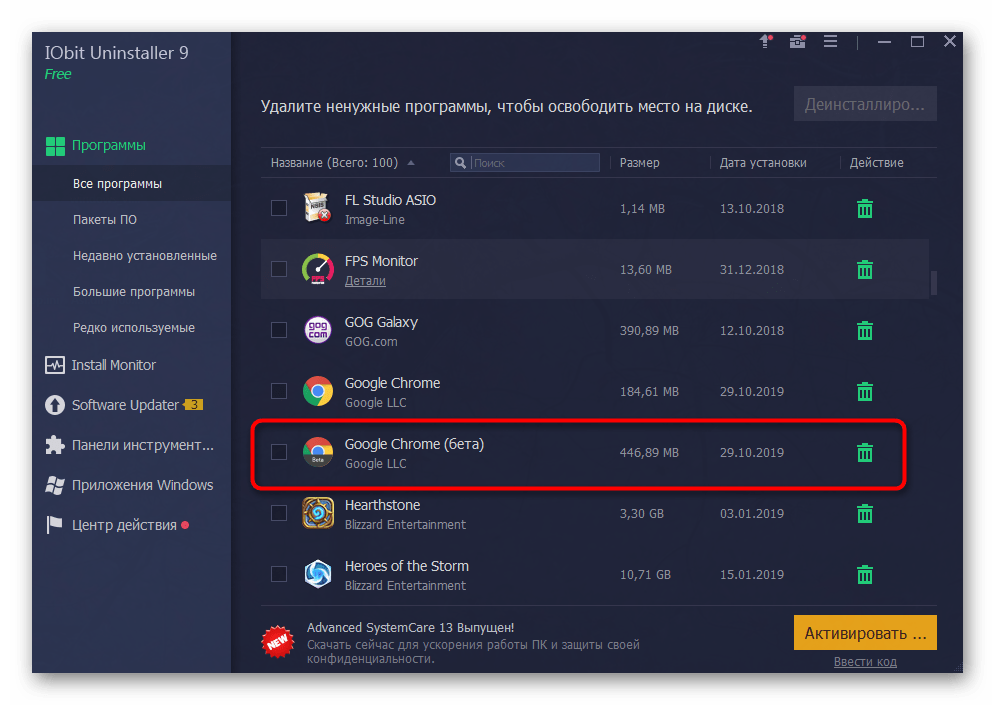
- После скачивания и установки софта запустите его и переходите в раздел «Программы».
- Опуститесь вниз по списку, где отыщите Google Chrome и выделите строку галочкой.
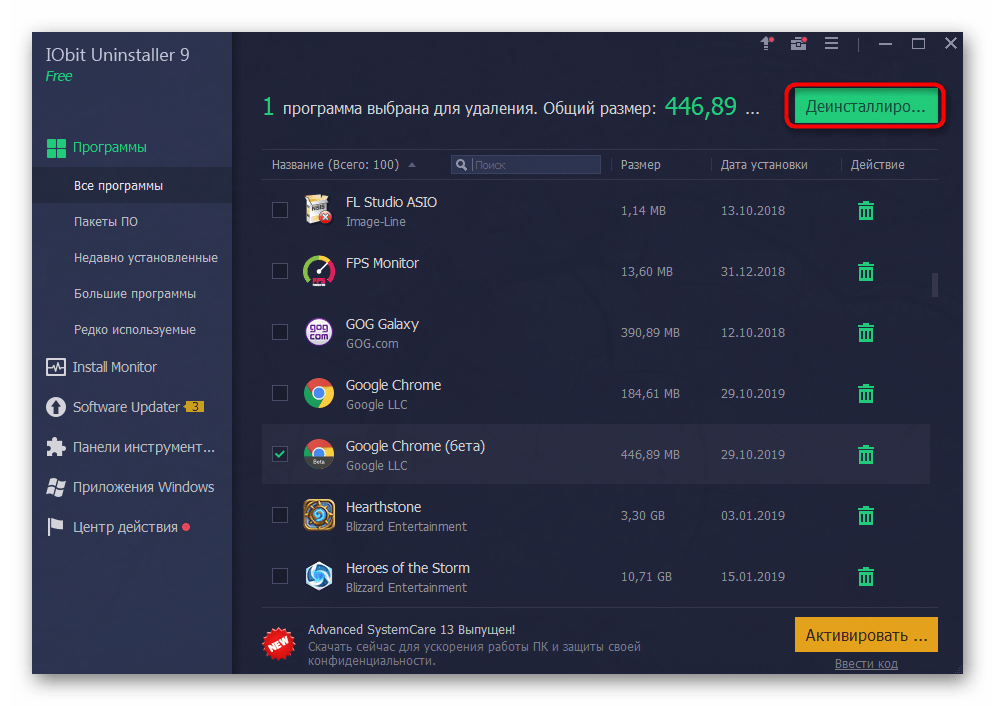
- Кликните по зеленой кнопке с надписью «Деинсталлировать», которая загорелась справа вверху.
- Отметьте галочкой пункт «Автоматически Удалять все остаточные файлы» и щелкните еще раз на «Деинсталлировать».
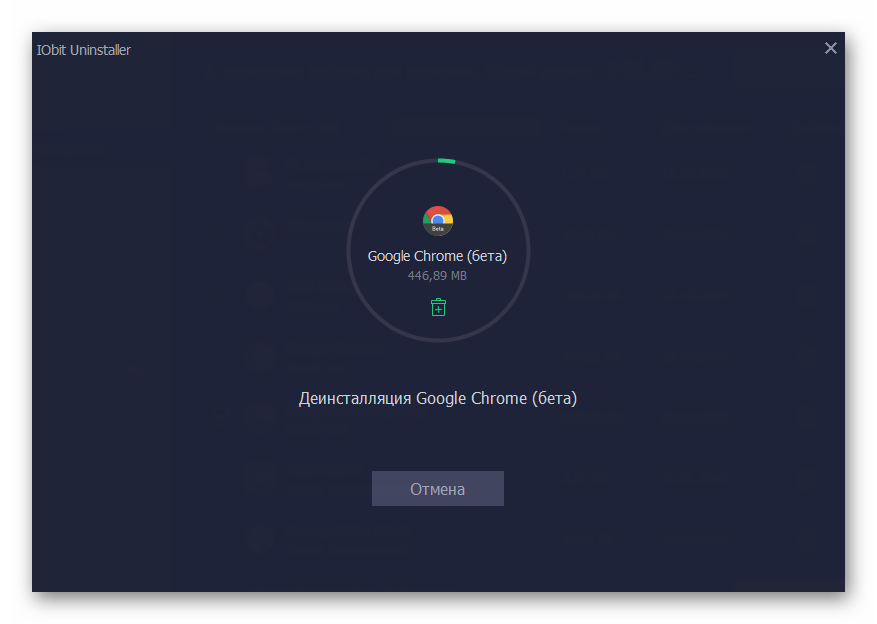
- Ожидайте завершения операции, следя за прогрессом через отобразившееся меню.
- Дополнительно появится встроенное сообщение об удалении приложения, подтвердите его, предварительно выбрав «Также удалить данные о работе браузера».
- По окончании вы будете уведомлены о том, сколько файлов было удалено и записей реестра очищено.


Можно на всякий случай перезагрузить компьютер, чтобы все изменения точно вступили в силу. После этого вы можете повторно инсталлировать Google Chrome или переходить к использованию другого веб-обозревателя.
Способ 2: Revo Uninstaller
Вторая программа, о которой пойдет речь в нашей сегодняшней статье, называется Revo Uninstaller и функционирует примерно по тому же принципу, что и рассмотренный выше инструмент. Мы рекомендуем использовать ее, если вам не подходит первый вариант, но вы все же желаете произвести деинсталляцию с помощью сторонних средств.
Скачать Revo Uninstaller
- Запустите ПО и перейдите в «Деинсталлятор».
- Отыщите в списке рассматриваемый браузер и дважды кликните по нему левой кнопкой мыши.
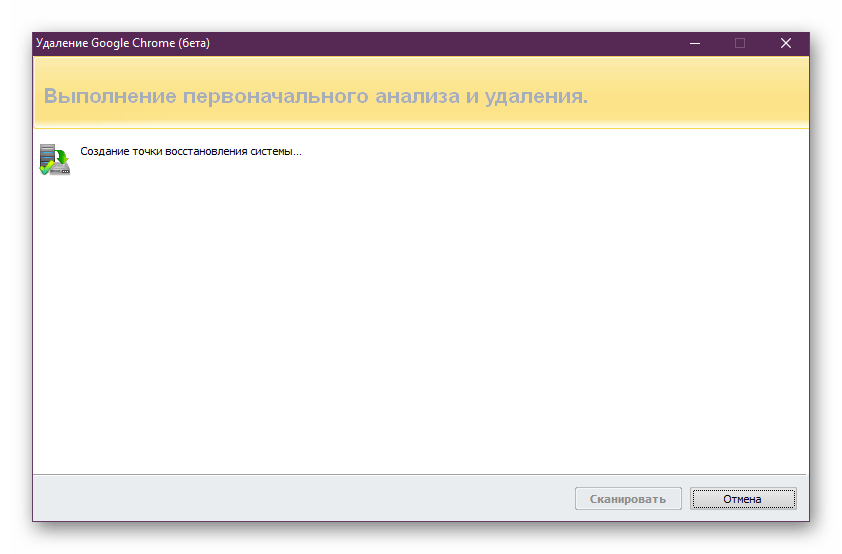
- Ожидайте создания точки восстановления системы.
- Затем на экране появится уведомление о том, что Хром будет удален. Подтвердите его.
- В стандартном браузере откроется страница справки Chrome. Здесь вы можете ответить на вопросы от разработчиков или просто закрыть это окно.
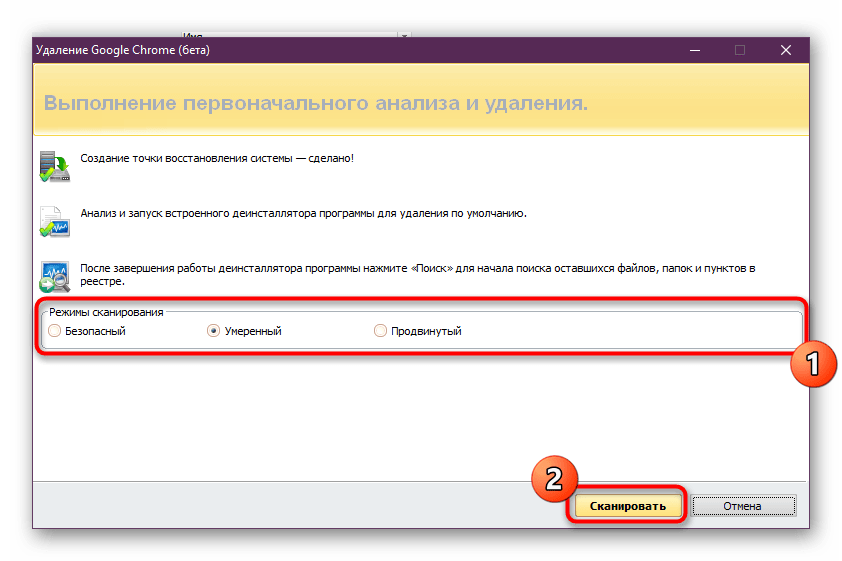
- Далее остается только выполнить сканирование на наличие остаточных файлов. Мы рекомендуем оставить режим «Умеренный», после чего нажмите на «Сканировать».
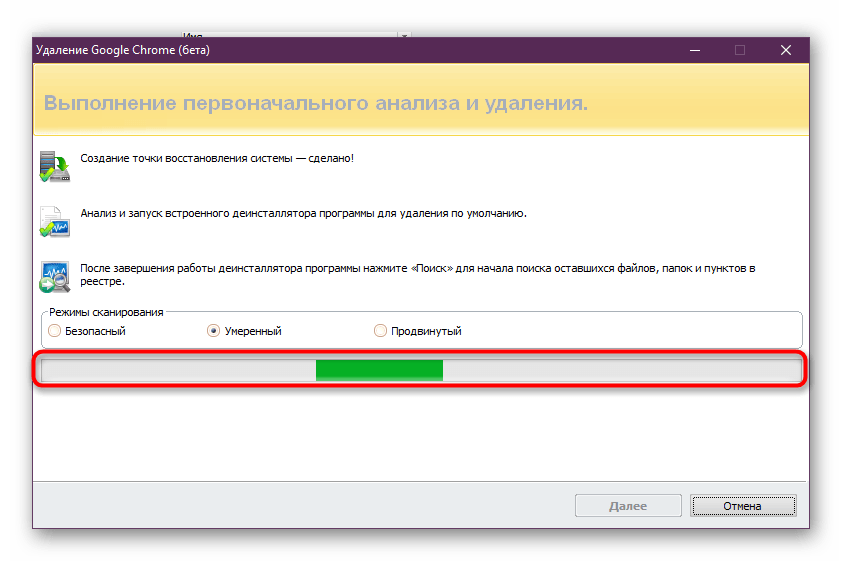
- Ждите окончания проверки, а затем подтвердите удаление найденных файлов.


Если вас заинтересовал Revo Uninstaller и вы желаете продолжить использование этого софта на постоянной основе, вам может пригодиться отдельный материал, в котором другой наш автор детально описал все аспекты взаимодействия с этим ПО.
Подробнее: Использование программы Revo Uninstaller
Дополнительно отметим, что сейчас на просторах интернета присутствует огромное количество похожего софта, который предназначен для удаления сторонних программ с дальнейшей очисткой от остаточных файлов. Мы не стали рассматривать их все, поскольку это просто не имеет смысла. При желании вы можете самостоятельно ознакомиться со списком подобных инструментов и выбрать там подходящий вариант.
Подробнее: Программы для удаления программ
Способ 3: Стандартное средство Windows
Переходим к последнему методу нашего сегодняшнего материала. Он заключается в использовании стандартного инструмента операционной системы для удаления браузера. Его преимущество позволяет обойтись без сторонних приложений, но каждое действие по очистке остаточных файлов придется выполнять самостоятельно.
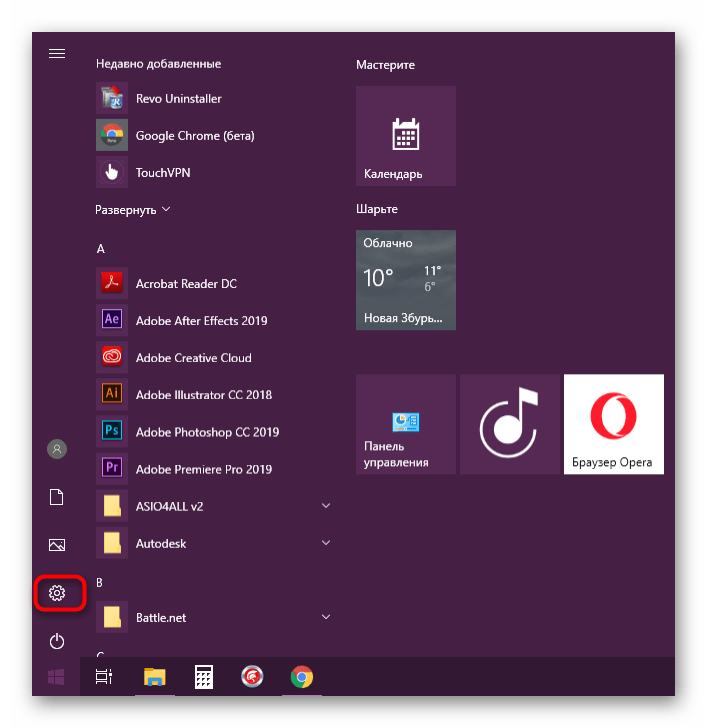
- Откройте «Пуск», нажав по соответствующей кнопке, где перейдите в «Параметры» или «Панель управления».
- В появившемся меню вас интересует меню «Приложения» или «Программы и компоненты».
- В списке отыщите Google Chrome и кликните по надписи ЛКМ.
- Выберите вариант «Удалить».
- Подтвердите свое действие и дождись окончания процесса.
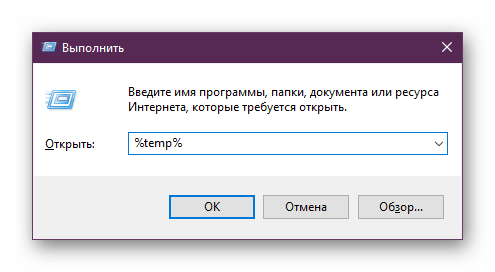
- После этого займитесь очисткой от остаточных объектов. Для этого запустите утилиту «Выполнить» через комбинацию Win + R, где введите
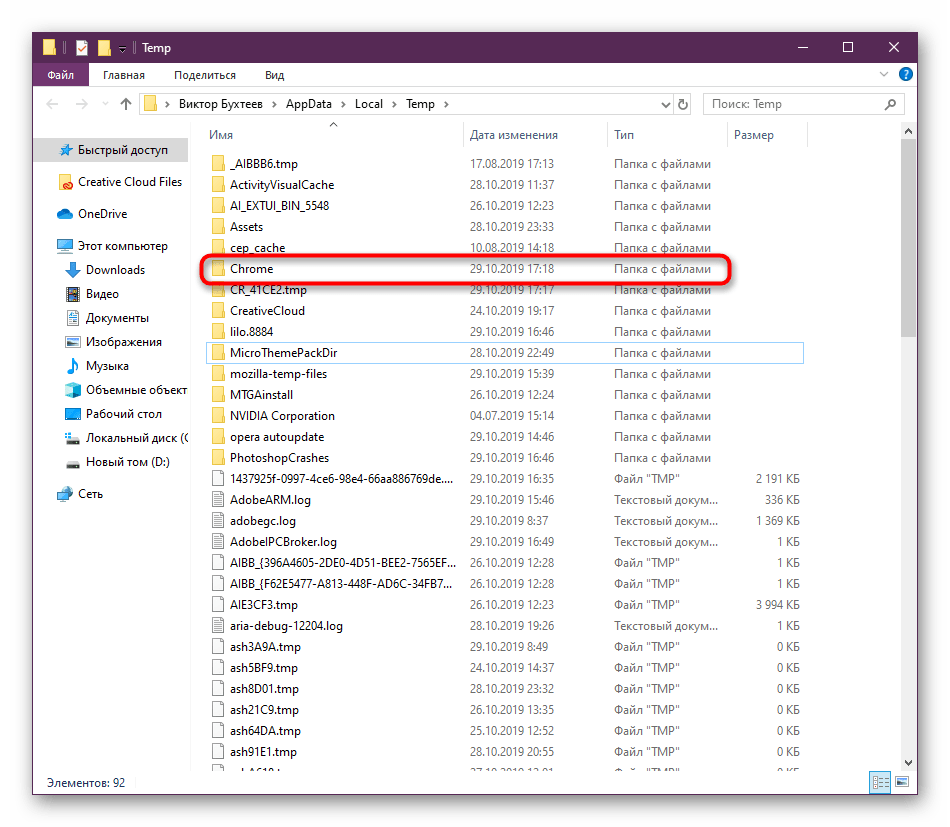
%temp%и нажмите на Enter. - Вы окажетесь в папке, где хранятся временные файлы. Отыщите там директорию, которая будет связана с рассматриваемым обозревателем, и удалите ее.
- Снова запустите «Выполнить», откуда перейдите в «Редактор реестра» путем ввода команды
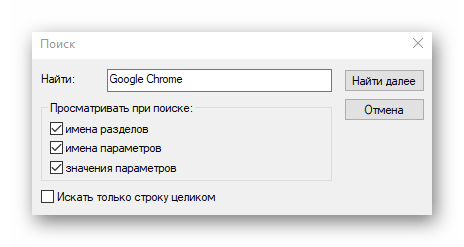
regedit. - Здесь потребуется использовать функцию поиска. Запустите ее через Ctrl + F или найдите строку в разделе «Правка».
- Введите в поле «Google Chrome» и начните поиск.
- Удаляйте все найденные упоминания, перемещаясь к следующим объектам нажатием на F3.


Теперь вы знаете все о методах деинсталляции Google Chrome. В конце этого материала отметим, что если вы решили удалить этот веб-обозреватель из-за того, что он по каким-то причинам перестал открывать, не спешите прибегать к подобным радикальным действиям. Для начала советуем использовать другие методы исправления ситуации. Детально обо всем этом читайте в другом руководстве на нашем сайте далее.
Подробнее: Решение проблем с запуском Google Chrome
Наша группа в TelegramПолезные советы и помощь

- To uninstall Google Chrome from Windows 11, open Settings > Apps > Installed apps, and click the “Uninstall” option for the browser.
- On Windows 10, open Settings > Apps > Apps & features, and click the “Uninstall” button for the browser.
- After following those steps, from the
%LOCALAPPDATA%path, inside the “Google” folder, delete the “Chrome” folder to delete the user data.
UPDATED 10/31/2024: On Windows 11 (or 10), if Google Chrome is not working correctly or you’re switching to another browser, you can uninstall it with a few clicks.
The process is similar to removing any other application in the operating system using the Settings app, but the steps may be slightly different depending on the version of Windows installed on Windows.
In this guide, I will teach you the steps steps to uninstall Google Chrome on Windows 10 or Windows 11.
- Remove Google Chrome from Windows 11 using Settings
- Remove Google Chrome from Windows 10 using Settings
Remove Google Chrome from Windows 11 using Settings
To uninstall Chrome on Windows 10, use these steps:
-
Open Settings.
-
Click on Apps.
-
Click on Installed apps.
-
Click the three-dot button next to the Google Chrome app.
-
Choose the Uninstall button.

-
Click the Uninstall button again.
-
(Optional) Open File Explorer.
-
Type this
%LOCALAPPDATA%path in the address bar and press Enter to open the “Google” folder in the “Local” folder.Quick tip: The
%LOCALAPPDATA%path is an environment variable that will automatically open the “Local” folder in the “AppData” location. -
Select the Chrome folder.
-
Click the Delete button in the address bar.


Once you complete the steps, the Google browser will be deleted from the computer. The steps to remove the “Chrome” folder are optional, but those extra steps will delete all the browser’s data, such as browsing history, cookies, and passwords.
Remove Google Chrome from Windows 10 using Settings
To uninstall Chrome on Windows 10, use these steps:
-
Open Settings.
-
Click on Apps.
-
Click on Apps & features.
-
Select the Google Chrome app.
-
Click the Uninstall button.

-
Click the Uninstall button again to confirm.
-
(Optional) Check the “Also delete your browsing data” option.
-
Click the Uninstall button.
-
(Optional) Open File Explorer.
-
Type this
%LOCALAPPDATA%path in the address bar and press Enter to open the “Google” folder in the “Local” folder. -
Select the Chrome folder.
-
Click the Delete button in the address bar.


After you complete the steps, Google Chrome will no longer be available on your computer. The uninstaller will also open a web page to ask you why you are removing the software, but you can just close the page.
It’s important to note that deleting your profile information won’t delete your personal information from the Google servers. You need to do this from your Google account.
Update October 31, 2024: This guide has been updated to ensure accuracy and reflect changes to the process.
Mauro Huculak is a
Windows How-To Expert and founder of
Pureinfotech
(est. 2010). With over 21 years as a technology writer and IT Specialist,
Mauro specializes in Windows, software, and cross-platform systems such as Linux, Android, and macOS.
Certifications:
Microsoft Certified Solutions Associate (MCSA),
Cisco Certified Network Professional (CCNP),
VMware Certified Professional (VCP),
and
CompTIA A+ and Network+.
Mauro is a recognized Microsoft MVP and has also been a long-time contributor to Windows Central.
You can follow him on
YouTube,
Threads,
BlueSky,
X (Twitter),
LinkedIn and
About.me.
Email him at [email protected].
Google Chrome is one of the most popular web browsers. Chrome is used by 2.65 billion people in 2021 and claimed 65.52% of the world wide web browser market share across all device types – Windows PC, Mac computer, android device, iOS device, you name it.
Even though Microsoft Edge is the default web browser for Windows computers, many users still prefer to use it to install Google Chrome and turn this into the default browser. That’s just how popular this browser is.
Using Google Chrome on Windows
Google Chrome is the most popular web browser used to browse online. It’s also a part of the bigger Google ecosystem, making it very difficult for users to move away from it.
This is especially true if you own an android device and own a Google account. Most android devices come with Chrome preinstalled, though on a rare occasion where you don’t have it, you can simply download it from Google Play Store. You can sync all of your search and history data across your devices simply by logging in to your Google account.
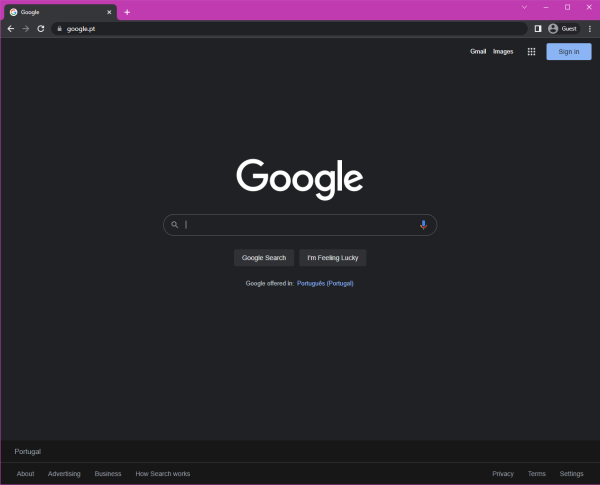
To use Google Chrome on Windows, simply click the Chrome icon to open the Google Chrome app, type the website address you want to visit on the address bar, and start browsing.
Why Uninstall Google Chrome?
Despite the popularity, there are also concerns related to data privacy and heavy RAM usage in Chrome, making users want to uninstall it and switch to different web browsers.
Another reason to uninstall Chrome is also simply because users need to fix issues with the browser itself, and then later re-install it.
How to manually uninstall Google Chrome on Windows 10
The most common way to uninstall Chrome from your computer is through the Windows Settings app and Control Panel. You can find more details on how to do it below.
Uninstall Chrome from Settings
Here’s how you can manually uninstall Google Chrome on Windows from the Settings app:
- Make sure that Google Chrome isn’t currently running. Close all the tabs and the browser window if it’s still running
- Press the Windows button to open the Start menu > click the gear icon to open the Settings menu

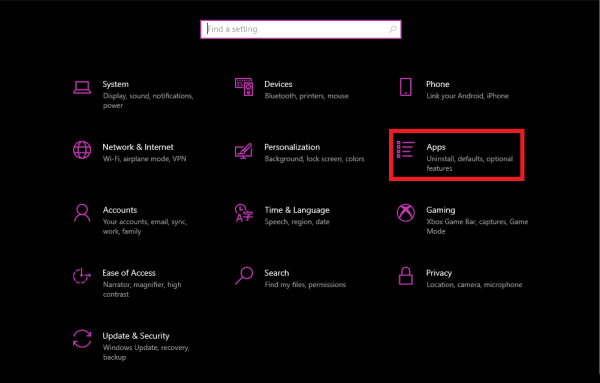
- In the new Settings window, select “Apps”
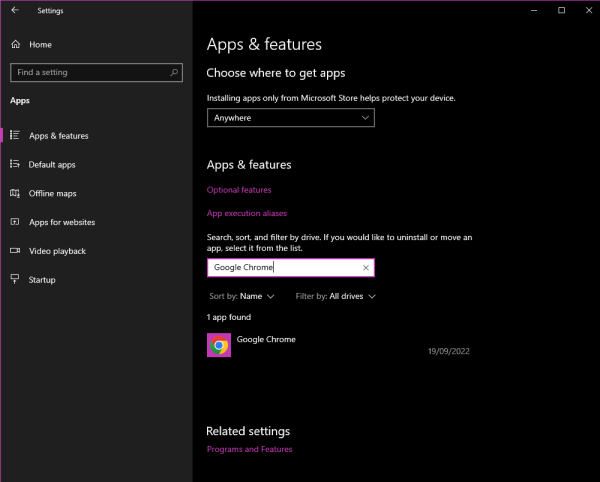
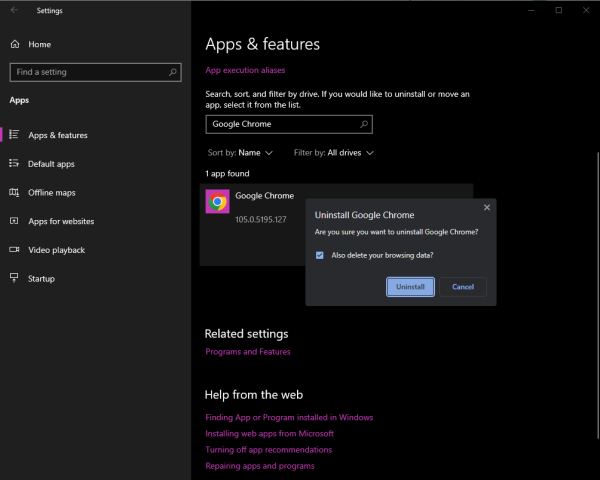
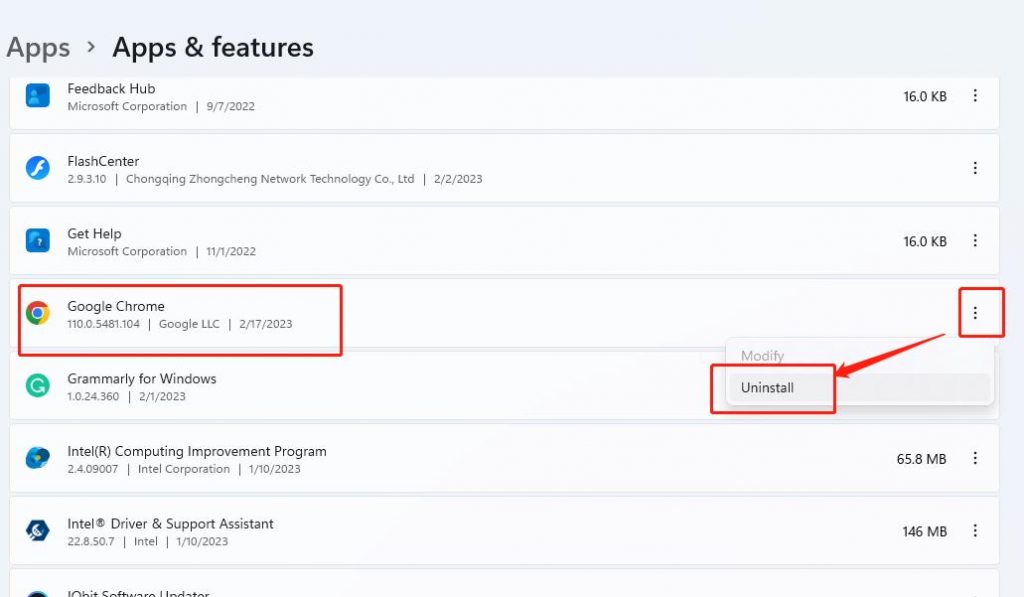
- A new “Apps & features” window will appear. Find “Google Chrome” from the list of installed apps
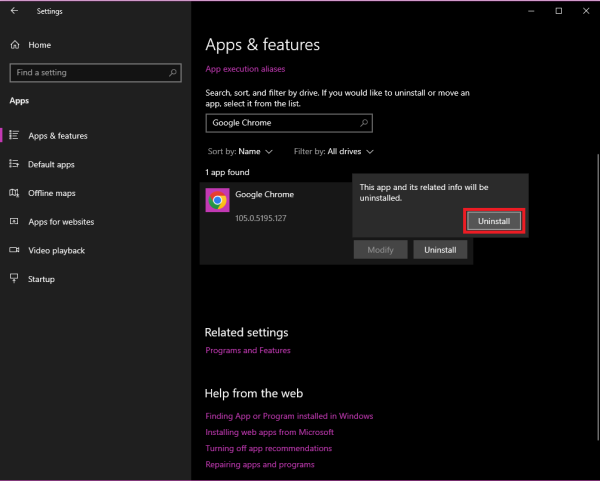
- Click the “Uninstall” button next to the Google Chrome icon
- A new warning pop-up will appear, click the “Uninstall” button once again to confirm the uninstallation
- A new pop-up will appear > click “Uninstall” to confirm the uninstallation. If you also want to delete your browsing history, you can tick the box next to “Also delete your browsing data?”. Doing this will also remove all your bookmarks, cache, and other temporary files
Uninstall Chrome from Control Panel
Here’s how you can manually uninstall Google Chrome on Windows from the Control Panel:
- Type in “Control Panel” on the Search bar > click “Control Panel” app from the search results
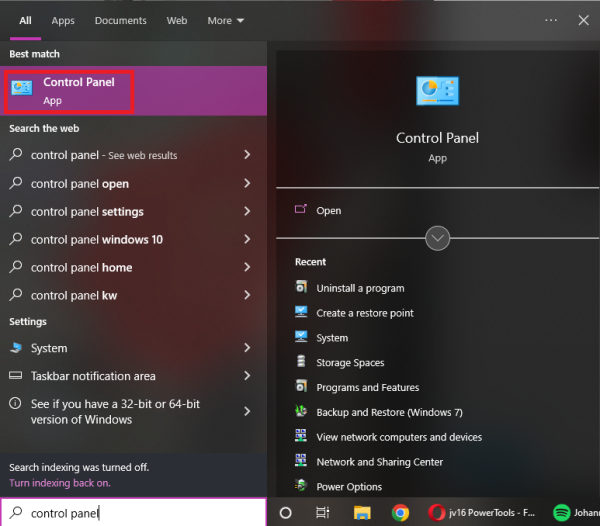
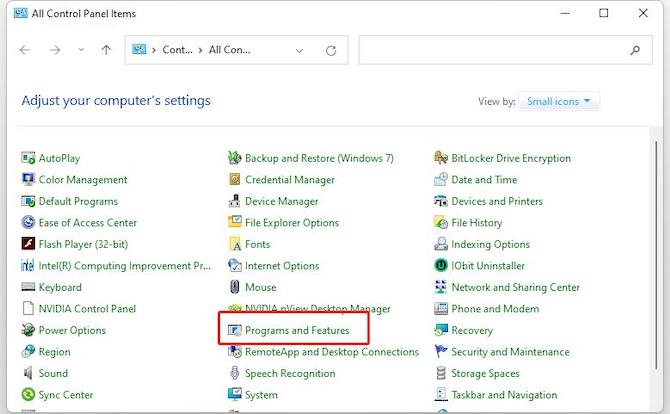
- A new Control Panel window will appear, select “Uninstall a program” under the Programs menu

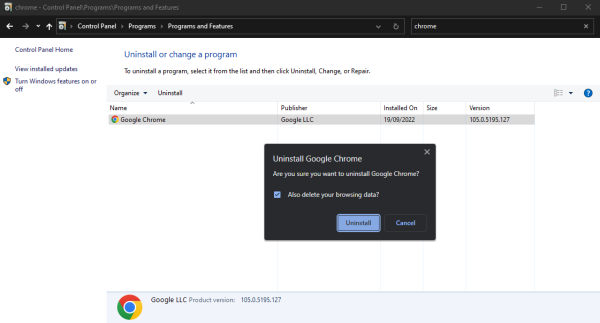
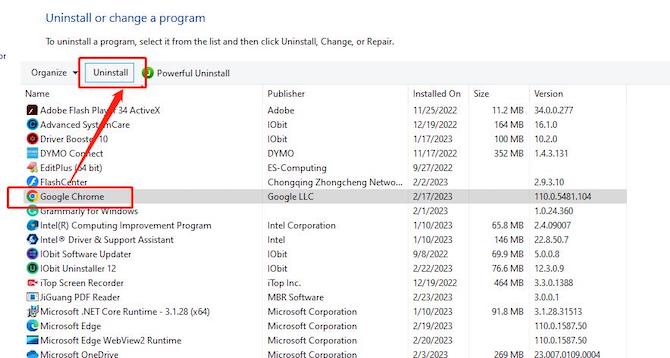
- In the new Programs and Features menu, find Google Chrome from the list of installed programs

- Double click Google Chrome to uninstall
- A new pop-up will appear > click “Uninstall” to confirm the uninstallation. You can tick the box to clear browsing history data in the uninstall process
How to uninstall Chrome automatically on Windows 10
Even though you can remove Chrome from Windows apps, there’s still no guarantee that the above steps can completely remove Google Chrome. There are always leftovers and hidden files that remain in the system files and folders. When they pile up, they can slow down your personal computer system over time.
This is where a trusted third-party app, like jv16 PowerTools’ Software Uninstaller tool, can help. Here’s how you can uninstall Google Chrome using Software Uninstaller:
- Run jv16 PowerTools and select ‘Software Uninstaller’ from the Main Menu

- A new window will appear, select “Start” to start the scanning process
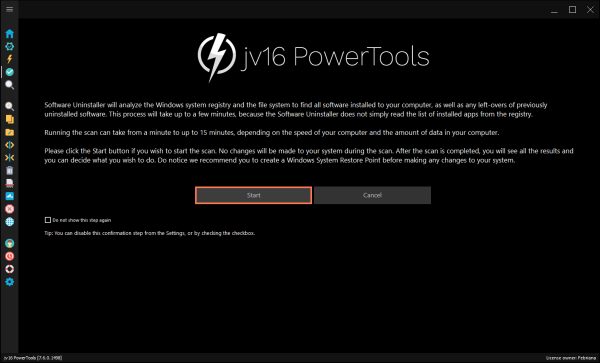
- Software Uninstaller will start scanning all installed software in your system

- When it’s done, select Google Chrome from the list > select Uninstall Software button
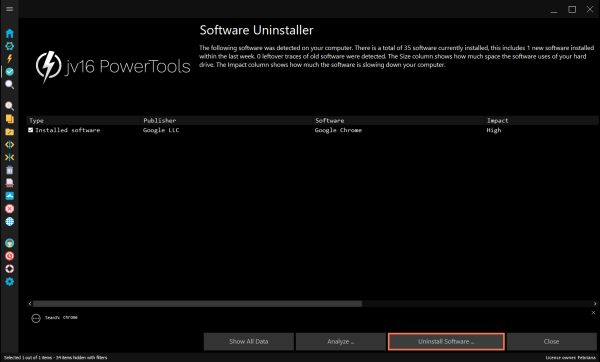
- A new warning box will appear, click “Yes” to begin the uninstallation
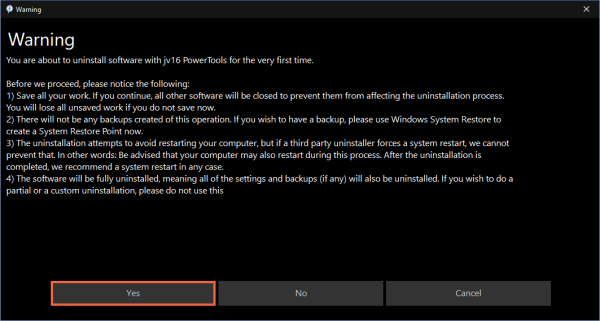
- Before uninstallation begins, you’ll be prompted to review all the files and items that will be uninstalled. Click the “Uninstall Software” button after you confirm that all looks good

- Software Uninstaller will perform uninstallation automatically. You won’t need to do anything at this stage. When it’s done, jv16 PowerTools will automatically restart your computer after all of the applications are successfully uninstalled (if the setting is enabled), otherwise, we recommend you manually restart your computer.
Delete your browsing data
Uninstalling the Chrome app doesn’t automatically delete your browsing history. You need to do an additional step to clear your data.
Depending on which device and how much data you want to delete, there are two ways to delete your browsing history: from your Google account and Google Chrome. This article will show you the detailed steps on how to clear your search and browsing history.
Unable to uninstall Google Chrome on Windows
Uninstalling Chrome usually is pretty straightforward. However, in the situation where you’re not able to do so, you can try the following steps to fix the issue.
Manually fix unable to uninstall Chrome issue
There are a couple of ways you can try to fix this issue: by ending the process in Task Manager and closing background apps.
End the process in Task Manager
The most common reason why Chrome can’t be uninstalled is that Chrome or its associated apps are still running in the background. You’ll need to end its process in Task Manager to make sure it’s not running in the background. Here’s how:
- Close all Chrome tabs or windows that are still running
- Open Task Manager by hitting Ctrl + Alt + Delete buttons at the same time > select Task Manager from the new window. You can also open Task Manager by simply searching “Task Manager” in the Windows search bar
- Go to the “Processes” tab window in Task Manager > Find Google Chrome’s process > right-click Chrome and select End Task

- Try the uninstallation process again
Close background apps
If the above steps don’t solve the issue, another possible reason for the issue is because there are Chrome’s background apps still running. You’ll need to disable them before trying the uninstallation again. Here’s how:
- Open Google Chrome’s Settings by clicking it from the three dots menu on the top right of the window
- Go to the “System” tab > Toggle off “Continue running background apps when Google Chrome is closed”
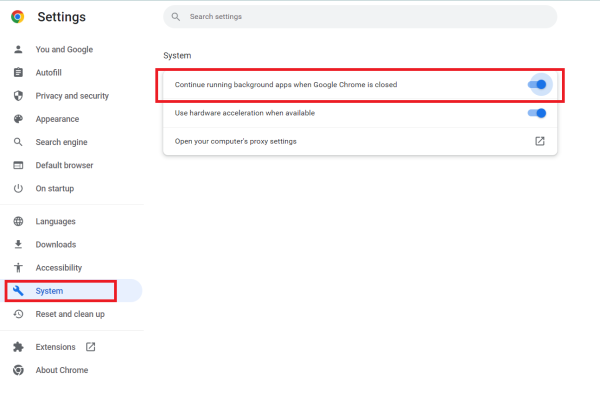
- Try the uninstallation process again
Automatically fix unable to uninstall Chrome issue
If the above steps don’t fix the issue or if you’re unsure of what you’re doing, you can always use a trusted third-party app like jv16 PowerTools’ System Fixer.
Before starting, it’s recommended to create a backup though jv16 PowerTools will also automatically create a System Restore Point after you install the app.
Here’s how you can fix the unable to uninstall Chrome issue using System Fixer:
- Run jv16 PowerTools and open the System Fixer tool by clicking the “System Fixer” menu
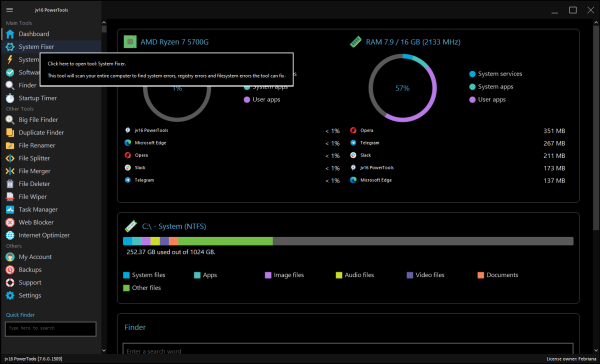
- A new window will appear, click “Start” to start the scanning process
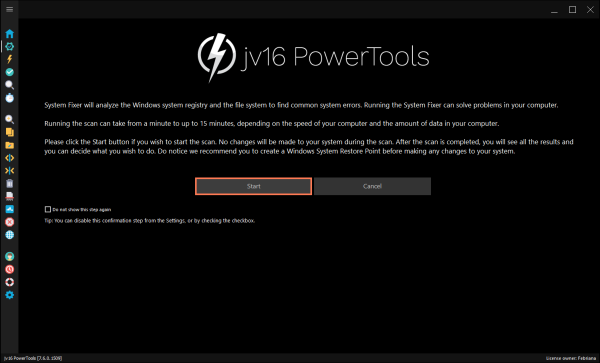
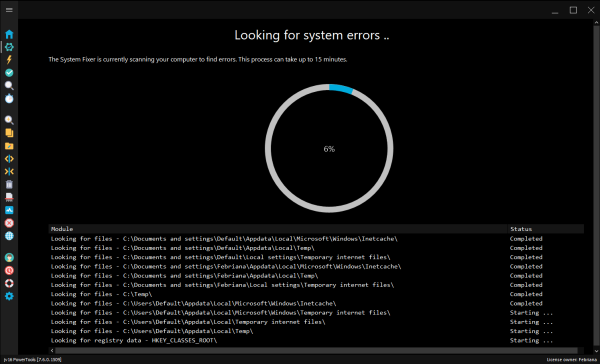
- System Fixer will scan your Windows system to look for errors
- When it’s done, a new window that shows the errors and recommended fix will appear You can review the items and click the “Fix All Errors” button if all looks good
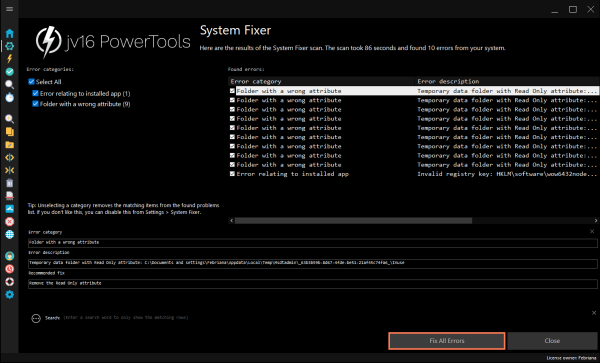
- System Fixer will automatically implement the fix. It’s recommended to restart your computer after this step to make sure the fix is implemented correctly
Install Google Chrome again
If you want to reinstall Google Chrome after the uninstall process, you certainly can do so. The steps are the same as installing Chrome for the first time.
Here’s how:
- Visit Chrome website: https://www.google.com/chrome/ through your default browser (Microsoft Edge for example)
- Click the Download Chrome button on the website to install the Chrome installer

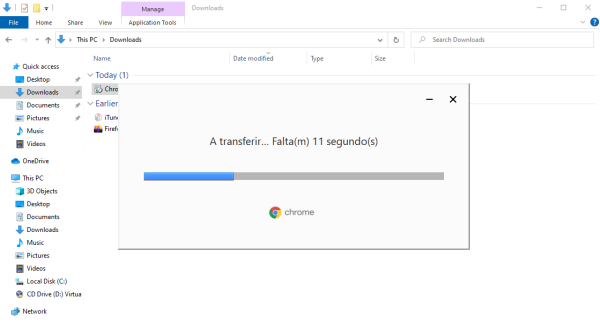
- Launch the downloaded Chrome installer
- Wait until Chrome installation is finished
- After the installation finishes, you can simply run the reinstalled Chrome to start browsing
If you want to have all of your Chrome bookmarks after reinstalling Chrome, you can simply log into your Google account since all of your data is synced on Google’s servers.
Do keep in mind that if you’re on Windows XP and intend to reinstall Chrome to fix issues, you might want to reconsider since Google has stopped issuing Chrome updates and support for Windows XP.
Easily and safely remove any application with jv16 PowerTools’ Software Uninstaller
Uninstalling Google Chrome or other applications, in general, may seem trivial, but actually quite tricky. You can delete it from Settings or Control Panel, but there are no straightforward ways available from Windows to completely uninstall Google Chrome without any leftovers.
You can manually delete possible files remaining, but doing so is tedious and can potentially harm your computer – especially if you’re not very familiar with the ins and outs of your system.
This is why we recommend jv16 PowerTools’ Software Uninstaller. With a few clicks, the tool will automatically scan your whole system, and uninstall the applications that you want to delete while making sure that no leftover items are remaining. It’s also suitable for bulk uninstallation.
We have over 20 years of experience bringing the best out of Windows computers, making jv16 PowerTools very safe to use while still being very user-friendly. Don’t believe us? Try jv16 PowerTools’ Software Uninstaller tool in a 14-day free trial today and see it by yourself!
Google Chrome is one of the most popular web browsers and are enjoyed by a great number of users. Sometimes, however, Google Chrome’s using experience don’t live up to your expectations, or you simply stop using them to free up disk space for a better PC performance.
Are you looking for an effective solution to thoroughly uninstall Google Chrome on your computer? Do you have trouble completely uninstalling Google Chrome from your system?
Then this post will solve your problems. In this guide, we will show you how to uninstall Google Chrome without any difficulty, and you will be able to get the most effective way to completely uninstall Google Chrome on Windows.
We’re going to discuss three different methods to uninstall Google Chrome on your Windows 10 / 7 / 8 / 11.
However, we would like to remind you that you won’t completely uninstall Google Chrome by using method 1 and methods 2. Because the related program files and the folders still exist in your system disk and the user data has not been removed.
And if you are looking for a solution that could help you uninstall Google Chrome completely, or you want to fix the problem of Google Chrome won’t uninstall, see Method 3 recommended below.
Method 1: Uninstall Google Chrome via Settings
The flat design of Windows 10 gives users a way to uninstall programs faster. You only need two steps to uninstall the Google Chrome directly.
Step 1: Open the Start Menu, and click Settings.
Step 2: Click Apps > Apps and Features. Look for Google Chrome in the list and click on it.
The next step is to click on the three dots in the vertical row on the right, then click Uninstall, so you can initiate the uninstalling. It will remind you that the program and its related information will be uninstalled.
Method 2: Uninstall Google Chrome via Control Panel
This is the legacy method that has also existed in the previous iteration of Windows. If you’re more comfortable with Control Panel than the Settings app, this is the way to go.
Step 1: Open the Start menu, type Control Panel then search for it. Click Control Panel > Programs and Features.
Step 2: Select Google Chrome from the list, and then click on the Uninstall button to remove Chrome from your system. Then your uninstalling is finished.
Method 3: Uninstall Google Chrome Completely (Won’t Uninstall Solution)
If you are looking for a complete uninstalling of Google Chrome, IObit Uninstaller will be an ideal choice. It helps you completely uninstall unwanted software, apps and browser plug-ins, and provides you the best solution to uninstall the programs and Windows apps that won’t uninstall (McAfee, Valorant, avast, discord, etc).
IObit Uninstaller provides you an easy and secure way to thoroughly remove unwanted programs, malicious/ad browser extensions and Windows Apps; helps you uninstall programs that can not be uninstalled, or to force uninstall a program that won’t uninstall; and gives you a clean PC and a secure & smooth online surfing experience.
- Uninstall all unwanted programs and apps thoroughly
- Force uninstall apps and programs that won’t uninstall
- Avoid annoying pop-ups and notifications on browsers and apps
- Shred and permanently remove unwanted extensions and files
Follow the steps to completely uninstall Google Chrome with IObit Uninstaller:
Step 1: Download, Install and Launch IObit Uninstaller.
Step 2: Click Programs, select Google Chrome from All Programs, then click Uninstall.
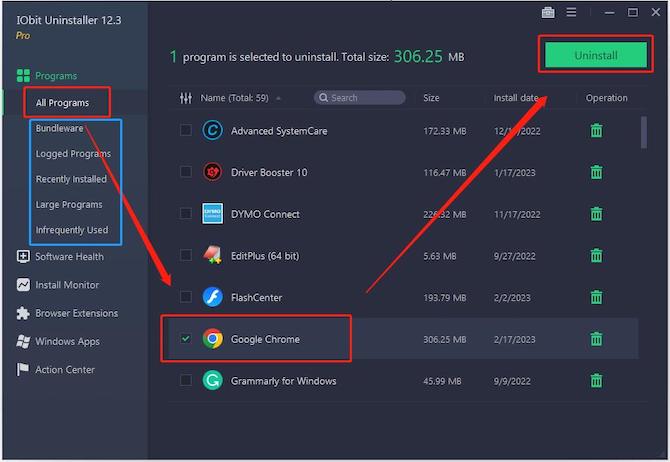
Note: Here on the left side you can see different items such as Bundle-ware, Large Programs, Recently Installed and so on. You can quickly find the program you want to uninstall based on these options.
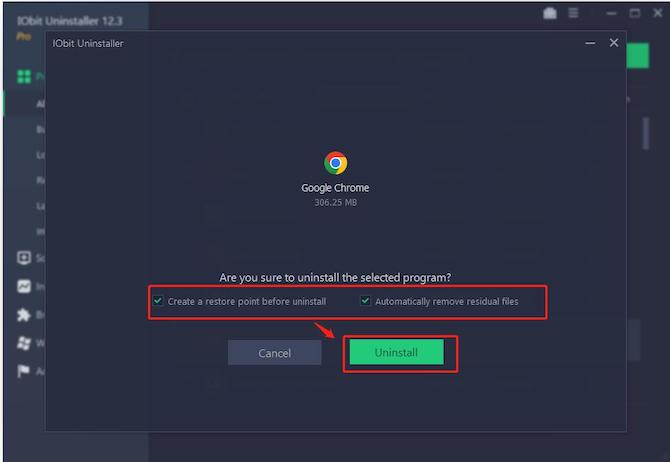
Step 3: Select Create a restore point before uninstall or Automatically remove residual file according to your needs. Then click Uninstall.
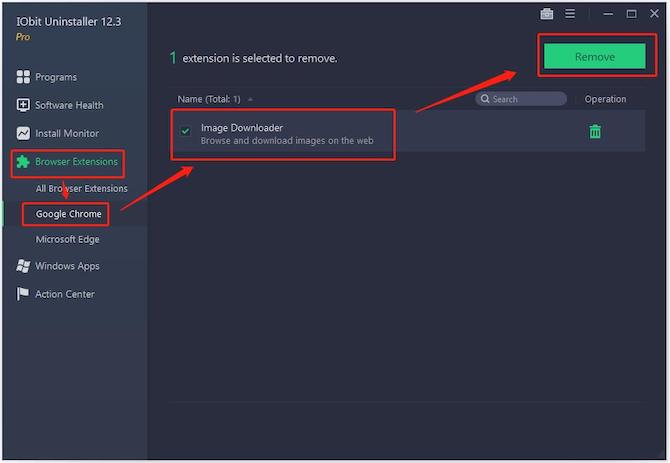
Step 4: Click Browser Extensions > Google Chrome, IObit Uninstaller automatically detects extensions of Google Chrome and lists them here, select the extensions and click Remove.
Once you complete the steps, your Google Chrome has now been completely uninstalled on your PC. Uninstalling Google Chrome with IObit Uninstaller is simple and easy, as it should be, and not tricky as it might seem at first.
Hopefully, this guide will be a great help if you wish to completely remove the Google Chrome from your computer.
FAQs about Uninstall Google Chrome
Q1: What will happen if I uninstall my Chrome?
A: When you uninstalled Chrome, it will automatically shift to its default browser (Microsoft Edge for Windows). If you don’t want to use the default browsers, you can use it to download any other browser that you want.
Q2: Why can’t I Uninstall Google Chrome from my computer?
A: If Google Chrome processes are running in the background, there’s a good chance that Google Chrome will not uninstall in Windows 10. Or, it could be a problematic extension that could interfere with the uninstallation process.
Q3: Can I Uninstall Google Chrome and then reinstall?
A: Yes. And you could uninstall and reinstall Google Chrome to fix most problems with default search engines, pop-ups, Chrome updates and so on.
Q4: Is it easy to Uninstall Google Chrome?
A: Yes. You could uninstall Google Chrome via Settings or Control Panel in just a few simple steps. However, in order to completely uninstall Google Chrome, IObit Uninstaller will be a more helpful choice.
Q5: If I uninstall Google Chrome and then install a fresh version, will my bookmarks repopulate when I reinstall the browser?
A: If you have signed into your account into the browser, yes. Your Google Account that is connected to your browser syncs all bookmarks even after a fresh install (though you’ll need to sign in again to retrieve all the synced data).
More Articles:
IObit Uninstaller Review – the Most Trustworthy Uninstaller Software in 2023
How to Uninstall Programs on Mac Easily and Completely
How to Uninstall Skype for Business on Windows and Mac Completely?