
Директ Икс – это технология, необходимая для запуска игр, 3D-моделирования, рендеринга видео и других мультимедийных задач. Она связывает оборудование компьютера (видеокарту, звуковую плату и др.) и программное обеспечение, которое пытается получить к нему доступ, при условии, что это оборудование его поддерживает. Сегодня мы расскажем о способе удаления DirectX, если, например, его файлы повреждены, а обновить их не получается.
Важная информация
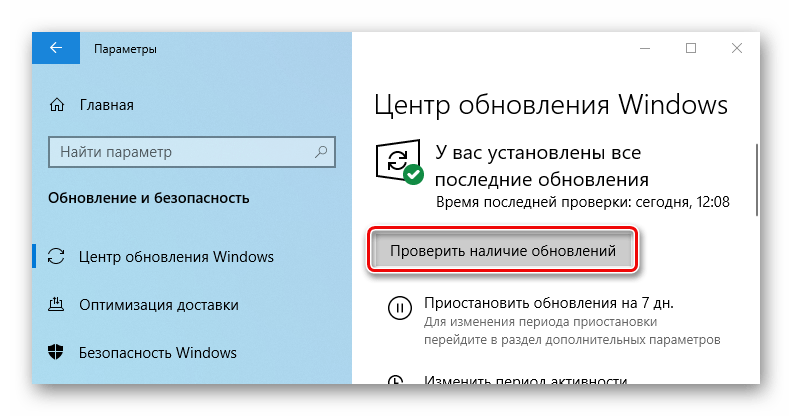
Директ Икс 12 – это набор компонентов, встроенный в Windows 10, а значит, его не удалить стандартным способом. Свои апдейты он получает вместе с обновлением системы. Поэтому при появлении проблем сначала попробуйте обновить Виндовс до последней версии. О том, как это сделать есть отдельная статья на нашем сайте.
Подробнее: Обновление Windows 10 до последней версии
Удаляя компоненты, которые являются частью системы, приготовьтесь к любым последствиям. Учитывая, что использовать придется сторонний софт есть вероятность, что после удаления библиотек DirectX система начнет работать некорректно. Поэтому создайте точку восстановления Windows 10, чтобы можно было откатить ее до рабочего состояния, или резервную копию системы. Об этом мы также подробно писали в отдельных статьях.
Подробнее:
Как создать точку восстановления Windows 10
Откат к точке восстановления в Windows 10
Как создать резервную копию Windows 10
Удаление Директ Икс
DirectX Happy Uninstall (DHU) – это инструмент для управления и обслуживания DX. Несмотря на англоязычный интерфейс, программа проста в использовании – с помощью всего нескольких кликов мышки можно сделать резервную копию Директ Икс, удалить его текущую версию и даже установить новый набор компонентов.
DHU работает только на 64-битных системах, а для полноценного использования предусмотрена лицензия. Поскольку на данный момент это единственное рабочее ПО для удаления DirectX из Windows 10, разработчики позволили себе сделать его платным. Ограничение как обычно касаются самых важных функций: «Исправление ошибок» и «Удаление DX».
Скачать DirectX Happy Uninstall с официального сайта
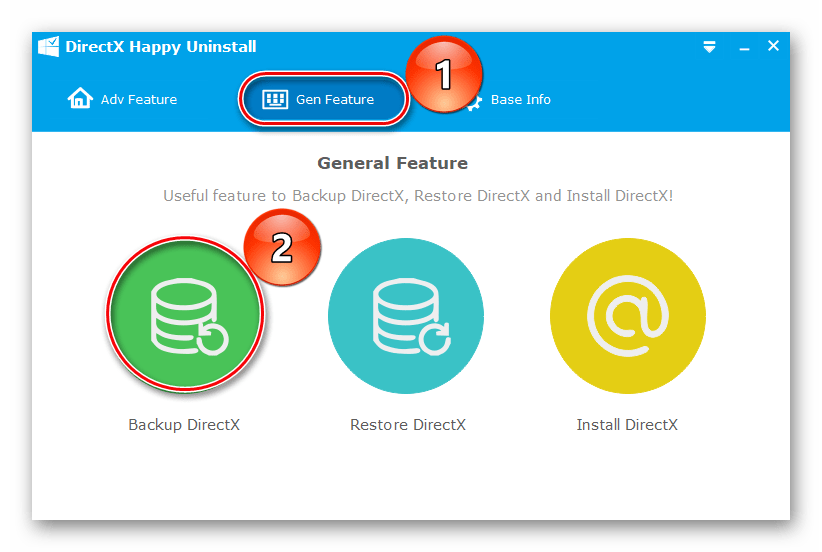
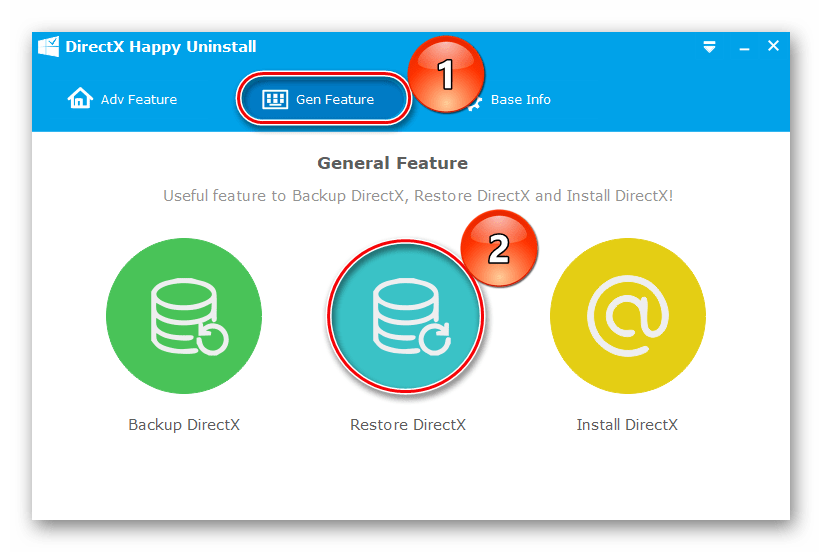
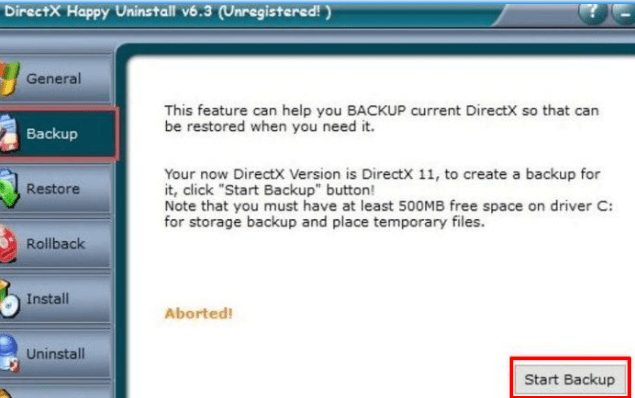
- Перед удалением рекомендуется сделать резервную копию. Для этого переходим во вкладку «Gen Features» и жмем «Backup DirectX».

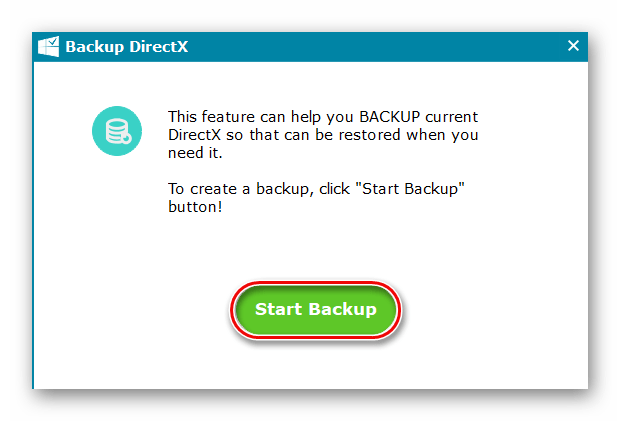
Далее щелкаем «Start Backup».
- Чтобы восстановить потом компоненты, жмем «Restore DirectX».
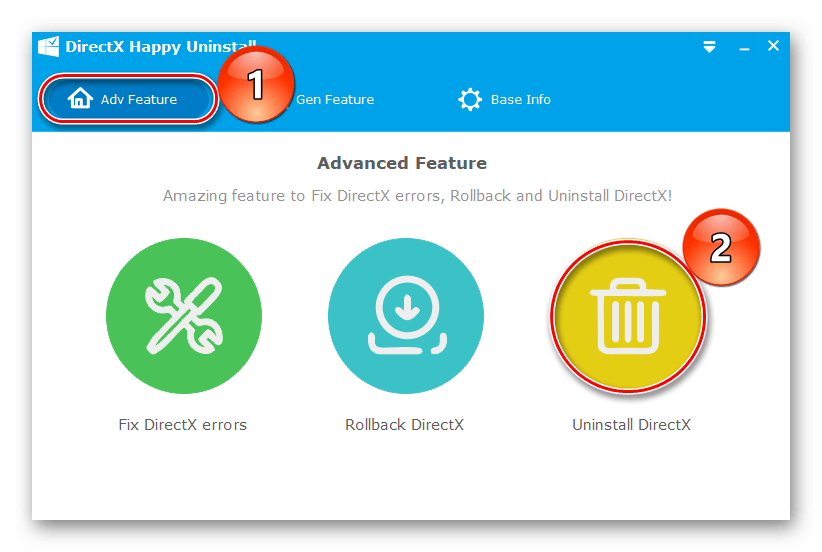
Если причиной удаления стали сообщения об ошибках DirectX, можно сначала попробовать их устранить. Для этого перейдите во вкладку «Adv Feature» и нажмите «Fix DirectX errors», затем — «Start Fix DX». Откроется страница с ссылками на скачивание пакета данных DirectX, который будет использоваться для устранения ошибок. Загрузите архив, распакуйте его и запустите файл «RunMe». Далее просто дождитесь, когда DHU завершит работу.
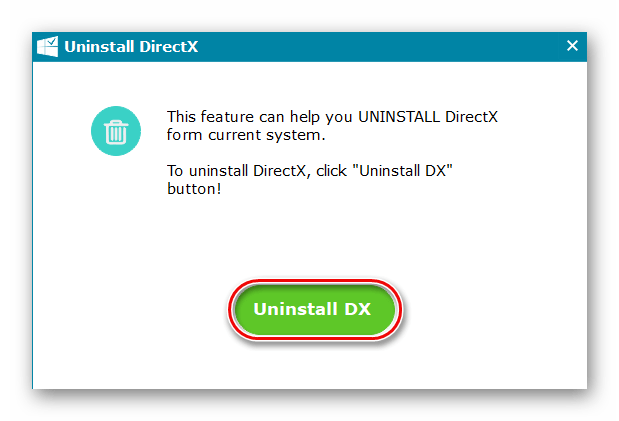
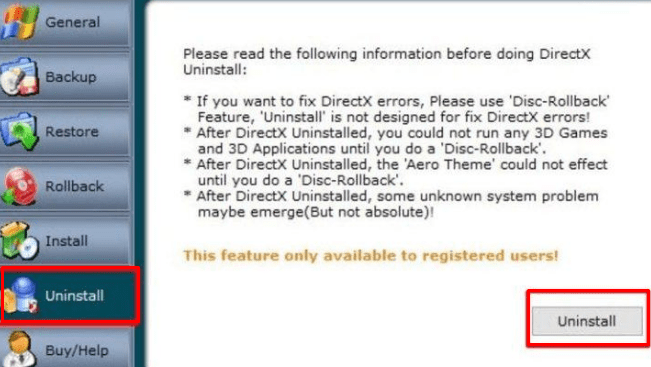
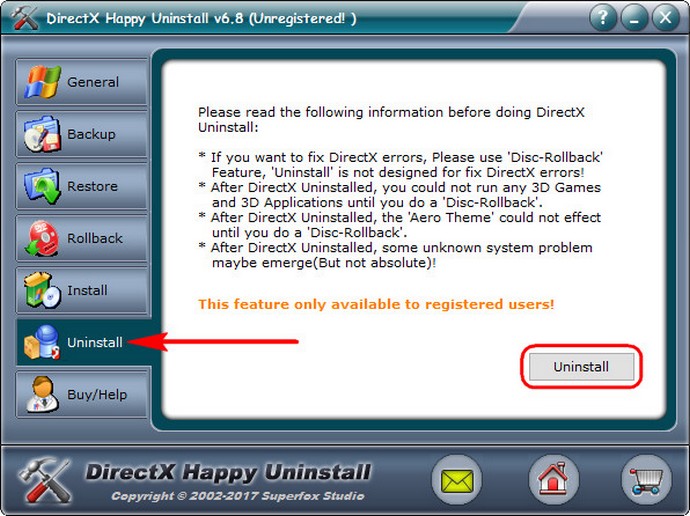
- Для удаления Директ Икс нажимаем «Uninstall DirectX».
Затем жмем «Uninstall DX». Ждем завершения процесса и перезагружаем компьютер.
Удаленные компоненты также можно установить с помощью DHU, но лучше восполнить недостающие библиотеки с официального сайта Microsoft.
Читайте также: Как установить DirectX
Надеемся, что ваша проблема решится раньше удаления DirectX. Но даже если до этого дошло, подумайте о сопутствующих причинах. Если вы просто не можете запустить программу или игру, в системных требованиях к которым указана более ранняя версия DX, нужно знать, что Директ Икс 12 содержит все необходимые компоненты из предыдущих библиотек, а значит, причина может быть в другом.
Наша группа в TelegramПолезные советы и помощь
Работа комплектующих компьютера обеспечивается специализированным ПО. Например, для видеокарты это драйвер оборудования и библиотека DirectX. Они помогают правильно перекодировать текстуры в игре, и оптимизируют воспроизведение видео. Но бывает такое, что при очередном обновлении произошел сбой и установка не завершилась, а произвести восстановление не получилось, так как исполняемые файлы стираются.
И единственный выход – переустановка ПО. Далее в статье мы расскажем, как удалить DirectX для Windows 7/XP и предотвратить возникновение проблемы в будущем.
Почему возникают проблемы?
Как и говорилось выше, первая причина – ошибки в работе в компьютера. В итоге обновления не установились и DirectX не оптимизирует, а тормозит работу видеосистемы.
Обновляясь со сторонних ресурсов,например, с “битых” серверов, вы подвергаете свой компьютер опасности. Помимо вирусов, в архиве с DirectX находятся взломанные библиотеки файлов, которые блокирует система, определяя их как “трояны”. В итоге – антивирус отправляет служебные файлы на карантин, запрещает доступ, и вам вылетает сообщение «Ошибка при запуске DirectX».
DirectX – системный компонент, вшитый в ОС (касается Windows 7 и выше), для его удаления понадобятся сторонние утилиты. Мы будем использовать ПО от Microsoft DirectX Eradicator и Happy Uninstall, если у вас XP – достаточно встроенных в систему средств. Вначале определите какая у вас версия , для этого есть 2 способа:
Чтобы удалить DirectX строенным средствами:
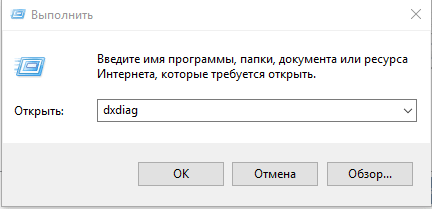
- Воспользуйтесь командой выполнить.
- Нажмите комбинацию клавиш WIN+R.
- Пропишите
dxdiagи нажмите “ОК”.
- Откроется окно с загрузкой информации об ОС, где вы увидите точные характеристики. Посмотрите на последнюю строчку «Версия».


Программными
Everest/AIDA
Разработка продукта Everest была прекращена, так как в 2010 году права на программу выкупила компания FinalWire Ltd и провела ребрендинг. Сейчас проект известен под названием AIDA 64 . Это инженерная утилита, показывающая расширенные свойства как Windows, так и ПК.
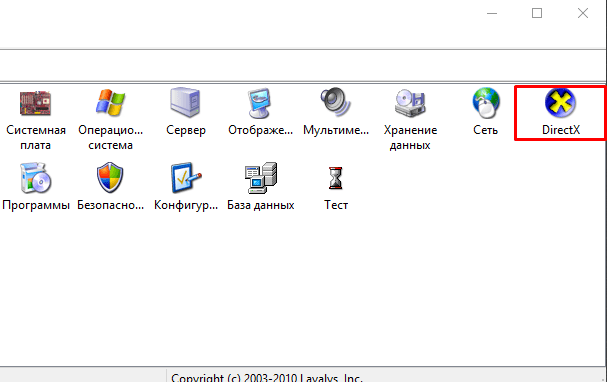
- Запустите EVEREST.
- В списке функций кликните на значок X.

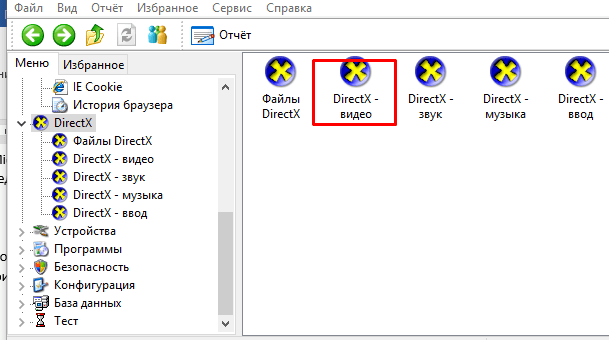
- Далее перейдите во вкладку «Видео».

- Скрольте вниз до поля «Аппаратная поддержка» и посмотрите версию.

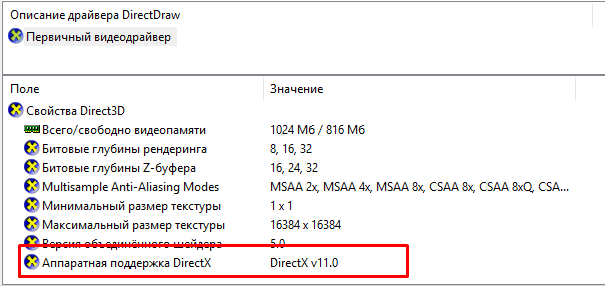
Everest покажет вам список установленных файлов библиотеки. Благодаря этому, вместо полной перезаписи DirectX можно загрузить отдельные составляющие библиотеки.
Проверка версии нужна для выбора способа удаления и обновления DirectX. С этим закончили, переходим к удалению. Один нюанс – не во всех Windows есть возможность удалить DirectX штатными средствами. Например, в 10-ке это сделать не получится. Поэтому, воспользуемся утилитами.
На Windows 10
Библиотека 12 версии установлена по умолчанию, а значит откатить либо переустановить не выйдет. В этом случае воспользуемся утилитами. Приступим:
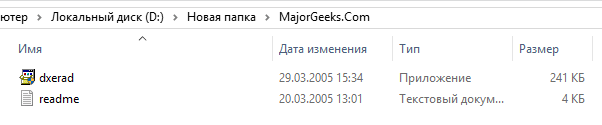
- Скачайте DirectX Eradicator, программа весит около 240 Кбайт.
- Устанавливать ее не нужно, распакуйте архив в удобное для вас место.
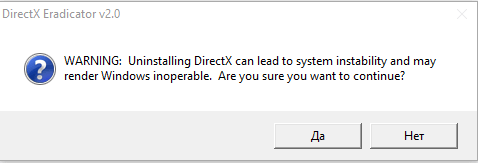
- Откройте файлик dxread.

- Высветится окно с предупреждением о возможной дестабилизации системы – нарушении работы ОС. Бояться не стоит, – проблема исчезнет после перезагрузки. Подтвердив свое решение, вы полностью удалите DirectX с компьютера.

Важно! Не всегда получается исправить ошибку DirectX удалением самой библиотеки, в 67% проблема возникает после обновления и решается восстановлением системы.
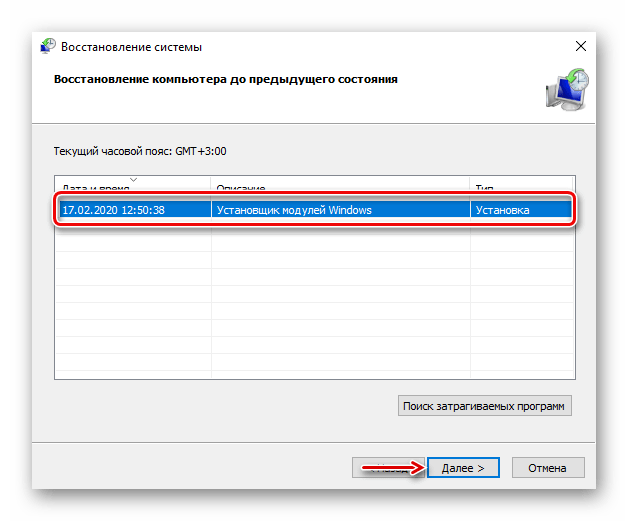
Восстановление системы
Если неисправность возникла после попытки загрузить актуальную версию, бэкап ОС поможет решить ее и сохранит стабильность системы. Начнем:
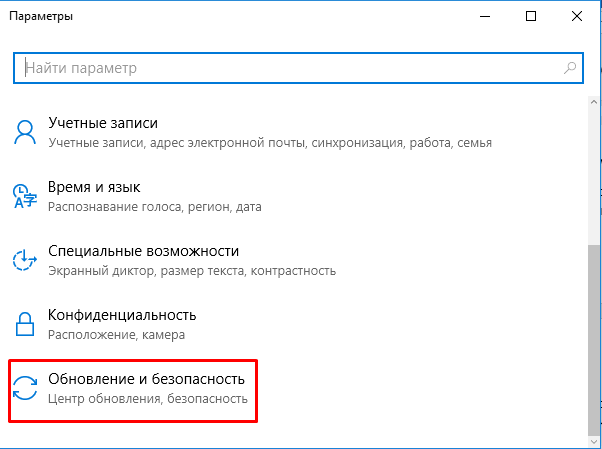
- Через кнопку «Пуск» зайдите в «Параметры».
- Выберите «Обновление и безопасность».

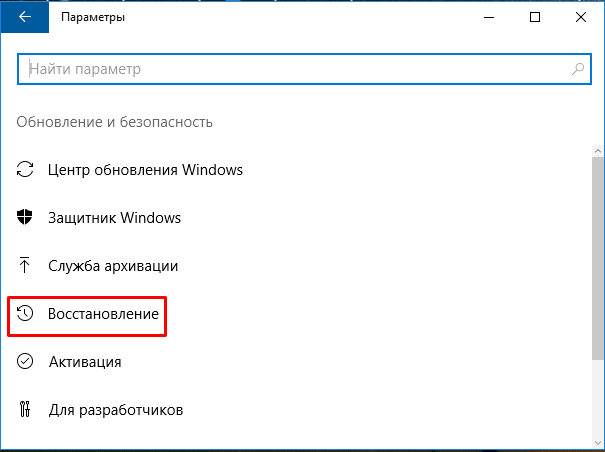
- Проскрольте до «Восстановление».

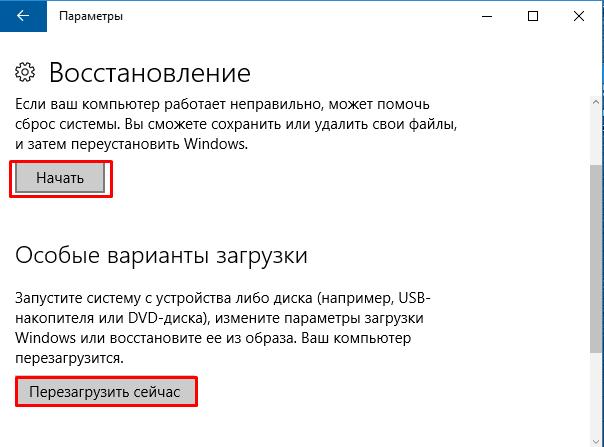
- В этом пункте есть два блока: «Вернуть в исходное состояние», «Перезагрузиться с другого носителя». Первый – откатывает систему до последней точки восстановления (обычно создается ОС) автоматически, второй – вернуть прежнее состояние ОС с помощью образа Windows.

- Если нет установочного диска, выбирайте “Вернуть в исходное состояние”.
На Windows 7
Вышеупомянутые средства подходят и для 7-ки. Но еще есть утилита Happy Uninstall, сертифицированная Microsoft. Она платная, воспользуемся триал-периодом. Скачайте и установите утилиту.
Сначала создайте резервную копию системы, чтобы в случае неудачи ее восстановить:
- Запустите программу.
- Перейдите в пункт «Backup» и нажмите кнопку “Старт”.

- Кликните на «Uninstal» и полностью удалите DirectX.

Программой можно пользоваться в целях диагностики и обновления ПО. Утилита показывает актуальную версию библиотек.
На Windows 8.1
Удалить DirectX полностью и без последствий возможно, если библиотека установлена без помощи системы обновления Windows. В противном случае система дестабилизируется. Если вы все же воспользовались утилитами для удаления и ОС перестала нормально функционировать, проведите восстановление системы, как указано выше, либо полностью переустановите ОС.
Are you getting interested to remove or uninstall Directx On PC ( Windows 7, 8, 10, and Mac )? After it still having files in C: drive? With this article, you will able to delete or kick out all of those files also after uninstalling Directx.
Are you bored, or tired of using Directx? Now, wanna kick-off this software from your PC ( Windows 7, 8, 10, and Mac )? There is no condition to follow up before installing, so, you can remove it without getting any confusion about it.
There are 10 methods that users can adapt if they want to uninstall Directx:
Method #1
- Go to Start Menu, then click on the Control Panel.
- In Control Panel, under programs, go through the list of the ones that are installed on your computer
- Right-click on Directx, and then click on uninstall a program
- Follow the prompt on the screen, and you will get to see a progress bar that will take you to remove the Directx from the computer.


Method #2
The second method involves uninstaller.exe, through which Directx can be uninstalled. Just follow the instructions below to execute this step:
- Go to the installation folder of Directx.
- Find a file that is named as uninstall.exe or unins000.exe
- Double click on the file, and then follow the wizard’s instructions that appear on the screen.


Method #3
The third method involves System Restore. For those who don’t know, System Restore is a utility, which helps the user restore their system to its previous state. System Restore removes all those programs, which interfere with the operation and performance of the computer.


If you have created a system restore point before you installed Directx, then you can use this software to restore the system, and remove such unwanted programs. However, before you do so, make sure that you save all the important data.
Follow the steps below to know more from this method:
- Close all the files and programs, which are currently running on your PC
- Open Computer from the desktop, and then select Properties
- System Window will open
- On the left side and click to System Protection
- System Properties will open.
- Then do click on the option of System Restore, and a new window will again open.
- Now, choose the ‘different restore point’ option, and click on Next.
- You have to select a date and time from the given options; when you select a date, the drivers that you installed after the chosen date won’t work.
- Click on Finish and then Confirm the ‘Restore Point’ on the screen.
- When you click Yes to confirm, the Directx would be uninstalled.
Method #4
If you have an antivirus, then you can use it to uninstall Directx.
There is much malware or Directx software in the computer applications that we download nowadays. They have become very difficult to remove from the system, like Trojan and spyware.
If you cannot remove Directx with the above methods.
- It means that there is malware or Directx in it, and only a good antivirus can be used for removing it.
- You can either download Norton Antivirus or AVG antivirus, as these are reputable software and will surely remove the malware, Directx on the system.

Method #5
If the files that are required for uninstalling the software are corrupted, then it is best to reinstall Directx.
- Once you have reinstalled the program, then you will get access to non-corrupted files, and it will become very easy to uninstall it.
- Simply go to Control Panel once the Directx is installed, and then remove it from there.
Method #6
If you want to uninstall Directx, then you can do so using Command Displayed in the Registry. A registry is a place where all the settings of Windows, along with information, are stored. This also includes the command to uninstall a software or program. You can try this method with Directx as well, but it is a very risky method. If you make any mistake and delete the wrong information, then the system is most likely to crash. It would become difficult for you to bring it back from deletion.

To execute this method, To follow the steps given below:
- Hold Windows + R together, and then Run command
- When the command box opens, type Regedit in the box and then click on OK
- You have to navigate and find the registry key for the Directx
- You will see an uninstall string on the next window; double click on it, and also copy ‘Value Data’
- Again hold Windows + R keys, and run the Command; paste the value data that you just copy and click on OK
- Follow the wizard that comes on screen and then uninstall Directx.
Method #7
The seventh method is to uninstall the Directx using a third-party uninstaller.
- At times, those who don’t have any knowledge of computer language, won’t be able to manually uninstall the software fully.
- There are many files that occupy the hard disk of the computer, so it is best to use third-party software to uninstall them.

Method #8
There are some codes that users can type into the command prompt, and they would be able to uninstall the Directx. For example, if they want to remove the package, then just type
sudo apt-get remove Directx
If you want to uninstall the Directx and its dependencies as well, then type:
sudo apt-get remove –auto-remove Directx
For those who don’t know, some of the dependencies of Directx are GCC-5, libc6, libgcc1, Directx–dev, and gc++-5.

Method #9
If the user wants to remove the configuration and data files of Directx, then they need to run the following code on the Command Prompt:
sudo apt-get purge Directx

Method # 10
It depends on you that are you willing to kick-out the data or you want to remove the configuration data or data files, along with the dependencies, then the following code is most likely to work for you:
sudo apt-get auto remove -purge Directx

To uninstall Directx on mac because anytime we need space or only want to remove from pc due to some viruses and also many problems which are need to remove or uninstall from pc. so I will show you some steps of uninstalling Directx on mac so follow my this step or method if you have still confusion so you may contact with us for uninstall of Directx on pc or mac.
How to Uninstall Directx on Mac?
For uninstalling Directx on mac so as I told you that there is a simple method to uninstall apps on mac. As there are installed some apps on your mac and now you want to remove or uninstall from your pc successfully and want to install some other apps on my mac so follow my these steps to uninstall Directx on mac.
Method #1
In the method 1, you have to open mac on your pc as I’m showing in image follow the images to uninstall Directx on you mac.

In the image there is Directx app on your mac dashboard and now we have to uninstall it from our mac now we will uninstall this app and will remove it in of mac now double-click-on-app showing in image

Now you double clicked on app mac will ask that are you sure to uninstall Directx click on Delete button so go to Trash of mac to uninstall completely from mac. Showing in image trash bin click on trash bin and go inside there will be Directx which we had delete before so have to uninstall completely from mac.

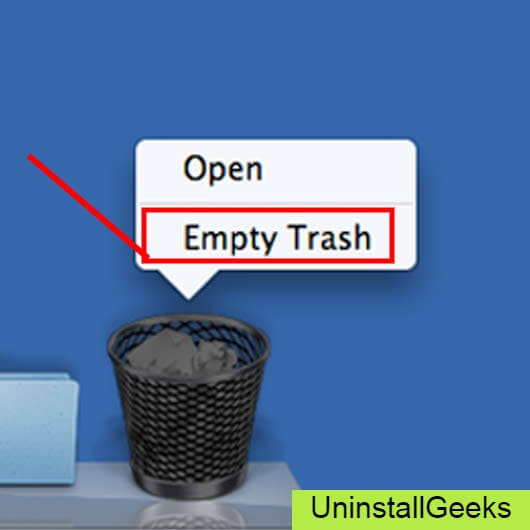
Not right click on trash to remove all data or app which we had uninstalled before see in image. Click on Empty Trash the whole data which is in trash will auto remove successfully.
Now we uninstalled Directx on mac so as you see that how to uninstall or remove any app on mac so if you liked this so share once. This method don’t required any antivirus or uninstaller software from them we are to uninstall. I described only simple one method of uninstalling Directx on mac.
This method more people are using but some people take it is too hard uninstalling in mac but in this step anyone can understand this simple method.
How To Install?
For those who don’t know much about Directx, they might lean more towards uninstalling it. These Directx create an environment, where users can create a high GPU-accelerated application. If you want to install this Directx, then make sure that your system is compatible with it.
- Firstly, verify that the system you are using has an Directx capable GPU, and then download the Directx.
- Install it, and then test that the software runs smoothly on the system.
- If it doesn’t run smoothly, then it could be because its communication with the hardware is corrupted.


Recommended Softwares To Uninstall:
- How To Uninstall Chromium In PC
- How To Uninstall Microsoft Edge In PC
- How To Uninstall Nvidia Cuda Toolkit In PC
- How To Uninstall Avast In PC
- How To Uninstall Google Chrome In PC
- How To Uninstall Python In PC
- How To Uninstall Internet Explorer In PC
- How To Uninstall Adobe Creative Cloud In PC
- How To Uninstall Skype for Business
- How To Uninstall Discord In PC
- How To Uninstall Avast Premium Security In PC
- How To Uninstall Skype On PC
Conclusion
There are other methods of uninstalling the Directx as well as in pc or windows, but these could be difficult for those, who don’t have much technical expertise.
Execute these methods, and they will surely work. These methods don’t require the user to have much knowledge of the technical side of an operating system. They can follow simple steps and uninstall Directx.
- Здравствуйте админ! Скачал на торренте известную компьютерную игрушку, запустил установку, после инсталляции автоматически запустился процесс установки DirectX, по окончании этого процесса компьютер аварийно перезагрузился и теперь у меня не идёт ни одна компьютерная игра, выходят ошибки .dll. Обновил драйвера видеокарты, но не помогло, а при обновлении DirectX на Windows 10 вышла ошибка с каким-то кодом. В результате я решил удалить DirectX из системы и установить заново, но как это сделать? Говорят, что встроенными в систему средствами этого сделать нельзя и нужно устанавливать специальную программу DirectX Happy Uninstall?
- Привет! Вопрос. На моём ноутбуке установлена Windows 10, но моя любимая компьютерная игрушка не запускается, выходит сообщение, что для работы игры нужна версия DirectX 11. Можно мне удалить DirectX 12 из Windows 10 и установить DirectX 11?
Привет друзья! DirectX – это важный системный компонент (набор динамических библиотек DLL), который всегда устанавливается вместе с операционной системой, к примеру в Windows 10 интегрирован DirectX 12. Нужен этот важнейший компонент не только для запуска игр в среде Windows, как некоторые полагают, но также для работы мыши, клавиатуры и многих прочих подключаемых к компьютеру устройств. Но чаще всего с проблемами в работе этого компонента обычно сталкиваются именно геймеры. Как узнать версию DirectX, как его установить или обновить, мы рассматривали ранее:
Ниже же поговорим о том, как удалить этот системный компонент.
Удалить этот компонент из системы штатными средствами нельзя. Но такая операция иногда может потребоваться. Например, в вашей системе периодически выходят ошибки, вызванные нарушением работы динамических библиотек DLL, а обновление DirectX поверх не помогает.
- Другой вопрос. Если ваша любимая игра не адаптирована под работу с новой версией этого компонента и вы хотите установить его старую версию, то знайте, что после установки версии DirectX, не предназначенной для работы в вашей операционной системе, возможны различные неприятные сюрпризы в виде глюков и нестабильной работы OS, и спасёт вас тогда только полная переустановка винды. Вообще вы должны знать, что самый последний DirectX 12, интегрированный в новую OS Windows 10, содержит в себе элементы всех предыдущих наборов динамических библиотек и игра ваша не запускается по другим причинам. Скорее всего старая игрулька полностью не совместима с новой ОС и разумным решением будет установить старую операционную систему или обратится к создателям игры и попросить адаптировать её к новой версии DirectX .
Для удаления этого компонента необходимо прибегнуть к стороннему ПО. Увы, из «живых» программ, реально решающих эту задачу – осталась только платная DirectX Happy Uninstall. Стоит почти $20, при этом удаление DirectX – её единственная полезная функция. За это, собственно, и взымается плата. Весь остальной функционал – отображение текущей версии DirectX и создание её бэкапа — в триал-редакции программы доступен бесплатно. Программа совместима со всеми версиями Windows, начиная с XP и заканчивая 10. Скачать её можно на сайте разработчика:
www.superfoxs.com/index.html
Предвижу саркастические ухмылки многих искушённых пользователей:
– Зачем нам что-то покупать, если практически любой софт можно скачать на торрентах!
Разочарую вас. На всех существующих торрентах выложена версия DirectX Happy Uninstall 4.02, но подходит она только для Windows XP.
Для удаления DirectX 11 или 12 в операционных системах Windows 7, 8.1, 10 нужна версия DirectX Happy Uninstall v6.8, но её пока не взломали.
Как удалить DirectX с её помощью? Создаём точку восстановления, а лучше резервную копию Windows и отправляемся в раздел программы «Uninstall». Здесь жмём кнопку «Uninstall» и дожидаемся завершения операции.
Перезагружаемся и устанавливаем необходимую версию DirectX с оф. сайта Майкрософт по ссылке:
https://www.microsoft.com/ru-ru/download/details.aspx?id=35
DirectX 11 is a set of APIs (Application Programming Interfaces) that allow software developers to create games and multimedia applications for Windows operating systems. It provides advanced graphics and audio capabilities, enhancing the overall performance of gaming experiences. However, there may be situations where you need to uninstall DirectX 11 on Windows 10. This blog post will guide you through the process, providing different methods and additional tips to successfully remove DirectX 11 from your system.
Video Tutorial:
The Challenge of Uninstalling DirectX 11 on Windows 10
Uninstalling DirectX 11 on Windows 10 can be a bit tricky due to its deep integration within the operating system. DirectX 11 is an essential component for many games and multimedia applications, so removing it without causing any issues requires careful execution. It’s important to note that uninstalling DirectX 11 may affect the functionality of certain programs if they rely on this API.
Things You Should Prepare for
Before proceeding with the uninstallation process, there are a few things you should prepare to ensure a smooth experience:
1. Backup important files: Before making any changes to your system, it’s always a good idea to backup any important files or data. This will help prevent any accidental loss of information.
2. Create a system restore point: Creating a system restore point allows you to revert back to a previous state in case anything goes wrong during the uninstallation process. This is an extra precautionary measure to ensure the safety of your system.
3. Check for alternative solutions: Some games or applications may have built-in options to switch between different versions of DirectX. Before uninstalling DirectX 11, check if the specific software you’re concerned about allows you to switch to an earlier version.
With these preparations in place, let’s move on to the methods for uninstalling DirectX 11 on Windows 10.
Method 1: Uninstall via Control Panel
Uninstalling DirectX 11 via the Control Panel is the simplest method. Here’s how to do it:
1. Open the Control Panel by searching for it in the Windows search bar.
2. In the Control Panel, select «Programs» followed by «Programs and Features.«
3. In the list of installed programs, locate and click on «DirectX 11.«
4. Click on the «Uninstall» button at the top of the window.
5. Follow the on-screen prompts to complete the uninstallation process.
Pros:
1. Easy and straightforward process.
2. Does not require any technical knowledge.
3. Can be done via a familiar interface.
Cons:
1. May not completely remove all files related to DirectX 11.
2. Can result in broken registry entries.
3. May affect the functionality of DirectX 11-dependent programs.
Method 2: Using DirectX Control Panel
The DirectX Control Panel is a tool provided by Microsoft specifically for managing and configuring DirectX settings. While it doesn’t offer a direct uninstall option, it can be used to disable DirectX 11. Here’s how:
1. Press the Windows key + R to open the Run dialog box.
2. Type «dxdiag» and press Enter to open the DirectX Diagnostic Tool.
3. In the DirectX Diagnostic Tool, navigate to the «Display» tab.
4. Under the «DirectX Features» section, locate and click on «Disable» next to «Direct3D Acceleration.«
5. Click «OK» to confirm the changes.
Pros:
1. Allows you to disable DirectX 11 without completely removing it.
2. Provides granular control over DirectX settings.
3. Can be useful in troubleshooting DirectX-related issues.
Cons:
1. Disabling DirectX 11 may cause compatibility issues with some games and applications.
2. Doesn’t completely remove DirectX 11 from the system.
3. May not be effective in resolving all DirectX-related problems.
Method 3: Using Command Prompt
Uninstalling DirectX 11 through Command Prompt provides a more direct and comprehensive approach. Here’s how to do it:
1. Press the Windows key + X and select «Command Prompt (Admin)» to open Command Prompt with administrative privileges.
2. In the Command Prompt window, type the following command and press Enter:
wusa /uninstall /kb:971512 /quiet /norestart
Pros:
1. Allows for a more thorough removal of DirectX 11.
2. Can be done via a powerful command-line interface.
3. Provides greater control over the uninstallation process.
Cons:
1. Requires advanced knowledge of Command Prompt.
2. Incorrect execution of commands can potentially harm the system.
3. Uninstalling DirectX 11 may cause compatibility issues with certain programs.
Method 4: Via Third-Party Uninstaller
Using a third-party uninstaller tool can provide a more comprehensive and automated approach to removing DirectX 11 on Windows 10. These tools are specifically designed to uninstall programs cleanly and efficiently. Here’s a general overview of the process:
1. Research and choose a reputable third-party uninstaller tool. Examples include Revo Uninstaller, IObit Uninstaller, and Geek Uninstaller.
2. Download and install the chosen uninstaller tool.
3. Open the tool and locate the entry for DirectX 11 in the list of installed programs.
4. Select DirectX 11 and choose the uninstall option provided by the tool.
5. Follow the on-screen prompts to complete the uninstallation process.
Pros:
1. Provides a comprehensive and automated uninstallation process.
2. Removes leftover files and registry entries related to DirectX 11.
3. Offers additional features for managing installed programs.
Cons:
1. Requires the installation of third-party software.
2. Some uninstaller tools may come with additional bundled software.
3. Not all third-party uninstallers are free.
Why Can’t I Uninstall DirectX 11
There can be multiple reasons why you may encounter difficulties when trying to uninstall DirectX 11 on Windows 10. Here are a few common scenarios and their possible fixes:
1. Conflict with other software: Certain programs may have dependencies on specific versions of DirectX. In such cases, you may need to uninstall or update the conflicting software before attempting to uninstall DirectX 11.
2. Restricted user permissions: If you’re logged in as a standard user, you may not have sufficient permissions to uninstall DirectX 11. Try logging in as an administrator or contact your system administrator for assistance.
3. Corrupted DirectX installation: If your DirectX installation is corrupted, it may cause issues during the uninstallation process. Consider reinstalling DirectX 11, then try uninstalling it again.
Additional Tips
Here are some additional tips to keep in mind when uninstalling DirectX 11 on Windows 10:
1. Restart your computer: After uninstalling DirectX 11, it’s always a good idea to restart your computer to ensure any changes take effect.
2. Update graphics drivers: Updating your graphics drivers to the latest version can help resolve compatibility issues and ensure optimal performance after uninstalling DirectX 11.
3. Reinstall DirectX 11: If you encounter any issues with DirectX-dependent programs after uninstalling DirectX 11, you can always reinstall it using the official Microsoft DirectX End-User Runtime Web Installer.
5 FAQs about Uninstalling DirectX 11 on Windows 10
Q1: Is it safe to uninstall DirectX 11 on Windows 10?
A1: Uninstalling DirectX 11 can be safe as long as you follow the proper procedures and consider the potential impact on DirectX-dependent programs. It’s recommended to backup important files and create a system restore point before proceeding.
Q2: Will uninstalling DirectX 11 affect my games?
A2: Uninstalling DirectX 11 may affect the functionality of games and applications that rely on this API. Some games may have built-in options to switch to an earlier version of DirectX, while others may require DirectX 11 for optimal performance.
Q3: Can I reinstall DirectX 11 after uninstalling it?
A3: Yes, you can reinstall DirectX 11 by downloading and running the official Microsoft DirectX End-User Runtime Web Installer.
Q4: Is it necessary to uninstall DirectX 11 for troubleshooting purposes?
A4: Uninstalling DirectX 11 is not typically necessary for troubleshooting purposes. It’s recommended to explore other options, such as updating graphics drivers, verifying game files, or contacting technical support before resorting to uninstallation.
Q5: Can I use System Restore to revert back if something goes wrong during the uninstallation process?
A5: Yes, if you have created a system restore point before uninstalling DirectX 11, you can use System Restore to revert back to a previous state and undo any changes made during the process.
In Conclusion
Uninstalling DirectX 11 on Windows 10 requires careful consideration and preparation. The methods outlined above provide different approaches, each with its own set of pros and cons. It’s important to weigh these factors and choose the method that best suits your needs and technical expertise. Remember to backup important files, create a system restore point, and proceed with caution. If you encounter any issues or have specific concerns, it’s recommended to seek assistance from technical support or the respective software developers.