
In Windows 11, most non-crucial icons are hidden in the taskbar corner overflow menu (used to be known as notification area back in Windows 10). These icons are only visible and accessible when user clicks on the “Show hidden icons” arrow button on the taskbar corner.
This guide will show you how to set these hidden icons to always show on the taskbar corner in Windows 11, so that the icons will always appear and visible on the taskbar without the need to click on the show hidden icons button.
Icons are hidden by default so that your taskbar does not get flooded by massive amount of icons as you use your computer. However, some icons do provide crucial information with its appearance such as those that would change its colors based on the app’s status and more. Additionally, some icons also requires frequent interactions with users.
It would be more convenient to set these icons to always show on the taskbar instead of hiding them in the overflow menu. Therefore, Windows 11 provides a way for users to show or hide any icon you want on the taskbar corner.
Display hidden icons on the taskbar in Windows 11
To show an icon that is hidden by default on the taskbar corner in Windows 11, follow the steps below.
First, right-click anywhere on the taskbar and select Taskbar settings. Alternatively, you can press Win + i keys to open Settings and navigate to Personalization > Taskbar.
Next, scroll down the settings page and click on Taskbar corner overflow to expand the section.
This section will list all icons that would appear in the taskbar corner. From here, you can choose which icons can appear in the taskbar corner and which to remain hidden in the taskbar corner overflow menu.
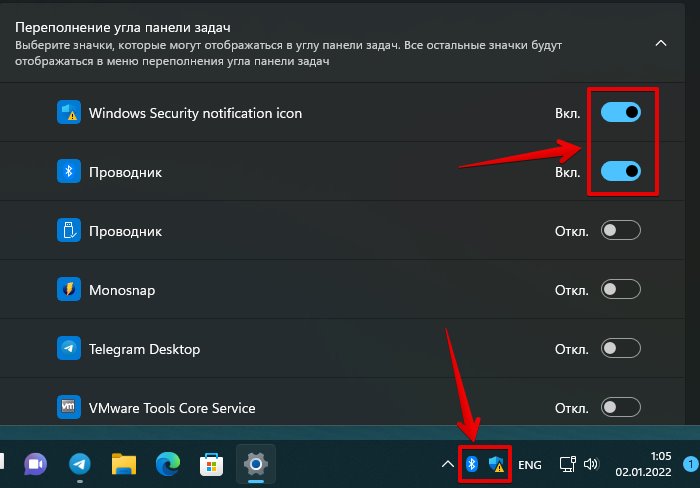
To show an icon on the taskbar corner instead of hiding it in the overflow menu, click on the toggle button for the icon to turn it on.
In the example screenshot above, I’ve set Windows 11 to always show my antivirus program’s and NVIDIA’s icons on the taskbar corner. As a result, my taskbar corner will look like the screenshot below.
Hide icons back into taskbar corner overflow menu
If there are icons you don’t want to show on the taskbar corner, you can hide them in the taskbar corner overflow menu by first following the steps above to open Taskbar settings.
Expand Taskbar corner overflow and then turn off any app’s icon that you don’t wish to always show on the taskbar corner (which will be hidden in the taskbar overflow menu instead).
Show or hide system icons such as Touch keyboard
To show or hide certain system icons such as the Pen menu, Touch keyboard and Virtual touchpad icon, right-click on the taskbar and select Taskbar settings.
Next, click on Taskbar corner icons to expand it. Then, click on the toggle button to turn on the icons you want to show on the taskbar corner.
How to show or hide Taskbar buttons such as Search
If it is taskbar buttons that you would like to show or hide on the taskbar, for apps buttons that were previously pinned to the taskbar, you can unpin them by right-clicking the buttons and select Unpin from taskbar.
As for some system taskbar items such as Search, Task view, Widgets and Chat, you can show or hide them via the Taskbar settings. To do so, right-click on taskbar and select Taskbar settings.

Next, click on Taskbar items to expand it and turn on or off for buttons that you would like to show or hide respectively.
Sign in to your XDA account
Windows 11 brings plenty of cool features and is always getting new ones, too, with updates like the Windows 11 23H2 update. You can enjoy Snap Layouts to multitask efficiently, play with Android apps on your PC, and even link your iPhone to your laptop. One thing that’s missing from Windows 11, however, is desktop icons.
You might have noticed that desktop icons for some classic system features are missing. Even in the taskbar, some icons might be missing for your favorite apps. There’s no icon for My PC, for example. Well, it’s super easy to bring these hidden icons back.
By default, Windows 11 hides the icons for the user folder and apps like This PC. To bring these icons and others back, follow the steps below.
- Right-click on the desktop.
- Choose Personalize > Themes.
-
Choose the link at the bottom for Desktop icon settings.

- The Desktop Icon Settings window should pop up.
-
Click the checkboxes for the items you want to see: Computer, User’s Files, Recycle Bin, and Control Panel.

- Click Apply.
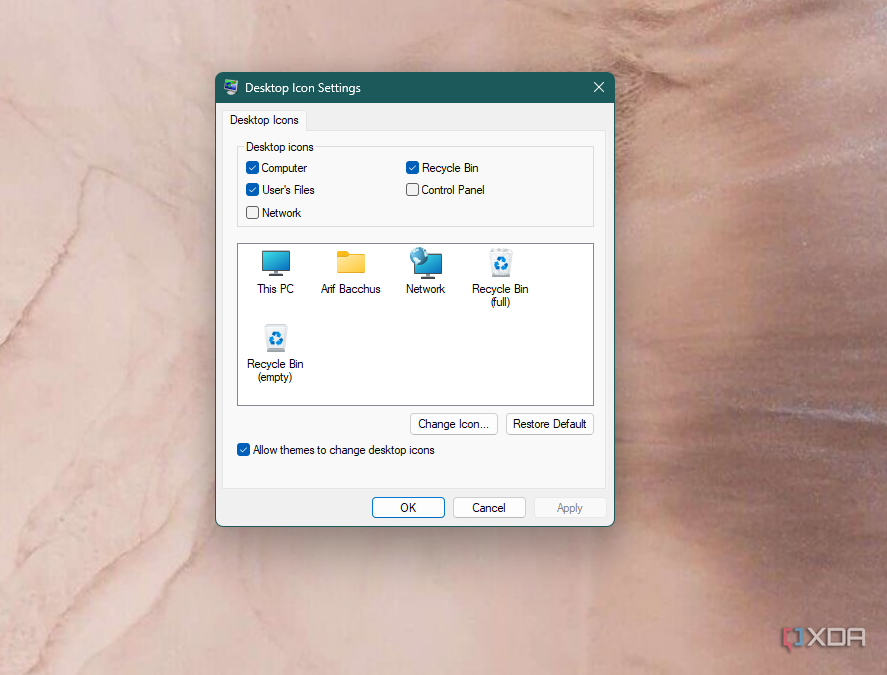
You should right away see these icons restored to your desktop. At any time, if you’d like to remove these icons, repeat steps one to five, and this time, uncheck which icon you no longer want to see. Then, choose Apply.
Another place where you’ll want to see icons is in the taskbar. Typically, each app that’s running on your PC will have an icon. If you don’t see that icon, then Windows is likely hiding it under the hidden icon menu. This is an area for icons that are turned off. Here’s how to make sure these icons are being shown.
- Right-click on the Taskbar.
- Choose Taskbar settings.
-
Turn off the toggle for Hidden icon menu.

- You should now see all icons populate right next to your clock in the system taskbar.
Alternatively, if you want to keep the hidden icon menu on and prioritize a specific app icon, simply tap on the ^ on your taskbar. Then click the icon that you want to show, and drag it to an area within your eyesight.
Showcase your icons
That’s all you need to know to show hidden icons in Windows 11. It doesn’t take much other than a few clicks. Remember, we have tons of other tutorials on how to make Windows 11 look the way you want, too, like how to enable taskbar ungrouping, along with just general customization tips.
По умолчанию Windows 11, как и предыдущая версия системы, прячет значки в области уведомлений (системном трее), но если раньше можно было включить показ всех значков, сейчас эта опция в параметрах панели задач недоступна. Тем не менее, возможность включения нужного поведения имеется.
В этой короткой инструкции подробно о том, как включить отображение всех значков в области уведомлений Windows 11. На близкую тему может быть полезным: Как отключить группировку значков на панели задач Windows 11.
Включение отображения всех значков в трее Windows 11
Стандартные и легко доступные средства системы предполагают, что отображение необходимых значков в области уведомлений будет производиться в разделе «Переполнение угла панели задач» в параметрах персонализации панели задач.
Этот способ не лишен недостатков: нельзя включить автоматический показ всех значков, и, даже если вы включили отображение значка какой-то программы, после её обновления, он может пропасть и включать его придется снова.
Способ обойти это и включить показ всех значков:
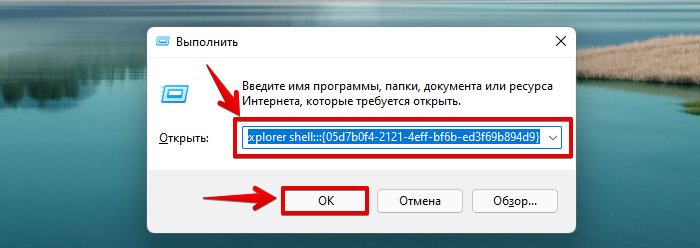
- Нажмите клавиши Win+R на клавиатуре или нажмите правой кнопкой мыши по кнопке «Пуск» и выберите пункт «Выполнить».
- Введите команду
explorer shell:::{05d7b0f4-2121-4eff-bf6b-ed3f69b894d9}и нажмите «Ок» или Enter.

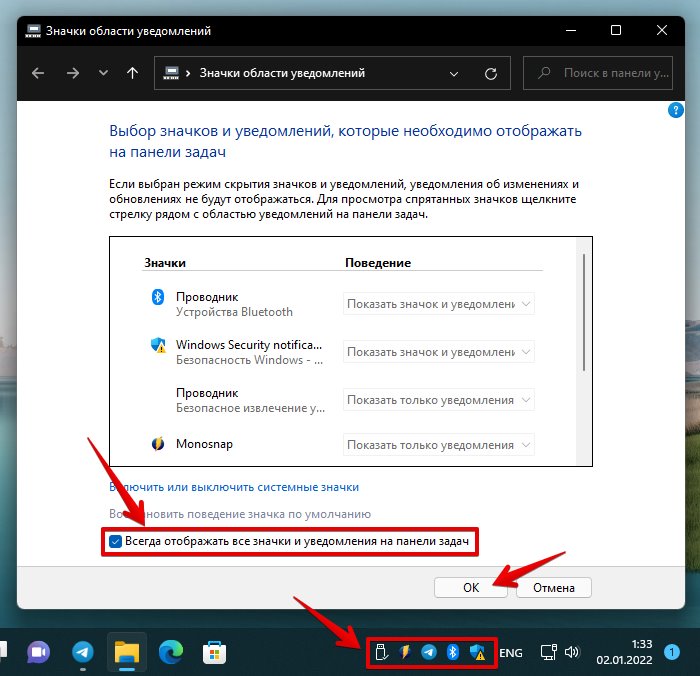
- Отметьте опцию «Всегда отображать все значки и уведомления на панели задач», нажмите «Ок».

В результате все значки в области уведомлений будут показаны, но есть нюансы:
- Если вы ранее каким-либо образом (не через параметры, а с помощью редактора реестра или иными «неофициальными» методами) меняли поведение значков в системном трее, переключение состояния пункта «Всегда отображать все значки» может быть недоступным и никак не влиять на показ значков. Например, с этим можно столкнуться, если включить показ значков области уведомлений в несколько рядов.
- Можно предположить, что в будущих версиях Windows элемент панели управления, который мы вызываем с помощью рассмотренной команды, станет недоступным, похожее уже случалось с другими системными настройками.
В настоящий момент времени способ работает с последней финальной версией Windows 11 и позволяет быстро включить отображение всех значков в правом нижнем углу экрана.
В операционной системе Window 11 вырезано или изменено множество полезных функций, которые были доступны в ранних версиях Windows. Так Компания Microsoft пересмотрела функцию системного трея и объединила ее с областью уведомлений, теперь она называется — «Угол панели задач».
Если в Windows 10 все значки системного трея можно было отобразить на панели задач установив специальный флажок в настройках Панели управления (опция «Всегда отображать все значки уведомлений на панели задач»), то с новыми настройками Windows 11 не все так просто.
Теперь для отображения значков необходимо перейти в «Параметры» — «Персонализация» — «Панель задач» — «Переполнение угла панели задач».
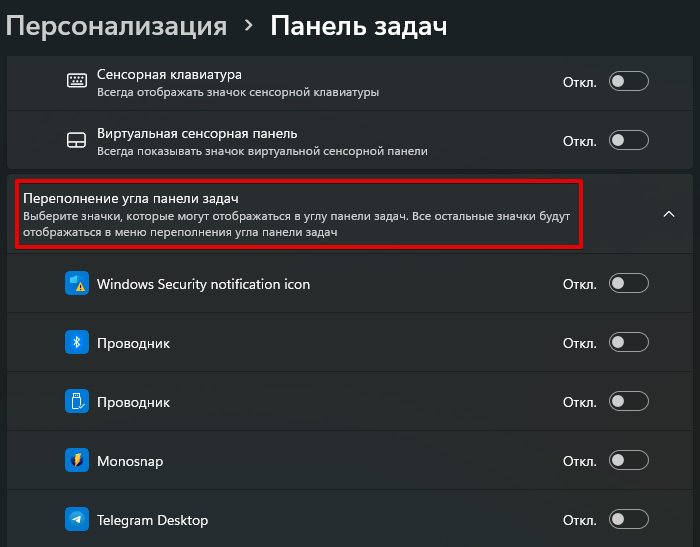
Теперь самое интересное, чтобы отобразить все значки на панели задач необходимо перевести КАЖДЫЙ переключатель в положение «Вкл» у всех приложений из списка.
Либо альтернативный вариант — ручное перетаскивание значков из трея на панель задач.
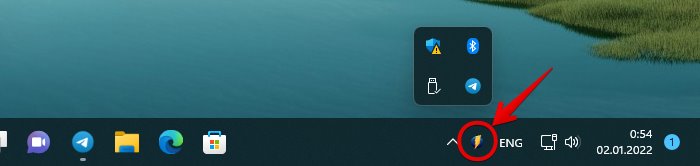
Открываем панель скрытых значков (системный трей или угол панели задач), щелкнув на «стрелку вверх», которая находится слева от значка языковой панели.
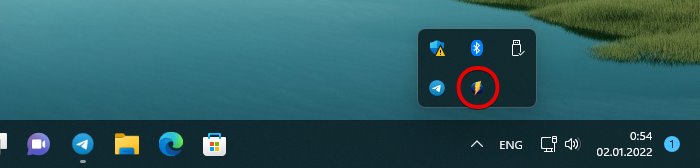
Затем, зажимаем левой кнопкой мыши по значку и перетаскиваем его на панель задач.
Как это стало неудобно в Windows 11, раньше один переключатель решал проблему навсегда, а теперь…
Отобразить все значки из трея на панели задач можно, используя специальную команду для доступа к настройкам Панели управления (Значки области уведомлений), которые были доступны в Windows 10, но отключены в Windows 11.
Открываем диалоговое окно «Выполнить», щелкнув правой кнопкой мыши по меню «Пуск» и выбрав пункт «Выполнить» (либо нажимаем горячие клавиш «Win+R»). Далее, вставляем следующую строку в текстовое поле «Открыть»:
explorer shell:::{05d7b0f4-2121-4eff-bf6b-ed3f69b894d9}
Нажимаем кнопку «ОК», либо клавишу ввода на клавиатуре.
Откроется окно «Значки области уведомлений». Устанавливаем флажок на «Всегда отображать все значки уведомлений на панели задач». Все значки тут же отобразятся на панели задач. Для того, чтобы сохранить настройку, нажимаем кнопку «ОК».
Если флажок не устанавливается или наоборот не снимается, решение может быть следующее.
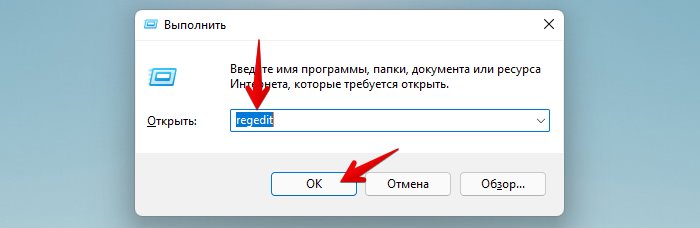
Вызываем окно «Выполнить» и вводим команду «regedit», чтобы перейти в редактор реестра Windows 11.
В окне редактора реестра переходим в раздел «Explorer» по следующему пути:
Компьютер\HKEY_CURRENT_USER\Software\Microsoft\Windows\CurrentVersion\Explorer
Находим строковый параметр «EnableAutoTray» и меняем его значение с «0» на «1». Нажимаем кнопку «ОК» для сохранения изменений.
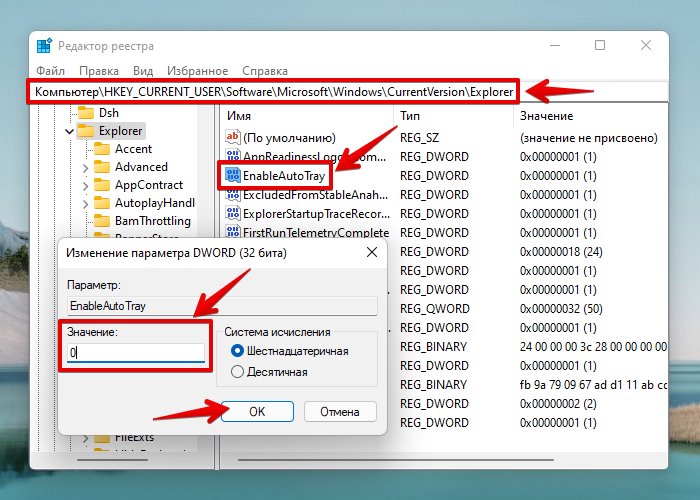
Теперь флажок «Всегда отображать все значки уведомлений на панели задач» в окне «Значки области уведомлений» станет доступным для изменений.