
In this lesson, you will learn how to install WordPress locally on your own computer.
Prerequisite Skills
Participants will get the most from this lesson if they have familiarity with:
- Experience downloading and installing programs on their computer.
- Administrative access to their local machine.
- Familiarity with the file system of their computer.
Objectives
After completing this lesson, participants will be able to:
- Download, install and configure MAMP.
- Start MAMP servers.
- Create a database.
- Download and install WordPress.
Materials Needed
- MAMP
- WordPress
Screening Questions
- Have you ever used WordPress?
- Have you created posts and pages in WordPress?
- Have you changed a theme in WordPress?
- Have you ever wanted to look under the hood of WordPress?
Notes for the Instructor
- Ahead of the lesson, make sure you take a look at your own computer setup. If you have MAMP or MAMP Pro already installed on your machine, you may want to run this demo on a virtual box to avoid conflicts with existing software and local sites that you may want to keep on your machine.
- Sometimes it can take a while to download large files like MAMP or WordPress core. You may want to have a copy of MAMP and the current version of WordPress downloaded and stored on a thumb drive that can be passed around the class before you start the lesson. In the context of the demo, you would still show where to download these files but would skip the actual live download.
- MAMP is updated quite often. Please be sure to walk through the lesson plan with a fresh install to be sure it is still up to date.
Lesson Overview
To run WordPress locally, you need to have a server. In this lesson, you will learn to set up a server, create a database and install WordPress on your computer.
Install MAMP
MAMP stands for My Apache, MySQL, and PHP. MAMP is an application you can install on your Mac or Windows PC that allows you to have access to a local server that is running PHP and MySQL. Essentially, MAMP gives you all of the tools you need to run WordPress on your machine, for development and testing purposes.
- To install MAMP, go to https://www.mamp.info/en/downloads/.
- Download the version of MAMP that corresponds with your machine (Mac OS X or Windows).
- Double click on the downloaded file. This will open the installation dialog.
- Next, we’ll follow the prompts in the dialog to complete the installation. This course uses the default settings recommended by the install dialog.

Open and configure MAMP
- Now that MAMP is installed, let’s open it up! MAMP has a button to start servers when first started. By clicking on “Preferences” you can select an option to start the Apache HTTP Server and MySQL database server upon starting MAMP.

- Click on the “preferences” icon. You’ll see that there are several tabbed menu items available.
- Click the “Web Server” tab and find the “Document Root.” This path is where MAMP expects to find the files associated with your local website. In this case, this is where the WordPress files will need to be located to run them on the server. You may change this directory to whatever you want. The default is “/Applications/MAMP/htdocs” on a Mac and “C:/MAMP” on Windows.

Set up a Database
- Next, we will create a database on your new MAMP server. This database will become the database for the locally installed WordPress site.
- Go back to the MAMP dialog and click “Start.”
- Using the menu bar at the top of the page, click “Tools -> phpMyAdmin.”

- The phpMyAdmin dialog will appear.

- Click the “New” link in the left menu sidebar. In the following dialog, use the name “mydatabase” to name the database:

- Leave the “Collation” option as default.
- You now have a database called “mydatabase.” Congratulations!
Install WordPress
- Now we’re ready to install WordPress on our local machine! Go to https://wordpress.org/download/ to download the most recent version of WordPress. Once you download and copy the WordPress files to your computer, you will be able to install WordPress using the traditional 5 Minute Install.
- Move the downloaded zip file to the default server directory, “/Applications/MAMP/htdocs.” You could expand the zip file in your downloads folder and move the expanded folder and its contents, but sometimes the “hidden” system files that are included in WordPress (like the .htaccess file) fail to copy over to new folders if the contents are unzipped. For that reason, we’ll leave our zip file zipped while we’re moving it.

- In the new”/Applications/MAMP/htdocs” location, double click the WordPress zip file and it will expand. Remove the zip file and the index.php file.

- Go back to your web browser, and in the black menu bar, click the link “My Website.”


- The link will take you to a list of websites installed in the directory. Click the “WordPress” link. This link will take you to the 5 minute WordPress install.

- Get ready to enter your database information:
- Your “Database Name” is: mydatabase
- Your “User Name” is: root
- Your “Password” is: root
- Your “Database Host” is: localhost
- You can leave the “Table Prefix” as the default: wp_

- Now, let’s click the “Submit” button to run the install.

- Click the “Run the install button” and then choose a username and password on the next screen. That’s it! You’re ready to log in!
- The link for your new site: http://localhost:8888/wordpress/. You will log in at this URL: http://localhost:8888/wordpress/wp-login.php.
Exercises
The following exercises reinforce the skills needed to install WordPress locally:
Practice Using phpMyAdmin
- Navigate back to phpMyAdmin on your localhost.
- Click on the name of your database to view the contents of your database now that you have installed WordPress.
- When looking at the database tables, scroll to the bottom of the page and click the “check all” box. Then in the dropdown that says “With Selected” choose “Export” and follow the prompts to practice backing up your database.
- Practice making a new database within phpMyAdmin.
Try Installing a Second WordPress Local Site
Go through the exercise demonstrated in this lesson again and try setting up a second instance of WordPress on your local machine in a new location.
- Make sure the document root matches wherever you’ll keep your files for the second instance of WordPress.
- Set up a new database using phpMyAdmin.
- Extract the WordPress files in a new location on your computer.
- Run the famous 5 minutes install for your new local site.
Assessment
What does “MAMP” stand for?
- My Computer, Apple, MySQL, PHP
- My Computer, Apache, MySQL, PHP
- My Apache, MySQL, PHP
- Macintosh, Apple, MySQL, PHP
Answer: 3. My Apache, MySQL, PHP
What is the user name and password for any named local install?
- username: root; password: localhost
- username: localhost; password: localhost
- username: root; password: root
- username: localhost; password: root
Answer: 3. username: root; password: root
What systems can MAMP run on?
- Macintosh
- Windows
- Macintosh and Windows
- Linux
- Macintosh, Windows and Linux
Answer: 3. Macintosh and Windows
Additional Resources
- WordPress Installation Techniques @ Codex
В нашей базе знаний много статей на тему установки WordPress на разные локальные серверы. Поэтому подробно обозревать не будем, а дадим лишь ссылки на статьи. Один инструмент разберем подробно, потому как он стал открытием для меня.
Содержание
- Пошаговая установка WorpdPress на локальный компьютер Laragon
- Загрузка и установка
- Запуск программы
- Установка WordPress на локальный компьютер
- Порядок работ
- Установка на XAMPP
- Установка WP на Openserver
- Denwer
Пошаговая установка WorpdPress на локальный компьютер Laragon
Программа Laragon пригодится, как для разработчикам, так и для вебмастерам. Установка WordPress производиться в два клика, ограждая от таких вещей как создание базы данных и загрузкой репозиториев вордпресса.
Весь софт проверяю на Windows 10 и 7 версии, в работоспособности и безопасности можете быть уверены.
Загрузка и установка
Для начала скачаем программу Laragon с официального сайта, если не знаете какую версию выбрать, то рекомендую полную. Полная версия отличается продвинутыми настройками и поддержкой PHP 7.2, что немаловажно для вордпресса.

Загрузка идёт медленно, наберитесь терпения. После скачивания запускаем файл, выбираем язык установки, который станет по умолчанию в программе.

Назначаем место расположения локального сервера на компьютере.

После установки перезагружаем компьютер, чтобы программа внесла изменения в файлы Windows. Перезагрузив компьютер в трее Windows появиться зеленый значок, если нет то запускаем с помощью exe файла в папке с программой.
Запуск программы

Появиться основное окно программы, нажимаем Запустить все. Начнется процесс активации сервера Apache и PhpMyAdmin.

Если все хорошо, то напротив в двух пунктов в программе будет надпись Запущено, значит можно идти дальше.

Установка WordPress на локальный компьютер
Прекрасное в Laragon, что WordPress можно установить буквально в два клика. В трее нажимаем правой кнопкой мыши на значок программы, выбираем Быстро создать и в списке находим WordPress.

В следующем окне вводим имя проекта на латинице, я назвал wp-1 и нажал OK.

Начнется процесс установки баз данных и движка, ждем несколько минут. Обе строчки должны быть заполнены на 100%, кнопка Перейти на сайт стать активной, нажимаем на нее.

Откроется сайт в браузере с названием, которое вводили ранее и с зоной test. Выбираем Русский и нажимаем Продолжить.

На следующей странице вводим данные сайта, название, логин, пароль и почту. Почту вводим актуальную, чтобы при случае можно восстановить доступ к сайту, и нажимаем Установить WordPress.
Не забываем записать данные для входа в отдельный файл или блокнот.

На следующей странице система поздравит и предложит авторизоваться в админке WordPress, нажимаем Войти.

Входим в административную панель вордпресса по ранее созданным логину и паролю.

Файлы установленного сайта находятся в папке Laragon в подкаталоге www, для редактирования движка заходите в папку wp-1 (это название сайта, которое создавал вначале).

Мы разобрали простой метод установки WordPress на компьютер, а именно на локальный сервер Laragon. Но некоторые вебмастера привыкли к другим локальным компьютерам, например Denwer, Openserver, XAMPP и др. Наши материалы уже включают подробные инструкции как установить WordPress на разные локальные сервера, давайте я дам вам наводки и разберу особенности.
Порядок работ
Вкратце рассмотрим порядок работ, чтобы установить WordPress на любой локальный компьютер.
- Создание чистой базы данных
- Загрузка движка вордпресс с официального сайта
- Запуск пятиминутной установки WordPress
- Синхронизация базы и файлов CMS
- Создание логина и пароля для входа в админку
Все эти процессы подробно разобраны в наших статьях, ниже напишу ссылки.
Установка на XAMPP
На локальном сервере XAMPP есть множество функций создания сайтов, для WP существует два способа:
- Стандартное создание сайта
- Загрузка с официального сайта специального модуля, который ограждает вебмастера от создания баз, загрузки фалов и т.д. Все происходит буквально в два клика.
Обзор с подробным описанием ждет вас в статье про установку WordPress на XAMPP.
Установка WP на Openserver
Так же в нашей базе знаний есть статья про Openserver. Упущением разработчиков является отсутствие быстрой установки популярных CMS таких, как WordPress, Joomla, Drupal и др. Но есть одна приятная вещь, опенсервер в своей полной версии, а она на секунду весит 1,3 Гб, имеет все необходимые инструменты для создания сайтов, например:

- Программы для офисной работы
- Мультимедийный софт: съемка экрана, скриншоты, пипетка
- Интернет приложения: FTP клиенты, браузеры
- Утилиты для работы с Windows
Были бы среди этого изобилия предустановленные CMS, то Openserver стал лучшей программой.
Denwer
Команда WPCourses настоятельно не рекомендует использовать локальный сервер Denwer. Причин есть несколько:
- Программа не обновляется и не дополняется
- Максимальная версия PHP, которая пойдет на денвере 5.6, хотя уже есть 7.3
- Та же сама ситуация с версиями Apache и MySQL
- Если сайт был создан сначала на Denwer а потом перенесен на хостинг, то готовьтесь к тому, что он не будет работать как нужно из–за устаревших модулей
- Сложность установки, много лишних действий
- Не знаешь как установить или загрузить сайт, то ли в папку localhost, то ли www или создавать новый каталог
Эти минусы в совокупности отбивают желание использовать Denwer, как локальный сервер. В сети появились доделанные версии денвера, но их устанавливать не рекомендуем в связи с повышенной опасностью использования.
На этом я попрощаюсь с вами, используйте для создания сайтов только современные программы, успехов.
Пожалуйста, оцените материал:
На чтение 5 мин Просмотров 5.9к. Опубликовано
Обновлено
В данном уроке разберем как быстро установить wordpress на операционной системе windows 7, 8, 10, 11 (x64) при помощи локального сервера Laragon. Также разберем альтернативные методы установки WP.
Содержание
- Пошаговая установка WorpdPress на Laragon
- Загрузка и установка
- Запуск программы
- Установка WordPress на локальный компьютер
- Установка phpMyAdmin для Laragon
- Видео обзор Laragon и установка WordPress
- Альтернативные способы установки WordPress на Windows
В данном уроке разберем как быстро установить wordpress на операционной системе windows 7, 8, 10, 11 (x64) при помощи локального сервера Laragon. Также разберем альтернативные методы установки WP.
Пошаговая установка WorpdPress на Laragon
Программа Laragon— это универсальная среда разработки, которая пригодится, как для разработчикам, так и для вебмастерам. Он имеет множество функций, которые сделают вас более продуктивными. Установка WordPress производиться в два клика, ограждая от таких вещей как создание базы данных и загрузкой репозиториев вордпресс.
Загрузка и установка
Для начала скачайте полную версию (Full) программы Laragon с официального сайта.

Полная версия в отличии от урезанной портабельной версии, отличается продвинутыми настройками и поддержкой PHP 8, что немаловажно для вордпресса.
Загрузка дистрибутива идёт довольно медленно, наберитесь терпения. После скачивания запускаем файл, выбираем язык установки.
После чего указываем место установки локального сервера (если у вас несколько локальных дисков, я обычно выбираю тот (D) на котором не установлена виндовс).


Я обычно снимаю галку с автозапуска, т.к. сервером пользуюсь не каждый день, да и это снижает скорость запуска самой винды. После данного шага установщик напишет что все готовок к установке, жмем «Установить».

После установки перезагружаем компьютер, чтобы программа внесла необходимые изменения в файлы Windows.

Перезагрузив компьютер, если не сняли галку с автозапуска, в трее Windows появиться зеленый значок.
Запуск программы
Для того чтобы запустить ларагон в ручную, перейдите в папку куда он установлен и щелкните пару раз по файлу laragon.exe.


При первом запуске скорее всего выскочит окно брандмауэра (защитника Windows), выбираем все галки и жмем по кнопке «Разрешить доступ».

Таких окон у меня выскочило 2: для апач сервера и mysql. После разрешения доступа должны запуститься модули Apache и MySQL. И в окне программы, напротив в двух пунктов в программе будет надпись Запущено, значит можно идти дальше.

Если что то не запустилось, попробуйте отключить антивирус и нажать на «перезапустить».
Установка WordPress на локальный компьютер
Прекрасное в Laragon, что WordPress можно установить буквально в два клика. В трее нажимаем правой кнопкой мыши на значок программы, выбираем «Быстрые приложения» и в списке находим WordPress.

В следующем окне вводим имя проекта (на латинице), я назвал wp-local-v1 и нажал OK.
Откроется браузер (если он не открыт) и откроется сайт (вернее один из финальных этапов установщики WP), где нужно выбрать язык и нажать «Продолжить».

На следующей странице вводим данные сайта, название, логин, пароль и почту. Почту вводим актуальную, чтобы при случае можно восстановить доступ к сайту.

Не забываем записать логин и пароль для входа в админку WordPress, после чего нажимаем «Установить WordPress».
На следующей странице система поздравит и предложит авторизоваться в админке WordPress, нажимаем Войти.


В последующем вы сможете заходить в нее по адресу http://wp-local-v1.test/wp-admin/ или http://wp-local-v1.test/wp-login.php
Файлы установленного сайта находятся в папке установки Laragon в подкаталоге www, для редактирования движка заходите в папку wp-local-v1 (это название сайта, которое создавал вначале).

Мы разобрали простой метод установки WordPress на компьютер под управлением ОС Windows, а именно на локальный сервер Laragon. Но некоторые вебмастера привыкли к другим локальным компьютерам, например Openserver, XAMPP и др. Ну или у вас старенький ПК на который не устанавливается Laragon, поэтому приведу ссылки на альтернативные способы установки.
Доп информация по Laragon
Управление базами данных
Управление БД в Laragon по умолчанию выступает HeidiSQL, чтобы в него перейти нажмите на панели «База данных» и в открывшемся окне нажмите по кнопке «Открыть»

Откроется интерфейс HeidiSQL.

Он немного не привычный по сравнению с phpMyAdmin, но самое главное в нем есть, выгрузка базы в SQL и т.п.
Установка phpMyAdmin для Laragon
- Скачиваем phpMyAdmin
- Распаковываем архив на компьютере в эту папку: {LARAGON_DIR}\etc\apps\phpMyAdmin
- Перезапускаем Laragon
После выполнения данных шагов, вы предопределите HeidiSQL и на панели после щелка по кнопке «База данных», вебсервер будет отправлять уже вас на интерфейc phpMyAdmin (будет доступен по адресу http://localhost/phpmyadmin/). Логин для входа root, пароль: пусто.

Также открыть phpMyAdmin можно через контекстное меню.

Видео обзор Laragon и установка WordPress
Альтернативные способы установки WordPress на Windows
Laragon далеко не единственный локальный веб-сервер для Windows, на который можно установить CMS WordPress. И если по каким либо причинам у вас не получается установить на него движок, попробуйте воспользоваться другими локальными серверами.
Установка вордпересс на Open Server Panel
Установка WordPress на ПК при помощи Local и Xammp
На этом я попрощаюсь с вами, используйте для создания сайтов только современные программы, успехов.
Last Updated :
16 Jul, 2024
If you want to build a website using WordPress on your Windows machine, you’re in the right place! WordPress is an open-source Content Management System (CMS) that allows you to create dynamic websites and blogs. Setting up WordPress on your Windows computer is a great way to create a local environment for development and testing.
What is WordPress?
WordPress is a powerful content management system (CMS) used by millions of websites worldwide. It is open-source, highly customizable, and user-friendly, making it a popular choice for bloggers, businesses, and developers.
Prerequisites
| Database | MySQL 5.0 + |
| Web Server |
|
| Operating System | Cross-platform |
| Browser Support | IE (Internet Explorer 8+), Firefox, Google chrome, Safari, Opera |
| PHP Compatibility | PHP 5.2+ |
Before installing WordPress, your local machine must meet the above requirements. In this tutorial, we will use XAMP as the web server and MySQL 5.0 database. My PHP version of the local machine is 7.3.
Why Install WordPress Locally?
Installing WordPress locally on your Windows computer allows you to:
- Test themes and plugins without affecting your live site.
- Develop websites in a controlled environment.
- Learn WordPress without the need for web hosting.
Step-by-Step Guide to Installing WordPress on Windows
Step 1: Download WordPress
- Visit the official WordPress website: WordPress.org.
- Click the “Download WordPress” button to get the latest version.

Step 01 : Download
Step 2: Upload the WordPress Folder
- Extract the downloaded WordPress ZIP file.
- Copy the extracted folder to your web server’s root directory:
- For XAMPP: Paste it in
C:\xampp\htdocs. - For WAMP: Paste it in
C:\wamp\www.
- For XAMPP: Paste it in
Step 02: Directory for the webserver

Step 02: Webserver folder
Step 3: Create a MySQL Database
- Access your MySQL server (e.g., using phpMyAdmin).
- Create a new database (you can leave it empty for now).

Enter a name for the database, then click the Create button. Now the database has been created. Now you can make tables if you want.
Step 4: Navigate to the WordPress Folder
- Open your web browser.
- Enter the path to your WordPress folder (e.g.,
localhost/FirstWP).

Step 04: Navigate to the web server folder on your browser
Step 5: Select Language
Then you can see a window like the following. Now you need to select the language for your website. I choose English. There are many languages like English, Sinhala, Deutsch, and you can choose the language of your choice.

Step 05 : select Language
After selecting language, you can click ‘Continue’ button for continuing the installation process.
Step 6: In this step, you can see the following screen. It shows you the database information you already need to know for WordPress installation. There is nothing to change on this page. So you can click the ‘Let’s go!’ Button.

Step 7: Entering Database information.
Then you can go next stage. In here you should enter your database details for the following fields.
| Database Name | Enter your MySql database name you have already created in previous step. |
| UserName | Enter a username of your database |
| Password | Enter a password of your database |
| Database Host | Enter host name. Default host name is localhost |
| Table Prefix | It is used to add prefixes to database tables that help to execute several sites in the same database.It takes the default value wp_ |
On the following screen, I have entered information about my database. After entering your database information, you can click the ‘Submit ‘ button located at the bottom of the screen.

Step 8: Before displaying the following screen, WordPress check and confirm your database information which you have entered and display following confirmation snapshot. Then you can click ‘Run the installation’ button to go to the next stage of the installation process.

Step 08 : Run as installation
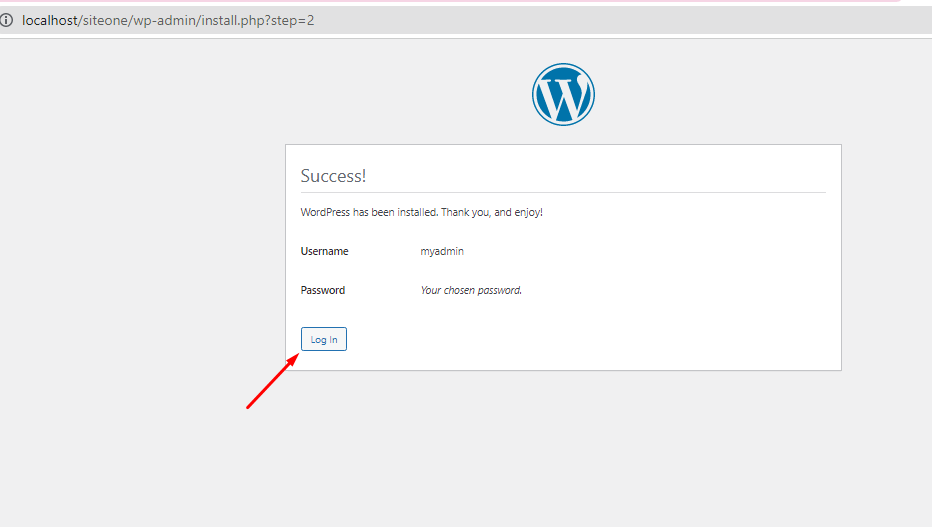
Step 9: Now you can see the welcome page below. In this step, you will need to enter the administrative information for your website. Such as username, password, etc. . Don’t confuse this username, password with the previous one. Previous step we have entered the username & password of the MySQL Database. Here we create a username and password for logging to WordPress for creating and modifying the website. In set title field you can give a name for your website which you go to create with WordPress. In the email field, you can give your email address. When you forget your password, it helps to create a new password for your website. After giving all information, you can click ‘install WordPress’ button to install WordPress. After the installation process is successful, you will get a screen showing that it is successful, as shown in the screenshot below.

Step 10 : Success Page
Now you can click ‘Log In’ button to log for creating your website using WordPress.
Step 10: Logging your website logging window displays like following. This is the final stage of this installation process.

Step 11 : Logging Page
Step 11: So now you can see WordPress Dashboard like following after clicking ‘Log In‘ button. Now you can create your own website. After this, I will write how to create your website using WordPress in the next blog.

WordPress Dashboard
Welcome to this step-by-step guide on how to install WordPress locally on Windows 10. If you’re new to WordPress or just getting started with building websites, then you’ve come to the right place. Installing WordPress locally on your computer can help you create and test your website before making it live on the internet.
WordPress is a powerful content management system that allows you to create, manage, and publish content on the web. Installing WordPress locally on your Windows 10 computer is easy, and you don’t need any programming knowledge to get started.
In this blog, we’ll walk you through the entire process of installing WordPress on your Windows 10 machine using XAMPP, a popular web development environment. We’ll cover everything from downloading and installing XAMPP to setting up a database and installing WordPress.
By the end of this tutorial, you’ll have a fully functioning WordPress website running on your Windows 10 computer, and you’ll be ready to start creating your own custom designs and content. So, let’s get started!
What’s a WordPress Localhost Website?
A WordPress localhost website is a website that is created on a local computer using software such as XAMPP, WAMP or MAMP, which simulate a server environment. This means that the website is not accessible to the public over the internet, but only on the local machine where it is installed.
The website is built using WordPress, a popular content management system (CMS), and all the files and databases are stored locally on the computer. This allows developers and designers to work on the website offline, without the need for a live server or an internet connection.
A WordPress localhost website can be used for testing, development, and staging purposes. It enables developers to experiment with new plugins, themes, and functionality without affecting a live website. Once the changes have been made and tested locally, the website can then be migrated to a live server for public access.
Why Should You Install WordPress on Windows?
WordPress is a popular content management system (CMS) used by millions of websites around the world. While many users choose to run WordPress on a web server, it is also possible to install it on a Windows computer. There are several reasons why someone might choose to install WordPress on a Windows computer, including the ability to create a local development environment, compatibility with Windows-based tools, and cost-effectiveness. However, there are also some potential drawbacks to consider.
There are several reasons why someone might choose to install WordPress on a Windows computer. Here are a few:
- Local development environment: Installing WordPress on a Windows computer can provide a local development environment for developers and designers to work on their website without having to upload files to a remote server. This can make the development process faster and more efficient.
- Familiarity with Windows: Some users might prefer to use a Windows computer because they are more familiar with the operating system and feel more comfortable working in that environment.
- Compatibility with Windows-based tools: If a user is already using Windows-based tools such as Visual Studio, they may find it easier to work with WordPress on a Windows computer.
- Cost: Using a Windows-based computer can be more cost-effective than using a Mac, which is traditionally associated with web development.
However, it’s worth noting that installing WordPress on a Windows computer requires additional software, such as XAMPP, MAMP, or WAMP, to create a local development environment. This can add some complexity to the setup process, and there may be some performance differences compared to using a dedicated web server. Ultimately, the decision to install WordPress on a Windows computer will depend on the user’s individual needs and preferences.
How to Install WordPress Locally on Windows Using XAMPP
Step 1: Download and Install XAMPP.
Go to the Apache Friends website and download the latest version of XAMPP for Windows. Follow the installation instructions to install it on your computer.

Download XAMPP and go for the on screen installation process.
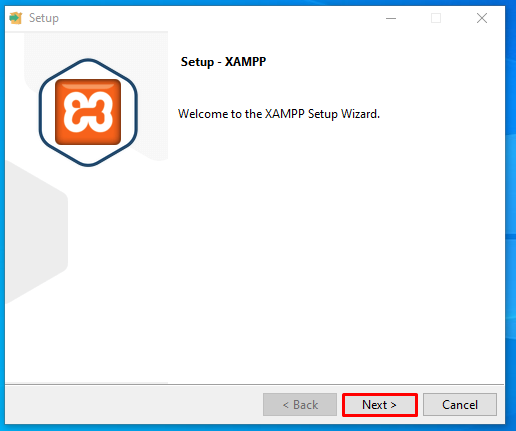
To complete the installation click Next and go for step by step procedure.

Now choose the components that you want to install. Here MySQL and phpMyAdmin are selected.

Select the folder to install XAMPP and click on Next.

After installing unpacking files click on Next and go for the finishing step.
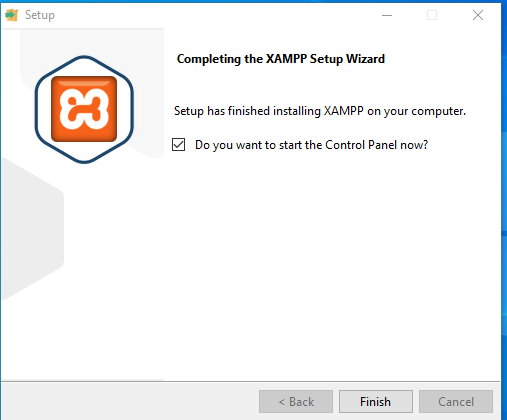
If you want to start the control panel now, click on the Finish button and that’s the finishing step of installing XAMPP.
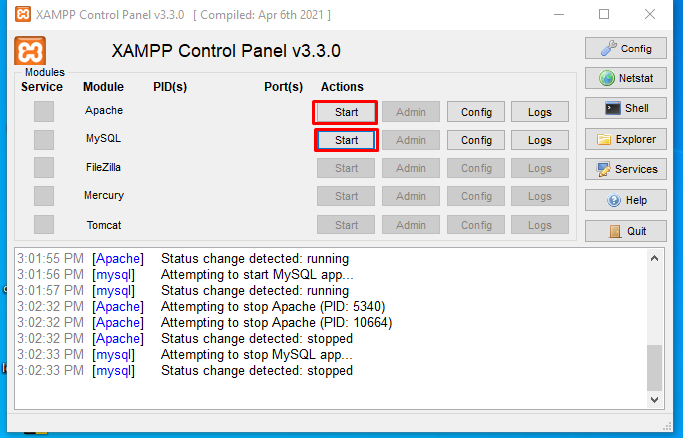
Now click on the Start button of Apache and MySQL in the XAMPP control panel .

After starting Apache and MySQL, XAMPP is fully ready to support. If you want pause then click on stop and the XAMPP will pause the total process for support.
Step 2: Download WordPress.
Go to the WordPress website and download the latest version of WordPress.

Go to the https://wordpress.org/download/ and download WordPress and extract the files.
Step 3: Add the WordPress files.

Create a folder in xampp >> htdocs >> siteone. After extracting the files of WordPress copy the containing files in the new folder named siteone in htdocs.
Step 4: Create a localhost database for WordPress.

Now, you need to create a MySQL database for your WordPress install. For doing that, you have to launch PHPMyAdmin from your XAMPP control panel. Or directly go for this link http://localhost/phpmyadmin/.
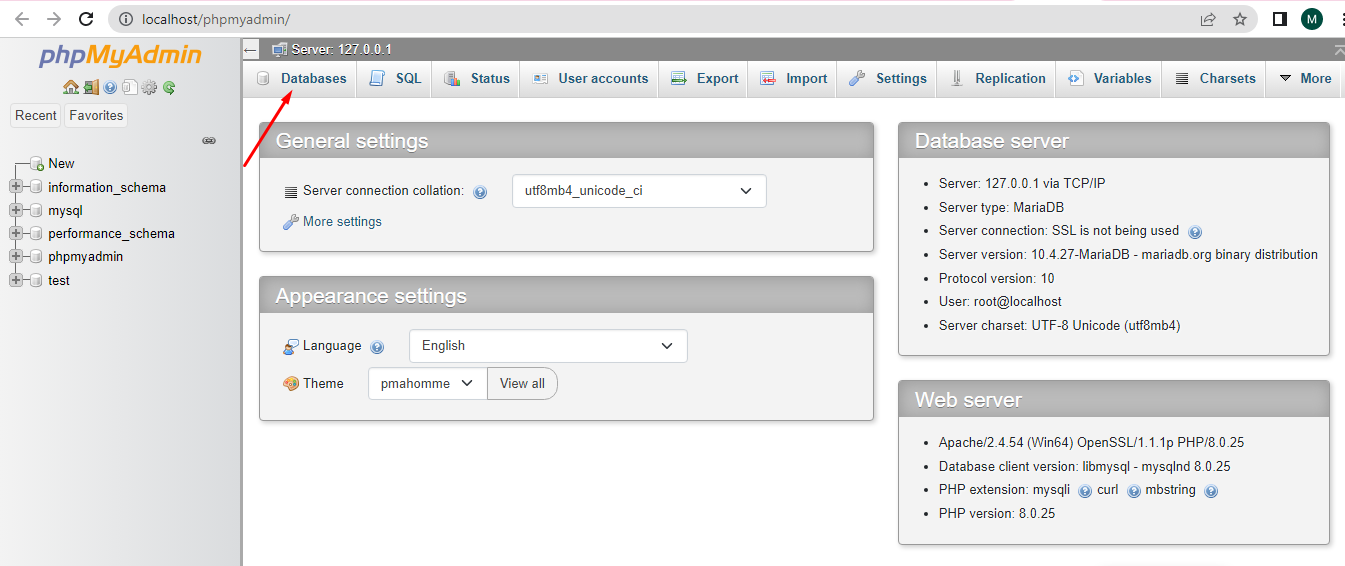
Now click on Database.

Then set the name of the site and clock on create. Your database is successfully created and go for the next step.
Step 5: Install and set up WordPress locally.

Once the database is created, launch the WordPress installation setup by visiting the following URL http://localhost/FOLDERNAME/wp-admin. So here the site name will be siteone and the link format will be http://localhost/siteone/wp-admin.

Now click on Let’s go.

Now fill up the required field of database name and username. Password and other fields will remain empty. After inserting the data click on Submit.
Your WordPress has been successfully installed and ready to log in.
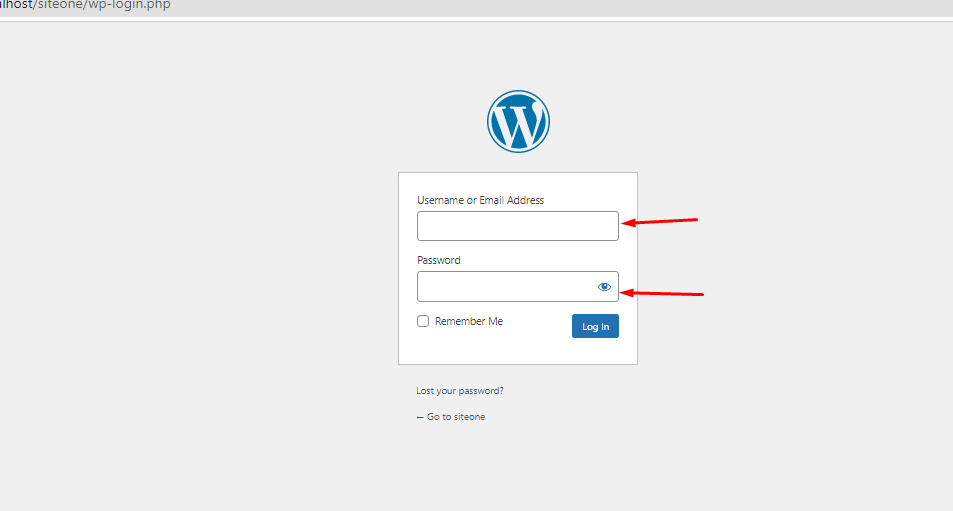
Provide the required username and password to log in your WordPress site named siteone.

Finally here is the dashboard of the siteone. So log into the dashboard and access the WordPress site locally for testing purposes.
Some Common XAMPP Errors
XAMPP is a popular web server solution for running local development environments on Windows, but like any software, it can sometimes encounter errors or issues. If you encounter any other issues with XAMPP, try searching online forums or contacting XAMPP support for assistance. With a little troubleshooting, you can usually resolve most XAMPP errors and get your local development environment up and running again.
Here are some common XAMPP errors and their potential solutions:
- Apache won’t start: If Apache fails to start, the most common cause is a conflict with another application using the same port. Check your XAMPP Control Panel to see if any other services are running on the same port as Apache. If so, stop those services and try starting Apache again.
- MySQL won’t start: If MySQL won’t start, it could be due to a variety of issues, such as a corrupted database or a conflict with another application. Try checking the MySQL error logs in the XAMPP Control Panel to see if there are any error messages that might indicate the issue. You can also try restarting your computer or reinstalling XAMPP.
- PHP errors: If you encounter PHP errors, it could be due to a problem with your PHP configuration or syntax errors in your code. Check your PHP error logs to see if there are any error messages that might indicate the issue. You can also try updating your PHP version or checking your code for syntax errors.
- Port conflicts: XAMPP uses a number of ports to run its services, and sometimes these ports can conflict with other applications. If you encounter port conflicts, try changing the ports that XAMPP uses in the configuration files. You can also check your system logs to see if there are any other applications using the same ports.
- Firewall issues: Sometimes firewalls can block XAMPP services from running properly. Check your firewall settings to make sure that XAMPP is allowed to access the network. You may also need to configure your firewall to allow inbound connections to the ports used by XAMPP.
Final Words
In conclusion, installing WordPress locally on Windows 10 can be a great way to develop and test your website before going live. By following the steps outlined in this guide, you can easily install WordPress on your local machine using a local server environment such as XAMPP or WAMP. Once installed, you can start customizing your site, creating content, and experimenting with different themes and plugins without the need for an internet connection or web hosting. Whether you’re a blogger, small business owner, or web developer, WordPress is a versatile platform that can be tailored to meet your unique needs. So why wait? Start your journey with WordPress today and unleash your creativity.