
В меню Chrome есть раздел «Сохранить и поделиться», который позволяет вывести изображение с ноутбука или рабочего стола на большой экран.
Что нужно знать
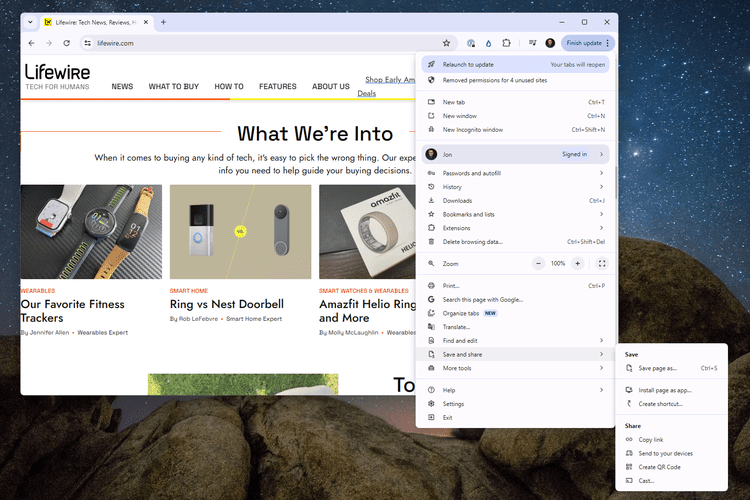
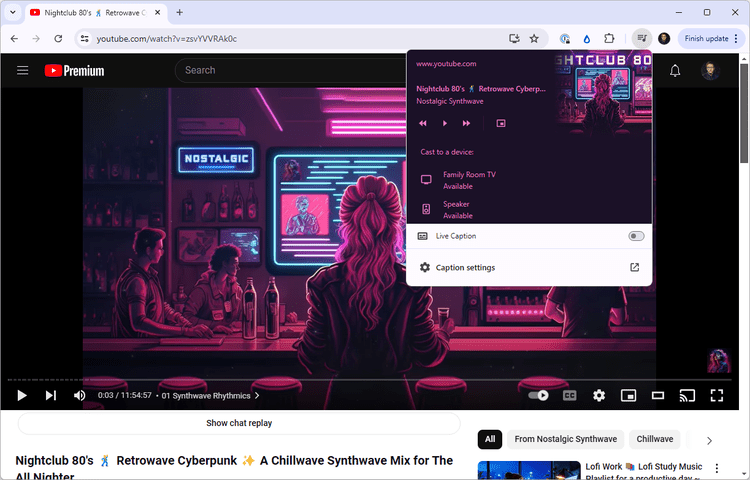
Откройте меню Chrome с тремя точками, а затем выберите «Сохранить и поделиться» > «Транслировать» > «Источники» > «Транслировать экран». /p>
Выберите Chromecast из списка, чтобы передать рабочий стол на телевизор, а затем выберите нужный монитор (если у вас их несколько). Chrome также может транслировать отдельную вкладку или отдельное видео, а не весь рабочий стол компьютера. В этой статье мы расскажем о том, как с помощью Chromecast транслировать изображение с ноутбука или настольного компьютера на телевизор. Из этой статьи вы узнаете, как транслировать весь рабочий стол, отдельную вкладку, а также видео с потоковых сервисов. Как транслировать рабочий стол компьютера
Вывод всего рабочего стола хорошо подходит для относительно статичных элементов, которые запускаются не в веб-браузере, поэтому такой вариант идеально подходит для демонстрации слайд-шоу или других приложений для рабочего стола. Убедитесь, что ваше устройство Chromecast и компьютер находятся в одной сети Wi-Fi, затем откройте Chrome и следуйте инструкциям:
1.Нажмите на три точки в правом верхнем углу Chrome и выберите «Сохранить и поделиться» > «Транслировать».
2.Выберите «Источник», а затем выберите «Транслировать экран».
3.Выберите устройство Chromecast. Через несколько секунд вы увидите ваш рабочий стол на экране телевизора.
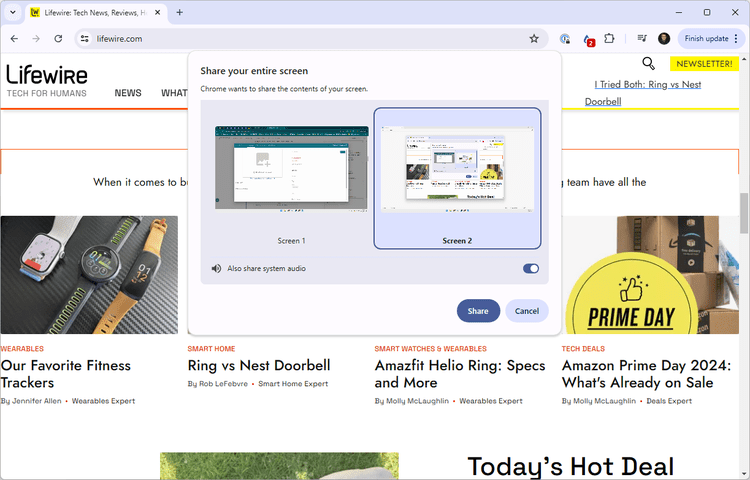
Совет: если вы не видите рабочий стол на экране, убедитесь, что ваше устройство Chromecast настроено и подключено к той же сети Wi-Fi, что и компьютер. 4. Если у вас несколько мониторов, вам будет предложено выбрать экран, который вы хотите транслировать. Выберите экран и нажмите «Поделиться».
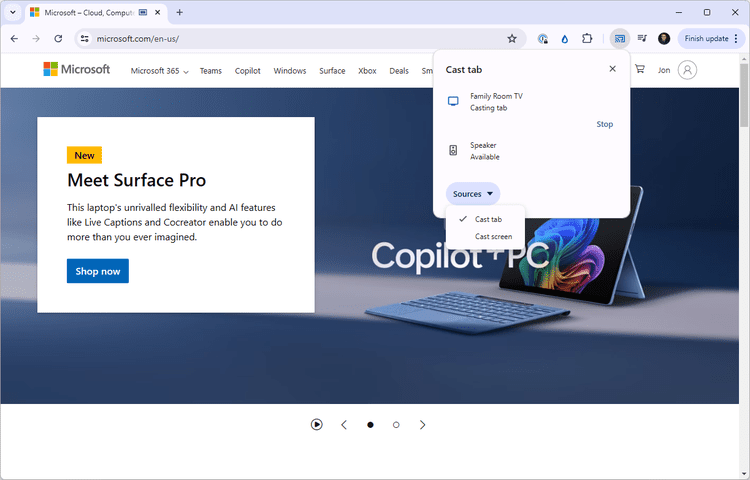
После этого рабочий стол вашего ПК сразу же начнет транслироваться. Чтобы остановить трансляцию, нажмите на синий значок Chromecast в правом верхнем углу браузера Chrome и выберите «Остановить».
Примечание: если вы транслируете весь рабочий стол, вы увидите опцию «поделиться системным звуком». Эту опцию можно включить или отключить.
Как транслировать отдельную вкладку браузера Chrome
Не хотите транслировать весь экран? В Chrome есть возможность выбрать одну вкладку, если вы хотите видеть на экране телевизора только ее. Такой способ удобен для показа веб-сайтов или для демонстрации фотографий, либо документов.
Чтобы транслировать отдельную вкладку, необходимо выполнить действия, похожие на описанные выше:
1.Откройте меню Chrome с тремя точками в правом верхнем углу и выберите «Сохранить и поделиться» > «Транслировать».
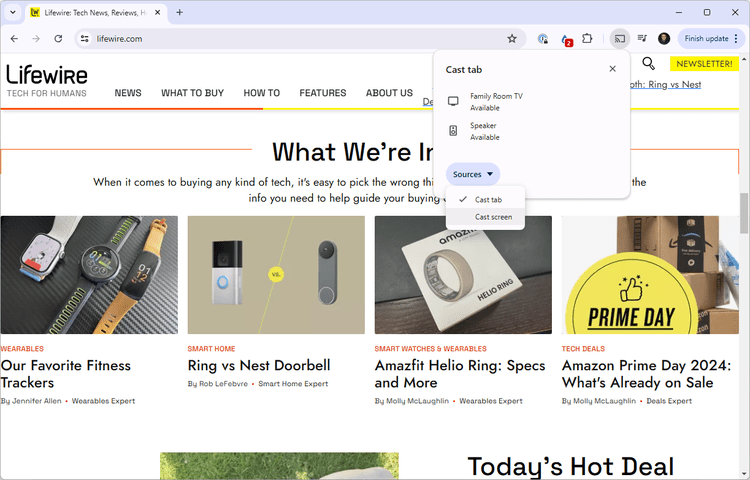
2.Во всплывающем окне выберите «Источник» и убедитесь, что выбрана вкладка «Транслировать».
3.Выберите устройство Chromecast из списка, чтобы начать трансляцию активной вкладки на экран телевизора.
Транслировать весь экран или отдельную вкладку
Это варианты использования Chromecast с компьютером. Они могут казаться похожими, но на самом деле между ними есть существенные различия, которые зависят от того, какой контент вы хотите транслировать на телевизор.
Опция «Экран» транслирует весь рабочий стол, включая панель задач, меню «Пуск» и любую программу, которая будет открыта во время трансляции. Это может быть Photoshop, Microsoft Office, другой веб-браузер или блокнот. Все, что открыто на рабочем столе компьютера или ноутбука, будет отображаться на экране телевизора до тех пор, пока вы не отключите трансляцию.
Опция трансляции вкладки имеет более ограниченный функционал, но в некоторых случаях она может оказаться предпочтительнее. На экране телевизора будет транслироваться вкладка, которую вы открыли перед началом трансляции. Вы можете переходить на различные веб-сайты, и пока вы не закроете вкладку, каждый сайт будет отображаться на экране телевизора.
Оба варианта отлично подходят для демонстрации контента на экране телевизора. Однако стоит учесть, что они будут хорошо работать только с сайтами, которые не содержат анимации или видео, например, с приложениями и текстовыми веб-страницами. А вот с видео ситуация сложнее. Но, здесь есть нюансы…
Трансляция видео с ПК на устройство Chromecast
Видео на устройстве Chromecast будет воспроизводиться отлично, если вы смотрите его на сайте, который поддерживает функцию трансляции. Это происходит потому, что устройство Chromecast получает поток непосредственно с сайта, а не с вашего компьютера. Другими словами, он транслирует видео не с вашей вкладки или экрана, а напрямую из Интернета.
Одним из таких примеров является YouTube, но существует и много других сайтов. Чтобы проверить, поддерживает ли ваше видео функцию трансляции, найдите значок трансляции в видеоплеере. На YouTube он находится в правом нижнем углу. Кликните эту кнопку, а затем выберите свое устройство Chromecast, чтобы посмотреть видео на телевизоре.
Вы можете попробовать посмотреть видео с помощью трансляции рабочего стола или вкладки, но оно, скорее всего, не будет таким четким, как вам хотелось бы. Для этого выполните описанные выше действия в зависимости от того, какой способ хотите использовать. Если видео воспроизводится в видеоплеере, например VLC, вам необходимо использовать рабочий стол, в противном случае выберите вариант с вкладкой.
Зачем транслировать?
Потоковое устройство от Google – это доступная альтернатива таким приставкам, как Apple TV и Roku. С его помощью вы можете просматривать на телевизоре любой контент, включая YouTube, Netflix, видеоигры и видеоролики Facebook.
С помощью устройства Chromecast также невероятно просто подключить компьютер к телевизору, ведь все, что для этого нужно, – это браузер Chrome. Эта функция работает с браузером Chrome на любой платформе ПК, которая его поддерживает, включая Windows, Mac, Linux и Google Chrome OS.
FAQ
Как установить Chromecast на компьютер? Установить Chromecast на компьютер невозможно. Однако если у вас есть устройство Chromecast для телевизора, то все, что нужно вашему компьютеру, – это последняя версия веб-браузера Chrome.
Как транслировать Kodi с ПК на устройство Chromecast?
Подключите устройство Chromecast к телевизору и откройте вкладку браузера Chrome на компьютере. Затем нажмите на три точки в правом верхнем углу Chrome, а затем выберите «Сохранить и поделиться» > «Транслировать». Выберите «Транслировать экран» в разделе «Источники», выберите телевизор в качестве устройства для передачи, затем откройте Kodi и зпустите трансляцию.
C помощью устройства Chromecast или Google TV Streamer (4K) вы можете вывести на телевизор вкладку Chrome или экран компьютера.
Поддерживается почти любой веб-контент. Однако некоторые плагины не будут работать, например Silverlight, QuickTime и VLC.
Чтобы транслировать контент из браузера Chrome на телевизор, вам потребуются:
- Chromecast, Chromecast с Google TV, Google TV Streamer (4K), Chromecast Ультра или телевизор с Google Cast.
- Высокий уровень сигнала Wi-Fi на стриминговом устройстве Google. Узнайте, как устранить неполадки с подключением Chromecast и Google TV Streamer.
- Компьютер, соответствующий минимальным системным требованиям, со стабильным подключением к той же сети Wi-Fi, которая используется на стриминговом устройстве Google.
- Обновленная версия Google Chrome.
- Узнайте, как обновить Google Chrome.
Как начать трансляцию из вкладки браузера Chrome
Важно! Для трансляции на компьютере под управлением macOS 15 или более новой версии ОС предоставьте Chrome доступ в настройках системы.
- Откройте Chrome на компьютере.
- В правом верхнем углу экрана нажмите на значок с тремя точками Транслировать, сохранить, поделиться Трансляция.
- Выберите устройство для трансляции.
- Если оно уже используется, контент будет заменен новым.
- Чтобы завершить показ, справа от адресной строки нажмите на значок Google Cast Прекратить трансляцию.
Примечание. На сайтах, поддерживающих Google Cast, можно транслировать контент прямо из медиапроигрывателя. Подробнее о сайтах с поддержкой Google Cast и трансляции вкладок Chrome…
Обозначения в Chrome
- Когда вкладка транслируется на телевизор, на ней показывается значок дисплея .
- Когда трансляция активна, справа от адресной строки, рядом с параметром «Расширения», показывается значок подключения Google Cast .
Чтобы быстро запускать трансляции из Chrome, закрепите кнопку трансляции на панели инструментов.
Примечание. Транслируемые видео или изображения показываются одновременно на компьютере и телевизоре, но звук воспроизводится только на телевизоре. Звук с других вкладок и из других приложений проигрывается на компьютере.
Как транслировать экран компьютера
С помощью Chrome можно транслировать весь экран ПК на базе macOS, Windows или ChromeOS.
Важно! Чтобы во время трансляции звук воспроизводился на телевизоре, а не на компьютере, необходимо транслировать отдельную вкладку.
- Откройте Chrome на компьютере.
- В правом верхнем углу экрана нажмите на значок с тремя точками Транслировать, сохранить, поделиться Трансляция.
- Выберите Источники Трансляция экрана.
- Укажите нужное устройство.
Как транслировать музыку и видео с компьютера
- Откройте Chrome на компьютере.
- Выберите файл, который вы хотите транслировать.
- Перетащите его на вкладку Chrome или используйте сочетание клавиш:
- Windows: Ctrl + O.
- macOS: Cmd + O.
- В правом верхнем углу экрана нажмите на значок с тремя точками Транслировать, сохранить, поделиться Трансляция.
- Выберите устройство, на которое вы хотите транслировать контент.
Информация по теме
- Устранение проблемы
- Как транслировать контент на устройство Google TV
- Как транслировать контент из приложения YouTube и с сайта youtube.com
- Как транслировать контент из приложений с поддержкой Google Cast на телевизор
- Трансляция экрана Android с помощью приложения Google Home
Эта информация оказалась полезной?
Как можно улучшить эту статью?
Загрузить PDF
Загрузить PDF
В этой статье мы расскажем вам, как передать картинку с экрана компьютера на экран телевизора через Chromecast. Когда вы подключитесь через Chromecast, у вас появится возможность смотреть видео, открывать веб-страницы или играть в игры на экране телевизора.
-

Убедитесь, что компьютер подключен к той же сети, что и Chromecast.
- Если подключить устройства к разным сетям, передать картинку с экрана компьютера на экран телевизора не получится.
-

Для этого щелкните по значку

на рабочем столе или в меню «Пуск».
- Если на компьютере Chrome нет, скачайте его с этого сайта.
-
Вы найдете его справа от адресной строки (а именно в правом верхнем углу окна). Откроется меню.
-
В верхнем правом углу откроется окно «Трансляция» и запустится сканирование беспроводной сети на наличие доступных устройств Chromecast.
-
Картинка с экрана компьютера отобразится на экране телевизора. Теперь на телевизоре можно смотреть видео, открывать веб-страницы и играть в игры — все это будет транслироваться с компьютера.
Реклама


Об этой статье
Эту страницу просматривали 59 196 раз.
Была ли эта статья полезной?
Chromecasting Windows 10 to your TV opens up a world of possibilities, allowing you to stream content from your laptop directly onto the big screen. Gone are the days of huddling around a small computer screen to watch your favorite shows or videos. With the click of a button, you can effortlessly share your Windows 10 screen with everyone in the room. But how exactly does this work?
To Chromecast Windows 10 to your TV, you’ll need a few key components. First, ensure that you have a Google Chromecast device plugged into your TV. This small device connects to your TV’s HDMI port, enabling it to receive signals from your Windows 10 computer. Next, ensure that both your Windows 10 computer and the Chromecast device are connected to the same Wi-Fi network. This is crucial for establishing a seamless connection. Once you’ve confirmed these requirements, you’re ready to start streaming!
To Chromecast Windows 10 to your TV, follow these steps:
- Ensure your TV and Windows 10 PC are connected to the same Wi-Fi network.
- On your PC, open the Chrome browser and click on the three-dot menu in the top right corner.
- Select «Cast» from the drop-down menu.
- A pop-up window will appear, showing available devices. Choose your TV.
- Your PC screen will now be mirrored on your TV, allowing you to enjoy media content effortlessly.

Setting up Chromecast on Windows 10
Chromecast is a popular device that allows you to stream your favorite content from your Windows 10 computer to your TV. Whether you want to watch movies, listen to music, or share photos, Chromecast provides a seamless way to enjoy your media on the big screen. Setting up Chromecast on Windows 10 is a straightforward process that requires a few simple steps. In this guide, we will walk you through the process of setting up Chromecast on Windows 10 and how to cast content to your TV.
1. Ensure Compatibility
Before you begin setting up Chromecast on Windows 10, it’s important to ensure that your devices are compatible. You will need a Windows 10 computer or laptop with an available HDMI port, a reliable Wi-Fi connection, and the latest version of the Google Chrome browser installed. Additionally, you will need a compatible TV with an HDMI input and access to a power outlet for the Chromecast device.
Once you have checked for compatibility, you can proceed to the next step of setting up Chromecast on Windows 10.
2. Connect Chromecast to your TV
The next step is to connect the Chromecast device to your TV. To do this:
- Plug the Chromecast into an available HDMI port on your TV.
- Connect the power cord to the Chromecast and plug it into a power outlet.
- Change your TV’s input/source to the HDMI port where you have connected the Chromecast.
Once the Chromecast is connected to your TV, you will see the Chromecast setup screen on your TV.
3. Install Google Home App
To continue setting up Chromecast on Windows 10, you will need to install the Google Home app on your Windows 10 computer or laptop. The Google Home app allows you to manage your Chromecast, set up Wi-Fi, and control the casting of content to your TV. Here’s how to install the Google Home app:
- Open the Google Chrome browser on your Windows 10 computer.
- Go to the Chromecast setup page by visiting https://www.google.com/chromecast/setup.
- Click on the «Set up your Chromecast using this computer» link.
- Click on the «Download the Google Home app» button.
- Follow the on-screen instructions to install the Google Home app on your Windows 10 computer.
4. Set up Chromecast on Windows 10
Now that you have installed the Google Home app on your Windows 10 computer, it’s time to set up Chromecast. Here’s how:
- Open the Google Home app on your Windows 10 computer.
- Click on the «+» icon to add a device.
- Follow the on-screen instructions to connect the Chromecast to your Wi-Fi network.
- Once the Chromecast is successfully connected, you will see a confirmation message on your computer screen.
Congratulations! You have successfully set up Chromecast on your Windows 10 computer. Now it’s time to start casting your favorite content to your TV.
Casting Content to your TV
With Chromecast set up on your Windows 10 computer, you can now start casting content to your TV. Here’s how:
1. Open Google Chrome and Sign In
Open the Google Chrome browser on your Windows 10 computer and sign in to your Google account. Ensure that the same Google account is signed in on both your Windows 10 computer and the Google Home app.
2. Find Content to Cast
Once you are signed in, you can start browsing for content to cast to your TV. Whether it’s a YouTube video, a Netflix show, or a website, simply find the content you want to cast and open it in Google Chrome.
3. Start Casting
To start casting the content to your TV:
- Click on the three-dot menu icon in the top right corner of Google Chrome.
- Select «Cast» from the dropdown menu.
- A list of available devices will appear. Select your Chromecast device from the list.
The content will now start playing on your TV screen through your Chromecast.
Tips for a Smooth Casting Experience
To ensure a smooth casting experience from your Windows 10 computer to your TV, here are a few tips:
- Make sure your Windows 10 computer and Chromecast are connected to the same Wi-Fi network.
- Close any unnecessary programs or browser tabs to free up system resources.
- Ensure that your Windows 10 computer is running the latest updates and that the Google Chrome browser is up to date.
- If you experience any issues, try restarting your Windows 10 computer, Chromecast device, and your Wi-Fi router.
By following these tips, you can enjoy a seamless casting experience and make the most out of your Chromecast device.
Now that you know how to set up Chromecast on Windows 10 and cast content to your TV, you can enjoy your favorite movies, TV shows, and more on the big screen. Whether you’re hosting a movie night, sharing photos with friends and family, or simply relaxing with your favorite content, Chromecast provides a convenient way to enhance your viewing experience. Get started today and unlock the full potential of your Windows 10 computer and TV.

How to Cast Windows 10 to TV using Chromecast?
Chromecast is a device that allows you to stream content from your computer or smartphone to your TV. If you have a Windows 10 PC and a Chromecast, you can easily cast your screen or specific applications to your TV. Here’s how:
- Ensure that your Windows 10 PC and Chromecast are connected to the same Wi-Fi network.
- Download and install the Google Chrome browser on your Windows 10 PC if you haven’t already.
- Open Google Chrome and install the Google Cast extension from the Chrome Web Store.
- Click on the Google Cast extension icon in the top-right corner of the browser window.
- Select the Chromecast device you want to cast to.
- To cast your entire screen, click on «Cast Screen» and select your Chromecast device.
- To cast a specific application, click on «Cast» and choose the application from the list.
Once the casting is initiated, your Windows 10 screen or application will be mirrored on your TV. You can enjoy videos, photos, presentations, and more on a larger screen!
Key Takeaways
- To Chromecast Windows 10 to your TV, ensure that you have a Google Chromecast device.
- Connect your Chromecast device to the HDMI port of your TV.
- Make sure that your Windows 10 computer and Chromecast are connected to the same Wi-Fi network.
- Download and install the Google Home app on your computer.
- Open the Google Home app and follow the on-screen instructions to set up your Chromecast.
Frequently Asked Questions
Chromecast is a popular device that allows you to stream content from your Windows 10 computer to your TV. If you’re unfamiliar with the process, here are answers to some frequently asked questions about how to Chromecast Windows 10 to TV.
1. How do I set up Chromecast on Windows 10?
To set up Chromecast on your Windows 10 computer, follow these steps:
- Connect your Chromecast device to your TV using an HDMI cable.
- Download and install the Google Home app on your Windows 10 computer.
- Open the Google Home app and follow the on-screen instructions to set up your Chromecast device.
- Once set up, open a supported streaming app or website on your Windows 10 computer.
- Look for the Cast icon in the app or website and click on it.
- Select your Chromecast device from the list of available devices.
- The content will start streaming on your TV via Chromecast.
2. Can I mirror my Windows 10 screen to Chromecast?
Yes, you can mirror your Windows 10 screen to Chromecast. Here’s how:
- Make sure your Windows 10 computer and Chromecast are connected to the same Wi-Fi network.
- Click on the Action Center icon in the bottom right corner of your screen or press the Windows key + A on your keyboard.
- Click on the «Connect» option in the Action Center.
- A list of available devices will appear. Select your Chromecast device.
- Your Windows 10 screen will now be mirrored on your TV via Chromecast.
3. Are there any system requirements to Chromecast Windows 10 to TV?
Yes, there are a few system requirements to Chromecast Windows 10 to TV:
- Your Windows 10 computer must have the Google Chrome browser installed.
- Your Windows 10 computer and Chromecast must be connected to the same Wi-Fi network.
- Make sure your computer meets the minimum hardware requirements to run Chromecast smoothly.
4. Can I stream local media files from my Windows 10 computer to Chromecast?
Yes, you can stream local media files from your Windows 10 computer to Chromecast. Here’s how:
- Make sure your Windows 10 computer and Chromecast are connected to the same Wi-Fi network.
- Open the Google Chrome browser on your Windows 10 computer.
- Click on the three-dot menu in the top right corner and select «Cast».
- Select your Chromecast device from the list of available devices.
- In a new tab, open the local media file you want to stream.
- The media file will now play on your TV via Chromecast.
5. Can I use Chromecast with multiple Windows 10 devices?
Yes, you can use Chromecast with multiple Windows 10 devices. Simply follow the initial setup process on each device and select the Chromecast device you want to stream to when casting content.
To conclude, Chromecasting from Windows 10 to your TV is a simple and convenient way to enjoy your favorite content on a larger screen. By following the steps outlined in this guide, you can easily set up and use Chromecast to stream movies, TV shows, videos, and more from your PC to your television.
Remember to ensure that your Windows 10 device and Chromecast are connected to the same Wi-Fi network for seamless casting. Additionally, make sure to keep your Windows 10 system and the Chromecast up to date to enjoy the latest features and performance improvements.
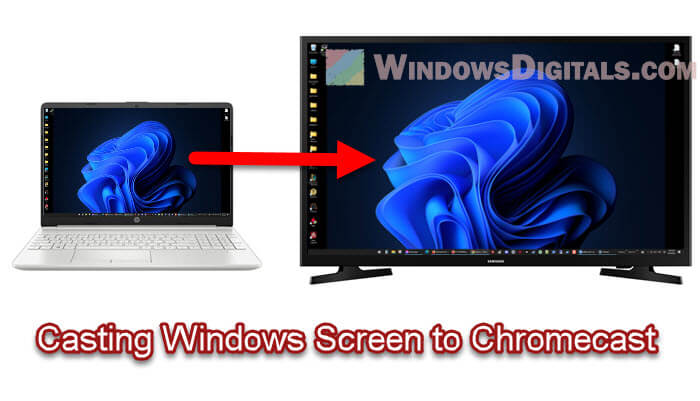
Casting your Windows 11 or 10 screen to a Chromecast device is super handy for showing your computer’s screen on a bigger screen like a TV, without needing an HDMI cable. This guide will help you step-by-step to cast your Windows 11 or Windows 10 screen to a Chromecast device, so you can enjoy movies, show off photos, or even do presentations without wires.
Also see: How to Share Screen on Windows 11 (3 Methods)
What you need to cast your Windows desktop screen to Chromecast
Before we start, make sure you have these things ready:
- A computer with Windows 11 or Windows 10. This guide is for these two operating systems.
- A Chromecast device. Google makes these media streaming gadgets, and they come in a few types like Chromecast, Chromecast Ultra, and Chromecast with Google TV. Any of these will do.
- A TV or monitor with an HDMI slot. You need this to plug in your Chromecast device.
- A Wi-Fi network. Your computer and Chromecast device need to be on the same Wi-Fi network to cast successfully.
- The Google Chrome browser on your computer. Chrome works best for casting because it has Chromecast support built in.
Recommended guide: How to Add Wireless Display Feature in Windows 10/11
Step 1: Set up your Chromecast device
Let’s get your Chromecast ready to go:
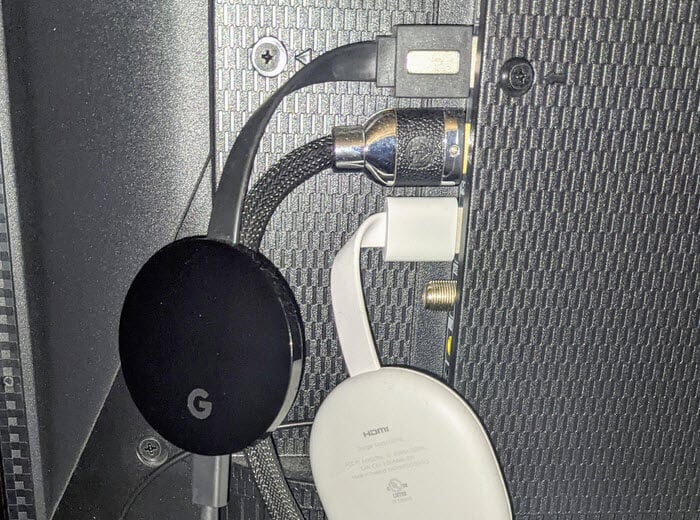
- Plug your Chromecast into your TV or monitor’s HDMI slot.

- Connect the power adapter to an outlet and your Chromecast. Depending on your Chromecast model, it might also get power directly from your TV or monitor’s USB port. Just follow what the manual says for your model.
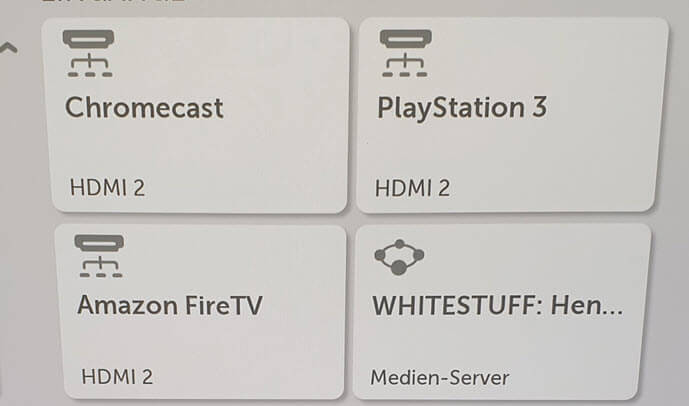
- Turn on your TV or monitor and choose the right HDMI input for your Chromecast. Use the remote control to switch to the HDMI port your Chromecast is connected to.

- Set up your Chromecast following the on-screen steps. You might need a smartphone or tablet with the Google Home app for this part.
Related resource: How to Duplicate or Mirror Screen on Windows 10/11
Step 2: Connect your computer to the same Wi-Fi network
To cast without a hitch, your Windows 11 or 10 computer needs to be on the same Wi-Fi network as your Chromecast. Here’s how to connect:
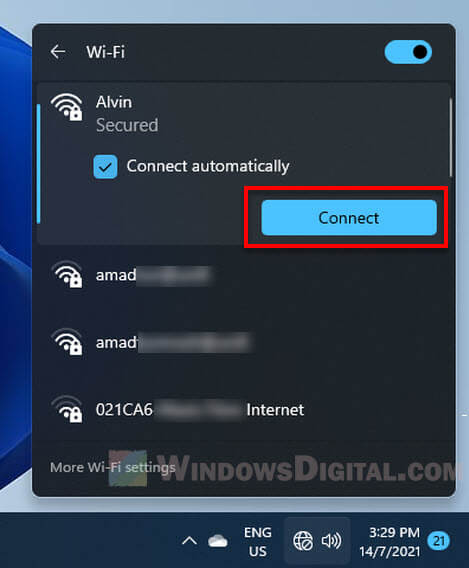
- Click the Network icon in your computer’s system tray, at the bottom-right of the screen.
- You’ll see a list of Wi-Fi networks. Pick yours and click Connect.

- Type in your Wi-Fi password and hit Next if it asks.
If your computer is already connected to the network with an Ethernet cable, just move on to the next part.
Step 3: Open Google Chrome browser
Now, open up Google Chrome on your computer. If you don’t have it, you can download it from the Google Chrome website.
Step 4: Cast your Windows 11 or 10 screen
Time to cast your screen to Chromecast. Follow these steps:
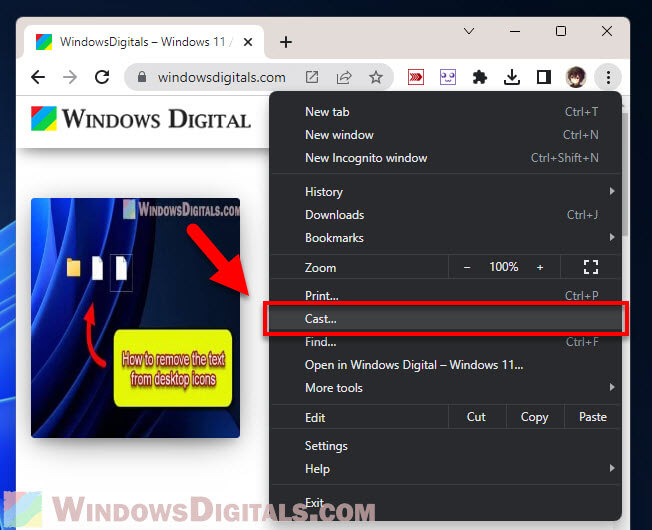
- In Chrome, click the three-dot menu icon at the top-right.
- Choose Cast… from the menu. A window will pop up showing you devices you can cast to.

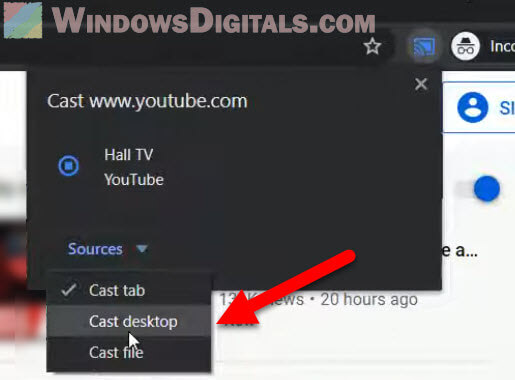
- Click the Sources dropdown at the bottom of the window. This lets you pick what you want to cast.
- Choose Cast desktop. This lets you share your whole computer screen, not just a browser tab or video.

- Pick your Chromecast device from the list that comes up. After choosing Cast desktop, you’ll see a list of Chromecast devices. Click on the one you want to use.

- A window will ask you which screen you want to share. If you have more than one monitor, pick the one you want to show on the Chromecast.

- Hit Share. After picking the screen you want, click Share to start casting.
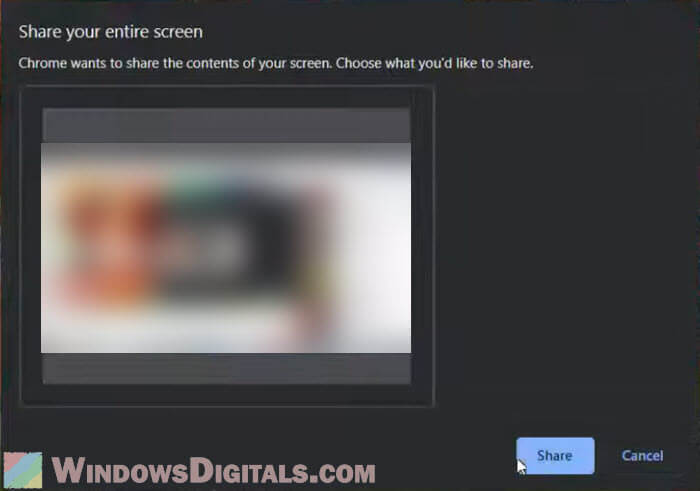
Your Windows 11/10 screen should now be showing on your TV or monitor through the Chromecast.
Useful tip: How to Record Screen on Windows 11/10 With NVIDIA Share
Step 5: Stop casting
When you want to stop casting, do this:
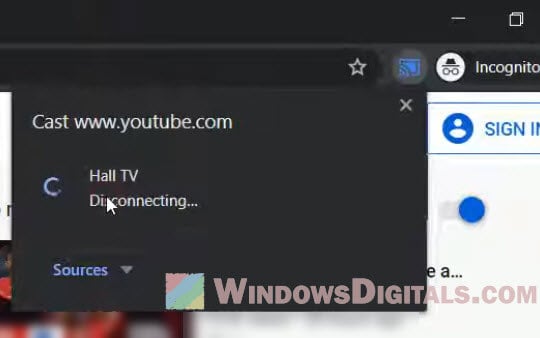
- In Chrome, click the three-dot menu at the top-right again.
- Choose Cast… You’ll see the device you’re casting to.
- Click the blue Stop button next to your Chromecast device. This stops the cast right away.

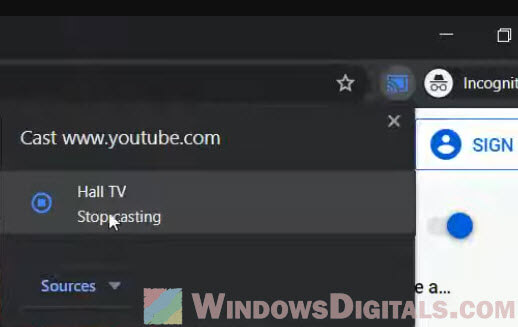
Your screen will no longer show on your TV or monitor.
Troubleshooting when things don’t work out
If casting isn’t working right, try these tips:
- Make sure your computer and Chromecast are on the same Wi-Fi network. Casting needs both devices on the same network.
- Restart your computer, Chromecast, and Wi-Fi router. A reboot can fix a lot of issues.
- Update Chrome to the latest version. Old versions might not work well with Chromecast.
- If nothing else works, reset your Chromecast to factory settings and set it up again. Follow the instructions that came with your device.
One more thing to note
Before you start casting, it’s a good practice to close any programs or tabs on your computer that you don’t want others to see. Since casting your desktop shares everything on your screen, make sure to hide your private stuff. This way, you can confidently share your screen knowing only the content you want to be seen is displayed.