
Before we delve into the data-driven world of ADO.NET, let’s first take a look at some tools available in the Visual Studio products. The following example shows you one way of connecting to a database without writing any code.
Creating a Connection to a Database
Open Visual C# Express and create a new Windows Forms Application. Name the project as DatabaseConnection. In Visual Studio, the Database Explorer is called Server Explorer. It is opened by default in Visual C# Express located in the left as a tab.
If you can’t find the Database Explorer, go to View > Other Windows > Database Explorer to open it up. Click the Connect to Database icon in the Database/Server Explorer.
Clicking it shows up the Add Connection Window.
Make certain that the Data source utilizes Microsoft SQL Server Database File. If not, you can click the Change button and choose the appropriate data source. We also need to provide the file name of the database file that was created when we create our database. Click Browse to show up the open dialog. By default, the database files of SQL Server Express is located in C:Program FilesMicrosoft SQL ServerMSSQL.1MSSQLData. Paste this path in the URL bar of the Open dialog to immediately go to that directory. Find the University.mdf file and select it. Click Open.
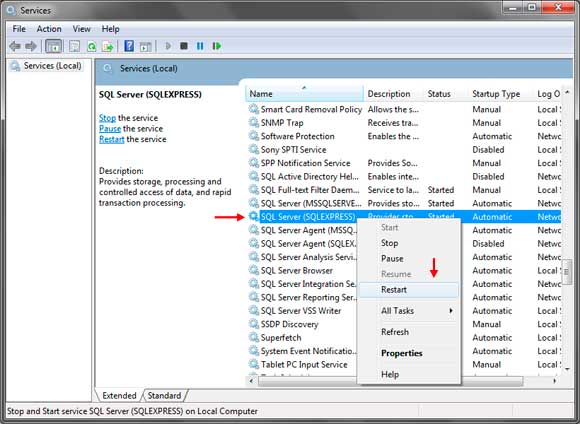
If an error shows up telling that file is used by another program. Open up the Services program by clicking Start and typing the word services in the search box. Find the SQL Server (SQLEXPRESS) service and right click on it. Choose Restart to restart the service.
After it is restarted, we can now go back to choosing the University.mdf file. After pressing open, click the Test Connection button in the Add Connection Window to test if our application can successfully connect to the database. If nothing is wrong, then a success message will show up.
Press OK to close the message. You can also choose the Authentication mode to be used. You can use Windows Authentication or SQL Server Authentication. You must provide the username and password if you are to use SQL Server Authentication mode. Press OK to close the Add Connection Window and add the database file to the Database Explorer window.
The Database Explorer allows you to see the contents of a database. If you expand a database file such as the University.mdf, you can see parts of it such as its tables and stored procedures. Expanding the Tables node shows our Students table and expanding the table shows its columns.
Creating a DataSet
A DataSet can be considered as a mini database located in the computer’s memory. It’s main purpose is to obtain the data received from the database and store it in different tables just like how a database stores its records. The next step is to create a DataSet that will contain the contents the database that we have connected to. We will be using the Data Sources Window. If you can’t see it, then go to Data > Show Data Sources. It will be located to the left of the IDE by default.
Click the Add New Data Source button to open up the Data Source Configuration Wizard.
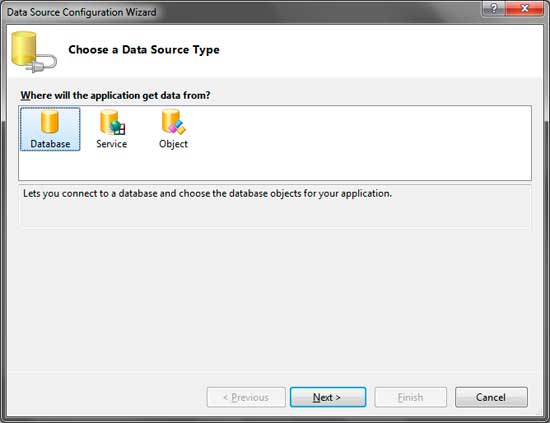
Choose Database and click Next.
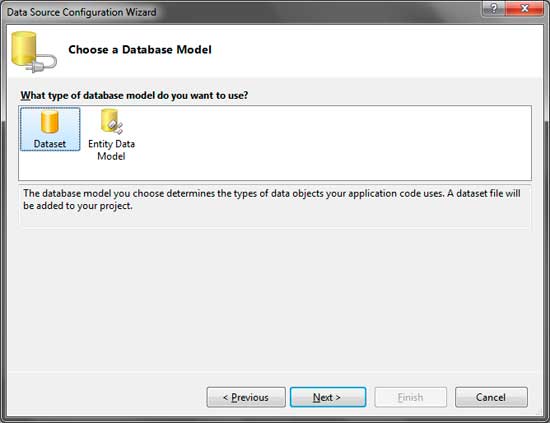
Choose Dataset then click Next.
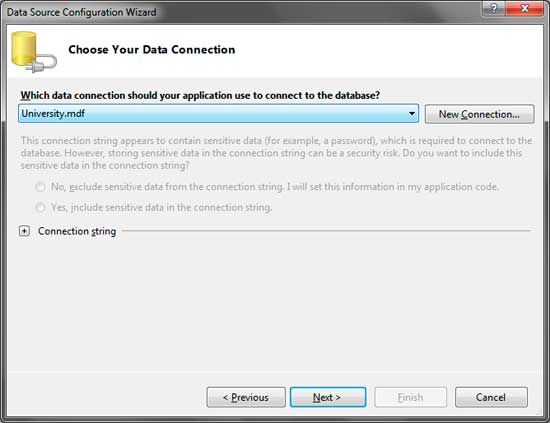
In the combo box, be sure to select University.mdf that we have connected using the Database Explorer. Click Next.
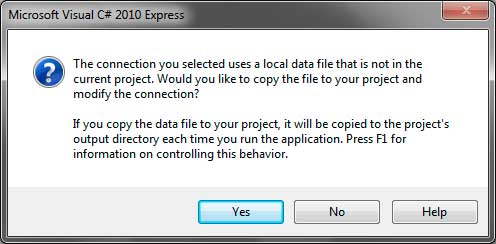
You will then be prompted that the database file needs to be copied to the project’s directory. Clicking yes will copy it to the project’s directory. You can confirm that the database has been copied by looking at the Solution Explorer and finding University.mdf.
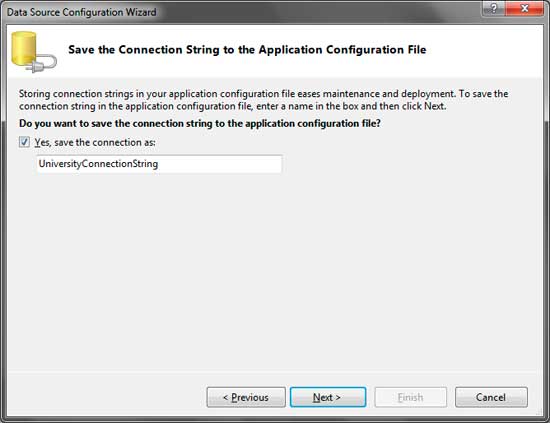
This window simply saves the connection string used to connect to the University database. Connection strings will be discussed in a later lesson. For now, you can leave the defaults and click Next.
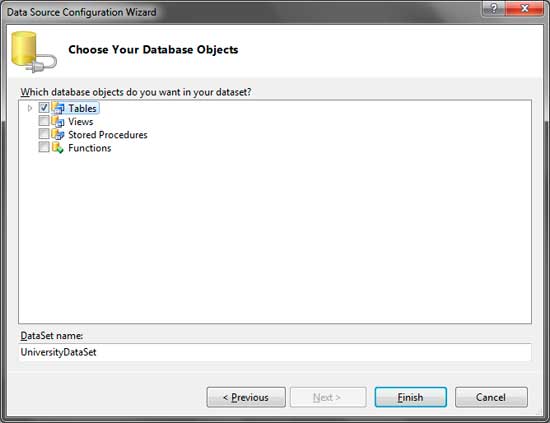
Wait for the Wizard to load the contents of the database. You will then be asked which parts of the database you want to be included in the DataSet. Since we will only be needing the tables, simply check the Tables. The DataSet name specifies the name of the DataSet to be created. Click finish to create the DataSet.
You can now see the created DataSet in the Data Sources Window. Expanding it shows the tables contained in the data set. Expanding a table shows its fields or columns. Visual Studio also generated 4 files grouped as one which is used to created the DataSet. You can see them in the Solution Explorer. They contain all the codes that create our DataSet. You don’t have to look at them for now.
Showing Table Data Via Drag and Drop
Now is the most exciting part. With our DataSet available in the Data Sources Window, we can simply drag a table to the form. You can also drag each column to a form but for now, we will drag a whole table to the form.
After dragging the table into the form, Visual Studio will automatically create a DataGridView control. The DataGridView allows you to view different kinds of data that can be represented in a table. An example is a database table or a multidimensional array of values. You can see that each column of the Students table was automatically placed in the DataGridView (try to resize the form and the DataGridView to see all the columns). You can also use the Dock property of the DataGridView and set it to Fill so the DataGridView will take up all the space of the form’s client area.
You will a toolbar on the top of the form. It is called the BindingNavigator control and Visual Studio also created this to allow you to move through records, update a record, delete an old record, and add a new record. If you also look at the component try below, more components have been automatically created for you by Visual Studio. We won’t be discussing each of them for now because there are lot’s of concepts to learn first. But if you are to create everything manually, then it can take us a lot of time to create what we have accomplished in this lesson.
Run the application and you will see that all the records are displayed in the DataGridView. You can use the BindingSourceNavigatorcontrol to modify the contents of the database.
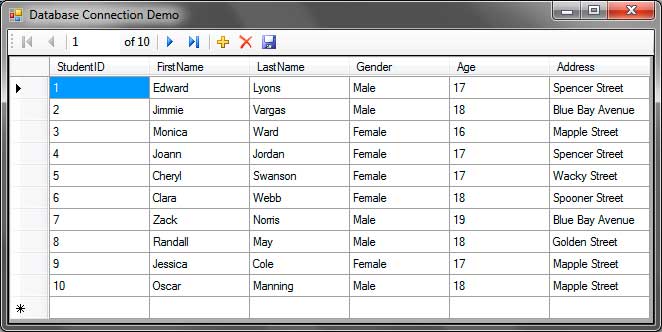
You can use the navigation buttons to move from 1 record to another. The plus icon allows you to add new records. Don’t worry if the StudentID that will be assigned for the new record is a negative number, it will be fixed by clicking the Save button which should be done to save the changes to the database. You can modify each field of a record by double clicking it. You can also delete a selected record by clicking the red X icon in the BindingNavigator control. Again, press the Save button after you have made a change to send the changes to the database.
Note that running your program duplicates the database from the root project folder to the Release or Debug folder so everytime you run your program, you will work with a fresh copy of the database. It implies any adjustment to the database you make will be overwritten and disposed of whenever you run your applicationThis is great when you are simply building up the application. If you don’t want this behavior, select the database file (University.mdf) in the Solution Explorer and in the find the Copy To Output Directory option in the Properties Window. Change its value to Copy if newer. The information go in the project’s root directory can currently solely be coppied if it a more moderen version of the one that already exists within the output directory.
Learn how to set up a local connection between winforms and mySQL.
XAMPP is a free and open source cross-platform web server solution stack package developed by Apache Friends, consisting mainly of the Apache HTTP Server, MariaDB database, and interpreters for scripts written in the PHP and Perl programming languages.
If you use xampp, you probably know how easy is to create and maintain databases with the integrated module of phpmyadmin. You may find easily to work with PHP, but, if you have .NET knowledge you can start working with it too.
MySQL offers a connector a easy connector that will allow you to execute queries to phpmyadmin from your winform.
In this article we’ll learn how to access a database created in phpmyadmin using winforms in C# easily.
Requirements
- Visual Studio (any version).
- MySQL .NET Connector Extension.
- XAMPP Distribution (we’ll assume that you know how to use mysql and xampp).
Implementation
This task is more easy than you think, to achieve a succesfully implementation follow these steps :
- Add the reference to the MySQL connector to your winform project.
- Create your database (ignore if you already have any) in MySQL with PHPMyAdmin.
- Start to execute queries.
Add the reference to the MySQL connector to the project
To get started, you need obligatory the .NET MySQL extension installed in your system as we need to add the reference in our project later. You can choose one of the latest version in the official website of MySQL.
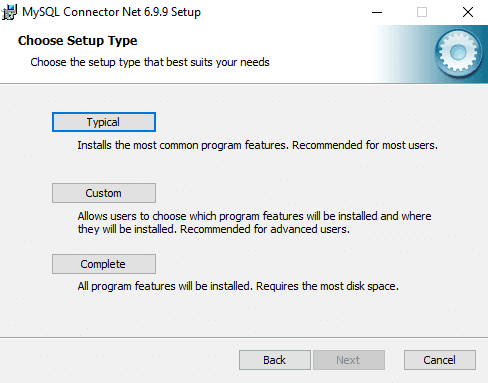
You can choose wether a complete installation or typical.
After the installation, we are going to proceed to create an empty Winforms project in Visual Studio as you usually do.
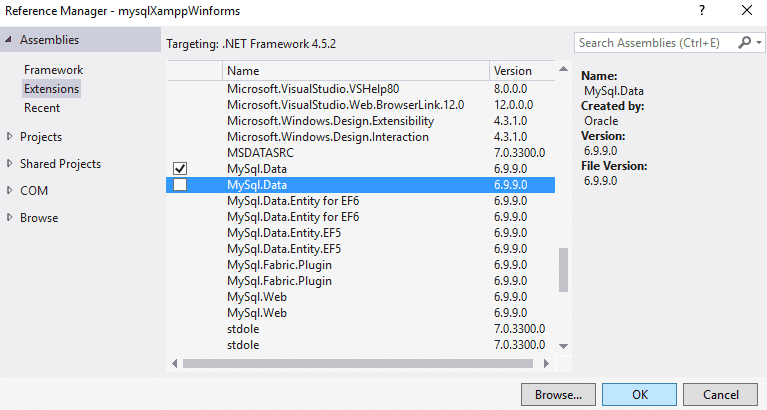
Now we need to add the reference to the mysql connector in our project. Locate the solution explorer in the right top corner of Visual Studio when your project is open, use right click on References and then select Add Reference from the context menu.
In the shown menu, navigate to Extensions and select the checkbox from the list the MySql.Data (MySql.Data.dll) and then click on OK.
Now we’ll be able to connect to execute queries to MySQL with C#.
Creating a test database in phpmyadmin (localhost)
As mentioned before, we assume that you already have Xampp installed on your system and you know how to use it.
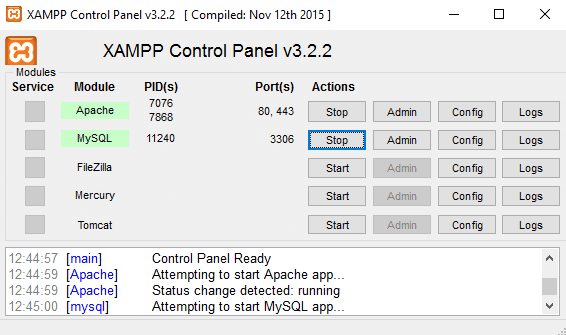
First, do not forget to enable the apache and mysql services in the xampp panel (which is recommended in Administrator mode).
Now navigate in your browser to http://localhost/phpmyadmin and go to the databases area.
Create a database (in this example our database will be test) and create a table named user.
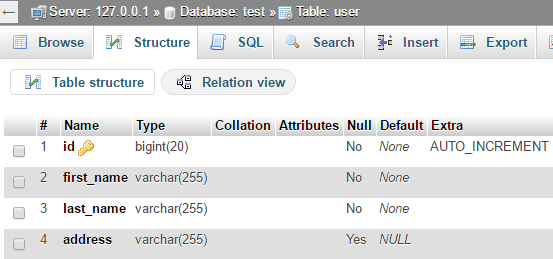
Note
Remember to enable the autoincrementable option to the id field, otherwise you’ll need to add an id everytime you insert a row.
Now that our database «test» contains at least one table «user», we can start executing queries.
Using C# to connect and execute queries
Now comes the fun part ! we’ll write some code to interact with the MySQL database. Primary, don’t forget to add the using statement of the reference in your class :
using MySql.Data.MySqlClient;You can understand how works the connection and how to execute a query with the following snippet :
// Change the username, password and database according to your needs
// You can ignore the database option if you want to access all of them.
// 127.0.0.1 stands for localhost and the default port to connect.
string connectionString = "datasource=127.0.0.1;port=3306;username=root;password=;database=test;";
// Your query,
string query = "SELECT * FROM user";

// Prepare the connection
MySqlConnection databaseConnection = new MySqlConnection(connectionString);
MySqlCommand commandDatabase = new MySqlCommand(query, databaseConnection);
commandDatabase.CommandTimeout = 60;
MySqlDataReader reader;

// Let's do it !
try
{
    // Open the database
    databaseConnection.Open();

    // Execute the query
    reader = commandDatabase.ExecuteReader();

    // All succesfully executed, now do something

    // IMPORTANT :
    // If your query returns result, use the following processor :

    if (reader.HasRows)
    {
        while (reader.Read())
        {
            // As our database, the array will contain : ID 0, FIRST_NAME 1,LAST_NAME 2, ADDRESS 3
            // Do something with every received database ROW
            string[] row = { reader.GetString(0), reader.GetString(1), reader.GetString(2), reader.GetString(3) };
        }
    }
    else
    {
        Console.WriteLine("No rows found.");
    }

    // Finally close the connection
    databaseConnection.Close();
}
catch (Exception ex)
{
    // Show any error message.
    MessageBox.Show(ex.Message);
}
And that’s it ! Basically, you just need to change the query and start testing. You can read more about the connection string and all the available properties here.
Basic examples of queries
In these examples we are going to execute the most basic tasks to execute (CRUD):
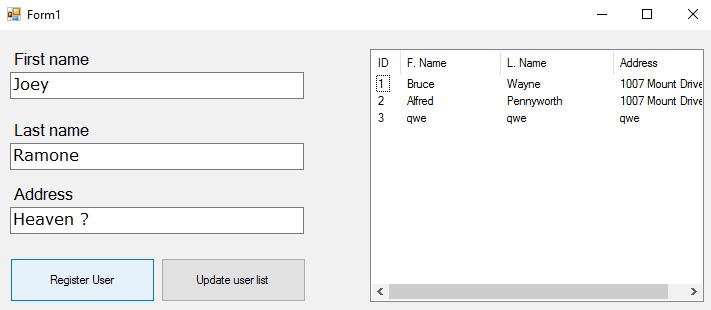
Note that we’ll use a simple listView component (with 4 columns : id,first name, last name and address), 3 textBox and 2 Buttons.
Create
In the following snippet, we’ll create a register in the test database :
private void SaveUser()
{
    string connectionString = "datasource=127.0.0.1;port=3306;username=root;password=;database=test;";
    string query = "INSERT INTO user(`id`, `first_name`, `last_name`, `address`) VALUES (NULL, '"+textBox1.Text+ "', '" + textBox2.Text + "', '" + textBox3.Text + "')";
    // Which could be translated manually to :
    // INSERT INTO user(`id`, `first_name`, `last_name`, `address`) VALUES (NULL, 'Bruce', 'Wayne', 'Wayne Manor')

    MySqlConnection databaseConnection = new MySqlConnection(connectionString);
    MySqlCommand commandDatabase = new MySqlCommand(query, databaseConnection);
    commandDatabase.CommandTimeout = 60;

    try
    {
        databaseConnection.Open();
        MySqlDataReader myReader = commandDatabase.ExecuteReader();

        MessageBox.Show("User succesfully registered");

        databaseConnection.Close();
    }
    catch (Exception ex)
    {
        // Show any error message.
        MessageBox.Show(ex.Message);
    }
}
Show
In the following snippet we’ll list all the users in the test database in a listview (if available or show in the console) :
private void listUsers()
{
    string connectionString = "datasource=127.0.0.1;port=3306;username=root;password=;database=test;";
    // Select all
    string query = "SELECT * FROM user";

    MySqlConnection databaseConnection = new MySqlConnection(connectionString);
    MySqlCommand commandDatabase = new MySqlCommand(query, databaseConnection);
    commandDatabase.CommandTimeout = 60;
    MySqlDataReader reader;

    try
    {
        databaseConnection.Open();
        reader = commandDatabase.ExecuteReader();
        // Success, now list

        // If there are available rows
        if (reader.HasRows)
        {
            while (reader.Read())
            {
                                     ID                              First name                  Last Name                    Address
                Console.WriteLine(reader.GetString(0) + " - " + reader.GetString(1) + " - " + reader.GetString(2) + " - " + reader.GetString(3));
                // Example to save in the listView1 :
                //string[] row = { reader.GetString(0), reader.GetString(1), reader.GetString(2), reader.GetString(3) };
                //var listViewItem = new ListViewItem(row);
                //listView1.Items.Add(listViewItem);
            }
        }
        else
        {
            Console.WriteLine("No rows found.");
        }

        databaseConnection.Close();
    }
    catch (Exception ex)
    {
        MessageBox.Show(ex.Message);
    }
}
Update
Update the fields of a row with id :
private void updateUser()
{
    string connectionString = "datasource=127.0.0.1;port=3306;username=root;password=;database=test;";
    // Update the properties of the row with ID 1
    string query = "UPDATE `user` SET `first_name`='Willy',`last_name`='Wonka',`address`='Chocolate factory' WHERE id = 1";

    MySqlConnection databaseConnection = new MySqlConnection(connectionString);
    MySqlCommand commandDatabase = new MySqlCommand(query, databaseConnection);
    commandDatabase.CommandTimeout = 60;
    MySqlDataReader reader;

    try
    {
        databaseConnection.Open();
        reader = commandDatabase.ExecuteReader();

        // Succesfully updated

        databaseConnection.Close();
    }
    catch (Exception ex)
    {
        // Ops, maybe the id doesn't exists ?
        MessageBox.Show(ex.Message);
    }
}
Delete
Delete a row with ID (x) :
private void deleteUser()
{
    string connectionString = "datasource=127.0.0.1;port=3306;username=root;password=;database=test;";
    // Delete the item with ID 1
    string query = "DELETE FROM `user` WHERE id = 1";

    MySqlConnection databaseConnection = new MySqlConnection(connectionString);
    MySqlCommand commandDatabase = new MySqlCommand(query, databaseConnection);
    commandDatabase.CommandTimeout = 60;
    MySqlDataReader reader;

    try
    {
        databaseConnection.Open();
        reader = commandDatabase.ExecuteReader();

        // Succesfully deleted

        databaseConnection.Close();
    }
    catch (Exception ex)
    {
        // Ops, maybe the id doesn't exists ?
        MessageBox.Show(ex.Message);
    }
}
Have fun !
Interacting with database servers is a key skill for any C# developer. Whether you are maintaining enterprise applications or building smaller-scale solutions, connecting your .NET code to databases like SQL Server is fundamental.
However, opening and managing connections from C# code to SQL Server can trip up new developers. Handling connections properly using best practices is important for security, performance and reliability reasons.
In this post, we will explore three methods to connect C# SQL Server along with the fundamentals of Database Connectivity and help you establish a C# SQL Server connection.
Introduction to Microsoft SQL Server
Microsoft SQL Server is a Relational Database Management System (RDBMS) that helps store and retrieve information as per the demand. Developed by Microsoft, it is one of the best designs to compete with Oracle Database and MySQL. Also, the Software Product supports different Business Intelligence Operations, Transaction Processing, Data Management, and Analytical Operations. The server has numerous versions managed and administered using the Structured Query Language (SQL) language.
Nowadays, various businesses carry sensitive customer information and share files through a network. In this case, using the Microsoft SQL Server will add increased security, speed, and reliability. Furthermore, it helps in maintaining a backup system. There are numerous benefits of using SQL Server in the business world. It also supports different database types.
Streamline SQL Server Replication with Hevo
With automated data migration and transformation from over 150+ sources, Hevo makes using SQL Server both as a source & destination effortless. Hevo ensures real-time synchronization and accuracy, enhancing your data analytics and reporting capabilities. Some of the key features of Hevo Data are given below:
- Data Transformation: Analyst-friendly data transformation approaches allow you to analyze data efficiently. To clean, prepare, and transform data before importing it to the desired destination, you can write a Python-based transformation script or utilize Drag-and-Drop transformation blocks.
- Incremental Data Load: Hevo Data can transfer data in real-time, maximizing bandwidth use on both ends of the data pipeline.
- Transparent Pricing: Hevo offers transparent pricing with no hidden fees, allowing you to budget effectively while scaling your data integration needs.
Hevo has been rated 4.7/5 on Capterra. Know more about our 2000+ customers and give us a try.
Get Started with Hevo for Free
Fundamentals of Database Connectivity
Various Programming Languages like C# and .Net are compatible with Oracle and Microsoft SQL Server. Also, they follow the same logic with each database in most cases. Here are a few concepts common for all Databases.
- Creating a Connection: The first and foremost step is to establish a connection. In order to work with Database information, establishing a connection is a must. Follow the below-listed parameters to create a connection.
- Database Name or Data Source: Database Name refers to the name of the Database to which the Developer needs to create a connection. These are case-sensitive with a maximum length of 64 bytes. It comprises letters, numbers, underscores, and symbols. Also, every connection is allowed to work with one Database at a time.
- Credentials: Secondly, to establish a secure connection to the Database, make sure to generate a username and strong password. This parameter allows only the privileged users to connect and use the database.
- Optional Parameters: There are a few optional parameters to establish a better connection, such as details on how .net must handle connections or how long the connections will stay active. These parameters can inform users if no action takes place. Also, it helps determine if the connection to the Database needs closure.
- Fetch data from the Database: As you create a connection to the database, the next step is to select information from the source. C# executes ‘SQL’ statements that can help fetch information from the database tables. Hence, to select specific information from the Database, it is recommended to execute the ‘SQL’ select command.
- Insert Information into the Database: C# Programming Language is a great option to insert data into Databases. All you require is to add or specify values in C# for each row that you want to insert.
- Update the Existing Data: C# Programming Language is also used for updating the previous data records in the Database. Again, you need to add or specify values in C# for each row that you want to update.
- Remove Data: Use C# for deleting any previous or new data records from the Database. Select or specify commands for each row in C# that you want to delete.
Methods for C# SQL Server Connection
- Method 1: C# SQL Server Connection using Entity Framework
- Method 2: C# SQL Server Connection using Dapper
- Method 3: Establishing a C# SQL Server Database Connection Using a Windows Forms Application
Method 1: C# SQL Server Connection using Entity Framework
Entity Framework is an Object Relational Mapping(ORM) framework that lets the user build a clean, portable, and high-level data access layer with C# across SQL Databases. It is the easiest and most preferred method for C# SQL Server Connection since it does not require the user to write any SQL queries.
Follow the steps below for an easy C# SQL Server Database connection:
- Step 1: Install the Entity Framework NuGet Package
- Step 2: Define your Data Model
- Step 3: Create DbContext Class
- Step 4: Configure Connection String
- Step 5: Initialize Database
- Step 6: Use DbContext in Your Code
Step 1: Install the Entity Framework NuGet Package
Install-Package EntityFramework
Step 2: Define your Data Model
Create your data model by creating C# classes that represent entities. Entities are typically equivalent to database tables.
// YourEntity.cs
public class YourEntity
{
    public int Id { get; set; }
    public string Property { get; set; }
}
Step 3: Create DbContext Class
Create a class that inherits from DbContext to represent your database context. This class will be responsible for interacting with the database.
// YourDbContext.cs
public class YourDbContext : DbContext
{
    public DbSet<YourEntity> YourEntities { get; set; }
}
Step 4: Configure Connection String
Make sure your App.config or Web.config file includes the connection string for your database.
<connectionStrings>
    <add name="YourDbContext" connectionString="Data Source=YourServer;Initial Catalog=YourDatabase;Integrated Security=True;" providerName="System.Data.SqlClient" />
</connectionStrings>
Step 5: Initialize Database
In your application (e.g., in the Main method or Application_Start in a web application), add code to initialize the database. This can be done using Entity Framework migrations or by simply calling Database.Initialize in your code.
// Main method or Application_Start
Database.SetInitializer(new YourDbInitializer());
Step 6: Use DbContext in Your Code
Now, you can use your DbContext in your application to perform database operations.
using (var context = new YourDbContext())
{
    // Query data
    var data = context.YourEntities.ToList();

    // Insert data
    var newEntity = new YourEntity { Property = "New Data" };
    context.YourEntities.Add(newEntity);
    context.SaveChanges();

    // Update data
    var entityToUpdate = context.YourEntities.Find(1);
    if (entityToUpdate != null)
    {
        entityToUpdate.Property = "Updated Data";
        context.SaveChanges();
    }

    // Delete data
    var entityToDelete = context.YourEntities.Find(2);
    if (entityToDelete != null)
    {
        context.YourEntities.Remove(entityToDelete);
        context.SaveChanges();
    }
}
By following these steps, you can integrate C# with SQL Server using Entity Framework in a Code-First approach. This method provides a convenient way to work with databases using C# classes, and it automatically handles the translation between the object-oriented world of C# and the relational world of SQL Server.
Advantages of Using Entity Framework
- It supports the querying of data with C# instead of SQL.
- It works with the data as objects.
- It has more advanced powers and features for the end user.
Method 2: C# SQL Server Connection using Dapper
Dapper is another open-source object-relational mapping (ORM) library for .NET and .NET Core applications. The library supports easy access to data from databases without the need to write endless code. Dapper is preferred for C# SQL Server connection because it facilitates the user in running raw SQL queries and mapping results to objects.
Follow the steps below for an easy C# SQL Server Database connection:
- Step 1: Install Dapper NuGet Package
- Step 2: Create Your Data Model
- Step 3: Use Dapper in Your Code
Step 1: Install Dapper NuGet Package
Install-Package Dapper
Step 2: Create Your Data Model
Define your data model by creating a C# class representing the entity. This class will map to a database table.
// YourEntity.cs
public class YourEntity
{
    public int Id { get; set; }
    public string Property { get; set; }
}
Note: Make sure your application has access to the connection string for your database.
Step 3: Use Dapper in Your Code
Use Dapper to perform database operations in your application.
using System.Data.SqlClient;
using Dapper;

// ...

string connectionString = "YourConnectionString";

// Query data
using (var connection = new SqlConnection(connectionString))
{
    connection.Open();

    var data = connection.Query<YourEntity>("SELECT * FROM YourTable").ToList();
}

// Insert data
using (var connection = new SqlConnection(connectionString))
{
    connection.Open();

    var newEntity = new YourEntity { Property = "New Data" };
    connection.Execute("INSERT INTO YourTable (Property) VALUES (@Property)", newEntity);
}

// Update data
using (var connection = new SqlConnection(connectionString))
{
    connection.Open();

    var entityToUpdate = new YourEntity { Id = 1, Property = "Updated Data" };
    connection.Execute("UPDATE YourTable SET Property = @Property WHERE Id = @Id", entityToUpdate);
}

// Delete data
using (var connection = new SqlConnection(connectionString))
{
    connection.Open();

    var entityIdToDelete = 2;
    connection.Execute("DELETE FROM YourTable WHERE Id = @Id", new { Id = entityIdToDelete });
}
Dapper provides extension methods for the SqlConnection class, making it easy to execute queries and commands. The Query method is used for SELECT queries, and the Execute method is used for INSERT, UPDATE, and DELETE operations.
Advantages of Using Dapper for C# SQL Server Connection:
- It has a better speed and performance.
- It treats data as objects.
Method 3: Establishing a C# SQL Server Database Connection Using a Windows Forms Application
Let’s say you want to create a connection to a Database named Demodb. Username (sa) and Password (demo123) are credentials that will make all the privileged users connect to a Database.
Follow the steps below to establish a C# SQL Server Database connection.
- Step 1: Create a New Project
- Step 2: Connect
- Step 3: Add Event Handler
- Code
- Code Explanation
- Output
Using a simple connect button, users can establish a C# SQL Server connection to the Database. Look at the Windows forms application to learn how to work with Databases.
Step 1: Create a New Project
- To get started with C# SQL Server, open Visual Studio to create a new project. Once the visual studio is active, go to the menu option at the top. Select “New” and click on “Project“.
- Mention your project name and choose a location from the browser. Now, press “OK“. Also, make sure to select your project type as a “Windows Forms” application.
- Before you move on to the next step, make a note of these:
- You can create various types of projects from the Project dialog box in Visual Studio. Go to the left-hand side and click on the “Windows” option.
- Now, select “Windows Forms Application” from the list. Name the application and provide a location where you want to save the project. In this example, we have saved the application as “DemoApplication”.
- Lastly, press the “OK” button to create a project in the Visual Studio.
Step 2: Connect
- Go to the toolbox and add a button to the Windows form. Mention the button’s text property as “Connect“. Here is how the button will appear on your screen.
Step 3: Add Event Handler
- To add the Event Handler to the code, make sure to double-click on the form. The Event Handler is used for the Button Click event. Copy the below-listed code and paste it into the Event Handler.
Code
using System;
using System.Collections.Generic;
using System.ComponentModel;
using System.Data;
using System.Data.SqlClient;
using System.Drawing;
using System.Linq;
using System.Text;
using System.Threading.Tasks;
using System.Windows.Forms;

namespace DemoApplication1
{
 public partial class Form1 : Form
 {
  public Form1()
  {
   InitializeComponent();
  }

  private void button1_Click(object sender, EventArgs e)
  {
   string connetionString;
   SqlConnection cnn;
   connetionString = @"Data Source=WIN-50GP30FGO75;Initial Catalog=Demodb;User ID=sa;Password=demol23";
   cnn = new SqlConnection(connetionString);
   cnn.Open();
   MessageBox.Show("Connection Open  !");
   cnn.Close();
  }
 }
}
Code Explanation
- In the first stage, you create variables. These variables help generate the connection string. Further, it aids in establishing a C# SQL Server Database connectivity.
- Now, in the next step, you will create a connection string. Make sure to place and specify it in the right manner for C#. It will help in a better understanding of the connection string. A connection string comprises:
- Data Source: It refers to the server name where a Database is maintained. In this example, the machine on which the Database resides is WIN- 50GP30FGO75.
- To specify the Database name, you require the initial catalog.
- To establish a connection with the Database, create credentials – userID and password.
- In the third step, the connection string is assigned to the variable cnn. It is a SqlConnection type mostly used to help create a connection with the Database.
- Now, the Open method of the cnn variable is exercised to establish a connection. As the connection is established, a message will display on your screen confirming the status.
- As the operation is successful, add a closure to the connection. It is best to close the connection if no other changes are necessary.
- Execute the project using Visual Studio and place the above code correctly in C#. We assure if done properly, you will get the right output. Also, click the “Connect” button as the form displays on your screen.
Output
You will notice that the connection to the Database is created as you press the connection button on the screen from the output. Here is how the output will appear on the screen.
That’s it, you’ve successfully established the C# SQL Server Database connection.
Conclusion
Microsoft SQL Server is a Relational Database Management System (RDBMS) that helps businesses work efficiently at all times. The Relational Database is generally used to store, retrieve information, Business Intelligence operations, manage data, and perform analysis.
Using Microsoft SQL Server adds more security, speed, and reliability. In this post, we have shown how to establish a C# SQL Server connection. Follow the above-listed fundamentals of Database connectivity and steps to build a C# SQL Server Database connectivity easily.
Dive into a deeper knowledge of SQL Server with these essential reads:
- Running SQL Server on Raspberry Pi using Docker | A 101 Guide
- MySQL vs SQL Server: 10 Critical Differences
- Connect Kafka to SQL Server: 2 Easy Methods
To get a complete overview of your business performance, it is important to consolidate data from SQL Server and other Data Sources into a Cloud Data Warehouse or a destination of your choice for further Business Analytics. This is where Hevo comes in.
visit our website to explore hevo
Hevo Data with its strong integration with BI tools such as SQL Server, allows you to not only export data from sources & load data to the destinations, but also transform & enrich your data, & make it analysis-ready so that you can focus only on your key business needs and perform insightful analysis using BI tools.
FAQ
How do I connect SQL Server to C#?
To connect SQL Server to C#, use the SqlConnection class from the System.Data.SqlClient namespace. Create a connection string with your SQL Server details and pass it to an instance of SqlConnection.
How to use SqlConnection in C#?
To use SqlConnection in C#, instantiate it with a connection string and open the connection using Open().
How to connect .NET and SQL?
To connect .NET and SQL Server, use ADO.NET. Install the System.Data.SqlClient or Microsoft.Data.SqlClient package, configure your connection string, and use classes like SqlConnection, SqlCommand, and SqlDataReader to interact with the database.
Give Hevo Data a try and sign up for a 14-day free trial today. Hevo offers plans & pricing for different use cases and business needs, check them out!
Share your experience of working with C# SQL Server connection in the comments section below.
Hitesh is a skilled freelance writer in the data industry, known for his engaging content on data analytics, machine learning, AI, big data, and business intelligence. With a robust Linux and Cloud Computing background, he combines analytical thinking and problem-solving prowess to deliver cutting-edge insights. Hitesh leverages his Docker, Kubernetes, AWS, and Azure expertise to architect scalable data solutions that drive business growth.
Этим материалом я начну новую серию статей, посвященных работе с базой данных в C# Visual Studio с помощью Microsoft SQL Server Compact 3.5. В процессе работы мы создадим приложение Windows Forms, в котором можно будет работать с файлом базы данных в формате sdf: добавлять записи в таблицу, удалять и изменять их. Также бонусом приложение сделаем «работающим из коробки» и на максимальном количестве даже чистых операционных систем. Уровень статей рассчитан на начинающего разработчика, обладающего хотя бы минимальным опытом работы с Visual Studio.
Сначала необходимо скачать и установить Microsoft SQL Server Compact 3.5 — я качал отсюда. После этого добавляем ссылку в обозревателе решений: вкладка «.NET» — библиотека «System.Data.SqlServerCe.Entity». После создания проекта по шаблону Windows Forms, надо настроить подключение к базе данных, да и не мешало бы её создать. Выбираем «Обозреватель баз данных» — «Подключения данных» — «Добавить подключение» — Источник данных «Microsoft SQL Server Compact 3.5 (Поставщик данных среды .NET для Microsoft SQL Server Compact 3.5)» — создать базу данных (предположим Books.sdf) в любом месте на компьютере — Проверить подключение — Ок. Пароль не устанавливаем, можно выбрать сортировку по «Россия — русский».
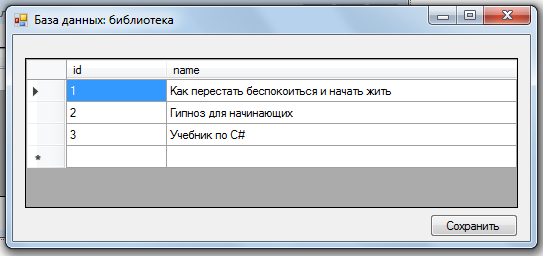
Далее создаем таблицу в этой базе, назовем её tbBooks; в ней два столбца: id и name. id — тип int, уникальный; name — тип nvarchar, остальные параметры по умолчанию.
Создаем подключение:
SqlCeConnection cn = new SqlCeConnection(@"Data Source = C:\rab\base\Books.sdf");
Что такое? Visual Studio подчеркивает строку и показывает ошибку «Не удалось найти имя типа или пространство имен «SqlCeConnection» (пропущена директива using или ссылка на сборку?)»? У нас имеет место ошибка с директивой using:
using System.Data.SqlServerCe;
Теперь ошибка должна исчезнуть. Для работы с базами данных есть очень удобный инструмент DataGridView. Добавляем его на нашу форму и подключаем к источнику данных (нашей таблице в базе): «Добавить источник данных проекта» — «База данных» — «Набор данных» — Выбираем наше подключение Books.sdf. Среда может попросить перенести файл в рабочий каталог и изменить настройки подключения: соглашаться не стоит — мы не предатели. Выбираем нашу таблицу tbBooks и подтверждаем наше подключение.
Если сейчас запустить проект, то можно даже изменять ячейки нашей таблицы. Однако, теперь мы имеем сразу две проблемы: во-первых, в столбце id ввод не чисел выбивает страшную и непонятную ошибку, а во-вторых, изменения не сохраняются. Первая проблема решается просто:
private void dataGridView1_EditingControlShowing(object sender, DataGridViewEditingControlShowingEventArgs e)
        {
                TextBox tb = (TextBox)e.Control;
                tb.KeyPress += new KeyPressEventHandler(tb_KeyPress);
        }

void tb_KeyPress(object sender, KeyPressEventArgs e)
        {
            if (dataGridView1.CurrentCell.ColumnIndex == 0)
            if (!(Char.IsDigit(e.KeyChar)))
            if (e.KeyChar != (char)Keys.Back) e.Handled = true;
        }
Вторая также несложно. Добавляем на форму кнопку, в обработчик вставляем следующий код:
SqlCeCommand command = new SqlCeCommand("UPDATE tbBooks SET id = @id, name = @name WHERE (id = @id)");
command.Connection = tbBooksTableAdapter.Connection;
tbBooksTableAdapter.Adapter.UpdateCommand = command;

SqlCeParameter parametr;

parametr = new SqlCeParameter("@id", SqlDbType.Int);
parametr.SourceColumn = "id";
command.Parameters.Add(parametr);

parametr = new SqlCeParameter("@name", DbType.String);
parametr.SourceColumn = "name";
command.Parameters.Add(parametr);

tbBooksTableAdapter.Update(booksDataSet.tbBooks);
MessageBox.Show("Изменения успешно сохранены");
Таким образом, в этой статье мы научились создавать базы данных, подключения к ним, таблицы в них, а также редактировать с помощью встроенного интерфейса.
Продолжение следует…
Автор этого материала — я — Пахолков Юрий. Я оказываю услуги по написанию программ на языках Java, C++, C# (а также консультирую по ним) и созданию сайтов. Работаю с сайтами на CMS OpenCart, WordPress, ModX и самописными. Кроме этого, работаю напрямую с JavaScript, PHP, CSS, HTML — то есть могу доработать ваш сайт или помочь с веб-программированием. Пишите сюда.
Introduction
In this article, we’ll learn to connect the MySQL Database with the C# .NET Framework application in Visual Studio. This is a foundational hands-on article that will help beginners to connect a widely used freely available database like MySQL in C# through other freely available tools. This article doesn’t require any paid applications or software.
Step 1
First of all, let us start with the installation of XAMPP. XAMPP makes it possible to create a local server with Apache and MySQL databases with other features.
Once the installation is done, the control panel should look something like this.
Step 2
Click on Start on Apache, MySQL, and FileZilla. The buttons turn the labels into Stop.
Step 3
Open your browser and type, localhost/phpmyadmin/
The page will look something like as follows. This is where the database can be accessed, and viewed and instructions can be performed right away. This is the location to access, the MySQL database.
Step 4
Click on Databases.
Now, Under Create Database, Type the name of the new database we are going to create.
Type, TestDB, leave the Collation as it is, and then click on Create.
Step 5
The Database TestDB has now been created. Let us create a Table now.
Step 6
Run the SQL Query
CREATE TABLE PhoneBook
{
    Id int,
    Name varchar(255),
    MobileNo int
};
Step 7
The Table has been created with an empty set and zero rows.
Step 8
You can view the table on the database from the Structure Option in the bar.
Click to browse and see the contents of the table.
Step 9
Now, let us install Visual Studio. The Community Edition is free and can be accessed from the Microsoft Official Website.
Once installed, the Visual Studio Installer can be opened. Now, click on Launch.

Step 10
Click on Create a New Project.
Create the project for Windows Forms App in C#, .NET Framework with the Solution name of your choice.
Step 11
You can see the solution Explorers as shown below with the references and resources all set up for the Framework.
Step 12
Now, let us go to Tools on the Menu Bar and select Connect to Database. There are numerous but no MySQL Database Options. This can be resolved by installing the MySQL Connector and MySQL for Visual Studio.
Step 13
Next, we need to install MySQL Connectors and MySQL for Visual Studio. Visit the following sites to obtain the download file for the respective installations, ADO.NET Driver for MySQL (Connector/NET) and MySQL Installer for Visual Studio.
Download the ADO.NET Driver for MySQL (Connector/NET) and MySQL Installer for Visual Studio 1.2.10 – Microsoft Windows – x86 MSI Installer.
Step 14
Once the MySQL Installations are done, restart Visual Studio.
Step 15
Now, go to Solution Explorer. Right-click on the project, click on Add, and select the Reference.
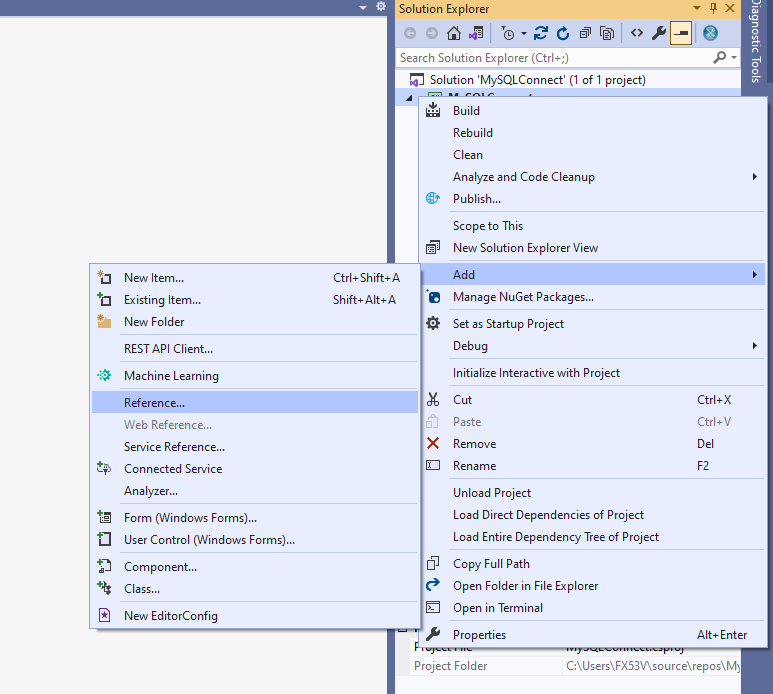
Step 16
Click on MySql.Data and MySql.DataEntityFramework for EF6 primarily. And then Click on Ok.
Step 17
Now, let us go back to Server Explorer. Double-Click on Data Connections and Choose Add Connections. You’ll be taken to Choose Data Source Option.
Under Data Source, Now, we can see the MySQL Database option. This wasn’t there primarily when we hadn’t installed MySQL Connector and MySQL for Visual Studio.
Step 18
Now, Click on Continue. The Server Name, User Name, Password, and Database Name are to be filled in.
Remember, this is the same as that of your database on the localhost/phpmyadmin
I’ve put in my Server name which is “localhost”, a User name that is “root” and my password. Remember, above we made the Database TestDB for this very experiment. Here, we can use the lowercase name “testdb”.
Click on Test Connection and as the success is prompted, choose OK.
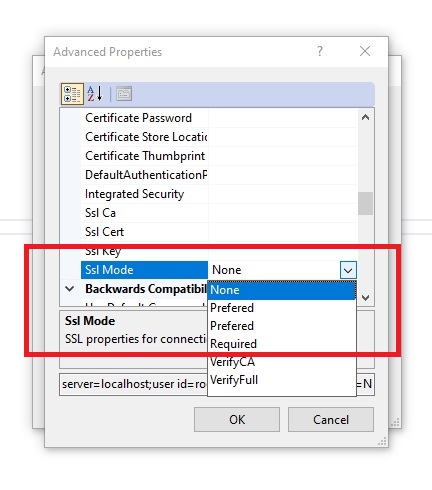
Note
In case any issues occur that prompt an error for database connection, choose the Advanced option and under the SSL Mode, Choose None. This would solve the error.
Step 19
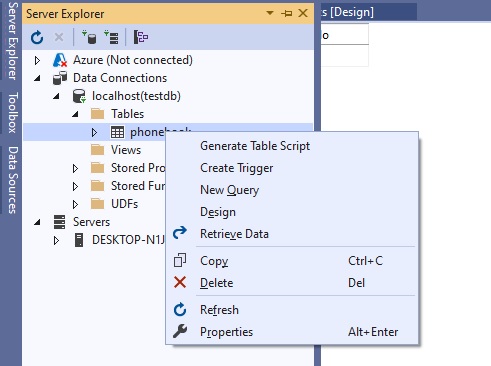
Now, we can see the localhost(testdb) database on our DataConnections with its tables. Remember, the PhoneBook table that we created earlier in phpmyadmin? See, it’s here now.
Step 20
Right Click on the table, and we can see the options for Trigger, Table Script Generation, Query, Designing, and Retrieving Data.
When we choose the generate Table Script, the following script will pop up.
Similarly, if we choose to retrieve data, the data can be seen. Here, since, we haven’t entered any data, NULL is seen.
Step 21
To test, if the connection has been made, let’s go back to localhost/phpmyadmin and insert some data on the table PhoneBook.
When we reload, we can see the NULL has now changed to numerous data on Id, Name, and MobileNo in the phonebook.
Step 22
Moreover, to connect using MySQL Connector/NET for Windows Applications, we can do it through the following code.
MySql.Data.MySqlClient.MySqlConnection conn;
string myConnectionString;

myConnectionString = "server=localhost;uid=root;" +
    "pwd=null;database=testdb";

try
{
    conn = new MySql.Data.MySqlClient.MySqlConnection();
    conn.ConnectionString = myConnectionString;
    conn.Open();
}
catch (MySql.Data.MySqlClient.MySqlException ex)
{
    MessageBox.Show(ex.Message);
}
The above code can be used to integrate MySQL in C# in the native Windows authentication and CRUD operations can then be performed on top of it. We’ll learn more about it in our next article.
Conclusion
Thus, in this article, we learned in step by step process the method to connect the MySQL Database in Visual Studio for C# .NET Framework. We set up XAMPP, Visual Studio, MySQL Connector, and MySQL for Visual Studio and then created a Windows Form App in C# .NET Framework. Lastly, we connected the MySQL database to our Windows Form Application.